Posted on

Beginners guide to Image steganography

Hello, aspiring ethical hackers. In our previous blogpost, you learn what is steganography, its significance and types of steganography to cybersecurity. In this blogpost you will learn in detail about image steganography. But first, let’s see its significance in cybersecurity.

In April 2024, a hacker group being tracked as TA558 has widely used image steganography to deliver malware such as Agent Tesla, FormBook, Remcos RAT, LokiBOT, GuLoader, Snake keylogger and Xworm etc. The malware code embedded in the images contained VBS, PowerShell.

Now that you have understood the importance of image steganography, its time to learn about various images steganography techniques. In cybersecurity, It is a very good thing to learn about various image steganography techniques used to hide data in an image.

Types of image steganography

Image steganography techniques can be primarily divided into Spatial Domain techniques and Transform Domain techniques.

Spatial Domain techniques

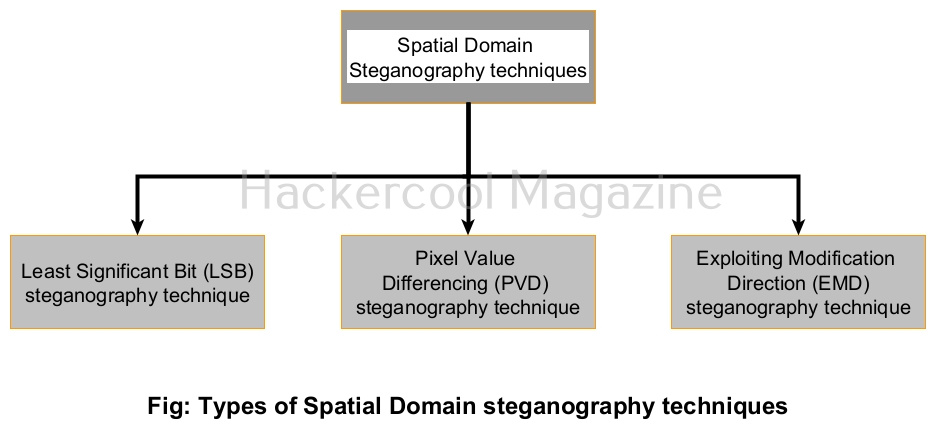
Let’s study about various Spatial Domain steganography techniques first.

1. Least Significant Bit (LSB) steganography technique:

In this type of steganographic technique, the secret data is stored in pixels of an image. This is done by replacing the least significant bit of the image.

2. Pixel Value Differencing (PVD) steganography technique:

Pixel Value Differencing (PVD) is a steganography techniques in which secret data is embedded into images using the differences in pixel Value between adjacent pixels.

3. Exploiting Modification Direction (EMD) steganography technique:

In this type of steganographic technique, the secret data is embedded into a group of pixels of an image.

Transform Domain techniques

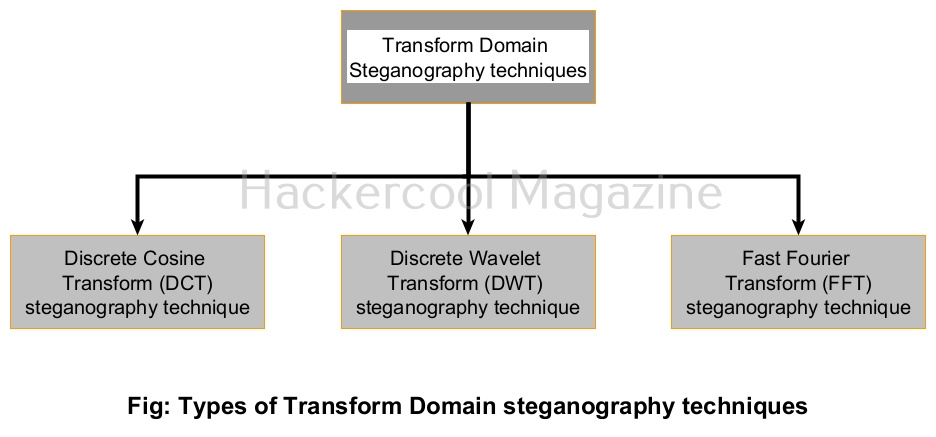
Now let’s learn about various Transform Domain image steganography techniques. In Transform Domain image steganography techniques, secret data is hidden in the transform domain coefficient of an image.

1. Discrete Cosine Transform (DCT) steganography technique:

In this steganographic technique, 8*8 blocks of an image are transformed into 64 DCT coefficients. Then, the LSB of each DCT coefficient is replaced with a bit of secret data.

2. Discrete Wavelet Transform (DWT) steganography technique:

In this steganographic technique, secret data is hidden by modifying the wavelet coefficient of the image.

3. Fast Fourier Transform (FWT) steganography technique:

In this steganography technique, the secret data is expressed as a Fourier series and then coefficients are added to the images.

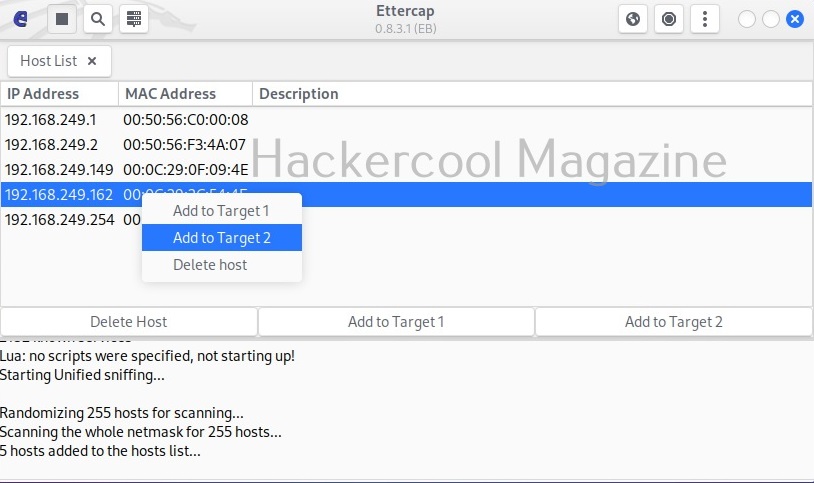
Learn how to hide secret data in an image using steghide.

Posted on

DNS spoofing for beginners

Hello, aspiring ethical hackers. In this blogpost, you will learn about DNS spoofing attack. Also known as DNS poisoning or DNS cache poisoning, in this attack a fake or wrong value are entered into the DNS cache. To understand this in detail, you have to first understand what is DNS, DNS server and DNS cache etc.

What is DNS?

Domain Name System (DNS) is a system that associates domain names with their IP addresses. For example, you want to go to a website named Alkapulka.com. When you open the browser and enter the domain name in the URL, your query first goes to a server that keeps a record of domain names and their IP addresses. Then this server takes you to the IP address associated with the alkapulka.com. This server is called the Domain Name System (DNS) server. A DNS server stores domain names and the IP addresses associated with these domain names in a cache known as DNS cache. Hence it is also known as DNS cache poisoning.

What is DNS spoofing?

Just imagine the IP address of the website alkapulka.com is xyx.xyz.xyx.xyz. Somehow the hacker takes control of the DNS server and registers the IP address of alkapulka.com to xyz.xyz.xyz.xyz where I am hosting a different website that looks similar to that of alkapulka.com. Now, when someone tries to visit alkapulka.com, instead of going to the original website, he will be redirected to the duplicate website controlled by the hacker.

Impact of DNS Spoofing

A hacker performs DNS spoofing to make unsuspecting users visit a malicious website. Once the user is one the malicious website, a lot of hacking attacks are possible. Some of them are,

1. Phishing:

Hackers may take unsuspecting users to a phishing website. Phishing is an act of presenting a fake page resembling the original webpage you intend to visit with the sole intention of stealing your credentials. Learn more about phishing.

2. Infecting with malicious software :

The website the users are redirected to may contain malware that can infect the user systems. Malware or malicious software is any software that performs malicious actions on a computer or mobile.

3. Gaining initial access:

Hackers can use multiple techniques to gain initial access on the system of the user. Learn more about gaining access.

How DNS spoofing attack can take place?

DNS spoofing can be achieved using many techniques like

1. Man in the Middle attack:

When attacker gets between the web browser and the DNS Server, he can perform DNS spoofing. Learn more about MiTM attack.

2. DNS server compromise:

If the DNS Server is compromised due to any vulnerability, then attacker gains access to the DNS cache, which he can manipulate as he want.

Posted on

Beginners guide to Ettercap

Hello, aspiring ethical hackers. In our previous blogposts, you learnt what is sniffing and what is Man in the Middle (MITM) attacks etc. In this blogpost, you will learn about a tool named Ettercap. Ettercap is an open-source sniffer and a comprehensive suite for performing man in the middle attacks. With Ettercap we can perform both active and passive protocol analysis, data injection etc.

Let’s see how to use Ettercap for sniffing. For this tutorial, I will be using Kali Linux as my attacker system as ettercap is installed by default on it. As a target system, I am using Metasploitable 2 (see how to create a virtual hacking lab). Ettercap can be started in both command line and GUI. For this tutorial, let’s use the graphical version.

To start ettercap in graphical mode, start ettercap with the “-G” option as shown below.

sudo ettercap -G

The GUI version of Ettercap opens as shown below.

You can also open a network capture file (pcap file) using Ettercap. To start sniffing with ettercap, we have to click on the highlighted part as shown below after selecting the interface we want to sniff on.

As soon as you do this, Ettercap loads all its plugins and engines required for sniffing. By default, ettercap starts sniffing automatically. It can be stopped or started by clicking on the highlighted part as shown below.

Before you perform any attack, you need to know about all the devices on the LAN. Clicking on the tab highlighted in the image below makes this tool scan for all the LIVE hosts on the network.

After the scan is finished, ettercap adds the detected hosts.

The added hosts can be viewed by clicking of the tab highlighted below.

In our case five hosts have been added. I want to sniff the communication taking place between two machines. To do this, I right click on the IP of the client machine with IP 192.168.249.162 and add it as Target 2.

Similarly, I add the server machine with IP 192.168.249.149 as Target 1.

Needless to say, these two machines are the machines I want to perform sniffing on.

Then, I open the MiTM menu of this tool and select ARP poisoning as shown below.

This opens a new window as shown below.

I select “sniff remote connections” option and click on “OK”. This starts the ARP poisoning attack and all the traffic intending to go for 192.168.249.162 (client machine) to192.168.249.149 (server machine) will be sniffed. From the client machine, I make a telnet connection to target system.

Then on ettercap, I open the menu and go to view > connections.

This will show all the connections being made between client and the server.

In the above image, we can see one connection from IP 192.168.244.162 to port 23 of 192.168.249.149. Clicking on it will reveal the connection data exchanged between the two machines.

By default, the data from the client and server machines are shown in different tabs. You can see the credentials being exchanged between client and server. You can even join both the views for clarity.

Here, you can see the clear text credentials used to login into the telnet server.

Posted on

Beginners guide to tcpdump

Hello, aspiring ethical hackers. In our previous blogpost, you learnt in detail about packet sniffing and packet analyzing. A sniffer or a packet analyzer plays a very important role in packet sniffing. In this blogpost, you will learn about a sniffer or packet analyzing tool called tcpdump.

tcpdump is an open-source data-network packet analyzer that runs under a command line interface. It works on almost all Unix-type operating systems like Linux, Solaris, FreeBSD, macOS etc. Tcpdump was written by Van Jacobson, Sally Floyd, Van Paxson and Steven McCanne in 1998 while working in Lawrence Berkely Laboratory Network Research group. Let’s see how to perform packet sniffing with tcpdump. For this tutorial, we will be using Kali Linux as tcpdump is installed by default on it.

The command to start sniffing with tcpdump is given below.

tcpdump

if you are unable to start tcpdump with the above command, run tcpdump as sudo. On many UNIX operating systems, running this command requires SUDO privileges.

sudo tcpdump

As soon as you execute the above command, tcpdump starts sniffing on all the network interfaces connected to the machine. If you want tcpdump to perform sniffing on only a specific interface, you can specify the interface with the ‘-i’ option.

sudo tcpdump -i <network interface>

Depending on the number of devices connected to the interface, the packet analysis output may contain heavy or less traffic. To view traffic belonging to only one machine on the network, you can use the “host” option and specify the IP address. For example, let’s say we want to only see traffic belonging to device with IP 192.160.254.144 on the network. Here’s how to do it.

sudo tcpdump -i <network interface> host <host ip>

Let’s say you want to view traffic only that is originating from a particular device, you can use the option “src” for that.

sudo tcpdump -i <network interface> src <device IP>

Similarly you can also view only the traffic that is coming to the particular system using the “dst” option.

sudo tcpdump -i <network interface> dst <device IP>

We can also view traffic belonging to a specific part using the “port” option.

sudo tcpdump -i <network interface> port <port number>

To write the output to a file, we have to use the “-w” option as shown below.

sudo tcpdump -i <network interface> port <port number> -w <file to write to> 

To open the saved pcap file, you have to use the ‘-r’ option as shown below.

sudo tcpdump -r <pcap file>

This pcap file can also be opened with Wireshark.

Posted on

WhatWeb tool: Beginners guide

Hello, aspiring ethical hackers. In one of our previous blogpost, you learnt about what is website hacking, what are the various website hacking techniques used by hackers etc. In this blogpost, you will learn about WhatWeb tool, a web scanner.

WhatWeb tool is a tool that can be used to identify a website. As its makers say, the goal of WhatWeb tool is to answer the question “What is that website?”.

That’s right because WhatWeb can identify a variety of web technologies used on a website that include web servers, Content Management System (CMS), blogging platforms, statistics and analytic packages, JavaScript libraries, embedded devices, version numbers of the software, email addresses, account in web framework modules, SQL errors etc. WhatWeb too has over 1800 plugins, each to recognize something different.

WhatWeb is installed by default in Kali Linux. Let’s see how to use it for scanning the website. As target, we will be using Multillidae in Metasploitable 2. To scan a website, all you have to do is specify the target website or its IP to WhatWeb as shown below.

WhatWeb has different levels of aggression while scanning its targets. By default it is set to 1 (stealthy) and it makes one HTTP request per target. However, we can set the level of aggression while scanning the target. If we set the aggression level to “3 (aggressive)” as shown below, WhatWeb will send additional requests once it finds a level 1 plugin.

Similarly, setting the aggression level to “4 (Heavy)”, WhatWeb makes a lot of HTTP requests per target. In this level, URLs from all plugins are attempted.

At the beginning of the article, I told you that WhatWeb has lot of plugins each suited for a specific purpose. You can view all the plugins of WhatWeb using the “-l” option.

If you want to view the information about each plugin the “–info-plugins” option will do this for you.

You can also search for a particular plugin from the list of plugins using the “–search- plugins” option. For example, let’s search for webdav plugin in WhatWeb.

To use a particular plugin the option is “-p”. For example, let’s use the “webdav” plugin with the same target.

If you want the result to be in more detailed format while scanning with WhatWeb, you can use the verbose option with WhatWeb.

Whatweb also has a quiet mode scan option that scans a website without showing output to terminal (stdout) as shown below.