Hello, aspiring ethical hackers. In this blogpost, you will learn about a tool named MAC changer. In your ethical hacking journey there may be one day a need arise to change your MAC addresses. Although you can change your MAC addresses manually, mac changer is a tool that helps you to change it automatically. In our previous data link layer attacks, you learnt that communication in a LAN takes place with MAC addresses.
In our previous article on Data-link layer attacks, you have learnt what is a MAC address and its uses. Now, let’s see how to change your MAC addresses using MAC changer tool. To be able to change your MAC address first, you need to know your present MAC address. You can find out the MAC address of your machine using the command shown below.
ip a

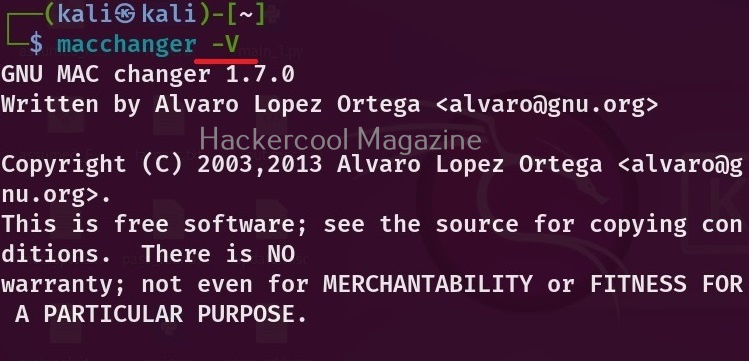
You can see the current version of mac changes installed using the ‘-V’ option as show below.
You can see that each network adapter (NIC) attached to the system has one unique MAC address. You can also see your the MAC address of your device using MAC changer with the “-s” option.
macchanger -s <network interface>

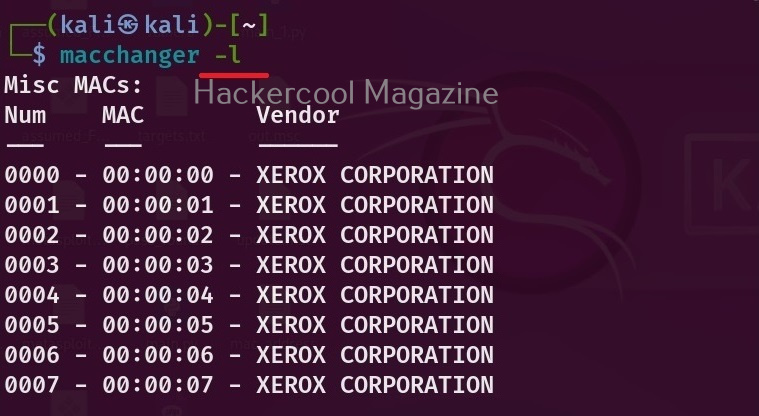
If you want to see all the vendors that provide MAC addresses, using mac changer, the option is ‘-l’ as shown below.
macchanger -l
Before changing the MAC address of a adapter, make sure you disable that adapter using command as shown below.
sudo ip link set eth0 down

After making changes, you can enable the adapter using command shown below.
sudo ip link set eth0 up

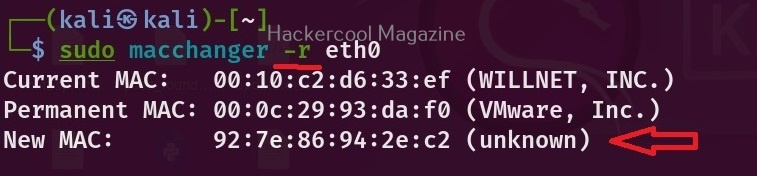
Now, let’s see the different ways in which MAC addresses can be changed using mac changer. To give a random MAC address to a particular network adapter, say to the “eth0” adapter, the option we need to use is “-r”.
macchanger -r <interface>
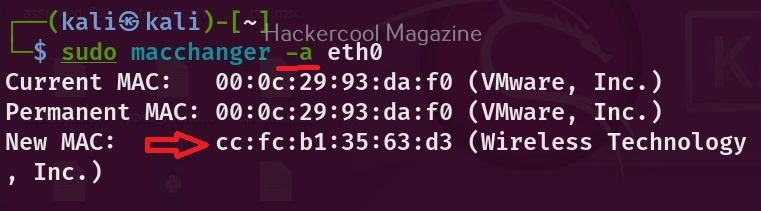
To assign a random vendor MAC address of the same kind with mac changer, the option to use is “a”.
macchanger -a <interface>
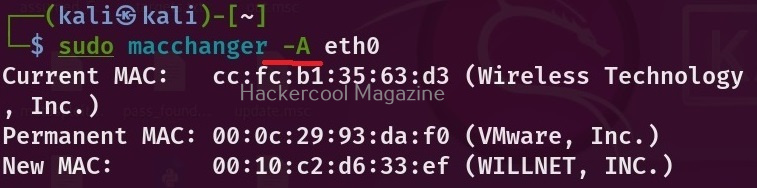
To give a random MAC address of any kind, we can use the “-A” option.
macchanger -A <interface>
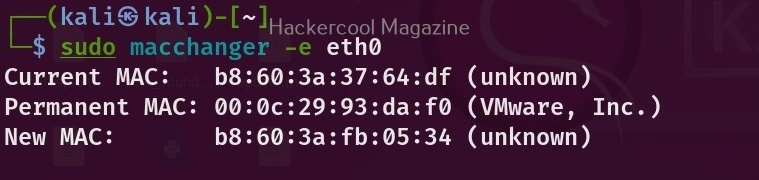
Every vendor has a unique MAC address that starts with unique vendor bytes. Using this tool, you can also change the MAC address without changing the vendor bytes using the “-e” option.
macchanger -e <interface>
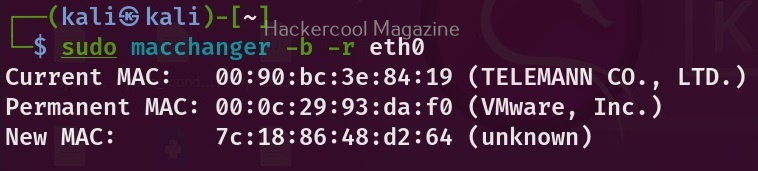
You already know that MAC address is hardcoded to a hardware NIC card. Using this tool, you can also make your changed MAC addresses pretend as the burned in address of the NIC.
macchanger -b -r <interface>
That’s all about mac changer tool.