Hello, aspiring ethical hackers. In this blogpost, you will learn about login bypass.
What is Login bypass?
Many resources like websites Routers, Gateways, file messengers use authentication to ensure security of the resources what if this login in bypass. The process of Login bypass refers to any action on current which allows a user to directly access the resources without the use of credentials. Many techniques can be used to bypass login of a page. Some of the techniques are,
- SQL injection
- Forced browsing
- URL parameters manipulation.
Let’s learn about each of them in detail.
1. SQL Injection:
Acunetix describes this as ” the type of attack that takes advantage of improper coding of your web applications that allows hacker to inject SQL commands into say a login form to allow them to gain access to the data held within your database. In essence, SQL Injection arises because the fields available for user input allow SQL statements to pass through and query the database directly.
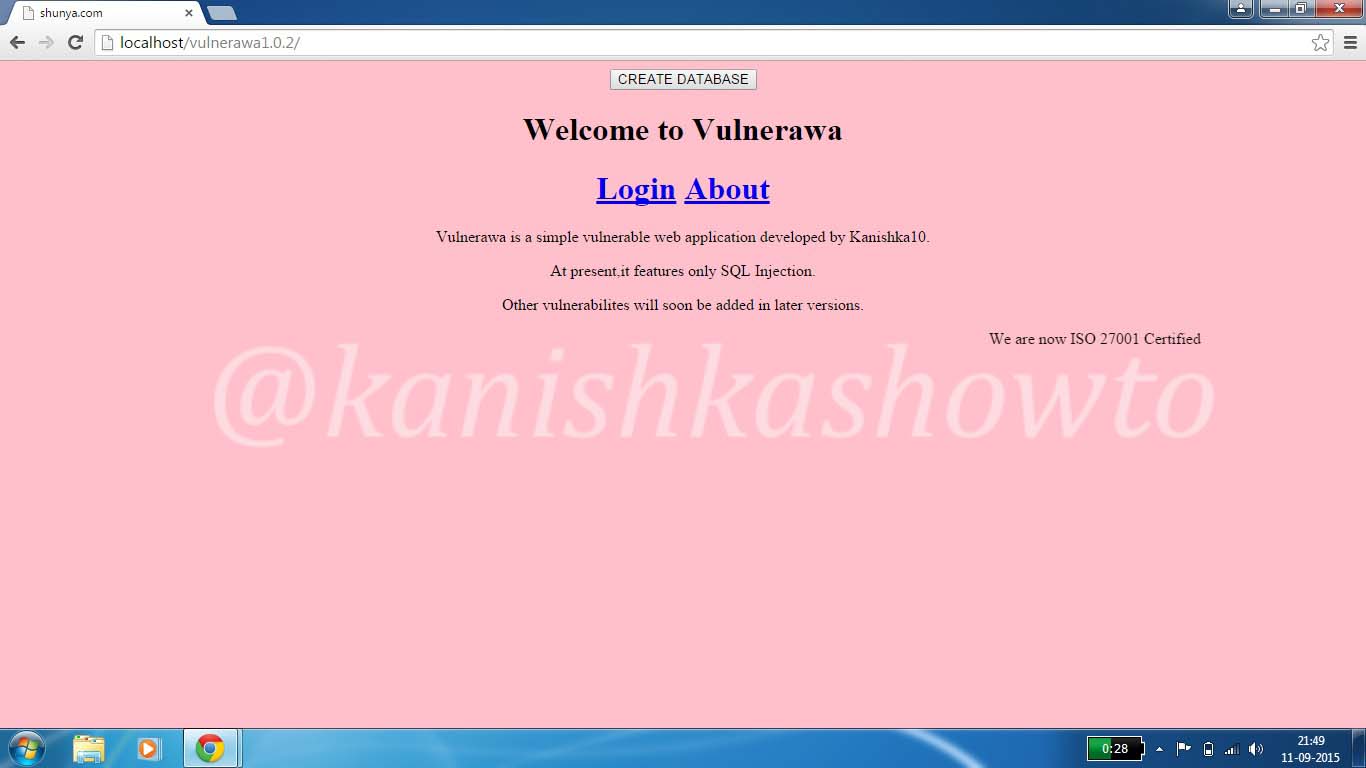
In this article, I am going to show you how login bypass attack can be done on websites using SQL injection. For this I am going to use Vulnerawa and WAMP server. You can download Vulnerawa from here. To see what is Vulnerawa, go here. To learn how to setup Vulnerawa in Wamp Server, go here. When you finish successfully setting up Vulnerawa, it should be as below. The first page of a website is the “index.php” which is as shown below.
Now click on the “Login” button. You should see a login form as below.

Now insert a single quote character( ‘ ) into the form as shown below.

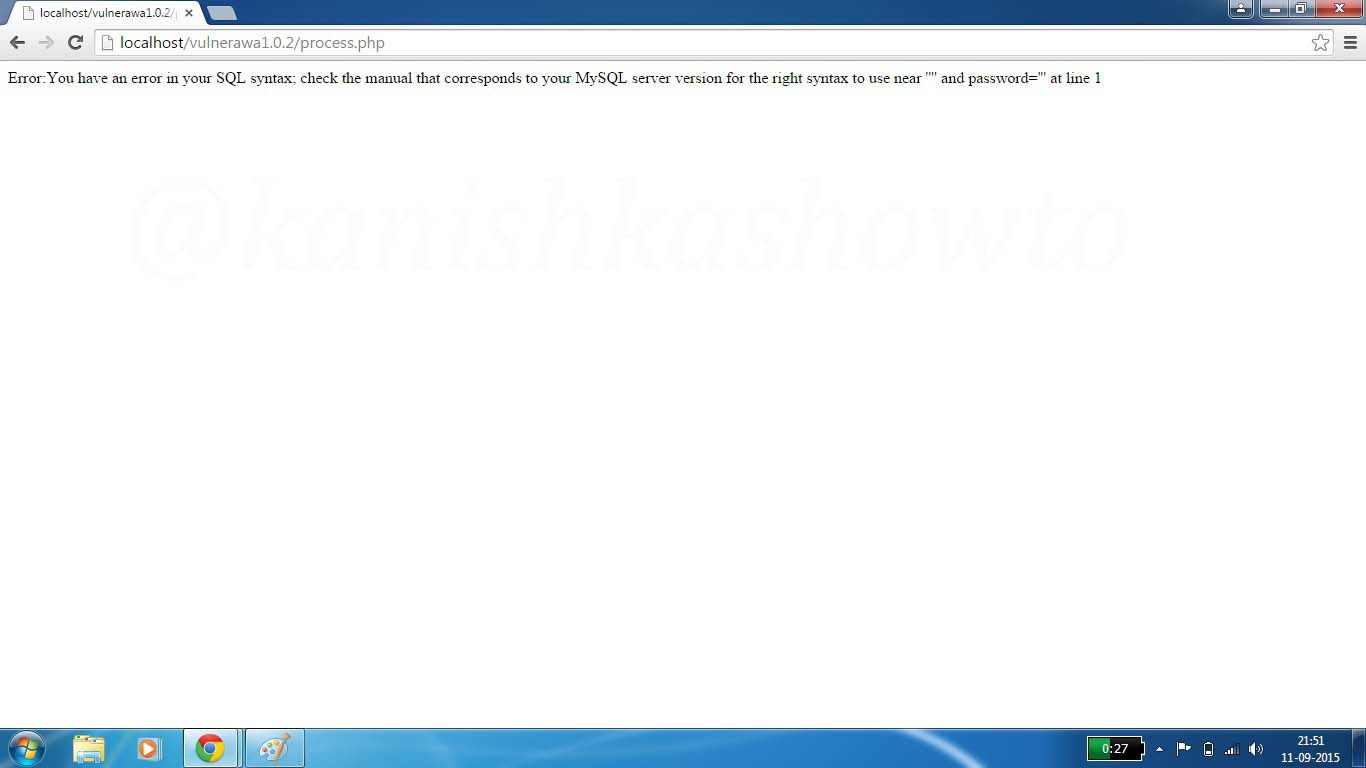
Click on “Submit”. You should get the error as shown below. This shows that the webpage is vulnerable to SQL injection. Notice that the URL has changed to a page “process.php”. Remember this for now.
Now enter the query
1′ or ‘1’=’1
as shown below in both username and password fields.

Click on “Submit”. If you got the below webpage, then you have successfully bypassed the login screen.

The query we entered above validates the user even without checking the password. There are some other queries which can work similarly. Two of them are here.
‘ or ‘1’=’1;
‘ or ‘1’=’1”
When a hacker enters these two queries, the username field becomes
” or ‘1’=’1;
which transforms to validate the user if username is empty or 1=1. Now whatever may happen, one will always be equal to one. We can find many more using trial and error. This vulnerability exists because we are supplying raw data to our application.
Now let’s go to the page “process.php” to understand how this sql injection worked. Go to the root directory of Vulnerawa. That would be “C://Wamp/www/vulnerawa1.0.2“. You should see the list of below pages. These are all the webpages which make the webapp vulnerawa1.0.2.
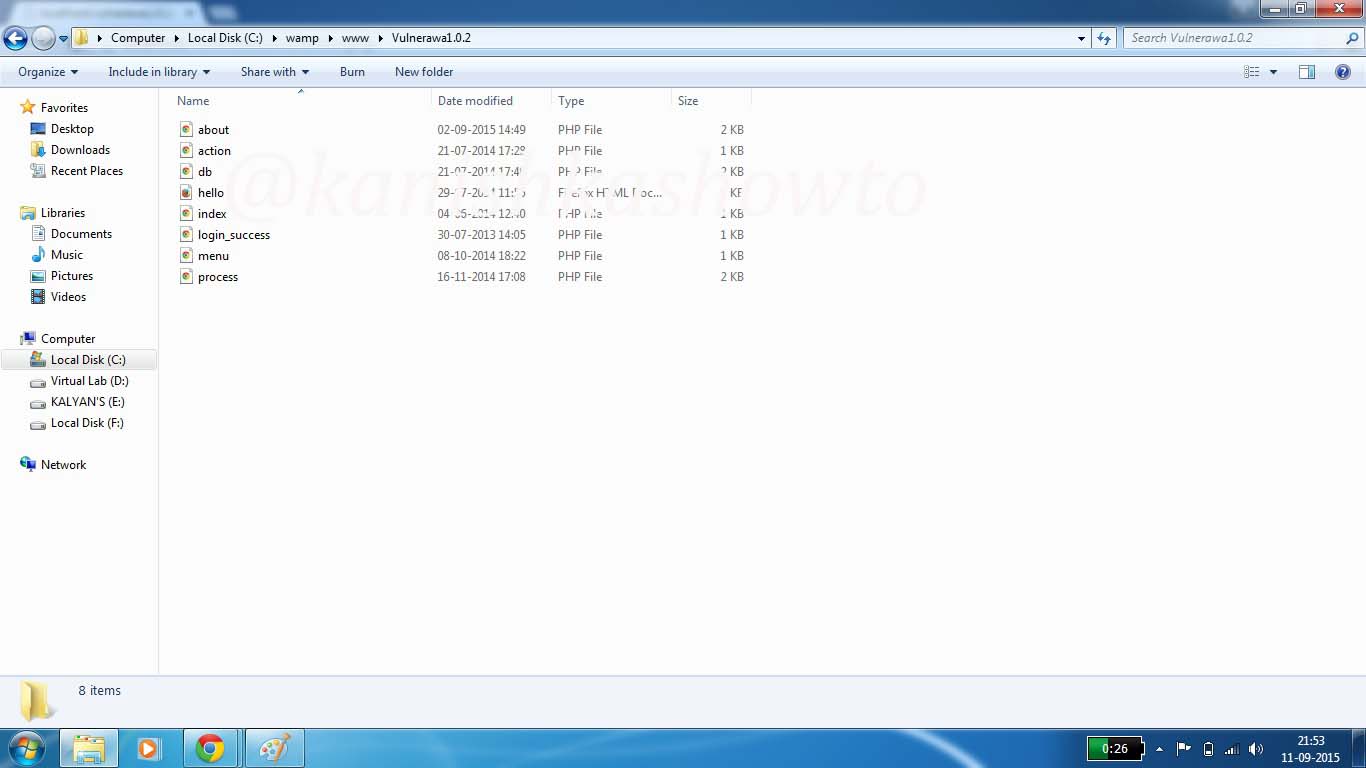
But we are interested in the page process.php. Right click on the page and select “edit” option to view the file. To put simply, open the process.php file with notepad. You should see it as below. We are interested in the two lines of code, $myusername=$_POST[‘username’] and $mypassword=$_POST[‘password’]. These are the two queries to take username and password from the user. You can observe that they are taking input directly aka without sanitization.
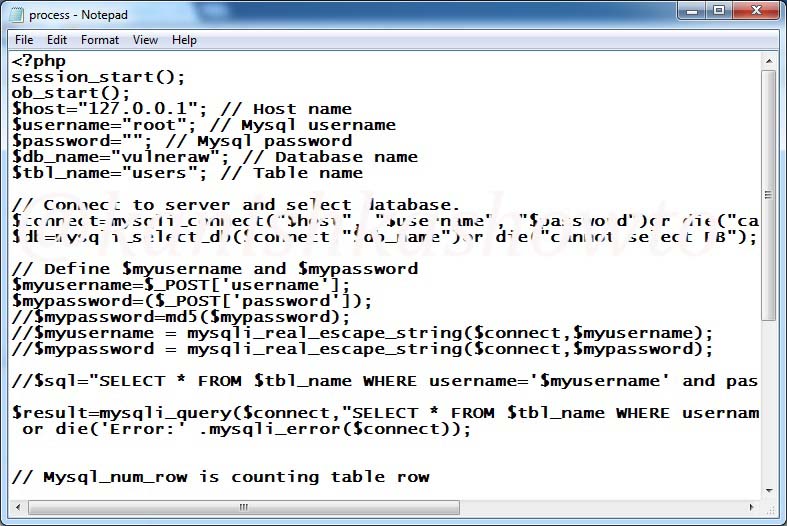
Now just below these two lines, we have two lines commented. These are
$myusername = mysqli_real_escape_string($connect, $myusername);
$mypassword = mysqli_real_escape_string($connect, $mypassword);
Now, uncomment those two lines by removing the two backward slashes as shown below.
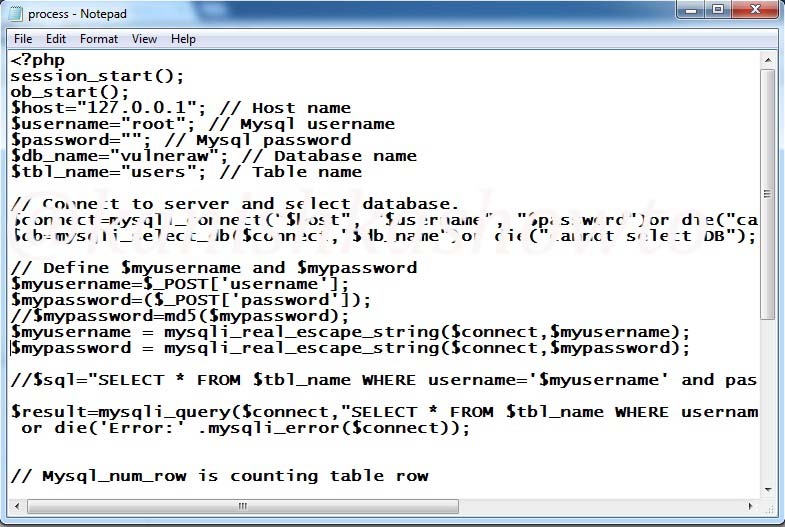
Save the file and restart the WAMP server. Now try to bypass the login screen as explained above. You should get something as shown below.

The “mysqli_real_escape_string” escapes any escapes any special characters entered in the input fields thus rendering injection harmless.
2. Forced browsing:
The page that is accessed after your login into any resource is also part of all the web pages that belong to that website. Sometimes, login can be bypassed by directly going to this page on browser. This is known as forced browsing and this page can be searched using web directory busting or fuzzing.
3. URL parameter tampering:
The login screen can also be bypassed by tampering with the URL parameter.

