Posted on

Cewl wordlist generator: Complete guide

Hello, aspiring ethical hackers. This blogpost is a complete guide to Cewl wordlist generator. Cewl stands for Custom Word List generation. It is written in ruby language. Unlike crunch that takes input from us to generate a wordlist, this tool spiders a given website to the depth specified by us and then creates a dictionary or wordlist from it. This wordlist can then be used for password cracking with tools the Brutus, Hydra, Medusa and John The Ripper. It was designed by Robin Wood based on a discussion on PaulDotCom about creating wordlists by spidering a target website.

Cewl can be downloaded from here. Kali Linux has cewl installed by default and for this tutorial we are using the same. Metasploitable 2will be used as target since it has lot of applications installed that can be used for testing it.

Cewl 1

To use cewl, all we have to do is simply supply the URL you want to spider for as shown below.

Cewl 2

Then it will create the wordlist for you as shown below.

Cewl 3
Cewl 4

Keeping the downloaded file (-k)

Specifying the ‘-k’ option the downloaded file can be saved.

Cewl 5

Depth of spidering (-d)

When you specify a target to Cewl, it spiders to the dept of 2 by default. You can change it using this option. For example, let’s set the depth to 1.

Cewl 6

Or 3 may be.

Cewl 7

Minimum word length (-m)

This option can be used to set the minimum length of the passwords cewl creates. For example, nowadays, most services set the minimum length of the password to at least 5. So there’s no use creating passwords with length less than the minimum length your target has set, If you have noticed the above results, the default minimum length for cewl is 3. Let’s set it to 5 for example.

Cewl 8
Cewl 9

As you can see in the above image, there are no longer passwords of length less than 5.

Spidering other sites (-o)

Setting this option allows cewl to spider another external sites during spidering of the target.

Cewl 10

Don’t scan specified paths (–exclude)

If the target website is too large, you may want to skip some paths or maybe you just want to skip some paths as they may not have any passwords. You can use this option what cewl to exclude the paths you don’t want to scan. Then paths should be supplied in a file.

Cewl 11
Cewl 12

–allowed

This option is used to specify regex patterns of the path to be followed. If the pattern doesn’t match, it drops the scan.

Cewl 13

No wordlist please (-n)

If you don’t want the wordlist to be printed, you can use the “-n” option.

Cewl 17

Saving the output (-w)

Till now, you have seen that Cewl has been printing the wordlists it creates to the terminal. The output can be copied and pasted in another file to be saved from using as a wordlist. But why take all this effort when we can just save the output to file, using the ‘-w’ option.

Cewl 14
Cewl 15

Use User agent (-u))

A user agent is a characteristic string that allows web server to identify the browser and operating system and we are using. You can see your user agent here. Using the (-u) option, cewl allows you to be get a specific user agent while spidering the website.

Cewl 16

Groups of words (-g)

Setting this option allow cewl to return group of words along with single words.

Cewl 18

Turn all generated passwords to lowercase (–lowercase)

Setting this option allows us to 16 turn all the passwords cewl generates into lower case.

Cewl 19

Here is the result.

Cewl 20

Include words with numbers too (–with-numbers)

While spidering, if cewl finds any words with numbers in them, it just ignores them. But many passwords contain numbers too. By setting this option, cewl collects numbers as well.

Cewl 21
Cewl 22

–convert-umlauts

Setting this option to while using cewl converts common ISO-8859-1 umlauts.

Cewl 23

Include meta data too (-a)

When we set this option, Cewl includes metadata found while spidering the website apart from the words.

Cewl 24

This metadata found is included at the end of the output files as shown below.

Cewl 25

Save metadata found to a different file (–meta-file)

You can even save all the metadata found on the target site to a different file as shown below using the “–meta-file” option.

Cewl 26

In the above image, you can see that cewl, while processing metadata creates a temporary file. This file known as cewl-temp.pdf is created in the /tmp directory by default. We can change the location of this file by using the “—meta-temp-dir” option as shown below.

Cewl 27

Gather emails too (-e)

Not just metadata, you can even process emails using cewl with the ‘-e’ option.

Cewl 28
Cewl 29

Save collected emails in another file (–email-file)

These collected emails can also be saved in another file using the “–email-file” option.

Cewl 30
Cewl 31

Show the count for each word (-c)

Setting this option shows the count for each word.

Cewl 32
Cewl 33

Verbose mode (-v)

Just like every other tool, this tool to has verbose mode that gives detailed information.

Cewl 34
Cewl 35

Debug mode (–debug)

Similarly, the “–debug” option gives detailed debugging information too.

Cewl 36
Cewl 37

Authentication

Some sites need authentication to spider it. Cewl allows authentication of websites too.

Cewl 38

It supports both basic authentication and digest authentication. The “auth_type” option is used to set the type of authentication. The “–auth _user” and “–auth_pass” option can be used to set username and passwords respectively.

Cewl 39

Here’s the output.

Cewl 40

Spidering through proxy

Spidering, no matter what the purpose is very noisy. Cewl has an option to spider through a proxy using the “–proxy_host” option.

Cewl 41

You can even specify the port of the proxy using the “–proxy-port” option.

Cewl 42

Cewl even has feature of authenticating to the proxy server using the “–proxy_username” and “–proxy_password” options.

Cewl 43
Posted on

Hydra password cracker: Complete guide

Hello, aspiring ethical hackers. This blogpost is a complete guide to Hydra password cracker. Hydra password cracker runs on Linux, Windows, Solaris, FreeBSD/openBSD, QNX and macOS. Using Hydra, we can crack passwords of various protocols like Asterisk, AFP, Cisco AAA, Cisco auth, Cisco enable, CVS, Firebird, FTP, HTTP-FORM-GET, HTTP-FORM-POST, HTTP-GET, HTTP-HEAD, HTTP-POST, HTTP-PROXY, HTTPS-FORM-GET, HTTPS-FORM-POST, HTTPS-GET, HTTPS-HEAD, HTTPS-POST, HTTP-Proxy, ICQ, IMAP, IRC, LDAP, MEMCACHED, MONGODB, MS-SQL, MYSQL, NCP, NNTP, Oracle Listener, Oracle SID, Oracle, PC-Anywhere, PCNFS, POP3, POSTGRES, Radmin, RDP, Rexec, Rlogin, Rsh, RTSP, SAP/R3, SIP, SMB, SMTP, SMTP Enum, SNMP v1+v2+v3, SOCKS5, SSH (v1 and v2), SSHKEY, Subversion, Teamspeak (TS2), Telnet, VMware-Auth, VNC and XMPP.

Hydra can be downloaded from here. This guide uses Hydra installed on default in Kali Linux and Metasploitable2 as target.

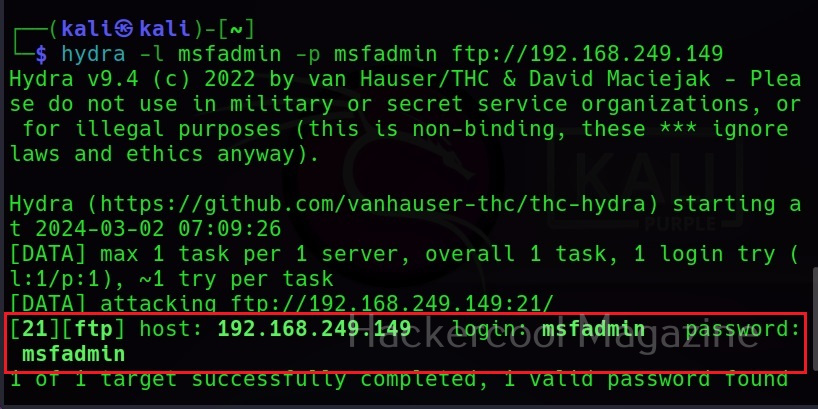
Single username (-l) and Password (-P)

If you want to check a single username and password with Hydra, the syntax is given below. Here we are testing the credentials on target system’s FTP server. This is normally useful when we have a general idea about at least one credential pair.

Hydra Password Cracker 1 1

Hydra will test this credential and come with a result. Here it is found this credential accurate.

Hydra Password Cracker 2

What if you can’t guess a password or have no knowledge about at least one credential pair. Then we need to test a large list of credentials using brute forcing by using a wordlist.

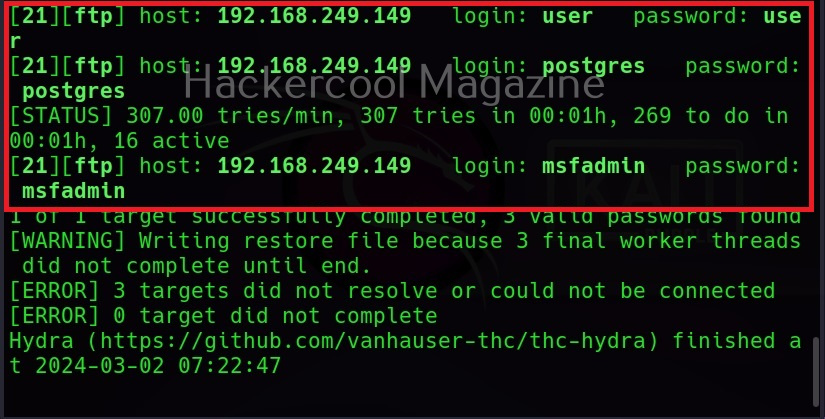
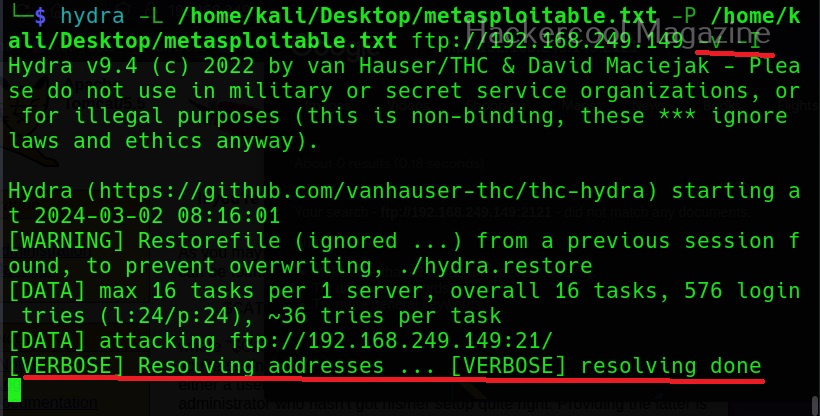
Specifying wordlist for usernames (-L) and passwords (-P)

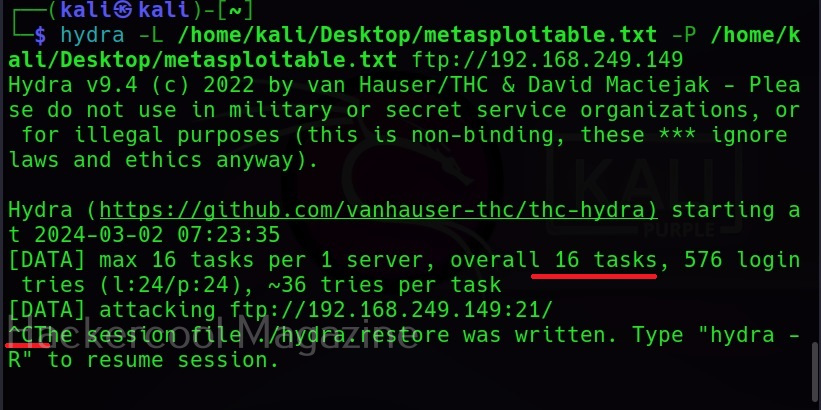
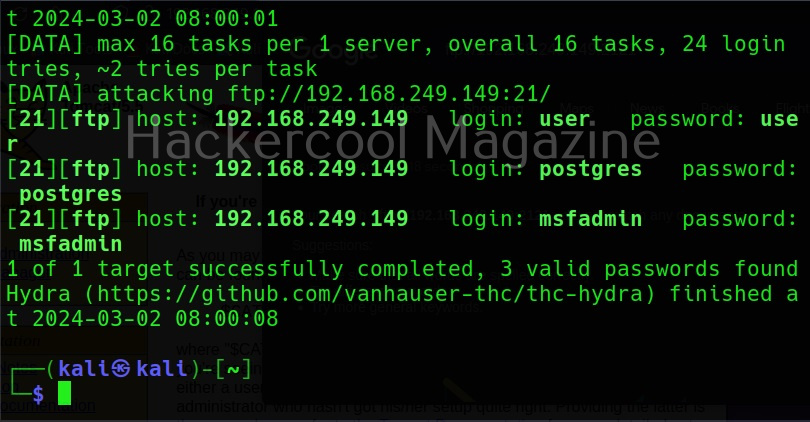
You can specify wordlist containing usernames using the (-L) option and specify the wordlist containing passwords using the (-P) option as shown below.

Hydra Password Cracker 3

Here, I am suing the same wordlist for both username and passwords. “Metsaploitable.txt”. These wordlists are normally created or obtained during the enumeration stage. For example, we obtained this during SMB enumeration of the target. Hydra found three credentials valid from this wordlist.

Hydra Password Cracker 4

Restore a cancelled session (-R)

Sometimes we may need to test a large wordlist, with thousands of credentials in it. This may obviously take a lot of time and we may have to hit “CTRL+C” sometimes to cancel the session or maybe a power cut ended our scan abruptly.

Hydra Password Cracker 5

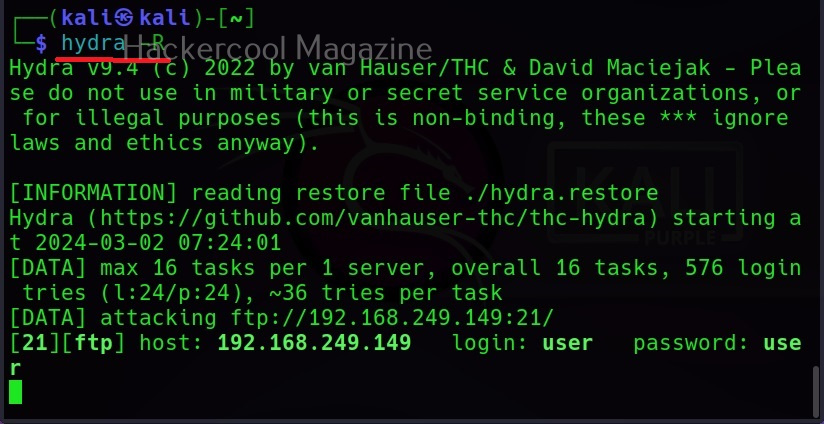
Do we have to start from the beginning again? Don’t worry. You can restore the session from where you stopped in Hydra as shown below.

Hydra Password Cracker 6

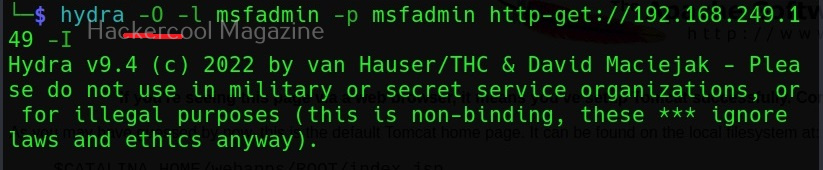
RIgnore the previous session (-I)

What if we don’t want to restart that session and to start a session afresh. We can just use the ignore (-I) command which asks it to ignore the previous session.

Hydra Password Cracker 7

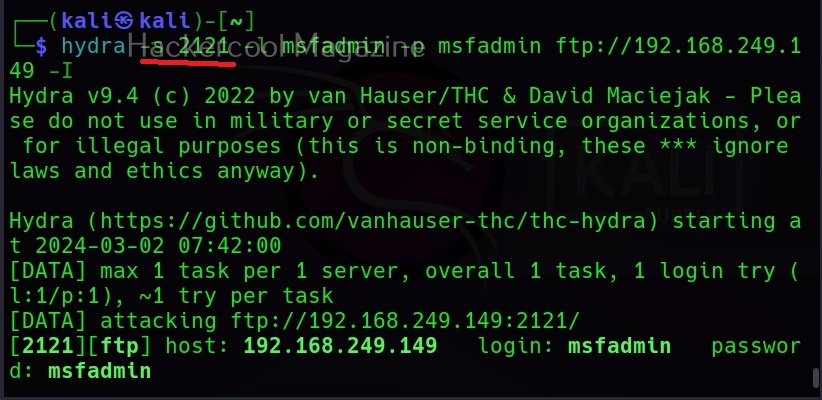
Scanning unconventional ports (-s)

You know every service has a default port on which it runs. For example, FTP (21), Telnet (23), and HTTP (80) etc. Sometimes administrators configure this service to run on unconventional ports to make them less conspicuous. Using Hydra we can even run password attack on these ports using the (-s) option. For example, imagine FTP is running on the port 2121 and not 21.

Hydra Password Cracker 8

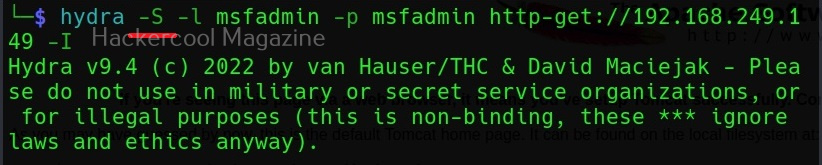
Target has SSL enabled (-S)

Using Hydra, we can connect using SSL with this option.

Hydra Password Cracker 9

If the service has an old version of SSL, we can use the “-O” option.

Hydra Password Cracker 10

Additional checks (-e)

Using this option, you can check accounts for null passwords (n), using username as password (-s) and using password as username and vice versa (-r).

Hydra Password Cracker 11

Combo (-C)

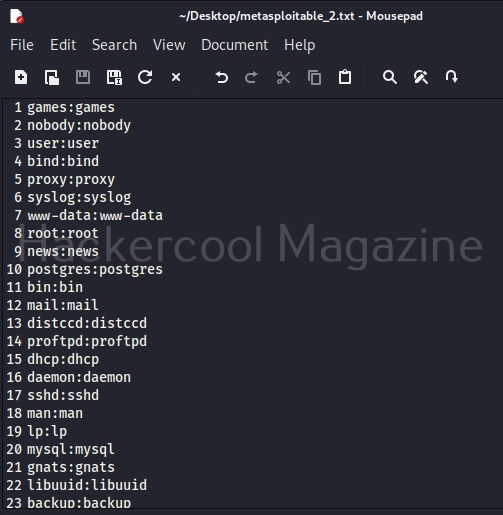
Sometimes, instead of an usual wordlist, we have wordlists that have credentials in “login:pass” format as shown below.

Hydra Password Cracker 12

If we want to use this type of wordlist, you can use this option.

Hydra Password Cracker 13
Hydra Password Cracker 14

-U

When you are using a wordlist with Hydra, by default it checks all passwords for the first username and then tries the next username. Using this option, we can loop around the passwords. The first password is checked for all the usernames and then it moves to next password and does the same.

Hydra Password Cracker 15

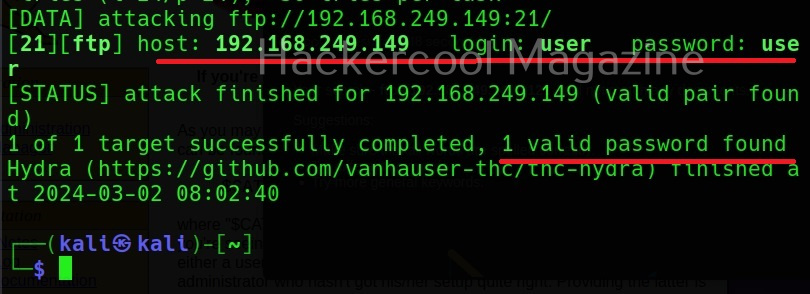
Stop after getting the first successful pair of credentials (-f)

This option (-f) makes Hydra stop password cracking as soon as one successful pair of credentials are found.

Hydra Password Cracker 16
Hydra Password Cracker 17

Target multiple servers (-M)

Hydra allows us to perform password cracking on multiple servers at once. We need to provide a file containing IP addresses of the targets.

Hydra Password Cracker 19

Stop after getting once successful pair on multiple servers (-F)

Setting the ‘-F’ option, Hydra stops after getting the first successful pair of credentials on multiple servers.

Hydra Password Cracker 18

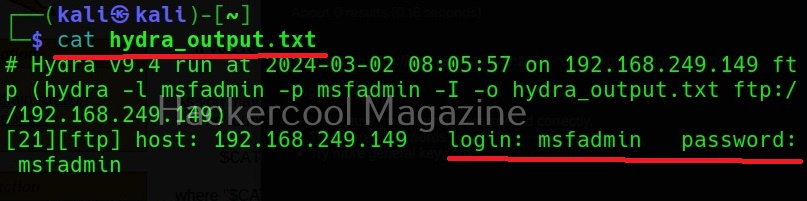
Saving the output (-o)

Till now, we have seen Hydra showing output on stdout. However, with the “-o” option, we can save the output of the tool to a file.

Hydra Password Cracker 20
Hydra Password Cracker 21

Format of the output file (-b)

Hydra allows you to save output in three formats, although the default format is text. It also allows you to save output in Json and Json v2 format.

Hydra Password Cracker 22
Hydra Password Cracker 23

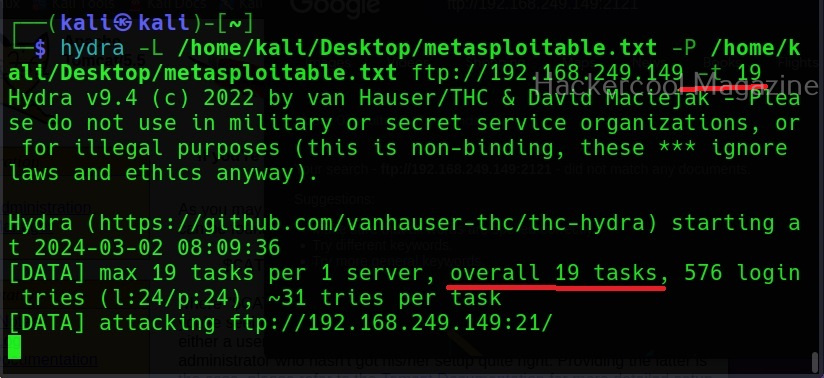
Number of tasks (-t)

Tasks are number of persistent connections Hydra makes while testing. By default, it makes 16 tasks, but this can be changed using this option. For example, let’s set it to 19.

Hydra Password Cracker 24

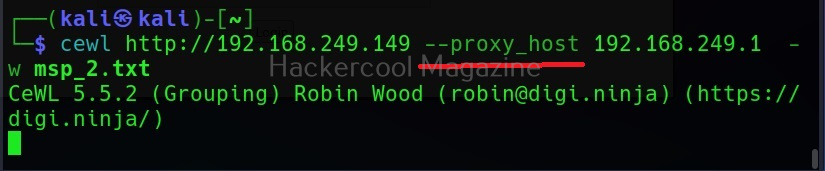
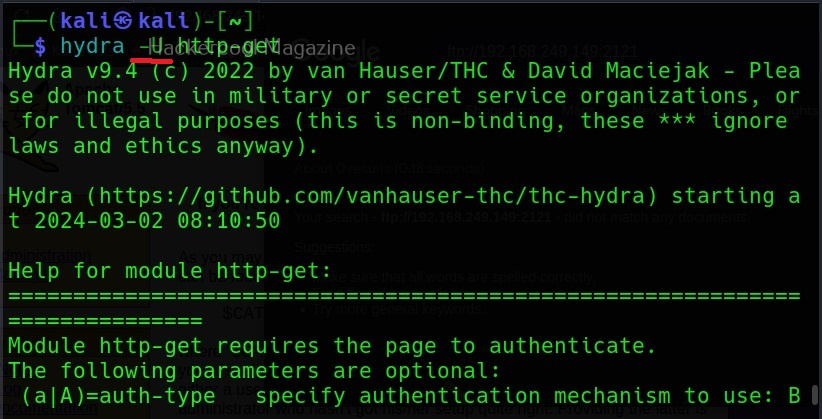
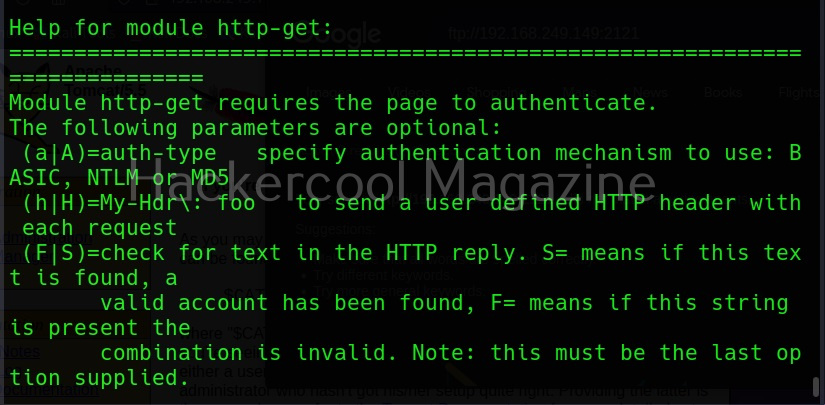
Module specific options (-m)

This option allows us to set module specific options. For example, FTP module in Hydra doesn’t have any module specific options. But other modules like HTTP have it. All the options for a specific module can be seen using the -U option. For example, lets change the option for http-get.
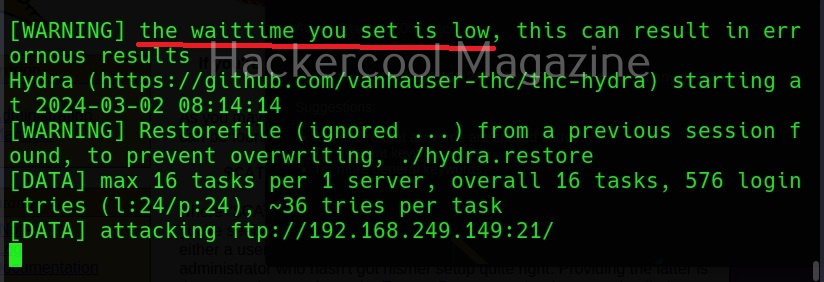
Hydra Password Cracker 25
Hydra Password Cracker 26
Hydra Password Cracker 27

Waiting time (-w)

Hydra waits for 32 seconds for receiving responses for it queries. This option can be used to change this time. For example, let’s set it to 10 seconds.

Hydra Password Cracker 28
Hydra Password Cracker 29
Hydra Password Cracker 30

Waiting time for login attempts (-c)

This option can be used set the waiting time for login attempts Hydra performs. It is useful only when a low task time is used.

Hydra Password Cracker 31

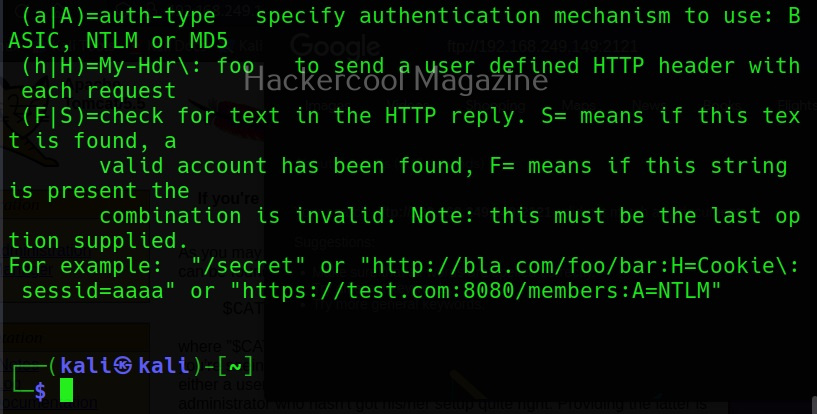
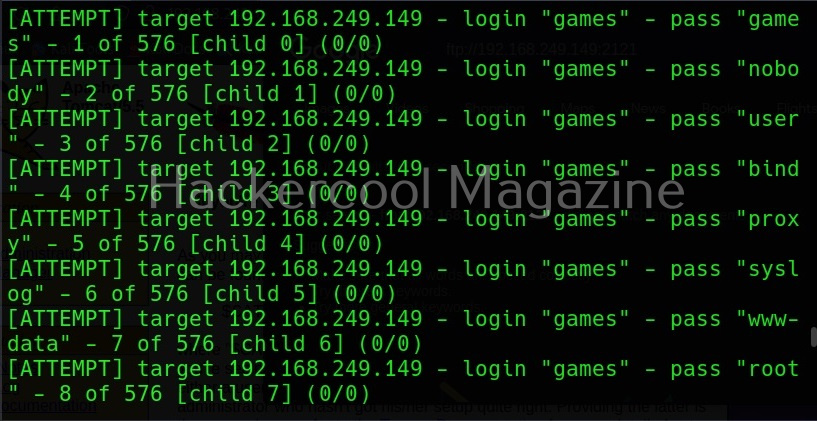
Verbose mode (-v) (-V)

Hydra has two verbose mode. The lowercase verbose mode is the default verbose mode in any other tool.

Hydra Password Cracker 32

If you want to see each login attempt Hydra makes, you need to use the (-V) option.

Hydra Password Cracker 33
Hydra Password Cracker 34

That’s all about Hydra password cracker.

Posted on

Brutus Password Cracker: Complete guide

Hello aspiring Ethical Hackers. In our previous blogpost, you learnt what is password cracking and various techniques of cracking passwords. In this blogpost, you will learn about Brutus password cracker, one of the popular tools that is used for cracking passwords.

Brutus Password Cracker 0

Brutus is a password cracking tool that was actually designed to test for default credentials for routers . It was made public way back in October 1998 but it is still popular in present time. It is a portable password cracking tool and there is no need of installing it. It can be downloaded from here. It works only on Windows and supports cracking passwords of various protocols. They are,

  • HTTP (Basic authentication)
  • HTTP (HTML form/CGI)
  • POP3
  • FTP
  • SMB
  • Telnet

After downloading, we just need to extract the contents of the archive.

Brutus Password Cracker 1

To run Brutus, click on the BrutusA2 application file.

Brutus Password Cracker 2
Brutus Password Cracker 3 2

It has three modes of operation. They are, wordlist, brute force and combo list where credentials are given as username/password pairs.

Brutus password cracker

For the purpose of demonstration, let’s try to crack FTP password of Metasploitable 2. I will be using the wordlist mode of attack for this. This wordlist was created while performing SMB enumeration of the target. Wordlists can also be generated using tools like Crunch, Cewl etc. After specifying the wordlist, I just need to click on “Start” to begin cracking passwords.

Brutus Password Cracker 5

As the tool continues to crack credentials, any positive authentication results will be displayed as soon as they are found. In our current example, Brutus successfully extracted three credentials. They are,

  • user:user
  • postgres:postgres
  • msfadmin:masfadmin

Let’s use them to login into our target.

Brutus Password Cracker 6
Brutus Password Cracker 7
Brutus Password Cracker 8

Successful. Similarly Brutus password cracker can be used to brute force credentials too.

Posted on

Name-That-Hash: A tool to identify hashes

Hello aspiring Ethical hackers. In this article, you will learn about a new tool named Name That Hash. Name That Hash is a hash identifying tool that can identify over 300 types including MD5 and SHA256. The other features of this tool include displaying summaries for the hashes identified, colored output and displaying in the order of their popularity etc. This tool can be installed from the repository of Kali as shown below.

Name That Hash 15 1024x536

Once this tool is installed, it can be started using command nth. To test a single hash, we can use “nth” with option “-t” as shown below. Let’s first give a MD5 hash.

nth -t <hash>

name that hash

Just like hashid and hash-identifier, this tool also got it right but it is giving us some additional information like where the hash is actually used. For example, Md5 is used in Linux shadow files. What about SHA-1 hash?

Name That Hash 1819 870x1024

It got this right too. Next, let’s give it a LM hash.

Name That Hash 20

It put this in the Least likely section. Next, let’s give it a NTLM hash.

Name That Hash 21
Name That Hash 22

It failed to get spot on NTLM too. Just like its predecessors, it correctly detected the SHA-512 and SHA-256 hashes.

Name That Hash 23
Name That Hash 24
Name That Hash 25
Name That Hash 26

The good thing about name-that-hash is that instead of being blank, it gives us more information about actually where the hash is used. This can be useful when you grab a collection of hashes from a target network. You can easily decide which hashes to crack and which not to crack.
If you have more number of hashes, giving it one by one can be cumbersome. Luckily, you can give them all at once by saving these hashes in a text file as shown below.

Name That Hash 27

and using “-f” option to specify the file.

nth -f <path to the file that has saved hashes>

Name That Hash 28

The output which is not shown here is same as above.

Name-That-Hash is only designed to identify hashes unlike the other two but if you have a base64 encoded string, it can be decoded by nth using the “-b64” option.

nth -b64 -t <base64 encoded string>

Name That Hash 29

It correctly decoded it as “hackercool” All the above are also encrypted hashes of the text “hackercool”. Suppose you want the result to only display the most likely result, you can get this by using the “-a” option as shown below.

nth -a -t <hash>

Name That Hash 31

If you observe the above images, you can see the banner of name-that-hash occupying lot of space. Just like me if this is putting you off, you can view result without banner using the “–no-banner” option.

nth –no-banner <hash>

Name That Hash 32

Once go to the image above the above image, the one where we used the “-a” option. Once, carefully observe the result. It correctly detected the hash as SHA-512. Next to it, you can see the text “HC 1700 JtR: raw-sha512”. This is HashCat (HC stands for HashCat) and John (JtR stands for John The Ripper) information being displayed by the tool because the next thing you will do after identifying the hash is to crack it using Hashcat or John. This requires what you need to put into these tools to crack it. For example, let’s take a simpler hash.

Name That Hash 31a

John The Ripper says its raw-md5. We need to just supply this format as shown below in JTR to crack this.

Name That Hash 31b

Similarly, the HC number given is “0”. Let’s supply it as shown below in HashCat.

Name That Hash 31c31d 895x1024

However, if you are an experienced ethical hacker with too much details hurting your ego, you can just view the result without the information of John The Ripper using “–no-john” option.

nth –no-john -t <hash>

Name That Hash 33

This is the difference.

Name That Hash 34

You can do the same with HashCat information using “–no-hashcat” information.

nth –no-hashcat -t <hash>

Name That Hash 35

The difference can be seen below.

Name That Hash 36

That was all about this tool.