Posted on 1 Comment

Hacking Metasploitable 2: Port scan output

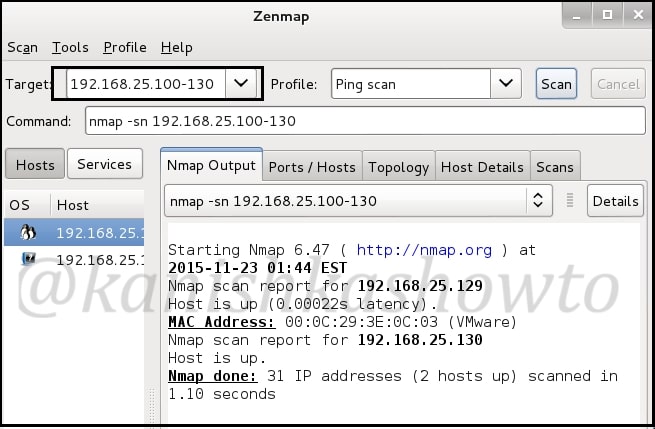
This howto is part of a series called Hacking Metasploitable. So it would be good if you follow this as part of that series. Today we will see scanning and banner grabbing of Metasploitable. Scanning is the second stage of hacking where we gather more information about our target. Imagine a scenario where we got the IP address range of our target and we want to check how many live systems are there. This is network scanning. There are many tools in our attacker system but we will use Zenmap. Open a terminal and type command “zenmap”. It would open a GUI tool as shown below. Give the IP address range as shown below. (192.168.25.100-130, it may differ for you ) and select “ping scan” . Then click on “scan”. It will show all the live systems. In our case, only Metasploitable.
Metasps1

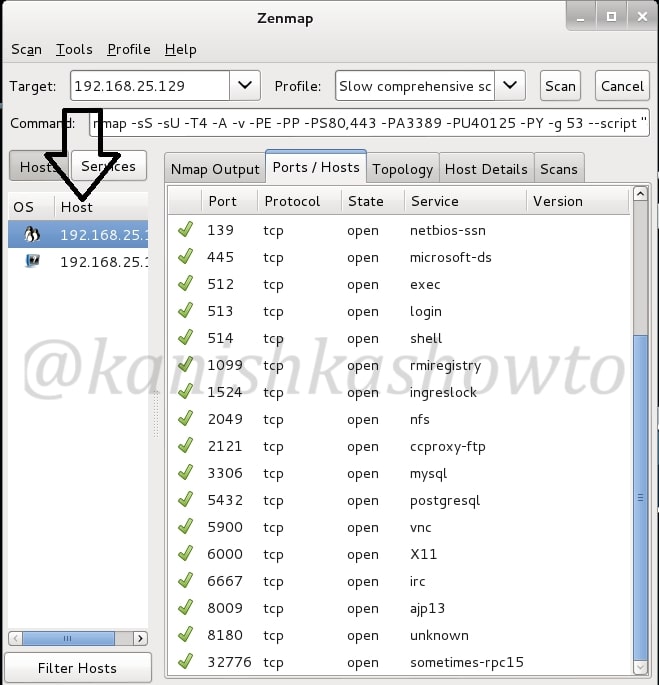
Now let’s do port scanning of the live system. Now in target field, specify only the IP address of Metasploitable. In Profile, select “slow and comprehensive scan” and click on “scan”. It will show all the open ports as shown below.
Metasps2

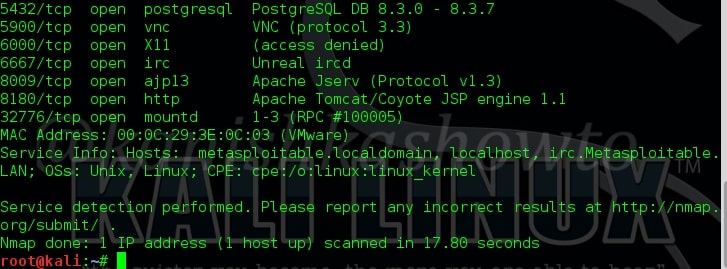
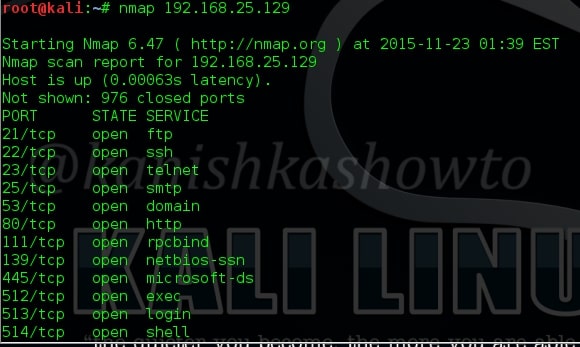
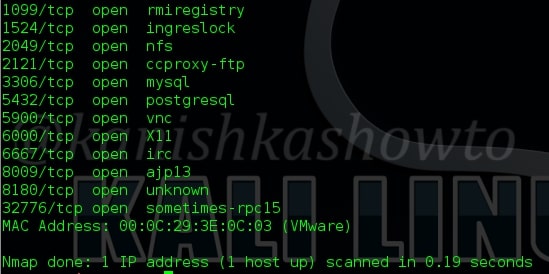
But there is another tool which is widely used for port scanning. Enter nmap. Nmap is a versatile port scanner. (Zenmap is the GUI version of Nmap). The default way to use Nmap is shown below. It would list all the open ports.
Metasps3
Metasps4

Next we will see how to grab banners. Banners display information about the type of service running at the open ports of our target. This can reveal some important information about our target which can be used for hacking. The Nmap command for banner grabbing and its results are shown below. We got a lot of banners.
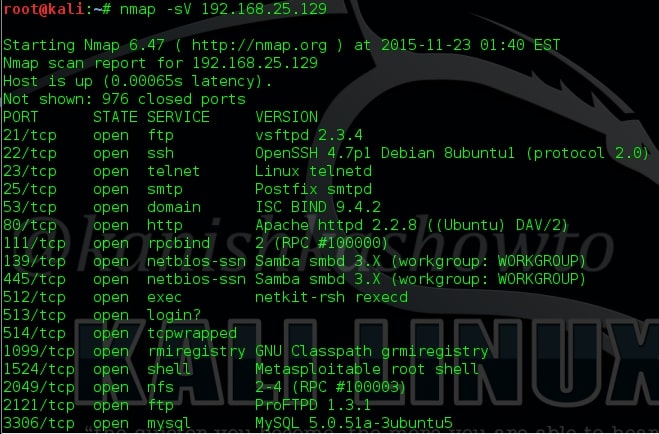
hacking metasploitable
Metasps6

Next we will use Nmap to find out the operating system of our target. The command is given below.

Metasps7

The OS details are given below.

Metasps8

There is another way of grabbing banners. It is telnetting to each port as shown below. The results can also be seen.

Metasps9
Metasps10

That’s all in Hacking Metasploitable : information Gathering stage.

Posted on 7 Comments

How to install Metasploitable 2 in VirtualBox

Hello aspiring Ethical Hackers. In this article, you will learn how to install Metasploitable 2 in VirtualBox. What is Metasploitable? Learning penetration testing or ethical hacking requires practical knowledge and good practice needs a vulnerable target. That is where Metasploitable comes into picture. It is an intentionally vulnerable operating system made by the makers of Metasploit themselves so that aspiring ethical hackers can practice and hone their hacking skills. As its name conveys Metasploitable is loaded with vulnerabilities that can be exploited with Metasploit modules.

This virtual machine can be used to conduct security training, test security tools, and practice common penetration testing techniques. For this i am going to use Metasploitable 2 which can be downloaded from here. After downloading the zip archive, extract the files into a folder. The file contents look like below.

Installing Metasploitable

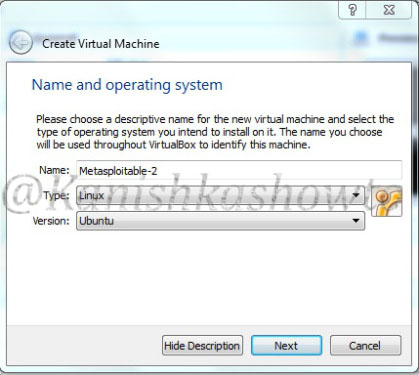
Open VirtualBox and click on “New Virtual machine wizard”. Type the name of your choice. I am using ‘Metasploitable-2‘. Choose ‘Type’ as Linux and ‘version’ as Ubuntu. Click on “Next”.

Metasploitable2

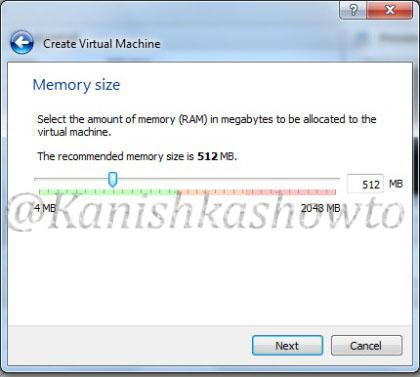
Choose the memory size appropriate to the availability of RAM on your host machine although 512MB is more than enough. Click on “Next”.

Metasploitable3

In the hard drive creation window, select option “Use an existing virtual hard drive”, browse to the folder where we have extracted our zip files and select the ‘vmdk’ file available. Click on “Create”.

Metasploitable4

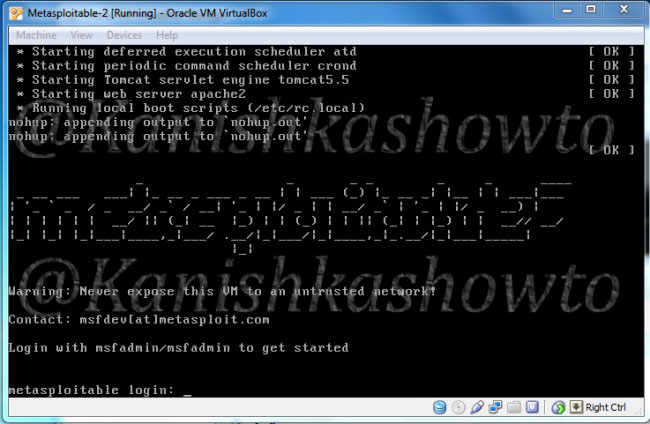
Then you are automatically booted into the metasploitable OS. The default username and password are “msfadmin”.

Metasploitable5

You learnt how to install Metasploitable 2 in VirtualBox. See how to create a penetration testing lab.