Posted on

Nikto vulnerability scanner: Complete guide

Hello, aspiring ethical Hackers. This blogpost is a complete guide to Nikto vulnerability scanner. Nikto is a free command line web vulnerability scanner that scans web servers and detects over 6700 potentially dangerous files/CGIs, outdated server software, other vulnerabilities and misconfigurations. Nikto can also detect the installed software on the target web server. We will be running Nikto on Kali Linux as it is installed by default in Kali Linux. So let’s start.

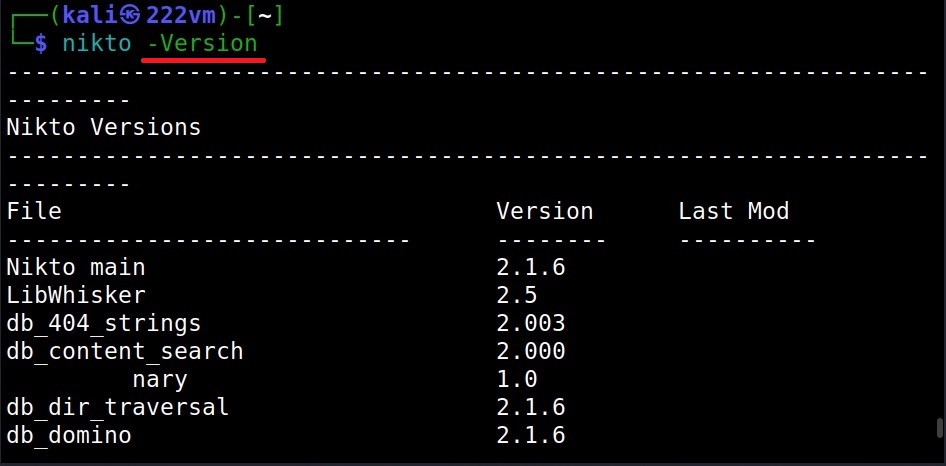
Let’s start with a version check (-Version)

The “version” option of Nikto checks for the version of the software, plugins and database versions.

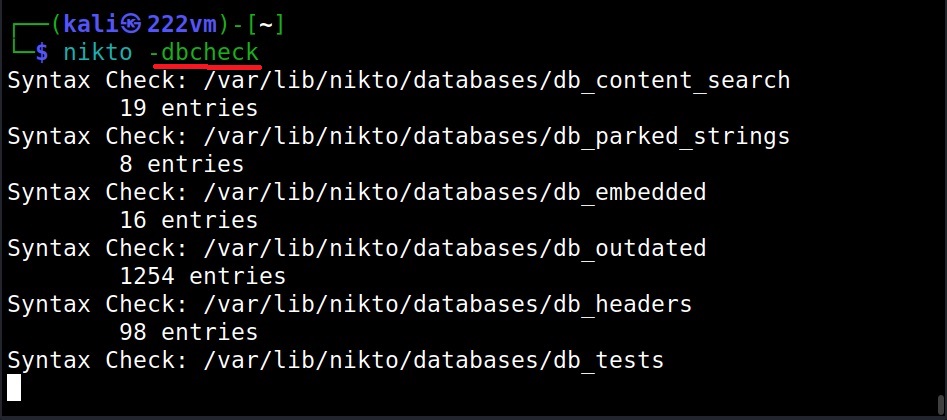
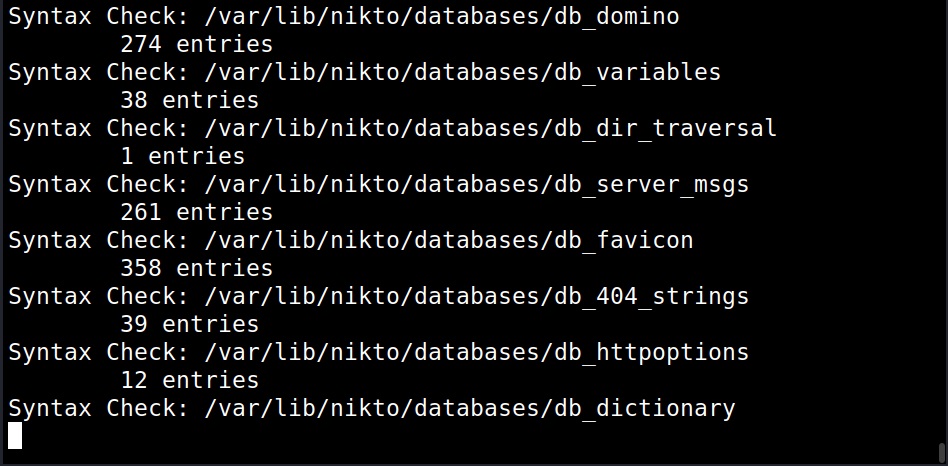
Checking Database (-dbcheck)

It’s always a good thing to check for any errors in the scan database before scanning. The “-dbcheck” option of Nikto checks the scan databases for any errors.

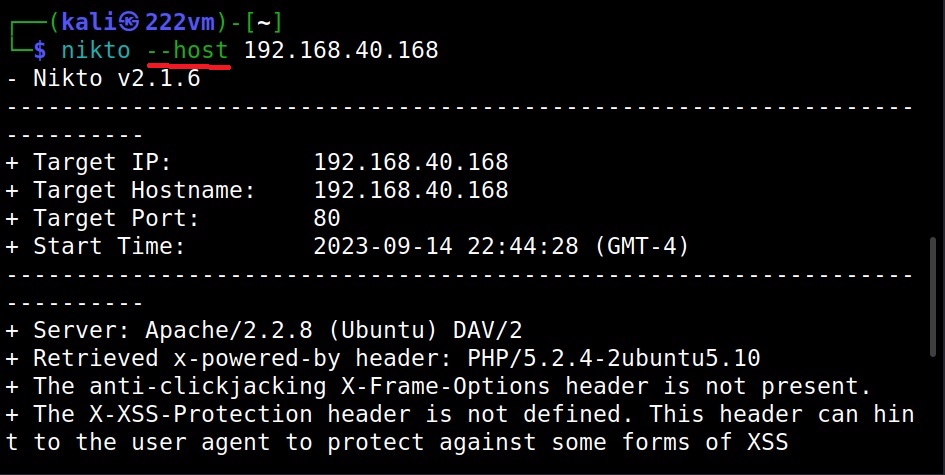
The Host option (–host) (-h)

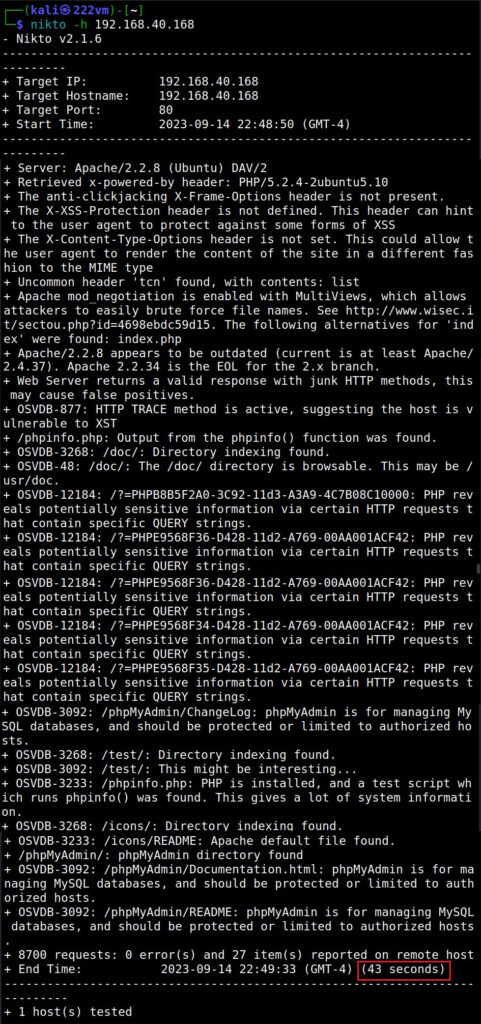
To scan a target using Nikto, first we need to specify a target. To set the target, we need to use the “host” option. This is shown below.

The target can be IP address of the webserver or URL of the website. This scan took 45 seconds to finish.

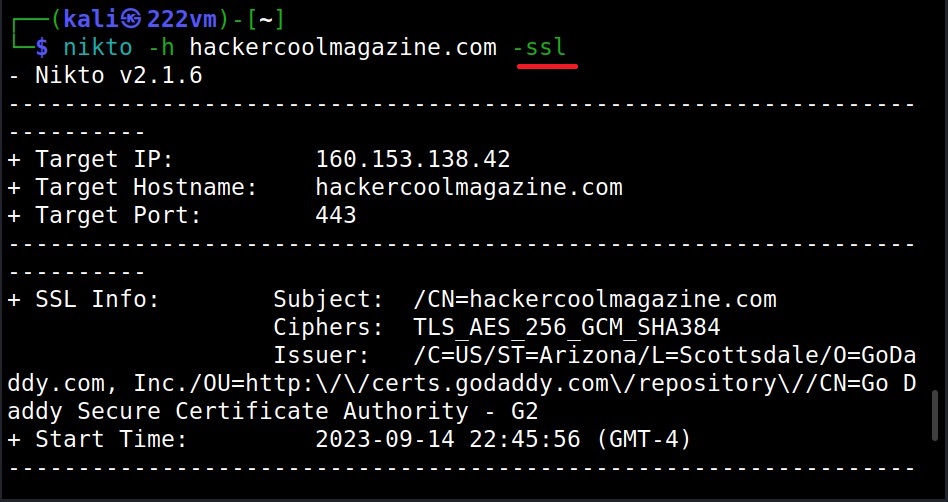
The Host option (–ssl)

To scan a website with HTTPS enabled with nikto, we can use the “SSL” option.

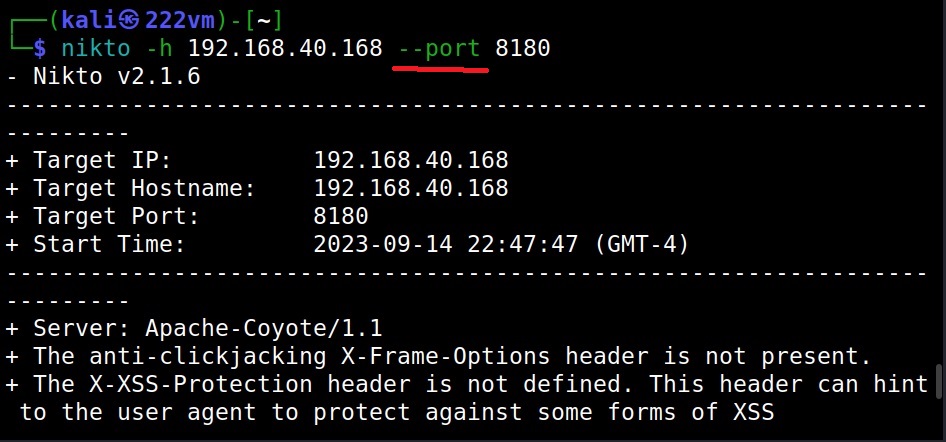
The Port option (–port)

By default, Nikto scans the default HTTP and HTTPS ports when specified. However, if the target web server is running on a custom port you can set Nikto to scan a different port by using the “port” option.

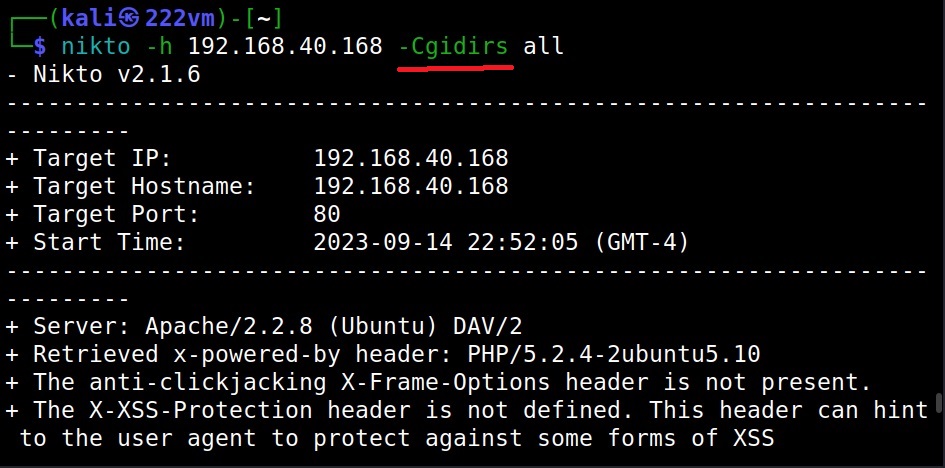
Scanning for CGI directories (–Cgidirs)

To scan for the presence of all CGI directories on the target webserver, the “cgidirs” option can be used.

You can specify a specific CGI directory to search or you can use “all” value to scan for all CGI directories on the target.

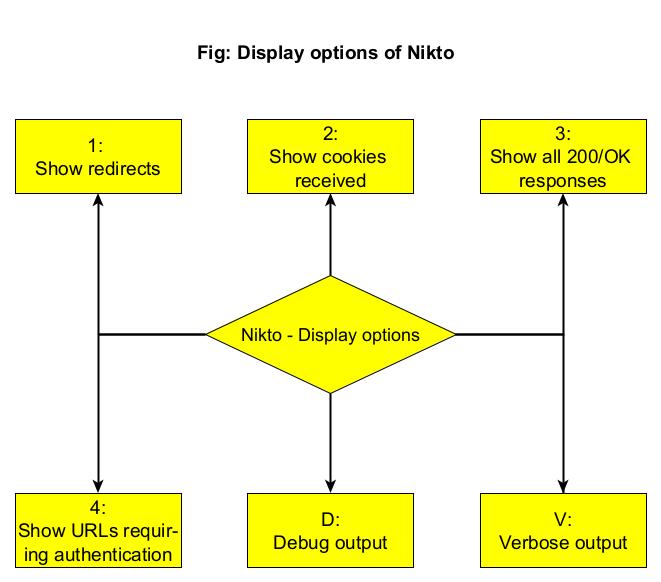
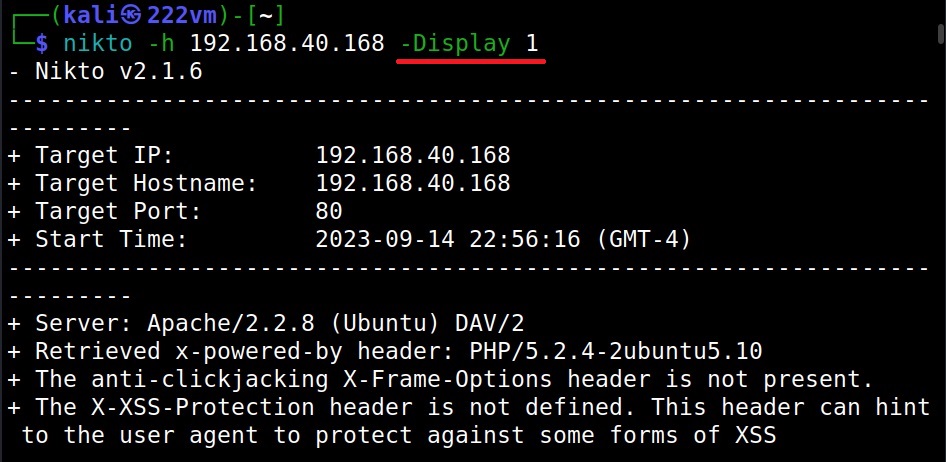
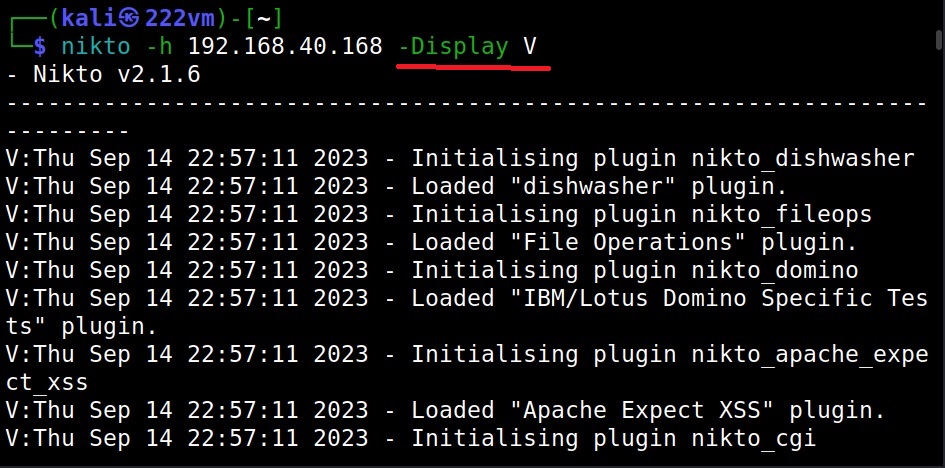
What output you want Nikto to show? (–Display)

To control the type and amount of output Nikto shows after finishing the scan, we can use the “Display” option. Here are the values that can be set for the Display option.

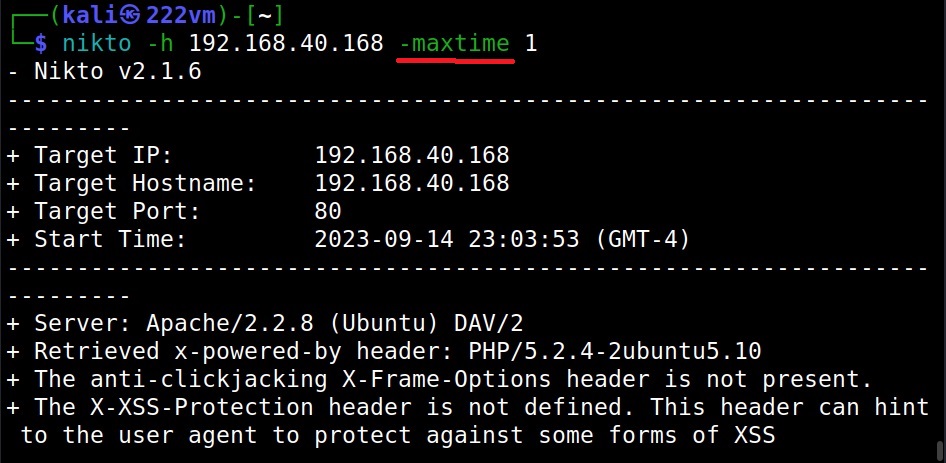
How much time you want Nikto to spend on a scan? (–maxtime)

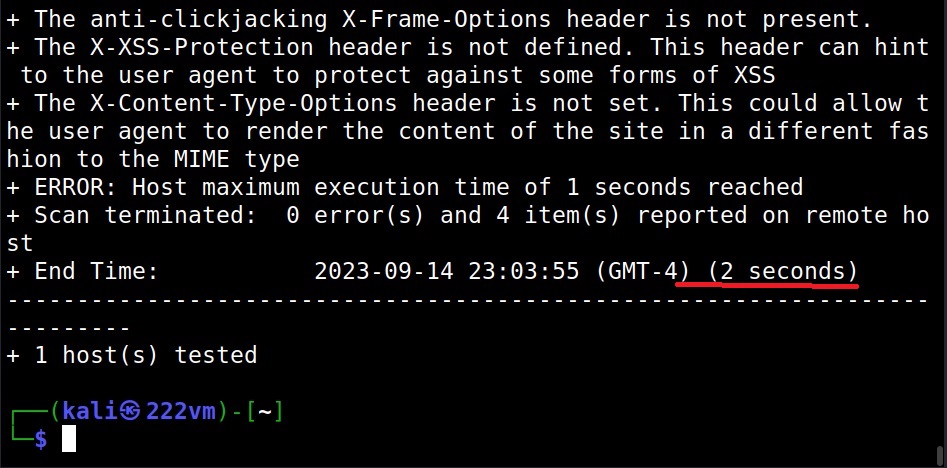
Using the “maxtime” option, we can specify the maximum time to spend for scanning a target. This time can be specified in seconds.

As you can see, the scan ended in 2 seconds while earlier the same scan took 45 seconds.

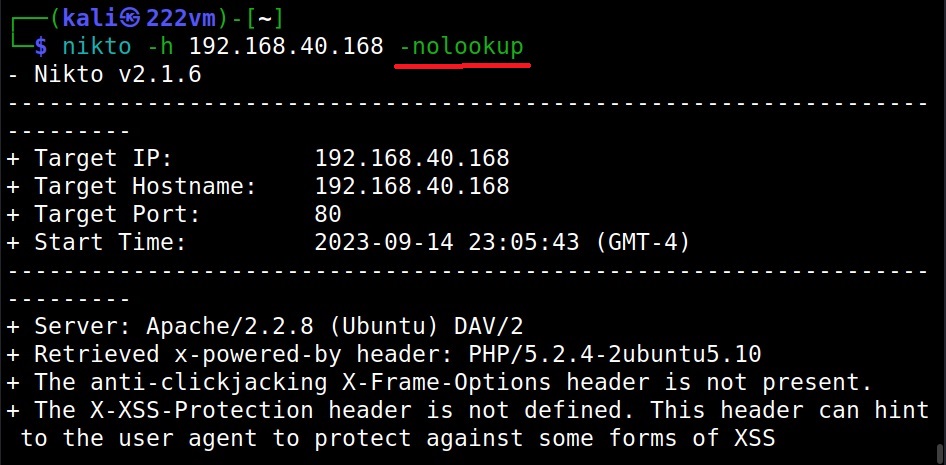
Don’t look for names (-nolookup)

The “nolookup” option specifies Nikto to not query for names when an IP address is specified.

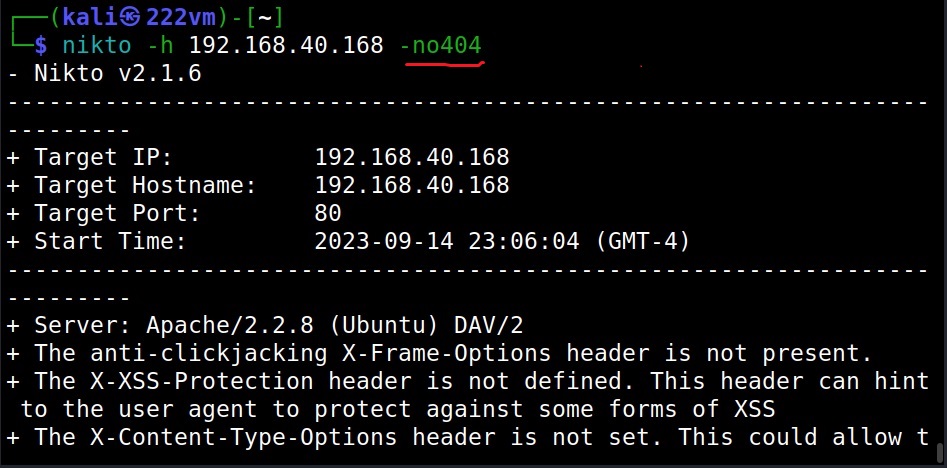
Don’t look for pages that are not there (–no404)

The “no404” option specifies Nikto to disable “file not found” checking. This will reduce the total number of requests made to the target.

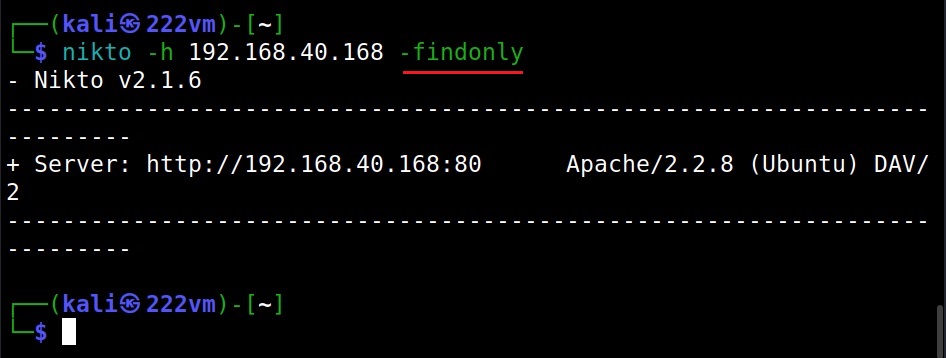
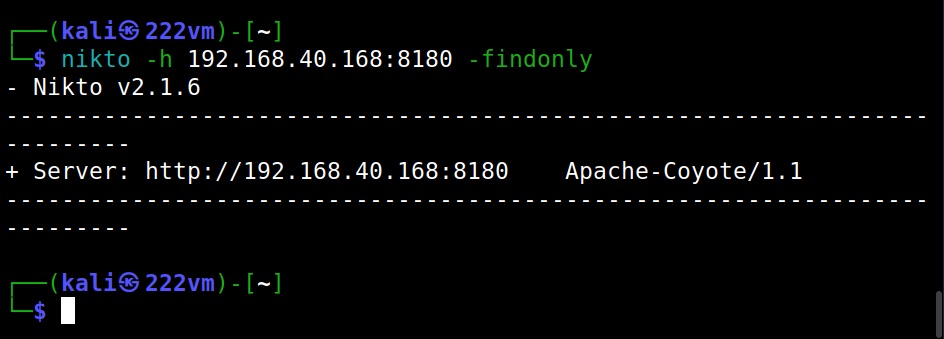
Just discover the ports (–findonly)

If you want to just find the HTTP(S) ports of a target without performing any security scan, you can use the “–findonly” option. Specifying this option allows Nikto to connect to HTTPS or HTTP ports and report the server header.

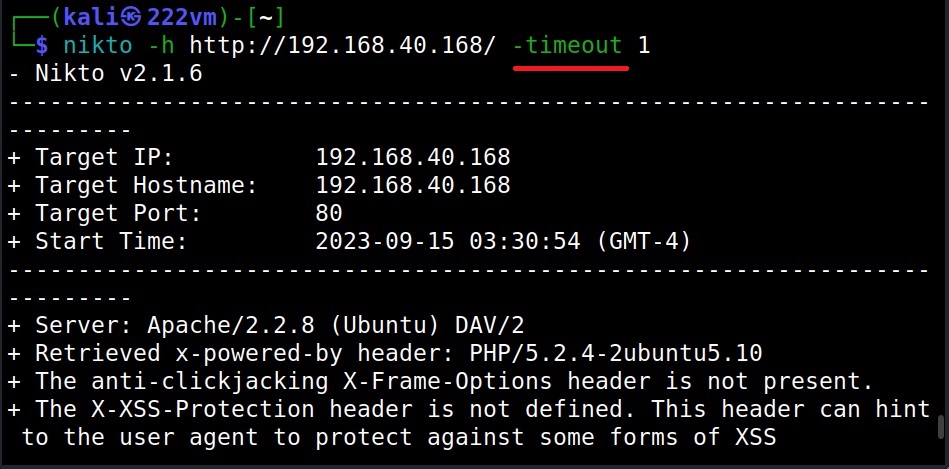
The Timeout option (–timeout)

The “–timeout” option specifies time to wait before timing out a request. The default timeout of Nikto is 10 seconds.

The Pause option (–Pause)

By using “–Pause” option of Nikto, we can specify delay between each test Nikto performs.

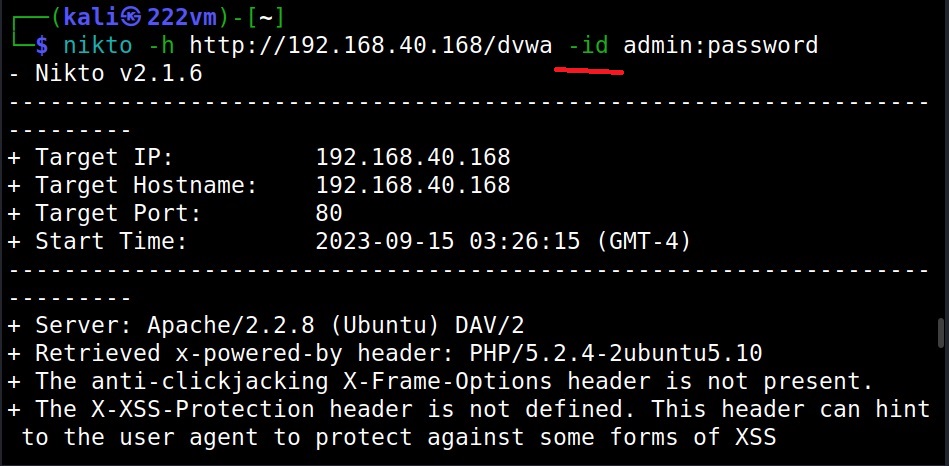
What if we have to authenticate? (–id)

With the “-id” option you can use Nikto to perform basic authentication to the target.

The tuning option (–tuning)

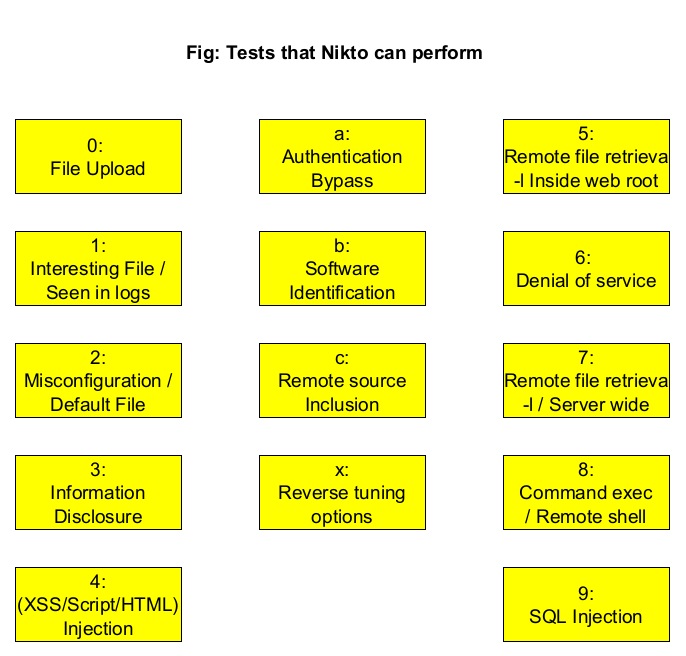
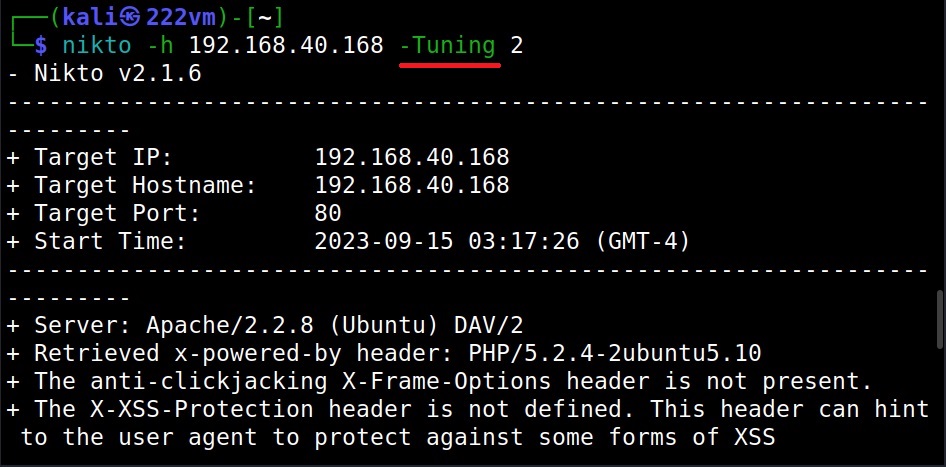
With the “-Tuning” option, we can control the test that Nikto will use against a target. It can take the following values.

For example, this is how we test for misconfigured files on the target.

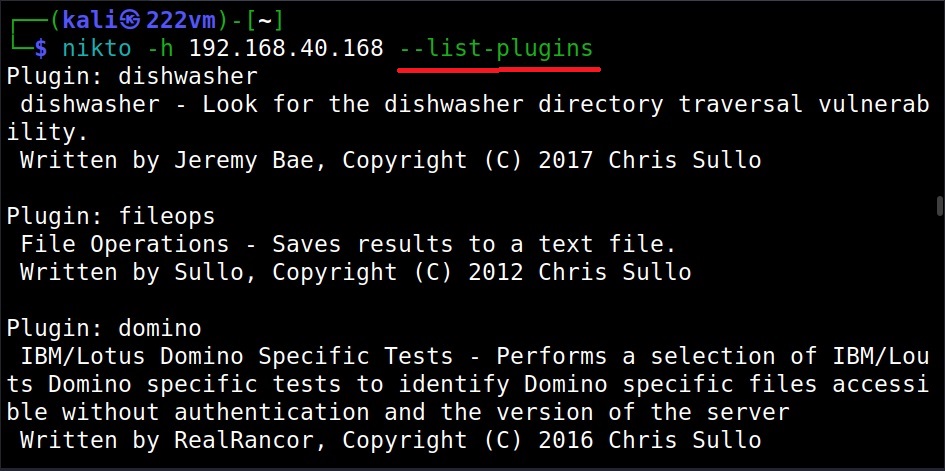
See all Nikto plugins (–list-plugins)

Nikto has lot of plugins that can be used against various targets. To view all these plugins, we can use the “–list-plugins” option.

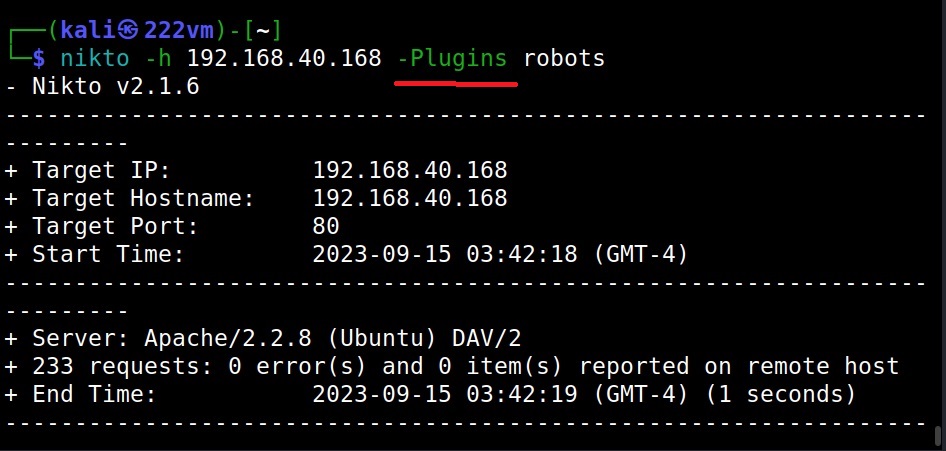
Use a particular plugin (–Plugins)

To use a particular plugin, we can use the “Plugins” option. For example, let’s use the robots plugin as shown below.

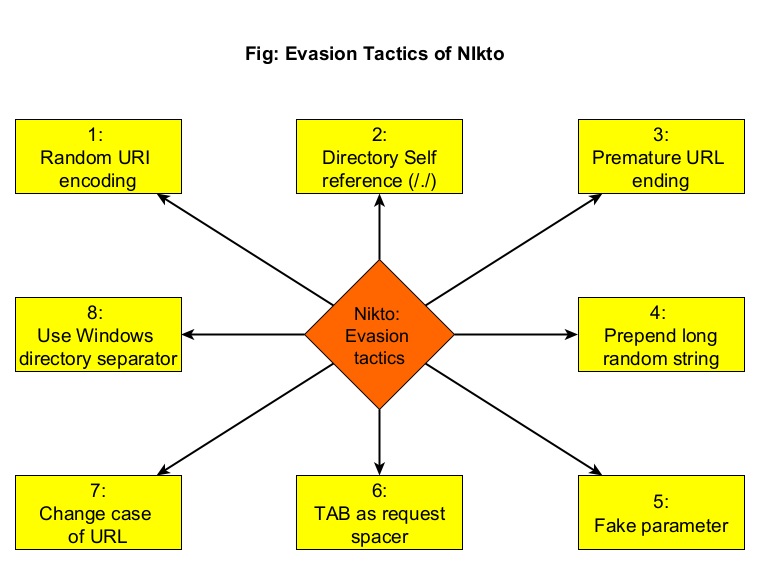
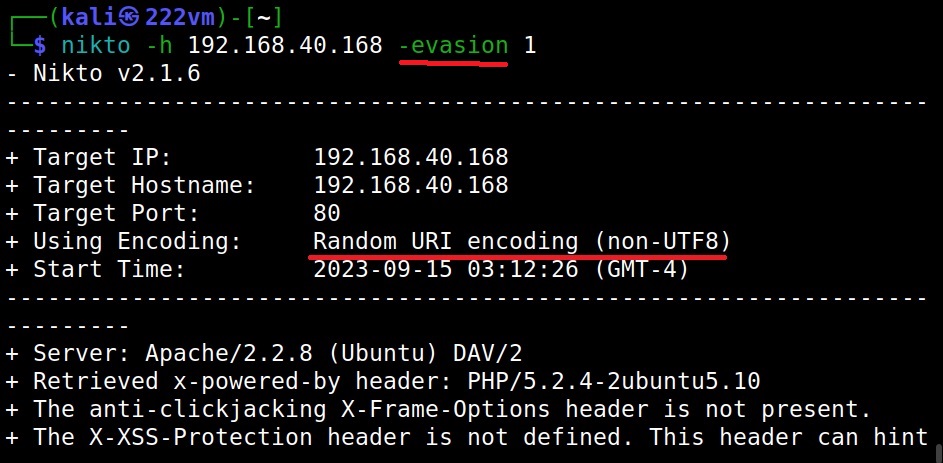
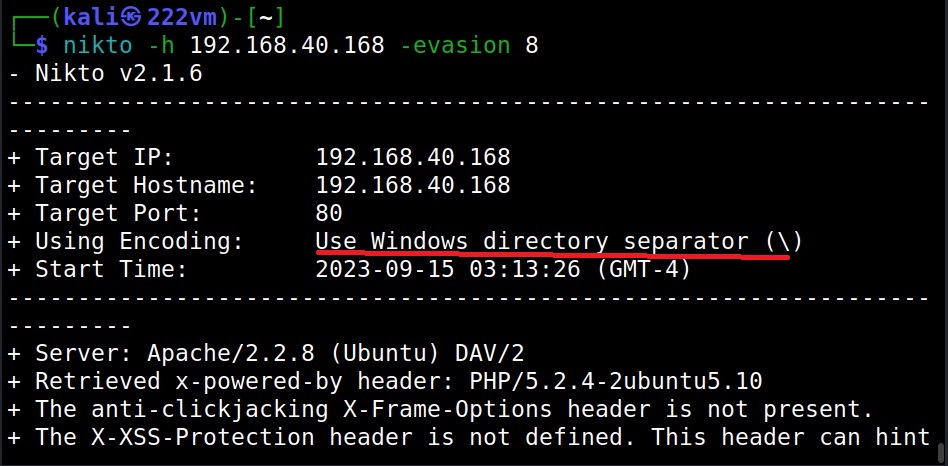
Can Nikto evade detection? (–evasion)

While scanning, Nikto can use various techniques to evade Intrusion Detection System (IDS). The evasion techniques of Nikto are given below.

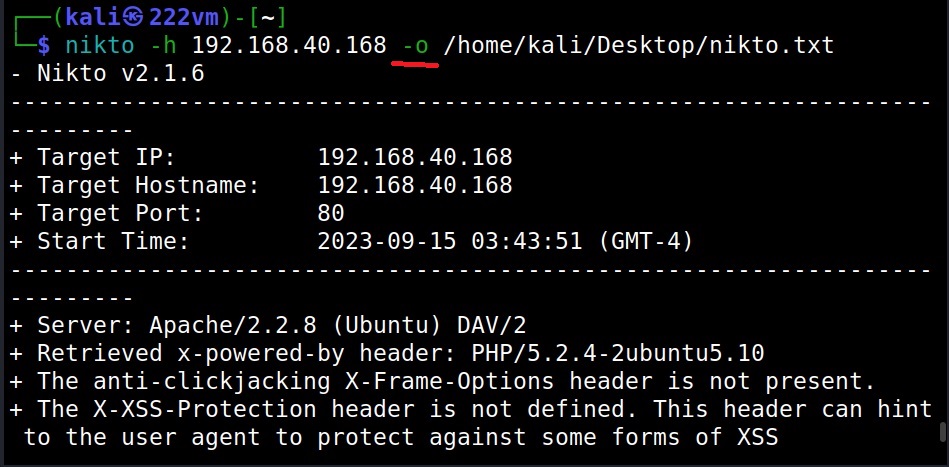
Saving output (-o)

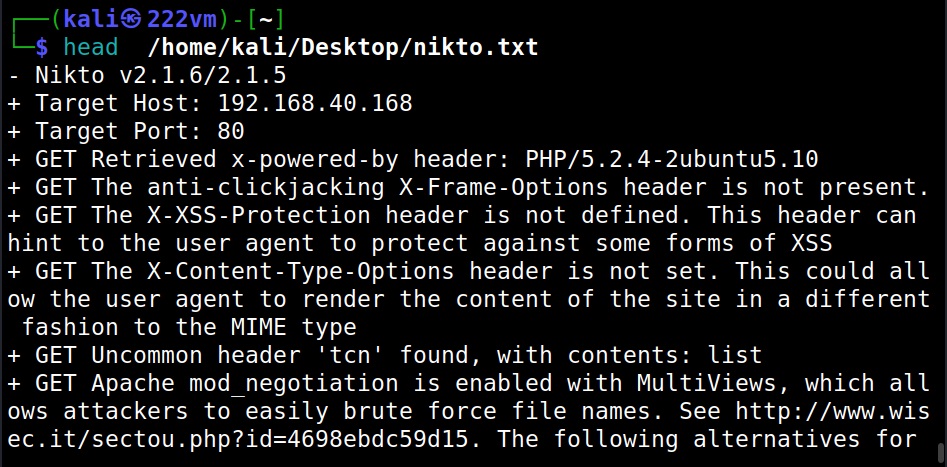
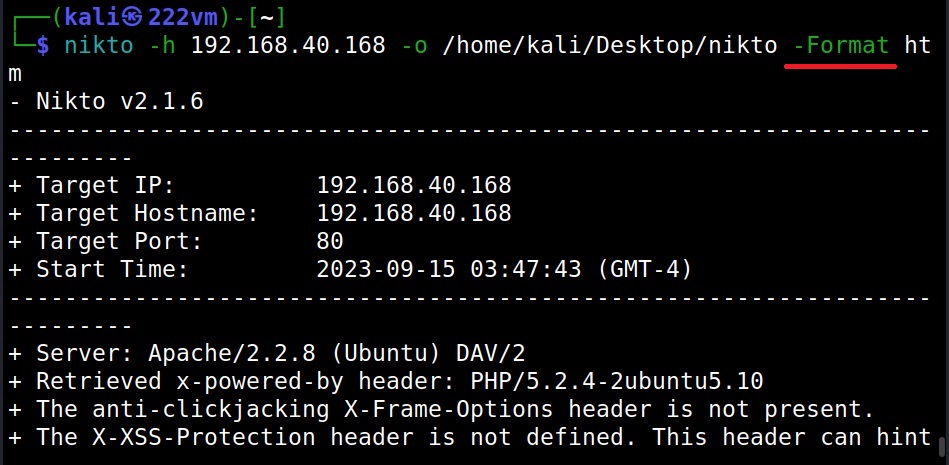
Nikto can save the output of the scan in a file with the “output(-o)” as shown below.

Formats in which you can save output (-Format)

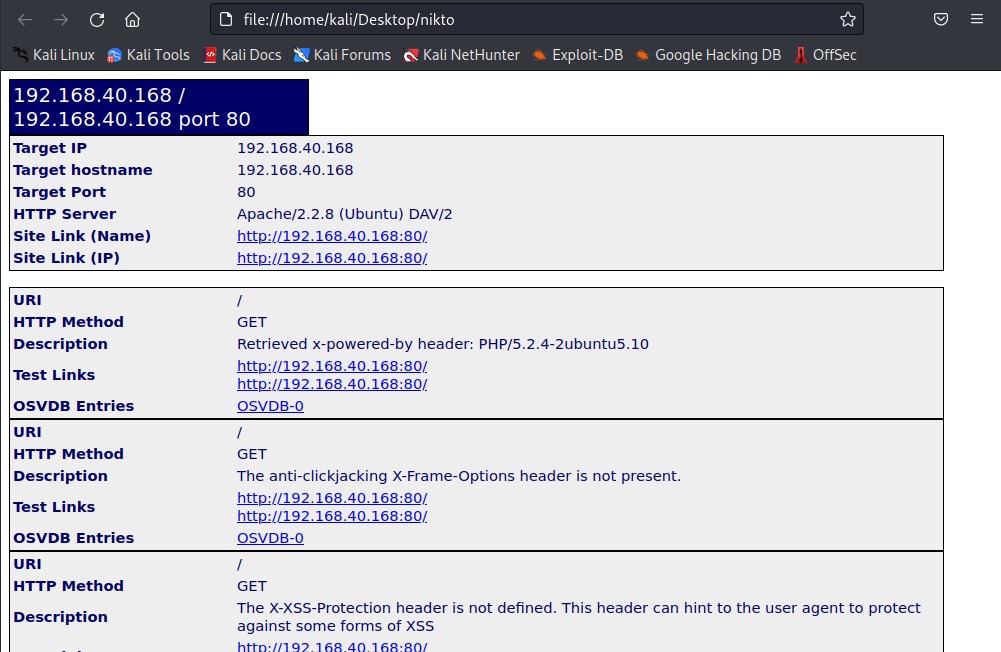
You can save in different formats you like using the “-Format” option. Valid formats are csv, htm, txt and xml.

That is the complete guide for Nikto vulnerability scanner. If you have any questions bring them in the comments section.

Posted on

Nessus vulnerability scanner: Beginner’s guide

Hello aspiring ethical hackers. In this blogpost, you will learn about Nessus vulnerability scanner. Nessus is an open-source network vulnerability scanner that uses Common Vulnerabilities and Exposures (CVE) architecture. It is widely used for vulnerability assessment and penetration testing.

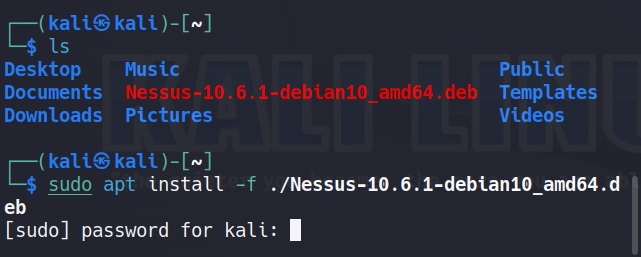
Nessus server can be installed on Unix, Linux and FreeBSD whereas Nessus client is available for Unix and Windows based operating systems. For this tutorial, we will be installing Nessus on Kali Linux. Nessus can be downloaded from here. It can also be downloaded using curl as shown below (version may change).

Once the latest version of Nessus is downloaded, it can be installed as shown below.

Once the installation is finished, enable nessus as shown below.

Then start nessus as shown below.

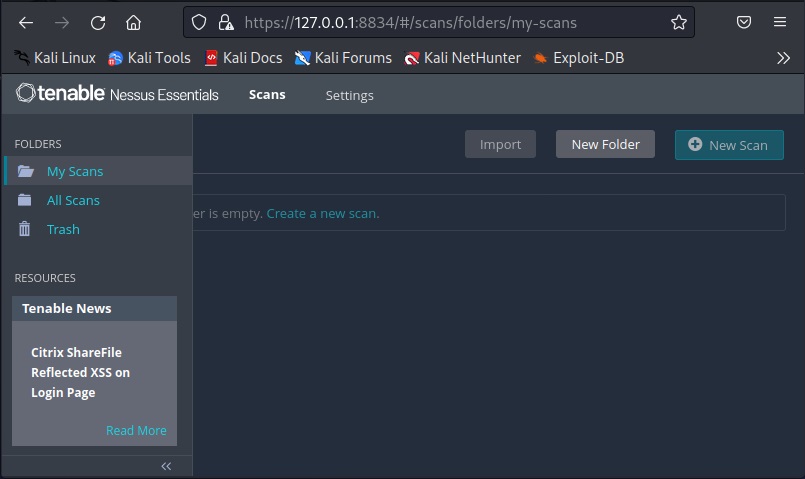
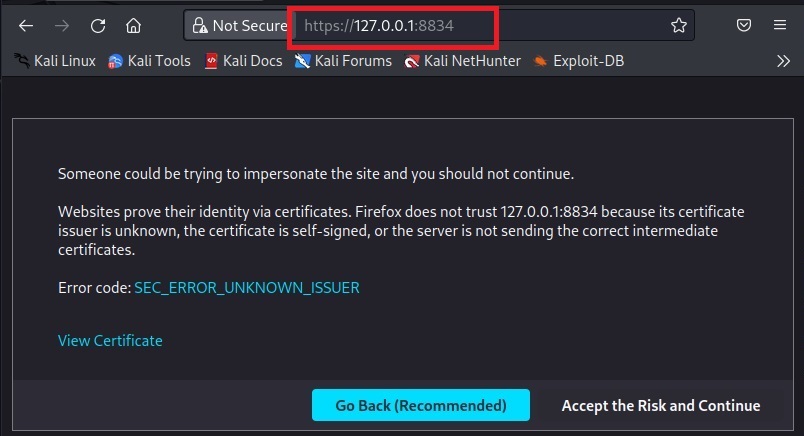
Nessus runs on port 8834 by default. It can be viewed in browser.

Click on “Accept the risk and continue”.

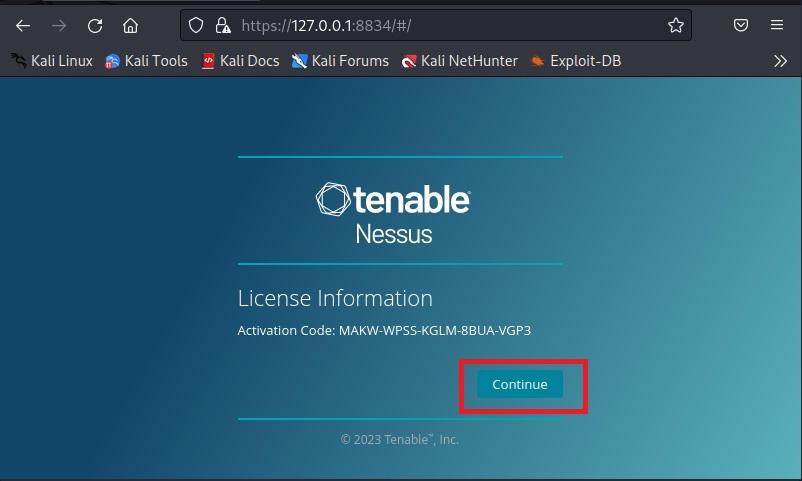
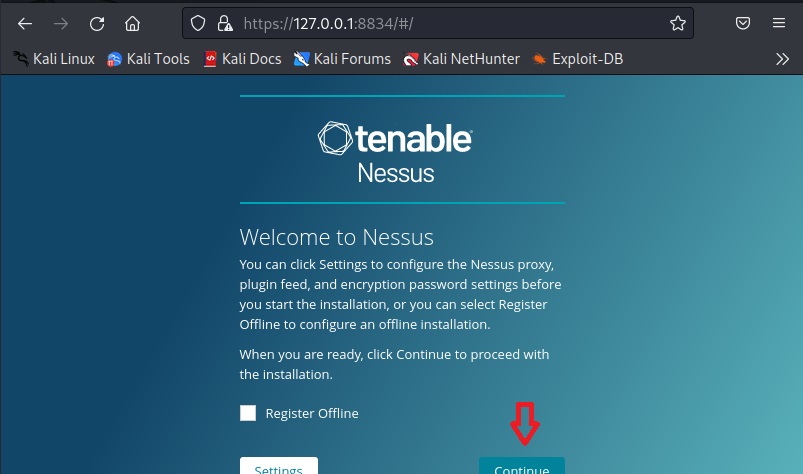
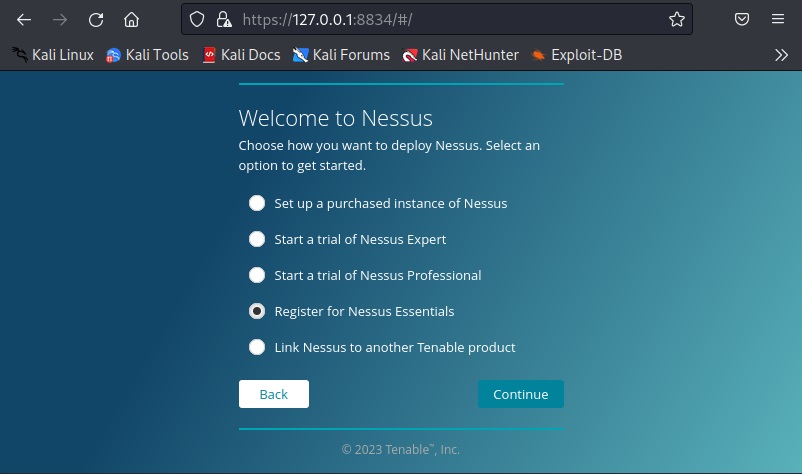
Click on “Continue”. Select the type of Nessus install you want. Since we are using a Free version of Nessus for this tutorial we select “Register for Nessus Essentials”. Click on “continue”.

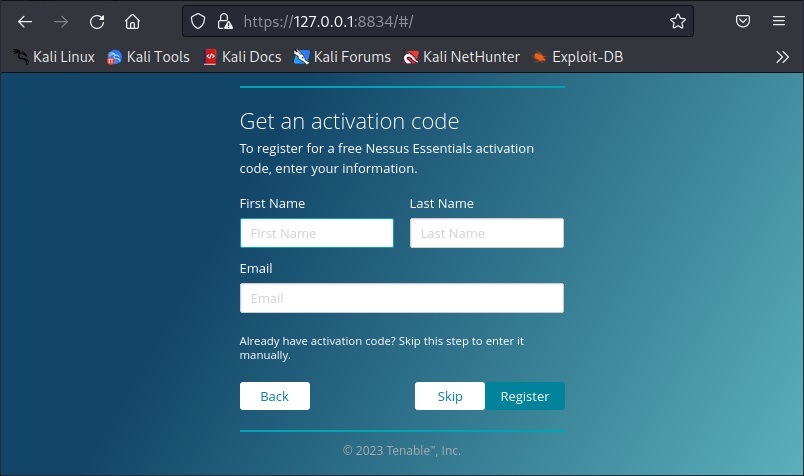
To run Nessus Essentials, you need an activation code. Get the activation code by entering the following details.

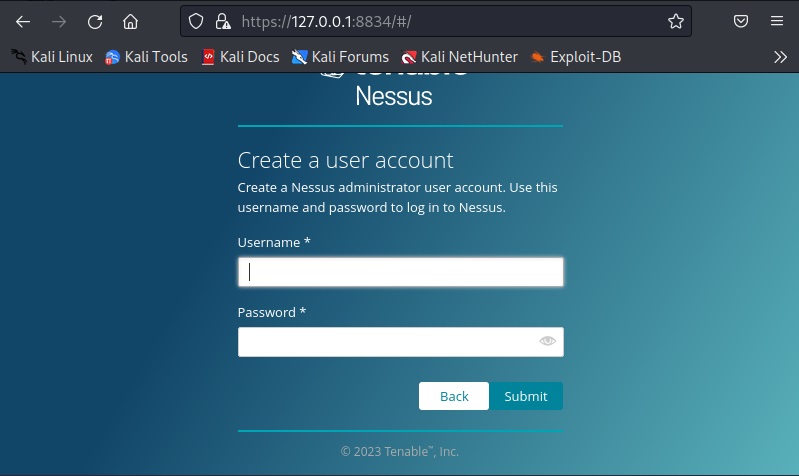
You need a user account to login into Nessus. Create an account and most importantly remember the user account information.

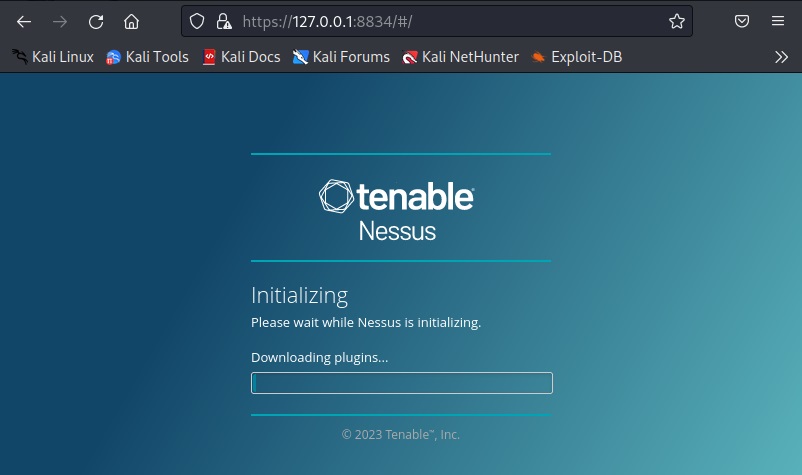
Then, Nessus will download all the required plugins. This may take some time (a bit long time sometimes).

Once all the plugins are finished downloading, you should see this.

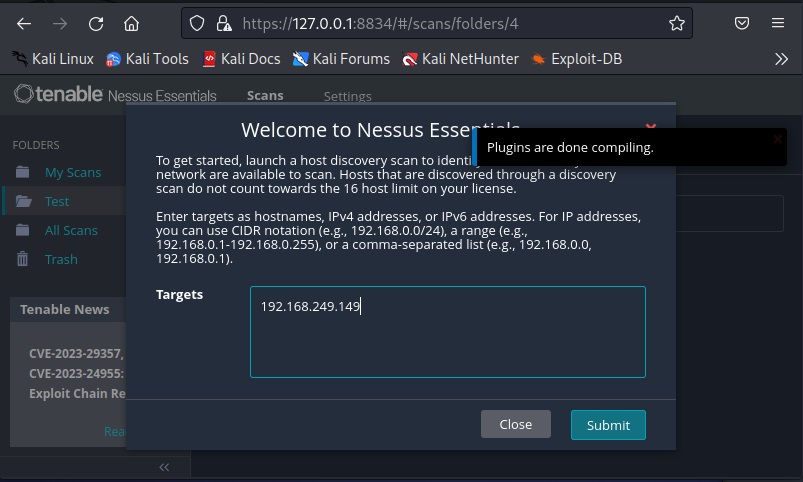
The installation is finished. Now, it’s time to start scanning with Nessus. Click on “New scan”. A new popup opens. Assign a target.

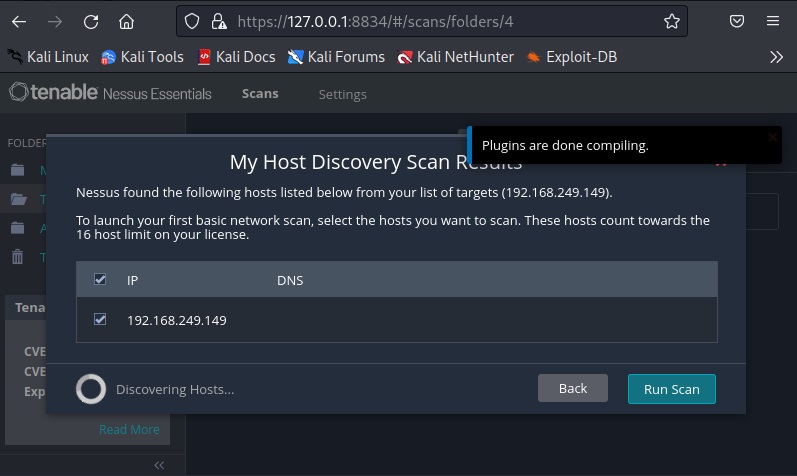
Click on “Run scan”.

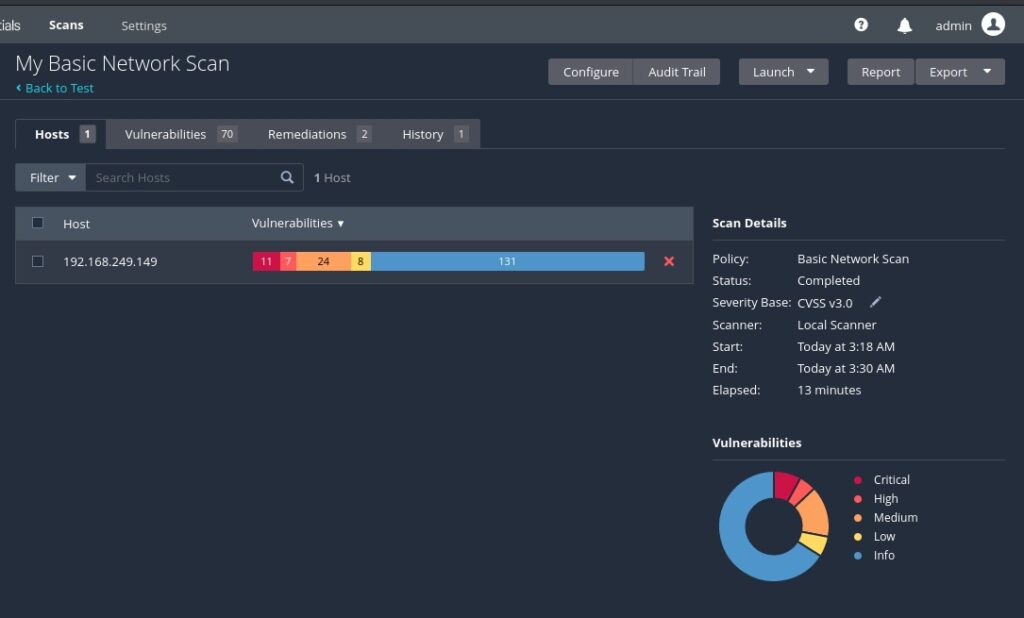
The scan will start and take some time to finish. For this tutorial, we are using “Metasploitable 2” as target. See how to install Metasploitable 2 in VirtualBox.

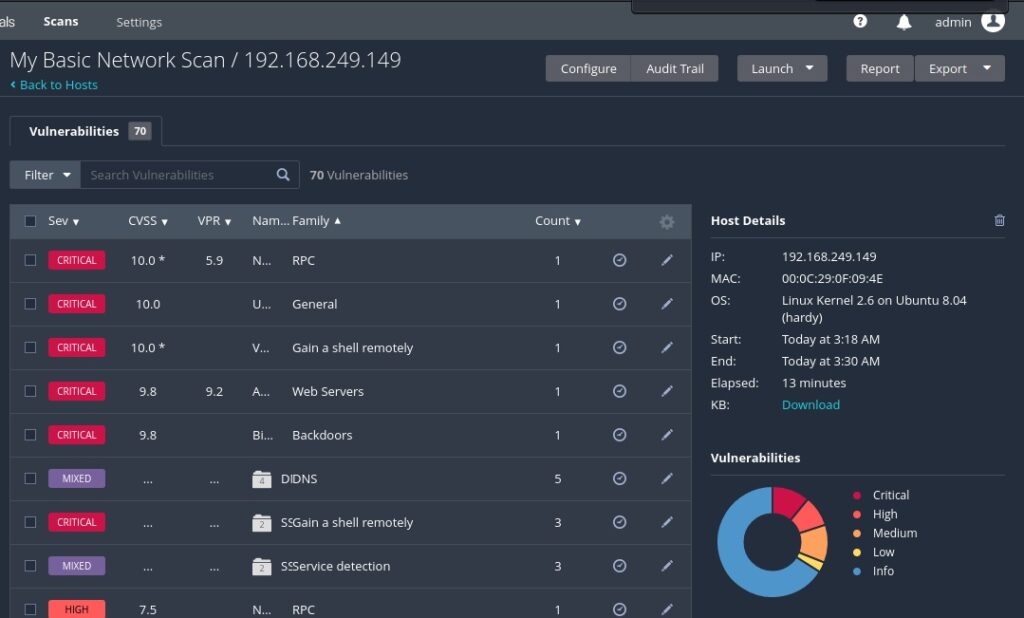
The vulnerabilities are classified into five categories by Nessus. They are Critical, High, Medium, Low and Information. You can view detailed information about the detected vulnerabilities by clicking on them.

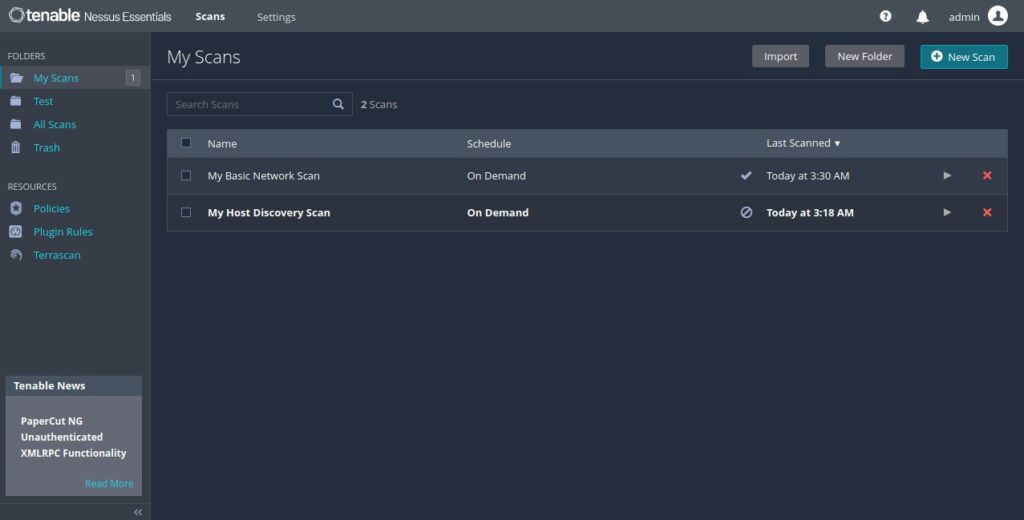
All the scans you perform are located in “My scans” section.
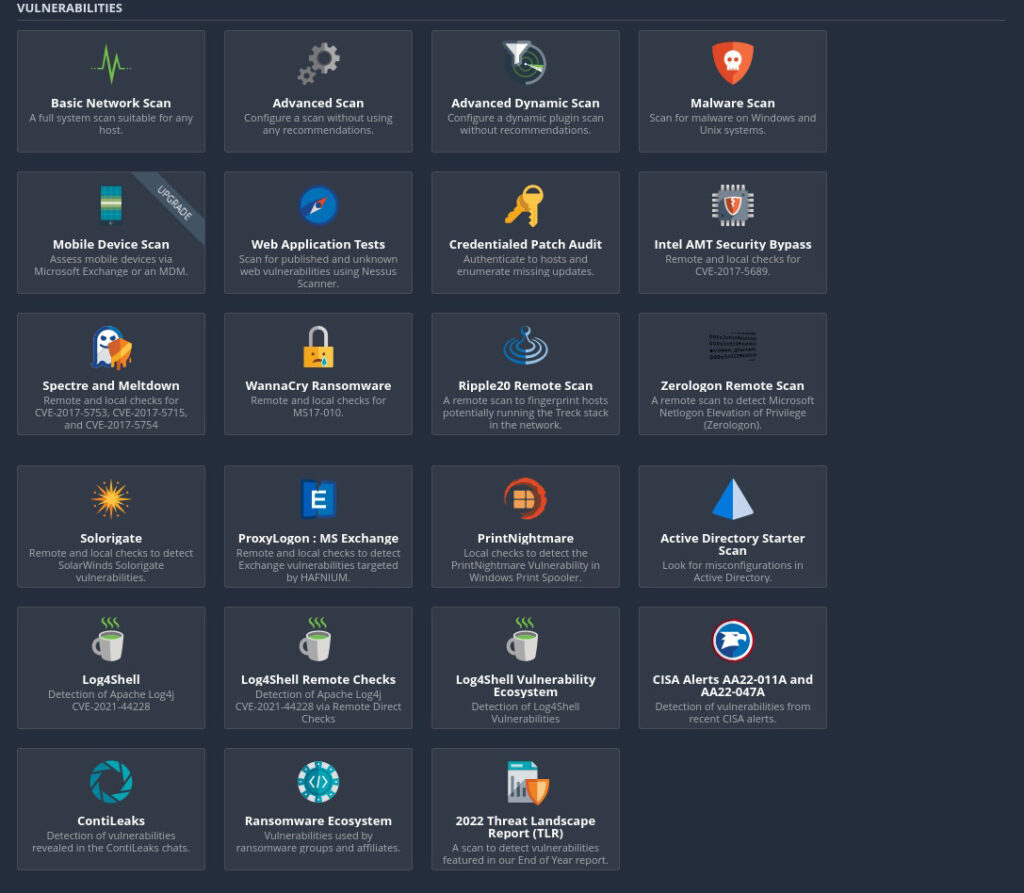
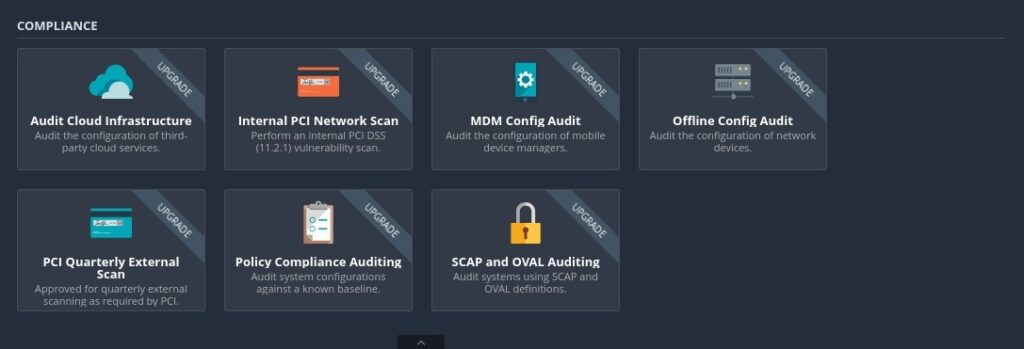
Nessus allows different types of scans. All the scans that can be performed using Nessus can be viewed from “All scans” section.
Posted on

Vulnerability scanning for beginners

Hello aspiring Ethical Hackers. In this blogpost, you will learn about vulnerability scanning. Before you learn what a vulnerability scan is, you need to know what a vulnerability is? A vulnerability is a weakness, flaw, error or a misconfiguration in a software or network that allows hackers to gain unauthorized access to the organization by exploiting it.

What is vulnerability scanning?

Now that you have understood what is a vulnerability, let’s see what is scanning. Vulnerability scanning is the process of identifying the security vulnerabilities in a software or a network of the organization. Vulnerability scanning is usually performed to protect the organization from hackers although it is also performed by hackers to gain access to the organization.

Types of vulnerability scans

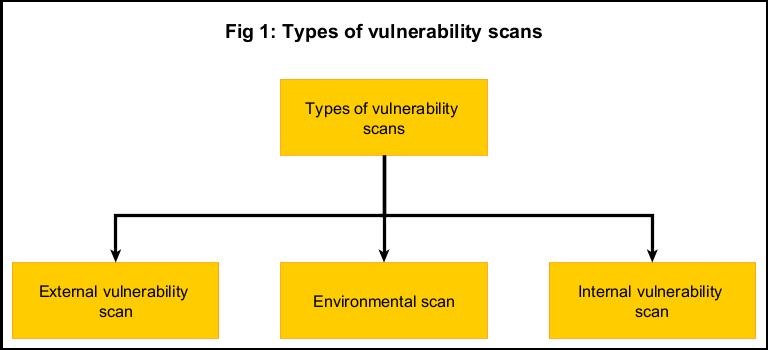
Vulnerability scanning can be categorized into different types. They are,

  1. External Vulnerability Scan
  2. Internal vulnerability scan
  3. Environmental scans
  4. Intrusive Scans
  5. Non-Intrusive scan.
  6. Credentialed scan
  7. Non-credentialed scan

1. External vulnerability scan:

In an external vulnerability scan, the external facing resources of an organization are scanned. These include, websites, systems, ports and services.

2. Internal vulnerability scan:

In this type of scan, the vulnerability scan is performed on the internal network of the organization or on resources to which the users or employees of the organization have access to. This scan is performed to get information about the vulnerabilities which employees or malware which gained access to the network can exploit.

3. Environmental scan:

Environmental vulnerability scans are performed based on the target environment. For example, target environment can be cloud based, IOT, mobile devise, websites etc.

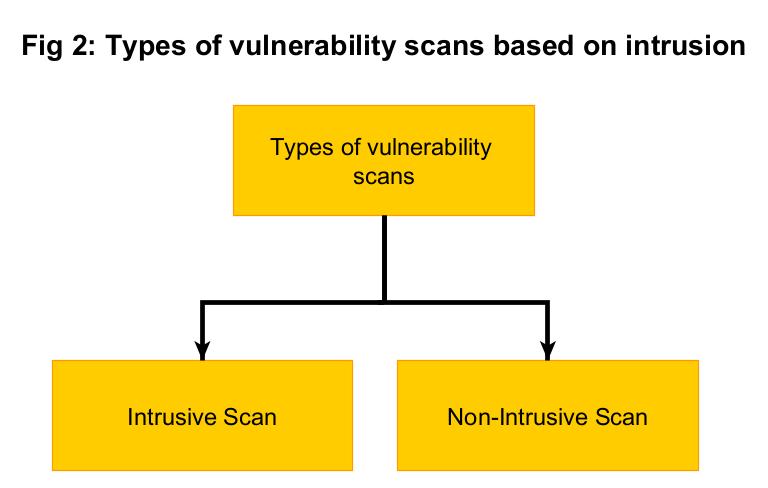
Vulnerability scans can also be classified as either Intrusive or Non-Intrusive.

4. Non- Intrusive scan:

In a non-intrusive vulnerability scan, vulnerabilities are just identified and reported.

5. Intrusive scan:

In an intrusive vulnerability scan, vulnerability is not just identified but also exploited.

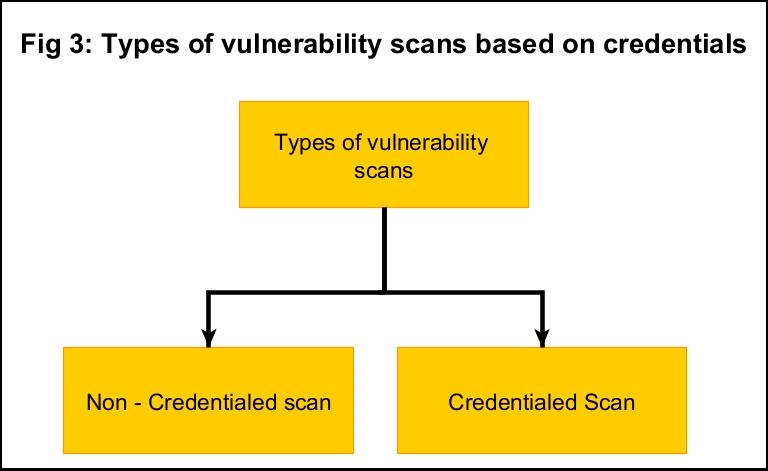
Apart from these categorizations, vulnerability scan is also classified as credentialed scans and non-credentialed scans.

6. Credentialed scan:

Also known as authenticated scan, this vulnerability scan in performed using a set of credentials. This type of scan gives the trusted users view of the organization.
7. Non-credentialed scan:

Also known as non-authenticated scan, this vulnerability scan gives the external user’s view of the network or revenue of organization.
Uses of vulnerability scans

Vulnerability scanning can help cyber security personnel of the organization to get an idea about the vulnerabilities in the organization beforehand and to prevent them from being exploited by attackers. As hackers also perform vulnerability scans, vulnerability scanning gives an idea to the organization as to what hackers can see.
How are vulnerability scans performed?

Vulnerability scans can be performed manually or using tools (vulnerability scanner). See how to perform vulnerability scanning with Nikto and Nessus.

Vulnerability scan vs Vulnerability assessment

In vulnerability scanning, vulnerabilities are scanned and reported whereas in vulnerability assessment, apart from identifying vulnerabilities the impact of the vulnerabilities when exploited is also assessed. Learn more about vulnerability assessment.

Posted on

LDAP enumeration for beginners

Hello, aspiring Ethical Hackers. In our previous blogpost, you learnt what is enumeration, why it is important in pen testing and what are the various types of enumeration. In this blogpost, you will learn about LDAP enumeration.

What is LDAP?

Lightweight Directory Access Protocol (LDAP) is a protocol that enables users to locate data about the organization, users and other resources like files and devices in a network. LDAP is also used as a central server for authentication. LDAP runs on port 389. Learn how LDAP works.

What information does LDAP enumeration reveal?

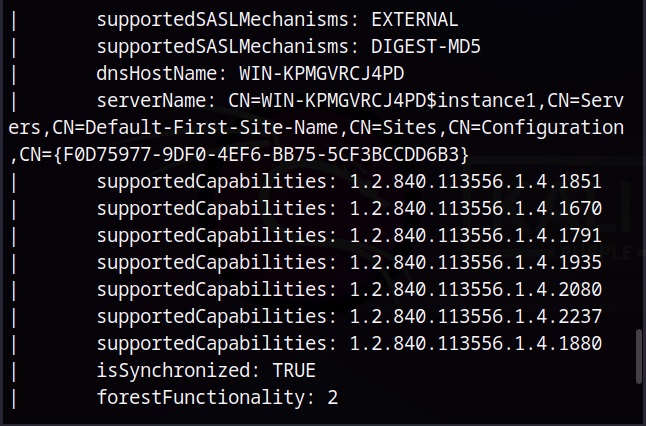
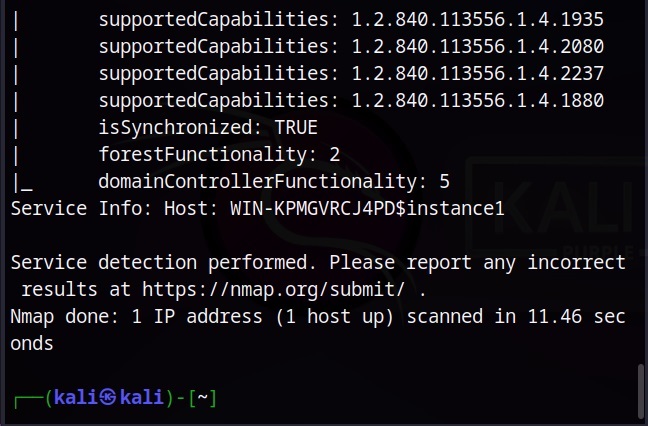
By enumerating LDAP, attackers can gather important information like valid usernames, addresses and other data about organization that can help as the hack progresses.

How to perform LDAP enumeration?

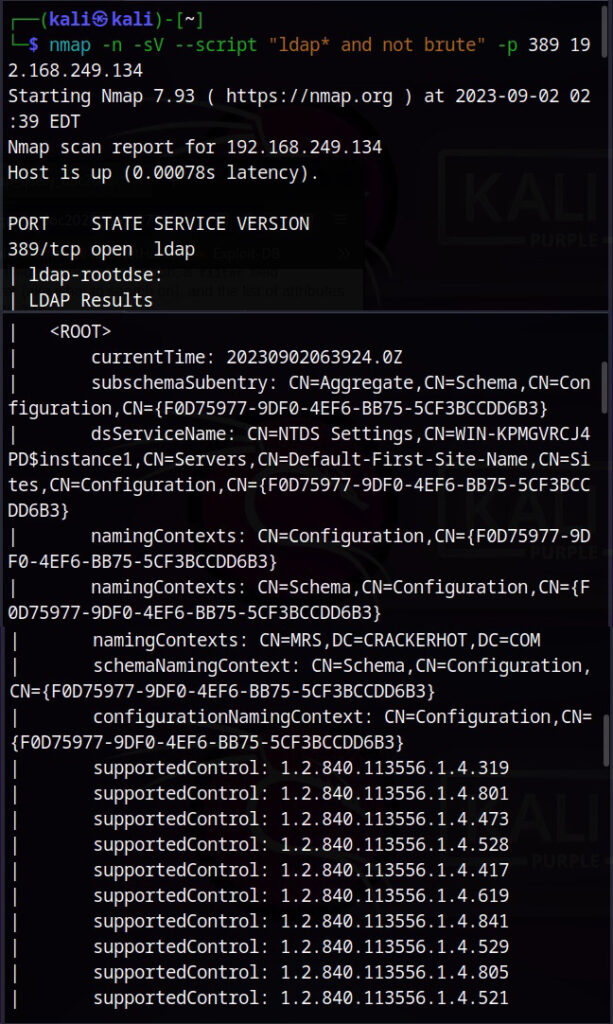
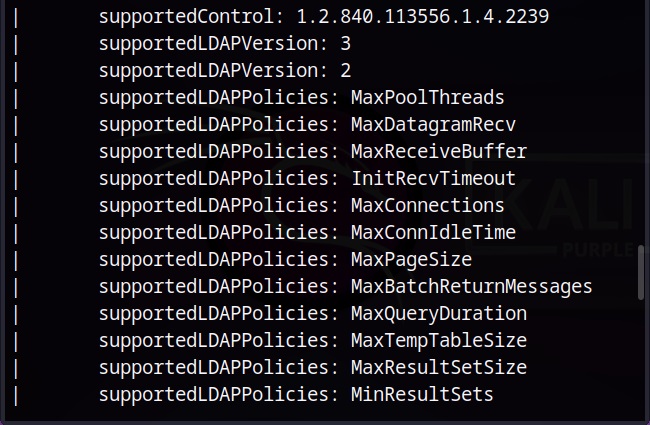
There are many tools that can be used to enumerate LDAP. For this article, let’s see how to perform it using a Nmap script. The script we use is “ldap and not brute”.

Posted on

SNMP enumeration for beginners

Hello aspiring Ethical Hackers. In our previous blogpost, you learnt what is enumeration, why it is important and various types of enumeration. In this blogpost, you will learn about SNMP enumeration.

What is SNMP?

SNMP stands for Simple Network Management Protocol. It is a protocol that is used to monitor devices in the network. These devices include routers, switches, bridges, computers and printers etc. This protocol really helpful for organizations with thousands of devices in is network. Learn more about how SNMP works. SNMP contains 3 main components. They are SNMP manager, SNMP agent and Management Information Base (MIB). SNMP runs on UDP ports 161,162.

What information does SNMP enumeration reveal?

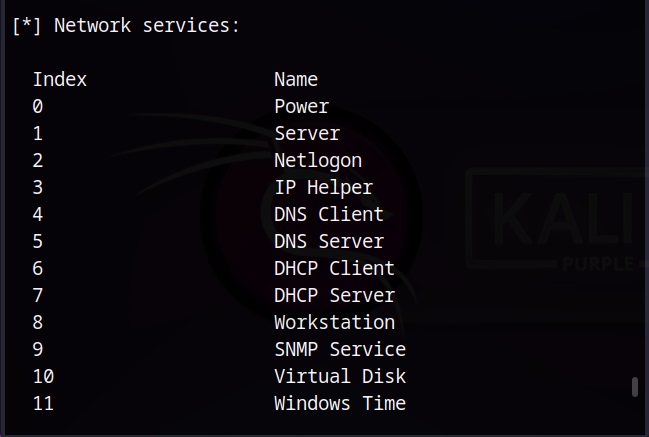
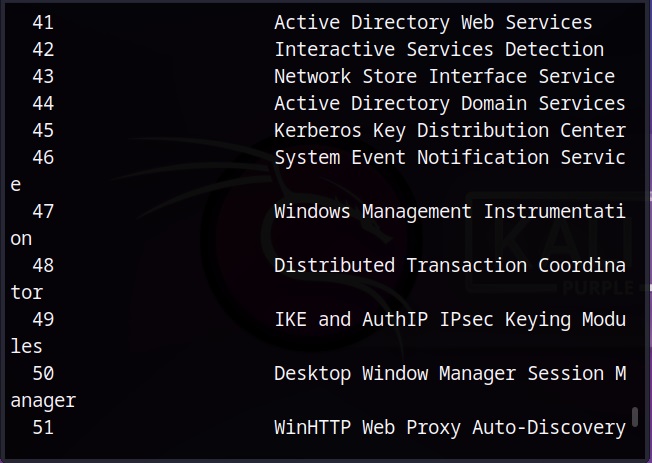
SNMP enumeration can reveal information about all the devices on the target network and user accounts on the target system with SNMP server running. Apart from this, SNMP enumeration reveals information about hosts, routers, network information, network interfaces, active TCP and UDP ports on the target system, services running on the network and network shares etc.

How to perform SNMP enumeration?

Simple Network Management Protocol (SNMP) consists of a manager and an agent. Agents are embedded on each and every network device and the manager is installed on a separate computer. SNMP consists of two passwords that are used to access and configure the SNMP agents from the management station. They are, Read community string, Read/write community string.

  1. Read community string: By default Public, it allows attackers to view device/system configuration.
  2. Read/write: It is private by default and allows remote editing of configuration.

Tools use these default community strings to extract information about the target. There are many tools that can be used to perform SNMP enumeration. Let’s see one of them.

1. snmp-check

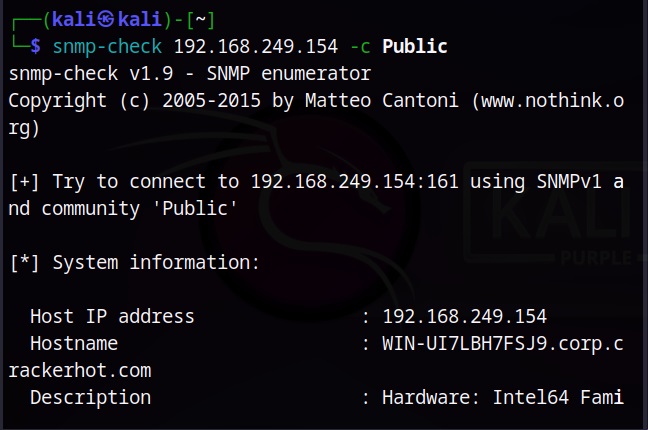
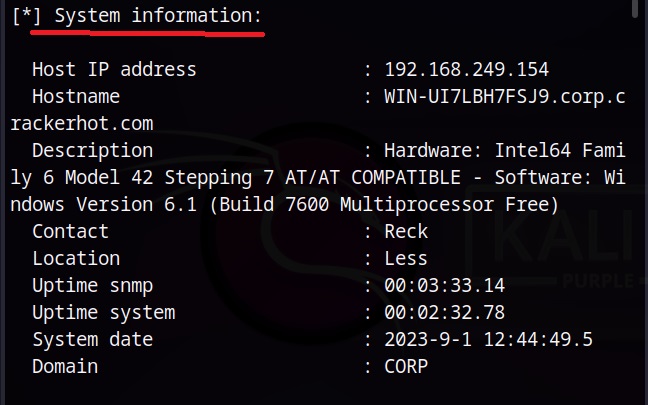
SNMP-check is a tool that is installed by default in Kali Linux. Here’s how we can enumerate the default community string of “public” of SNMP.

Here are the user accounts on the target system.

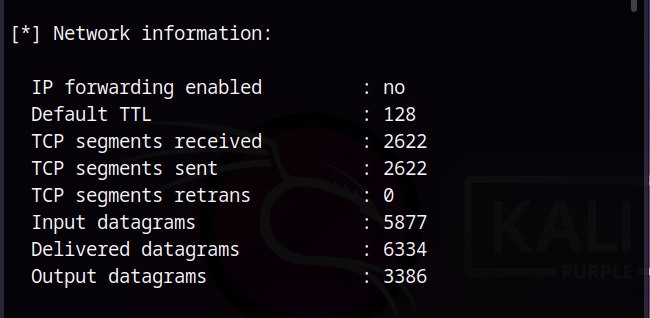
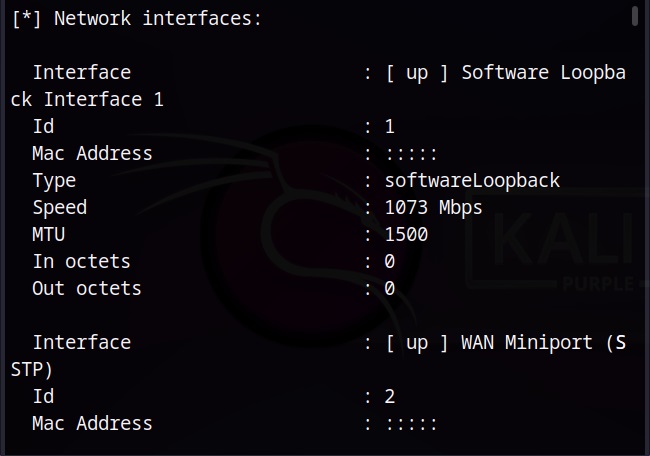
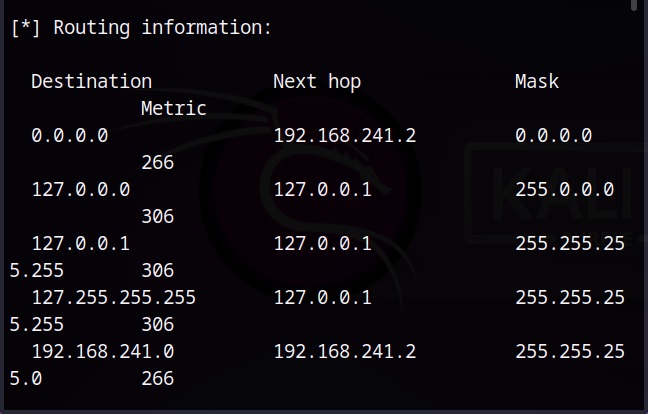
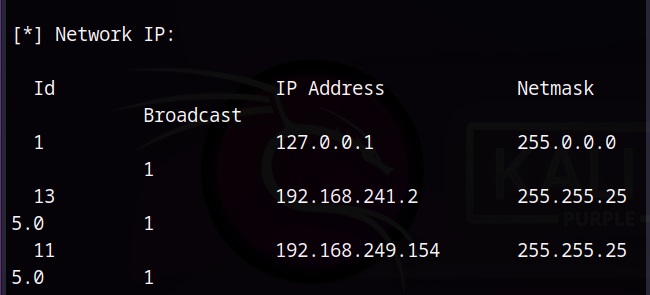
Here the network information is revealed.

We can see that the target is a Dual-homed system.

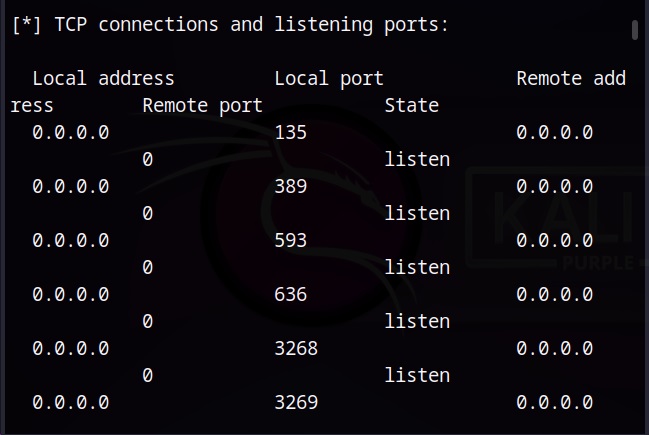
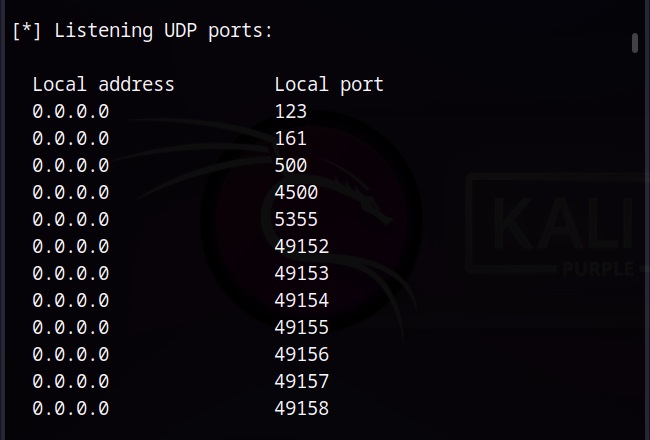
Here are the active TCP and UDP ports.

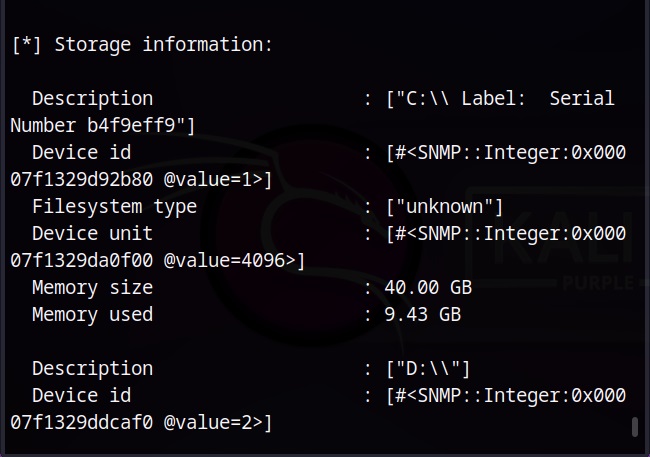
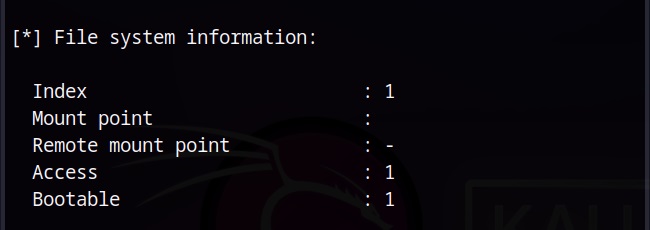
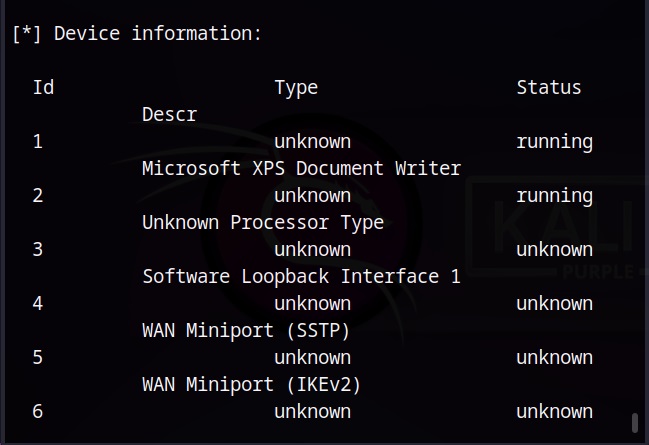
It also reveals other system information about the target.

You can see that SNMP enumeration reveals a lot of information about the target system and network which can prove very helpful as the hack progresses.