Posted on

How to create a payload

Hello, aspiring ethical hackers. In this blogpost, you will learn what is a payload and how to create a payload manually. Note that it is only for educational and knowledge purposes and not for performing any malicious actions. The aim of this article is to give you a basic understanding on how to create a payload. Let’s start with defining what exactly is a payload.

What is a payload?

A payload in cyber security is a piece of code that is executed after successfully running an exploit to take advantage of a vulnerability. When a Proof Of Concept (POC) for a vulnerability is disclosed, this allows most hackers around the world to execute their chosen payloads. This payload can be anything from malware, reverse shell, RAT, ransomware etc or their own custom payload.

For example, ms08_067 vulnerability was exploited in real-world to deploy Conficker worm payload, but while pen testing with Metasploit, meterpreter is used as payload. Although payloads can be created using payload generators simply, it would be very thrilling and educative to create manually.

Creation of a computer payload consists of six steps. They are,

  1. Decide the function you want your payload to perform.
  2. Select a programming language in which you want to code your payload.
  3. Code the payload.
  4. Compiling the payload.
  5. Testing.
  6. Sharing the payload.

Let’s learn about each step in detail.

1. Function of a payload:

Before you even start coding a payload, you need to decide what exactly you want your payload to do. In real-world, payloads perform many functions that include downloading and installing additional payloads, wiping data from the infected system and even taking complete control of the system. For example, I decide that my payload should open a Firefox browser when executed.

2. Choose your language:

After deciding the function you want your payload to perform, next thing you have to do is choose a programming language to code this payload. Payloads can be written in many programming languages like C, Delphi, Visual Basic, C#, C++, Cobol, Ruby, Python etc. They can also be created using scripting languages like JavaScript, Batch script, Bash, PowerShell etc. Choose the programming or scripting language of your choice. For example, I want to write my payload in Batch scripting.

3. Write code:

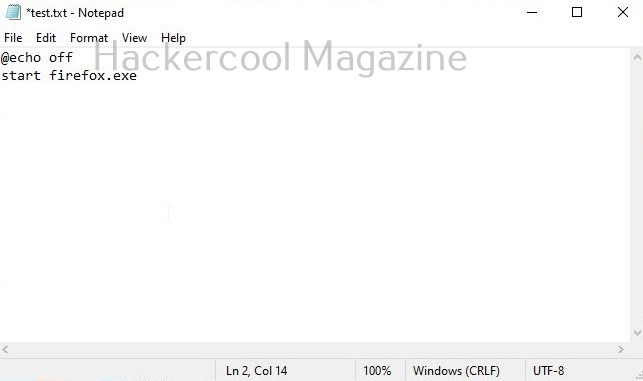
Once you select the programming language or scripting language, you need to code the payload. To code a batch script, all I have to do is open a notepad, add the code shown below and save the file as Batch file (with extension .bat)
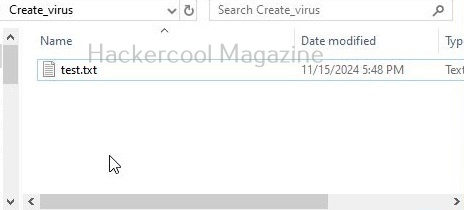
@echo off
start firefox.exe

4. Compile (if necessary):

Compile the payload. Compiling is a process of converting source code into machine-readable code so that a computer can execute it. Since we have written our code in Batch, it doesn’t need any compilation. But programs written in C,C++, Python need compiling. Compiled programs are usually fast.

5. Test the payload:

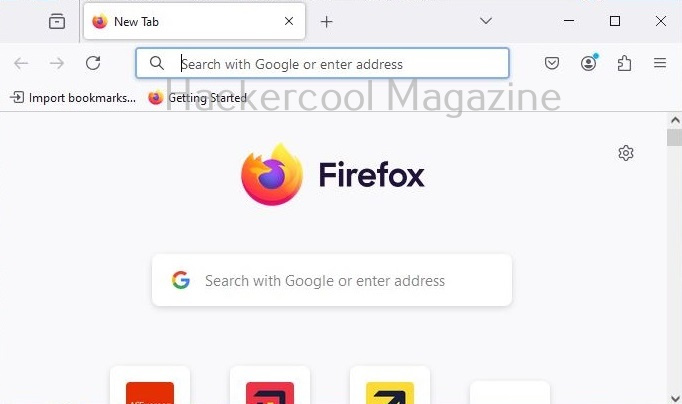
Once you have finished coding the virus and compiling it, test its working by executing the virus. I execute the Batch virus I created and it open Firefox browser as shown below.

6. Share the virus:

The last step is to share the payload to make your target user execute it. Normally hackers use social engineering or phishing schemes to spread the paylaod.

Posted on

Complete guide to sherlock tool

Hello aspiring ethical hackers. In our previous blogpost, you learnt what is OSINT and its importance in ethical hacking, different types of OSINT etc. In this blogpost, you will learn about Sherlock, a OSINT tool.

Sherlock’s role in OSINT comes while gathering information from social media. It works by hunting for a particular username across various social networks. It does this by relying on social media site’s design feature to provide a URL with the username when a user registers an account on the social network.

Sherlock queries that URL and determines if the user has an account on that particular social network. It works by querying that URL and then uses that response to determine if there is a username. Sherlock can search for users on over 300 social networks that include Apple Developer, Arduino, Docker Hub, GitHub, GitLab, Facebook, Bitcoin Forum, CNET, Instagram, PlayStore, PyPi, Scribd, Telegram, TikTok, Tinder etc.

Let’s see how this tool works. For this I will be using Kali Linux which has Sherlock in its repository. You can install sherlock on Kali as shown below.

The simplest way to query a username with sherlock is by just supplying a username.

Searching on a particular social media site

Instead of searching for a username on all the social media accounts, you can search for a username’s presence even on a single site as shown below. For example let’s search for a username on site Twitch.

Searching for similar usernames

Sometimes, a username can be slightly different to a person we are searching for. We can also search for similar usernames with this tool as shown below.

Here, {?} will be replaced with – or hyphen or period (.).

Searching for multiple usernames at once

You can even search for multiple usernames with this tool as shown below. For example, let’s search for “hackercoolmagazine” and “hackercool” on Instagram.

Using a proxy while searching

You can even route your query through a proxy to remain anonymous.

Dump the entire HTTP response

We can even see the HTTP response of the site while searching using this option.

Time to call

By default, while querying for usernames, this tool waits for 60 seconds for response to the request it made. With this timeout option, this time can be changed as shown below. The value should be set in seconds.

Print all the output

By default, Sherlock only prints out the social network where the username was found. Using the option, we can see all the social networks this tool queries for and also the reason why it was not found.

Print only positives found

This option prints out all the social networks on which the username is found.

Browse

By setting this option, we can use Sherlock to view the job result page on browser.

Search NSFW sites too

By default, sherlock doesn’t query NSFW sites while searching for a username. When we set this option, it even queries NSFW sites for the particular username.

Writing the output to a file

Like any other tool, we can use Sherlock too to save the output to a file of our choice using the “-o” option as shown below.

Posted on

Beginners guide to Payload generators

Hello, aspiring ethical hackers. In our previous blogpost, you have learnt about types of Metasploit payloads, what is a payload etc. In this blogpost you will learn what is a payload generator and popular payload generators.

What is a payload?

A payload in cyber security is a piece of code that is executed after successfully running an exploit to take advantage of a vulnerability. When a Proof Of Concept (POC) for a vulnerability is disclosed, this allows most hackers around the world to execute their chosen payloads. This payload can be anything from malware, reverse shell, RAT, ransomware etc or their own custom payload.

For example, ms08_067 vulnerability was exploited in real-world to deploy Conficker worm payload, but while pen testing with Metasploit, meterpreter is used as payload. Although payloads can be created manually, it would be very simple to make payloads with payload generators.

What is a payload generator?

Any software or application that helps us to automatically create a payload to be used in a pen test is known as a payload generator. Payloads can be a simple one liner or multiple lines of complex code. Whatever it is, it is payload generator makes our work very simple. Let’s learn about some of the popular payload generators.

1. MSF venom:

MSF venom is a payload generator from Metasploit framework that can be pretty useful in generating payloads for windows hacking, Linux hacking, web application hacking and even mobile hacking. MSF venom is a replacement to MSF payload earlier. Learn more about msfvenom.

2. Veil-Framework:

Veil-Framework is a tool that can generate Metasploit payloads that bypass common anti-virus solutions. Veil-framework is officially supported by Debian 8 and Kali Linux rolling 2018+. It may also be run on Arch Linux, Manjaro Linux, Black Arch Linux, Deepin 15+, Elementary, Fedora 22+, Linux Mint, Parrot Security, Ubuntu 15.10+ and Void Linux. Learn more about Veil Framework.

3. Msfpc:

MSFvenom Payload Creator (MSFPC) is a wrapper that can generate multiple types of payloads, based on users choice. The idea is to be as simple as possible (only requiring one input) to produce their payload.

4. WinPayloads:

This tool can generate undetectable Windows payloads.

5. Arcanus Framework:

ARCANUS is a customized payload generator/handler for penetration testing that can generate both Linux and Windows payloads. Learn more about Arcanus Framework.

6. Hercule’s Framework:

HERCULES is a customizable payload generator to generate Windows and Linux payloads that bypass antivirus software.

Posted on

Beginners guide to Ettercap

Hello, aspiring ethical hackers. In our previous blogposts, you learnt what is sniffing and what is Man in the Middle (MITM) attacks etc. In this blogpost, you will learn about a tool named Ettercap. Ettercap is an open-source sniffer and a comprehensive suite for performing man in the middle attacks. With Ettercap we can perform both active and passive protocol analysis, data injection etc.

Let’s see how to use Ettercap for sniffing. For this tutorial, I will be using Kali Linux as my attacker system as ettercap is installed by default on it. As a target system, I am using Metasploitable 2 (see how to create a virtual hacking lab). Ettercap can be started in both command line and GUI. For this tutorial, let’s use the graphical version.

To start ettercap in graphical mode, start ettercap with the “-G” option as shown below.

sudo ettercap -G

The GUI version of Ettercap opens as shown below.

You can also open a network capture file (pcap file) using Ettercap. To start sniffing with ettercap, we have to click on the highlighted part as shown below after selecting the interface we want to sniff on.

As soon as you do this, Ettercap loads all its plugins and engines required for sniffing. By default, ettercap starts sniffing automatically. It can be stopped or started by clicking on the highlighted part as shown below.

Before you perform any attack, you need to know about all the devices on the LAN. Clicking on the tab highlighted in the image below makes this tool scan for all the LIVE hosts on the network.

After the scan is finished, ettercap adds the detected hosts.

The added hosts can be viewed by clicking of the tab highlighted below.

In our case five hosts have been added. I want to sniff the communication taking place between two machines. To do this, I right click on the IP of the client machine with IP 192.168.249.162 and add it as Target 2.

Similarly, I add the server machine with IP 192.168.249.149 as Target 1.

Needless to say, these two machines are the machines I want to perform sniffing on.

Then, I open the MiTM menu of this tool and select ARP poisoning as shown below.

This opens a new window as shown below.

I select “sniff remote connections” option and click on “OK”. This starts the ARP poisoning attack and all the traffic intending to go for 192.168.249.162 (client machine) to192.168.249.149 (server machine) will be sniffed. From the client machine, I make a telnet connection to target system.

Then on ettercap, I open the menu and go to view > connections.

This will show all the connections being made between client and the server.

In the above image, we can see one connection from IP 192.168.244.162 to port 23 of 192.168.249.149. Clicking on it will reveal the connection data exchanged between the two machines.

By default, the data from the client and server machines are shown in different tabs. You can see the credentials being exchanged between client and server. You can even join both the views for clarity.

Here, you can see the clear text credentials used to login into the telnet server.

Posted on

Beginners guide to tcpdump

Hello, aspiring ethical hackers. In our previous blogpost, you learnt in detail about packet sniffing and packet analyzing. A sniffer or a packet analyzer plays a very important role in packet sniffing. In this blogpost, you will learn about a sniffer or packet analyzing tool called tcpdump.

tcpdump is an open-source data-network packet analyzer that runs under a command line interface. It works on almost all Unix-type operating systems like Linux, Solaris, FreeBSD, macOS etc. Tcpdump was written by Van Jacobson, Sally Floyd, Van Paxson and Steven McCanne in 1998 while working in Lawrence Berkely Laboratory Network Research group. Let’s see how to perform packet sniffing with tcpdump. For this tutorial, we will be using Kali Linux as tcpdump is installed by default on it.

The command to start sniffing with tcpdump is given below.

tcpdump

if you are unable to start tcpdump with the above command, run tcpdump as sudo. On many UNIX operating systems, running this command requires SUDO privileges.

sudo tcpdump

As soon as you execute the above command, tcpdump starts sniffing on all the network interfaces connected to the machine. If you want tcpdump to perform sniffing on only a specific interface, you can specify the interface with the ‘-i’ option.

sudo tcpdump -i <network interface>

Depending on the number of devices connected to the interface, the packet analysis output may contain heavy or less traffic. To view traffic belonging to only one machine on the network, you can use the “host” option and specify the IP address. For example, let’s say we want to only see traffic belonging to device with IP 192.160.254.144 on the network. Here’s how to do it.

sudo tcpdump -i <network interface> host <host ip>

Let’s say you want to view traffic only that is originating from a particular device, you can use the option “src” for that.

sudo tcpdump -i <network interface> src <device IP>

Similarly you can also view only the traffic that is coming to the particular system using the “dst” option.

sudo tcpdump -i <network interface> dst <device IP>

We can also view traffic belonging to a specific part using the “port” option.

sudo tcpdump -i <network interface> port <port number>

To write the output to a file, we have to use the “-w” option as shown below.

sudo tcpdump -i <network interface> port <port number> -w <file to write to> 

To open the saved pcap file, you have to use the ‘-r’ option as shown below.

sudo tcpdump -r <pcap file>

This pcap file can also be opened with Wireshark.