Posted on

Crunch wordlist generator: Complete guide

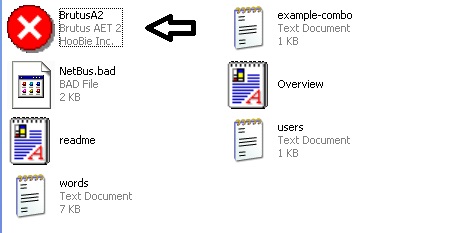
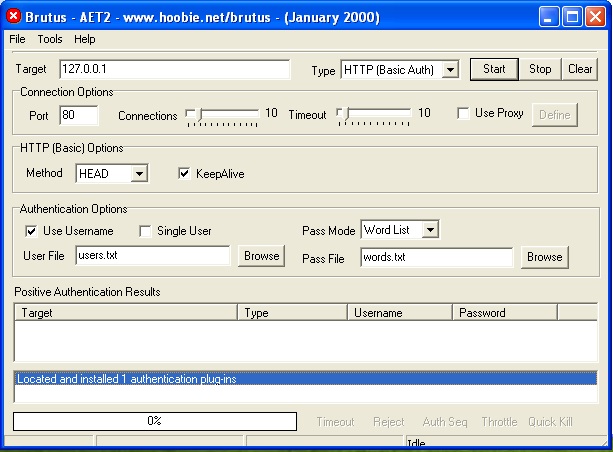
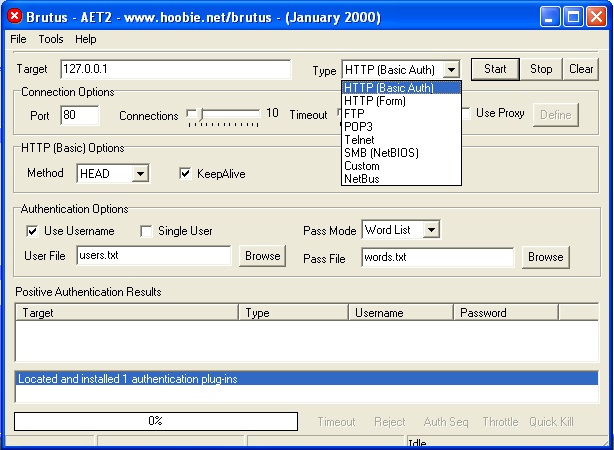
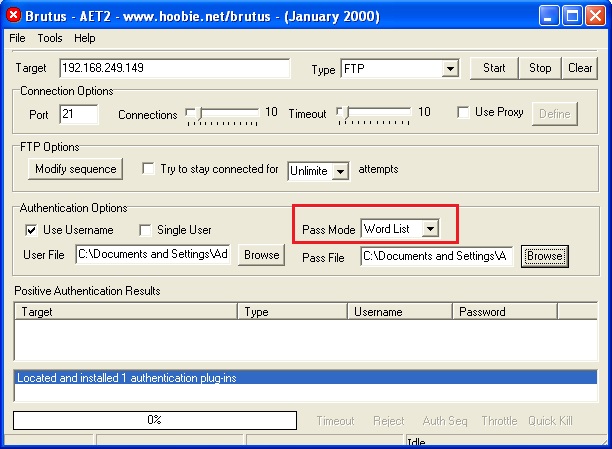
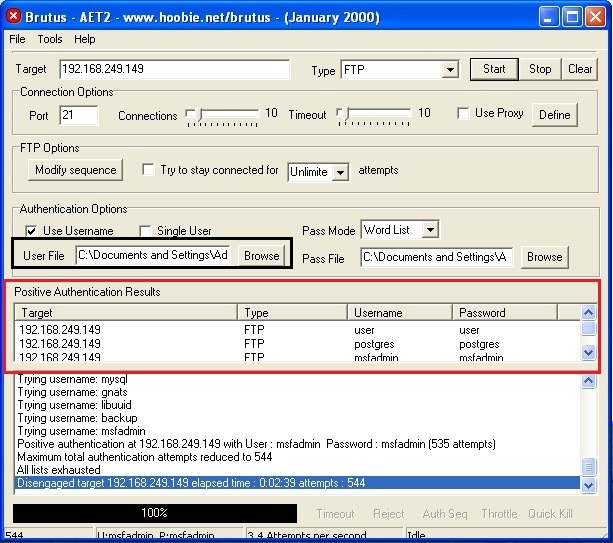
Hello, aspiring ethical hackers. In this blogpost, you will learn about a tool named Crunch which is a wordlist generator. A wordlist or a dictionary is a file containing credentials that is useful while using any password cracking tool like Brutus, Hydra, Medusa or John The Ripper usually when you are using Dictionary attack.

A good wordlist goes a long way in the success of a password cracking attack and Crunch is one of the best wordlist generator tools there. Let’s see how to use Crunch to generate wordlist we want. Crunch is installed by default in Kali Linux and it can be started using command “crunch”. The syntax of crunch is given below.

crunch <min> <max> <options>

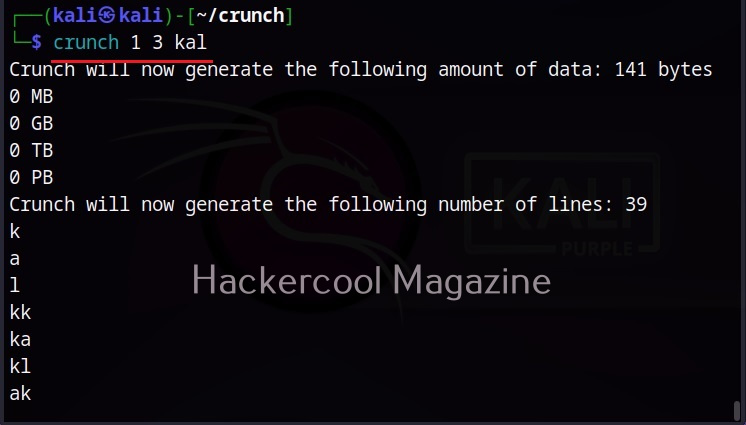
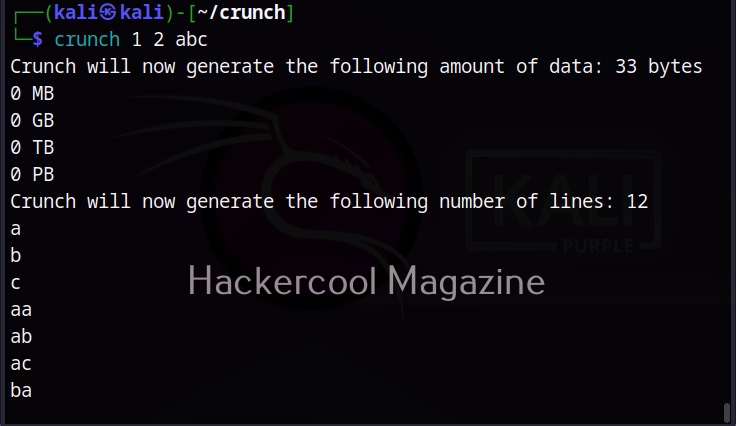
where “min” stands for minimum length of the password you want and “max” stands for the maximum length of the password string you want. To generate a wordlist containing random passwords with minimum and a maximum length 1 and 2 respectively, this is the command we have to use.

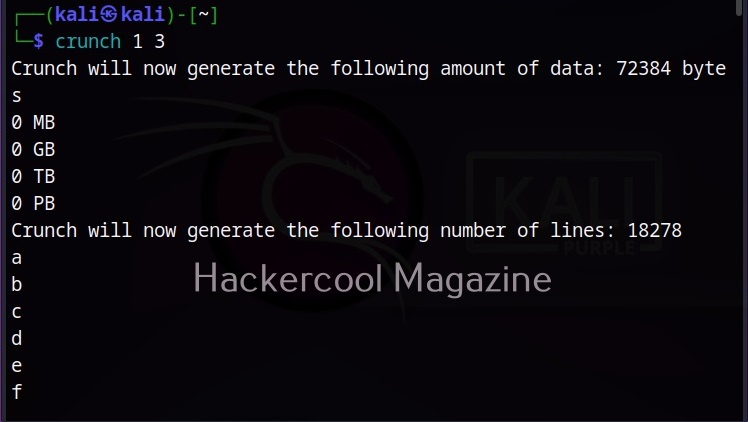
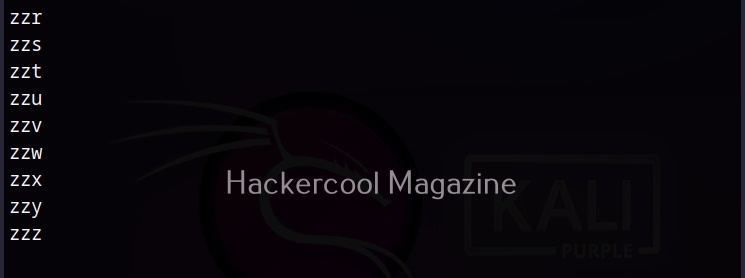
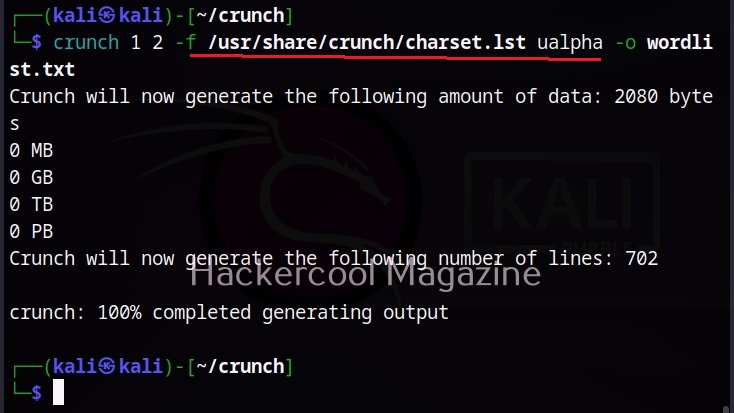
If you want a wordlist with characters you specify, you can also specify them as shown below.

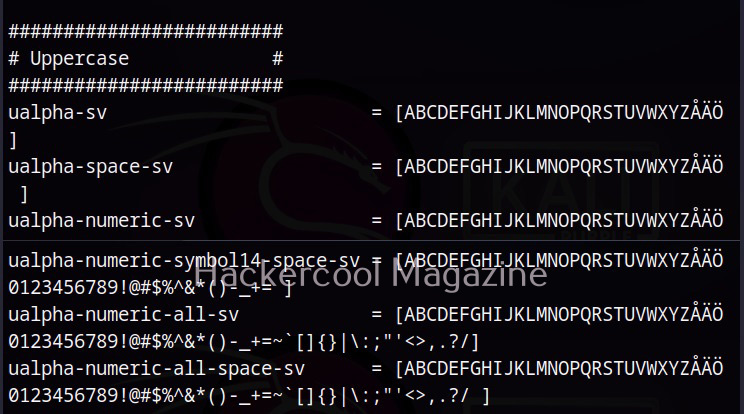
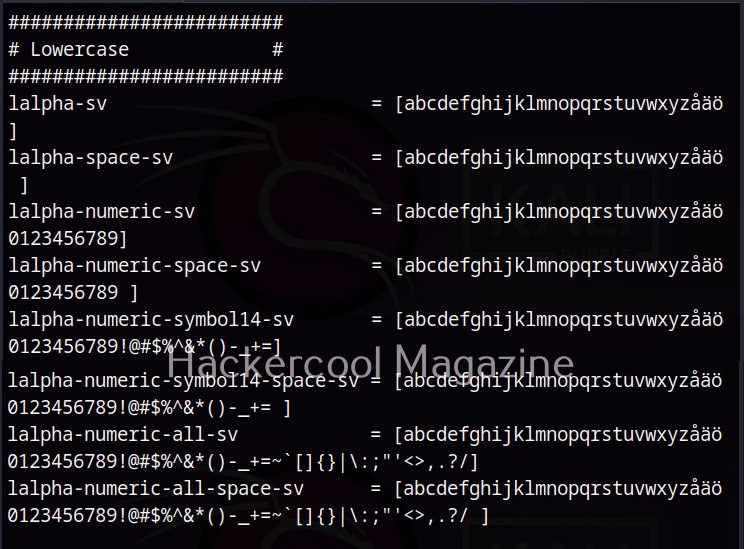
Crunch already has a collection of character sets stored in “charset.lst” file located in /use/share/crunch/ directory. Here is the list of character sets it has.

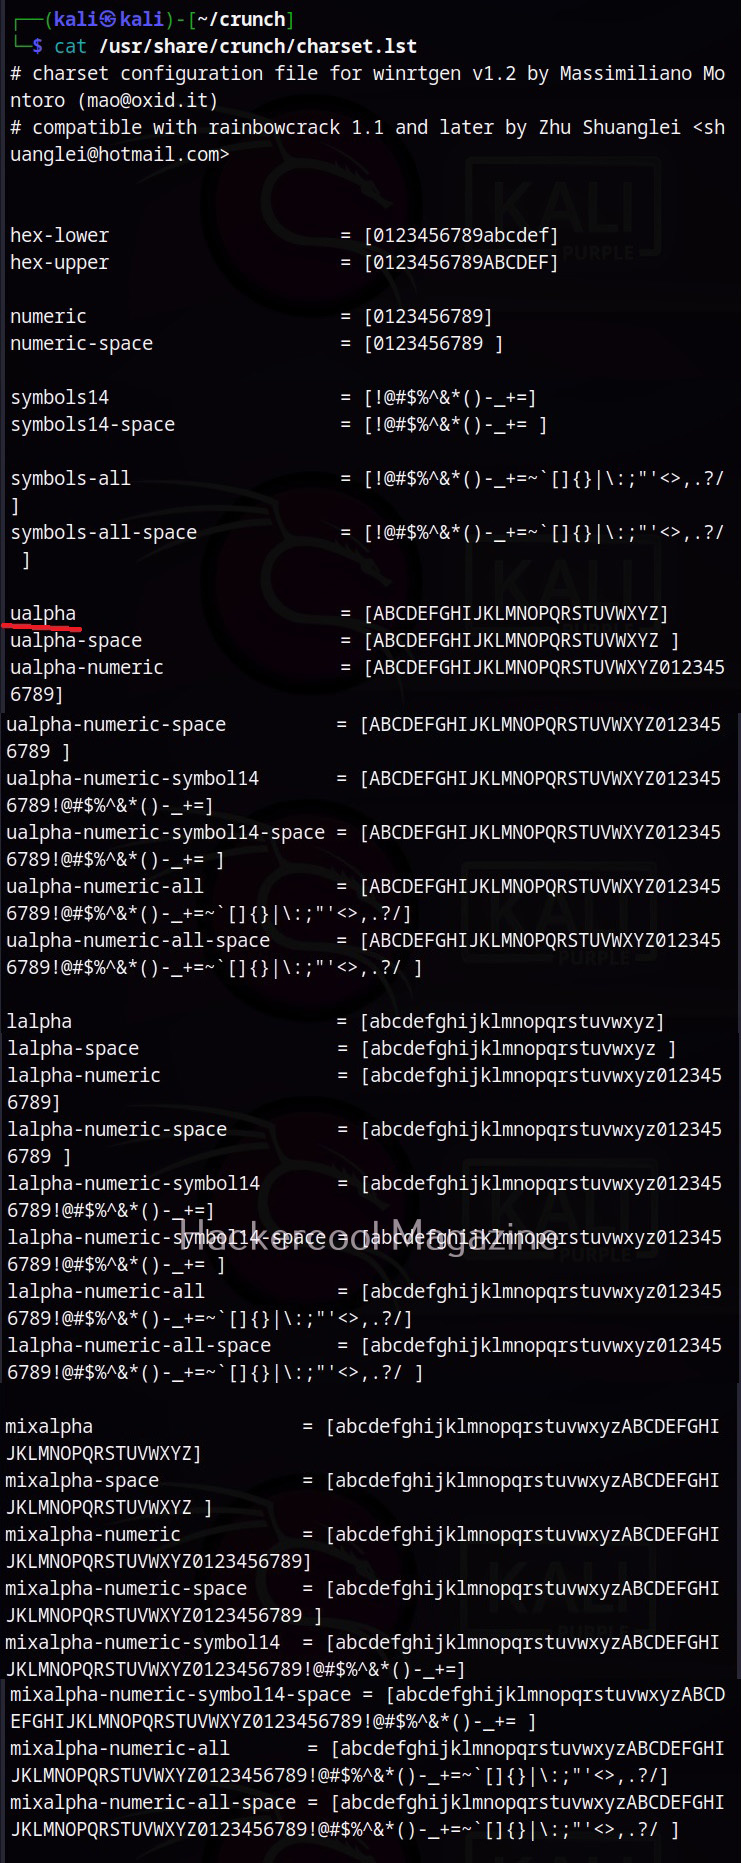
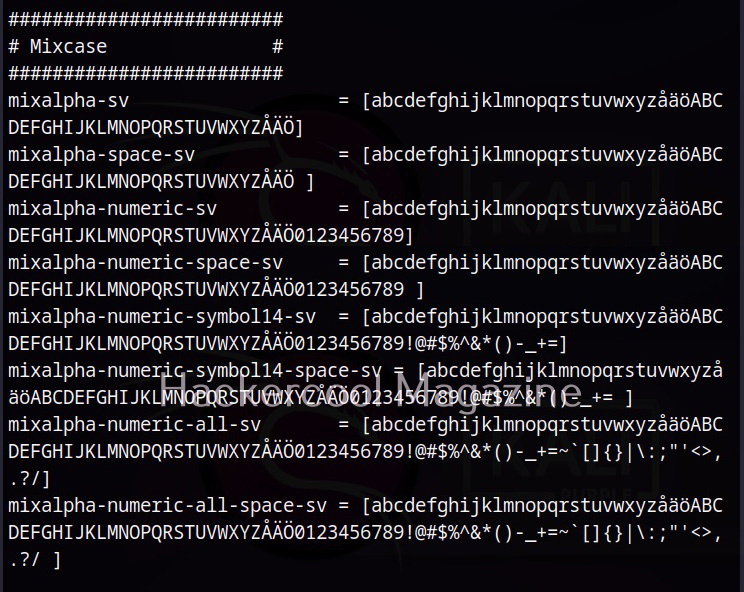
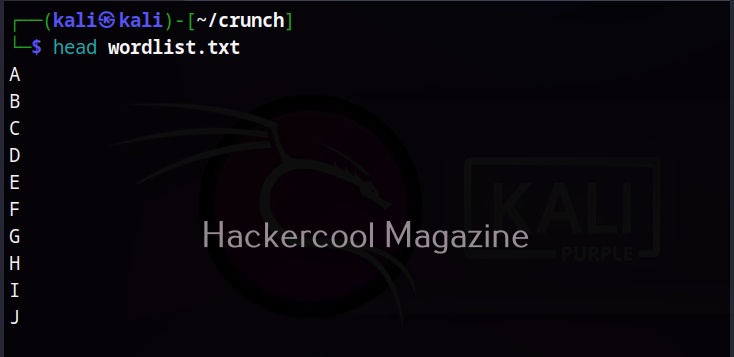
For example, if you want to create the wordlist with only uppercase alphabets, you can use the command shown below.

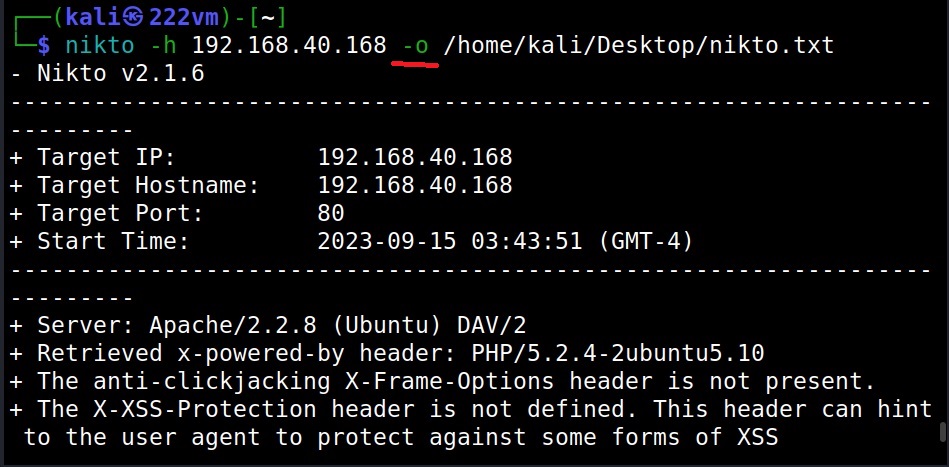
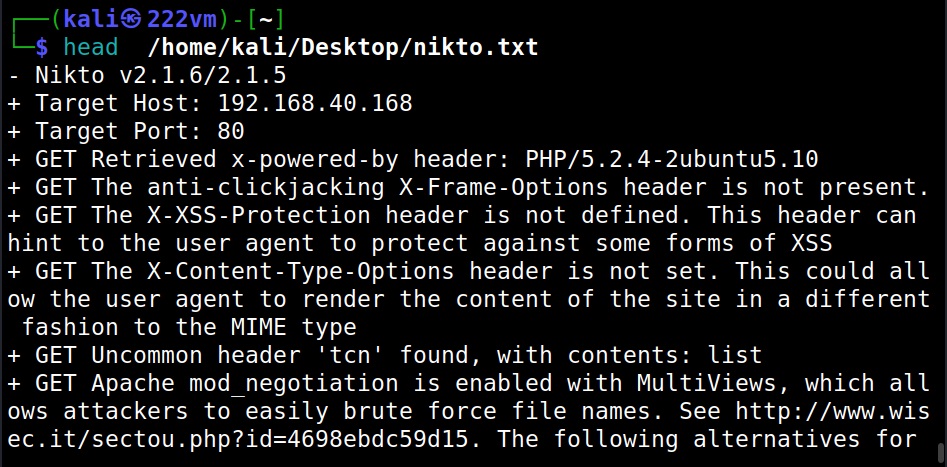
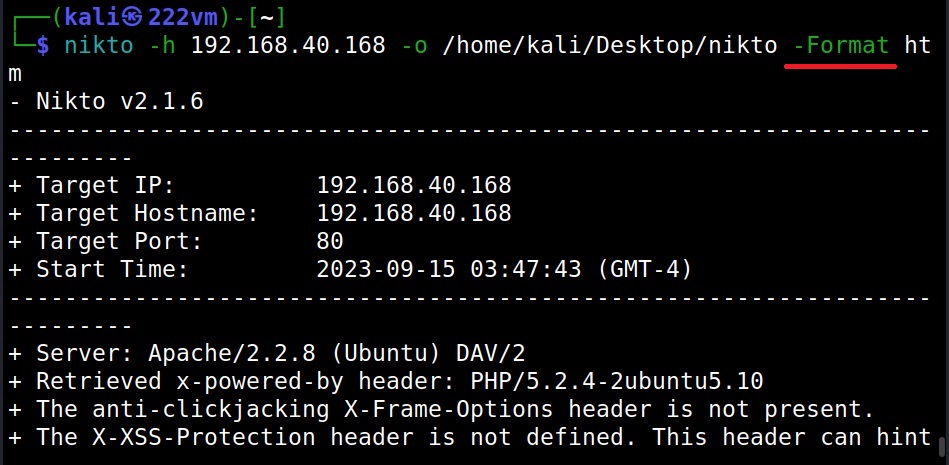
What’s a wordlist without a saved file? (o)

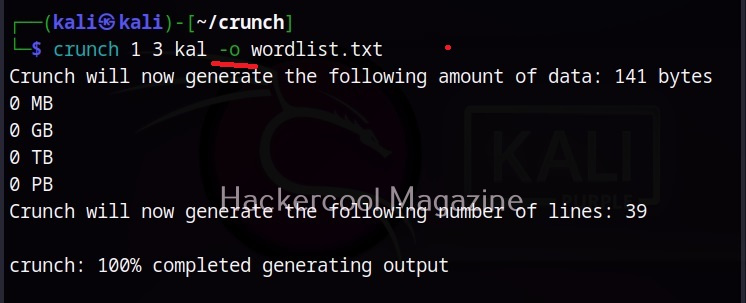
Really, what is a wordlist without a saved file. To save the output, use the “-o” option as shown below.

Be careful with the size of the wordlist (b and c)

Sometimes while making a huge wordlist, the size of the wordlist may become too large in size, usually adding up to Giga bytes (GB). This can put a lot of pressure on memory and resource of the computer or may be even difficult to open. Don’t worry though. Crunch has a feature to overcome this problem using the “b” option. The “b” option can be used to set the size you want for the wordlist.

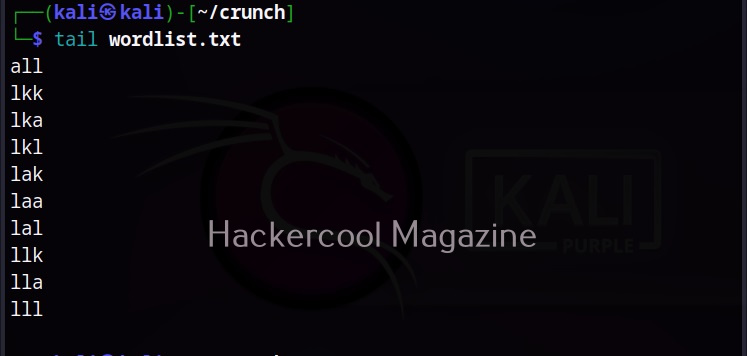
Once the size of the file reaches this limit, it saves the output to a new file with the same size. Let me show you practically. For example, here we create a wordlist and is size in 2620200 bytes as shown below.

Now, let’s create the wordlist size of just IMB as shown. While using the ‘-b’ option, ‘-o’ option and “START” are compulsory.

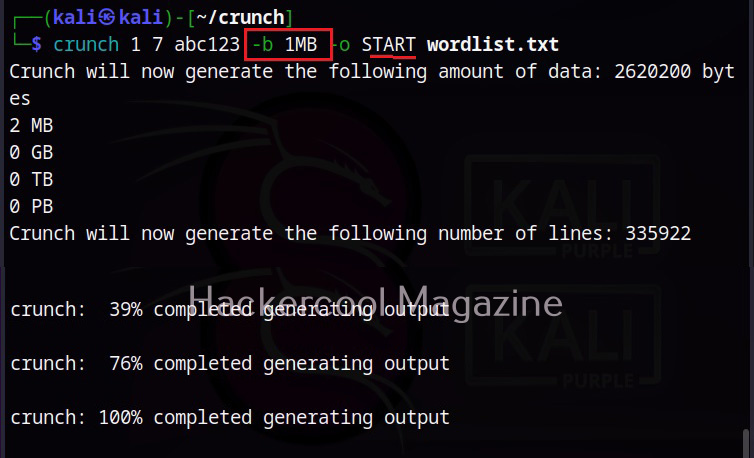
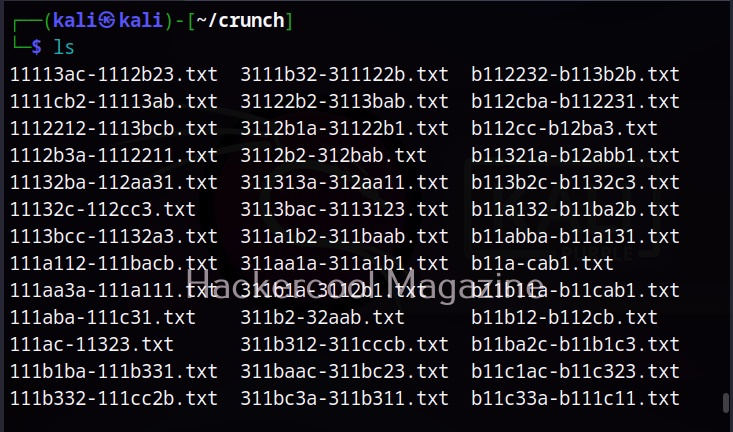
When we do this, instead of creating a single wordlist, crunch will create three wordlists as shown below.

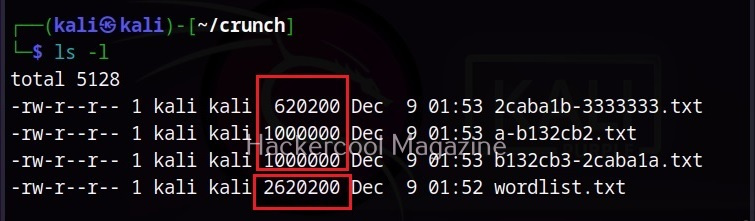
Add up the size of the first three files and that should add up to the size of the “wordlist.txt” dictionary. Also note that while we use the “-b” option, the name of the wordlist is the first and last string in the wordlist.

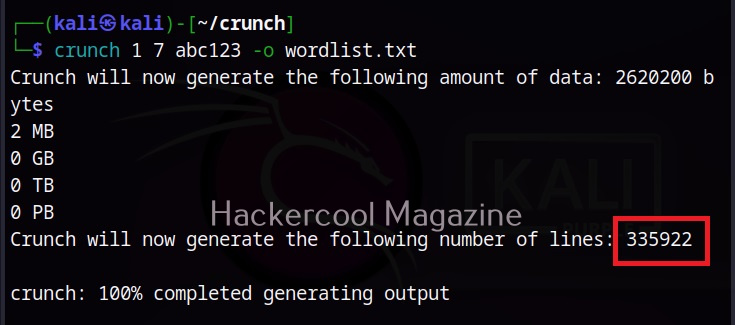
Crunch can also create a wordlist with a specified number of lines. For example, the wordlist we created here has 3,75,922 lines.

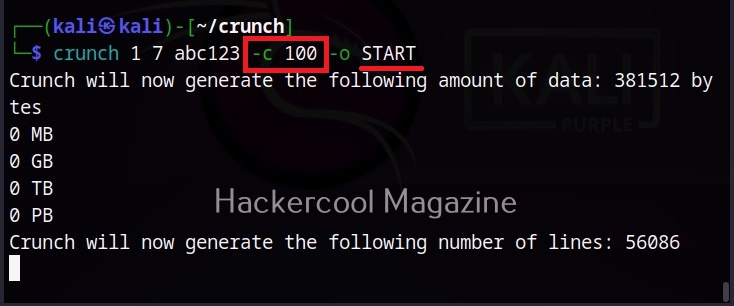
Now, if you want your wordlist to have just 100 lines, you can use the ‘-c’ option to achieve this as shown below.

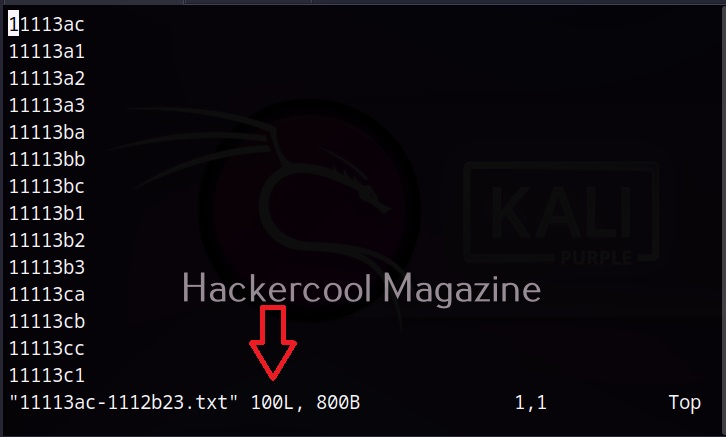
Let’s check the number of lines in each wordlist.

Remove duplication (d)

Using the ‘-d’ option, we can remove the duplicate characters from the values in the wordlist.

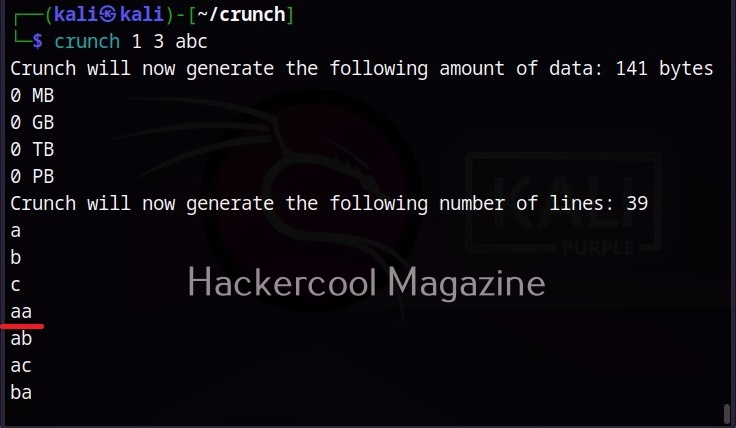
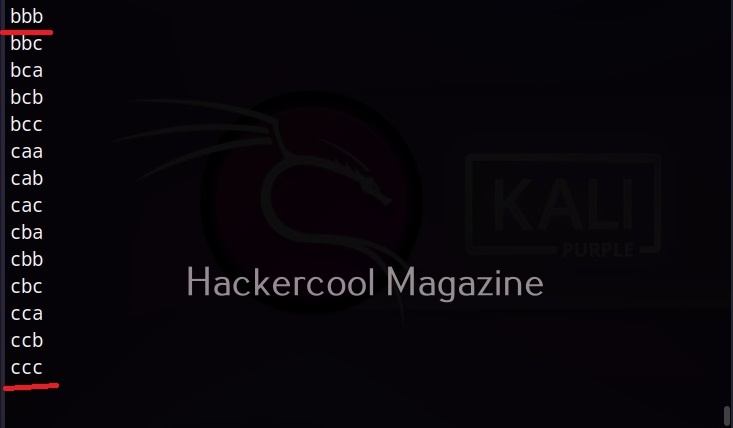
In the above wordlist, you can see duplicate characters like aa, bbb, ccc etc. Let’s say you want to limit the duplicate characters to two alphabets. This can be done by setting ‘2@’ value to -d option.

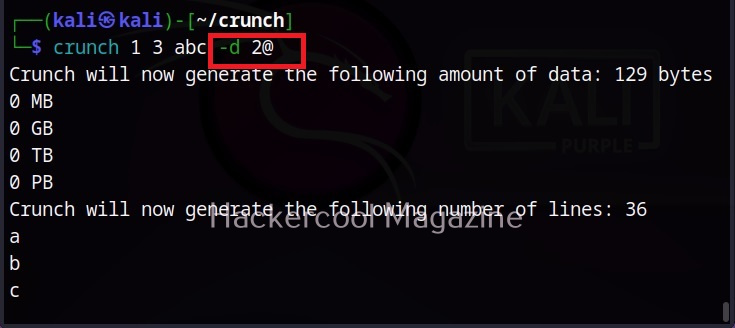
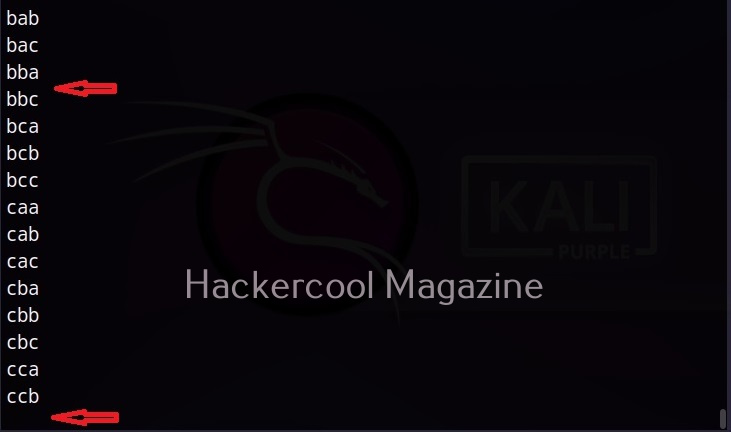
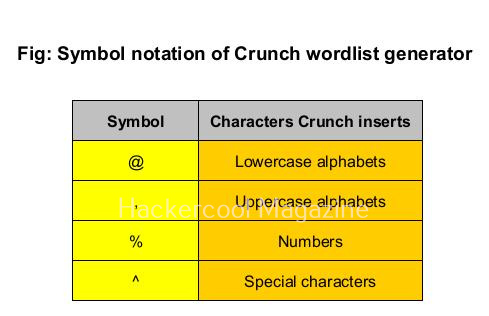
You can see that “bbb” and “ccc” are gone from the wordlist. The format to give value to the “-d” option is the number and the symbol. In ‘2@’, 2 is the maximum number of consecutive characters to be allowed and @ in the symbol of the characters we want to limit. The symbol for different character sets for crunch are given below.

Exit after a specific study is created (e)

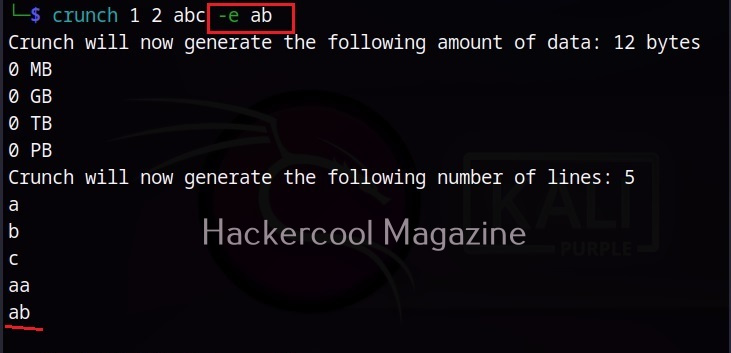
You just don’t have to wait for the entire wordlist to be created with crunch. You can exit wordlist generation after a specific string is generated. Let’s see an example.

Now, you want to exit crunch after creation of string ‘ab’ in the above wordlist, you can do so as shown below.

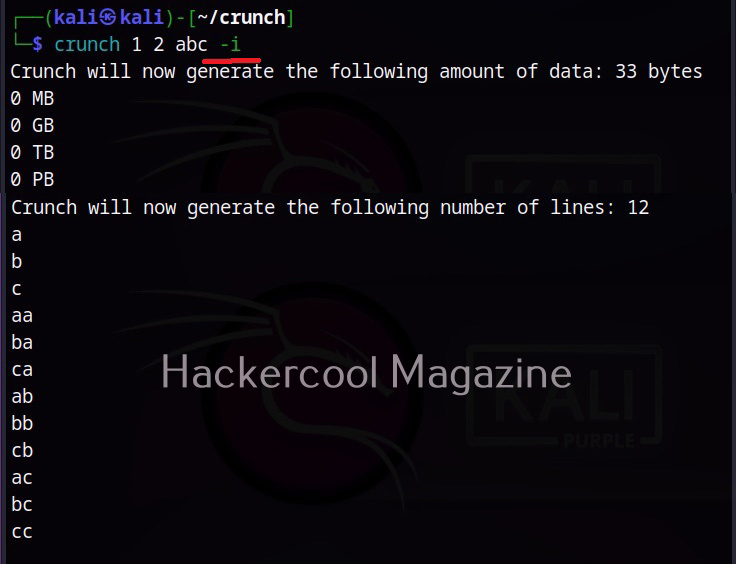
Invert the strings (i)

Using this option (-i), we can insert the strings generated in Crunch. In the above wordlist, instead of aa, ab, ac, ba, it will be aa, ba, ca, ab.

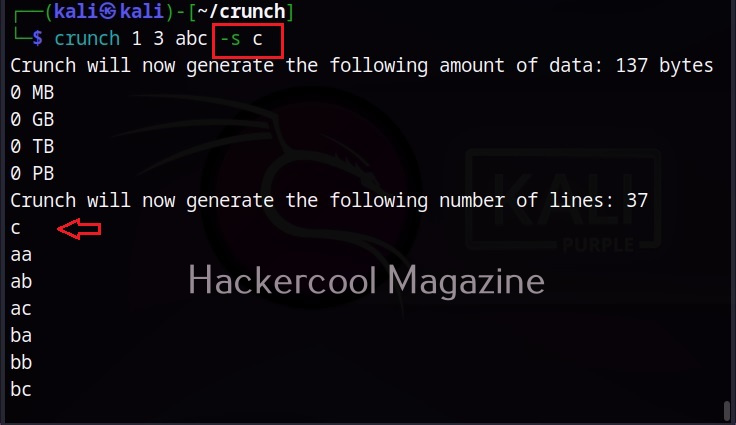
Start with a specific string (s)

While creating a wordlist, you may have a feeling to try a specific string as password but not sure. But you want to try it first in your wordlist. You can set a starting string to the wordlist you are creating using the ‘-s’ option.

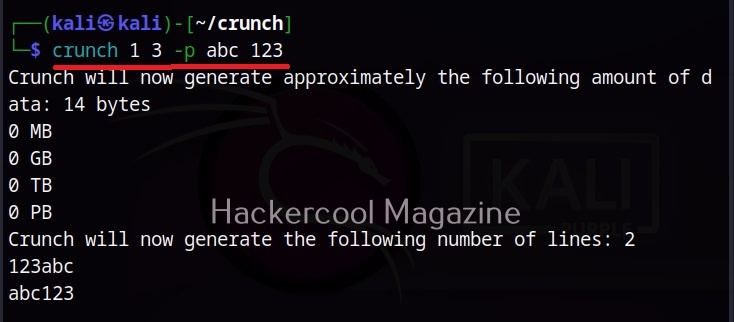
Don’t you want repeating characters (p)

Crunch can generate words that don’t have repeating characters using the ‘-p” option. Setting this option will generate factorial of characters in charset. For example, if there are 3 character in charset, setting this option will generate 3x2x1=6 words. While by default, crunch generates a wordlist the size of “characters in charset” to the power of maximum length specifically.

This option cannot be used along with ‘-s’ option and must be the last option to be specified. Also, this option ignores the maximum and minimum length specified but still needs two numbers to the specified.

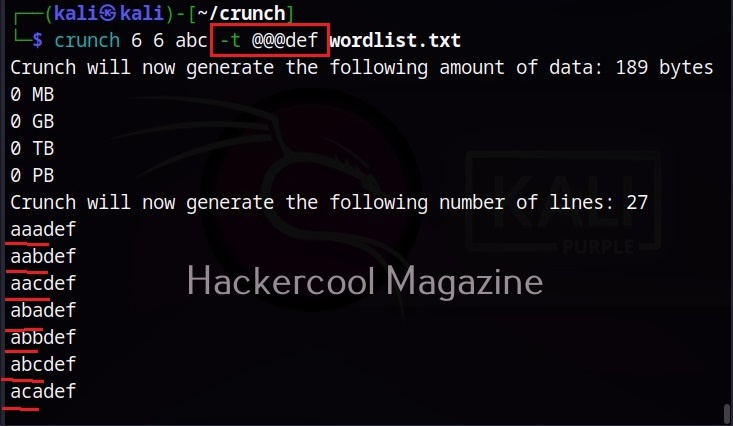
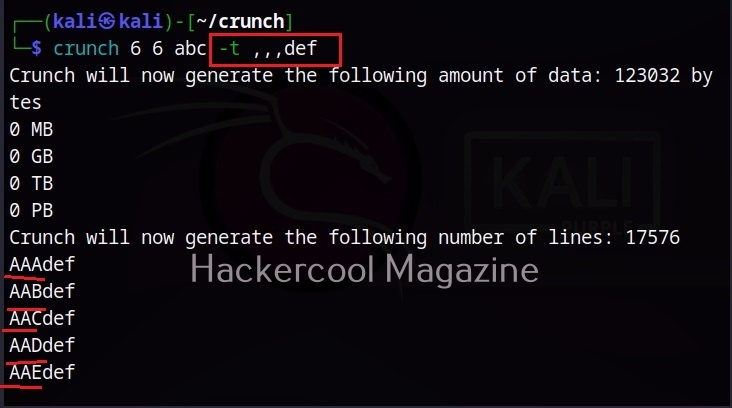
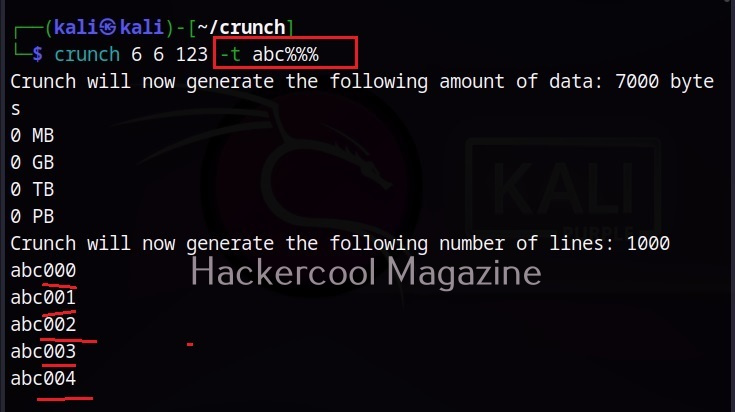
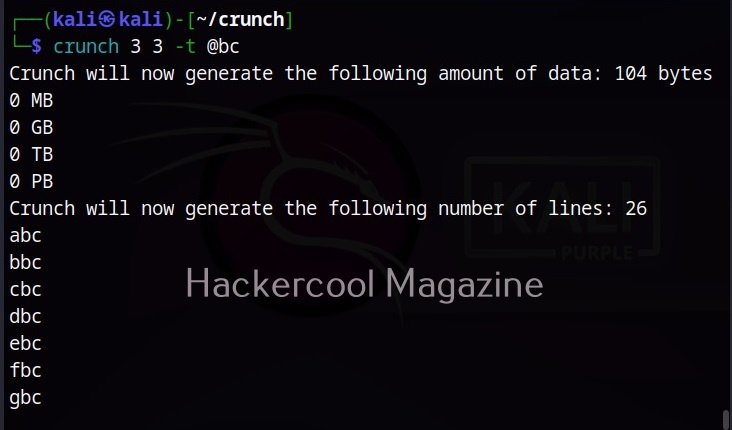
You want to specify a pattern (t)

This option helps you to specify a pattern. The character set can be specified using symbol as shown below.

What if you want symbols to be treated literally (l)

Setting a specific pattern is very helpful while creating wordlists but what if we have to include @, % ^ character in the string. Don’t worry. Crunch has that option too. Using -l option asks crunch to treat the specified characters as literals instead of symbols pointed to other characters.

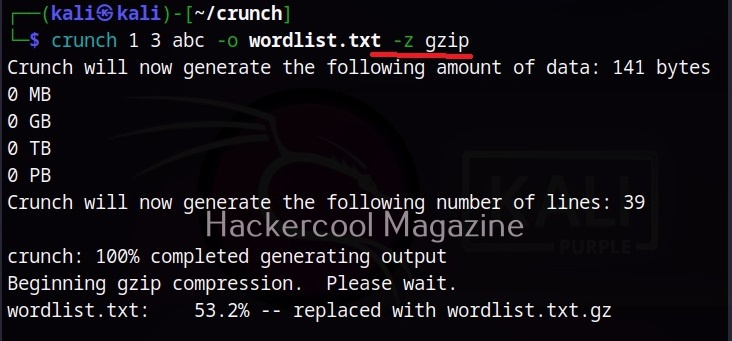
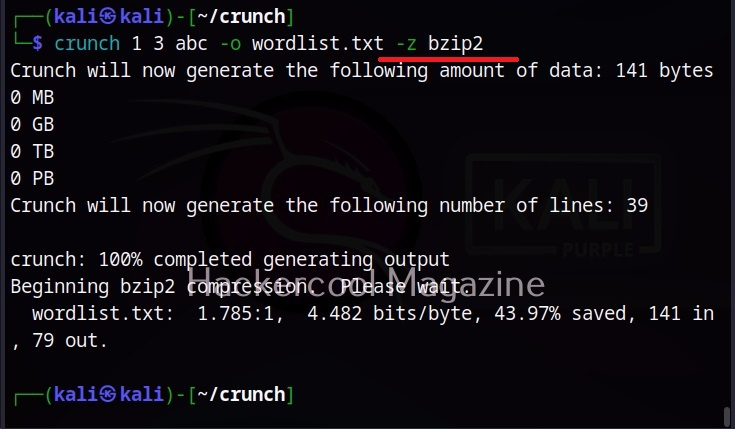
Save the wordlist as archive: (z)

Sometimes, need arises to save the generated wordlist as a compressed archive. With the “-z” option you can save generated wordlist as gzip, bzip, lzma and 7zip archives.

Resume whenever you want (r)

You may face some unexpected interruption while generating wordlists with crunch. This may be power cut or unexpected shutdown or some other problem which forces crunch to abort generating wordlists. Don’t you worry. Crunch has the resume (-r) option to restart from where it stopped or got aborted.

Disabling print percentage thread (u)

Its very nice to see crunch displaying the print percentage thread at the bottom while generating wordlist. But it you don’t like it, you can just disable this print percentage thread with the -u option.

That’s all about Crunch wordlist generator. Leave comments below.

Posted on

Brutus Password Cracker: Complete guide

Hello aspiring Ethical Hackers. In our previous blogpost, you learnt what is password cracking and various techniques of cracking passwords. In this blogpost, you will learn about Brutus password cracker, one of the popular tools that is used for cracking passwords.

Brutus is a password cracking tool that was actually designed to test for default credentials for routers . It was made public way back in October 1998 but it is still popular in present time. It is a portable password cracking tool and there is no need of installing it. It can be downloaded from here. It works only on Windows and supports cracking passwords of various protocols. They are,

  • HTTP (Basic authentication)
  • HTTP (HTML form/CGI)
  • POP3
  • FTP
  • SMB
  • Telnet

After downloading, we just need to extract the contents of the archive.

To run Brutus, click on the BrutusA2 application file.

It has three modes of operation. They are, wordlist, brute force and combo list where credentials are given as username/password pairs.

Brutus password cracker

For the purpose of demonstration, let’s try to crack FTP password of Metasploitable 2. I will be using the wordlist mode of attack for this. This wordlist was created while performing SMB enumeration of the target. Wordlists can also be generated using tools like Crunch, Cewl etc. After specifying the wordlist, I just need to click on “Start” to begin cracking passwords.

As the tool continues to crack credentials, any positive authentication results will be displayed as soon as they are found. In our current example, Brutus successfully extracted three credentials. They are,

  • user:user
  • postgres:postgres
  • msfadmin:masfadmin

Let’s use them to login into our target.

Successful. Similarly Brutus password cracker can be used to brute force credentials too.

Posted on

Beginners guide to Computer Virus

Hello aspiring Ethical Hackers. In this blogpost, you will learn in detail about computer virus. In our previous article on malware, you have read that virus is one type of malicious software.

What is a VIRUS?

Virus stands for Vital Information Resources Under Seize (VIRUS). Once a computer virus infects any system it tries to seize is resources. Like it’s pathological name sake, a virus attaches itself to an executable or program to propagate or infect computers. VIRUS always requires human action or interaction to infect systems. Let’s now study about different types of Virus and what resources they affect.

Types of Computer VIRUS

1. Browser Hijacker:

Have you ever opened your browser and noticed that all of its settings have changed? These settings include but not restricted to the URL of the home page, favorites and even the default search engine. Well, this is the case of a Browser Hijacker. It is called so because it simply hijacks your browser to alter its settings and also redirect to a phishing site or to display advance.

Browser hijackers are used by hackers to earn some good amount of money. For example, a browser hijacker named CoolWebSearch infected victim’s browsers and redirected the homepage and search results to the links the hackers wanted. Every time a victim clicked on these links, the hacker was paid money.

2. Web scripting virus:

A web scripting is a virus that exploits vulnerabilities in browser to infect web pages or websites and inject malicious code. This virus is useful to send spam or for stealing cookies.

3. File Infector virus:

One of the most common viruses, file infector virus infects files and copies itself into other executable programs such as .COM and EXE files. Some file infecting viruses infect critical system files too thus affecting the operating system.

4. Macro virus:

Macro virus is a virus that is written in the language of Microsoft Office macros or Excel Macros. They are embedded into a Word document on Excel file

5. Direct Action virus:

Also known as Non-resident virus, this type of virus directly connects itself to executables like EXE and COM file. This virus is also known as Non-resident Virus as it doesn’t install itself on the target system. Direct Action Virus becomes active only when the victim executes the file.

6. Resident virus:

Resident virus install itself in the memory to the system and then from there, infects other files while they are opened by the users.

7. Boot Sector virus:

This type of virus infects the Master Boot Sector of the hard disk or a USB drive. Master Boots Record (MBR) is the boot sector that is located at the very beginning of partition table. It contains information about operating system’s location and how it can be booted. Once this section is infected, the infected system will face bootup problems etc.

8. Multipartite virus:

A virus that uses multiple methods to infect the target system is known as multipartite virus.

9. Polymorphic virus:

A polymorphic virus or metamorphic virus is a virus that constantly changes its appearance or signature files to avoid detection.

Posted on

Malware guide for absolute beginners

Hello, aspiring ethical hackers. This blogpost is intended to be a beginner’s guide to malware. This blogpost will teach you what is malware, its purpose, types of malware and functions of malware.

What is Malware?

Malware stands for malicious software. So, any software that performs malicious actions on a computer or mobile is called as malware. These malicious actions include showing persistent popups, encrypting data, stealing data, deleting data, capturing sensitive information and making the target system completely unusable etc. Based on its functions, and purpose malware can be classified into various types.

Types of Malware

VIRUS

Often used interchangeably with malware, virus is the most popular malware you may encounter in cyber security. Just like its pathological namesake, virus attaches itself to an executable or program to propagate or infect computer. Virus always requires human action to infect system.

According to Discovery, the first virus is the Creeper program. It was created by Bob Thomas in 1971. It was actually designed as a security test to see if a self-replicating program will be successful. The function of Creeper was to just display a simple message on computer if infected.

The most popular (or should I say unpopular) virus should be ILOVEYOU virus. Released in 2000, ILOVEYOU infected over ten million Windows computers. It started spreading as an email message with subject line “I LOVE YOU” and contained an attachment with name “LOVE-LETTER-FOR-YOU.TXT.VBS. When the recipient clicked on this attachment, a Visual Basic script activated and over writes files on the infected system. Then, it sent itself to all the email addresses in the Windows Address Book. It is estimate that the cost of this simple virus was at least $15 billion.

WORM

A computer worm is a type of malware that unlike virus doesn’t need any human action or interaction to infect target systems. Usually a computer worm spreads by exploiting vulnerability on the target systems. They also have no need to attach themselves to any program or executable.

Morris worm is considered to be the first worm to spread over the internet. It was created by Robert Tappan Morris and it caused a loss of over $100,000 and $10,000,000. It infected over 2000 computers within 15 hours. Morris worm spread by exploiting vulnerabilities like holes in the debug mode of the Unix send mail program, a buffer overflow vulnerability in finger network service. Rexec and Rsh accounts with weak or no password at all.

The most unpopular worm should definitely be Stuxnet. Released in 2010 and accused of sabotaging nuclear program of Iran, Stuxnet was designed to target programmable logic controllers (PLCs). These PLC’s allow automation of electromechanical process used by control machines and industrial processes (for example, gas centrifuge that are used to separate nuclear material). Stuxnet spread by exploiting 4 Zero-day vulnerabilities in Siemens setup7 software installed on Windows systems. Stuxnet infected almost over 2,00,000 computers and destroyed at least 100 machines.

TROJAN

A Trojan acts as some other file (usually benign, genuine and harmless) but performs malicious actions. The name is a reference to the Trojan horse (the large wooden horse) assumed by Trojans as gift given by Greeks to Troy. However, when the horse was let into the kingdom, Greek soldiers hiding inside the horse came out and ransacked Troy. (you should watch Troy movie).

Just like viruses, Trojans also need victims to click on Trojan to be activated and most users fall victim to trojans thinking that they are genuine files. ANIMAL, a program released in 1975 is generally considered the world’s first Trojan. It fooled victims by presenting itself as a simple game of 20 questions. When user clicked on it, it copied itself to shared directories to be found by other victims.

According to me, the most dangerous Trojan was Zeus. Zeus is a banking Trojan used to steal banking information. It is spread by drive by downloads and phishing in 2003. It is estimated that Zeus infected over 74,000 FTP accounts.

ADWARE

Adware stands for Advertising malware. Have you ever experienced you are viewing something in your favorite browser and you are being incessantly bombarded with ads, especially ads which you did not and never wanted? If you had that experience you have encountered adware and if you didn’t it is thanks to ad blockers enabled by almost all browsers. Note that Adware is sometimes genuine too.

SPYWARE

Spyware is short for spying software and now you know what it does. It spies and gathers information about a user or organization. Spyware may be present in even legitimate software. The first recorded spyware is considered to be a freeware game called “Elf Bowling” as it came bundled with tracking software.

The most popular spyware seen recently should be Pegasus spyware. This spyware developed by Israeli cyber arms firm NSO Group installs not just covertly but remotely on mobile phones running IOS and Android and that too using a Zero-click exploit. Once installed on a device, Pegasus can read text messages, snoop on calls, collect credentials, track location of the device, access device’s cameras and microphone and harvest information from apps installed on the target device.

KEYLOGGER

Keylogger is a malicious software that records keystrokes a user types into computer on mobiles. The first keylogger used in real world was allegedly distributed with Grand Theft Auto V mod in 2015. Recently, a keylogger named Snake keylogger was detected being distributed with Microsoft Excel sample. Snake keylogger first appeared in late 2020.

ROOTKIT

Rootkit is a malicious software that is designed to enable access to a computer in a way that is not usually possible to an authorized user. Simply put, Rootkit gives SYSTEM level access. As if this is not enough, Rootkit is undetectable once installed, unlike other types of malware. The term “Rootkit” is a combination of root (the most privileged account on Unix system and “kit”. This is because rootkits usually give ‘root’ level access to the target system.

The first malicious rootkit appeared in 1999 and it affected Windows NT OS. In 2012, a rootkit named Flame was detected. Flame affected over 80 servers around the world and is considered one of the dangerous rootkits.

BACKDOOR

A backdoor is a type of malware that provides access to a system bypassing normal security measures that usually prevent access. For example, if you can access a system without providing any login or need of credentials, you have a Backdoor access. Usually, hackers install backdoor after gaining complete access to the system to have unhindered and continuous access in future.

In 1998, a U.S hacker group “Cult of the Dead cow” designed a backdoor named “Back Orifice” that enables a user to control a computer remotely. In 2014, multiple backdoors were detected in WordPress. These backdoors were WordPress plugins with an obfuscated JavaScript code.

BOT

A BOT is a shortcut for Robot and it is an automated piece of code that performs predefined tasks. Malicious Bots as normally used to infect a system and make them a part of a Botnet which can then be used to perform DDOS attacks.

In 2007, all botnet attack called Cutwail attacked Windows systems using a trojan named Pushdo which infected Windows systems to make them part of the Cutwail botnet. This botnet had over 1.5 to 2 million computers. The most famous BOT malware should be MIRAI. MIRAI is designed to infect smart devices that run on ARC processes.

RANSOMWARE

Ransomware is a malicious software that locks victim’s computers or encrypts the victim’s files or permanently block access to the victim’s system. Its called ransomware as the key to decrypt the data or access the system is not provided unless a ransom is paid.

The first known ransomware was AIDS Trojan. It’s payload hid the files on the victim’s hard drive and encrypted their names. The most dangerous & popular ransomware attack was WannaCry in 2017. WannaCry ransomware spread by exploiting EternalBlue vulnerability and it infected over 2,30,000 computers within one day.

This score depends on the additional work that has to be put by attacker to exploit the vulnerability. For example, exploiting EternalBlue does not need any additional work by attacker whereas to performing a Man-In middle attack requires additional work from the attacker. Usually, the additional work the attacker puts depends on factors which are out of control of the attacker.

CRYPTO MINER

Crypto mining malware or cryptojacker is a malicious software that targets computer sources and mines crypto currencies like Bitcoin. Cryptominers are rather new in the evolution of malware. Their growth directly grew with the growth in popularity of crypto currencies.

Posted on

Nikto vulnerability scanner: Complete guide

Hello, aspiring ethical Hackers. This blogpost is a complete guide to Nikto vulnerability scanner. Nikto is a free command line web vulnerability scanner that scans web servers and detects over 6700 potentially dangerous files/CGIs, outdated server software, other vulnerabilities and misconfigurations. Nikto can also detect the installed software on the target web server. We will be running Nikto on Kali Linux as it is installed by default in Kali Linux. So let’s start.

Let’s start with a version check (-Version)

The “version” option of Nikto checks for the version of the software, plugins and database versions.

Checking Database (-dbcheck)

It’s always a good thing to check for any errors in the scan database before scanning. The “-dbcheck” option of Nikto checks the scan databases for any errors.

The Host option (–host) (-h)

To scan a target using Nikto, first we need to specify a target. To set the target, we need to use the “host” option. This is shown below.

The target can be IP address of the webserver or URL of the website. This scan took 45 seconds to finish.

The Host option (–ssl)

To scan a website with HTTPS enabled with nikto, we can use the “SSL” option.

The Port option (–port)

By default, Nikto scans the default HTTP and HTTPS ports when specified. However, if the target web server is running on a custom port you can set Nikto to scan a different port by using the “port” option.

Scanning for CGI directories (–Cgidirs)

To scan for the presence of all CGI directories on the target webserver, the “cgidirs” option can be used.

You can specify a specific CGI directory to search or you can use “all” value to scan for all CGI directories on the target.

What output you want Nikto to show? (–Display)

To control the type and amount of output Nikto shows after finishing the scan, we can use the “Display” option. Here are the values that can be set for the Display option.

How much time you want Nikto to spend on a scan? (–maxtime)

Using the “maxtime” option, we can specify the maximum time to spend for scanning a target. This time can be specified in seconds.

As you can see, the scan ended in 2 seconds while earlier the same scan took 45 seconds.

Don’t look for names (-nolookup)

The “nolookup” option specifies Nikto to not query for names when an IP address is specified.

Don’t look for pages that are not there (–no404)

The “no404” option specifies Nikto to disable “file not found” checking. This will reduce the total number of requests made to the target.

Just discover the ports (–findonly)

If you want to just find the HTTP(S) ports of a target without performing any security scan, you can use the “–findonly” option. Specifying this option allows Nikto to connect to HTTPS or HTTP ports and report the server header.

The Timeout option (–timeout)

The “–timeout” option specifies time to wait before timing out a request. The default timeout of Nikto is 10 seconds.

The Pause option (–Pause)

By using “–Pause” option of Nikto, we can specify delay between each test Nikto performs.

What if we have to authenticate? (–id)

With the “-id” option you can use Nikto to perform basic authentication to the target.

The tuning option (–tuning)

With the “-Tuning” option, we can control the test that Nikto will use against a target. It can take the following values.

For example, this is how we test for misconfigured files on the target.

See all Nikto plugins (–list-plugins)

Nikto has lot of plugins that can be used against various targets. To view all these plugins, we can use the “–list-plugins” option.

Use a particular plugin (–Plugins)

To use a particular plugin, we can use the “Plugins” option. For example, let’s use the robots plugin as shown below.

Can Nikto evade detection? (–evasion)

While scanning, Nikto can use various techniques to evade Intrusion Detection System (IDS). The evasion techniques of Nikto are given below.

Saving output (-o)

Nikto can save the output of the scan in a file with the “output(-o)” as shown below.

Formats in which you can save output (-Format)

You can save in different formats you like using the “-Format” option. Valid formats are csv, htm, txt and xml.

That is the complete guide for Nikto vulnerability scanner. If you have any questions bring them in the comments section.