Posted on

Beginners guide to wifipumpkin 3

Hello, aspiring ethical hackers. In our previous blogpost on wifi hacking, you learnt what is a rogue access point and why hackers or pentesters use it. In this article, you will learn about Wifipumpkin 3, a powerful framework for creating rogue access points. The features of wifipumpkin 3 are,

  • 1. Creating Rogue access point attack
  • 2. Performing Man-in-the-middle attack
  • 3. Performing deauthentication attack
  • 4. Module for extra-captiveflask templates
  • 5. Creating Rogue DNS server
  • 6. Performing captive portal attack (captiveflask)
  • 7. Intercepting, inspecting, modifying and replay web traffic
  • 8. WIFI networks scanning
  • 9. DNS monitoring service
  • 10. Credentials harvesting
  • 11. Phishkin3 (Support MFA phishing attack via captive portal)
  • 12. EvilQR3 (Support Phishing QR code attack)
  • 13. Transparent Proxies
  • 14. RestFulAPI (new)
  • and more!

Let’s see how to create a rogue access point using this tool. For this, we will be using Kali Linux as this tool is present in its repositories by default in it. We will also need a wireless adapter that can monitor wireless packets. I am using ALFA AWVS036NHA adapter for this article.

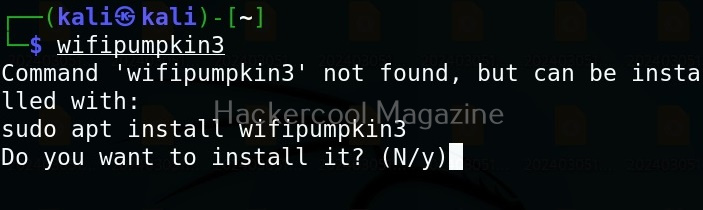
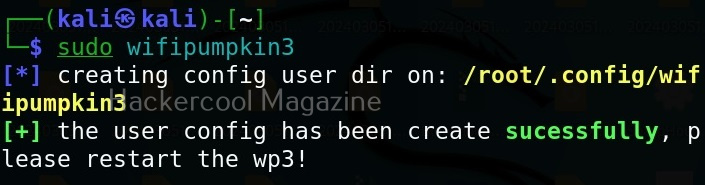
It can be started using command as shown below.

sudo wifipumpkin3

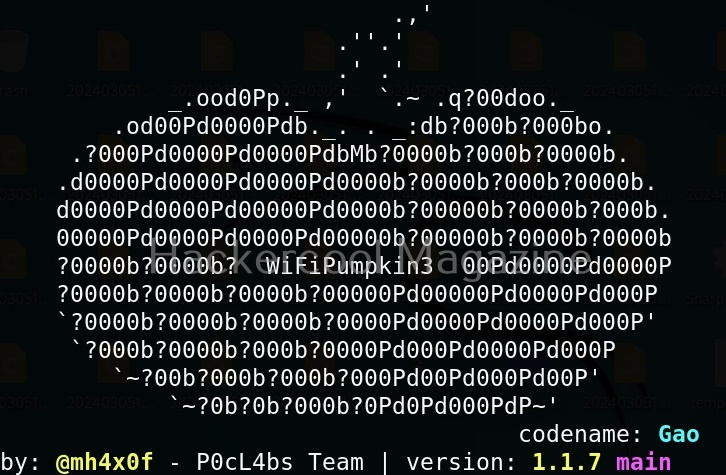
Here’s its nice artwork once started.

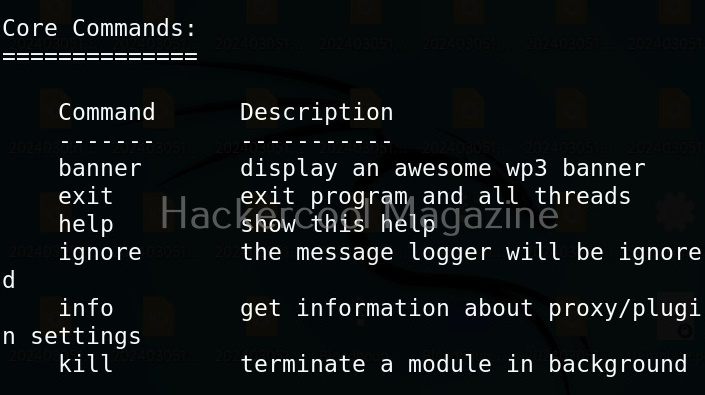
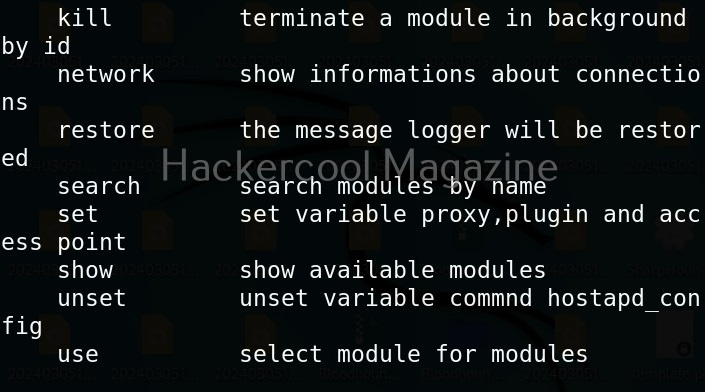
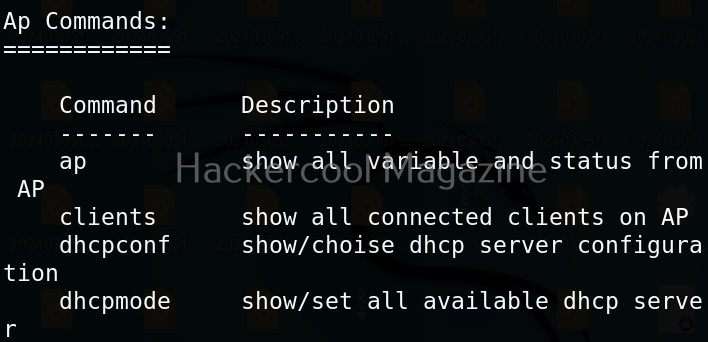
To see all the commands that can be run using wifipumpki3, use the command shown below.

help

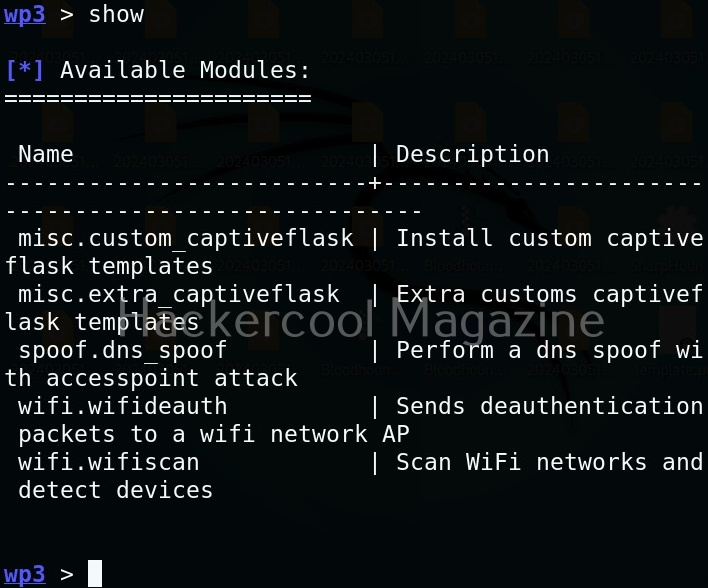
To see all the available modules of Wifipumpkin3, use the “show” command.

show

To use any module, we have to use the command “use” literally.

use <module name>

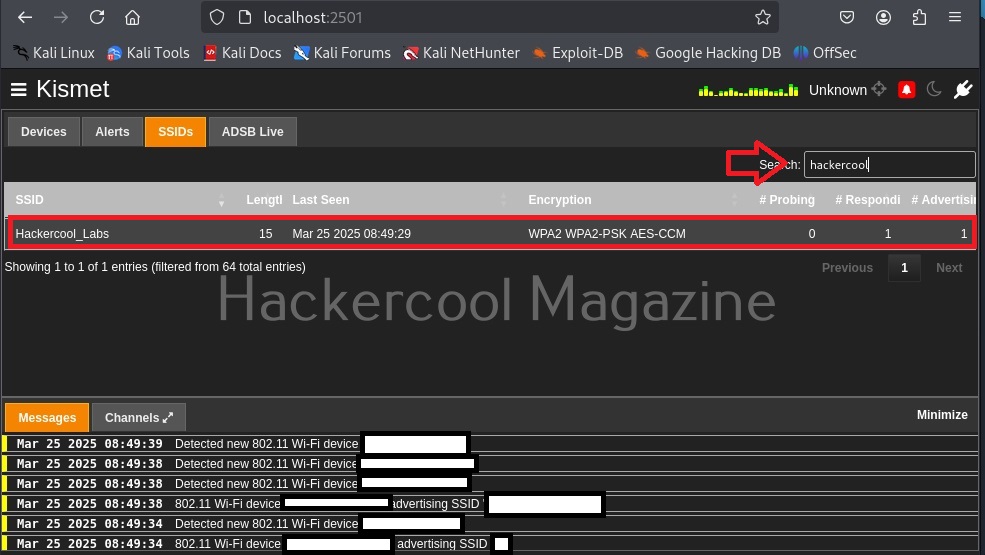
For example, let’s load the wifi-wifiscan module. As its name implies, this module of wifipumpkin scans for all wireless access points and devices trying to connect to them.

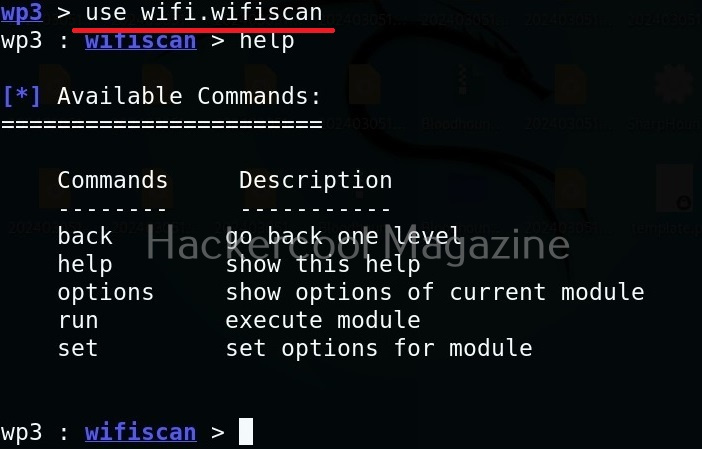
We can see all options of a module by using the “options” command as shown below.

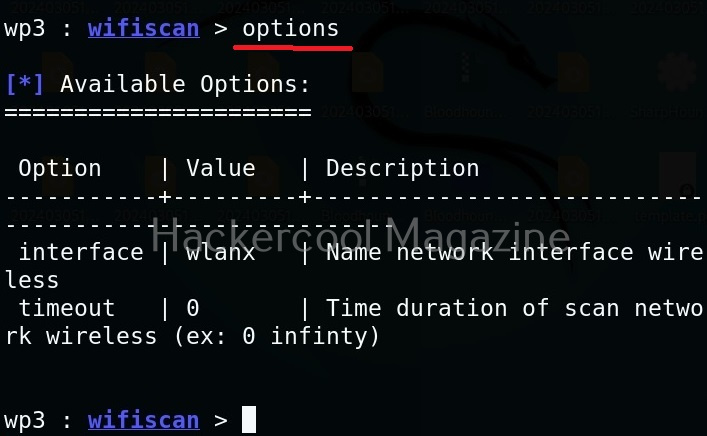
This module just requires the name of the wireless interface which can be set as shown below.

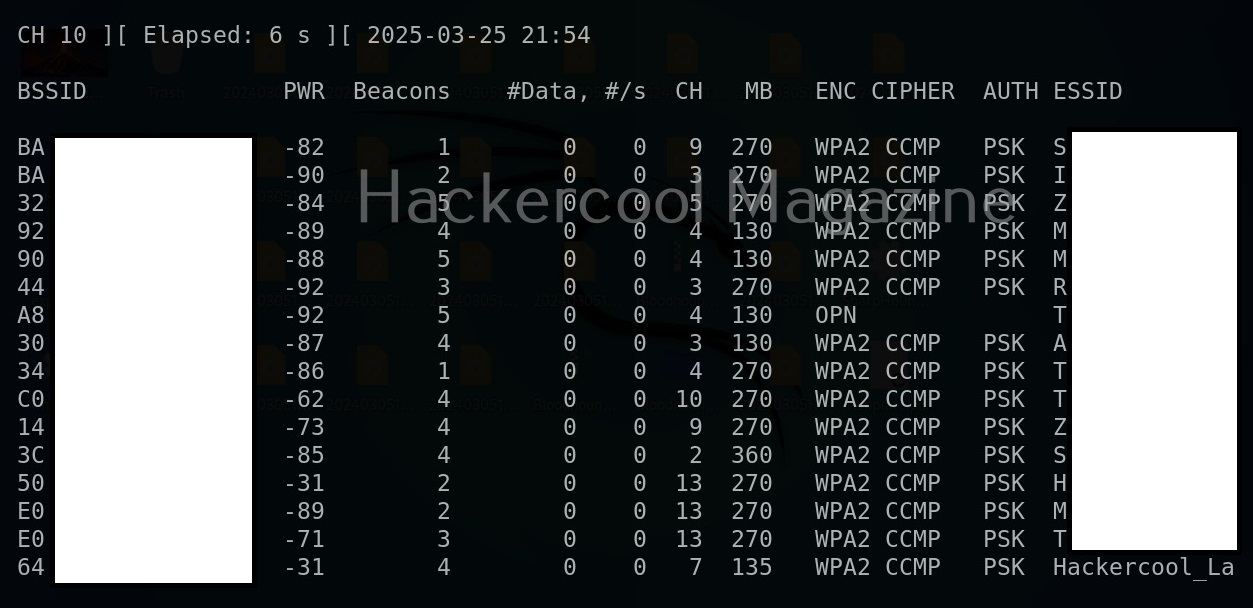
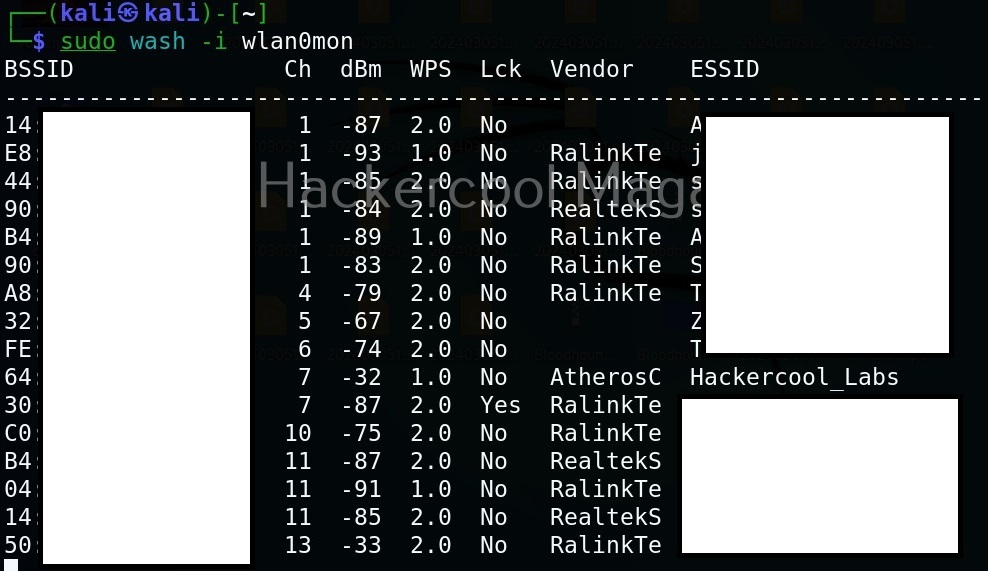
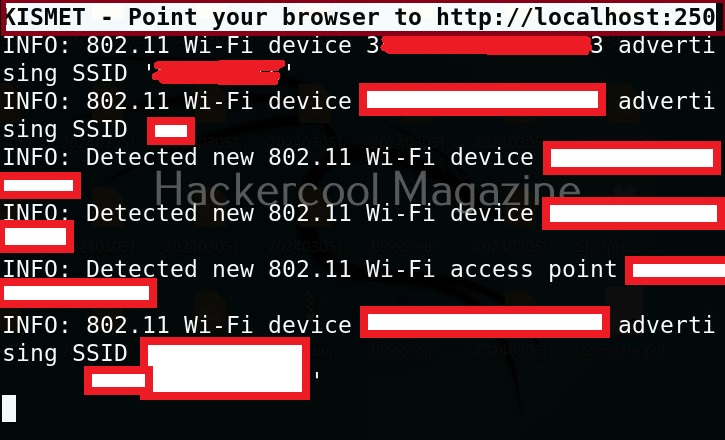
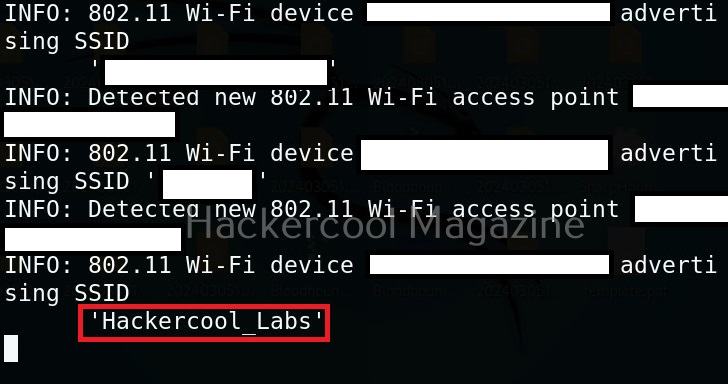
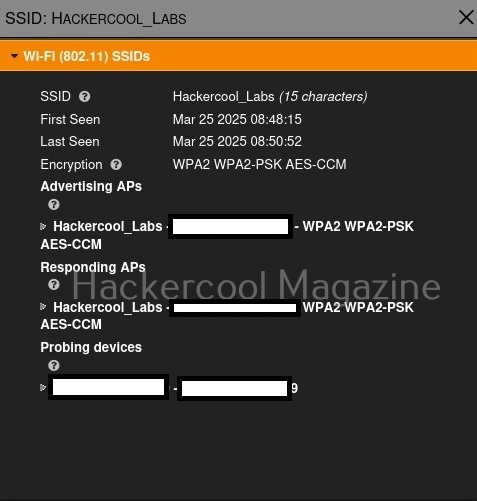
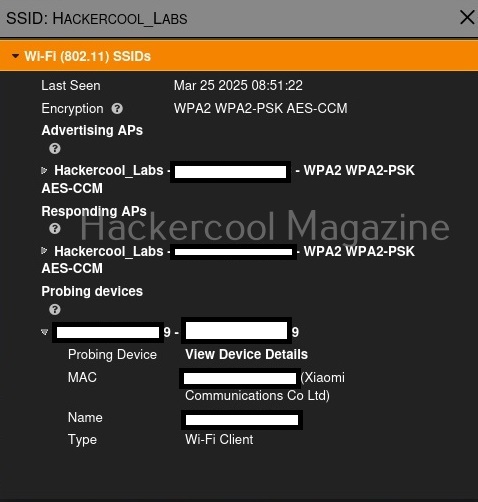
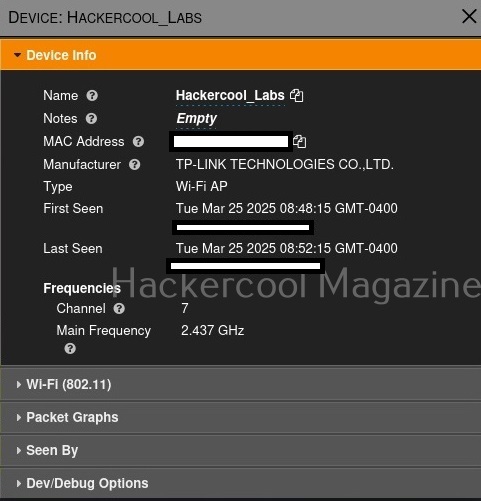
After all options are set, we need to use “run” command to execute the module. Then, the module displays all access points as shown below.

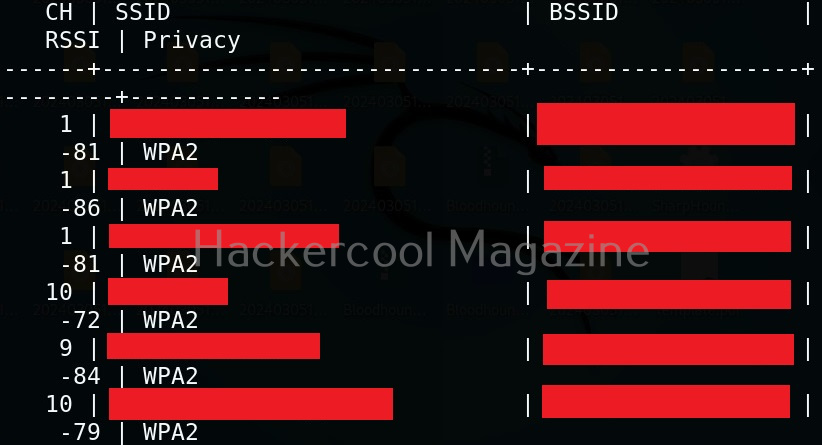
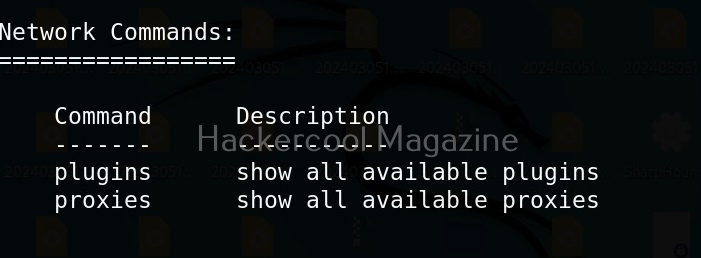
Select the access point you want to target. For this blogpost, we will select “Hackercool_Labs” access point. We want to create a rogue access point for this access point. For this, go back and use “Proxies” command to see all the available proxies.

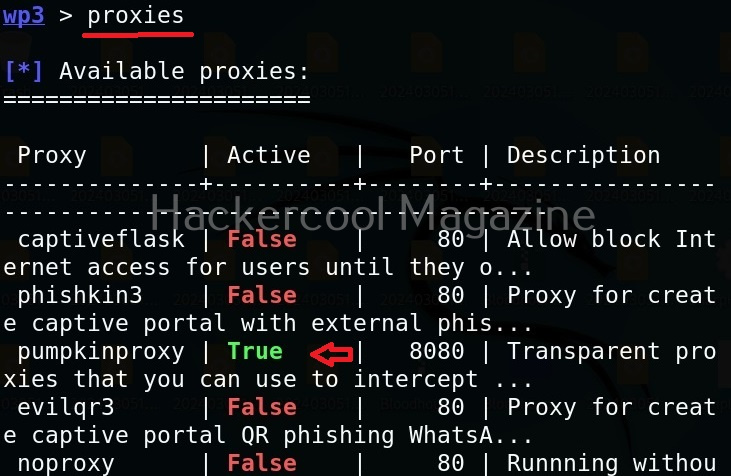
As you can see, a proxy named pumpkinproxy is enabled by default. A rogue access point should provide internet just as the original wifi access point of which we are creating a rogue in order not to raise suspicions. Use “ap” command to view all the settings for our rogue access point.

We can change any options we want as shown below. Let’s change the SSID to “Hackercool_Labss” from “Wifi Pumpkin”. The name of the rogue access point should be almost similar to the original one. Here, we added extra “s” so that you can differentiate easily.

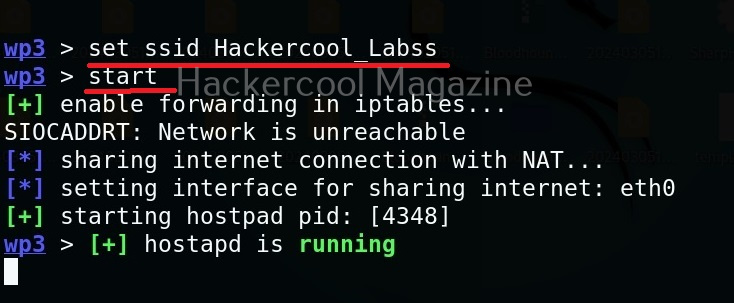
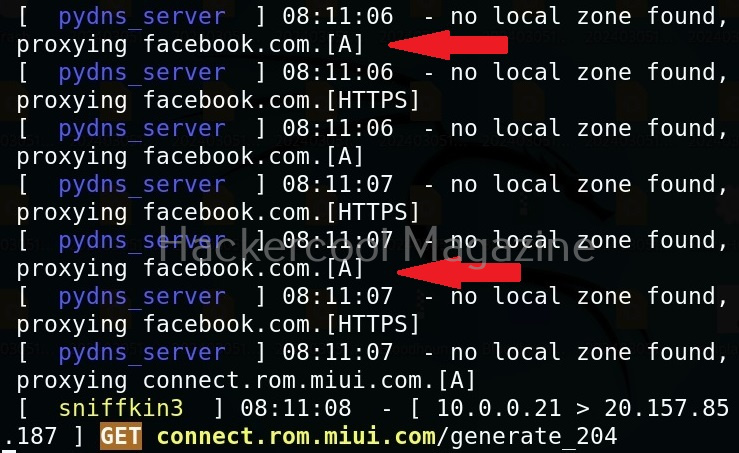
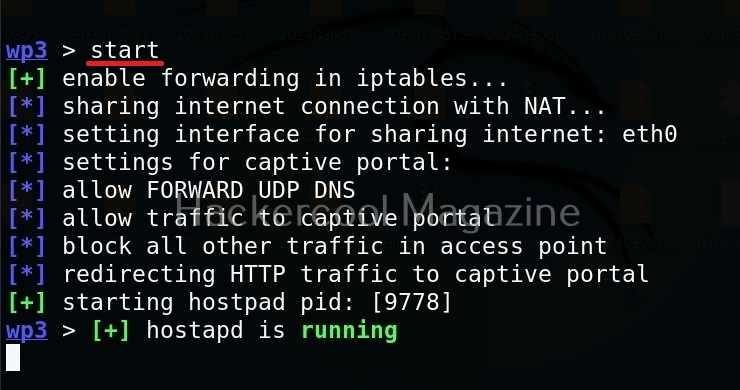
We can use “start” command to start the access point. Note that this access point is “open” and has no password. When any client connects to the rogue access point assuming it as the original one, the tool identifies the device as shown below.

We can see their browsing data to some extent. For example, our client is trying to visit Facebook.

Instead of allowing clients to directly connect to our rogue access point, we can present a login page to the client. For this, we have to use the captiveflask proxy.

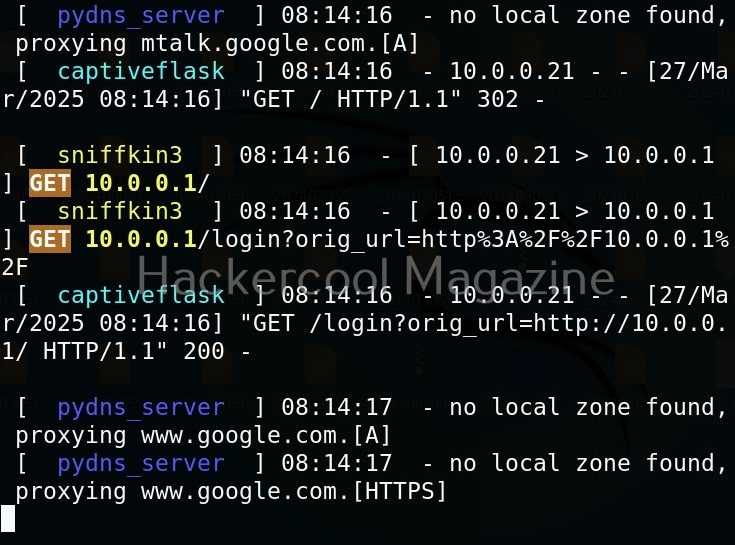
Now, as soon as anybody connects to our rogue access point, he/she will be presented with a login screen as shown below.

As soon as the user enters credentials assuming that he connected to the original access point and it was prompting for credentials for some reason,

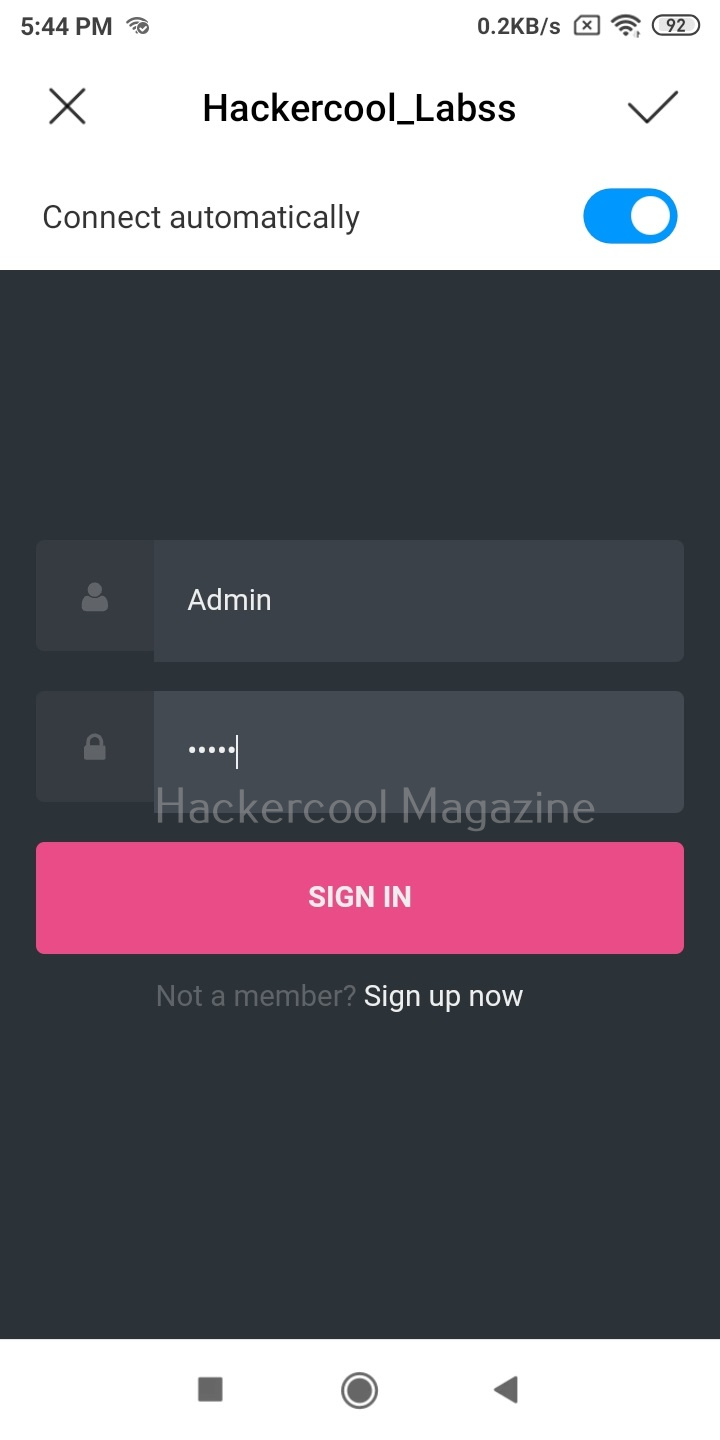
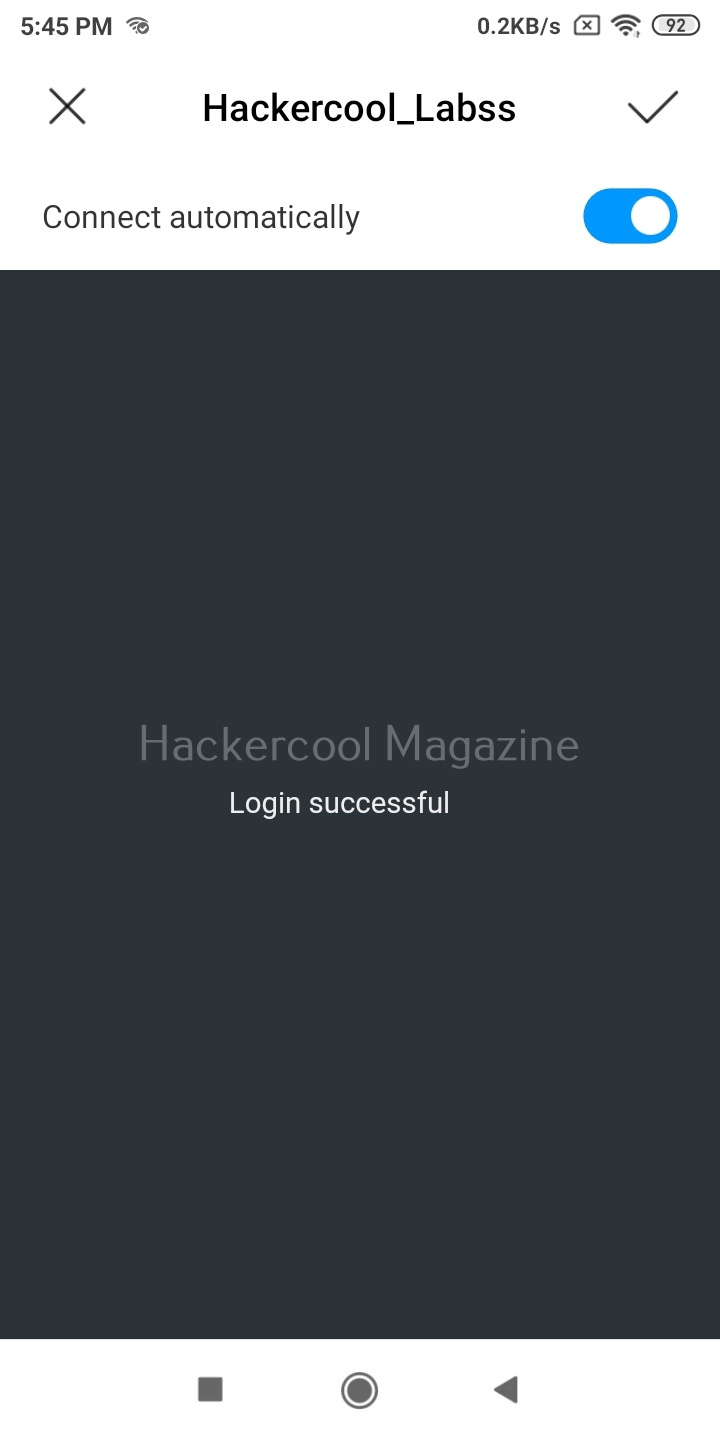
wifipumpkin 3 captures and displays the credentials as shown below.

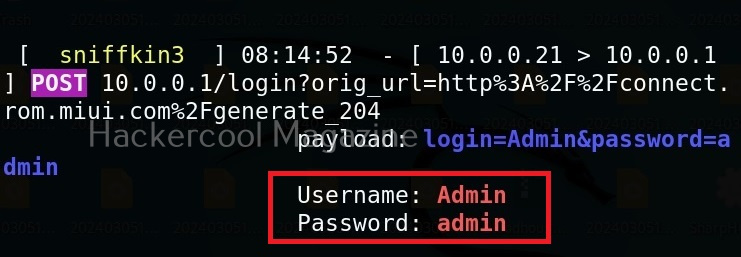
Thus, we can capture credentials using this. To see all the devices connected to our rogue access point, we can use “clients” command.

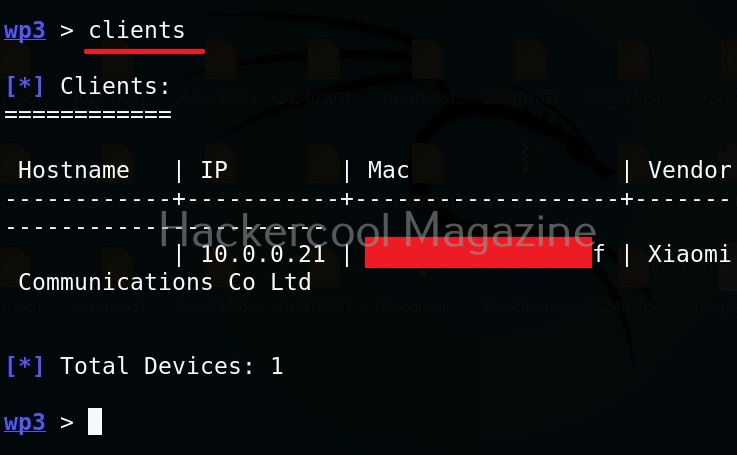
We can even see all the information about connected devices using “dump” command.

Posted on

Beginners guide to reaver

Hello, aspiring ethical hackers. In our previous blogpost on wifi hacking, you learnt what is a WPS pin, why it is used, it’s strengths and weaknesses etc. In this article, you will learn about Reaver, a tool that brute force attacks WPS pins in order to retrieve WPA/WPA2 passphrases.

Let’s see how this tool works. For this we will be using Kali Linux as reaver is installed by default on it. We will also need a wifi adapter that allows packet monitoring. For this, we will be using ALFA AWVS036NHA wifi adapter.

After turning on Kali and plugging in the wireless adapter, the first thing we need to do is enable monitoring mole on our wireless adapter as shown below. Monitoring mode allows the wifi adapter to see all the available wireless networks.

Let’s use airodump to dump all the wifi access points it is monitoring.

Here are the wifi access points detected by our adapter.

We can also use wash to detect WPS enabled access points.

Next, we have to set our target. For this tutorial, we will be setting “Hackercool_Labs” access point as our target. We need to note its MAC address. Then, use reaver as shown below.

Here is the explanation for the options we set.

-i: interface

-b: -bssid or MAC address of the wireless access point.

-c: Channel on which this access point is advertising.

-V: Verbose output

Reaver starts trying to crack the WPS pin as shown below.

You can even use Pixiedust attack to crack WPS pins by specifying the “-k” option.

You can even specify the channel of the wifi access point for quicker cracking using the ‘-c’ option as shown below.

Depending on the access point, reaver can take between 4-10 hours to retrieve the WPA/WPA2 passphrase from the WPS pin while it takes around half of this time to crack the WPS pin itself. Learn how to crack WPS pins with Bully tool.

Posted on

Beginners guide to Kismet

Hello, aspiring ethical hackers. In our previous blogpost, you learnt everything about wifi hacking. In this article, you will learn about kismet, a wifi security assessment tool.

Kismet is a wireless network and device detector, sniffer, war driving tool and intrusion detection system (WIDs) for not just wifi but also Bluetooth, Zigbee, RF and more. Let’s see the working of this tool. For this, I will be using Kali Linux as kismet is installed by default on Kali or is present in its repositories. We will also be needing a wireless adapter that can monitor wireless packets. I am using ALFA AWVS036NHA adapter for this article.

First thing we do is to plugin the adapter to the system and check if it is connected to the device using command shown below.

iwconfig

In the above image, you can see our wireless interface is named “wlan0”. Next, we start monitor mode on our wireless adapter using command as shown below. Monitor mode allows the adapter to scan for all wireless networks in the air.

sudo airmon-ng start wlan0

We can confirm if monitor mode is enabled on the adapter by once again using “iwconfig” command.

As you can see in the above image, the mode of the adapter changed from managed to monitor and its name changed to wlan0mon from wlan0. Now we have to start kismet on this interface. It can be done as shown below.

sudo kismet -c <wireless interface>

kismet starts capturing data immediately as shown below.

You can see the wireless network and wireless devices in a browser with the link given at the beginning of the capture. The URL is “localhost:2501”. Go to the URL using a browser. As soon as you do that, you will be faced with a login screen as shown below.

Since you are setting up kismet for the first time, set a username and password and most importantly don’t forget them.

Then click on “Continue” to see the interface of kismet.

Kismet will show you all the wireless access points it has detected.

While the top shows all the wifi access points and client devices, in the bottom you can see messages. Just beside the “messages” tab there is a “Channels” tab where you can see all the channels and active devices on each channel.

Coming to the top, while devices tab shows you all the wireless devices, clicking on the SSIDs tab displays all wireless access points. You can even search for a access point of your choice. For example, let’s search for wifi access point named “Hackercool_Labs”.

Clicking on the resulting entry shows more details about the wireless access point as shown below. We can see that the access point is a router from TP-Link.

It will also show the MAC addresses of the devices or clients connecting to this particular access point as shown below.

We can even learn more about the devices connecting to this access point. For example, the device that connected to our target access point is a mobile from Xiaomi. Similarly, we can identify other devices like cameras, smart devices etc.

We can learn the channel on which it is running and its frequency.

To the top left, there is a kismet menu.

Click on “Data sources”. This will give you information from where your data is coming.

By default kismet hops from one channel to another channel (channels are explained in our wifi hacking article) to collect information. You can even lock kismet to a single channel. For example, say 7.

That’s all for now. In our future updates we will show you what more you can do with kismet. Learn about wifipumpkin3 tool.

Posted on

Beginners guide to OllyDbg

Hello, aspiring ethical hackers. In our previous blogpost, you learnt about reverse engineering. In this article, you will learn about OllyDbg, a debugger that is used to reverse engineer programs.

OllyDbg is an X86 debugger that is used to perform binary code analysis even when source code is not available. It can trace registers, switches, tables, constants, strings, recognize procedures, API calls and can even locate routines, object files and libraries. At present, this debugger can only disassemble binaries compiled for 32 bit processors.

Let’s see how this tool works. For this, I will be using Kali Linux as OllyDbg is available in its repositories.

Note that OllyDbg can only run on Windows systems. To run it on Kali, you need to install wine.

After wine is successfully installed, you can start Ollydbg using command shown below.

ollydbg

If it shows up wine error like this, just use the command shown below to fix it.

mv ~/.wine ~/.wine.old

Now, OllyDbg should start normally. The interface looks as shown below.

To see the working of Ollydbg, we need an executable file to disassemble. To help you understand how OllyDbg works in detail, I have written a simple program in C. The program is nothing new. It just adds two numbers provided by the users and displays the result. I name it “hc_app.c”.

Then I compile it as shown below to get an exe file named “hc_app.exe”.

Let’s first check if the program works as expected.

The program “hc_app.exe” is working as expected. Now, let’s load this into OllyDbg. This can be done by dragging hc_app.exe to OllyDbg or by going to File menu>Open (F3) as shown below.

This will open file explorer.

Navigate to the location of the app we just created and select it.

Doing this will open a terminal as shown below.

Minimize the terminal window for now. After minimizing it, you will see this on OllyDbg.

If you are a normal human like me, you will not understand anything. This is assembly code. The interface of OllyDbg is divided into 4 sections.

The first section is CPU window. This contains all virtual addresses of instructions. This window is located to the upper left of OllyDbg.

The second section is located to the upper right of the program and contains CPU registers.

The third section is located to the lower left. This has data residing in memory.

The fourth section, located to the bottom right is the stack.

Apart from this, I have assigned number ‘5’ in yellow. It shows if the program we loaded (hc_app.exe) is paused or running. Before doing anything, go to the Debug menu and hit “Run”. Now, bring forward the the command window we minimized earlier. It will change to this.

That’s all good. Now, let’s make something sense out of what looks like gibberish. Right click inside the CPU window, a menu should open. Select “Search for” and in the sub menu “All referenced text strings” as shown below.

What we are doing is searching for all text strings referred to in the program. This will give output as shown below.

Here, you can see “Enter two integers:” and “The final number is :”. You remember something from the source code of the program. But note here that, we don’t have access to source code and only loaded the compiled program (hc_app.exe). To the left, highlighted in red, you can see the address at which this string is present. The address is “00401576”. Go to that address in CPU window.

See the disassembled code here. It is this.

MOV DWORD PTR SS: [ESP], hc_app.00411044

The important thing here is the address “00411044”. Pointers in C point to a memory address. So, this command is pointing to a memory address “00411044”. Once again right click in CPU window select “Go to” this time and select “Expression” (shortcut for this is CTRL+G).

In the window that opens, enter address value as shown below and click on “OK”.

You should see this in CPU window. At address “00411044”, you should see a command “INC EBP”. Right click on that command and go to Binary>Edit as shown below.

A new window opens as shown below.

Observe the ASCII value. It is ‘E’. Similarly do it for next four commands.

Here are the combined ASCII values. They are ‘E’ ‘n’ ‘te’ ‘r’. What does it become? “Enter”.. I think you have figured out where this is going. This is part of the text, “Enter two integers:”. Right.

Now let’s do one thing. Change the ASCII value of ‘E’ ‘n’ ‘te’ ‘r’ to ‘H’ ‘E’ ‘LL’, ‘O’. respectively as shown below.

Now, when we go to debug menu and run the code again, instead of “Enter Two integers” we got “HELLO two integers” as shown below.

Here, you can see that we have successfully altered the code of a program without even knowing its source code. Next, learn how to perform static analysis of a program or malware with PEframe.

Posted on

Linux exploit suggester: Complete guide

Hello, aspiring ethical hackers. In our previous blogpost, you learnt about various linux privilege escalation techniques. In this article, you will learn about Linux exploit suggester, a script that helps us in elevating privileges on a Linux system.

Linux exploit suggester assists in detecting security deficiencies of a Linux kernel or Linux machine and suggests exploits for the vulnerabilities detected. It does this by assessing exposure of kernel to publicly known exploits. Obviously, this script should be run on target system after gaining access. Let’s see how this tool works. For this, I will be running this script after transferring it to target Ubuntu 20.04 machine after gaining a shell. The simplest way to run this script is using the command shown below.

./linux exploit suggester

As you can see in the above images, this script found 81 kernel exploits and 49 user space exploits. Moreover. it suggested the vulnerability and also an exploit for this. For example, in this case, the target system is vulnerable to DirtyPipe, Pwnkit vulnerabilities etc.

You can even run Linux exploit suggester by supplying the kernel information as shown below.

You can even supply the entire output of “uname-a” command by using the “-u” option.

Check security settings of the target system (–checksec)

This tool can also check most security settings in your Linux kernel using this option.

View only kernel space exploits

Setting this option shows only kernel related exploits for the target kernel.

View only userspace exploits

Setting this option shows only userspace exploits.

Display sources (-s)

Setting this option not only lists the exploits but also downloads the source code of the exploits.

The sources of the exploit are in the format of zip archive.

Download binaries (-b)

Setting this option downloads binaries of the exploit code if available. Binary exploits can be executed directly.

Get more detailed view (-f)

Setting this option displays a more detailed view of the exploit.

Get a brief view (-g)

Setting this option displays only brief information about found exploits.

After getting the exploit information, all you have to do is execute the exploit to elevate privileges on the target linux system. Next, learn about linux post exploitation after gaining elevated privileges.