Hello aspiring Ethical Hackers. In this blogpost, you will learn about Cross Site Scripting (XSS). Cross-Site Scripting (XSS) attacks are one of the most common web application security threats today. These attacks can allow attackers to steal sensitive data, gain unauthorized access to systems, and compromise entire networks. In this blog post, we will explore what XSS attacks are, their different types, and how to prevent them. In this article, we’ll discuss what Cross Site Scripting is, how it works, types of attacks, how to prevent and detect XSS.
What is Cross Site Scripting?
Cross-Site Scripting (XSS) is a type of security vulnerability that allows attackers to inject malicious code into web pages viewed by other users. The malicious code is typically written in client-side scripting languages like JavaScript, which is executed by the victim’s web browser when they view the infected page. The injected code can then be used to steal sensitive data, such as login credentials or credit card information, or to launch more advanced attacks, such as session hijacking or malware installation.
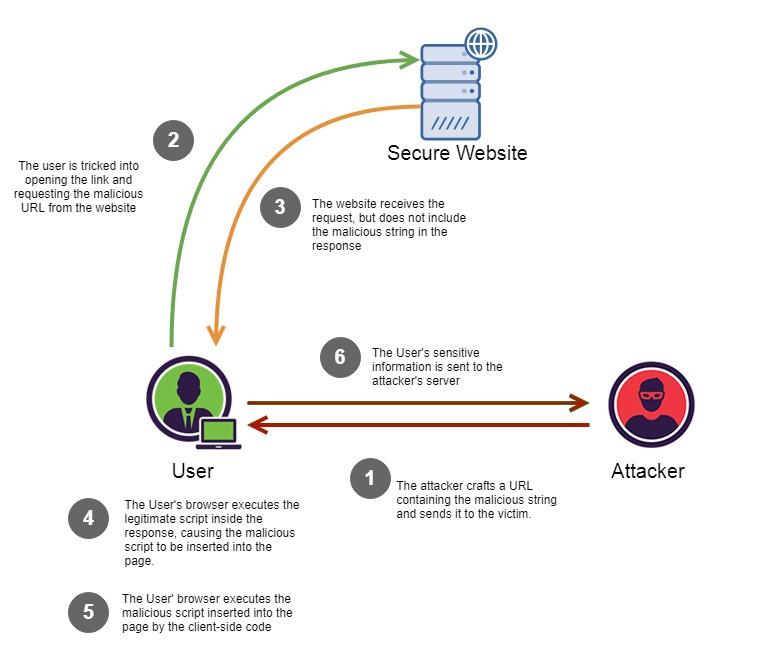
How XSS Works?
Types Of XSS
There are three primary types of XSS attacks: Stored (Persistent) XSS, Reflected (Non-persistent) XSS, and DOM-Based XSS. Let’s take a closer look at each type.
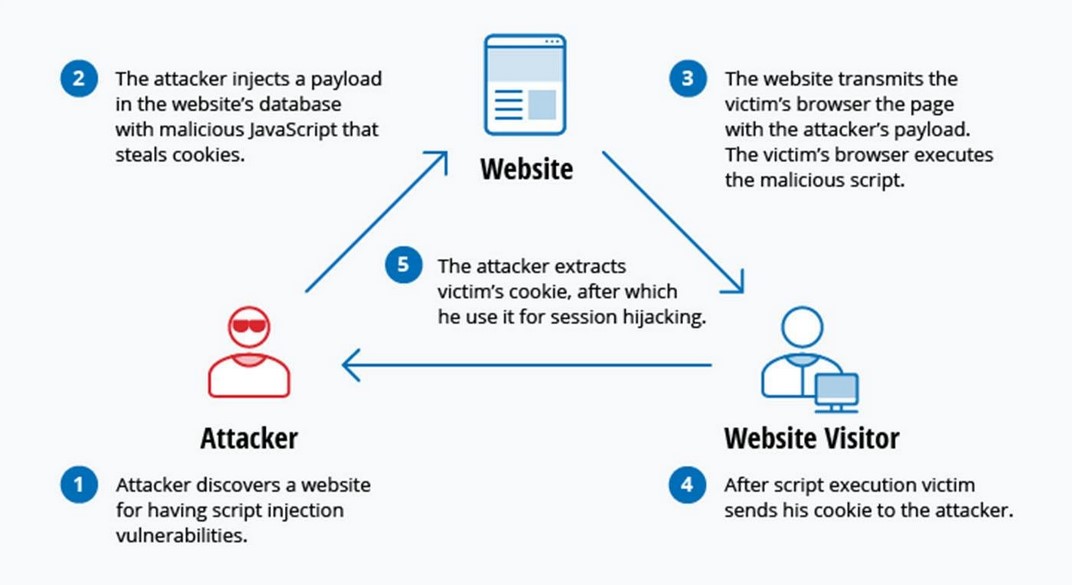
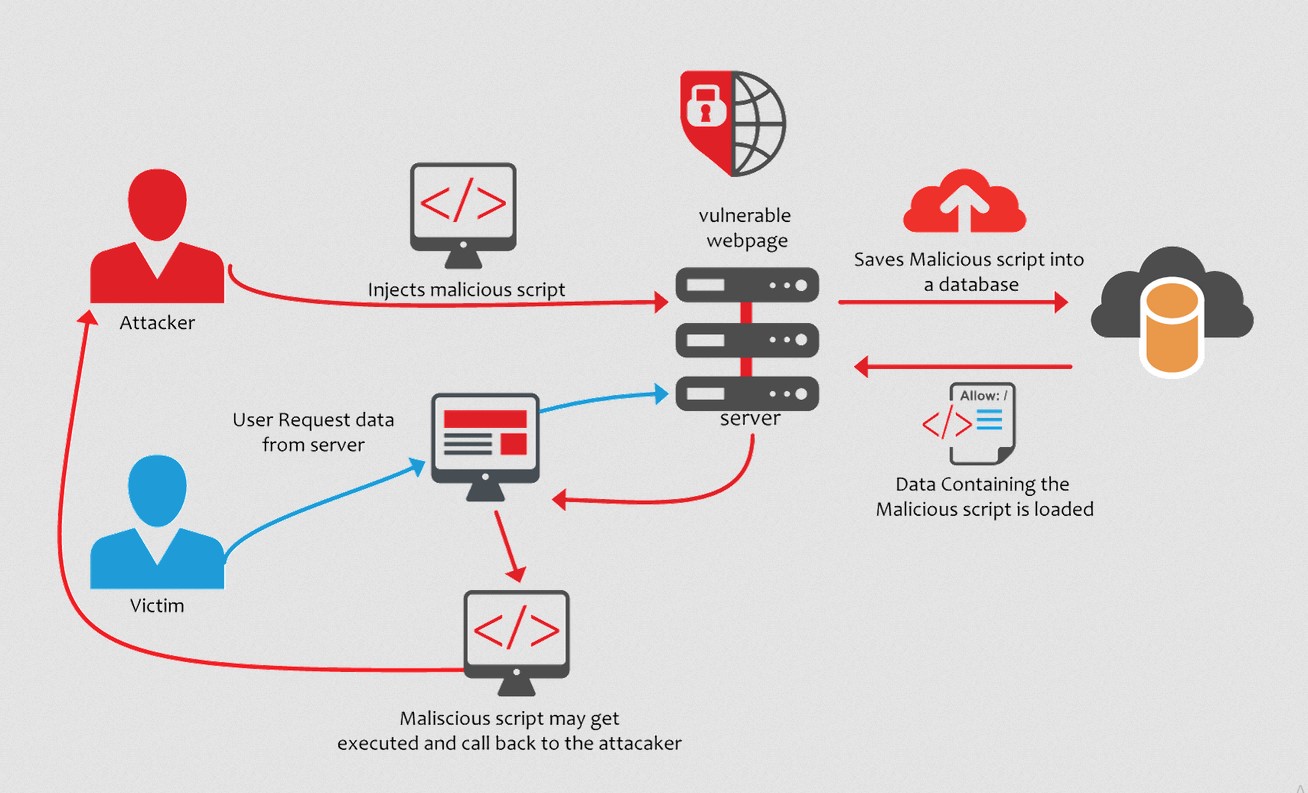
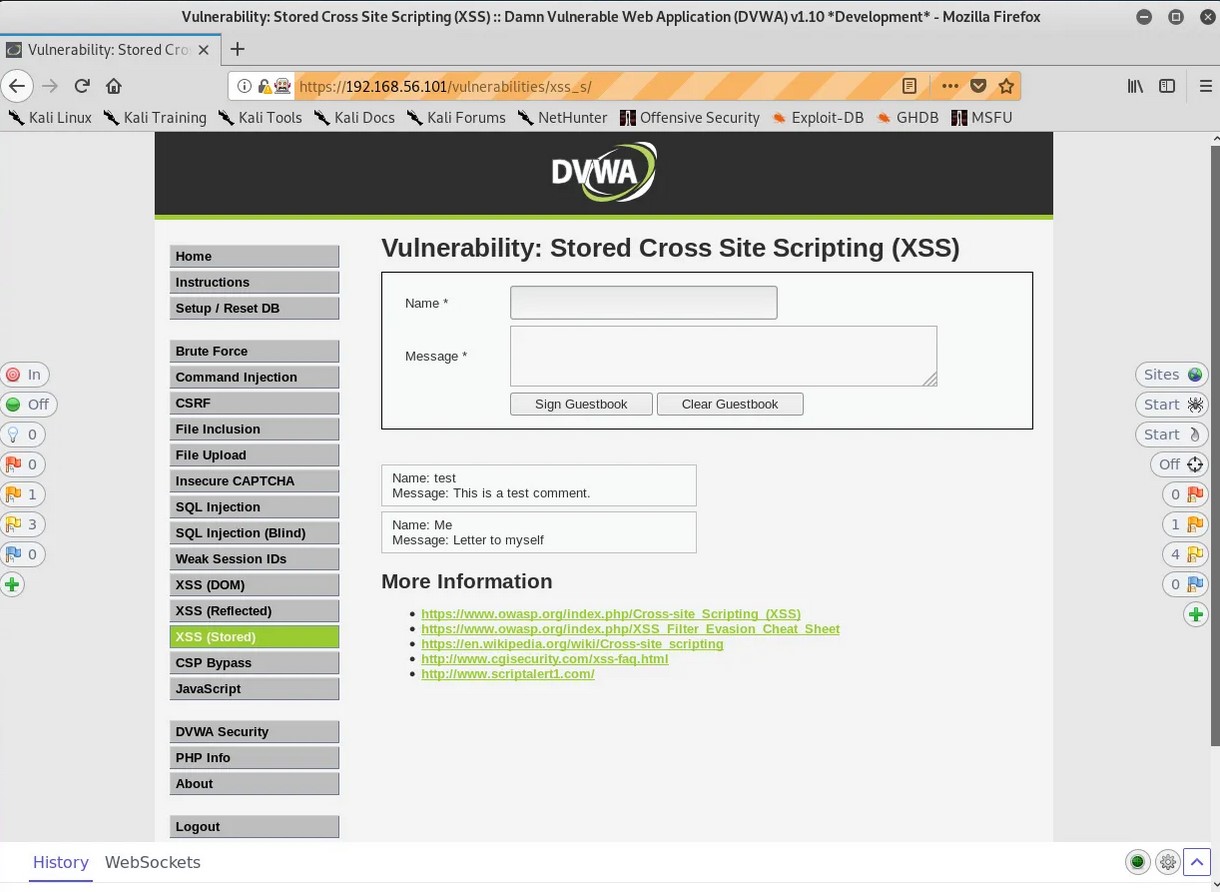
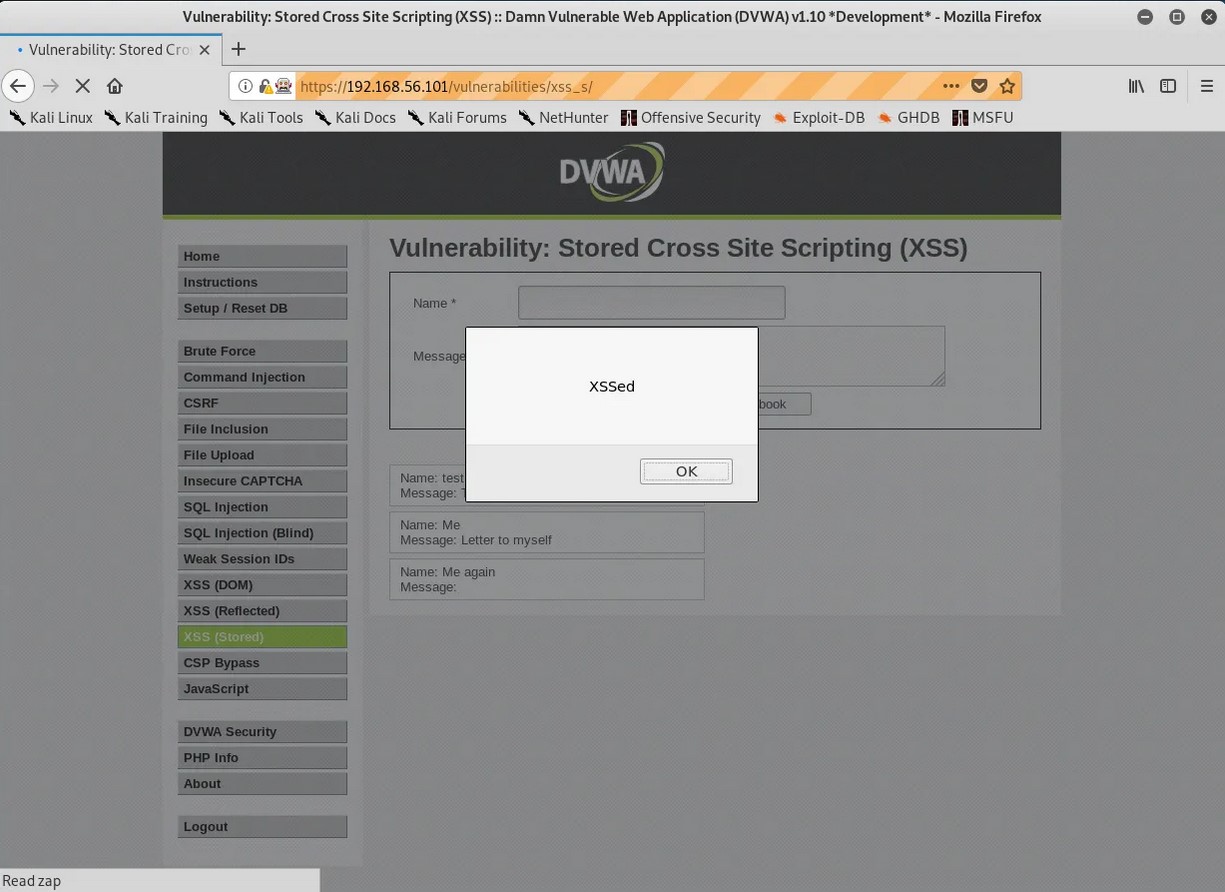
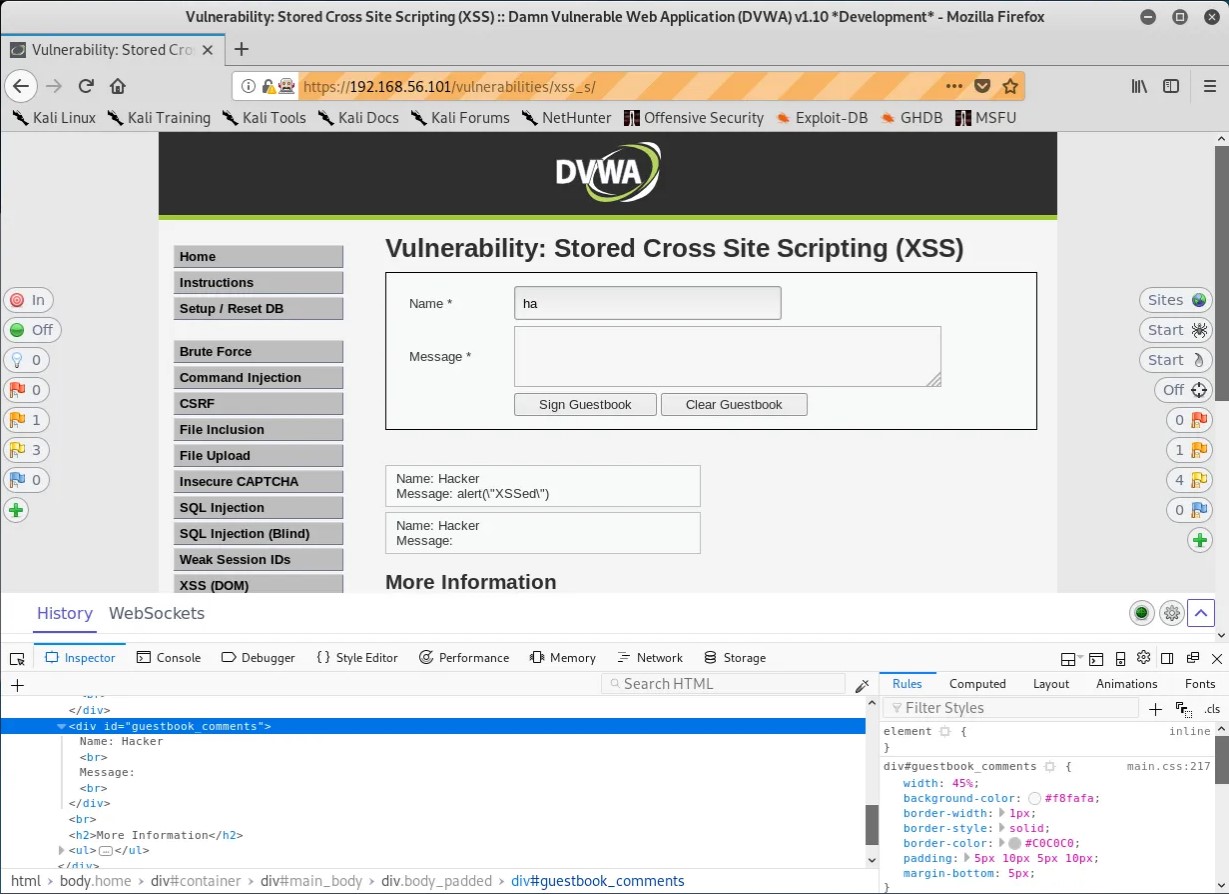
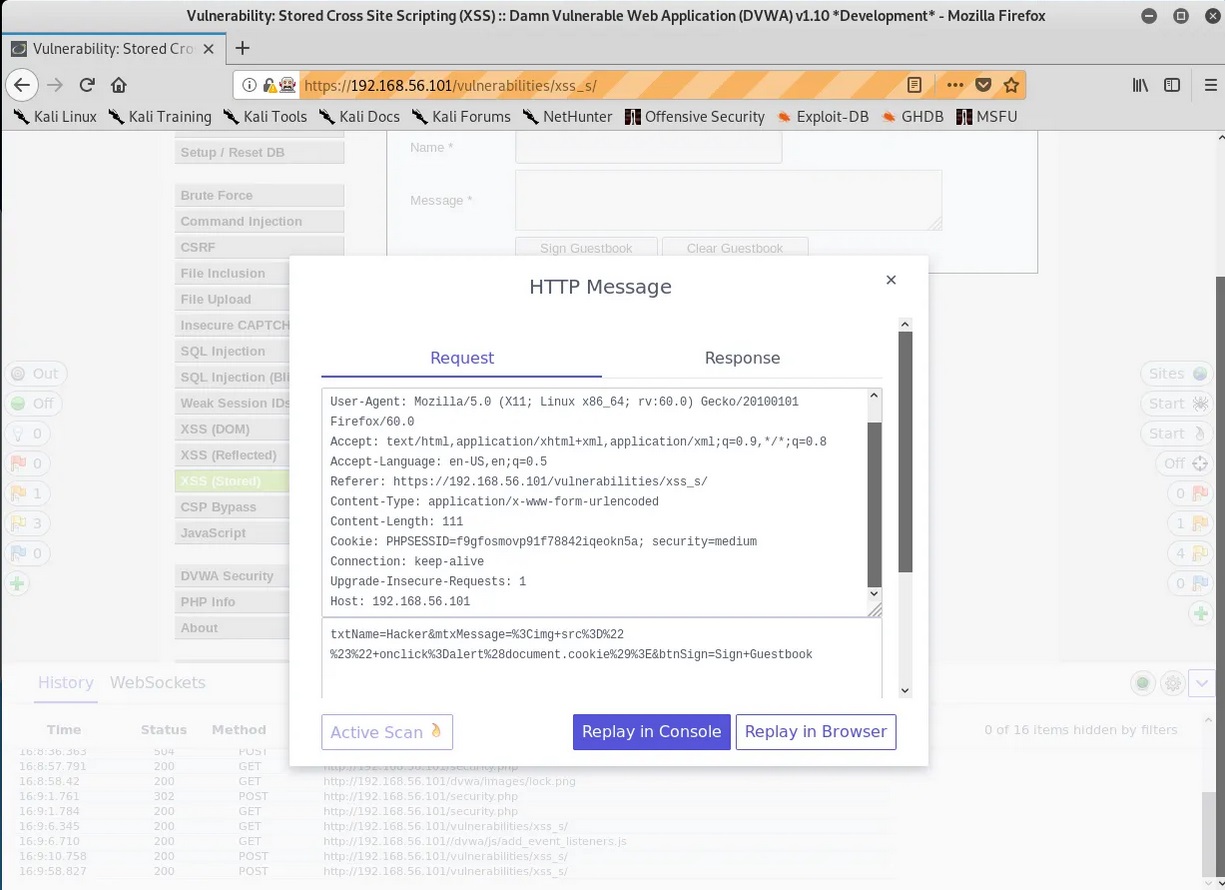
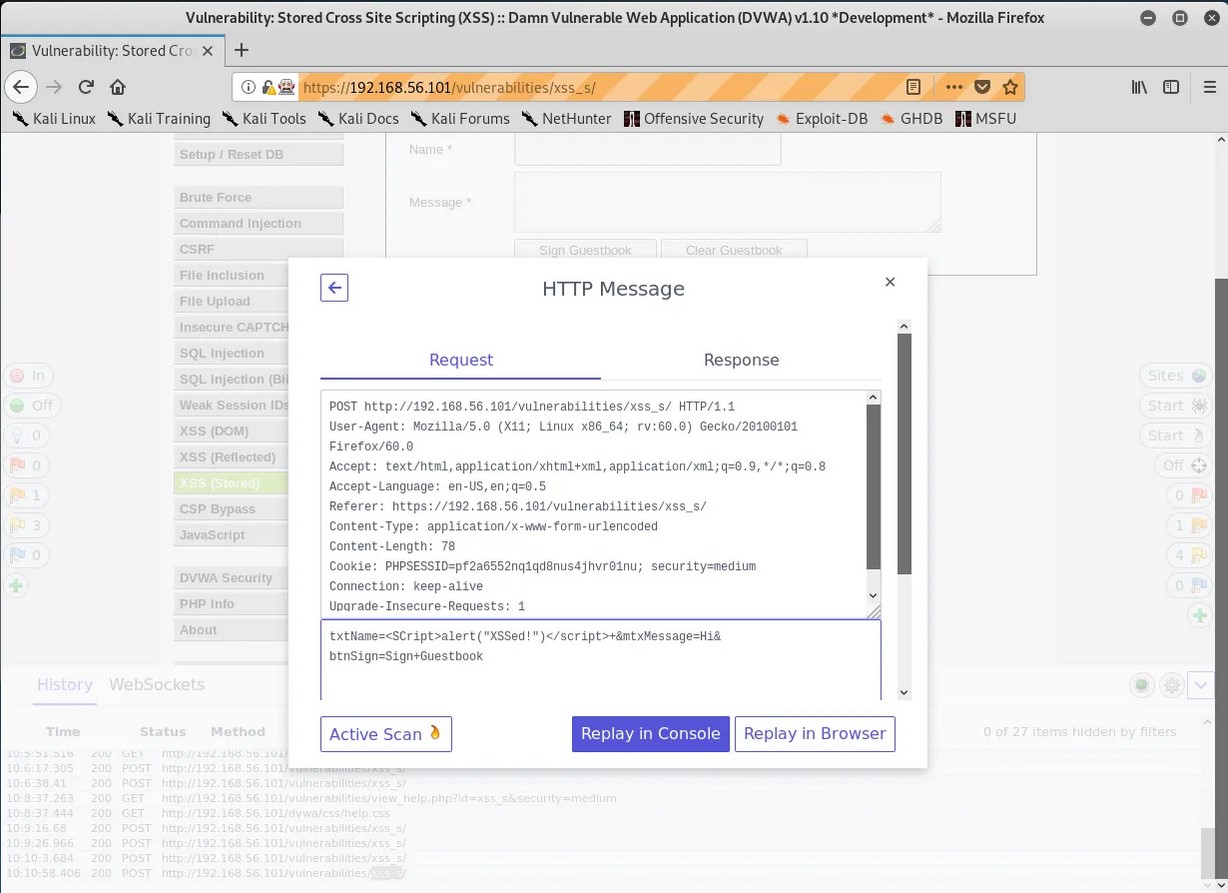
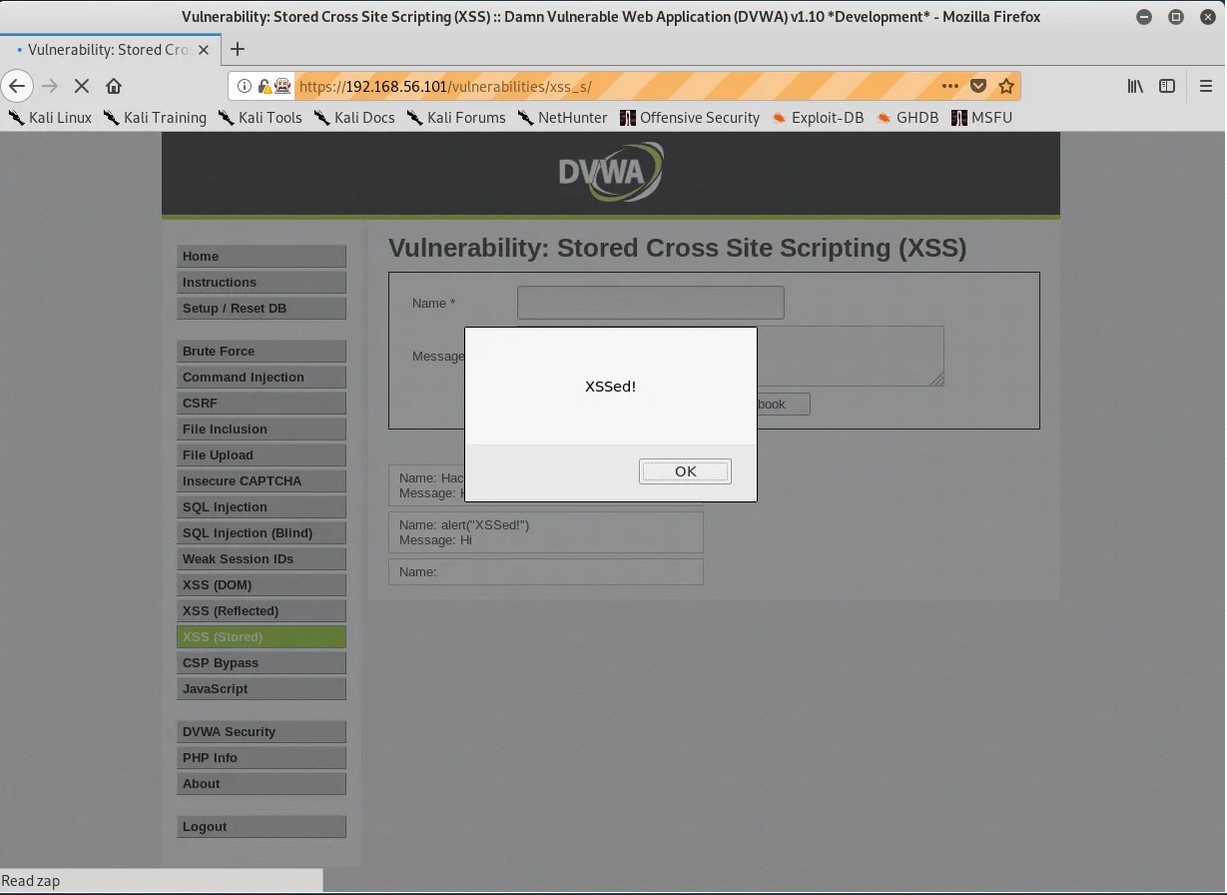
1. Stored (Persistent) XSS:
Stored XSS attacks are a type of XSS attack where the malicious code is injected into a website’s database, and then retrieved and executed by other users who view the infected page. This type of attack is particularly dangerous because the malicious code can be stored on the website for an extended period of time and can infect multiple users.
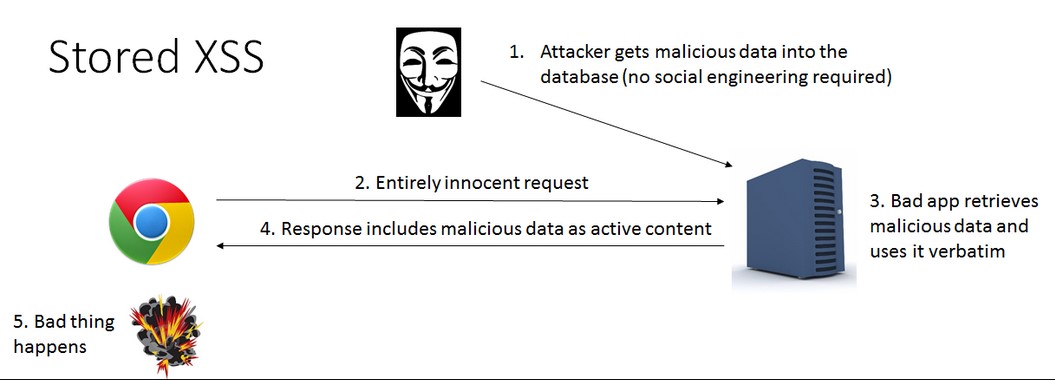
A typical example of a Stored XSS attack is when a user posts a message on a forum or blog containing malicious code. The code is then stored in the website’s database and is displayed to all subsequent visitors to the page, potentially compromising their systems.
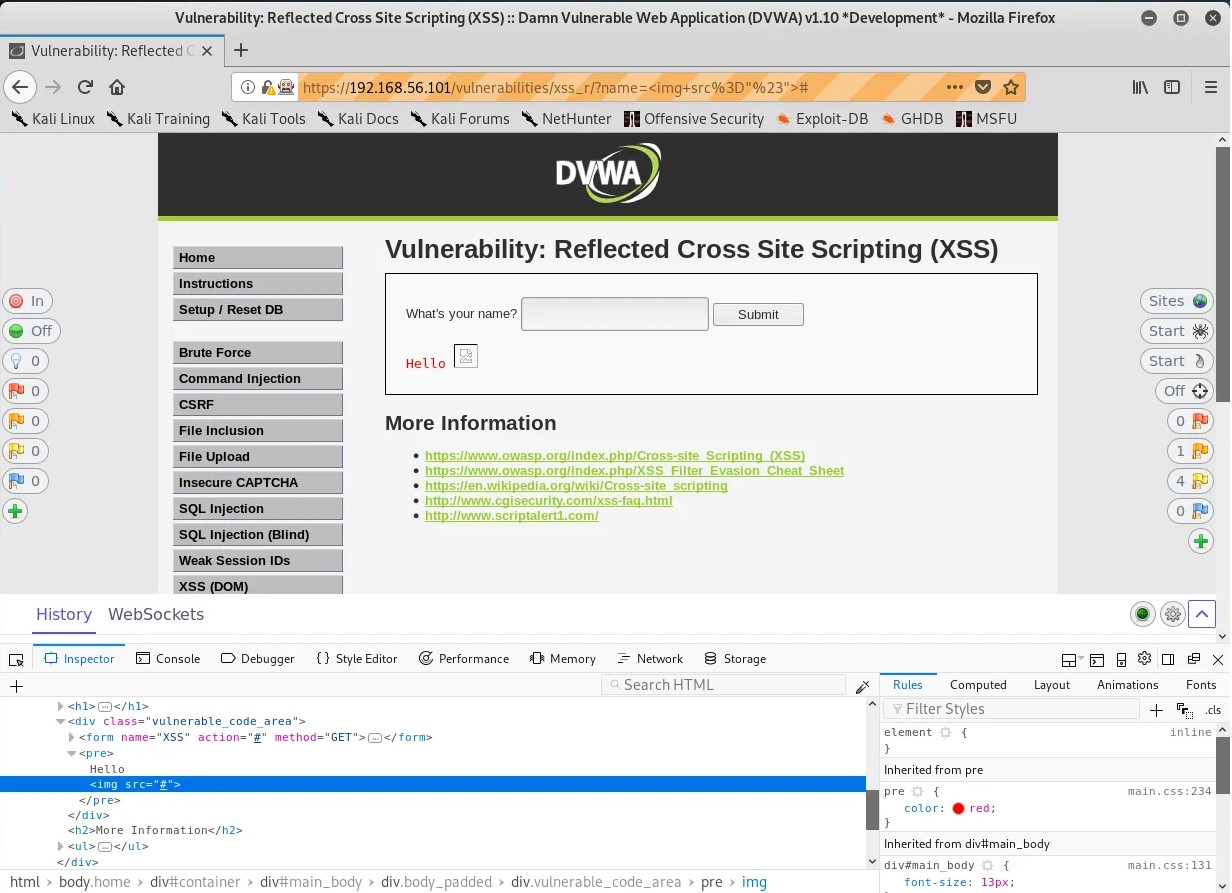
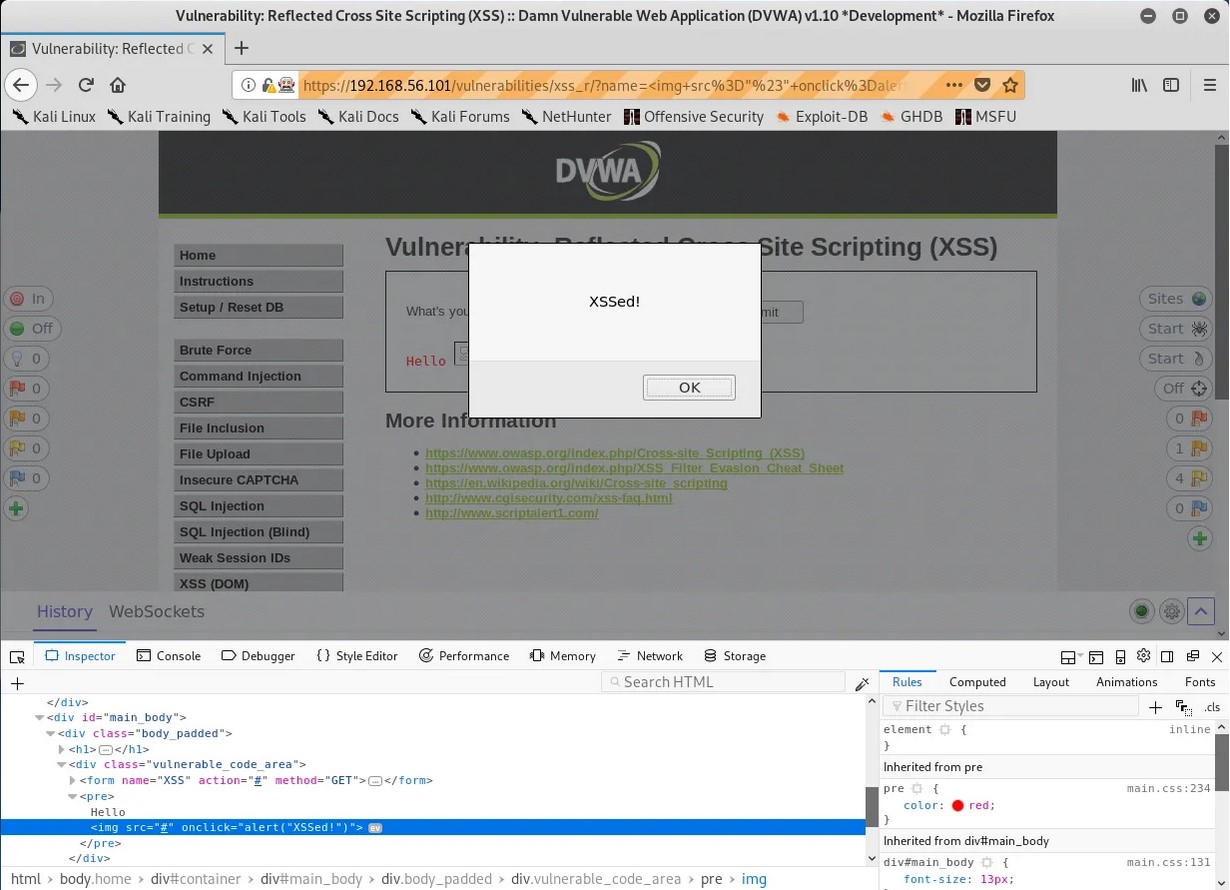
2. Reflected (Non-persistent) XSS:
Reflected XSS attacks are a type of XSS attack where the malicious code is injected into a website’s search field, comment box, or other input field, and then reflected back to the user in the website’s response. This type of attack relies on the user clicking on a link containing the injected code, which then executes the malicious script in their browser.
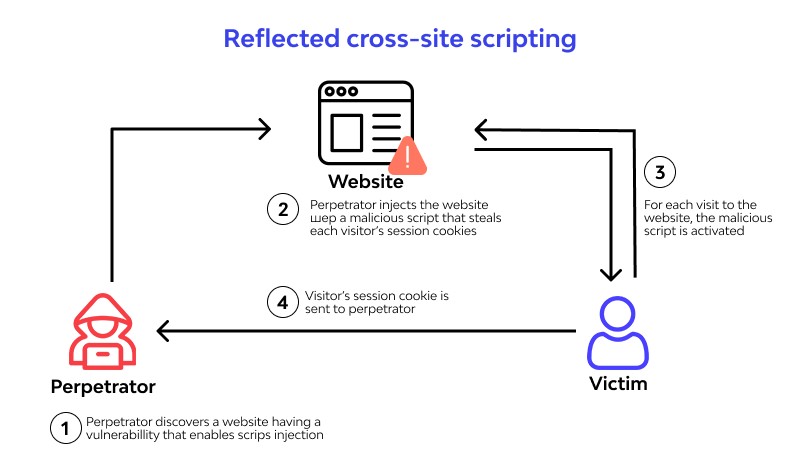
A common example of Reflected XSS is when an attacker sends a phishing email with a link containing the injected code to a victim. When the victim clicks on the link, the code is reflected back to them through the website’s response and executed in their browser, potentially compromising their system.
3. DOM-Based XSS:
DOM-Based XSS is a type of XSS attack where the malicious code is injected into a website’s Document Object Model (DOM) rather than the server’s response. The injected code is then executed by the victim’s browser when the infected page is loaded.
Real World Examples Of XSS
Here are some of the SQL injection vulnerabilities and their exploitation cases in Real World.
1. British Airways:
In 2018, British Airways suffered a data breach due to cross site scripting. Magecart, a hacker group known for its card skimming scripture exploited a cross-site scripting vulnerability in Java script library known as feedify. This Java script library was modified to record customer data and send it to server controlled by Attackers using this, the attackers collected over 3,80,000 credit card details.
2. eBay:
eBay had a XSS vulnerability in its code for a short time at the end of 2015. EBay used an “URL” parameter to redirect users to the right page. However, the value submitted to this url parameter was not validated before it got inserted into the webpage. In the right attacker’s hand this could allow attacker to inject malicious code into the webpage. Luckily this didn’t happen.
Mitigation and Prevention
Preventing XSS attacks involves a range of technical measures and best practices. Some of the most effective strategies include:
1. Input Validation:
One of the most critical measures for preventing XSS attacks is input validation. This involves filtering and sanitizing user input to ensure that only safe and expected characters are allowed. This can be accomplished using a range of methods, including regular expressions, input masks, and whitelisting.
2. Output Encoding:
Another critical measure for preventing XSS attacks is output encoding. This involves encoding all output from the web application to prevent malicious code from being injected into the page. This can be accomplished using a range of methods, including HTML encoding, URL encoding, and JavaScript encoding.
3. Content Security Policy (CSP):
Content Security Policy (CSP) is a security standard that allows developers to define the sources of content that are allowed to be loaded by their web application. By defining a CSP, developers can prevent malicious scripts from executing on their web pages, thereby mitigating the risk of XSS attacks. CSP works by specifying a whitelist of trusted sources for content, such as scripts, stylesheets, and images. Any content that is not from a trusted source is blocked by the browser, preventing it from executing on the page.
4. Limiting the Use of Client-Side Scripting:
Another effective measure for preventing XSS attacks is to limit the use of client-side scripting languages like JavaScript. This can be accomplished by using server-side scripting languages like PHP or ASP.NET to generate dynamic content. By limiting the use of client-side scripting, developers can reduce the attack surface of their web application and minimize the risk of XSS attacks.
5. Using HTTP-only Cookies:
HTTP-only cookies are a type of cookie that prevents client-side scripting languages like JavaScript from accessing them. By using HTTP-only cookies, developers can protect sensitive information stored in cookies from being accessed by attackers through XSS attacks. This can help prevent session hijacking and other types of attacks that rely on stealing session cookies.
6. Keeping Software Up-to-Date:
Finally, it’s essential to keep all software used by the web application up-to-date, including web servers, frameworks, and third-party libraries. Developers should regularly check for security updates and patches and apply them promptly to reduce the risk of XSS attacks.