Posted on

MiTM Attack: Sniffing Images In a Network

Hello aspiring ethical hackers. In this article you will learn how to sniff images in a network using MiTM attack. In our previous article, readers have learnt how plaintext credentials passing through the network can easily be captured by attackers using Wireshark.

In this article, readers will learn about a different type of sniffing. i.e capturing images being transmitted through the network. As good as Wireshark is, it cannot be used to sniff images being sent through the network.

      For this tutorial, we will be needing any program that requires images to be transferred in a network. For this purpose, we will use Netop Vision Pro Classroom Management Software (https://www.codework-systems.com/products/netop/netop-vision-pro/). As its name implies, this is a classroom management software used for distance learning. It has two modules:  the Teacher module and Student module. The Teacher module is installed on one system and the student module is installed on all the student systems. The computer running the Teacher module has complete control over the computer running the student module and the student has no or very small limited role. The Teacher can view the Desktop of the Student’s Desktop to make sure the student is on track.       

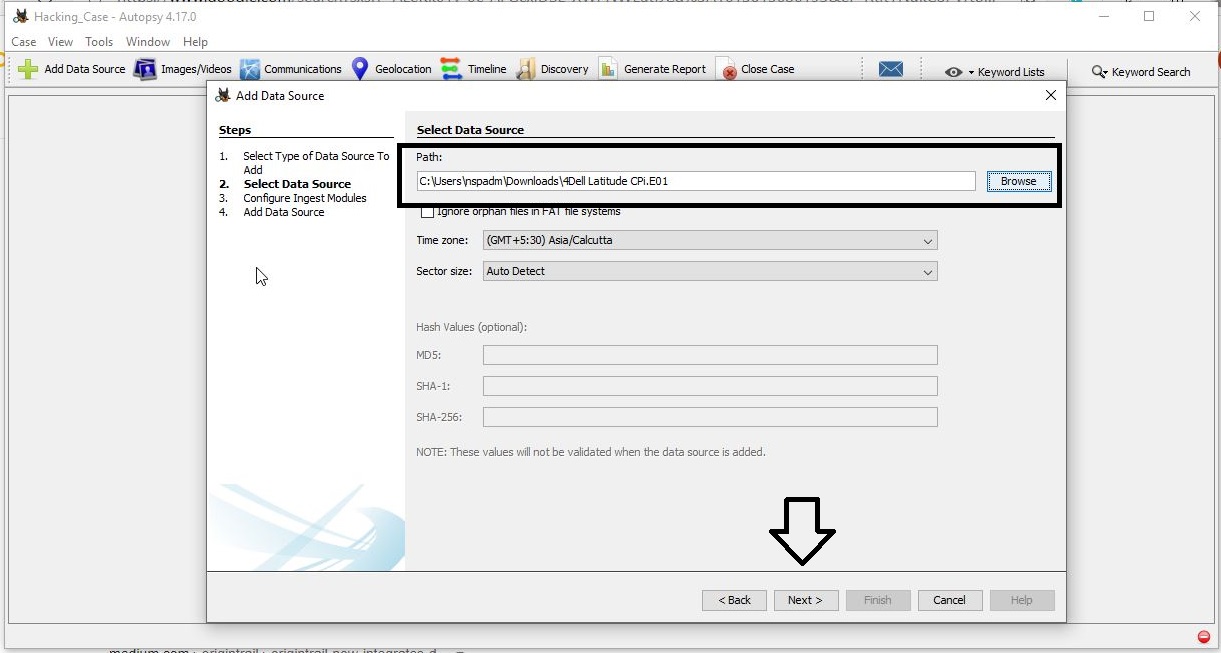
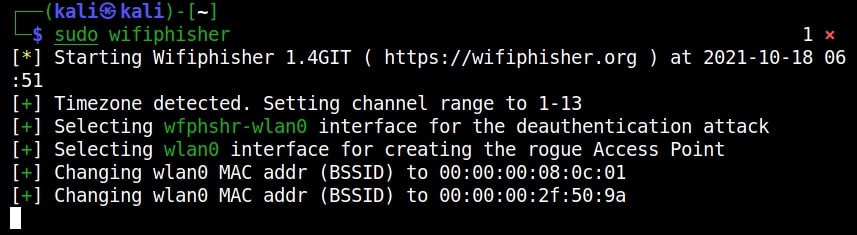
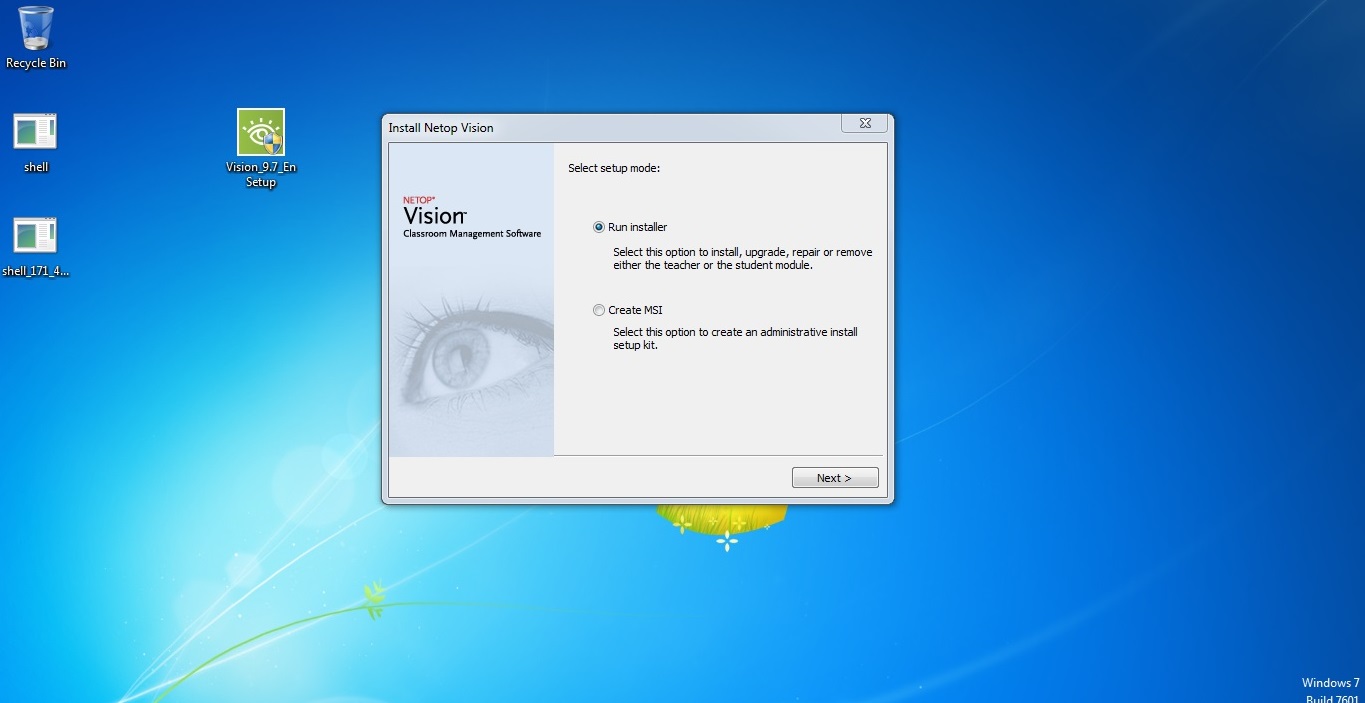
Remember the sniffing lab we used in one of our previous article. In the same Sniffing Lab, we will add three systems: two Windows 7 systems with Netop Vision Student Module installed on one system and Netop Vision Teacher Module installed on another Windows 7 system. The third system is Kali Linux which is the attacker system and used for sniffing images. Let’s setup the Lab first. Download the Netop Vision Pro software onto the first Windows 7 system and click on it. Select the “Run Installer” and click on “Next”.

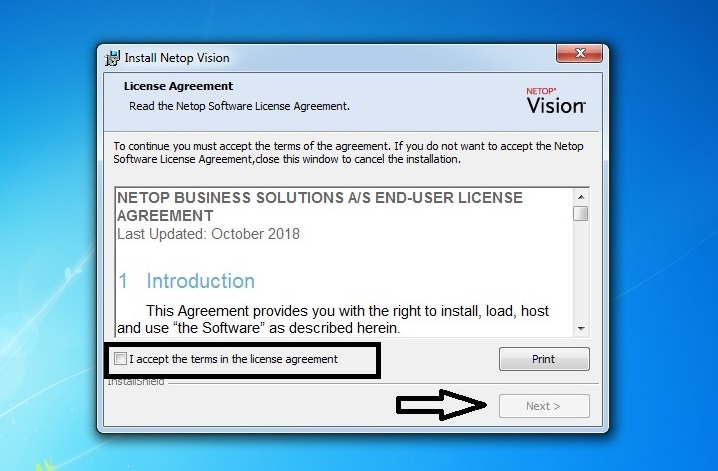
Click on “I Accept The Terms in the license agreement” and click on “Next”.

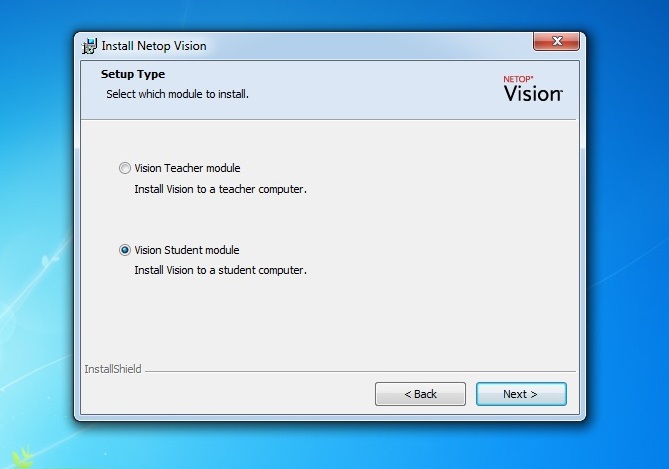
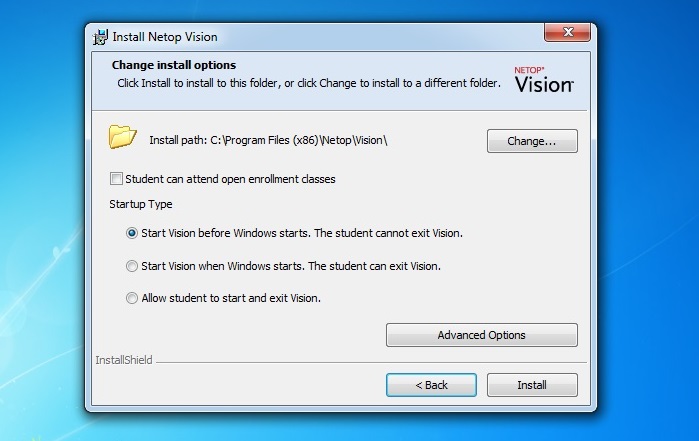
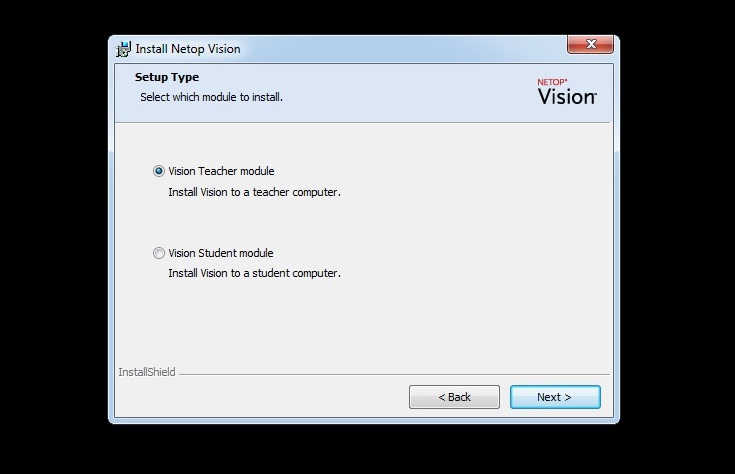
Select the Vision Student Module and click on Next.

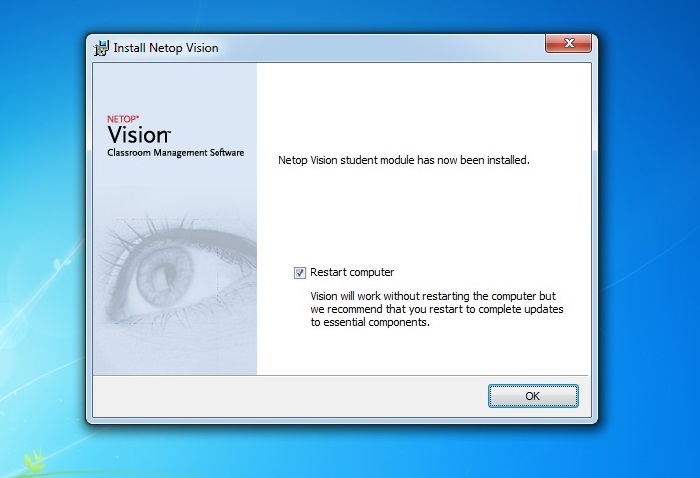
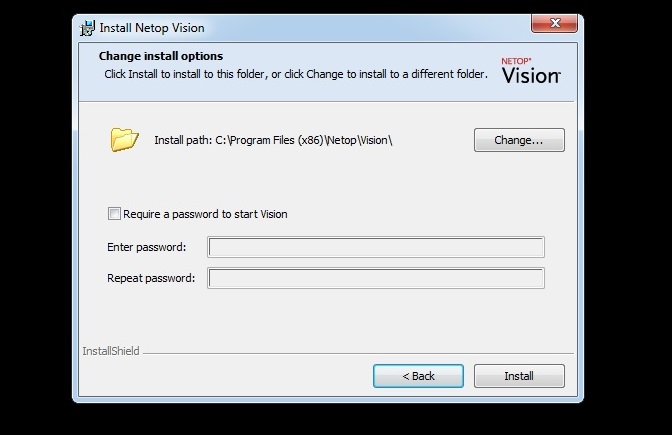
Select the option as a Windows Startup Service and click on Install.

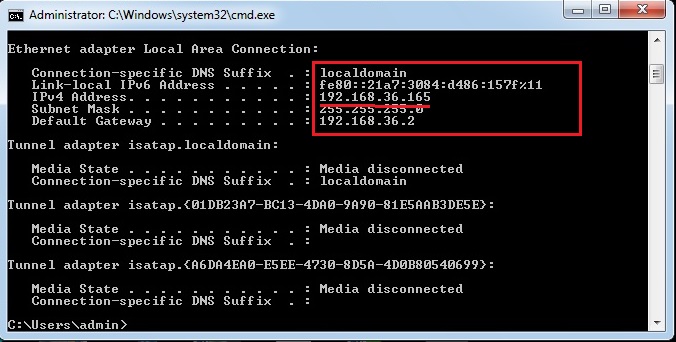
Check the IP address of this system and restart it.

Here’s the Student’s Windows system. There is some program running on it.

Now, in the second Windows 7 system, install the Teacher module of Netop Vision.

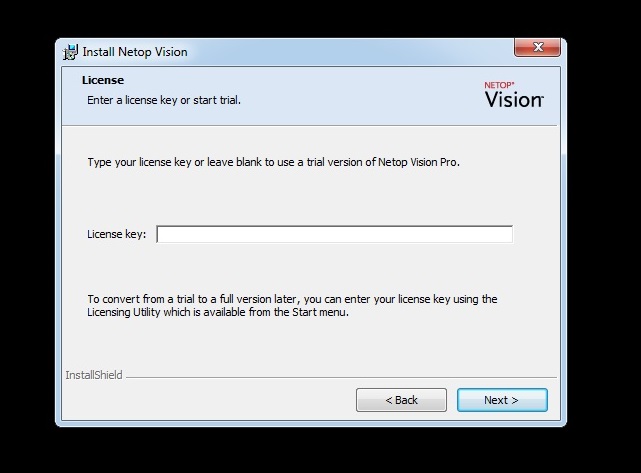
When it prompts for the license key, click on “Next”.

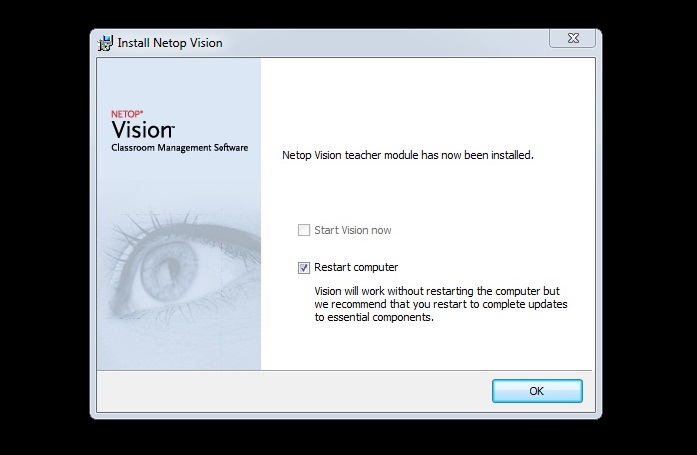
Click OK to restart the computer.

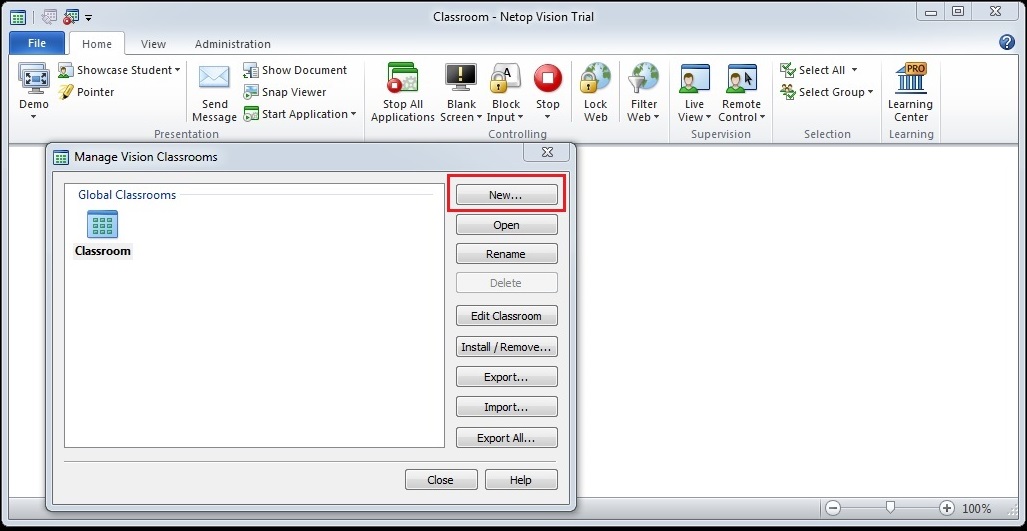
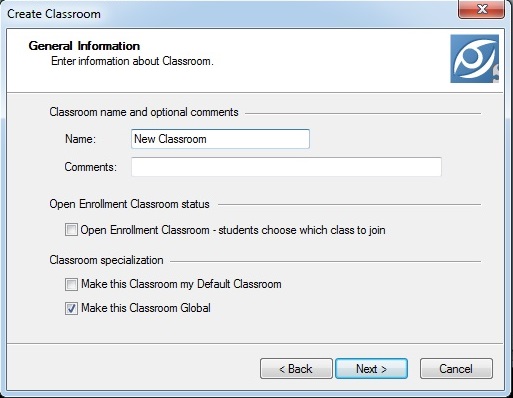
After the computer (on which Netop Vision’s Teacher Module) reboots, open the Netop Vision application. This should open the class room manager window automatically. If that did not happen, open it from the File menu. Create a new classroom. Click on “New”.

Click on “Next”.

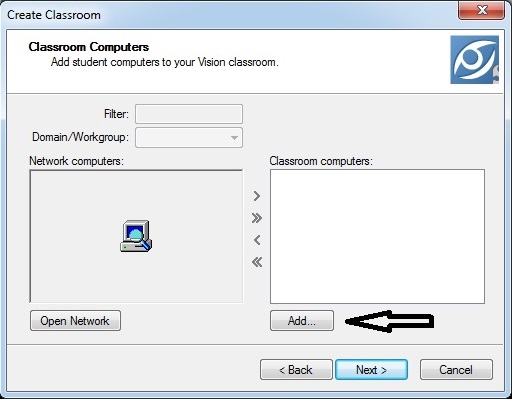
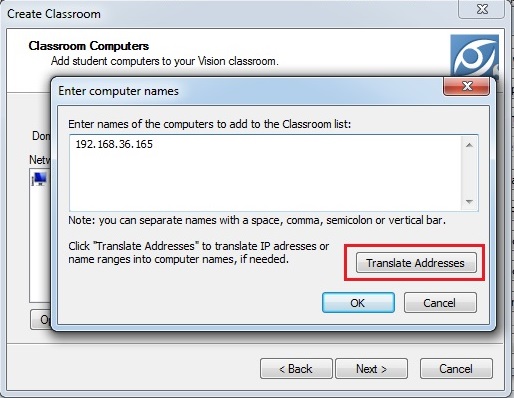
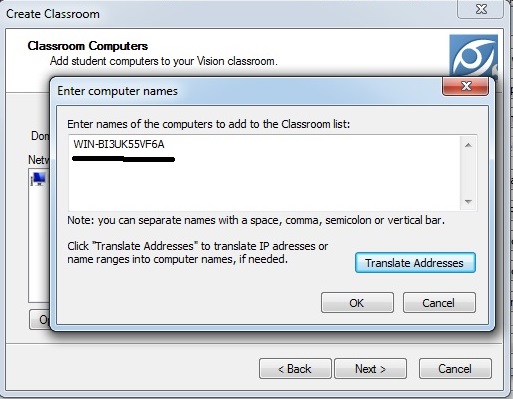
Add the student system. Click on “Add” and add the IP address of the student system as shown below. Then click on “translate addresses”. You will get the IP address translated to the name of the computer. Click “OK”.

Click “Next”.

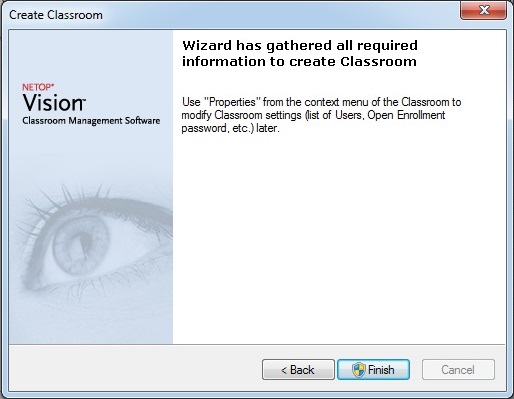
Click on “Finish” to finish the installation.

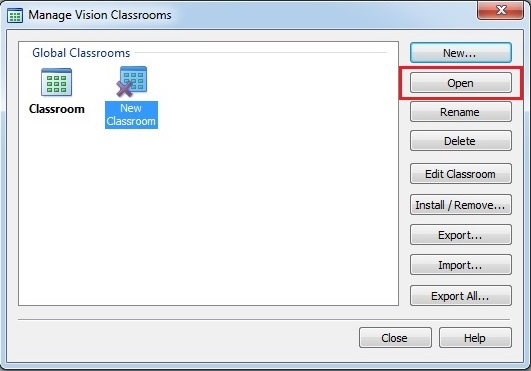
We have set up a new classroom. From the classroom manager, open the new classroom you just created.

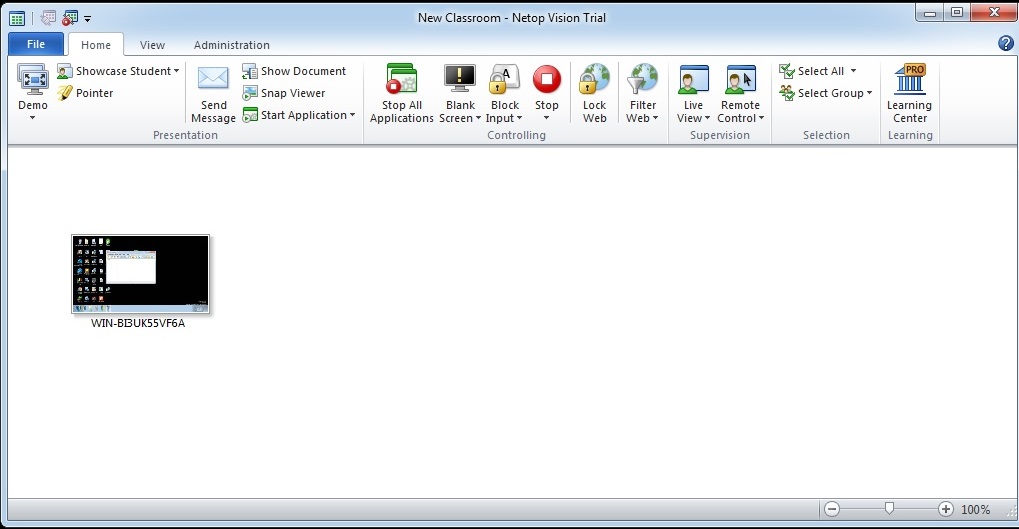
We can see the Desktops of connected Student computers. Since we have connected only one student computer, only one system is shown.

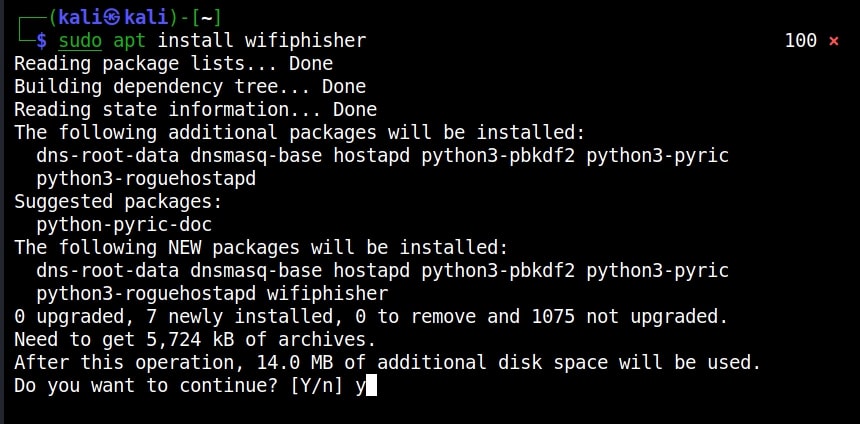
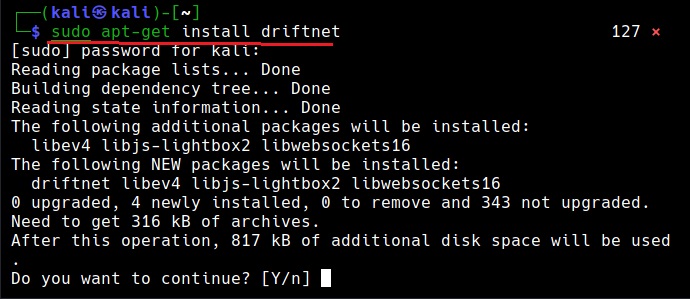
The target is ready. On the Kali Linux system, install the Driftnet tool as shown below.

mitm attack

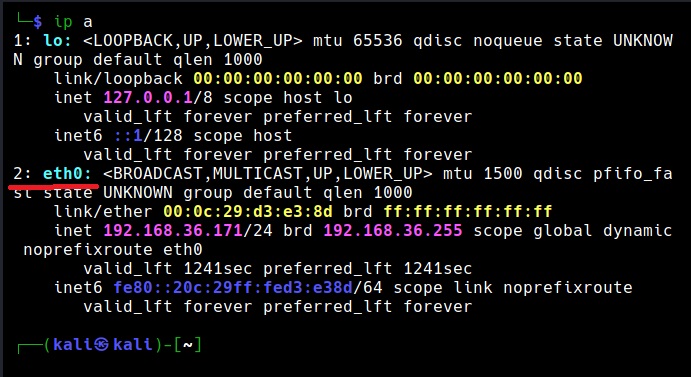
Check the name of the network interface.

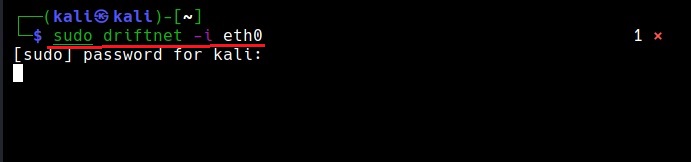
Now all we have to do is to start the driftnet tool on that interface.

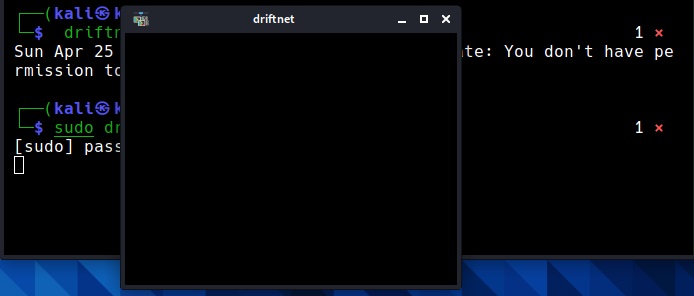
A small window will open as shown below.

When you maximize the window, you can see the live capture of the images of the Student’s Desktop. These images of the student computer are being captured by the teacher module. As already said, the feature is available in Netop Vision classroom management software to monitor student computers. These images are captured at regular short intervals and transmitted in real time to the Teacher computer.

But how are these images being sniffed by Driftnet? Just like in the case of plain text protocols, these images are being transmitted in the network without any encryption. Hence, driftnet has been able to capture them by sniffing on the network.

Posted on

WPS pin is cracked but WPA key is not shown

Hello aspiring ethical hackers. In this article, you will learn how to solve a problem that you experience while cracking WPS pin. We have seen how to retrieve WPA key by cracking WPS pin with both Bully and Wifite. Well, If you get WPA key as soon as you crack WPS pin, you are lucky. However, sometimes the WPS pin is cracked but the WPA-PSK key is not shown. For example, see the image below.

In the above image, we can clearly see that the Wifite cracked WPS pin successfully but failed to get the WPA key. To get the WPA key in such cases, open a new terminal and type the command shown below.

sudo systemctl stop NetworkManager

Then using your favorite text editor open the file wpa_supplicant.conf located in  /etc directory.

You should see the contents of the file as shown below.

If there is any data more than this, delete it and just leave the above three lines. Then, run the command shown below.

sudo wpa_supplicant -i wlan0 -c /etc/wpa_supplicant.conf

Leave this terminal open and open another new terminal window and run the command as shown below.

sudo wpa_cli

It goes into interactive mode.

While interactive mode is active, type the following command as shown below.

status

Many events will take place but what we are looking for is an event that says “connected”.  Once that happens, check the wpa_supplicant.conf file and you should be seeing WPA-PSK key of the wireless network as shown below.

wps pin
Posted on

Digital Forensics with Autopsy : Part 2

Hello aspiring Computer Forensic Investigators. This article is the second part of performing Digital Forensics with Autopsy. Read the first part here. So let’s continue answering the questions presented by the case.  

11. When was the last recorded computer shutdown date/time? 

The last recorded shutdown date and time can be found out in the following file in Windows. 

“C:\WINDOWS\system32\config\software\Microsoft\WindowNT\CurrentVersion\Prefetcher\ExitTime”

digital forensics

The shutdown date and time is 2004/08/27 10:46:27.

12. List the network cards used by this computer?

The information about the network cards on this computer can be found in the Windows file   “C:\WINDOWS\system32\config\software\Microsoft\WindowNT\CurrentVersion\NetworkCards”

There are two network cards on this system. One is a Compaq WL 110 Wireless LAN PC Card and another is Xircom CardBus Ethernet 100 + Modem 56 (Ethernet Interface).

13. A search for the name of “G=r=e=g S=c=h=a=r=d=t” (The equal signs are just to prevent web crawlers from indexing this name; there are no equal signs in the image files) reveals multiple hits. One of these proves that G=r=e=g S=c=h=a=r=d=t is Mr. Evil and is also the administrator of this computer. What file is it? What software program does this file relate to?

The file that reveals all this information is “C:\Program Files\Look@LAN\irunin.ini”

his file belongs to the program Look@LAN.

14. This same file reports the IP address and MAC address of the computer. What are they?

The IP address of this machine is 192.168.1.111 and the MAC address is 0010a4933e09. The LAN user is Mr. Evil. This confirms that Mr. Evil and Greg Schardt are one and the same.

15. An internet search for vendor name/model of NIC cards by MAC address can be used to find out which network interface was used. In the above answer, the first 3 hex characters of the MAC address report the vendor of the card. Which NIC card was used during the installation and set-up for LOOK@LAN?

Media Access Control (MAC) address or the physical address is a 12 digit hexadecimal number hardcoded to the NIC card. The first 3 hexadecimal characters reveal the vendor of the NIC card. There are many websites which offer this service of knowing the vendor of the NIC card. Pasting the MAC address of the computer reveals the vendor.

The Vendor of this NIC card is XIRCOM.

16. What is the SMTP email address for Mr. Evil?

SMTP or Simple Mail Transfer Protocol is a protocol used to send emails. The SMTP email address if present on the system can be found in “C:\Program Files \Agent\Data\AGENT.INI file”.

The SMTP email address is “[email protected]”.

17. What are the NNTP (News Server) settings for Mr. Evil?

This information can be found in the same file as above.

The news server being used is “news.dallas.sbcglobal.net”.

18. What two installed programs show this information?

We searched for local settings of all programs and found the information about this news server in the local settings of Outlook Express.

We found this information in the documents and settings file (and above shown path) of user Mr. Evil.

19.  List 5 newsgroups that Mr. Evil has subscribed to?

We can find this information in the same file as above.

User Mr. Evil subscribed to over 23 news groups. The news groups subscribed by the user Mr. Evil are,

  1. Alt.2600.phreakz  2. Alt.2600  3. Alt.2600.cardz    4. Alt.2600codez  5. Alt.2600.crackz   6. Alt.2600.moderated  7. Alt.binaries.hacking.utilities 8. Alt.stupidity.hackers.malicious   9. Free.binaries.hackers.malicious   10. alt.nl.binaries.hack   11. Free.binaries.hacking.talentless.troll_haven   12. alt.hacking 13. free.binaries.hacking.beginner  14. alt.2600.programz   15. Free.binaries.hacking.talentless.troll-haven   16. alt.dss.hack   17. free.binaries.hacking.computers   18. free.binaries.hacking.utilities 19. alt.binaries.hacking.websites   20. alt.binaries.hacking.computers   21. alt.binaries.hacking.websites  22.           alt.binaries.hacking.beginner   23. alt.2600.hackerz

20. A popular IRC (Internet Relay Chat) program called MIRC was installed. What are the user settings that were shown when the user was online in a chat channel?

We can find this information in the .ini file of the installed program MIRC. The path to this program is in “C:\Program Files\mIRC\mirc.ini”

The user settings that were shown when the user was online and in a chat channel are                        
user = Mini Me                        
email = [email protected]                        
nick = Mr                         
anick = mrevilrulez

21. This IRC program has the capability to log chat sessions. List 3 IRC channels that the user of this computer accessed?

This information can be accessed from C:\Program Files\mIRC\logs file.

The IRC channels that this user accessed are          
Ushells.undernet.log                                             
Elite.hackers.undernet.log          
Mp3xserv.undernet.log                                         
Chataholics.undernet.log          
Cybercafé.undernet.log                                         
M5tar.undernet.log          
Thedarktower.afternet.log                                     
Funny.undernet.log          
Luxshell.undernet.log                                            
Evilfork.efnet.log          
Iso-warez.efnet.log                                                
Houston.undernet.log

22. Ethereal, a popular “sniffing” program that can be used to intercept wired and wireless internet packets was also found to be installed. When TCP packets are collected and re-assembled, the default save directory is that users\My Documents directory. What is the name of the file that contains the intercepted data?

After going through the Documents folder, we found the file that contains the intercepted data. It’s name is “interception”.

23. Viewing the file in a text format reveals much information about who and what was intercepted. What type of wireless computer was the victim (person who had his internet surfing recorded) using?

Viewing the file “interception” in text format revealed that the victim was using Windows CE Pocket PC wireless computer.

24.  What websites was the victim accessing?

Even this information can be obtained from the same file “interception” which is a packet capture file. We found two websites the victim was accessing, Mobile.msn.com and MSN Hotmail Email.

25. Yahoo mail, a popular web based email service, saves copies of the email under what file name?

Yahoo mail saves copies of email under the file name “ShowLetter[1].htm” which is in the temporary internet files folder of the user’s Documents and Settings.

26. Search for the main user’s web based email address. What is it?

This information can be found out in the same file. The main user’s web based email address is [email protected].

27. How many executable files are in the recycle bin?

The contents in the Recycle bin can be found in the RECYCLER folder.

There are in total four executable files in the Recycle bin.

28. Are these files really deleted?

As most of our readers already know, the files that go to the Recycle Bin are not permanently deleted. They are only deleted temporarily and can be restored easily to their actual location in Windows.

29.  How many files are actually reported to be deleted by the file system?

This information can be found out from the INFO2 file.

The actual files deleted are three.

On being asked to find out any evidence that this laptop was used for hacking, we found in our forensic investigation that this laptop belonged to Greg Schardt who also has a online persona “Mr. Evil”. We found his operating system as Windows XP and he was running Ethereal, a packet interception program to capture network traffic. Apart from Ethereal, his system had six other programs which were used for hacking. He was active among many hacking related IRC channels and new groups. Corroborating this evidence with what his associates said about him, we can come to a conclusion that this laptop belonged to Greg Schardt and he was involved in hacking activities. This case can be closed now. Read how to perform forensics on a PDF File.

Posted on

Digital Forensics with Autopsy : Part 1

Hello aspiring ethical hackers. In this article, you will learn how to perform digital forensics with Autopsy. Autopsy is an open source digital forensics tool that acts as a graphical interface for SleuthKit. As our readers will soon see, it is fast and very easy to use this tool. The cross platform tool is used by law enforcement agencies, military agencies and corporate forensic analysts to find out about a hacking attack. It is installed by default in various pen testing distros.

But we have decided to use install Autopsy on a Windows 10 machine. Autopsy can be downloaded from here. After downloading the .msi file, install it just like any other Windows .msi file.

To perform digital forensics, we also need an image of a target computer or any other target device. For this we will use an Encase Image of a suspected Dell Latitude laptop named “Hacking Case” that can be downloaded from here. Here is a feel real back story about this image.

“On 09/20/04, a Dell CPi notebook computer, serial # VLQLW, was found abandoned along with a wireless PCMCIA card and an external homemade 802.11b antennae. It is suspected that this computer was used for hacking purposes, although cannot be tied to a hacking suspect, G=r=e=g S=c=h=a=r=d=t. (The equal signs are just to prevent web crawlers from indexing this name; there are no equal signs in the image files.) Schardt also goes by the online nickname of “Mr. Evil” and some of his associates have said that he would park his vehicle within range of Wireless Access Points (like Starbucks and other T-Mobile Hotspots) where he would then intercept internet traffic, attempting to get credit card numbers, usernames & passwords. Find any hacking software, evidence of their use, and any data that might have been generated. Attempt to tie the computer to the suspect, G=r=e=g S=c=h=a=r=d=t. A DD image and a EnCase image of the abandoned computer have already been made.”

The mission for us is to analyze this Encase Image and answer around 20 questions that solve this case. The questions are also provided by the same people who provided this Hacking Case to us. Let’s start analyzing this image and solve the case. Once the program is installed, open it and click on “New Case”.

autopsy

Give a name to the case. We have named it “Hacking_Case”.

Assign a number to the case and provide the name of the Forensic investigator. Our case number is 00 and the investigator is Luke_Reckah.

Next, select the type of source. Select “Disk Image”.

Select the Data Source. You need to download two Encase Images. Select the first part of the Encase images downloaded.

Next, select all the ingest modules you want to run. Ingest modules are all the tests that can be run on the image to gather information about it. These ingest modules include tests like hash lookup, email parsing etc. We selected all for this.

Autopsy will start analyzing the image. It may take some time to completely analyze the image. However, it will start displaying findings as soon as it finds them. Let the image analysis finish.

After the image analysis is finished, all the extracted information can be found on the left side of the program window.

It’s time to start answering questions related to the case.

1. What is the image hash? Does the acquisition and verification hash match?

In Digital Forensics, as soon as a image is acquired to perform analysis on it, a hash is calculated to check if the file integrity is intact and not compromised. If the acquisition and verification hash do not match, it means our forensic analysis has changed the image which is not at all intended. The image hash is “AEE4FCD9301C03B3B054623CA261959A”. It is found in the File Meta data section.

2. What operating system was used on the computer?

The operating system information can be found in the operating system information of the extracted content.

The operating system is Windows XP.

3. Who is the registered owner? 

The information about the registered owner of the computer is found in the same operating system info section in extracted content.

The name of the owner of this computer is “Greg Schardt”.

4. When was the install date?

The install date can be found in the same operating system info section just below the OS information.

The OS on the computer was installed on 19-08-2004 22:48:27.

5. What is the computer account name?

The computer account name on this computer is found in the same section.

The computer account name is N-1A9ODN6ZXK4LQ.

6. How many accounts are recorded?

The information about the user accounts is found in the Operating system user account section.

There are total five user accounts on the target computer. They are Administrator, Mr. Evil, SUPPORT_388945a0, Guest and HelpAssistant.

7. What is the account name of the user who mostly uses the computer?

 In the same section, the count section shows how many times the user logged in.

The user Mr. Evil has logged in 15 times while the others didn’t even log in once. So Mr. Evil is the user who mostly uses the computer.

8. Who was the last user to logon to the computer?

The information about the last user to logon to this computer can be found from the Date accessed column of the user account.

The last user to logon to this computer is Mr. Evil.

9. Find 6 installed programs that may be used for hacking?

The programs installed on the computer system can be found out from the Installed programs section of the extracted content.

There are total 32 programs installed on the computer and from them, there are seven programs that can be used for hacking. They are Ethereal 0.10.6 v.0.10.6, Network Stumbler 0.4.0, Look@LAN 2.50 Build 29, 123 Write All Stored Passwords, CuteFTP, Cain & Abel v2.5 beta45 and Anonymizer Bar 2.0.

10. Perform a Anti-Virus check. Are there any viruses on the computer?

Malicious files (if any) are found in the Interesting Items section of the extracted content.

There is one malware present on the computer system. It is a zip bomb.

Will be continued in Part 2.

Posted on

Evil Twin Attack

Hello aspiring ethical hackers. In this article, you will learn about Evil Twin Attack. Till now in our blog, readers have learnt about various wireless hacking tutorials like cracking WEP, cracking WPA/WPA2 and cracking WPS. Almost all of these hacking methods involved brute forcing or password cracking. What if there was another easier way to hack wireless networks without the need of brute forcing. 

Well, Evil Twin Attack is one such attack. An evil twin attack is a wireless attack in which a fake Wi-Fi access point is set up with the same SSID as that of the original one. This fake access point appears to be legitimate but is actually set up to eavesdrop on wireless communications of the original one. The evil twin is the wireless LAN equivalent of the phishing scam.

Since it has the same name, it’s called twin and as it is malicious it can be termed Evil Twin. The aim of this attack is to confuse users trying to connect to the target Wi-Fi network and make them connect to the Evil Twin instead and thus capture sensitive data. Let’ s see it practically. There are many tools that can be used for this attack but let’s use a tool called Wifiphisher because it’s the simplest one. Our Attacker system is Kali Linux. Wifiphisher can be installed on Kali Linux as shown below.

Once installation is finished, Wifiphisher can be started using command.

sudo wifiphisher

Then the tool will prompt you to select the Wi-Fi Access Point of which you want to create an Evil twin.

For this tutorial as always (OK, most of the time) I will select the Wi-Fi network “Hack_Me_If_You_Can” as my target.

The tool will prompt you the available phishing scenarios available. For this case, OAuth Login Page attack is available.

The OAuth Login Page attack creates a fake login page asking for credentials of the users who want to connect. Note that while creating a fake access point, it is created as an open network unlike the one we are targeting. I select the OAuth Login Page attack and the attack starts.

So just imagine while we are running this Fake access point, some mobile user is looking for available Wi-Fi networks to connect to. He will see two networks with the same name and gets confused. Once he selects our Evil Twin to connect to, he will be prompted with a login page as shown below.

evil twin attack

Here, he is being asked to submit his Facebook credentials of course by dangling the carrot of free internet. The login page is so believable even to me. And if the user falls for the trick (or carrot) and submits his credentials as shown below.

On Kali Linux, the activity is recorded as shown below.

and the credentials are captured successfully.

That looked simple enough. But where can Evil Twin Attack become successful? In many areas but especially where there are free Wi-Fi access points. Imagine creating an Evil twin with the same name as the original.