Posted on

Metasploit Framework: Beginners guide

Hello, aspiring ethical hackers. In our previous blogpost, you learnt in detail about Pen testing. In this blogpost you will learn about the perhaps the most popular penetration testing software suite, Metasploit Framework. Metasploit Framework (MSF) is free, open-source pen-testing suite that is used to execute exploits and develop code against a remote target machine. Although it sis made for penetration testers, it is also used by Black Hat Hackers around the world.

History

Metasploit was originally written by H.D.Moore, an American network security expert, open-source programmer and hacker. He has been the chief Architect of Metasploit Framework until his departure from Rapid7 company in 2016. Originally written in Perl, Metasploit was rewritten in Ruby programming language by 2007. In 2009, it was acquired by Rapid7. Metasploit is available for Windows, Mac and Linux. Metasploit is so widely used that it is included in every ethical hacker os like Kali and Parrot Security.

Structure of Metasploit

Metasploit Framework is the name given to the free version of Metasploit. The role of Metasploit in penetration testing comes after the stage of port scanning and vulnerability scanning (Information from tools such as NMap, Nessus and OpenVAS etc can even be imported into Metasploit). Metasploit is built with a modular approach. For beginners, Metasploit can be complex and a bit difficult to understand. Let’s learn in detail how to run Metasploit.

Let’s start with Metasploit modules. The most important modules of Metasploit are Exploit, Payloads, POST, Auxiliary, Evasion and Encoder modules. Let’s learn about each one of them now.

1. Auxiliary modules:

Auxiliary modules in Metasploit perform simple functions like scanning, enumeration, gathering information, logging in into services etc. They have single function. At the time of writing this article, there are over 1267 auxiliary modules in Metasploit.

2. Exploit modules:

Exploit modules are exploit codes written in Ruby. They exploit the vulnerabilities to execute arbitrary code on the target system. At the time of writing this article, there are over 2461 exploit modules in Metasploit.

3. Payload modules:

The arbitrary code that is executed by the exploit modules of Metasploit is known as payload. At the time of writing this article, there are over 1468 payload modules in Metasploit.

4. Encoder modules:

As the name of the module suggests, Encoder modules of Metasploit take raw bytes of a payload as input and run some sort of a encoding algorithm like XOR, Bitwise XOR on the payload code. At the time of writing this article, there are over 49 encoder modules in Metasploit.

5. Evasion modules:

Evasion modules are used to generate payloads that evade Antivirus. At the time of writing this article, there are over 9 evasion modules in Metasploit.

6. POST modules:

POST modules are those modules of Metasploit that are useful during POST exploitation phase of the pen test. At the time of writing this article, there are 431 POST modules in Metasploit.

How to use Metasploit Framework?

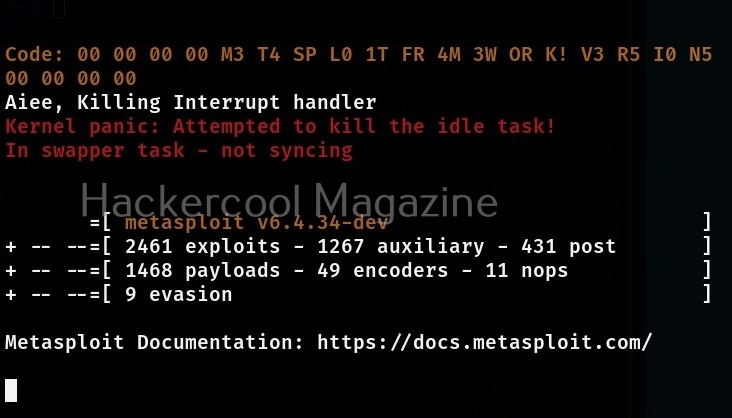
Let’s see how to use Metasploit for beginners. We will be using Metasploit in Kali Linux as it is already installed. To start Metasploit, open a terminal and type command shown below.

msfconsole
Metasploit Framework 1
Metasploit Framework 2

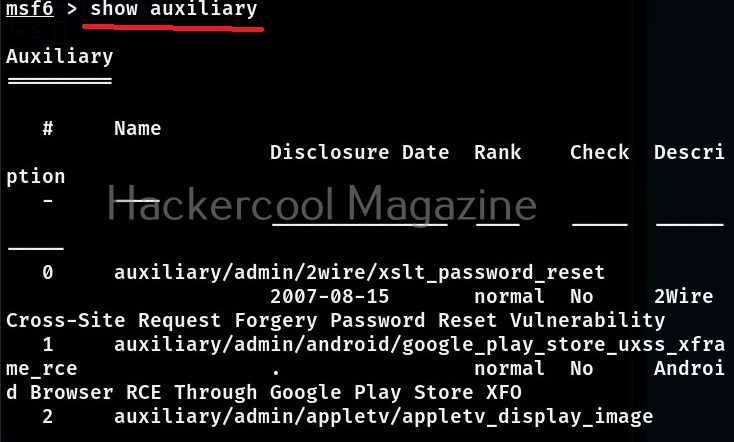
To see all the auxiliary modules of Metasploit, use the command shown below.

show auxiliary
Metasploit Framework 3

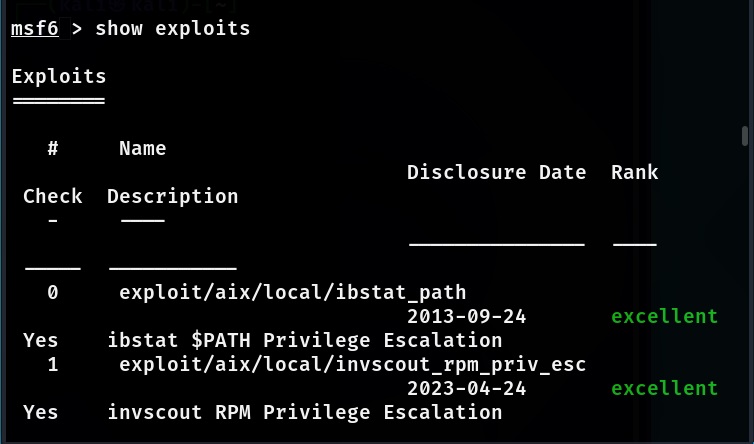
Similarly all the exploits in Metasploit can be seen using the command shown below,

show exploits
Metasploit Framework 0

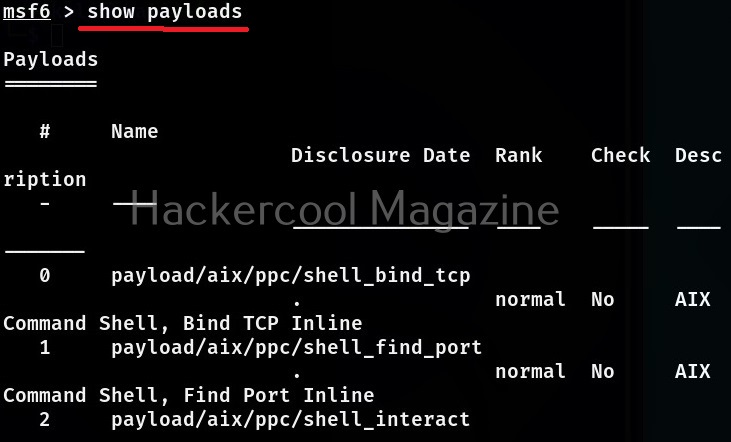
To view all the payloads in Metasploit, you can use the “show payloads” command.

show payloads
Metasploit Framework 4

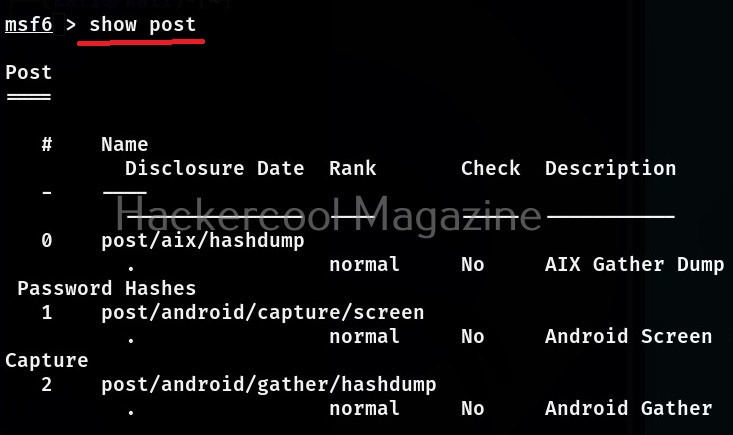
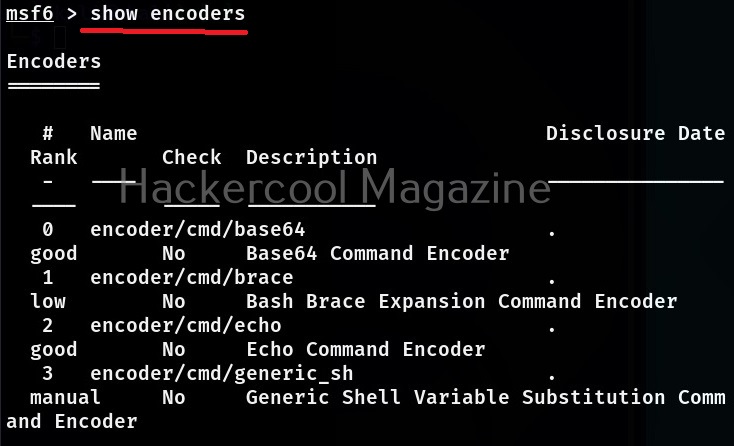
The same commands can be used to view all the encoder, evasion and POST modules of Metasploit respectively.
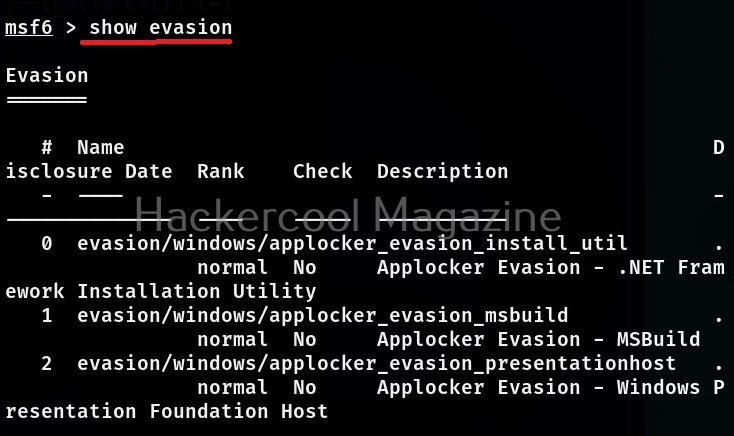
Metasploit Framework 5
Metasploit Framework 6
Metasploit Framework 7

Now, let’s come to the realistic use of Metasploit. As I already told you at the beginning of this blogpost that the use of Metasploit comes after the stage of footprinting and scanning. As part of vulnerability scanning, we happen to find that one of the devices in the target network is vulnerable to Bluekeep vulnerability.

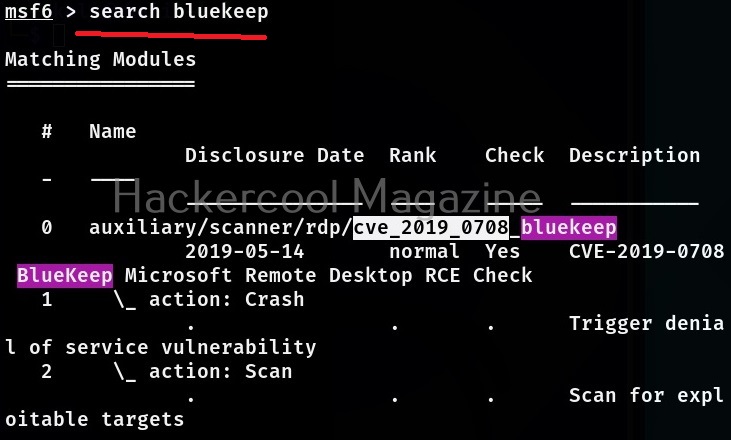
Now, let’s see how to exploit this vulnerability with Metasploit. The first to do after starting Metasploit is to use the search function of Metasploit to search for the exploit we need. For example, “bluekeep” as shown below.

Metasploit Framework 8

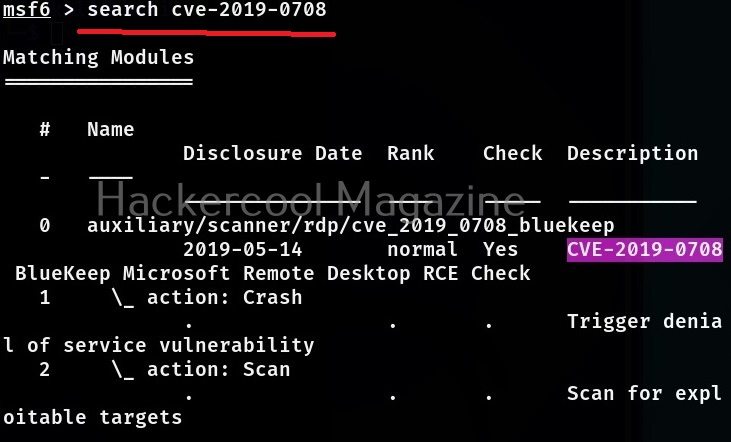
Metasploit has a very versatile search function. You can also search using the CVE ID of vulnerability as shown below.

Metasploit Framework 9

No matter how you search, Metasploit will show all the modules related to particular vulnerability you searched for. Since, I already know the target machine is vulnerable to Bluekeep vulnerability, I select the exploit module for this vulnerability. To load this module, we can use (literally) and load the module using the entire name of the module or its serial number given at the begining.

Metasploit Framework 11
Metasploit Framework 12

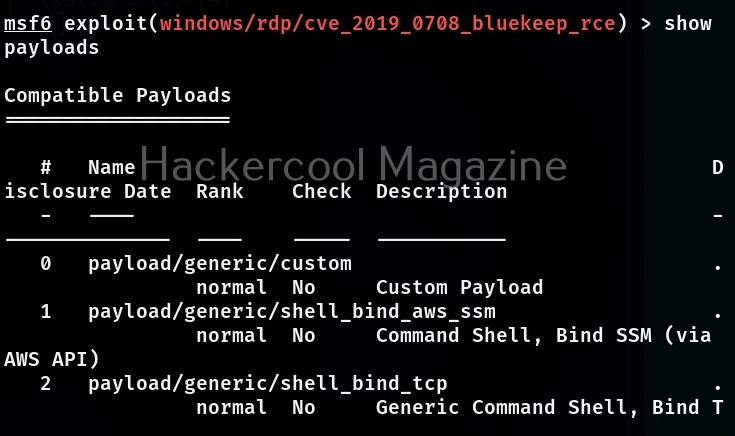
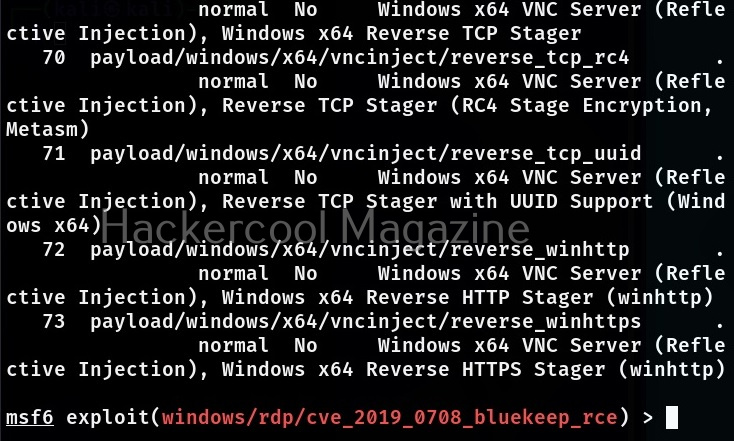
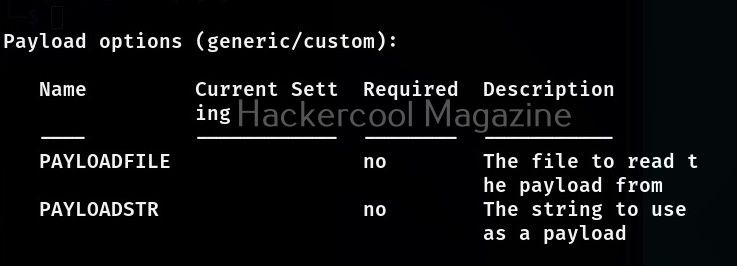
A payload most probably METERPRETER payload is assigned by default as soon as you load the exploit module. If you want to set a different payload other than the default one, you can use “show payloads” command to see all the payloads supported by the selected module. Unlike earlier this will not show all the payloads of Metasploit but only the ones supported by this exploit module.

Metasploit Framework 16
Metasploit Framework 17

To assign a new payload, we use the “set” command in the same way as we used the “USE” command earlier.

Metasploit Framework 18

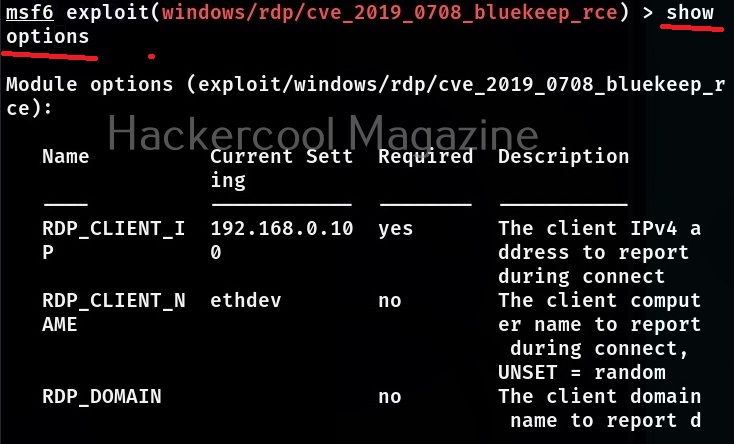
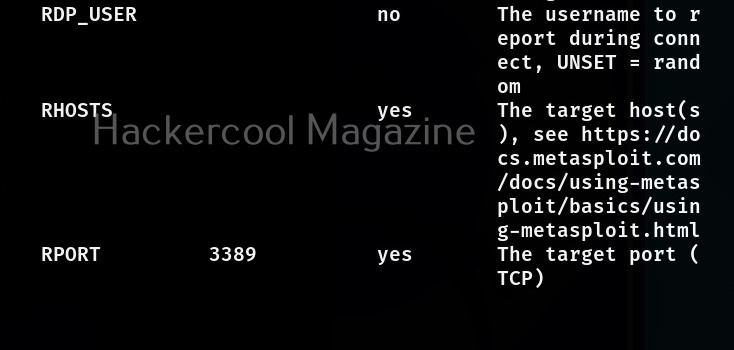
Then we use the “show options” command to see all the options required for this module to work after selecting the payload. The required options are marked with “yes” in the required column.

Metasploit Framework 13
Metasploit Framework 14
Metasploit Framework 19

This module required the RHOSTS option which is the IP address of the target system. All the required options can be set with the SET command as shown below.

Metasploit Framework 20

After all the required options are set, all we need to do is execute the module using “run” command or “execute” command. You can see Metasploit module in action in our blogpost on exploiting ms08_067 vulnerability.

Learn how to upgrade a normal command shell to meterpreter session.

Learn how to perform Windows POST exploitation with Metasploit.

Learn how to perform HTA attack with Metasploit.

Posted on

Beginners guide to MAC spoofing

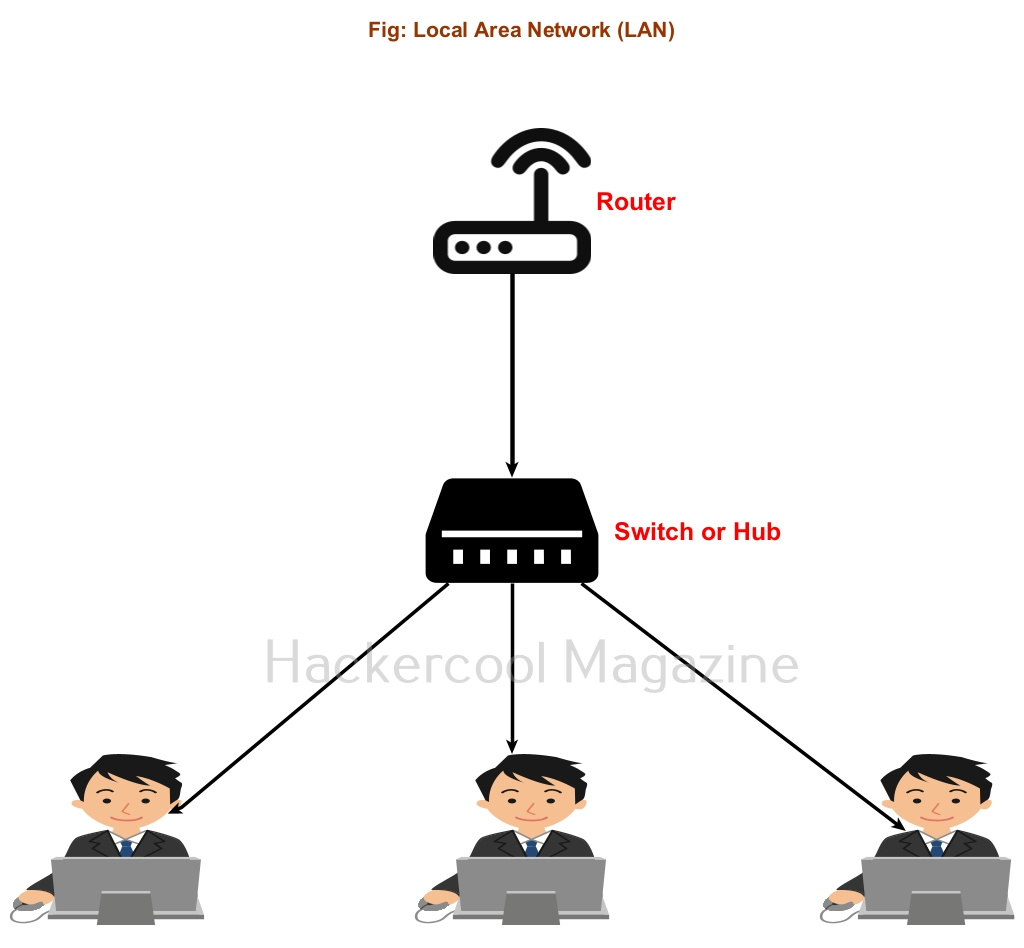
Hello, aspiring ethical hackers. In our previous blogpost on data link layer attacks, you learnt what is a hub, What is a switch, how they both work, what is a MAC address, what is a CAM table and different types of LAN attacks etc. In this blogpost, you will learn about one of the LAN attacks, MAC Spoofing.

What is MAC spoofing?

MAC Spoofing is a technique in which a factory assigned Media Access Control (MAC) address of a network interface is changed or altered. As communication between devices in a single LAN takes place using the MAC address of the device, changing the MAC address to that of another device will make all the traffic belonging to that device visible to the attacker.

For example, let’s say there are two devices A and B. An attacker changed the MAC address of the device “A” to that of “B”. Then all the traffic belonging to “B” will be coming to “A” and the attacker can sniff this traffic. MAC spoofing attack can be performed after gaining access on the target network.

How can MAC address be changed?

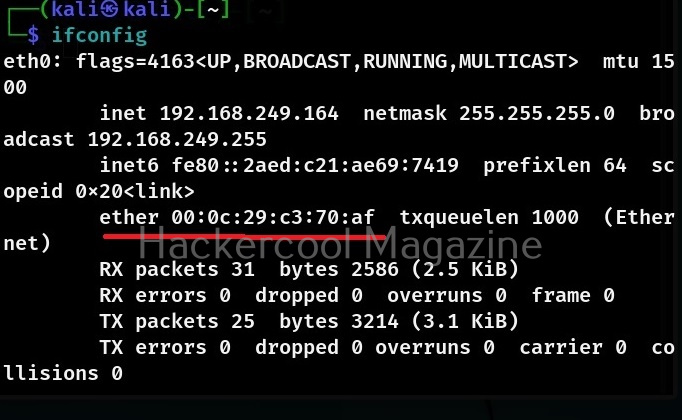
MAC address of a network interface card can be changed either manually or using a tool. Let’s see how to change the MAC address of a Linux machine manually. For this, I will be using Kali Linux. The first method we can use to change MAC address in a Linux machine is the “ifconfig” command. Ifconfig is a command line tool in UNIX operating systems that is used to configure network interfaces.

MAC Spoofing 1

To change the MAC address of the network interface, we need to first disable the network interface. This can be done with “ifconfig” using the command below.

sudo ifconfig <network interface> down
MAC Spoofing 2

Then we can change the MAC address using the command shown below.

sudo ifconfig <network interface> hw ether <new MAC address>

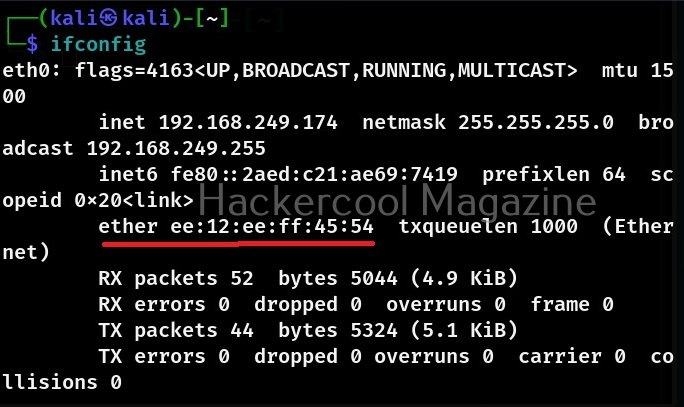
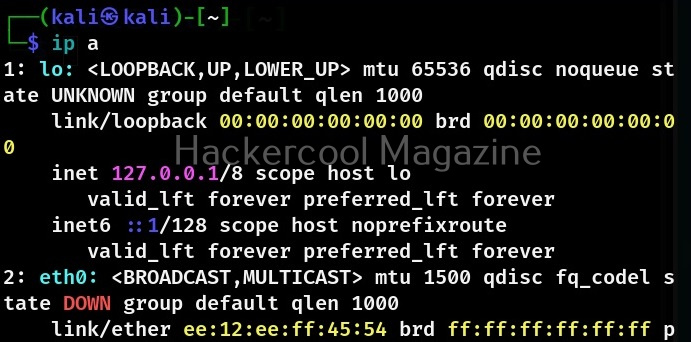
For example, let’s assign a MAC address ee:12:ee:ff:45:54 to the interface eth0.

MAC Spoofing 3

Then all we have to do is enable the network interface as shown below.

MAC Spoofing 4

Let’ see use the ifconfig command again to see if the MAC address has changed.

MAC Spoofing 5

It has changed. There is another way in which we can change the MAC address using ip command of Linux too. Even for this, you have to disable the network interface. This can be done with “ip” as shown below.

MAC Spoofing 6
MAC Spoofing 7

To change the MAC address with ip utility, the command is given below.

sudo ip link set <network interface> address <new MAC address>

For example,

MAC Spoofing 8

Then all we have to do is enable the network interface as shown below.

MAC Spoofing 9

We can also use tools to change MAC addresses. one such tool is mac changer. See the complete guide to change MAC addresses with macchanger tool.

Learn how to change the MAC address of a Windows machine manually here.

Posted on

Beginners guide to Image steganography

Hello, aspiring ethical hackers. In our previous blogpost, you learn what is steganography, its significance and types of steganography to cybersecurity. In this blogpost you will learn in detail about image steganography. But first, let’s see its significance in cybersecurity.

In April 2024, a hacker group being tracked as TA558 has widely used image steganography to deliver malware such as Agent Tesla, FormBook, Remcos RAT, LokiBOT, GuLoader, Snake keylogger and Xworm etc. The malware code embedded in the images contained VBS, PowerShell.

Now that you have understood the importance of image steganography, its time to learn about various images steganography techniques. In cybersecurity, It is a very good thing to learn about various image steganography techniques used to hide data in an image.

Types of image steganography

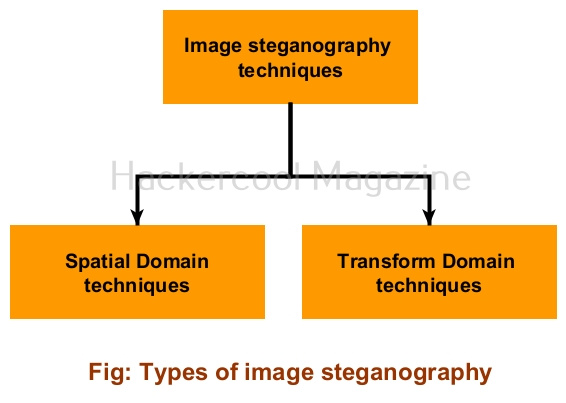
Image steganography techniques can be primarily divided into Spatial Domain techniques and Transform Domain techniques.

Image Steganography 1

Spatial Domain techniques

Image Steganography 2

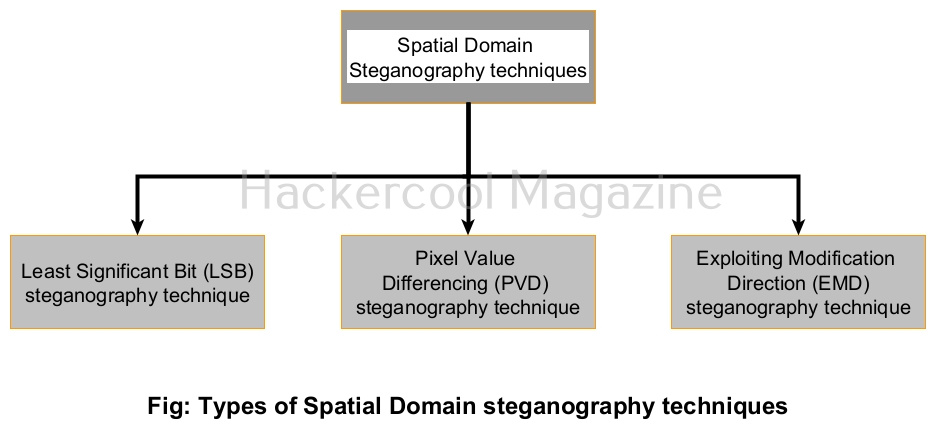
Let’s study about various Spatial Domain steganography techniques first.

1. Least Significant Bit (LSB) steganography technique:

In this type of steganographic technique, the secret data is stored in pixels of an image. This is done by replacing the least significant bit of the image.

2. Pixel Value Differencing (PVD) steganography technique:

Pixel Value Differencing (PVD) is a steganography techniques in which secret data is embedded into images using the differences in pixel Value between adjacent pixels.

3. Exploiting Modification Direction (EMD) steganography technique:

In this type of steganographic technique, the secret data is embedded into a group of pixels of an image.

Transform Domain techniques

Image Steganography 3

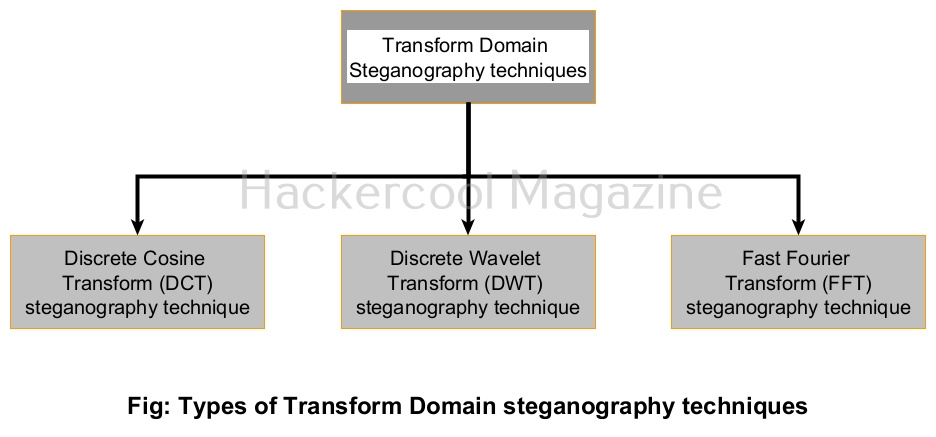
Now let’s learn about various Transform Domain image steganography techniques. In Transform Domain image steganography techniques, secret data is hidden in the transform domain coefficient of an image.

1. Discrete Cosine Transform (DCT) steganography technique:

In this steganographic technique, 8*8 blocks of an image are transformed into 64 DCT coefficients. Then, the LSB of each DCT coefficient is replaced with a bit of secret data.

2. Discrete Wavelet Transform (DWT) steganography technique:

In this steganographic technique, secret data is hidden by modifying the wavelet coefficient of the image.

3. Fast Fourier Transform (FWT) steganography technique:

In this steganography technique, the secret data is expressed as a Fourier series and then coefficients are added to the images.

Learn how to hide secret data in an image using steghide.

Posted on

Beginners guide to MAC flooding

Hello, aspiring ethical hackers. In our previous blogpost on data link layer attacks, you learnt what is a hub, What is a switch, how they both work, what is a MAC address, what is a CAM table and different types of LAN attacks etc. In this blogpost, you will learn about one such attack, MAC flooding attack.

Data Link Layer Attacks 1 1

What is MAC flooding?

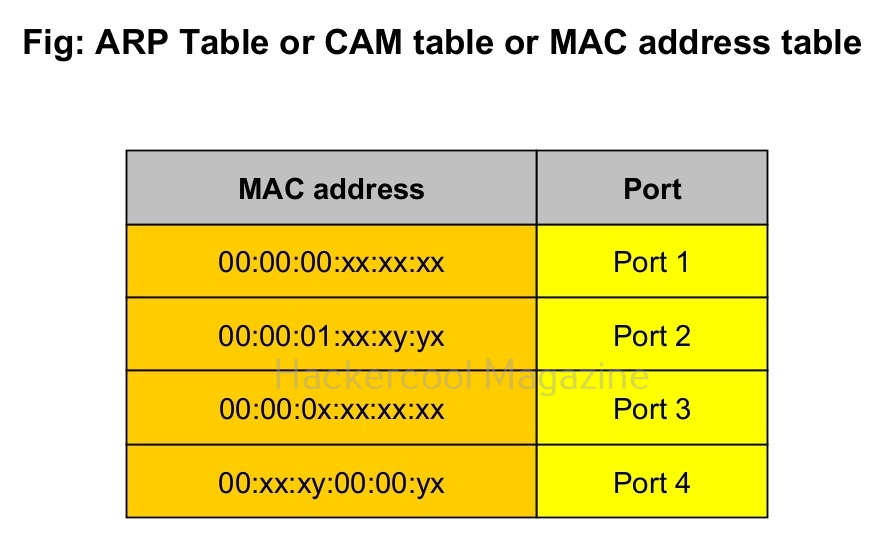
MAC flooding attack is an attack on the network switch that floods the network switch with fake MAC addresses. The purpose of this attack is to consume memory of the network switch. Once the CAM table of the network switch becomes full, the MAC addresses of the legitimate devices are purged out of the CAM table.

Data Link Layer Attacks 4

The network switch can no longer save new MAC addresses sent to the switch and it soon falls into a fail-open mode in which it will broadcast the incoming data to all the ports of the switch instead of transferring it to the intended device. Typically, the switch here functions like a network hub.

Since the data is now being broadcast to all the devices connected to the network, hackers can sniff on data belonging to all the devices in the network.

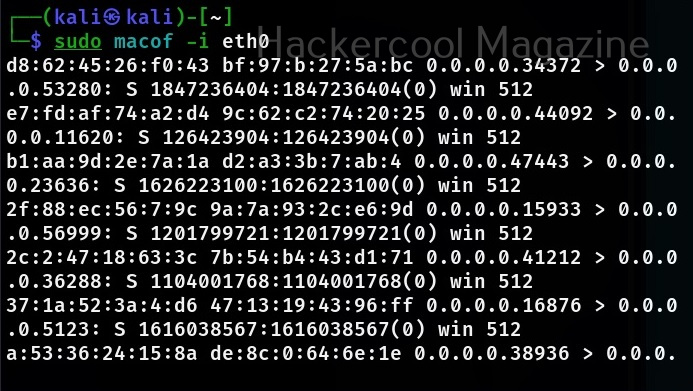
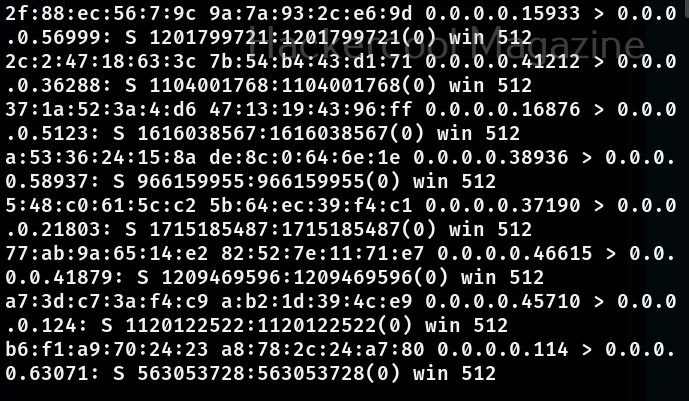
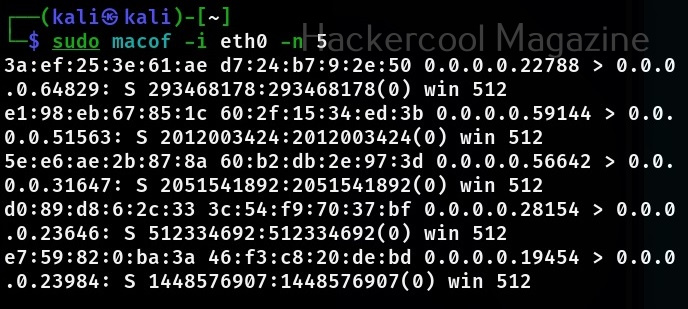
There are many ways to perform MAC flooding. One such method is to using a too named macof. Macof is a tool that comes with dsniff package. macof is used to flood the local network with random MAC addresses. It is installed by default in Kali Linux. The default way to flood the switch with macof is to specify the interface as shown below.

sudo macof -i eth0
MAC Flooding 1
MAC Flooding 2

This will create multiple random MAC addresses. You can even specify the number of packets you want to create as shown below.

sudo macof -i <interface> -n <number of packets to create>
MAC Flooding 4

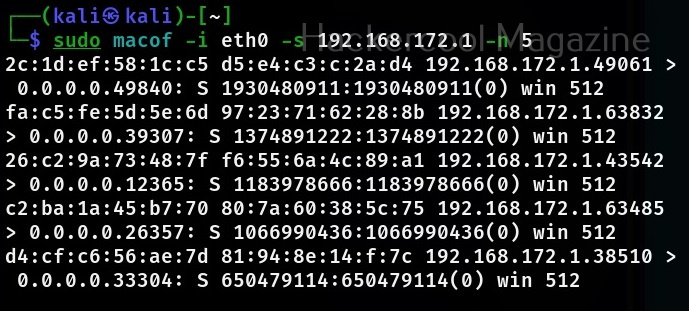
You can even specify the source IP address from where these random MAC address should originate from.

sudo macof -i <interface> -s <IP address> -n <number of packets to create>
MAC Flooding 5

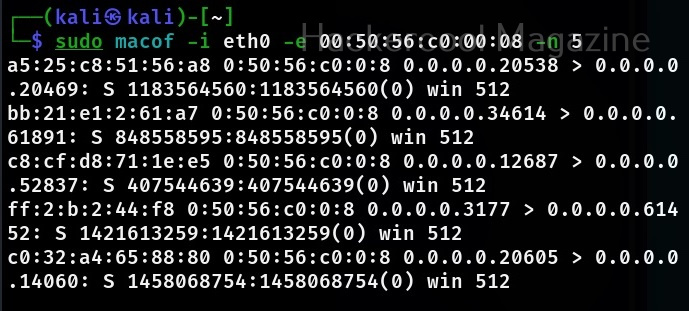
You can also specify the MAC address or physical address of the target device you want to flood with random MAC addresses.

sudo macof -i <interface> -e <Physical address of target> 
MAC Flooding 6
Posted on

DNS spoofing for beginners

Hello, aspiring ethical hackers. In this blogpost, you will learn about DNS spoofing attack. Also known as DNS poisoning or DNS cache poisoning, in this attack a fake or wrong value are entered into the DNS cache. To understand this in detail, you have to first understand what is DNS, DNS server and DNS cache etc.

What is DNS?

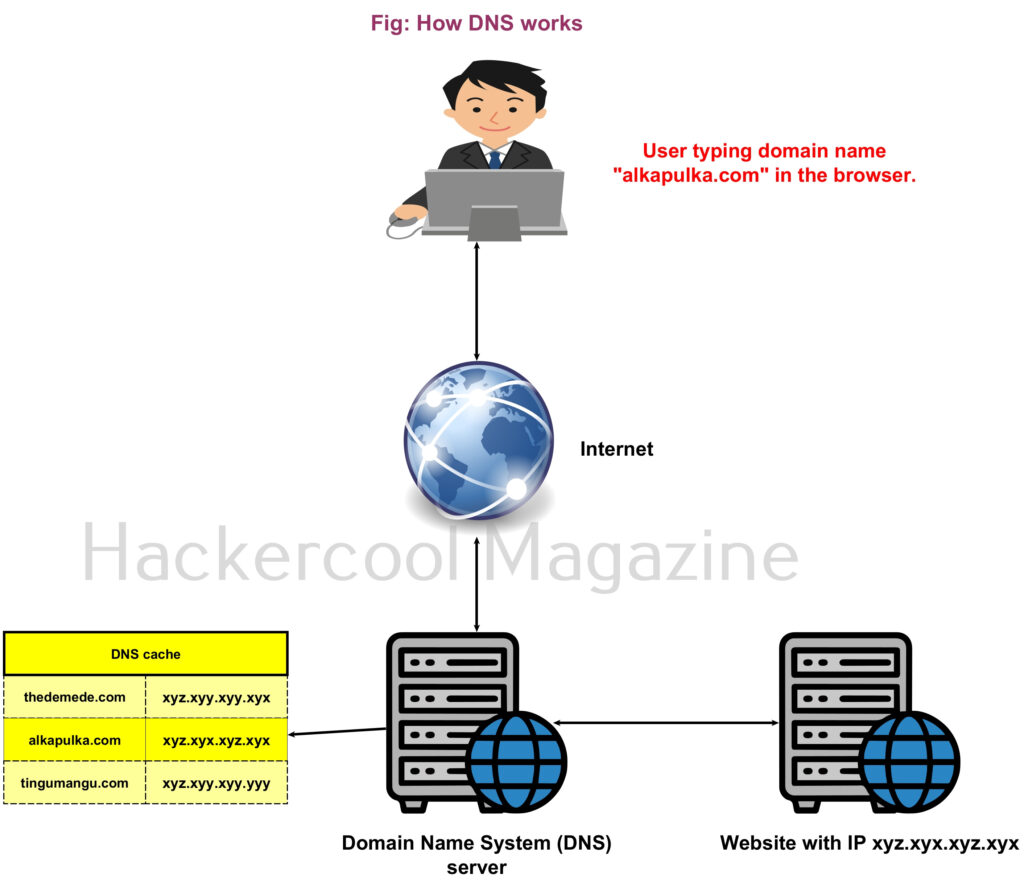
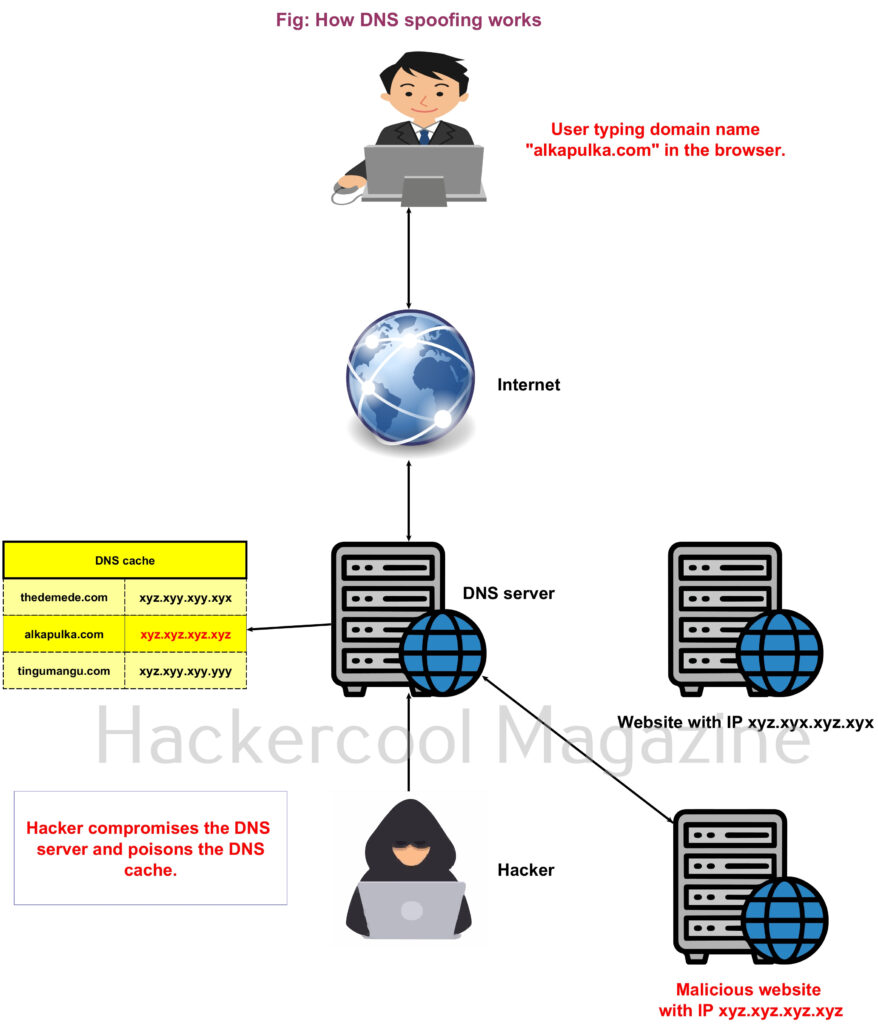
Domain Name System (DNS) is a system that associates domain names with their IP addresses. For example, you want to go to a website named Alkapulka.com. When you open the browser and enter the domain name in the URL, your query first goes to a server that keeps a record of domain names and their IP addresses. Then this server takes you to the IP address associated with the alkapulka.com. This server is called the Domain Name System (DNS) server. A DNS server stores domain names and the IP addresses associated with these domain names in a cache known as DNS cache. Hence it is also known as DNS cache poisoning.

DNS Spoofing 1 1 1024x883

What is DNS spoofing?

Just imagine the IP address of the website alkapulka.com is xyx.xyz.xyx.xyz. Somehow the hacker takes control of the DNS server and registers the IP address of alkapulka.com to xyz.xyz.xyz.xyz where I am hosting a different website that looks similar to that of alkapulka.com. Now, when someone tries to visit alkapulka.com, instead of going to the original website, he will be redirected to the duplicate website controlled by the hacker.

DNS Spoofing 2 1 1 878x1024

Impact of DNS Spoofing

A hacker performs DNS spoofing to make unsuspecting users visit a malicious website. Once the user is one the malicious website, a lot of hacking attacks are possible. Some of them are,

1. Phishing:

Hackers may take unsuspecting users to a phishing website. Phishing is an act of presenting a fake page resembling the original webpage you intend to visit with the sole intention of stealing your credentials. Learn more about phishing.

2. Infecting with malicious software :

The website the users are redirected to may contain malware that can infect the user systems. Malware or malicious software is any software that performs malicious actions on a computer or mobile.

3. Gaining initial access:

Hackers can use multiple techniques to gain initial access on the system of the user. Learn more about gaining access.

How DNS spoofing attack can take place?

DNS spoofing can be achieved using many techniques like

1. Man in the Middle attack:

When attacker gets between the web browser and the DNS Server, he can perform DNS spoofing. Learn more about MiTM attack.

2. DNS server compromise:

If the DNS Server is compromised due to any vulnerability, then attacker gains access to the DNS cache, which he can manipulate as he want.