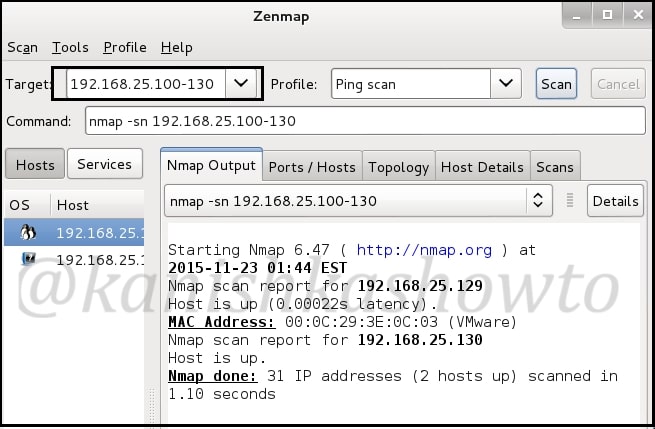
This howto is part of a series called Hacking Metasploitable. So it would be good if you follow this as part of that series. Today we will see scanning and banner grabbing of Metasploitable. Scanning is the second stage of hacking where we gather more information about our target. Imagine a scenario where we got the IP address range of our target and we want to check how many live systems are there. This is network scanning. There are many tools in our attacker system but we will use Zenmap. Open a terminal and type command “zenmap”. It would open a GUI tool as shown below. Give the IP address range as shown below. (192.168.25.100-130, it may differ for you ) and select “ping scan” . Then click on “scan”. It will show all the live systems. In our case, only Metasploitable.
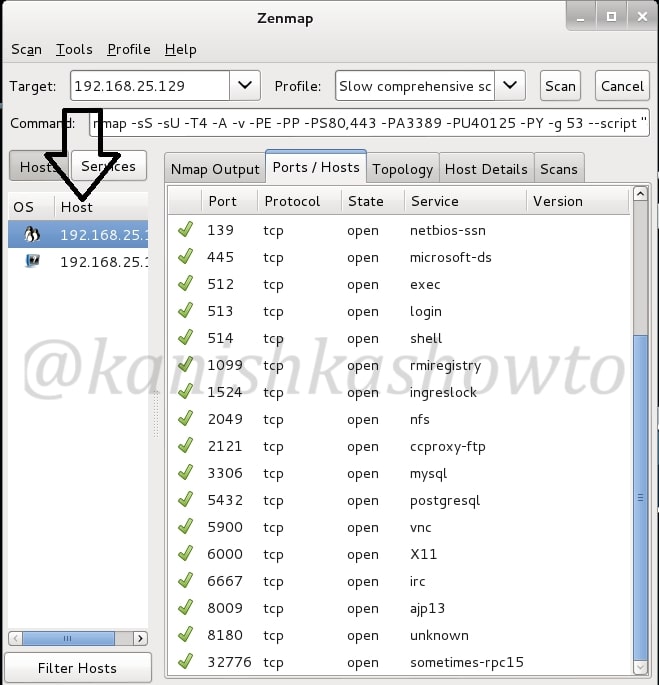
Now let’s do port scanning of the live system. Now in target field, specify only the IP address of Metasploitable. In Profile, select “slow and comprehensive scan” and click on “scan”. It will show all the open ports as shown below.
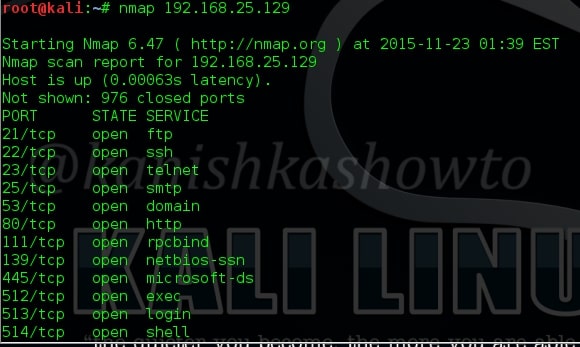
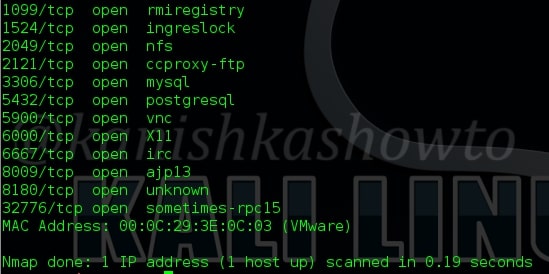
But there is another tool which is widely used for port scanning. Enter nmap. Nmap is a versatile port scanner. (Zenmap is the GUI version of Nmap). The default way to use Nmap is shown below. It would list all the open ports.
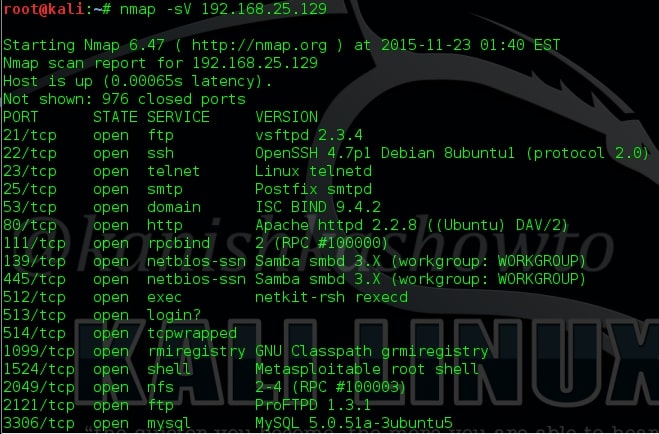
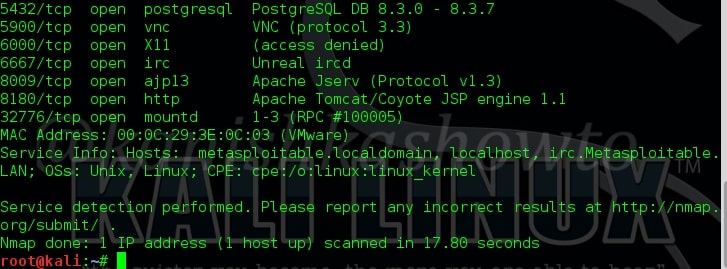
Next we will see how to grab banners. Banners display information about the type of service running at the open ports of our target. This can reveal some important information about our target which can be used for hacking. The Nmap command for banner grabbing and its results are shown below. We got a lot of banners.
Next we will use Nmap to find out the operating system of our target. The command is given below.

The OS details are given below.

There is another way of grabbing banners. It is telnetting to each port as shown below. The results can also be seen.


That’s all in Hacking Metasploitable : information Gathering stage.


