Posted on

Beginners guide to Guymager

Hello, aspiring Cyber Forensic Investigators. In our previous blogpost on Computer Forensics, you learnt what is Imaging and its importance. In this article, you will learn about Guymager, a tool used for reliable disk imaging.

When it comes to digital forensics, few tools are as clean, fast and beginner-friendly as Guymager. Unlike command-line imaging tools such as dd, dcfldd or dc3dd, Guymager provides a powerful graphical interface, making it perfect for new forensic investigators who want to perform reliable evidence acquisition with minimal complexity. Despite its simplicity, Guymager is highly respected in professional labs for its speed, hashing accuracy, detailed logging and support for common forensic image formats.

In this blog post, we’ll break down what Guymager is, why it’s used in digital forensics and how beginners can start using it including sample commands and workflows.

What is Guymager?

Guymager is an open-source forensic imaging tool for Linux, designed to create exact clones of storage devices while preserving integrity. It is widely used for:

  • Creating forensic disk images
  • Hashing drives with MD5, SHA-1, SHA-256
  • Performing bit-for-bit cloning
  • Generating detailed acquisition logs
  • Producing EWF (E01), AFF, or Raw (.dd) images

Its user-friendly GUI makes it suitable for students, interns and analysts who are new to imaging procedures.

Why Use Guymager?

Here are the main reasons forensic teams rely on Guymager:

1. Graphical Interface

Being a GUI tool, there is no need to memorize long commands while using this tool. Simply select the drive, choose an output format and start imaging.

2. Very Fast Imaging Engine

Guymager is optimized for multi-threading and often outperforms traditional imaging tools.

3. Automatic Hashing and Logging

Every image created comes with:

  • Pre- and post-imaging hashes
  • Complete logs of the imaging session
  • Information about the device metadata

4. Supports Write-Blocking

Guymager automatically prevents writes to the source drive when used with hardware write blockers.

5. Stable, Trusted and Open-Source

Frequently found in forensic Linux distros like DEFT, CAINE, and Kali Linux.

Installing Guymager

On most Linux systems (Debian, Ubuntu, Kali), you can install this tool using commands shown below.

sudo apt update
sudo apt install guymager

You can start this tool using command shown below.

sudo guymager

Running as root is necessary because Guymager interacts directly with disk devices.

Step-by-Step Guide to use this tool

STEP 1: Launch the Tool

After starting guymager, the GUI will open and automatically scan for available devices.

It displays:

  • Device name (e.g., /dev/sdc)
  • Size
  • Serial number
  • File system information (if available)
  • Read-only status

STEP 2: Select the Drive to Image

Right-click on the device and choose “Acquire Image”.

Now pick:

  • Output format (EWF-E01, AFF, RAW)
  • Output directory
  • Case metadata (optional but recommended)

STEP 3: Configure Imaging Options

You can enable:

  • MD5 / SHA-1 / SHA-256 hashing
  • Compression (for E01 images)
  • Segment size
  • Automatic log creation

For beginners, the default settings are usually enoigh.

STEP 4: Start Imaging

Click on “Start”.

Guymager will display:

  • Imaging speed
  • Remaining time
  • Hash values
  • Log progress

When complete, the tool verifies the image by comparing pre- and post-acquisition hashes.

Useful Commands for Beginners

Even though Guymager is GUI-based, you can still interact with imaging results using standard Linux commands. Here are some useful commands for beginners while interacting with this tool.

1. Verify Image Hashes

If you choose RAW imaging (.dd), you can verify the image using:

md5sum image.dd
sha256sum image.dd

2. Mounting the Forensic Image (Read-Only)

You can mount the forenisc image with Guymager using command shown below.

sudo mount -o loop,ro image.dd /mnt/image

3. Viewing Logs

While using this tool, each imaging session generates a .log file. You can view this log file using command shown below.

cat case123.log

4. Checking information about Acquired Image (E01 Format)

You can view information belonging to the acquired Forensic Image by using ewf tools as shown below.

Install ewf-tools:

sudo apt install ewf-tools

Then view metadata:

ewfinfo evidence.E01

Beginner Tips for using Guymager

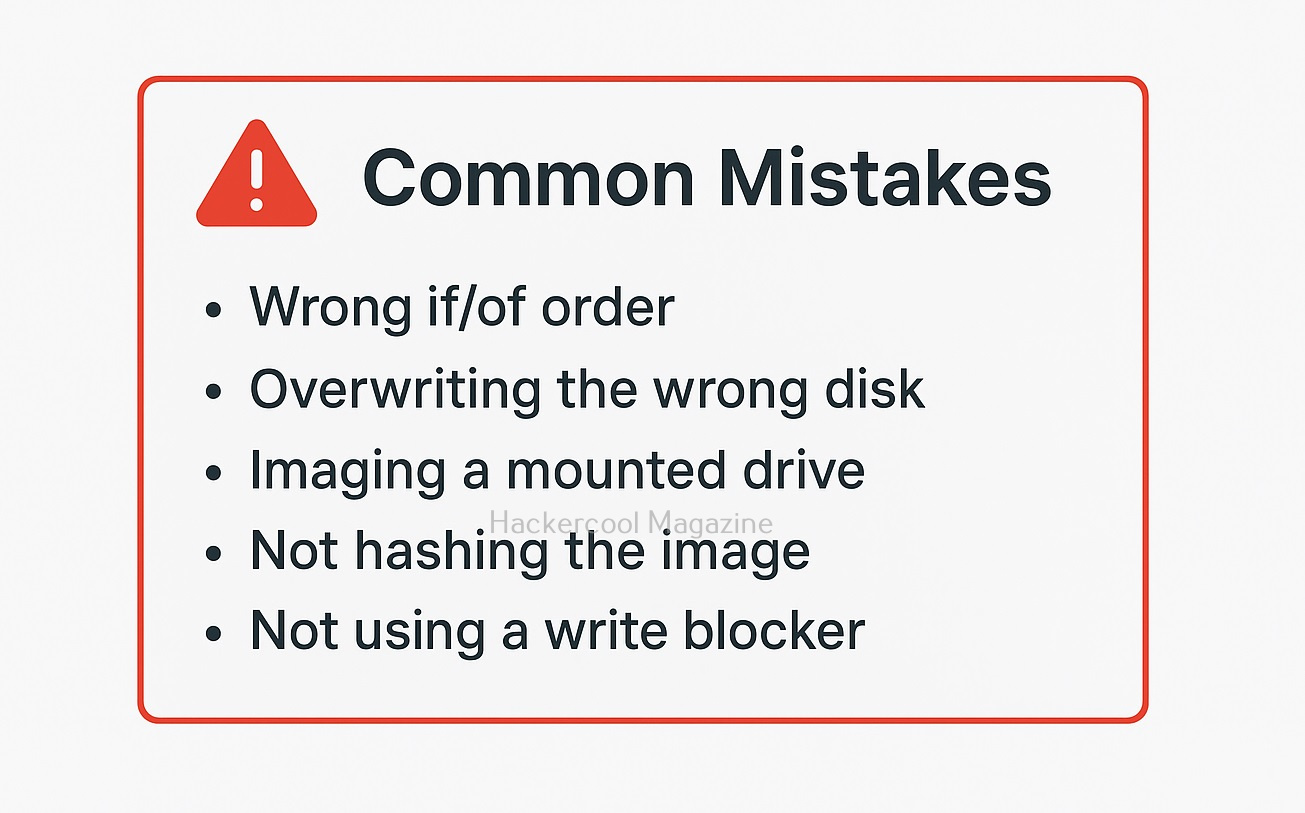
1. Always use a Write Blocker:

Always and always use a Write Blocker while using this tool. This ensures the original evidence drive is never modified.

2. Save Images on a Different Drive:

Never store the forensic image on the same drive you are imaging from.

3. Document Everything:

Always document everything about the Imaging process. Maintain a record of the Case number, device details, serial numbers, hash values etc. Although Guymager logs help, you should always keep personal notes too.

4. Prefer E01 for Real Cases:

While using this tool for imaging in Real-world cases, always prefer E01 format. This format stores metadata, hashes and compression which is ideal for investigations.

5. Use RAW(.dd) format for Training:

Always prefer RAW (.dd) format for training. This is simpler, easier to mount and widely supported.
Conclusion

For beginners entering the field of digital forensics, Guymager is one of the easiest and most reliable tools for forensic imaging. Its fast performance, intuitive interface, automated hashing and comprehensive logging make it a favorite among forensic professionals and students alike. Next, learn how to acquire evidence using FTK Imager tool.

Posted on

Beginners guide to FTK Imager

Hello, aspiring Cyber Forensic Investigators. In our previous blogpost on Computer Forensics, you have learnt what is Imaging and its importance. In this article, you will learn about FTK Imager, a tool used for fast and forensically sound evidence acquisition.
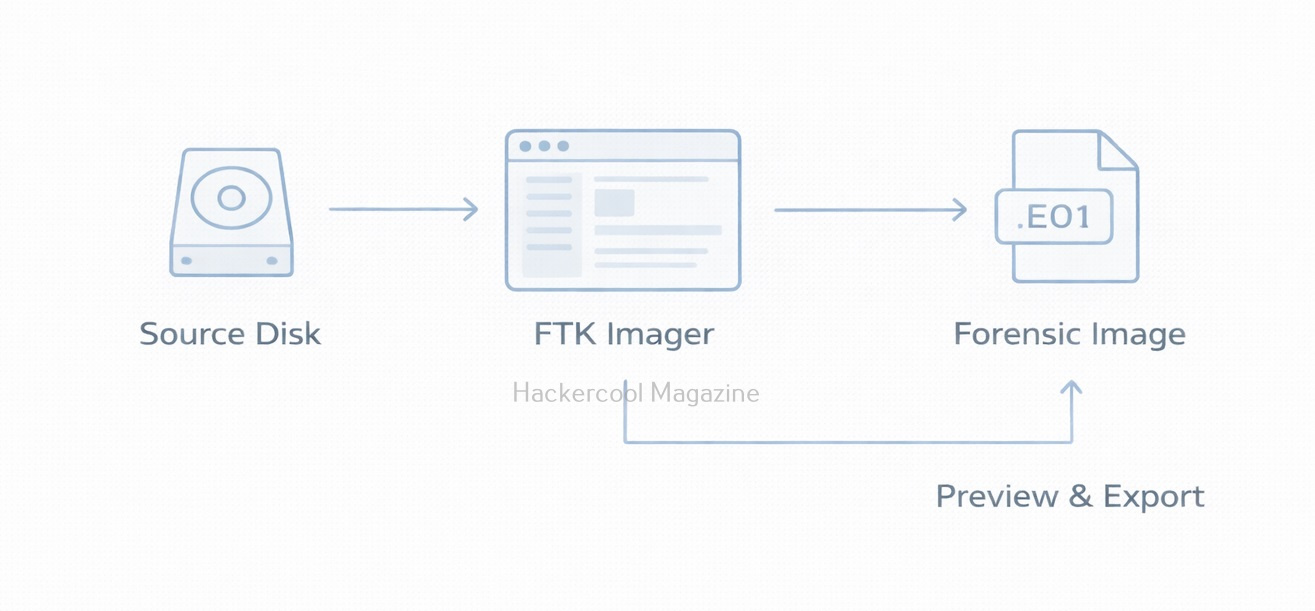
FTK Imager may be the first tool you’ll encounter when you’re just beginning your journey into digital forensics. Developed by AccessData, it is a lightweight but powerful forensic acquisition tool used worldwide by investigators, incident responders, law enforcement and cybersecurity analysts. Its primary purpose is simple but critical: create a forensically sound image of digital evidence.

Unlike other evidence acquisition tools like dd, dcfldd or dc3dd, FTK Imager offers a clean, intuitive graphical interface, making it ideal for beginners who want to learn proper evidence handling without complex terminal syntax. Yet, despite its beginner-friendly design, FTK Imager is robust enough for professional, court-admissible investigations.

What makes FTK Imager Popular in Forensics?

FTK Imager is more than just an imaging tool. It provides a range of features essential in the early stages of forensic analysis. They are,

  • Creates forensically sound disk images (E01, Raw/DD, SMART, AFF formats)
  • Supports physical and logical imaging
  • Can preview file systems before imaging
  • Extracts volatile data such as RAM
  • Generates integrity hashes (MD5, SHA-1, SHA-256)
  • Verifies images after creation
  • Writes detailed forensic logs
  • Offers options to mount images as read-only drives

For students and early-stage analysts, these features offer a complete introduction to acquisition and evidence handling.

Installing and Setting up FTK Imager

FTK Imager runs on Windows and is available as both an installed application and a portable executable. Beginners should prefer the portable version because it can be run from a USB forensic toolkit.

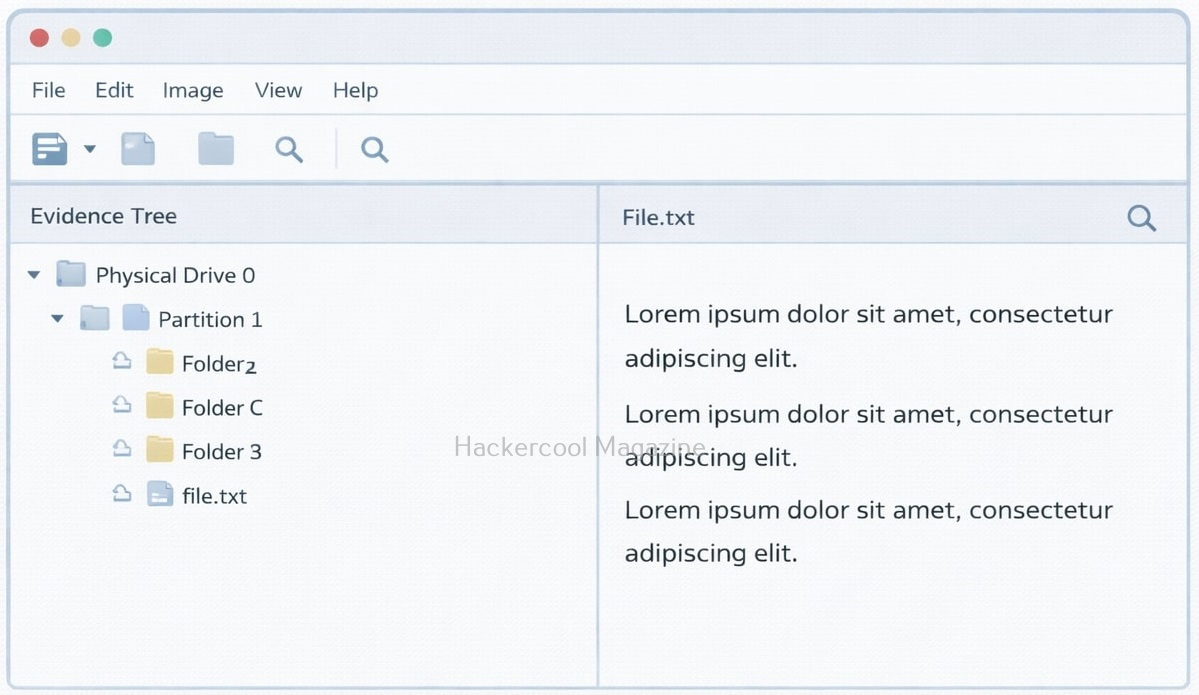
Once launched, the interface is clean, with clear options for adding evidence items, creating images, viewing files and exporting data.

How To Create a Disk Image with FTK Imager?

Here’s a simple step-by-step workflow for creating a forensic image of a suspect drive using this tool.

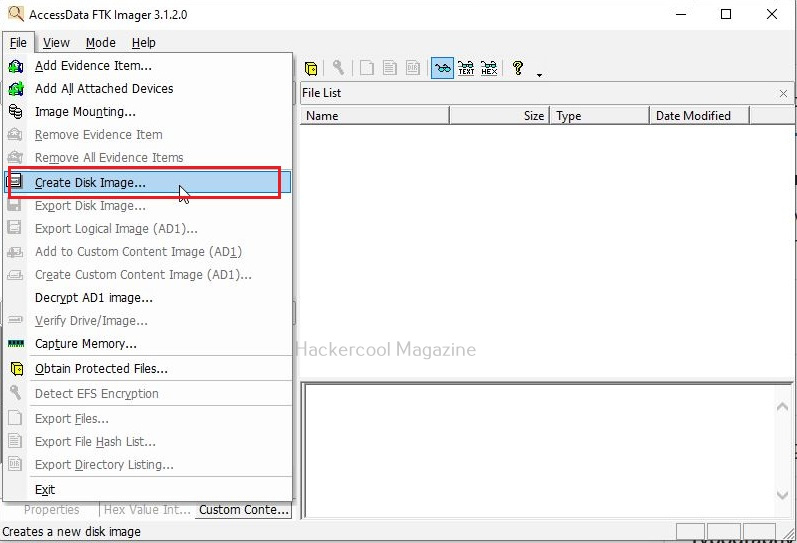
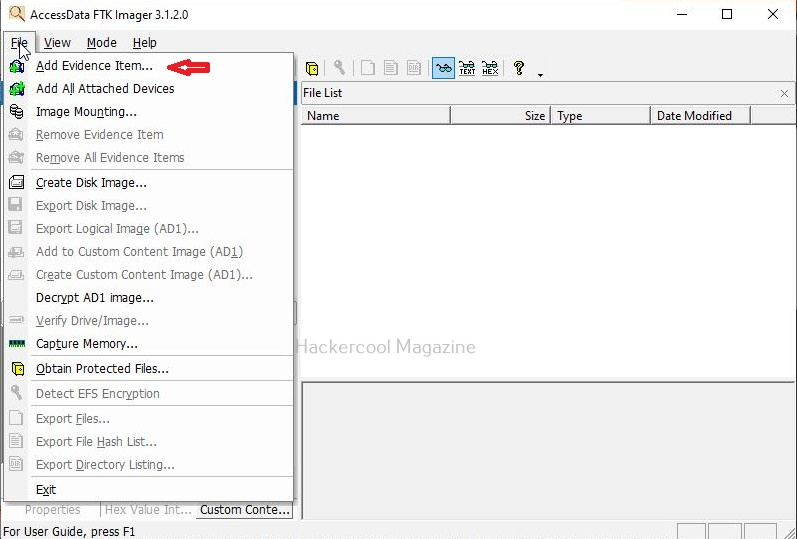
STEP 1: Launch the Tool

Open FTK Imager and Go to File → Create Disk Image.

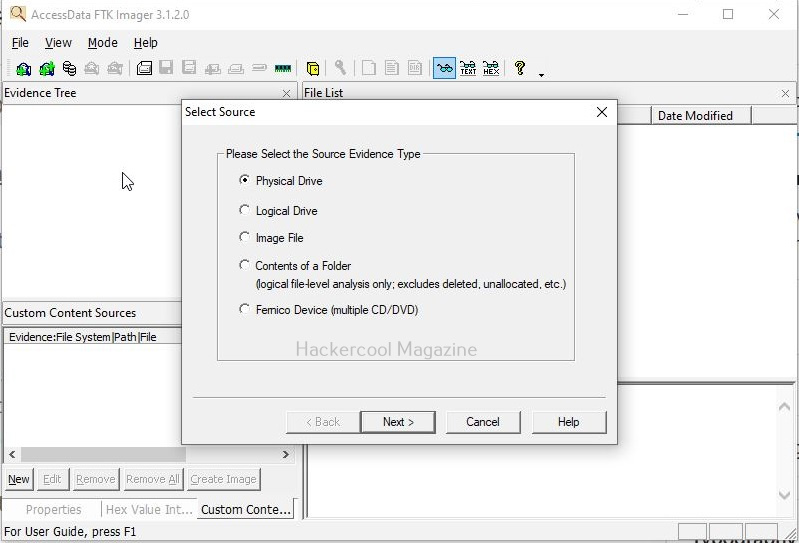
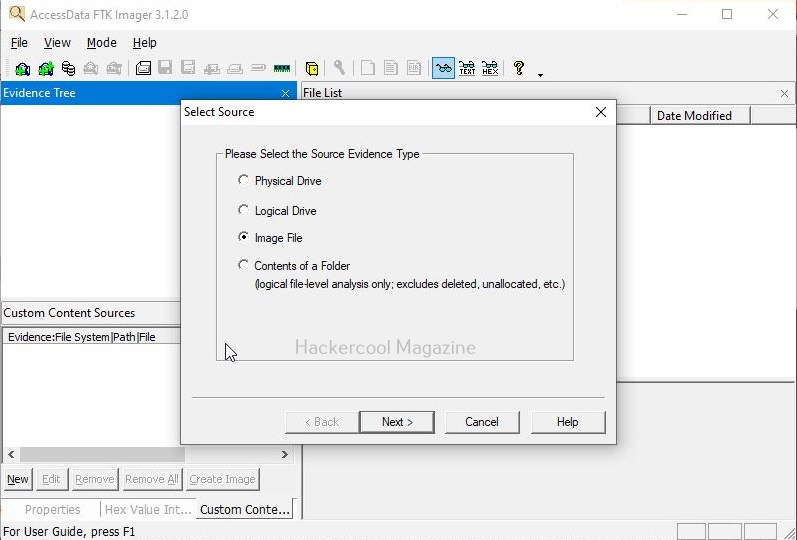
STEP 2:  Choose the Source Type

Select what you want to acquire:

  • Physical Drive
  • Logical Drive
  • Image File
  • Folder Contents

For beginners who are practicing, use Physical Drive.

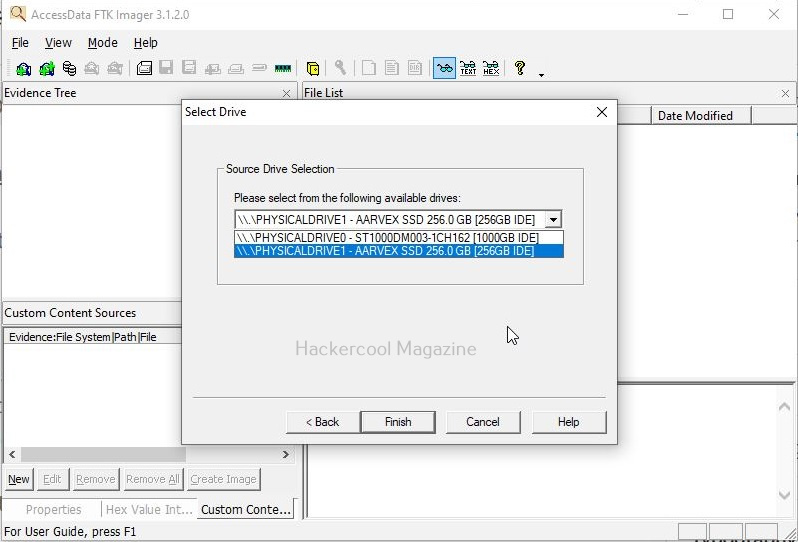
STEP 3: Select the Target Device

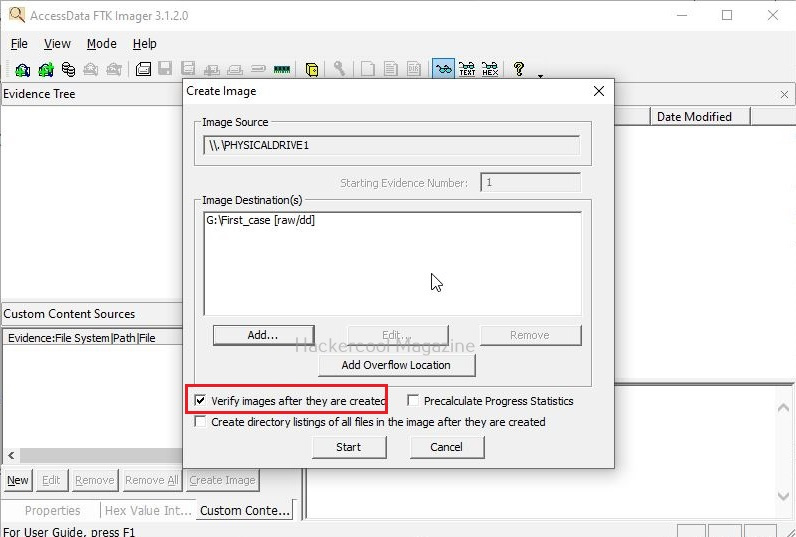
Choose the drive you want to image, such as:

\\.\PHYSICALDRIVE1

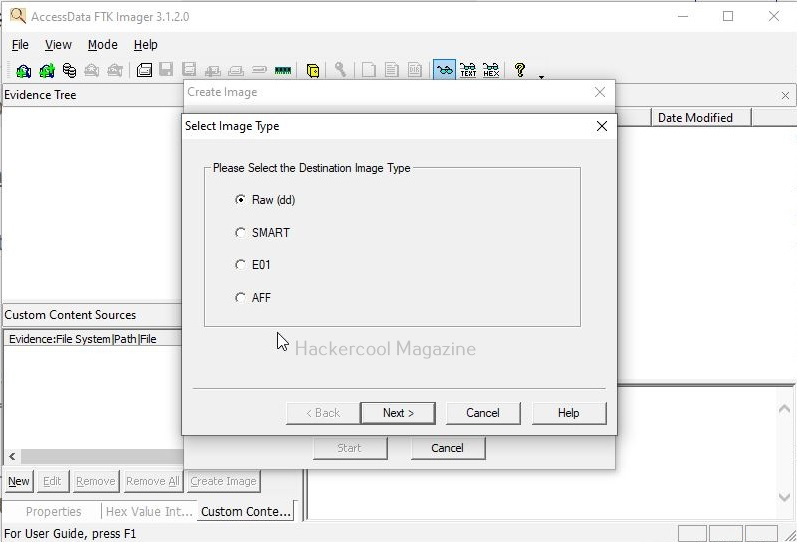
STEP 4: Choose the Image Format

Choose the format of the forensic Image you want to save this evidence as.

It supports:

  • E01 (Expert Witness format) – Recommended for real cases
  • Raw/DD – Compatible with many open-source tools
  • SMART / AFF formats

Beginners should typically start with Raw/DD format for simplicity.

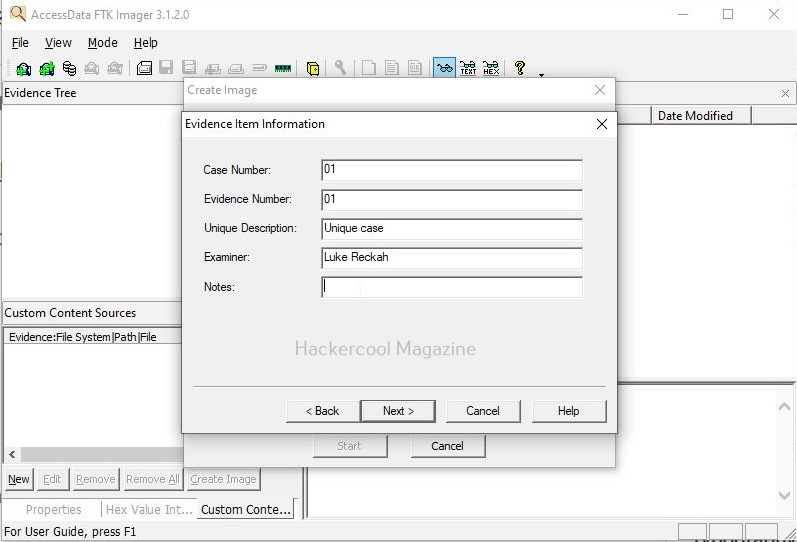
STEP 5: Add Case Information

You’ll be prompted to fill optional metadata. This will include information shown below.

  • Case Number
  • Evidence Number
  • Examiner Name
  • Notes

This information helps maintain chain of custody.

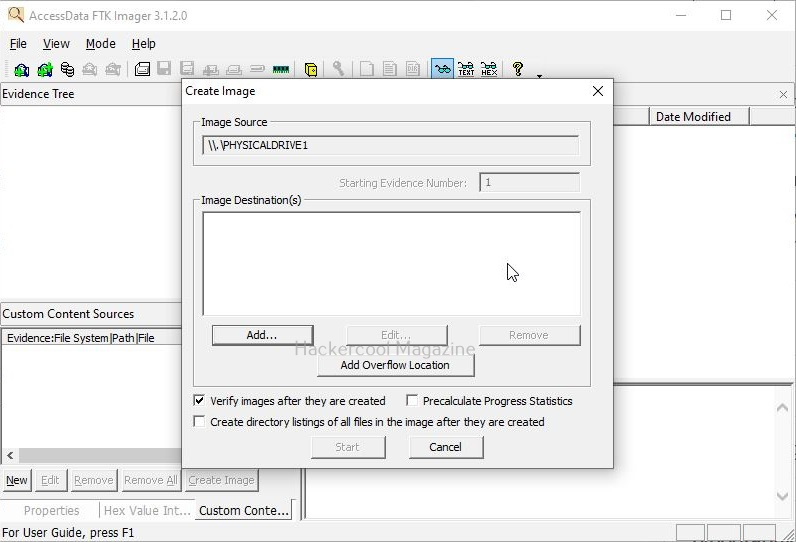
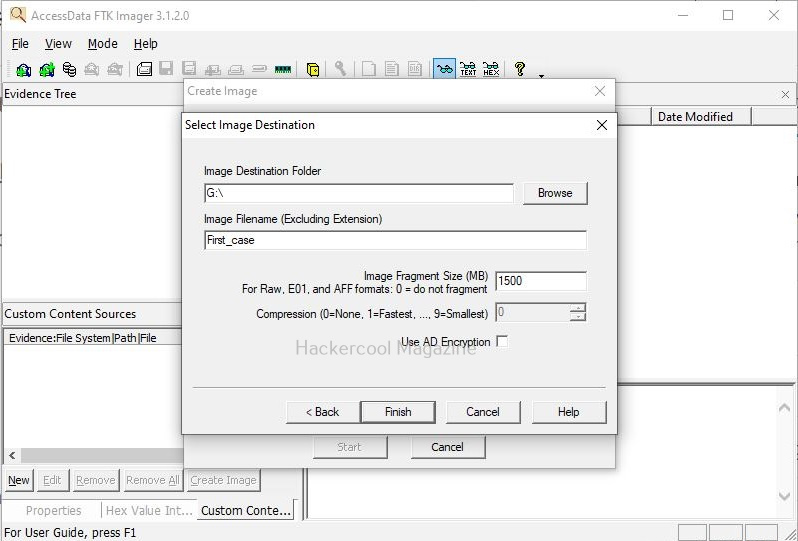
STEP 6: Set the Output Destination

Choose a location where you want to save your forensic image. Note that this should be separate storage drive, not the source device.

STEP 7: Enable Hashing

Hashing verifies the integrity of the Image, So, check the boxes:

  • MD5
  • SHA-1 or SHA-256 (recommended for modern investigations)

This tool will automatically generate and verify these hashes.

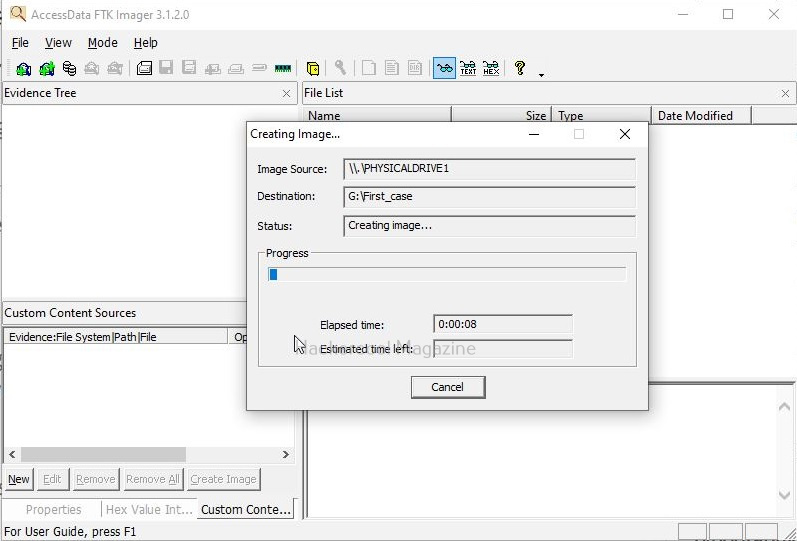
STEP 8: Start Imaging

Click “Start” and FTK Imager will begin acquiring the bit-for-bit copy, showing real-time progress, speed and any errors.

How to Preview Evidence with FTK Imager?

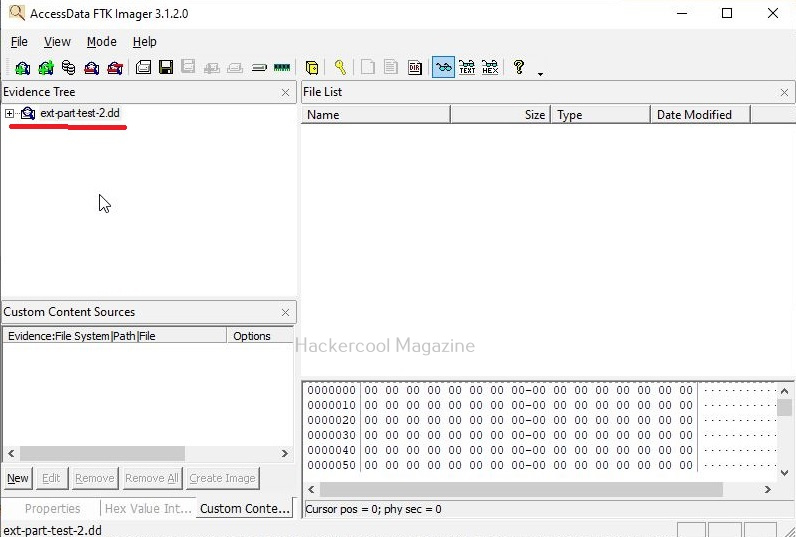
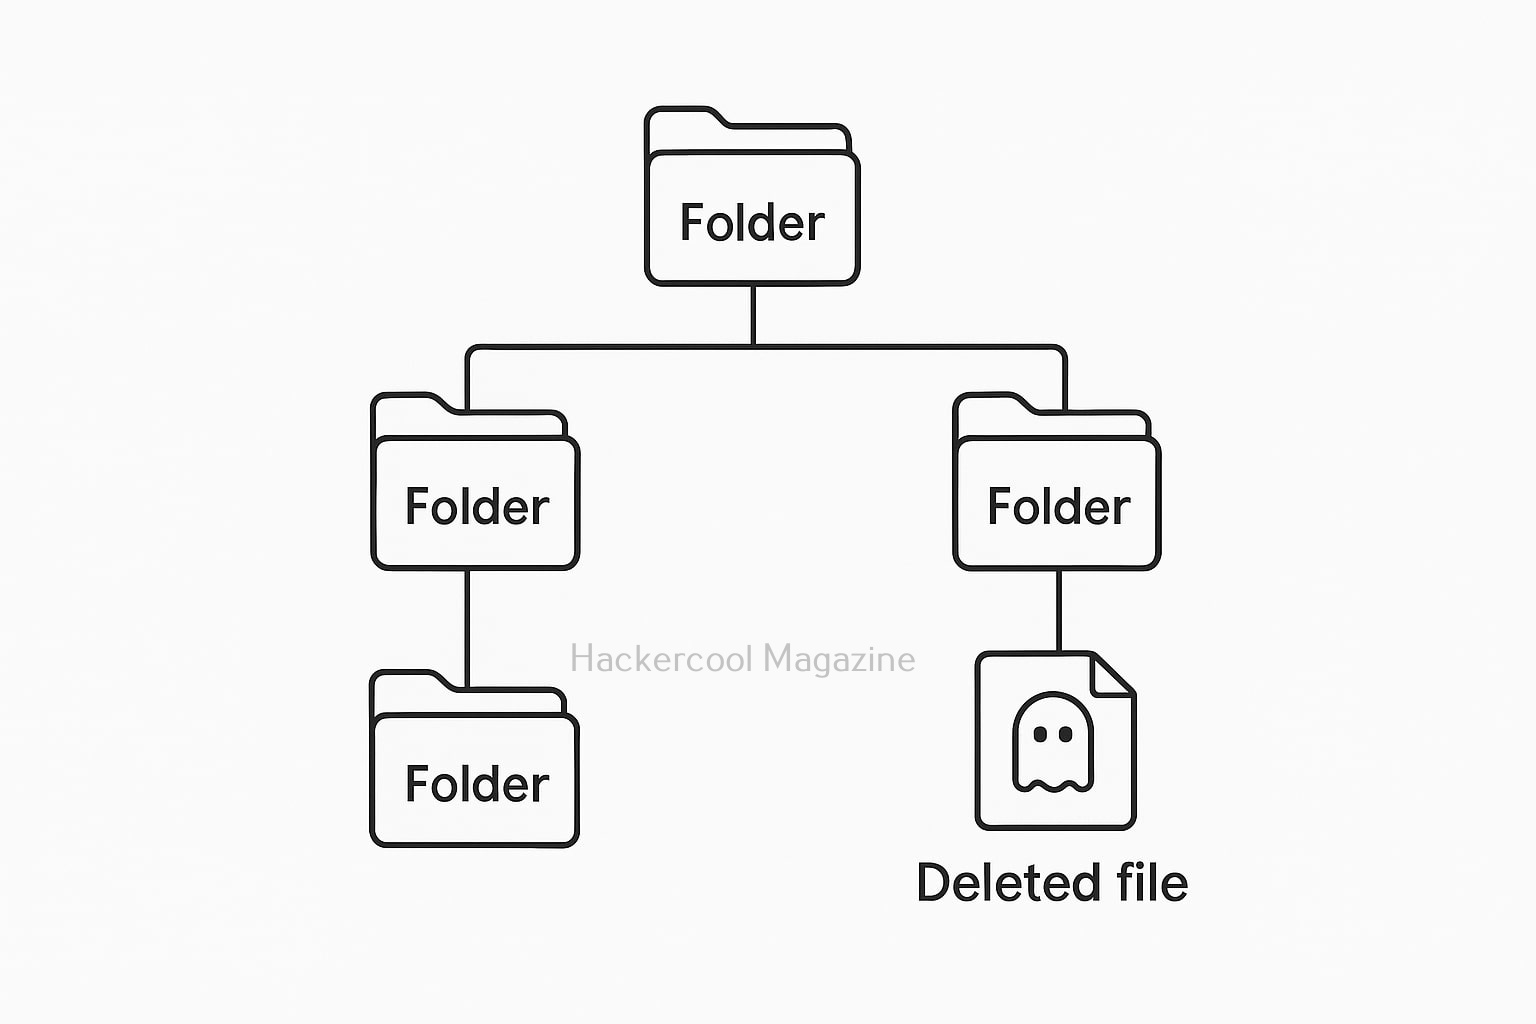
One of this tool’s greatest strengths is its ability to preview evidence without altering it. To view evidence with FTK Imager, go to File → Add Evidence Item → Image File.

This tool can display:

  • Folder structure
  • File metadata
  • Deleted files
  • Hex view of sectors
  • File hashes

Beginners find this extremely helpful for practicing forensic interpretation.

How To Export Files from an Image?

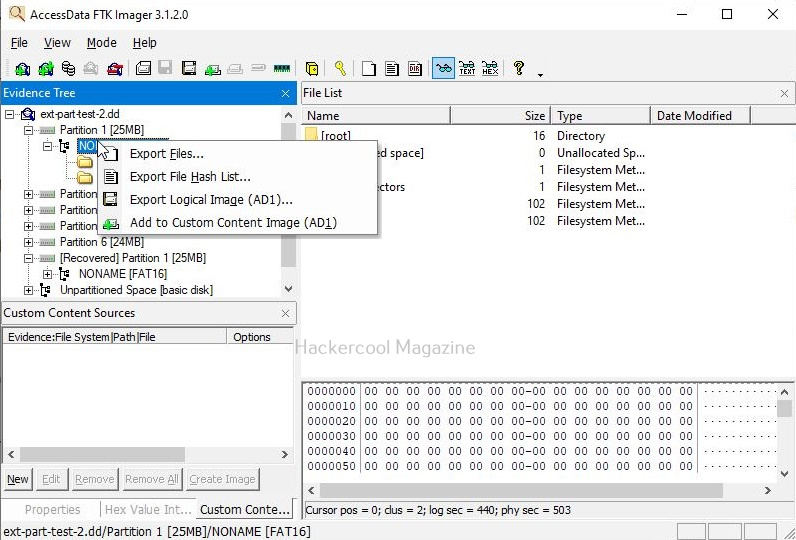
You can even extract individual files or folders from a forensic image using this tool. To do that, Right-click any file and go to → Export File(s). FTK Imager maintains timestamps and metadata, keeping the export forensically sound.

How To Capture RAM (Volatile Memory)?

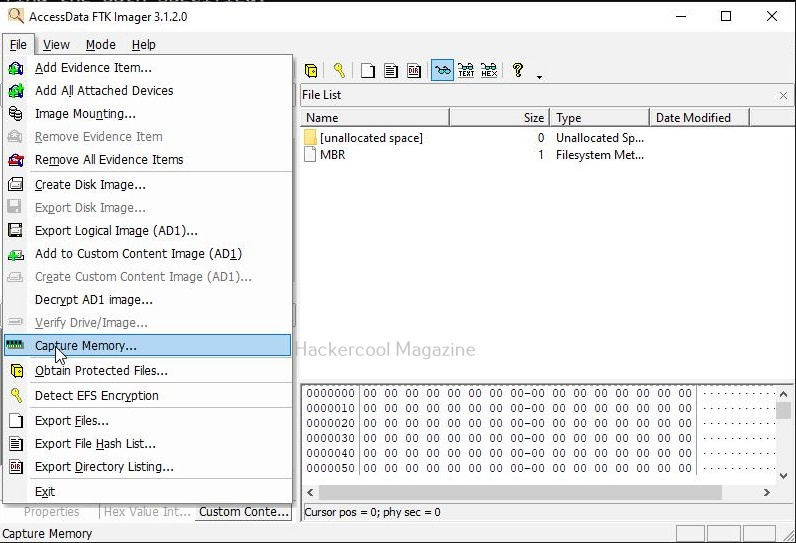
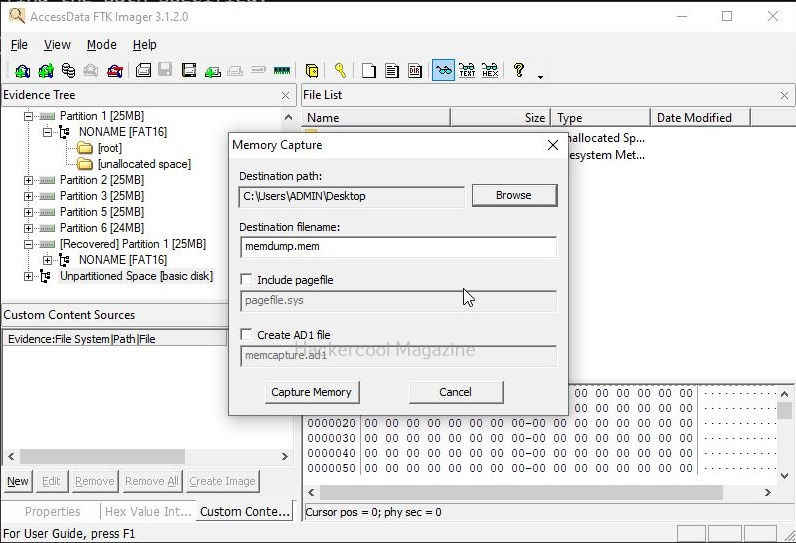
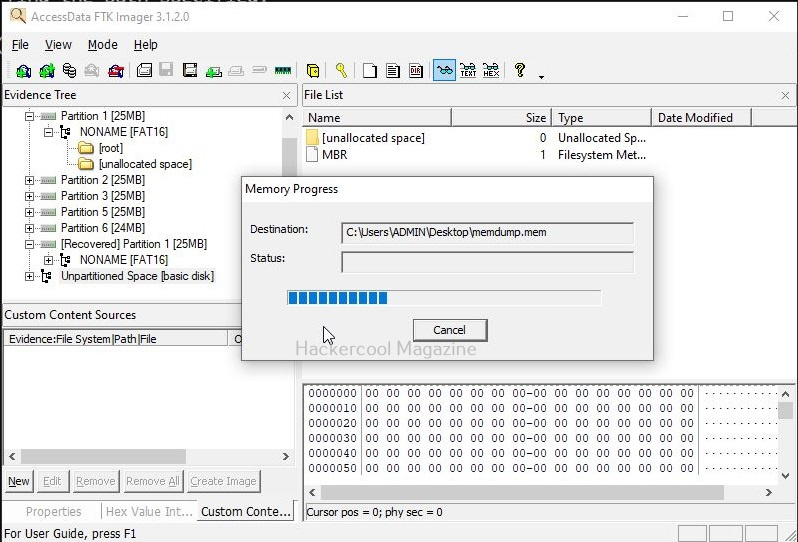
To capture volatile memory with FTK Imager, go to File–>Capture Memory as shown below.

How To Create Hashes of Individual Files?

A common beginner task is to hash individual files for the purpose of integrity. To do this, Right-click on the file you want to compute hash to. and select Compute Hash

FTK Imager can generate:

  • MD5
  • SHA-1
  • SHA-256

hashes, depending on your settings.

How to Mount A Forensic Image?

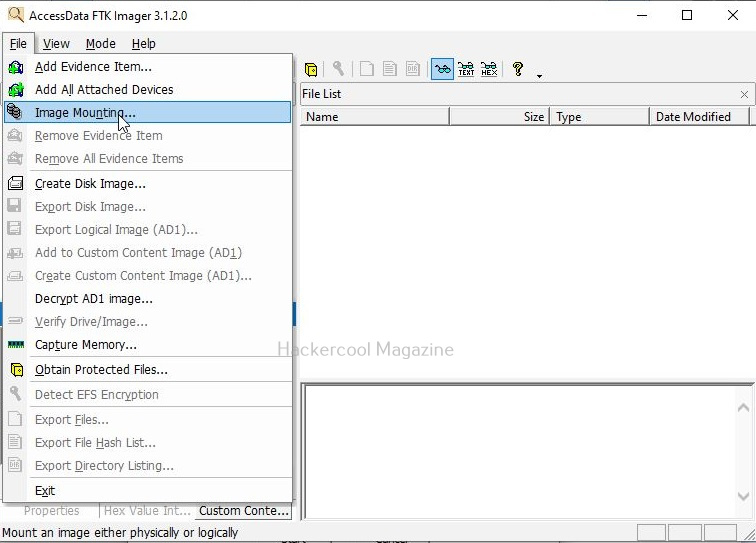
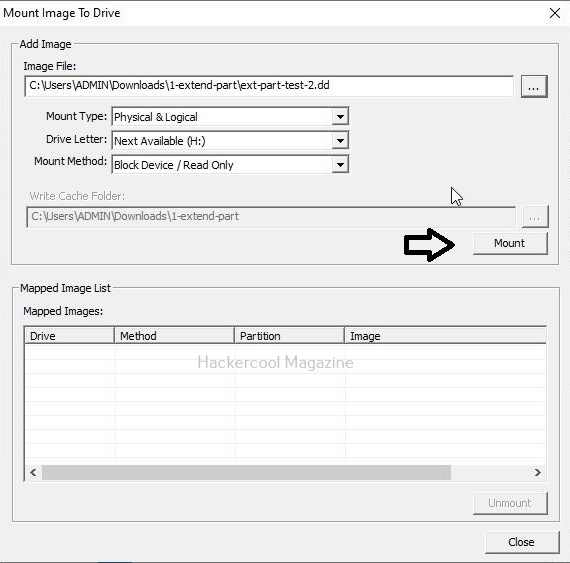
You can mount also mount a forensic image as a read-only drive for examination. You can do this by going to File → Image Mounting. Once you are here, select from:

  • Read-only mode
  • Mount as a physical or logical drive

This helps beginners explore forensic artifacts using Windows tools without altering evidence.

Best Practices for Beginners

1. Always Use a Write-Blocker

Never and never connect a suspect drive directly to your system and always use a Write-Blocker.

2. Store Images Separately

Never save images on the same drive as the evidence source.

3. Document Every Action

Always document each and every action like Case details, hashes, timestamps and imaging logs. They must be preserved.

4. Verify Images:

FTK Imager does verification automatically. Always maintain the verification log.

Conclusion

FTK Imager remains one of the most essential tools for beginners in digital forensics. Its intuitive interface, strong forensic controls, built-in hashing and preview capabilities make it an ideal starting point for anyone learning evidence acquisition. Whether you’re preparing for a real investigation or building your lab skills, mastering FTK Imager gives you a strong foundation in the world of DFIR.

Posted on

Beginners guide to dc3dd Forensic Tool

Hello, aspiring Cyber Forensic Investigators. In our previous blogpost, you learnt in detail about Computer Forensics. In this article, you will learn about DC3DD forensic tool, used for safer disk imaging.

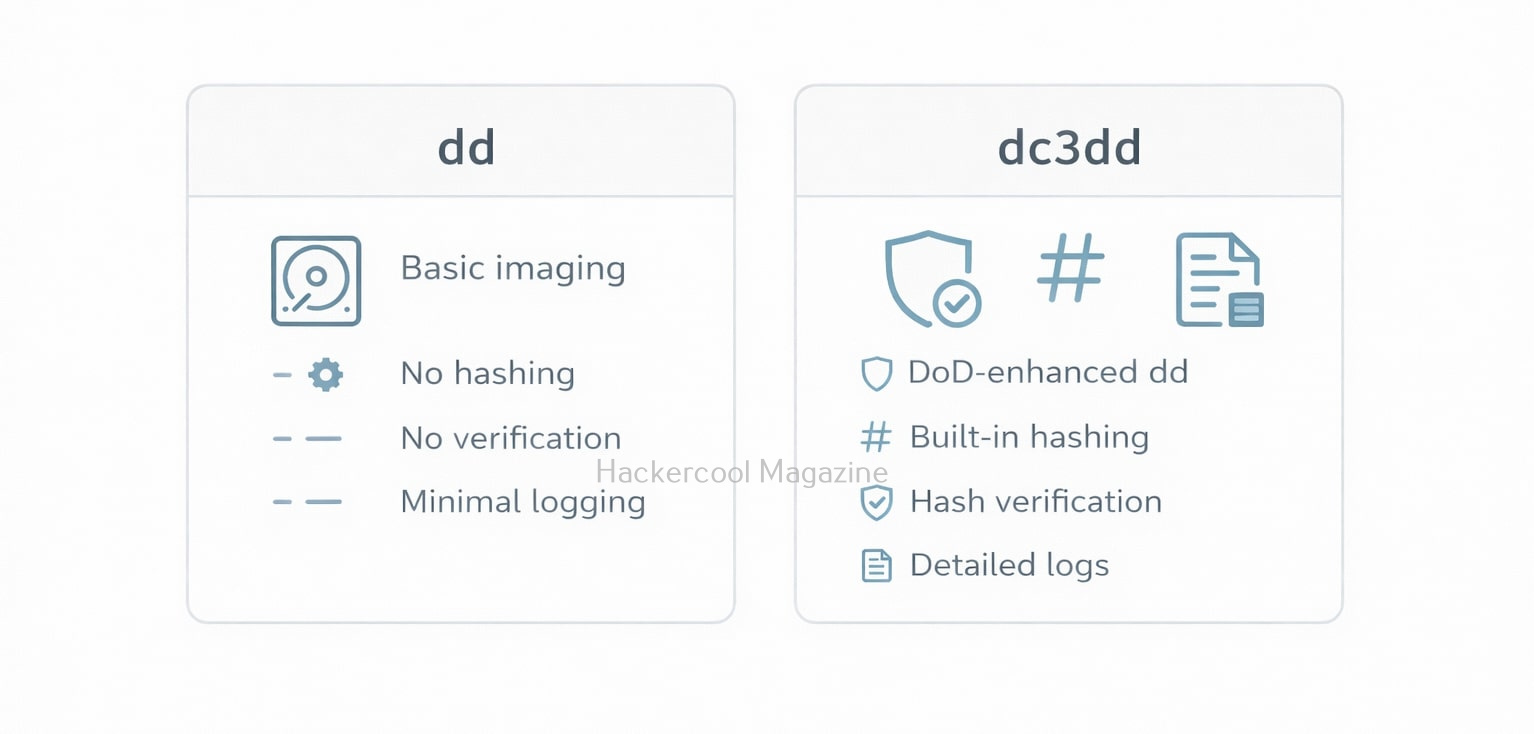
When it comes to digital forensics, acquiring a forensically sound disk image is one of the most important steps in any investigation. Traditionally, investigators relied on the classic dd tool for raw disk copying, but dd lacks features that modern forensic workflows require. That’s where DC3DD comes in.

DC3DD is an enhanced or updated version of dd Forensic tool. Developed by the U.S. Department of Defense Cyber Crime Center (DC3), it has been designed specifically for forensic imaging. It includes built-in hashing, logging, error handling and progress monitoring—features that significantly reduce mistakes and streamline the imaging process. For beginners entering the DFIR world, DC3DD is an ideal tool to learn.

What is DC3DD?

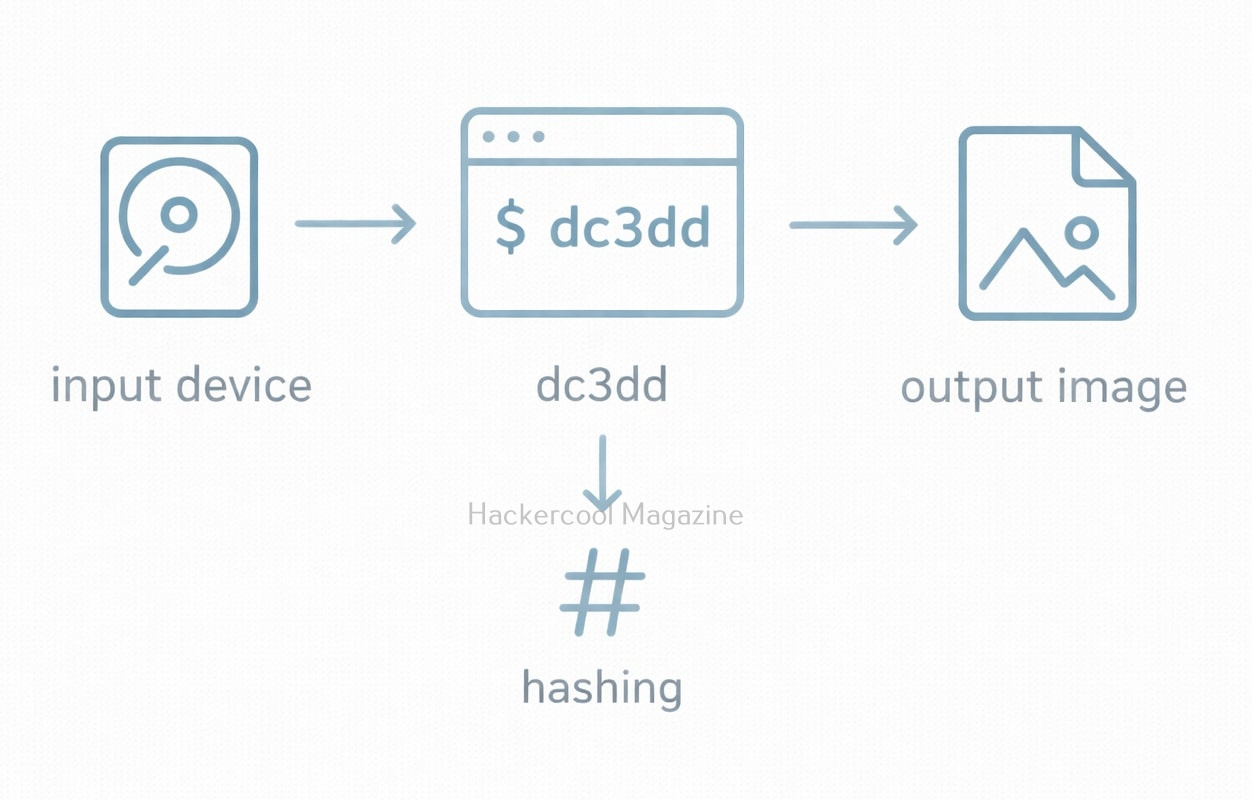
DC3DD is a command-line tool used for creating low-level, bit-for-bit forensic images of storage devices. It’s built from the original source code of dd, but adds functionality needed by law enforcement, military and professional forensic analysts.

Here’s what makes DC3DD powerful:

  • Automatic hashing feature (MD5, SHA-1, SHA-256, SHA-512)
  • Hash verification in the same command
  • Detailed logging
  • Human-readable progress display
  • Ability to split images into chunks
  • Robust error handling

In other words, DC3DD takes the simplicity of dd and lays on it all the forensic-grade features investigators need.

Why Beginners should use DC3DD?

Compared to dd, DC3DD simplifies forensic imaging by giving you a tool that:

  • Shows how much data has been copied
  • Automatically calculates and stores hashes
  • Verifies the image in the same step
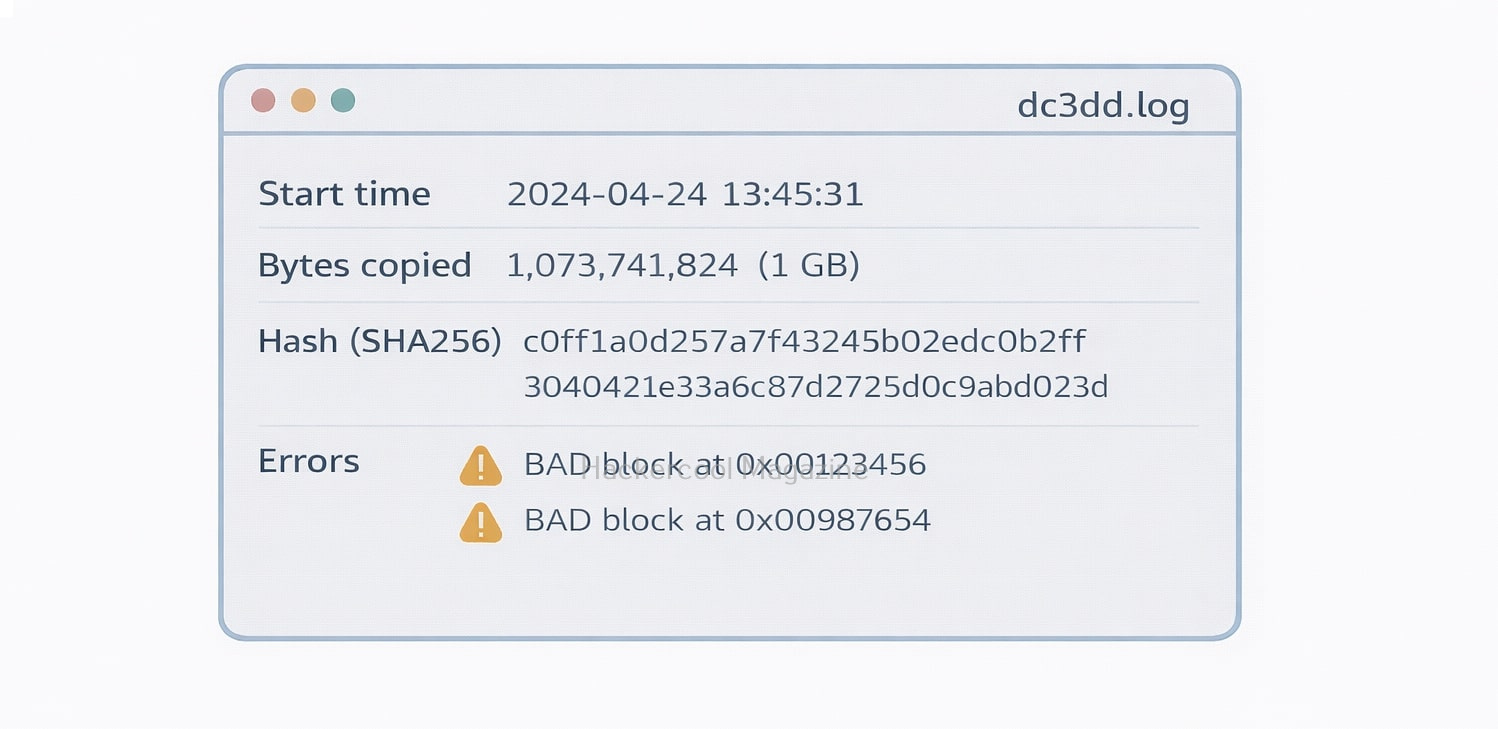
  • Produces detailed forensic logs

Beginners don’t need to run any extra commands or use separate hash or logging tools, DC3DD handles everything in a single workflow. This reduces the chance of human error and ensures the results are courtroom-ready.

A Simple DC3DD Disk Imaging Command

Let’s see the most common beginner command used to create a forensic image:

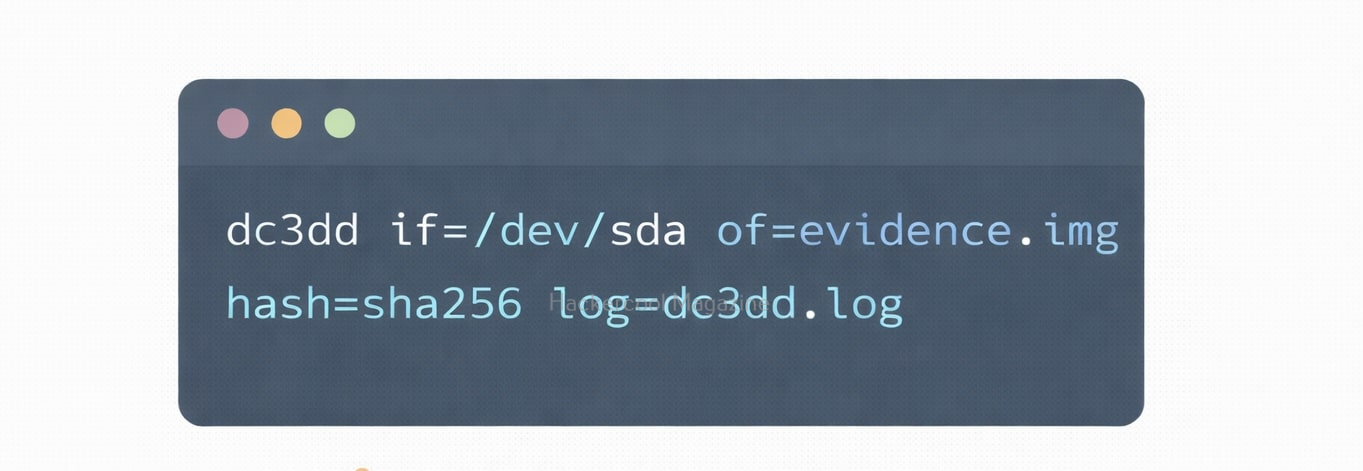
dc3dd if=/dev/sdb of=/cases/suspect.img hash=sha256 log=/cases/dc3dd.log

Here is the explanation of this command,

  • if=/dev/sdb: Reads from the suspect’s storage device
  • of=suspect.img: Saves the output as a raw forensic image
  • hash=sha256: Calculates a SHA-256 hash during imaging
  • log= : Writes all imaging details to a log file

Viewing Progress During Imaging

DC3DD provides built-in progress output, making imaging easier to monitor than dd:

dc3dd if=/dev/sdb of=suspect.img hash=sha1 log=case1.log progress=on

With progress=on, you will see:

  • Number of bytes copied
  • Speed of copying process and
  • Estimated time

All this information is invaluable when imaging large hard drives or SSDs.

Creating Split Images

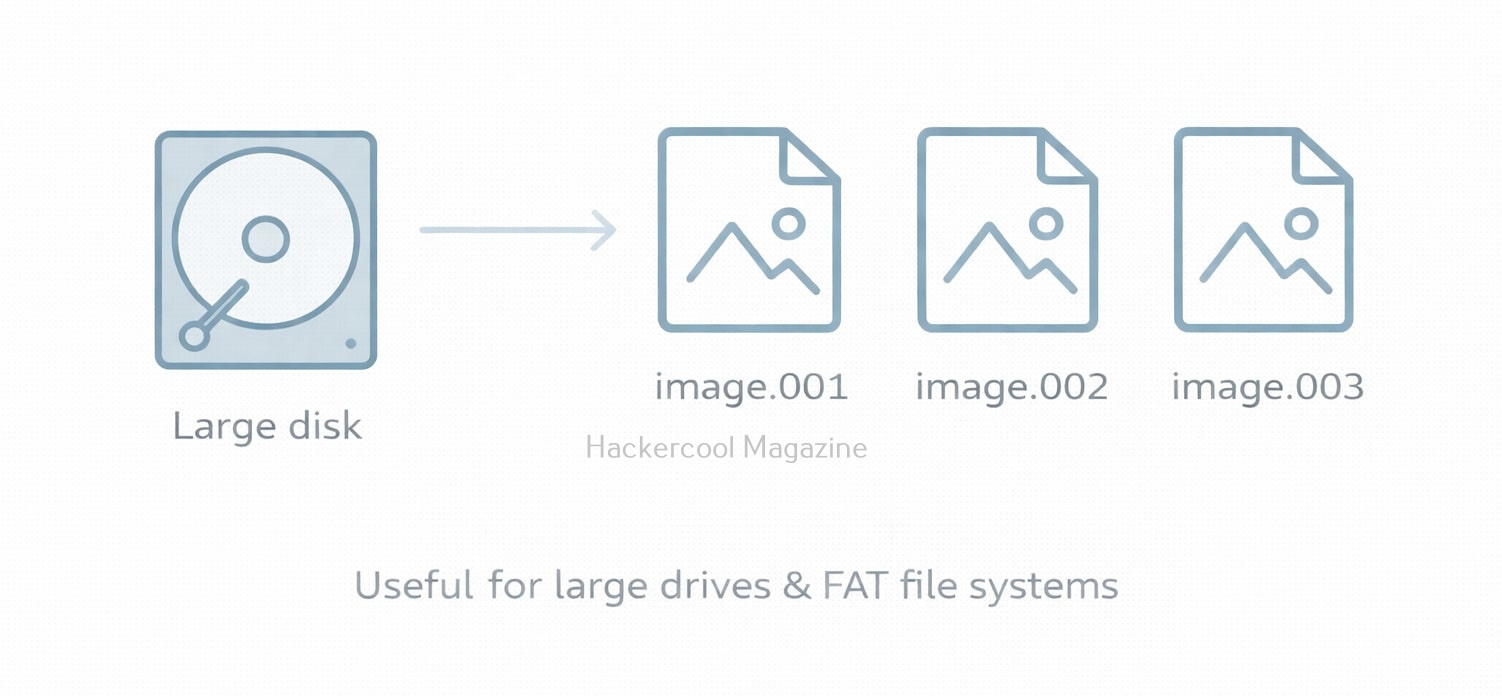
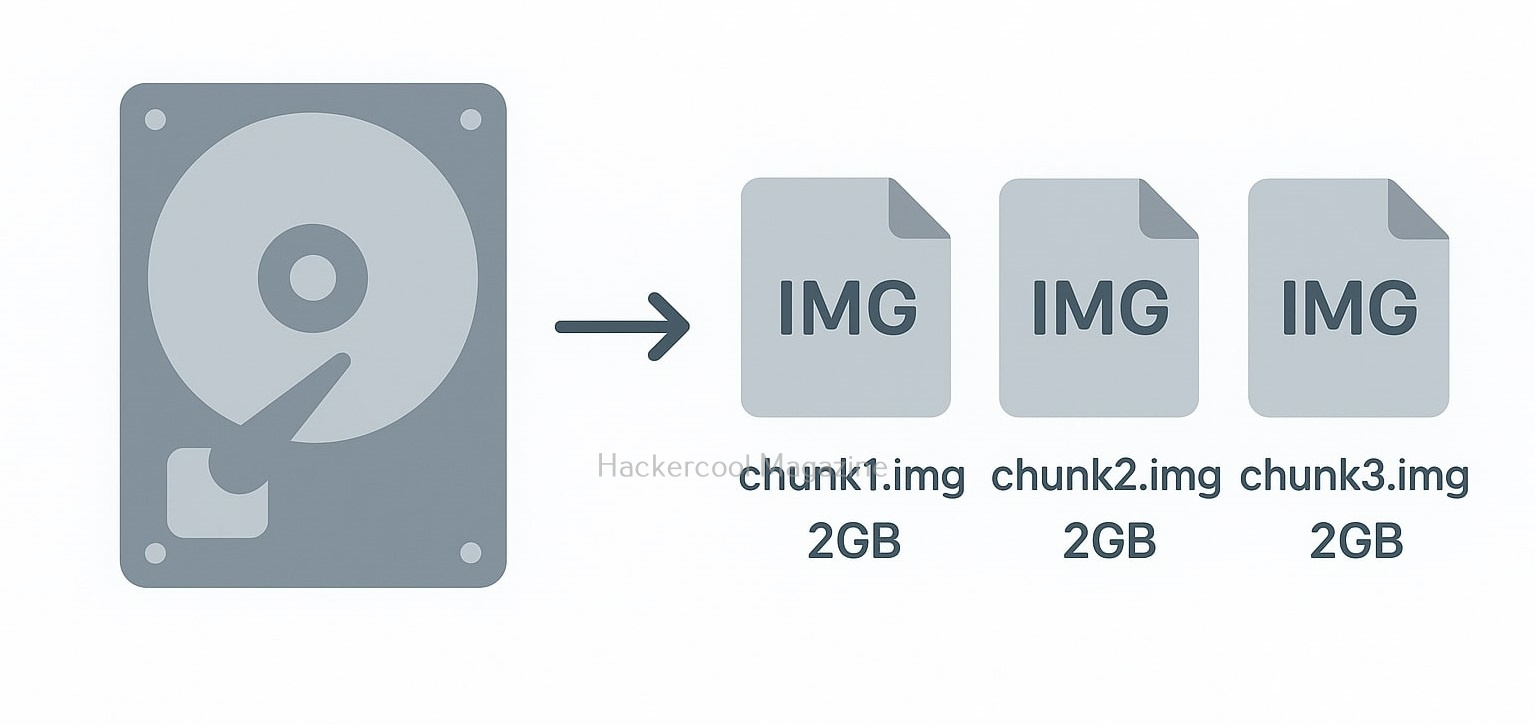
Imaging large drives can produce multi-gigabyte images that are difficult to store or transport. DC3DD can split images automatically as shown below.

dc3dd if=/dev/sdb of=suspect.img split=2G log=split.log

The above command generates files like:

  • suspect.img.000
  • suspect.img.001
  • suspect.img.002

Useful for FAT32 drives, DVDs or segmented evidence storage.

Verifying the Forensic Image Automatically

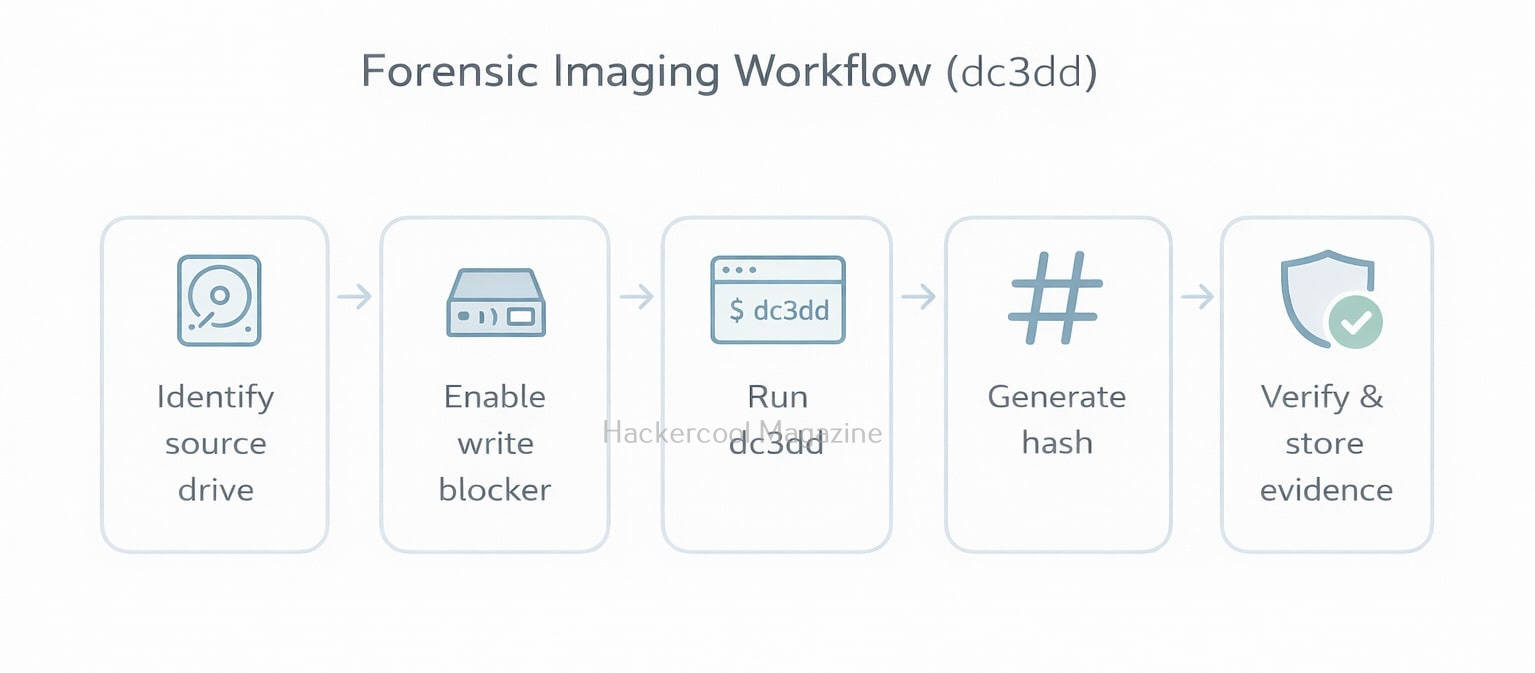
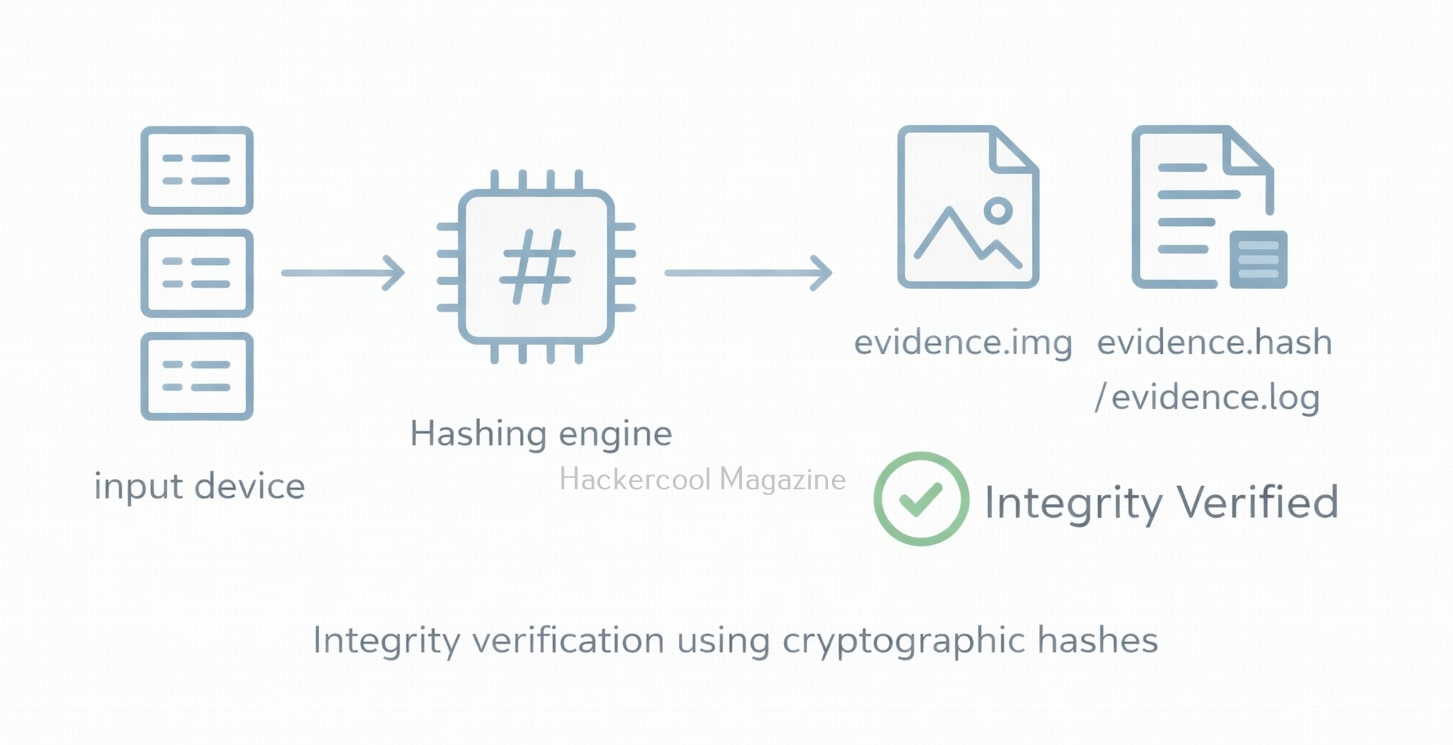
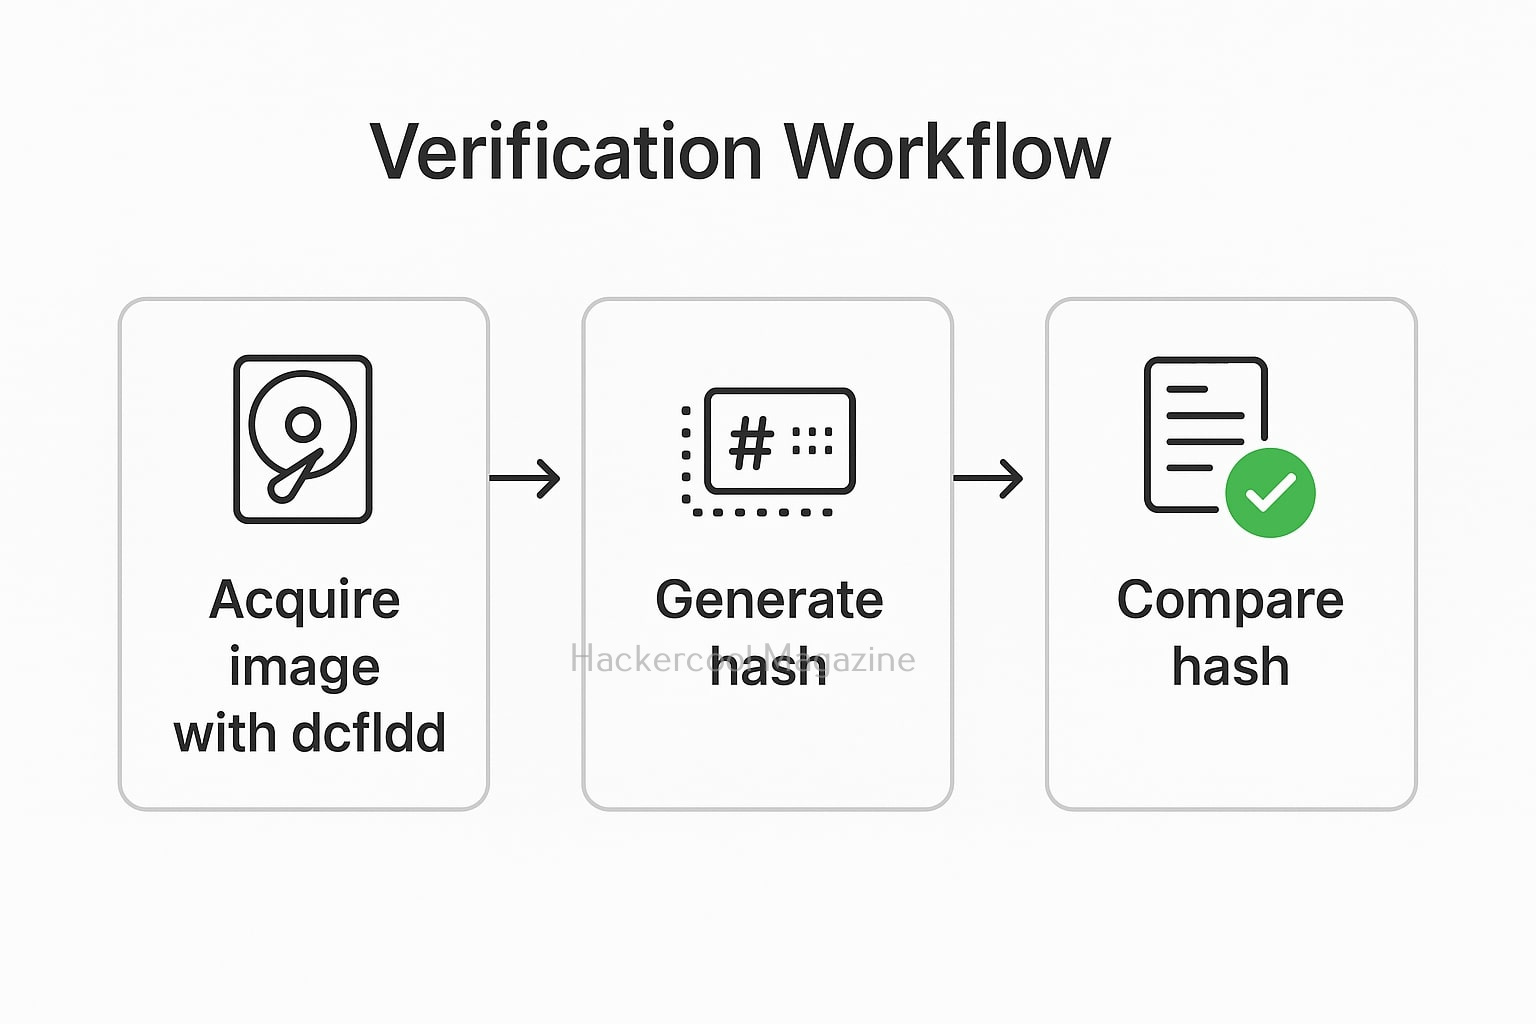
Verification is critical in any forensic workflow. DC3DD can hash the source and the image and compare the hashes in one command:

dc3dd if=/dev/sdb of=suspect.img hash=sha256 verify=sha256 log=verify.log

The resulting log file shows whether both hashes match, a confirmation that the image is a perfect copy.

Imaging only a Partition

Instead of copying an entire disk, you can copy specific partitions too with the command shown below.

dc3dd if=/dev/sdb1 of=/cases/partition.img hash=md5 log=partition.log

You can use this to image USB drives, boot partitions or Linux system partitions.

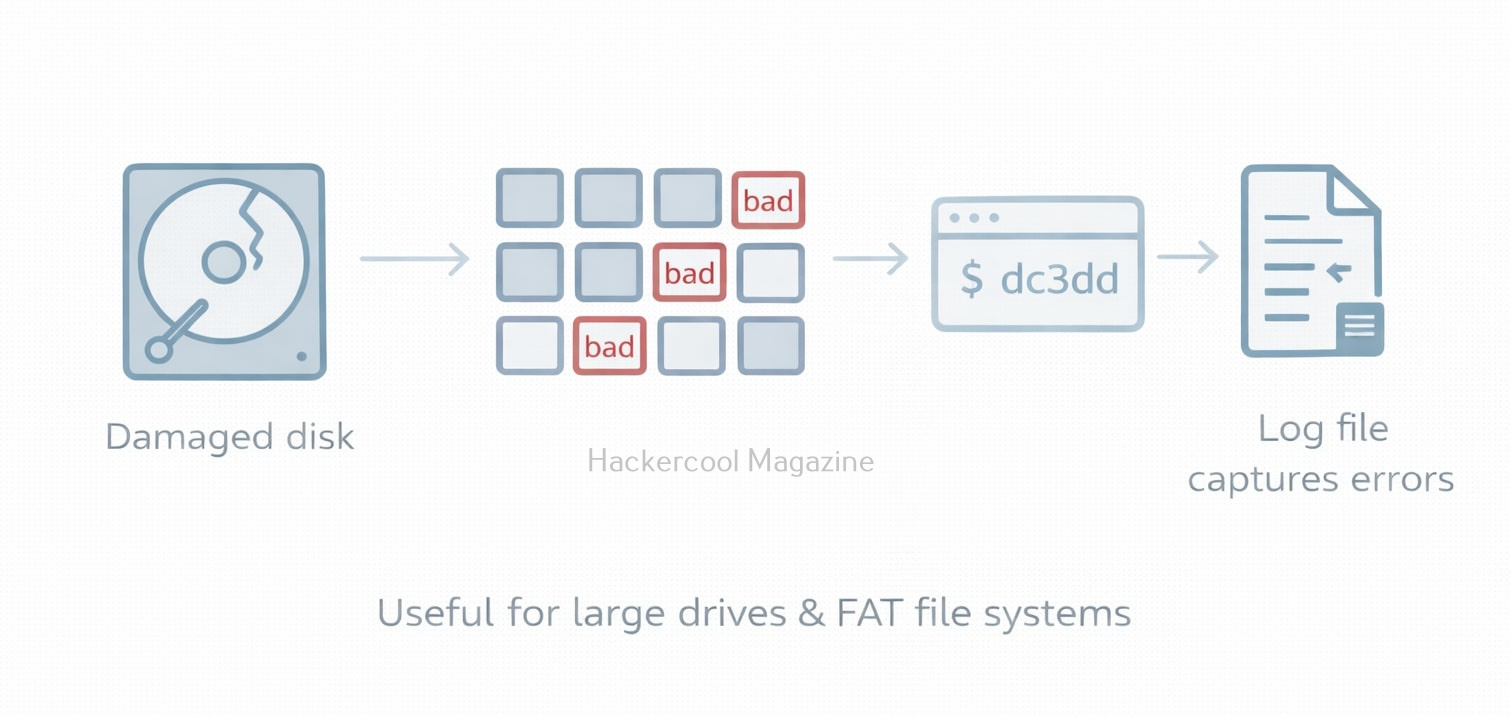
Recovering Data from a Problematic Drive

DC3DD supports useful error-handling features inherited from dd:

dc3dd if=/dev/sdc of=recover.img conv=noerror,sync log=recover.log

  • noerror → Continues even when bad sectors are found
  • sync → Writes zeros if data cannot be read

While DC3DD isn’t as advanced as ddrescue for failing drives, it still performs well in light recovery situations.

Essential Safery Tips for Beginners

1. Always use a Hardware Write-Blocker

This ensures no accidental modifications occur to evidence.

2. Double-Check Device Paths

Always double-check what you are specifying as input and output using commands shown below to confirm you’re imaging the right device. Be careful, a single typo could overwrite evidence.

lsblk

or

fdisk -l

3. Document everything

This includes:

  • Command used
  • Device model/serial
  • Hash values
  • Date, time, examiner name
  • Case reference

Good documentation ensures chain-of-custody integrity.

4. Use String hashes

SHA-256 or SHA-512 are recommended for modern forensic investigations.

Conclusion

DC3DD is one of the most beginner-friendly forensic imaging tools available today. By combining the reliability of dd with modern forensic features like hashing, logging, verification and progress tracking, it gives new investigators everything they need in a single tool. Mastering DC3DD not only improves your imaging skills but also helps you produce professional, court-ready evidence from day one. Next, learn about DCFLDD Forensic tool.

Posted on

Beginners guide to DCFLDD Forensic Tool

Hello, aspiring Cyber Forensic Investigators. In our previous blogpost on Computer Forensics, you learnt in detail about Imaging. In this article, you will learn about DCFLDD, an Imaging tool that made a guest entry in the above-mentioned blogpost.

For anyone starting in digital forensics, the first major skill to learn is acquiring a forensically sound disk image, a bit-for-bit copy of a suspect’s storage device. While many beginners start with the classic dd tool, modern forensic workflows often rely on a more advanced and investigator-friendly tool: dcfldd.

Created by the U.S. Department of Defense Computer Forensics Lab (DCFL), dcfldd builds directly on top of dd, adding features specifically designed for forensic imaging. These improvements make it safer, faster and easier for beginners to use, especially when dealing with hashing, viewing progress and logging. If you’re just stepping into the world of DFIR, dcfldd is one of the best tools to master early.

What is dcfldd?

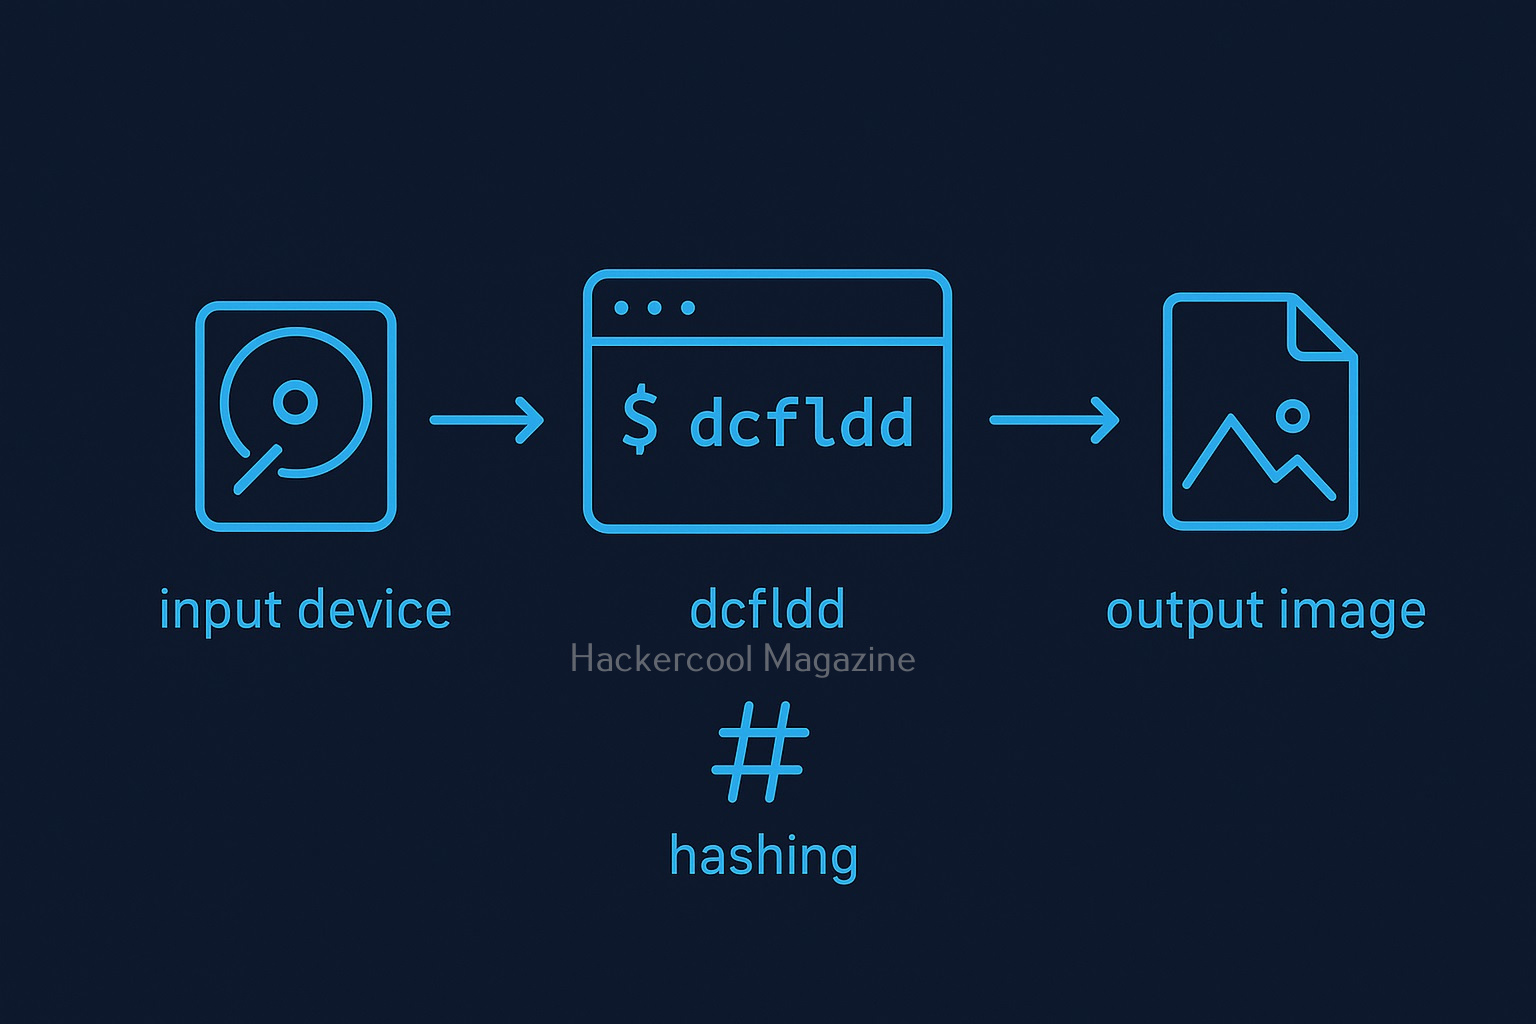
dcfldd is a command-line disk imaging tool used for digital forensics and incident response. Think of it as dd with “forensics mode” built in.

Compared to dd, dcfldd adds:

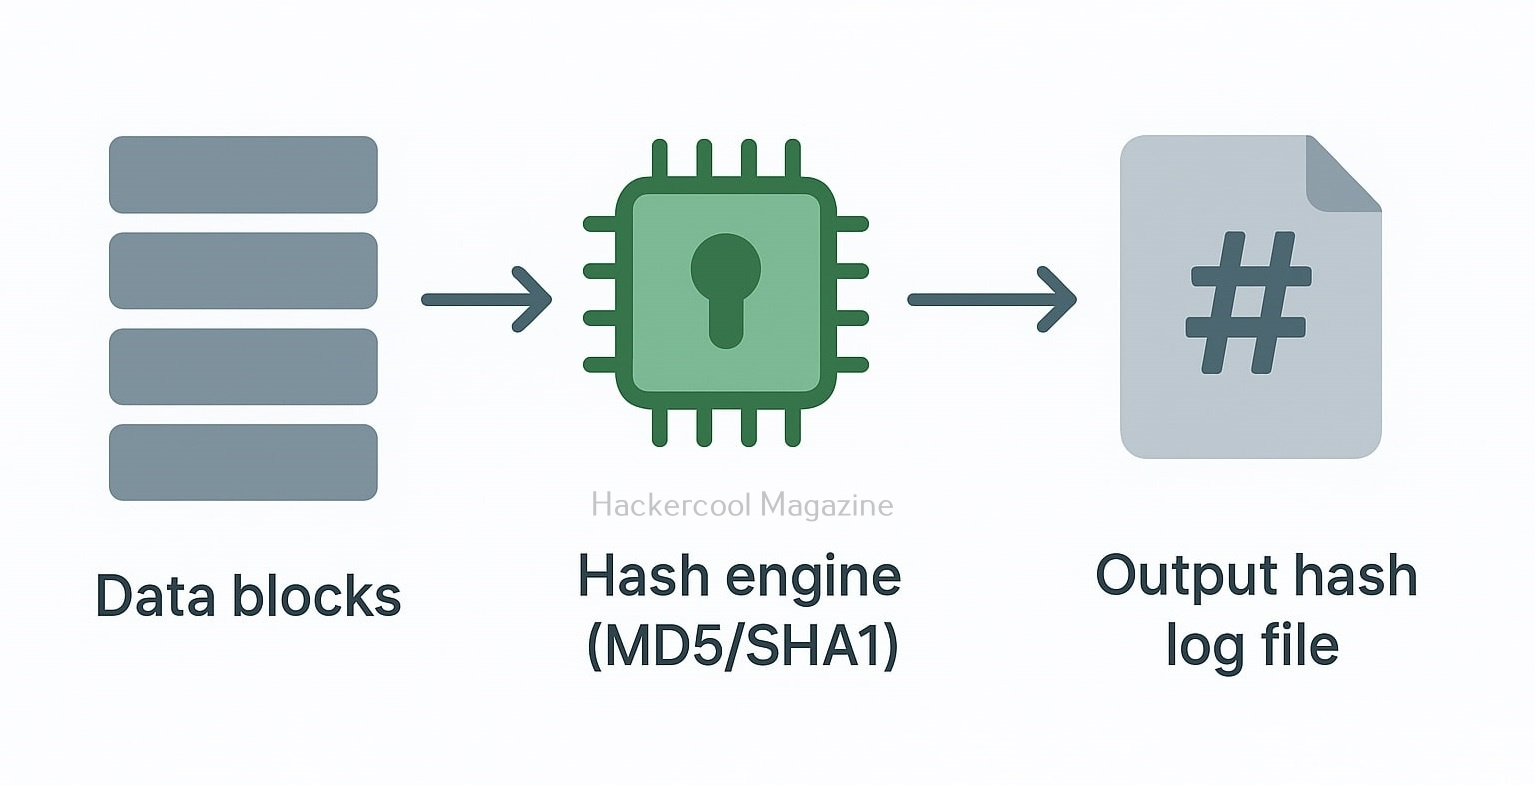
  • Built-in hashing feature (MD5, SHA-1, SHA-256, etc.)
  • Real-time progress indicators
  • Automatic verification
  • Error handling improvements
  • Ability to split output images
  • Detailed logging for forensic reports

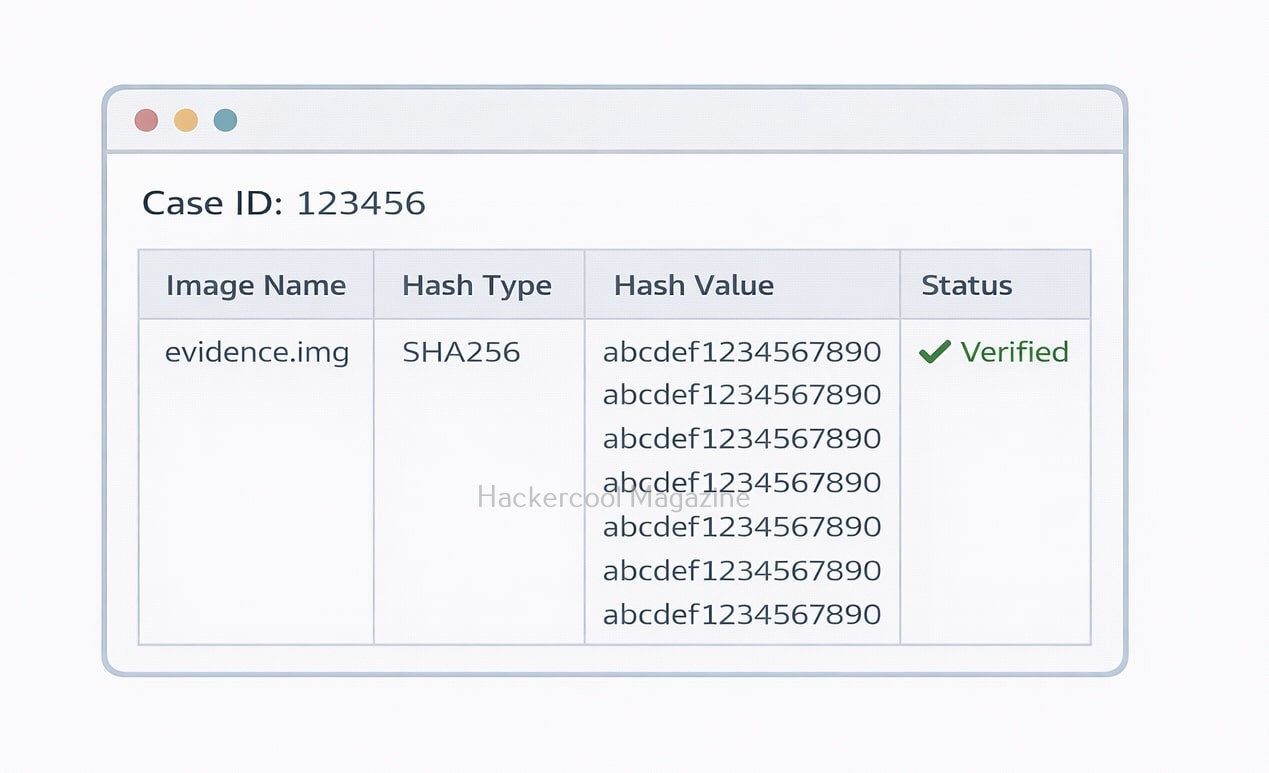
In short, it streamlines the entire imaging process while reducing mistakes, an advantage for both new and experienced investigators.

Why you should use dcfldd instead of dd?

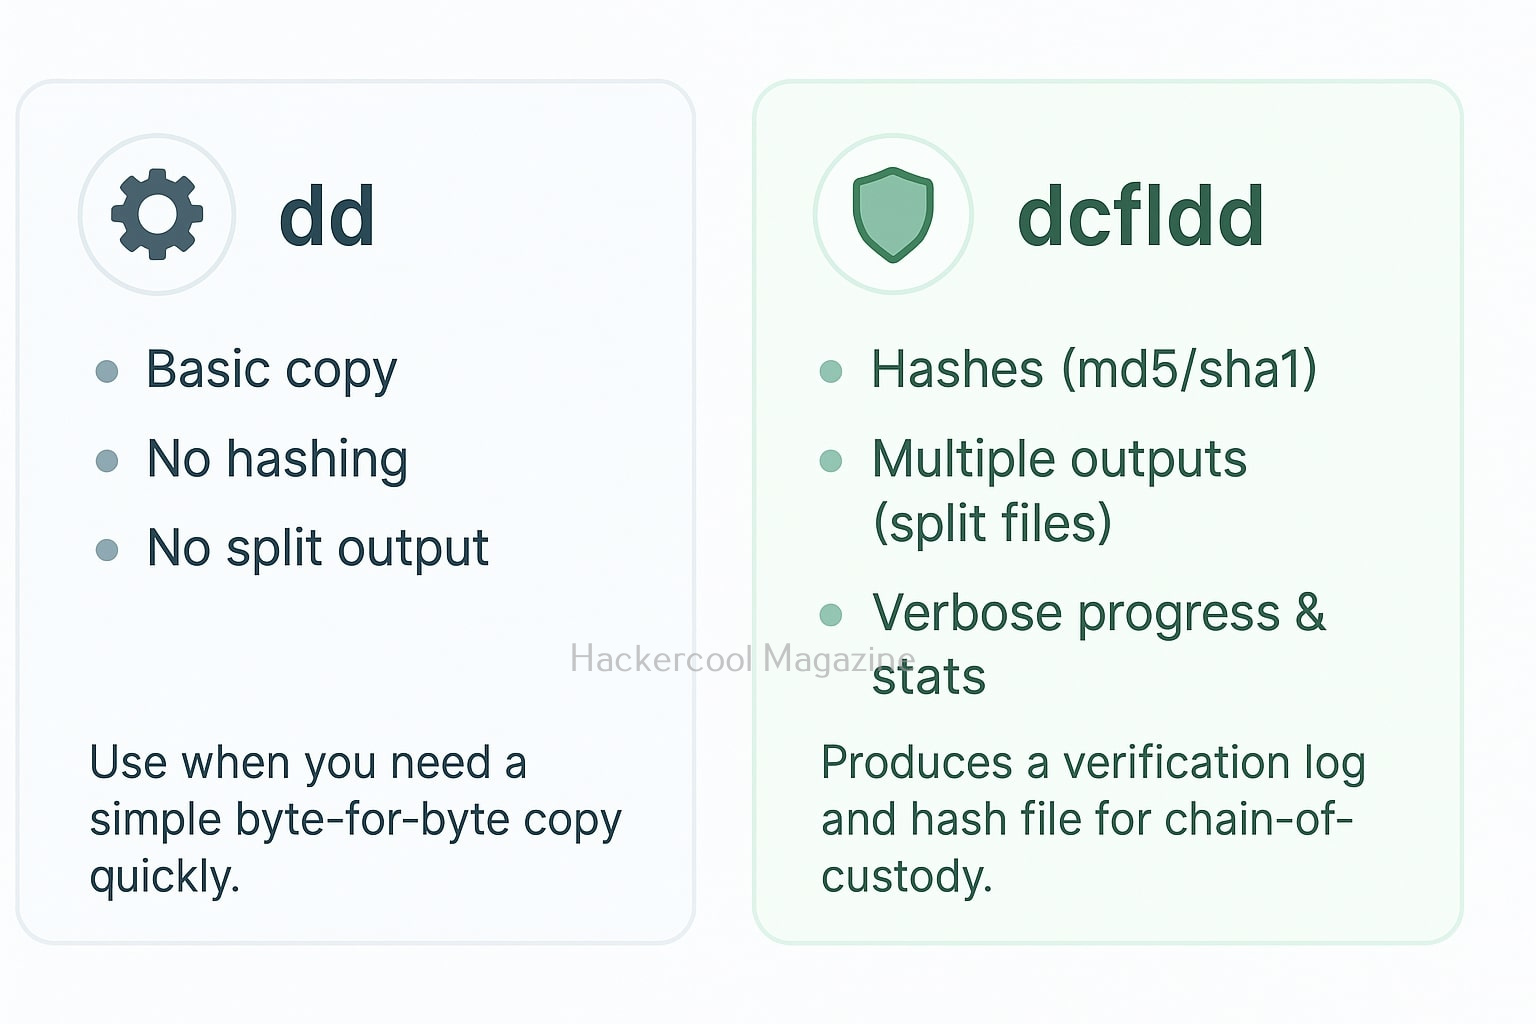
While dd is reliable, it has many limitations. Needless to say, dcfldd fixes many of them:

Featuredddcfldd
Built-in hashing❌ No✅ Yes
Hash verification❌ No✅ Yes
Progress display❌ Basic✅ Built-in
File splitting❌ No✅ Yes
Logging❌ Minimal✅ Automatic

For beginners, these enhancements take away the stress of managing multiple commands and help create court-ready evidence images with fewer commands.

Basic dcfldd Imaging Command

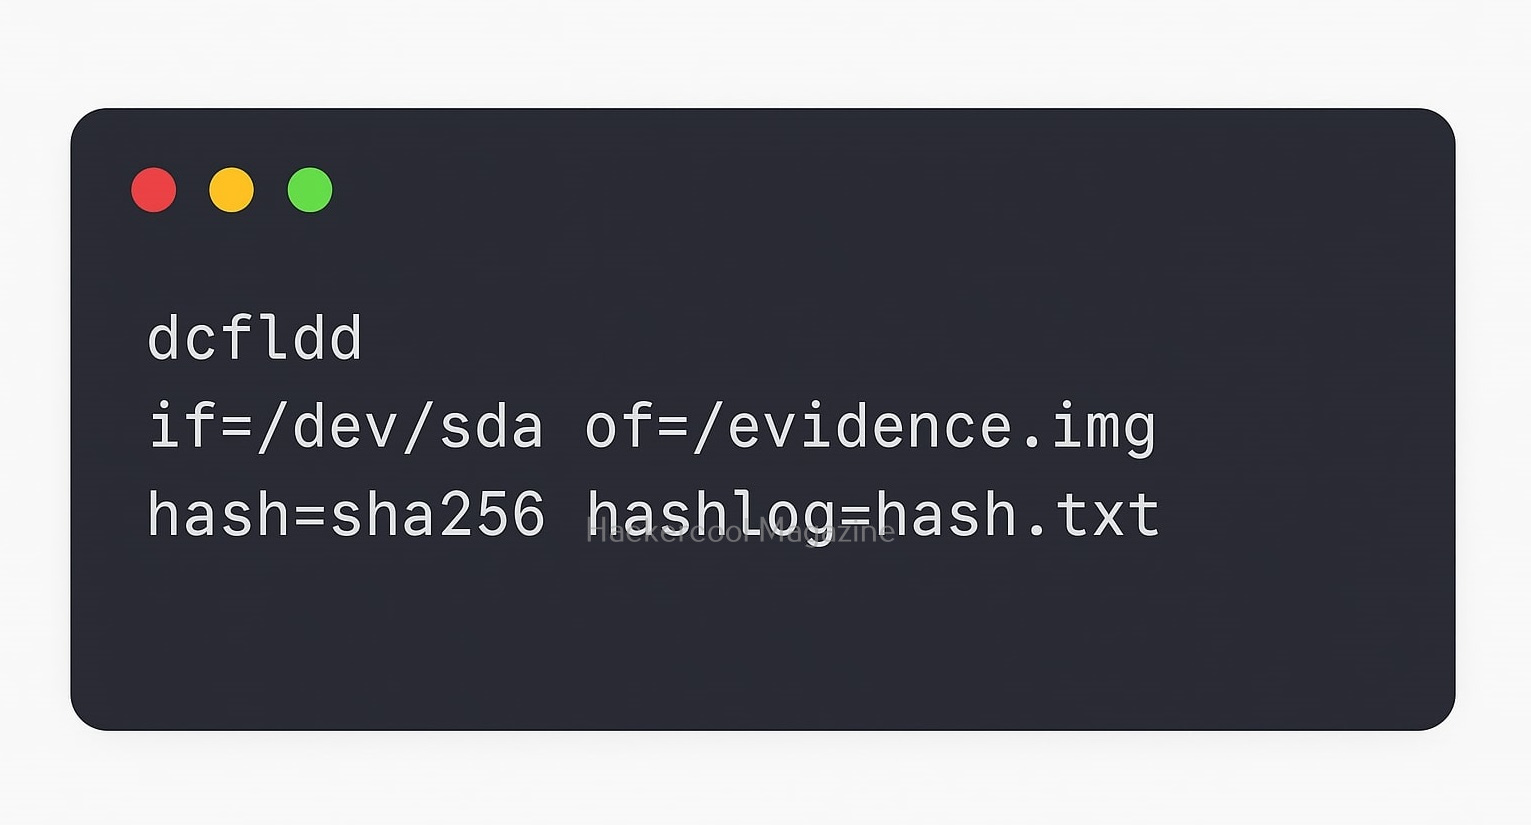
Here’s the most commonly used command when creating a forensic image with this tool.

dcfldd if=/dev/sdb of=/cases/suspect.img hash=sha256 hashlog=/cases/suspect_hash.txt

What this command does is,

  • if=/dev/sdb: Reads from the suspect drive
  • of=suspect.img: Saves the output as a disk image
  • hash=sha256: Generates a SHA-256 hash during imaging
  • hashlog=: Saves the hash value to a file

This single command does what dd requires multiple commands for, making it ideal for beginners learning proper forensic acquisition.

Show Progress While Imaging

Seeing progress of your imaging is extremely helpful, especially when imaging large drives. dcfldd has native support for this. This can be done using command shown below.

dcfldd if=/dev/sdb of=suspect.img hash=sha1 hashlog=hash.txt statusinterval=5

Where,

statusinterval=5: Shows progress every 5 seconds

You’ll see data copied, percentage of copying completed and throughput.

How to Split a Large Image into Smaller Chunks?

Large forensic images can be difficult to store and transfer. dcfldd allows for easy splitting using command shown below.

dcfldd if=/dev/sdb of=suspect.img split=2G

The above command creates files like:

  • suspect.img.000
  • suspect.img.001
  • suspect.img.002

Perfect for archiving and moving across FAT32 drives or network locations.

How to Verify the Image?

Verification of images is very crucial in forensics. dcfldd can compare source and image hashes using command shown below.

dcfldd if=/dev/sdb of=suspect.img hash=sha256 verifylog=verify.txt

When we use the above command, dcfldd will not only generate a hash for both the source and the image but also confirm whether they match.

How to Image only a specific Partition?

In some cases, we don’t need to image the whole disk. We just need the Image of a specific Partition. We can use dcfldd to image a single partition using command shown below.

dcfldd if=/dev/sdb1 of=/cases/partition_sdb1.img hash=md5 hashlog=partition_hash.txt

This command is very helpful while Imaging USB drives, boot partitions or Linux system partitions.

How to Recover Data from a Damaged Drive?

The below command recovers data from a damaged drive.

dcfldd if=/dev/sdc of=recovery.img conv=noerror,sync

  • noerror → Continues even if sectors are unreadable
  • sync → Fills unreadable sectors with zeros to preserve structure

While ddrescue is still best for severely damaged drives, dcfldd performs reliably for light recovery tasks.

Beginner Tips for Safe Forensic Imaging

1. Always Use a Hardware Write-Blocker:

Never and never connect a suspect drive directly. Always use write-blockers to ensure the original data remains untouched.

2. Double-Check Device Names

Be very, very careful. A small typo can prove dangerous while using this tool. Mixing up /dev/sdb and /dev/sdc can permanently damage evidence.

Use command shown below to confirm device names.

lsblk

3. Document Everything

Always make a record of:

  • Hash values
  • Device model and serial number
  • Commands used
  • Date and time
  • Case number

This ensures chain-of-custody integrity.

4. Use Strong Hashes

SHA-256 is the current standard in courts and forensic reports.

Conclusion

dcfldd is one of the most beginner-friendly forensic imaging tools available today. Its built-in hashing, progress tracking, verification and logging eliminate many of the hurdles new investigators face when using tools like dd. By mastering a few essential commands, even beginners can produce professional, court-admissible forensic images with confidence. Next, learn about dc3dd, another imaging tool.

Posted on

Beginners guide to dd Forensic tool

Hello, aspiring Cyber Forensic Investigators. In our previous blogpost, you learnt in detail about Computer Forensics. In this article, you will learn about dd forensic tool, and evidence acquisition tool which made a guest entry in the above-mentioned blogpost.

Despite the rapid evolution of digital forensics tools, one command-line utility has remained a trusted backbone of evidence acquisition for decades: dd. Minimalist, powerful and universally available, dd continues to be a fundamental component in forensic imaging workflows. Whether you’re an investigator, incident responder or DFIR student, learning about dd is a must.

What is dd and Why it is still Relevant?

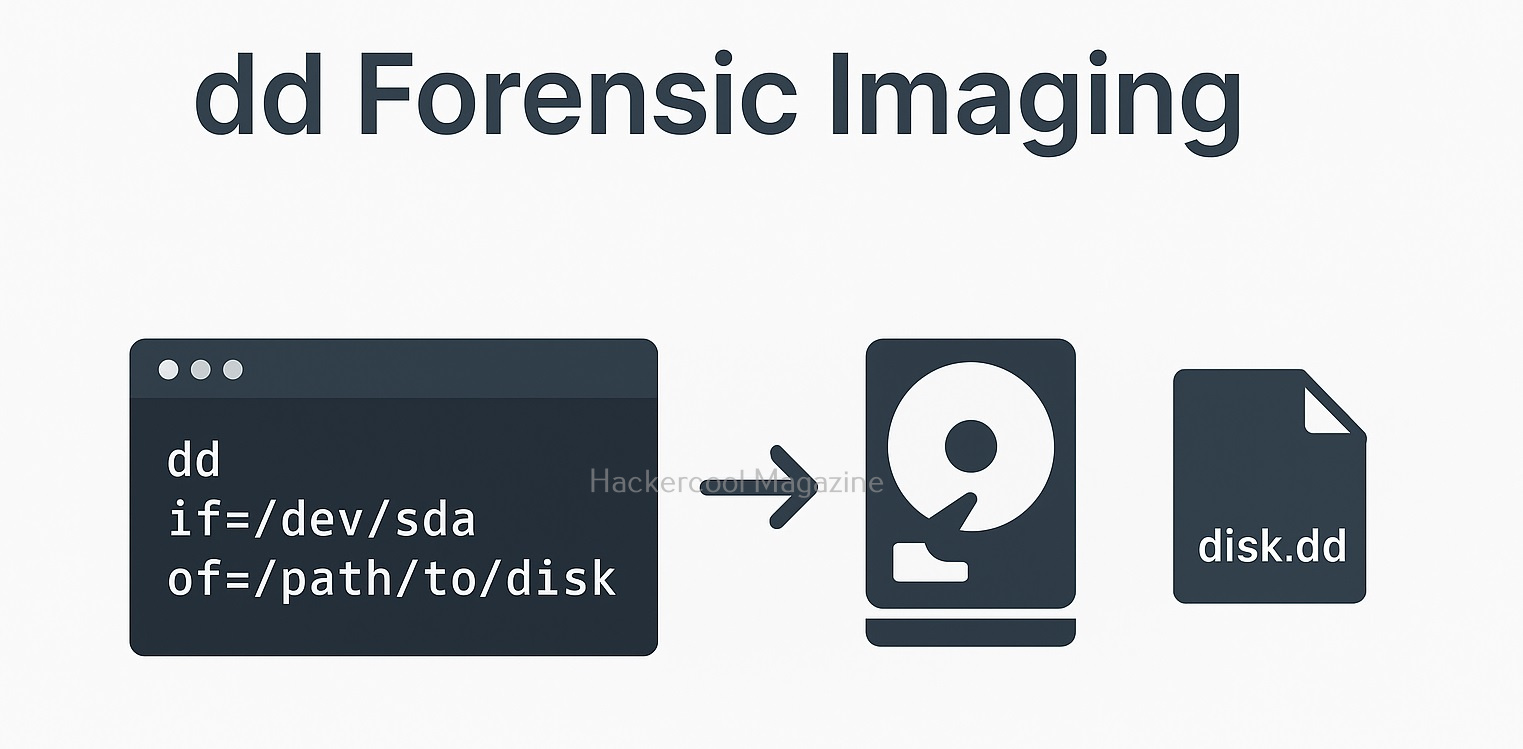
dd is used to create forensically sound images of the target devices. The word “dd” stands for “data duplicator.” Originally, it was not created with forensics in mind, but its ability to copy data bit-for-bit from virtually any storage device made it an accidental forensic superstar. Designed for Unix systems in the 1970s,

Today, it is used to:

  • Create forensically sound disk images
  • Extract data from partitions, disks, memory cards and USB drives
  • Copy entire file systems for analysis
  • Works across Linux, macOS, BSD and Windows (through WSL or Cygwin)

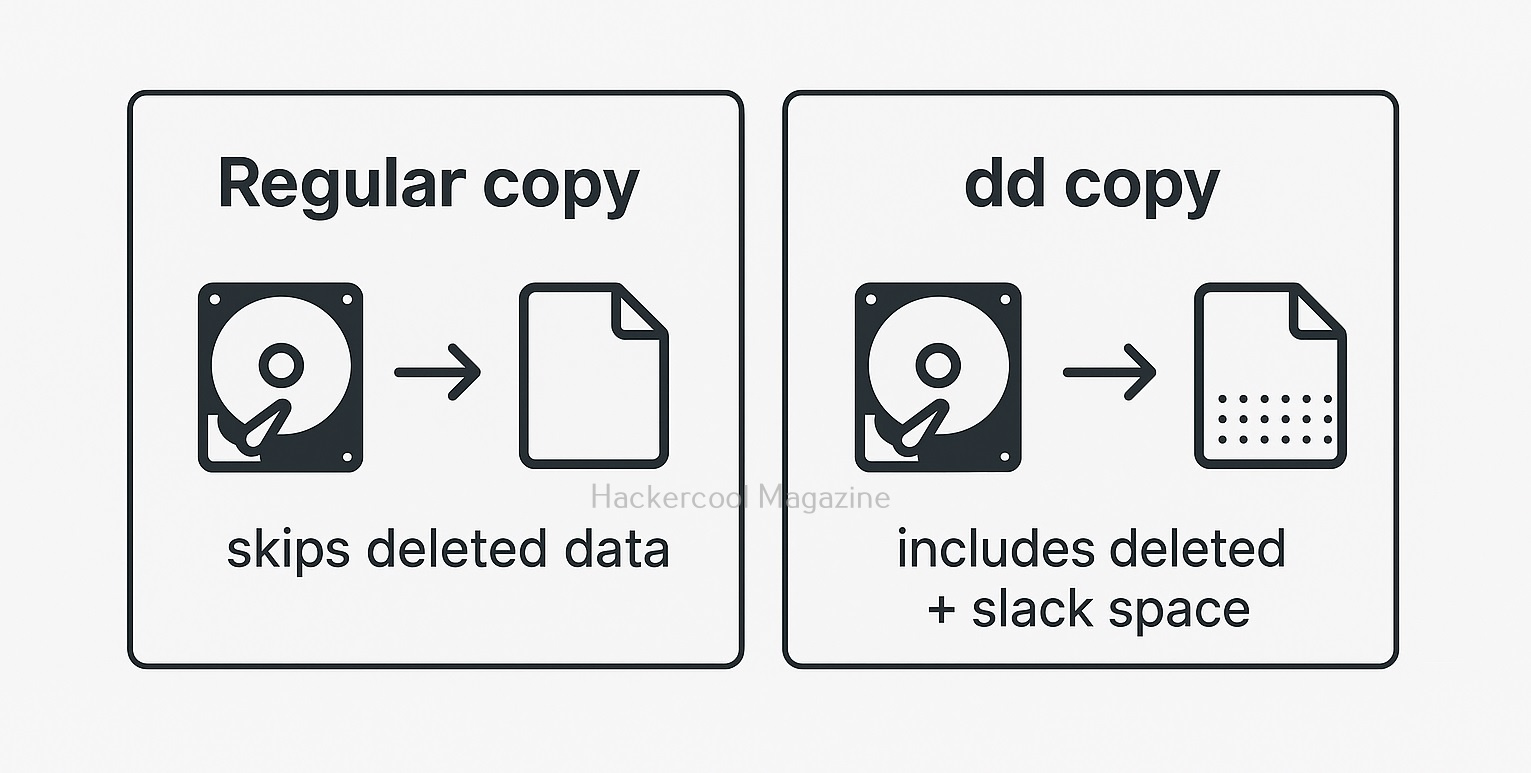
In forensics, dd’s importance lies in its precision. It doesn’t care about file systems, metadata or even OS structures. It just opies everything at the raw level. This includes deleted files, slack space and system artifacts that GUI tools may overlook.

Basic Command Structure

Before diving into forensic imaging, let’s understand dd’s syntax:

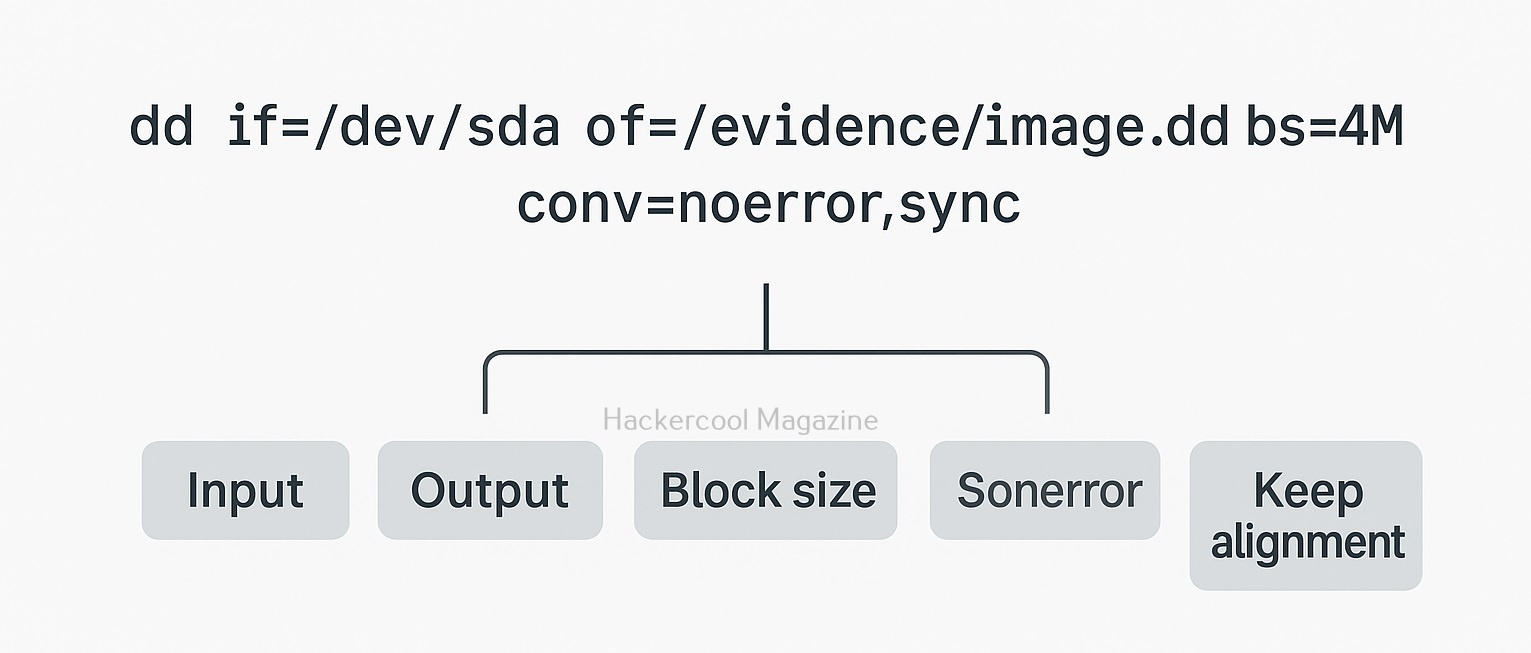
dd if=<input> of=<output> bs=<block size> options

  • if= Input file or device (e.g., /dev/sda)
  • of= Output file or image
  • bs= Block size (affects speed)
  • Additional options control behavior during copying

Now that you have understood the basic command structure of this tool, please note that a small typo can overwrite a disk. So examiners type dd commands with extreme caution.

How to create a Forensic Disk Image with dd?

The command most widely used to create a raw forensic image with this tool is:

dd if=/dev/sdb of=/evidence/suspect01.img bs=4M conv=noerror,sync

What this command does is:

  • if=/dev/sdb – Reads from the suspect’s drive
  • of=suspect01.img – Writes to an image file
  • bs=4M – Reads in 4 MB blocks for faster performance
  • conv=noerror – Continues imaging even if bad sectors exist
  • conv=sync – Pads missing data, preserving structure

This produces a forensically complete bitstream image, capturing every sector of the drive.

Generate a Hash for Integrity Verification:

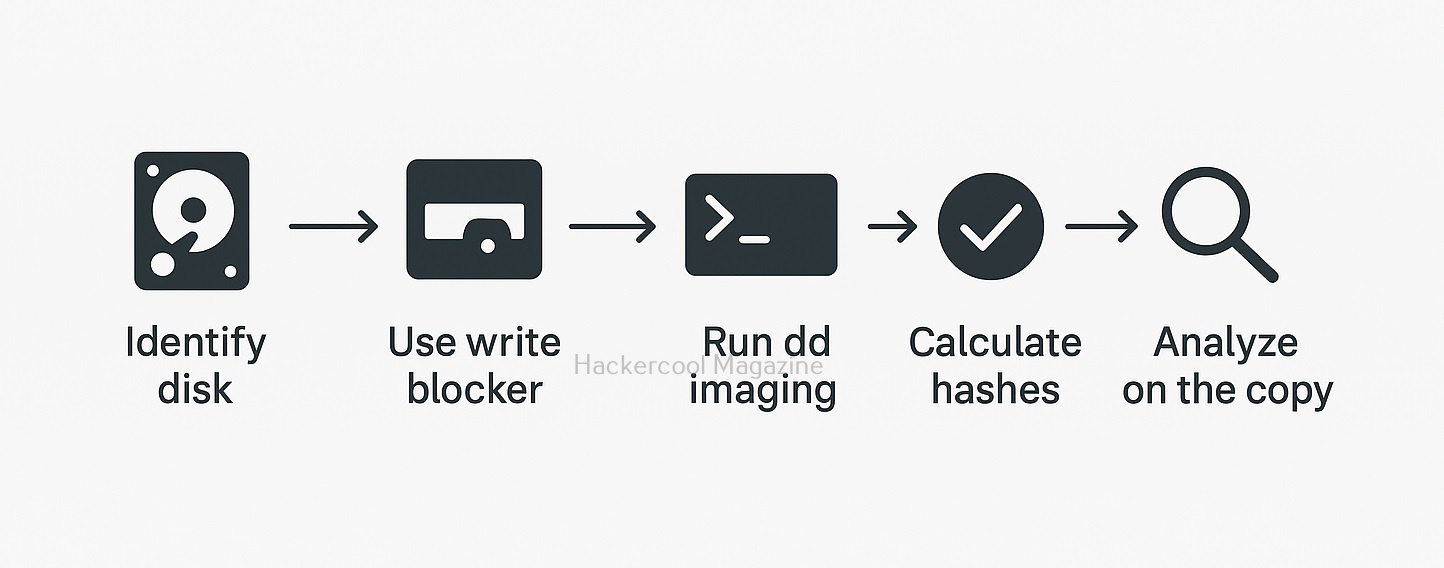
Creating a forensic image is itself incomplete without verifying its integrity. Investigators always hash both the source device and the dd image as shown below.

sha256sum /dev/sdb
sha256sum /evidence/suspect01.img

If both values match, the image is considered to be an exact duplicate.

Showing Progress during Imaging:

While creating the forensic image, dd doesn’t show progress by default, but You can use two methods to view progress:

Method 1 — Sending USR1 Signal:

Run dd in one terminal, then in another terminal, run command:

kill -USR1 $(pidof dd)

dd will print progress to its running terminal.

Method 2 — Using pv (Pipe Viewer):

pv /dev/sdb | dd of=suspect01.img bs=4M

pv acts as a progress bar for dd imaging.

How to create a Forensic Clone of a Partition?

If you want to create a forensic clone of only a specific partition, this is the command:

dd if=/dev/sda1 of=/cases/partition_sda1.img bs=1M

This is the common practice when you want to image Linux or Android partitions.

How to restore from a dd Image?

To restore or reconstruct a drive from the dd Image, you need to run command shown below.

dd if=suspect01.img of=/dev/sdc bs=4M

This recreates the original drive structure on another disk.

How to handle Damaged or Failing Drives?

In some cases, dd can image failing drives too. For this, you need to use parameters shown below.

dd if=/dev/sdb of=recovered.img bs=512 conv=noerror,sync

Using smaller block sizes (512 bytes) helps extract readable sectors from degraded media.

Forensic Safety Tips while using dd

Although dd is a awesome tool for forensic imaging, here are some safety measures you should follow while using tool.

1. Always Use a Write-Blocker:

Never and never connect a suspect drive directly. Always use a Hardware write-blocker. They prevent accidental modification of the suspect drive.

2. Double-check if= and of=:

Always double-check what you are specifying as input and output while using this tool. A single typo can overwrite your evidence source. Many investigators type dd commands slowly or use the “read-only” flag on devices.

3. Document Every Step:

Always document every step you take. This should include:

  • Device details
  • Start/stop times
  • Hash values
  • Commands used
  • Examiner name and case number

This measure is not just relevant to thsi tool but entire digital forensic process. Proper documentation ensures admissibility in court.

4. Store Raw Images securely:

After generating forensic images, store them on encrypted storage with proper chain-of-custody controls. Note that dd images are huge.

Limitations of dd in Modern Forensics

For all its powerful featires, dd has certain drawbacks:

  • It doesn’t have built-in hashing functionality.
  • No automatic logging feature.
  • It doesn’t have capability of resuming if imaging stops for some reason.
  • Not optimized for severely damaged drives

This is why variants like DC3DD and GNU ddrescue were developed, offering better logging, hashing and recovery options. Still, dd remains the most stable, universal base tool.

Conclusion

Despite its age and simplicity and introduction of many new tools, dd continues to be a workhorse of forensic imaging. Its low-level copying capabilities, universal availability and stability make it a tool every aspiring forensic professional must master. Even with advanced forensic suites available, dd stands strong because it does one thing exceptionally well: create a perfect, verifiable replica of digital evidence.