If you’re starting to learn cybersecurity, vulnerability scanning is one of the skills you’ll encounter early in your journey. Organizations need to identify weaknesses across servers, workstations, applications and network devices before those weaknesses become serious security problems.
One of the well-known tools used for vulnerability assessment is Nessus. Nessus is a vulnerability assessment platform that helps security professionals identify potential security weaknesses, outdated software, configuration problems and other security issues.
For beginners, Nessus is useful because it provides an opportunity to understand how vulnerability scanners work and how security teams analyze large numbers of potential findings. In this guide, we’ll explore what Nessus is, how vulnerability scanning works, what Nessus can identify, how beginners can learn it safely and why scanner results still require human analysis.
New to Ethical Hacking?
Start your journey with The Beginner Ethical Hacker Starter Kit (2026 Edition).
Inside the free guide, you’ll learn:.
- Ethical hacking fundamentals
- Beginner cybersecurity roadmap
- Essential hacking tools
- Common vulnerabilities explained

What Is Nessus?
Nessus is a vulnerability assessment tool developed by Tenable. It is designed to scan systems and identify potential vulnerabilities and configuration issues. Security professionals can use vulnerability scanners to assess environments containing:
- Servers
- Workstations
- Network devices
- Applications
- Cloud infrastructure
- Other connected systems
Rather than manually checking every system for known security problems, a scanner can automate much of the initial assessment process.

Why Is Vulnerability Scanning Important?
Modern organizations may have hundreds or thousands of assets. Manually checking every operating system, application and configuration would be extremely time-consuming. Vulnerability scanners help security teams discover potential problems more efficiently.
A scanner may identify issues such as:
- Missing security updates
- Outdated software
- Known vulnerabilities
- Insecure configurations
- Exposed services
- Weak security settings
The results give security teams a starting point for investigation and remediation.
How Does Nessus Work?
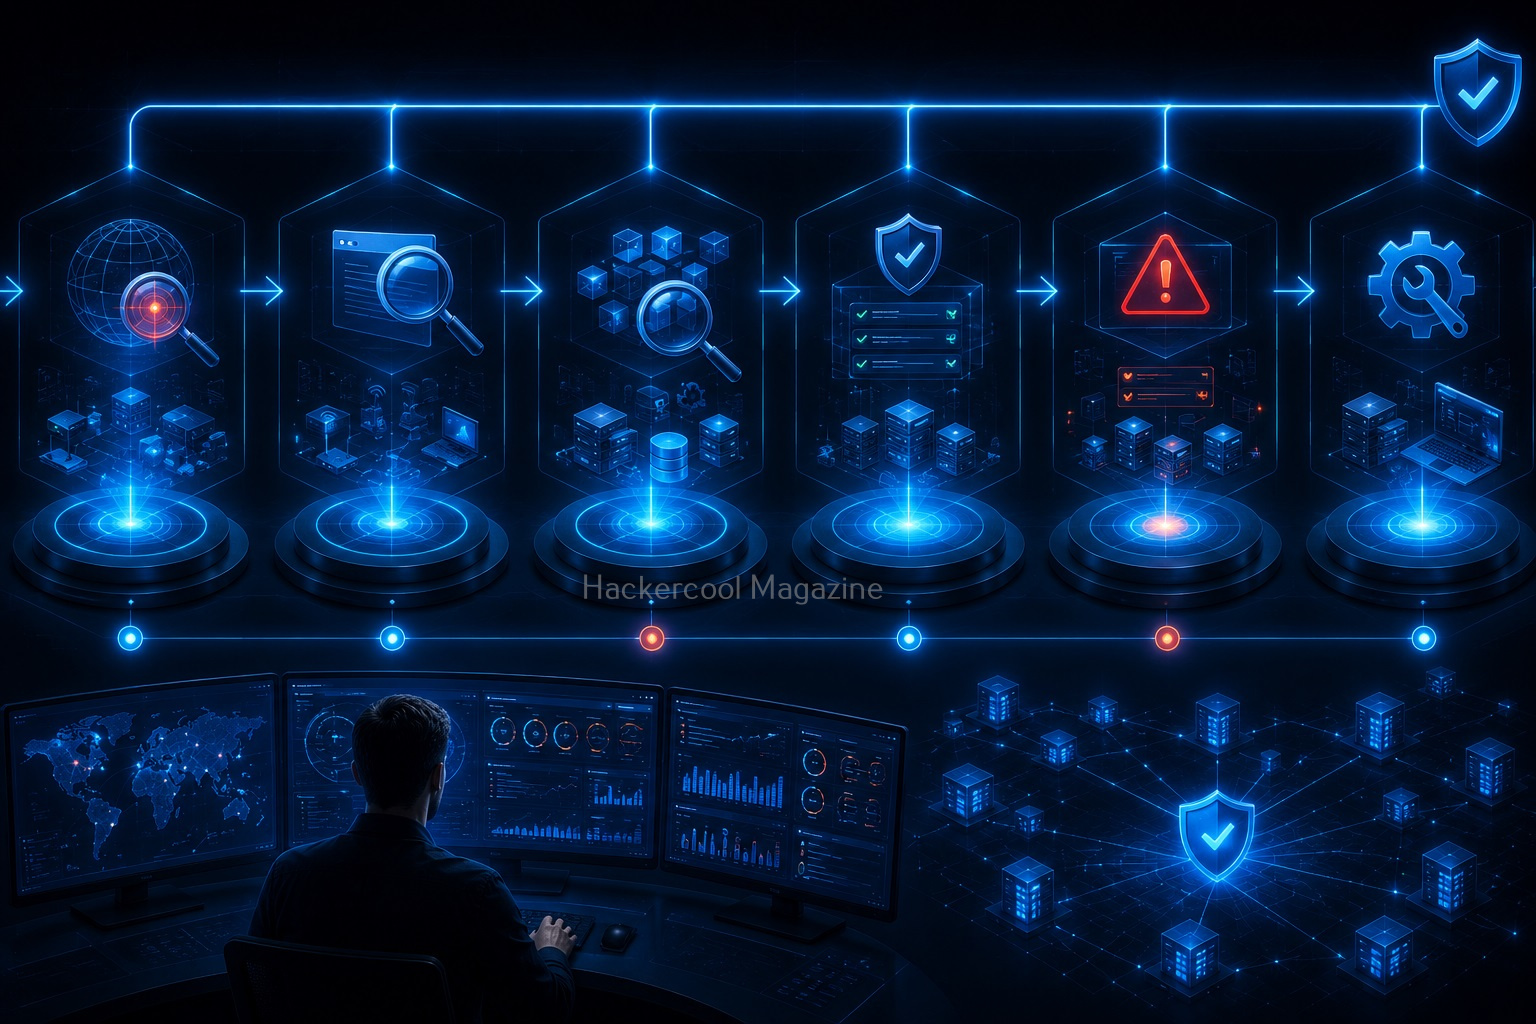
At a high level, vulnerability scanning with Nessus follows a relatively simple process.
1. Identify the Target:
The security professional selects systems that are authorized for assessment. These might include servers, workstations or network devices.
2. Discover Information:
The scanner gathers information about the target, including available services and software.
3. Perform Security Checks:
Nessus compares what it discovers against its collection of vulnerability and configuration checks.
4. Generate Findings:
Potential security issues are organized into a report.
5. Analyze and Remediate:
Security professionals investigate important findings and determine how they should be fixed or mitigated.
The scanner automates much of the repetitive work but people remain responsible for interpreting the results.

What Can Nessus Detect?
The exact findings depend on the target, configuration, plugins and scan type. Nessus can help identify areas such as:

1. Outdated Software:
Older versions of software may contain publicly known security vulnerabilities. A scanner can help identify potentially outdated components that require review.
2. Missing Security Updates:
Unpatched operating systems and applications can create unnecessary security exposure. Vulnerability scanning can help organizations identify systems that may require updates.

3. Configuration Problems:
Security isn’t only about software vulnerabilities. Incorrect configurations can also create risk. A scanner can identify certain insecure settings and configuration weaknesses.
4. Network Services:
Scanning can provide information about services exposed by systems. Understanding which services are available helps security teams determine whether they are necessary and appropriately protected.
5. Known Vulnerabilities:
Nessus can identify potential vulnerabilities associated with software and system configurations. Findings may reference standardized vulnerability identifiers such as CVE entries.

Understanding Nessus Plugins
One important concept beginners should understand is the plugin. Nessus uses plugins to perform different security checks. Each plugin is designed to identify a particular type of vulnerability, configuration issue or other security condition.
Think of plugins as individual security checks that collectively allow the scanner to assess a system from many different angles. This architecture allows vulnerability assessment capabilities to evolve as new security issues are discovered.

Understanding Nessus Scan Results
After a scan completes, you’ll typically see a collection of findings. Beginners should learn to pay attention to information such as:
- Vulnerability description
- Severity
- Affected asset
- Evidence
- References
- Recommended remediation
Don’t simply look at the highest severity number and stop there.
Ask:
What is affected?
Why is it vulnerable?
How could the issue affect the organization?
Is the finding accurate?
How can it be fixed?
These questions turn vulnerability scanning into a real cybersecurity skill.

Nessus Severity Ratings
Vulnerability scanners commonly organize findings by severity.
You may encounter categories such as:
- Informational
- Low
- Medium
- High
- Critical
Severity helps security teams prioritize their work. However, severity alone doesn’t always represent real-world risk. For example, a high-severity vulnerability affecting an isolated test server may be less urgent than a medium-severity issue affecting an Internet-facing business-critical system. This is why vulnerability management requires context.

Nessus and CVSS
You will often encounter CVSS or Common Vulnerability Scoring System when studying vulnerability reports. CVSS provides a standardized way of describing the severity of vulnerabilities. A CVSS score can help security teams compare findings and prioritize investigation.
However, beginners should remember:
CVSS severity is not the same as organizational risk. Security teams should also consider asset importance, network exposure, exploitability, business impact and available security controls.

False Positives and Validation
Automated vulnerability scanners are powerful but they aren’t perfect. A scanner may occasionally report a vulnerability that doesn’t actually affect a particular system. This is known as a false positive.
Possible reasons include:
- Incorrect software version detection
- Configuration differences
- Missing information
- Environmental conditions
Important findings should therefore be investigated and validated before major remediation decisions are made. This is one of the most valuable lessons beginners can learn from vulnerability scanning.

Nessus for Beginners
Beginners shouldn’t try to scan large networks immediately. Instead, create a controlled cybersecurity lab.
A simple setup might contain:
- A virtualization platform
- A Linux virtual machine
- A Windows virtual machine
- An intentionally vulnerable practice machine
- An isolated virtual network
You can then learn how vulnerability scanners identify software, services, configurations and potential weaknesses. Start with small scans and gradually increase the complexity of your environment.

What Should Beginners Learn Before Nessus?
Nessus becomes much easier to understand when you already know basic networking. Before focusing heavily on vulnerability scanning, study:
Networking:
Learn IP addresses, ports, protocols, services and basic network architecture.
Operating Systems:
Understand basic Windows and Linux administration.
Vulnerabilities:
Learn why software vulnerabilities and configuration weaknesses occur.
CVE and CVSS:
Understand how vulnerabilities are identified and scored.

Remediation:
Learn how organizations patch, configure and otherwise reduce vulnerabilities.
With these foundations, Nessus results become much more meaningful.
Practical Walkthrough
Nessus has two important components: Server and Client. Nessus server can be installed on Unix, Linux and FreeBSD whereas Nessus client is available for Unix and Windows based operating systems. For this tutorial, we will be installing Nessus on Kali Linux. Nessus can be downloaded from here. It can also be downloaded using curl as shown below (version may change).


Once the installation is finished, enable nessus as shown below.

Want to Learn Ethical Hacking Step-by-Step?
If you’re serious about learning cybersecurity, a structured roadmap makes the journey much easier.
Download The Beginner Ethical Hacker Starter Kit (2026 Edition) and discover:
✔ The ethical hacking learning path
✔ Beginner-friendly security concepts
✔ Essential tools ethical hackers use
✔ The most common vulnerabilities explained
Then start nessus using command shown below.
sudo systemctl start nessusd

Nessus runs on port 8834 by default. It can be viewed in browser.
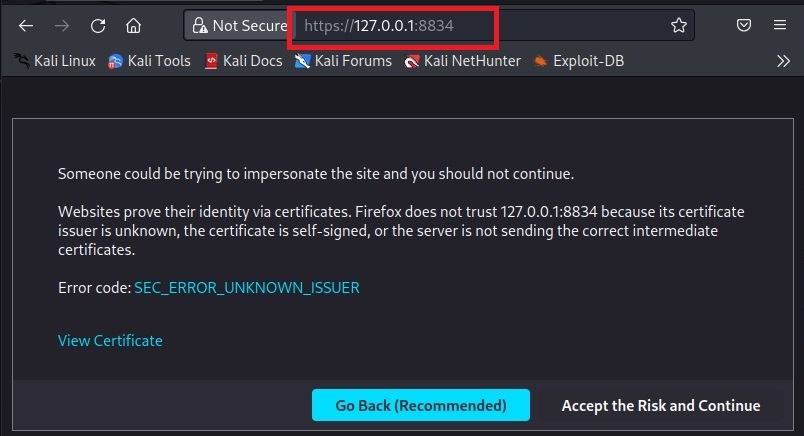
Click on “Accept the risk and continue”.

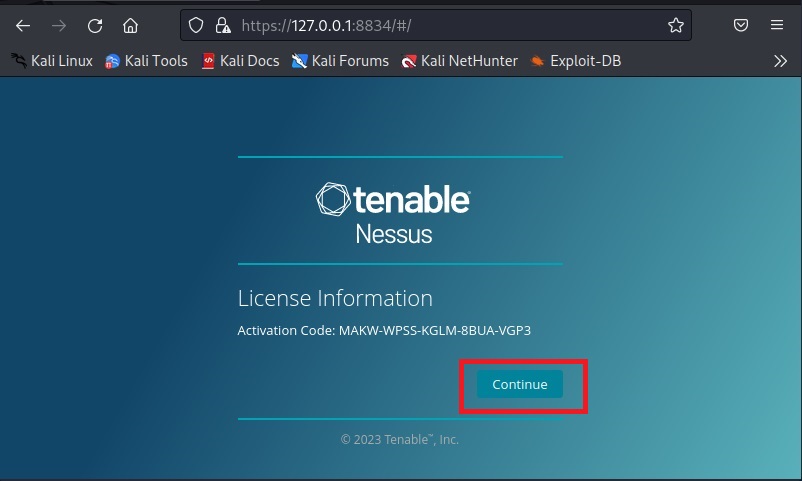
Click on “Continue”. Select the type of Nessus install you want. Since we are using a Free version of Nessus for this tutorial we select “Register for Nessus Essentials”. Click on “continue”.

To run Nessus Essentials, you need an activation code. Get the activation code by entering the following details.

You need a user account to login into Nessus. Create an account and most importantly remember the user account information.

Then, Nessus will download all the required plugins. This may take some time (a bit long time sometimes).

Once all the plugins are finished downloading, you should see this.

The installation is finished. Now, it’s time to start scanning with Nessus. Click on “New scan”. A new popup opens. Assign a target.

Click on “Run scan”.
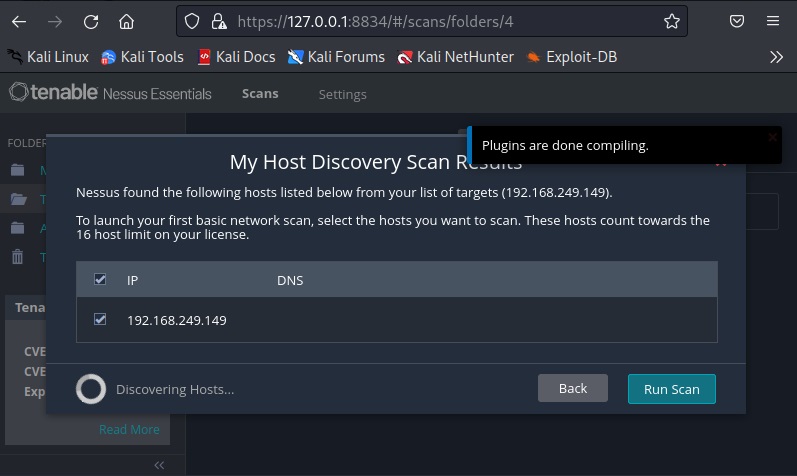
The scan will start and take some time to finish. For this tutorial, we are using “Metasploitable 2” as target. See how to install Metasploitable 2 in VirtualBox.

The vulnerabilities are classified into five categories by Nessus. They are Critical, High, Medium, Low and Information. You can view detailed information about the detected vulnerabilities by clicking on them.

All the scans you perform are located in “My scans” section.

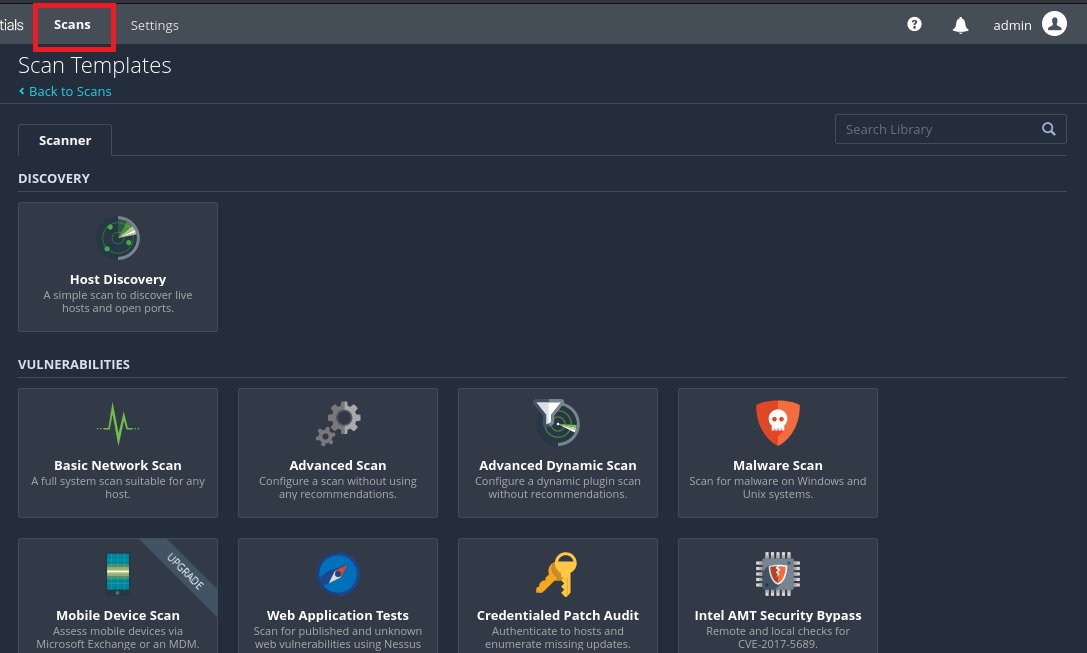
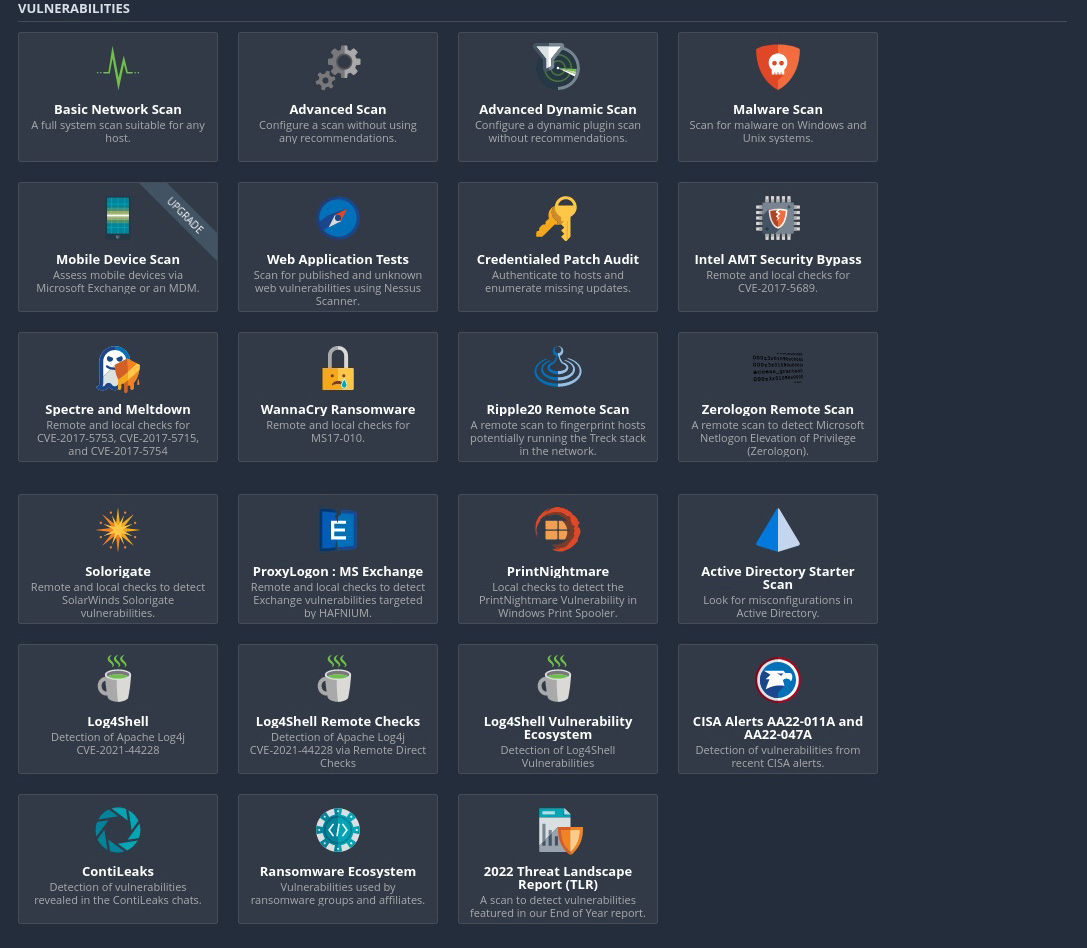
Nessus allows different types of scans. All the scans that can be performed using Nessus can be viewed from “All scans” section.

Common Beginner Mistakes
Treating Nessus as a Hacking Button:
Nessus is primarily a vulnerability assessment tool. It doesn’t replace understanding or professional security methodology.
Trusting Every Finding:
Always validate important findings.
Focusing Only on Critical Issues:
Lower-severity findings can become important when combined with other weaknesses.
Ignoring Remediation:
Finding vulnerabilities isn’t enough. Security teams need to fix or mitigate them.
Scanning Without Permission:
Only scan systems you own or have explicit authorization to assess.

Nessus vs Manual Security Testing
Automated vulnerability scanning is only one part of cybersecurity. A scanner can efficiently identify potential weaknesses across many systems. Manual security testing can provide deeper analysis of how vulnerabilities interact with an application, system or environment.
A professional security assessment may therefore combine:
Discovery → Scanning → Analysis → Validation → Remediation → Verification
Learning Nessus gives beginners an introduction to the scanning stage of this broader process.

Conclusion
Nessus is a valuable tool for learning how modern vulnerability assessment works. It can help security teams identify potential vulnerabilities, outdated software, missing updates and configuration issues across large environments.
For beginners, however, the most important lesson isn’t learning how to click the scan button. It’s learning how to understand the results.
Study networking.
Understand operating systems.
Learn CVE and CVSS.
Practice in an isolated lab.
Investigate findings carefully.
and learn how vulnerabilities can be remediated. Most importantly, always perform vulnerability scans only against systems you own or have explicit permission to assess.
Once you understand the fundamentals, Nessus becomes more than a vulnerability scanner—it becomes a practical tool for learning how security professionals discover, prioritize and reduce risk.
Start Your Ethical Hacking Journey Today
Learning cybersecurity can feel overwhelming at first. The best way to start is with a clear roadmap and the right resources.
Download The Beginner Ethical Hacker Starter Kit (2026 Edition) and get instant access to:
Ethical Hacking Fundamentals
A beginner cybersecurity learning roadmap
Essential hacking tools every beginner should know
Common vulnerabilities explained simply