Posted on

Complete guide to Stegseek

Hello, aspiring ethical hackers. In our previous blogposts, you learnt what is steganography, its uses and how to hide secret data in an image using the tool Steghide. In this blogpost, you will learn about a tool that can retrieve this hidden data from an image. The tool’s name is Stegseek.

Although the working of Stegseek is same as Stegcracker, it is a lightning fast steghide cracker that is thousands of times faster than other crackers and can run through the entirety of rockyou.txt wordlist in under 2 seconds. Let’s see how this tool works. For this article, we will be using Kali Linux as our attacker system as this tool is installed by default on Kali Linux. For performing steganography attack, we will be using same image in which we have hidden data using Steghide, “Volcano_with_Secret,jpg”.

All you need to retrieve the hidden information from the image with this tool is to just supply the path of the image as shown below.
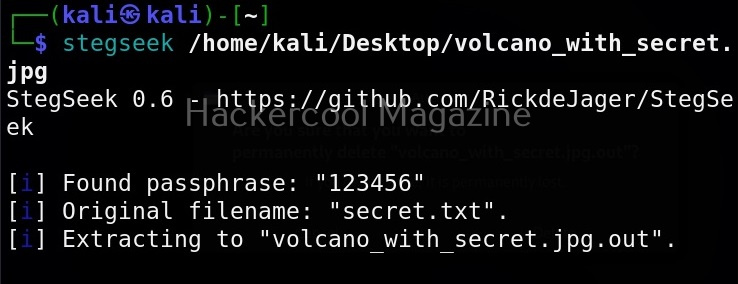
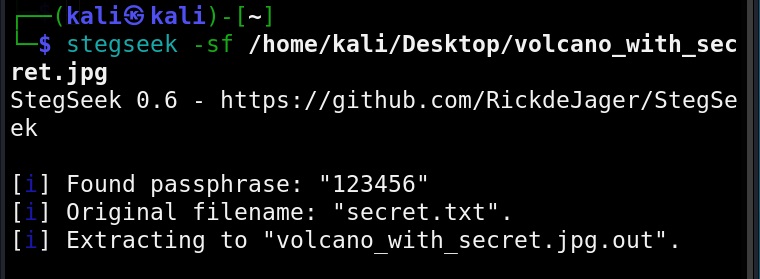
The “-sf” option stands for stego file. A stego file is a file that contains hidden information in it.

As you can see in the above image, Stegseek cracked the password (123456) of this file and successfully retrieved the hidden data. That too in lightning speed pace. The retrieved data from the image is saved in a file named <name of the file.jpg.out>. By default, Stegseek uses rockyou.txt wordlist to brute-force the password.

Specify a different wordlist (-wl)

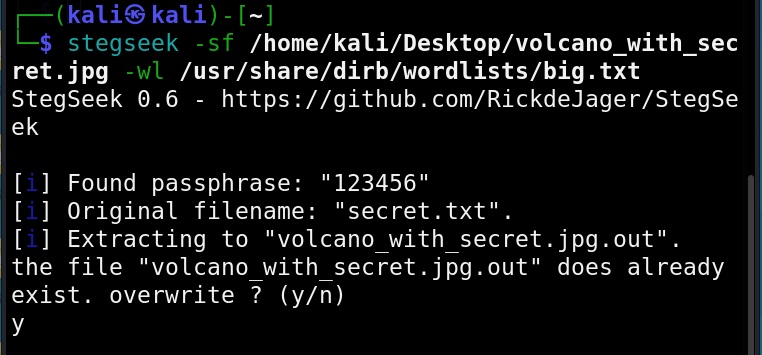
We can even specify a different dictionary or wordlist if needed as shown below.
Select file name for extracting data (-xf)

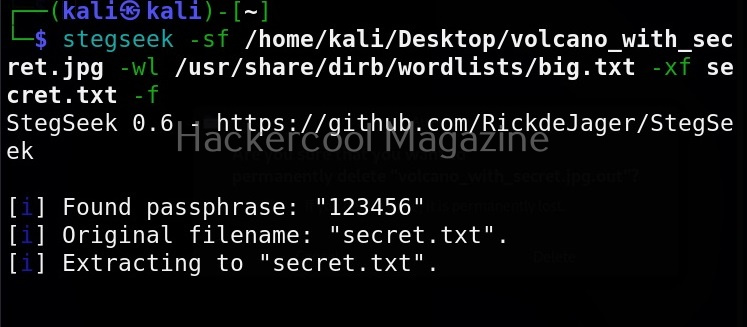
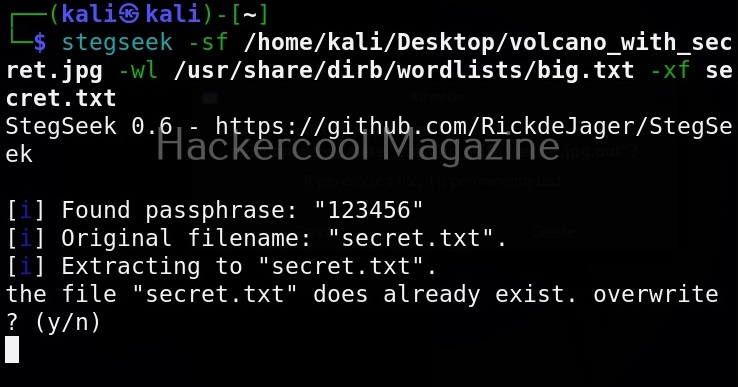
As you already read at the beginning of this article, stegseek saves retrieved hidden data to a file named “<name-of-the-file>.out”. To extract the hidden data to a different fie, we can use this option. For example, let’s save the retrieved data to a file named “secret.txt” as shown below.
Overwrite existing file (-f)

In the above image, you can see that when we extracted hidden information to a file named “secret.txt”, we got prompted saying that there is already a file with the same name and if I wanted to overwrite it. Well, using this option, we can force overwrite already existing file.

Get detailed output (-v)

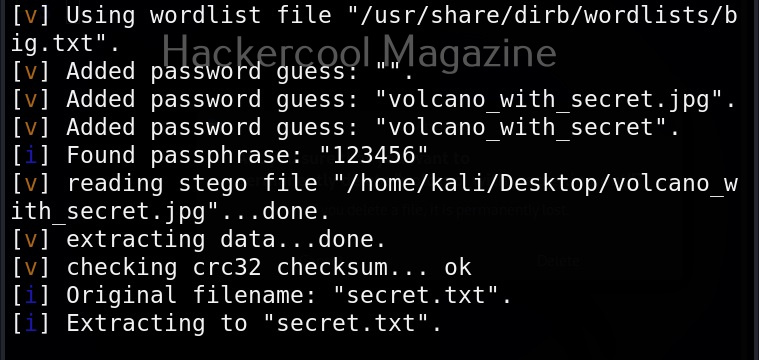
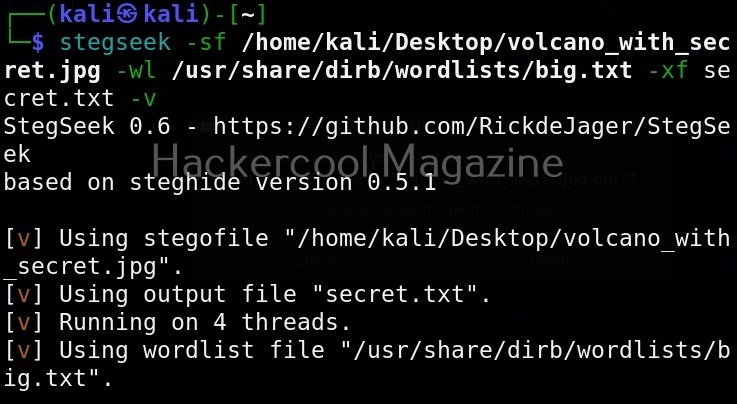
This option gives us detailed output while using Stegseek.
Quiet mode(-q)

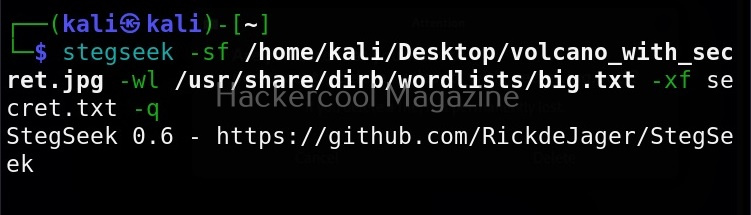
On the contrary, you can run Stegseek in quiet mode. Running in this mode will just display the cracked password of the file as shown below and of course retrieve the hidden data. Status updates or other output is not displayed.
Skip defaults (-s)

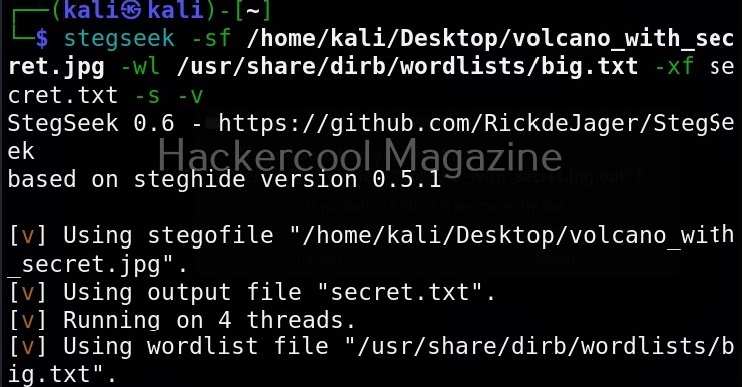
Specifying this option skips adding default guesses while cracking like using an empty password, the name of the file etc to the wordlist.
Number of threads (-t)

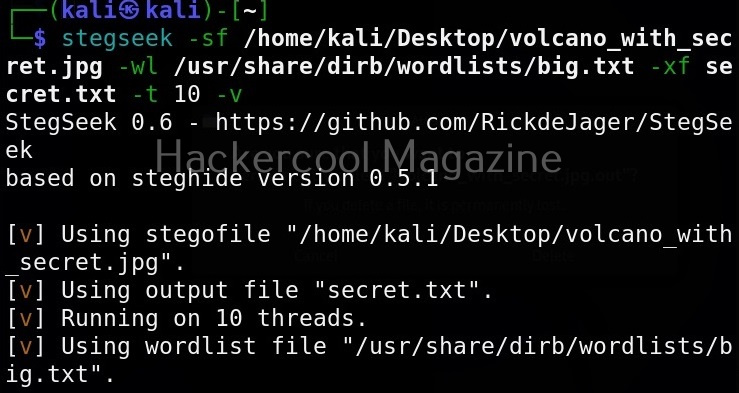
By default, stegseek uses 4 threads while cracking the password. Increasing the number of threads can lead to better performance. Threads can be increased or decreased using this option. For example, let’s increase the number of threads to 10.
Posted on

Complete guide to Stegcracker

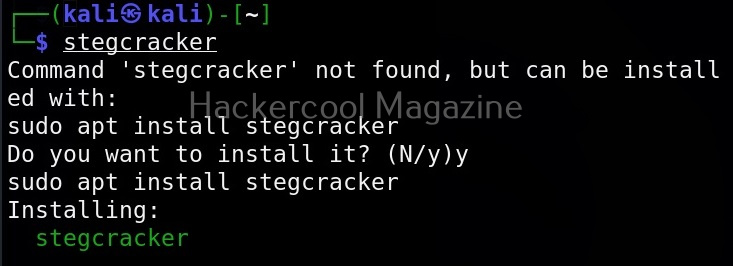
Hello, aspiring ethical hackers. In our previous blogposts, you learnt what is steganography, it’s uses and how to hide secret data in an image using the tool Steghide. In this blogpost, you will learn about a tool that can retrieve hidden data from an image. The tool’s name is Stegcracker.

Stegcracker is a steganography brute-force utility to uncover hidden data inside files. Let’s see how this tool works. For this article, we will be using Kali Linux as our attacker system as this tool is available by default in its repositories. For performing steganography attack, we will be using same image in which we have hidden data using Steghide “Volcano_with_Secret,jpg”.

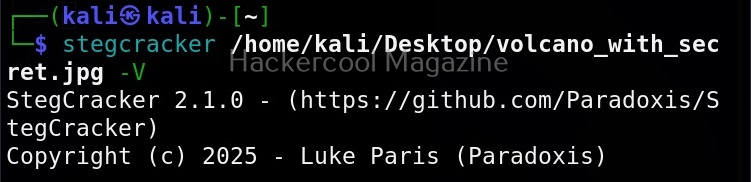
Check version (-v)

It is a good practice to check the version of the tool first before doing anything with the tool. You can check the version of Stegcracker using this option.

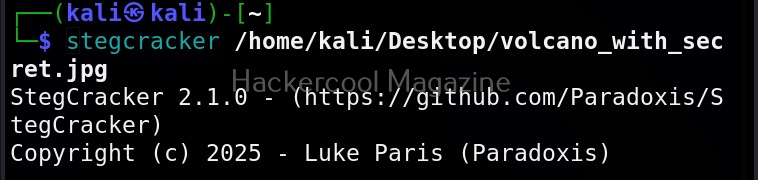
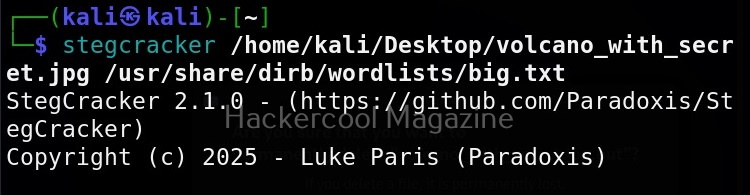
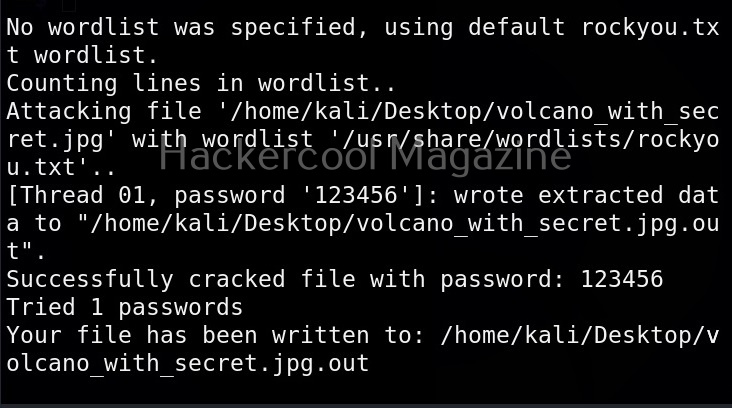
All you need to retrieve the hidden information from the image with this tool is to just supply the path of the image as shown below.

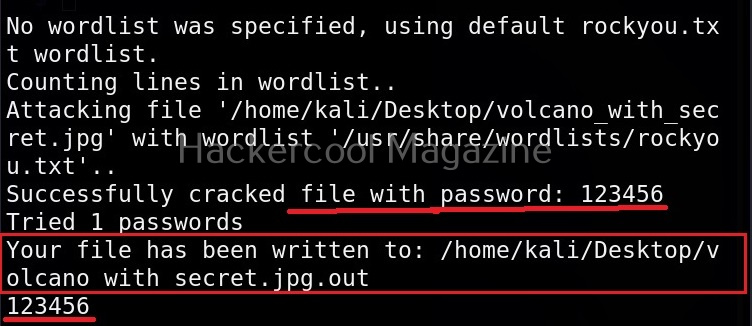
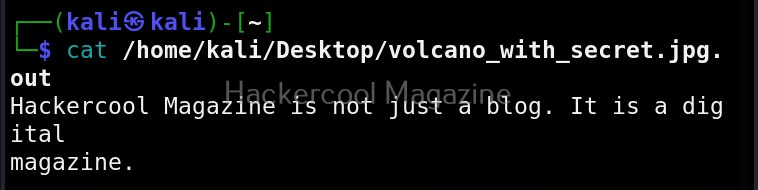
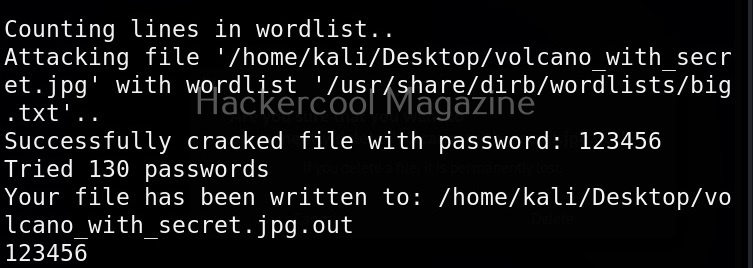
As you can see in the above image, Stegcracker cracked the password (123456) of this file and successfully retrieved the hidden data too. The retrieved data from the image is saved in a file named <name of the file.jpg.out>. By default, Stegcracker uses rockyou.txt wordlist to brute-force the password.

Specify a different wordlist

We can even specify a different dictionary or wordlist if needed as shown below.

Verbose output (-V)

This option can be used to get detailed output from stegcracker.

Quiet mode(-q)

On the contrary, you can run Stegcracker in quiet mode. Running in this mode will just display the cracked password of the file as shown below and of course retrieve the hidden data. Status updates or other output is not displayed.

Number of threads (-t)

By default, stegcracker user 16 threads while running. Increasing the number of threads can lead to better performance. Threads can be increased or decreased using this option. For example, let’s increase the number of threads to 32.

Saving the output (-o)

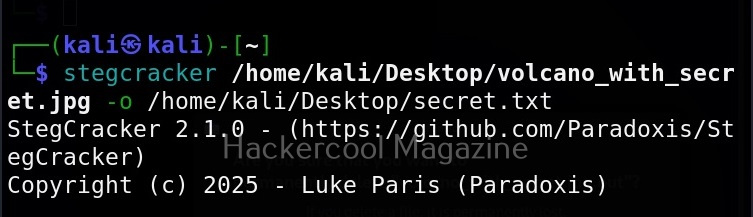
As you already read at the beginning of this article, stegcracker saves retrieved hidden data to a file named “<name-of-the-file>.out”. However this can be changed using the “-o” option.

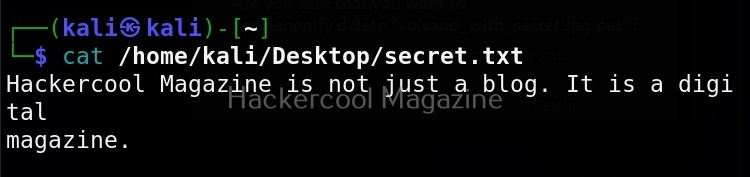
For example, let’s save the retrieved data to a file named “secret.txt” as shown below.

Posted on

Beginners guide to Socat

Hello, aspiring ethical hackers. In our previous blogpost, you learnt how to use netcat for various purposes in ethical hacking. In this blogpost, you will learn about another such tool named Socat.

Socat, shortcut for SOcket CAT is a command line utility that enables bidirectional data transfer between two independent data channels. Actually, it can provide multiple functions. It supports many protocols like TCP, UDP, SOCKS4 and OpenSSL.

Bind and Reverse shells

The use of socat tool comes after you completed gaining access to target network or device. Here, it helps you in maintaining access as channel for communication.

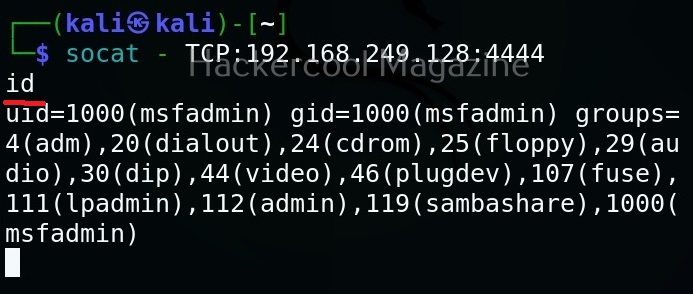
Let’s see how to create bind shells with socat (learn about different types of shells). For this, we will be using Metasploitable2 as target system in our virtual hacking lab. Note that socat should be installed on both target and attacker systems for this to work. To create a bind shell, run this command on the target system as shown below.

Then on the attacker system, we need to run this command.

Here’s our bind shell.

To create reverse shell, the above commands should be run on attacker and target system respectively.

Here’s our reverse shell.

Encrypted bind and reverse shell with socat

The above shells, although they are good, the data between them is transferred in plain text and is susceptible to sniffing and detection. No problems though. Socat can create an encrypted shell using OpenSSL.

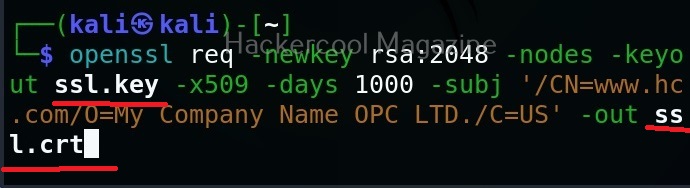
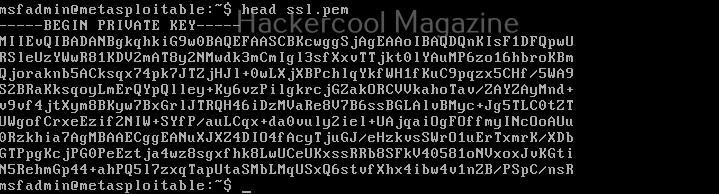
To create an encrypted shell, first, we need to create a SSL key as shown below. Two files with extensions “.crt” and “.key” are created as shown below.

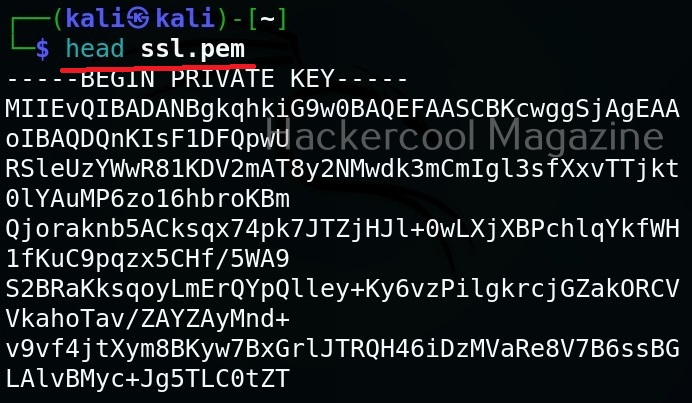
Then, we need to join this two files into one file with “.pem” file as shown below.

Now this file should be on the system on which we start our listener. For example, to create a bind shell, the “ssl.pem” should be on the target system. Then we need to run command as shown below.

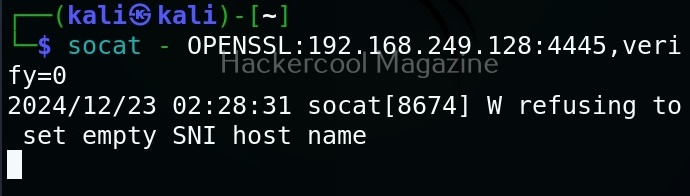
Then, on attacker system we should run this command shown below.

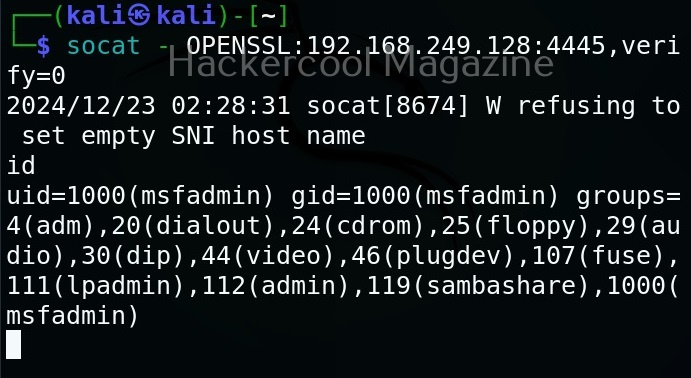
Here’s the shell.

Similarly, we can also create a reverse shell.

File transfer

Socat can also be used to transfer files between two machines. For example, to transfer that SSL certificate we created above from attacker system to target system, the command to be run on the attacker system is shown below.

Then on the target system, we should run this command.

Posted on

Complete guide to Subfinder

Hello, aspiring ethical hackers. In our previous blogpost, you learnt what is footprinting and various techniques used for footprinting. In this blogpost, you will learn about subfinder, a tool that helps us in footprinting.

Subfinder is a sub domain discovery tool that queries and retrieves valid sub domains for a given domain or website. It is a simple tool that uses passive subdomain enumeration for this purpose.

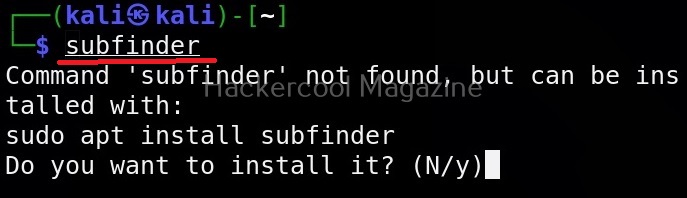
Let’s see how to use this tool to perform subdomain enumeration. For this, we will be using Kali Linux as our attacker machine. Subfinder can be installed on Kali as shown below.

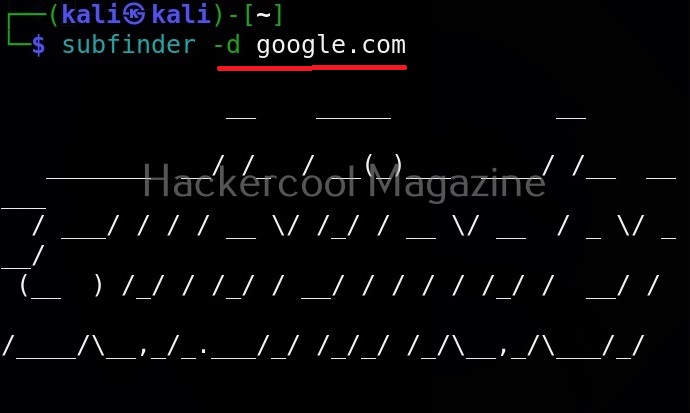
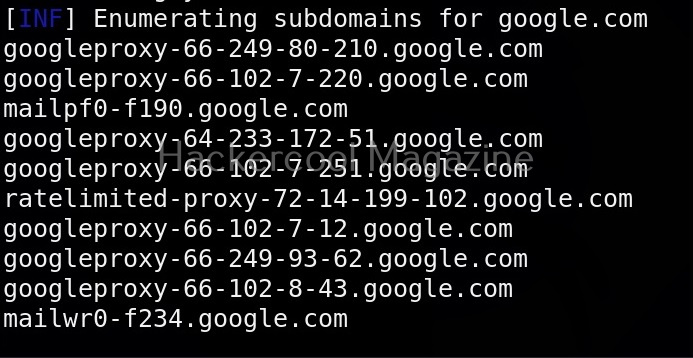
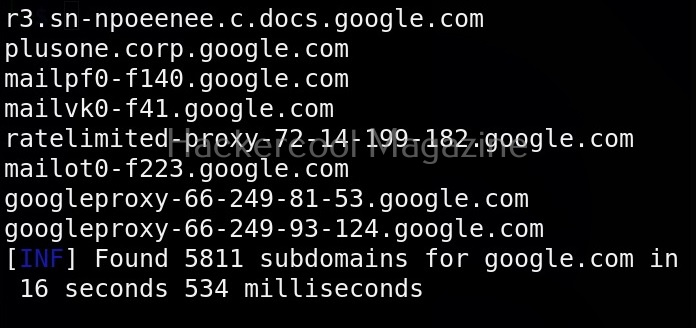
The simplest method to use subfinder to query a sub domain of a particular domain is as shown below.

Specify multiple domains at once (-dL)

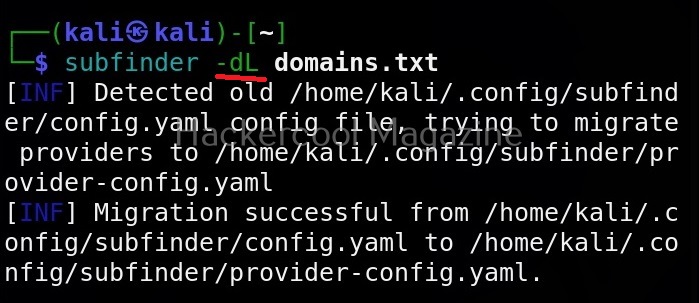
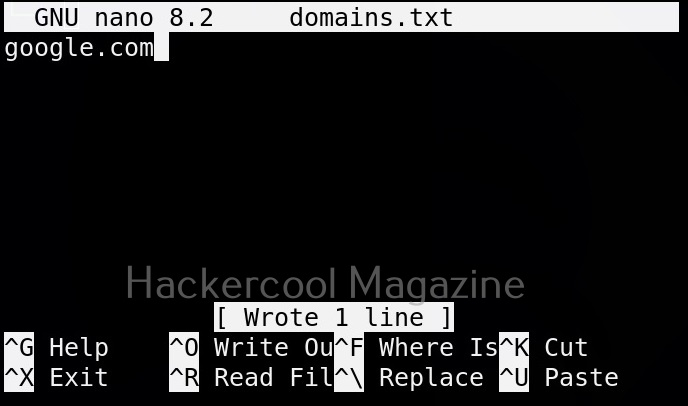
This tool can also query multiple domains at once. You can supply these domains using a file. For example, let’s create a new file “Domains.txt” and add a domain as shown below.

This file can be provided as input to subfinder as shown below.

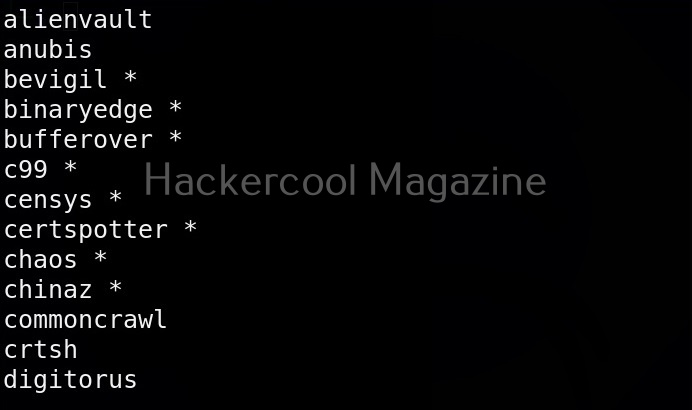
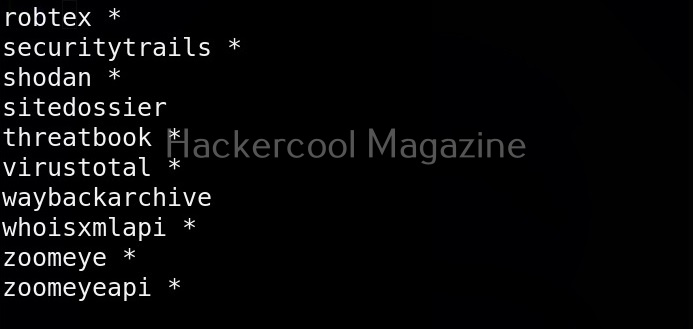
View all the sources of this tool (-ls)

Subfinder collects information from a number of sources like AlienVault, Anubis, Censys, Shodan etc. You can view all the sources the subfinder tool queries using the command given below.

Query a single source (-s)

You can specify subfinder to query just one source using (-s) option as shown below. For example, let’s just specify GitHub and Anubis as sources.

Query all the sources (-all)

We can also specify this tool to query all the sources using the “-all” option.

Exclude some sources (-es)

We can even exclude some sources as shown below. For example, let’s exclude GitHub.

Display the source this tool queried in results (-cs)

We can even display source information to be displayed in output using the “-cs” option as shown below.

Saving output (-o)

You can save the output of this tool to a file as shown below.

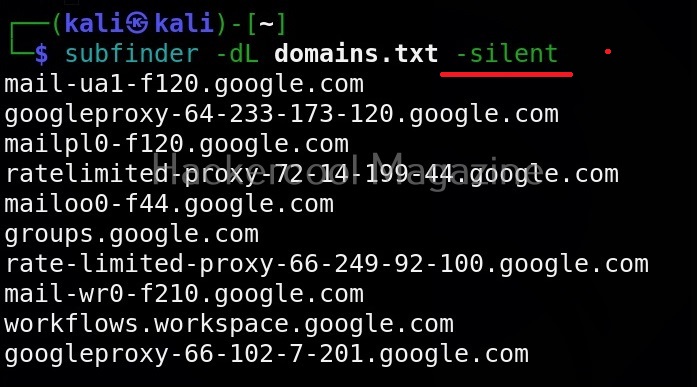
Silent mode

In this mode, sub finder just displays the sub domains it found and nothing else.

Posted on

Beginners guide to ARP scan

Hello, aspiring ethical hackers. In our previous blogpost, you have learnt about network scanning and enumeration. In this blogpost, you will learn about a tool named arp scan, a command line tool used for scanning and fingerprinting on the local network.

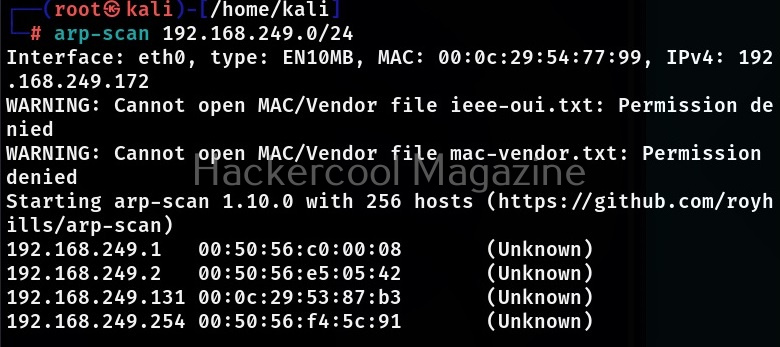
ARP scan is available for Linux and BSD systems and uses ARP protocol to scan the network. Let’s see how to use this tool. For this, we will be using Kali Linux as this tool is available for download by default in Kali repositories.

It is good to run arp scan tool as root user in order not to face some errors. You can simply scan a network using arp-scan as shown below.
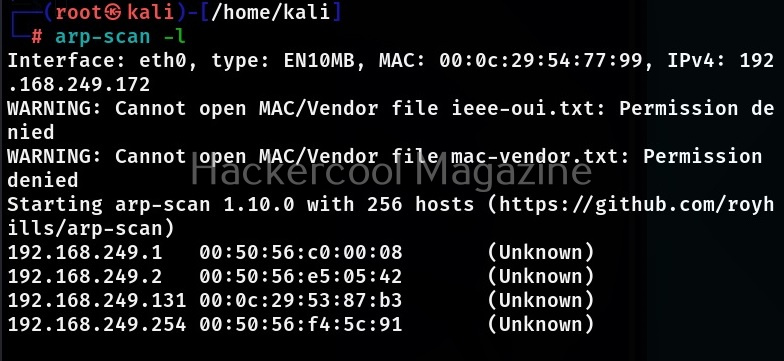
If you want to scan your local network, you can simply specify the “-r” option to do it as shown below.

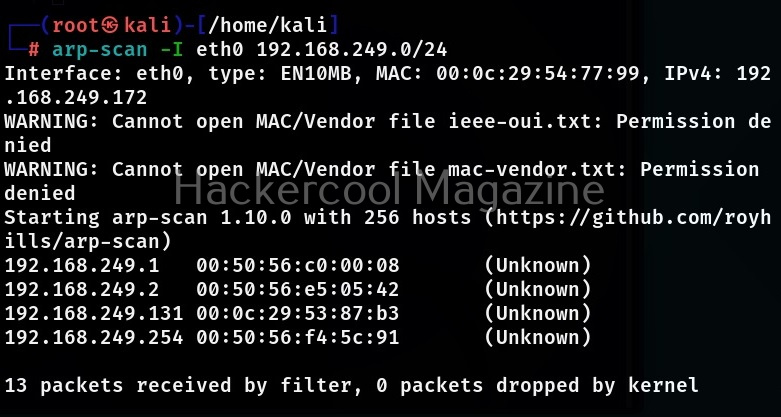
If your device is connected to multiple networks and you want to scan a particular network, you can specify the network interface using the “-I” option. By default if the “-I” option is not specified, arp-scan will search the system interface list for the lowest numbered configured up interface, excluding Loopback and scan that network.

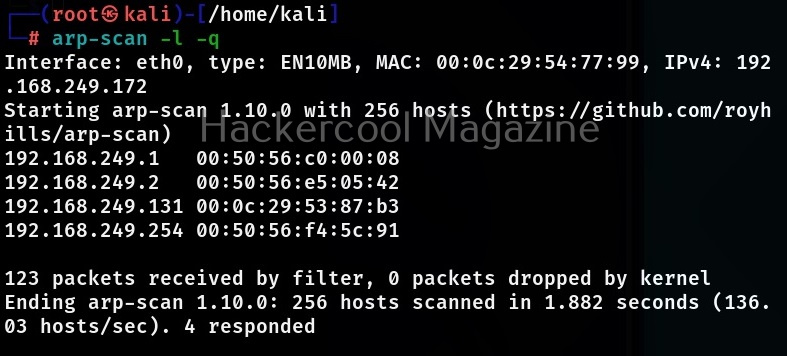
Quiet mode (-q)

If you want minimal output to be displayed for each responding host, while scanning with arp-scan, you can use quiet mode. While using this mode, only the target IP address and MAC address are displayed.
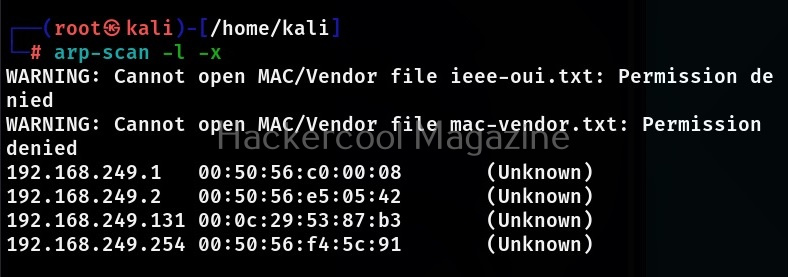
Plain mode (-x)

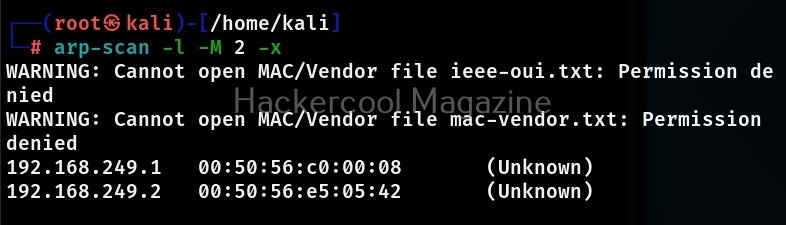
If you want more less details like just the responding host details, you can use the plain mode. While using this mode, arp scan suppresses the header and footer text in output as shown below.

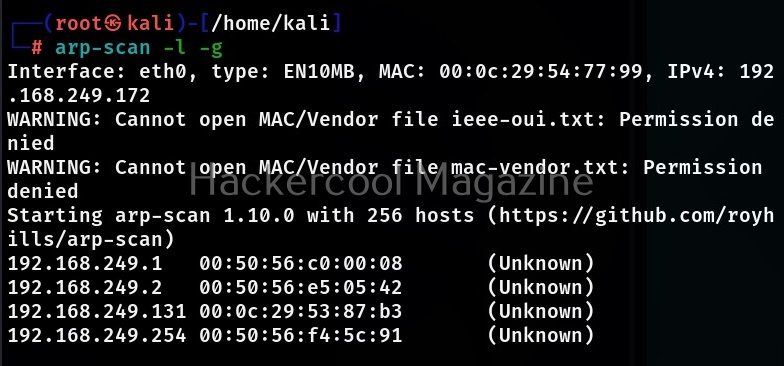
Ignore duplicates (-g)

By default, arp scan displays duplicate packets by flagging them with (DUP.n) where “n” is the number of times the target host responded. By specifying the option, these duplicate packets can be ignored by arp-scan.
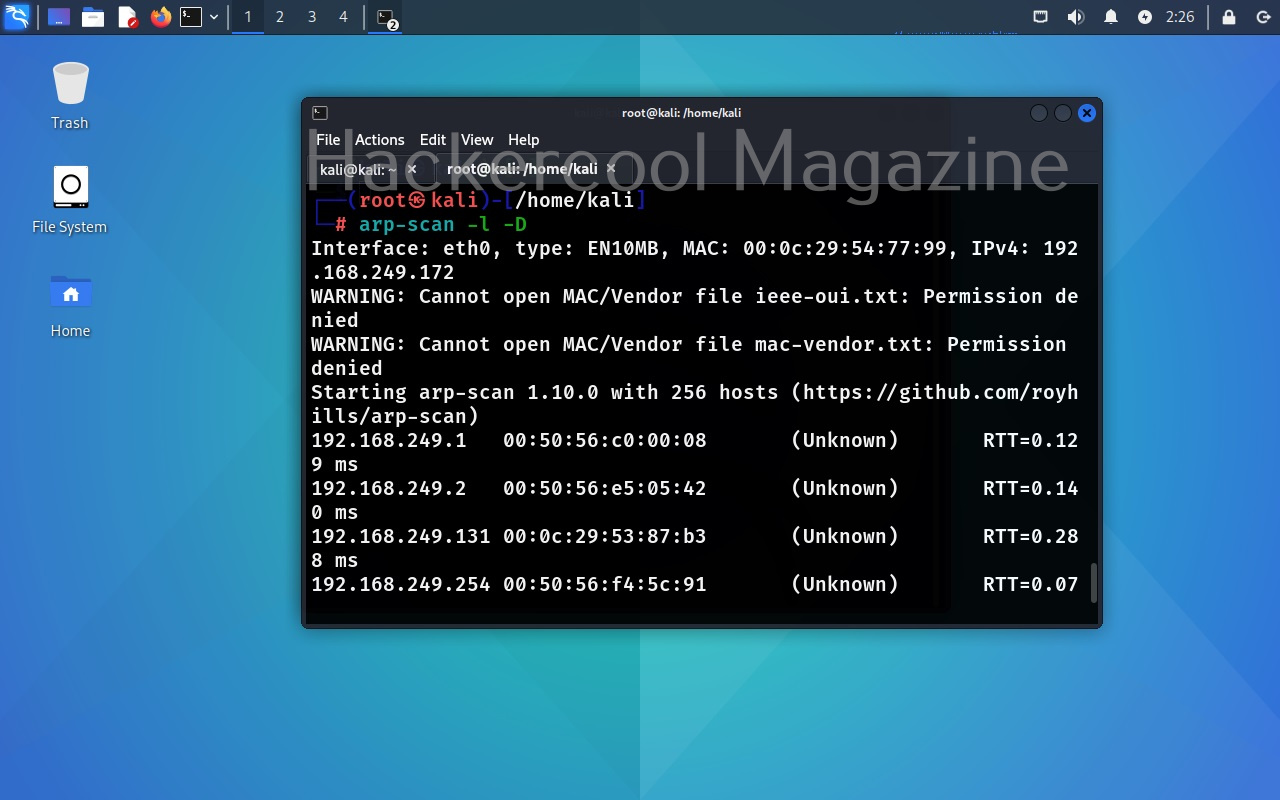
Calculate and display round trip time (-D)

Network Packet round trip time (RTT) is the time it takes for a data packet to travel from a source to a destination and back again. It is a key matric to measure network latency and is usually measured in milliseconds. Setting this option, allows us to measure the round trip time.

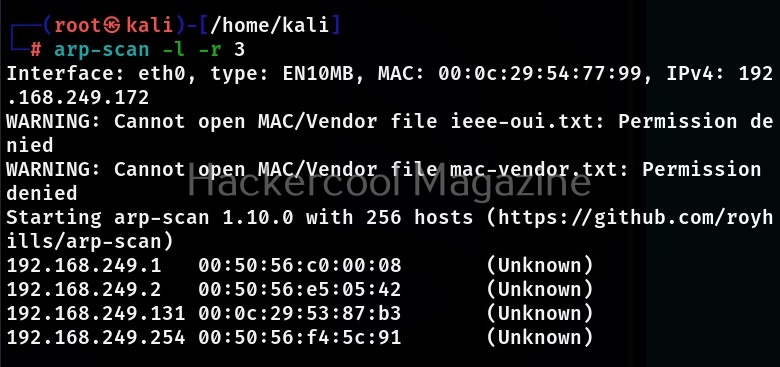
Retry attempts (-r)

This option can be used to specify the number of retry attempts to make per host. By default arp-scan makes 2 retry attempts. For example let’s set it to 3.

timeout (-t)

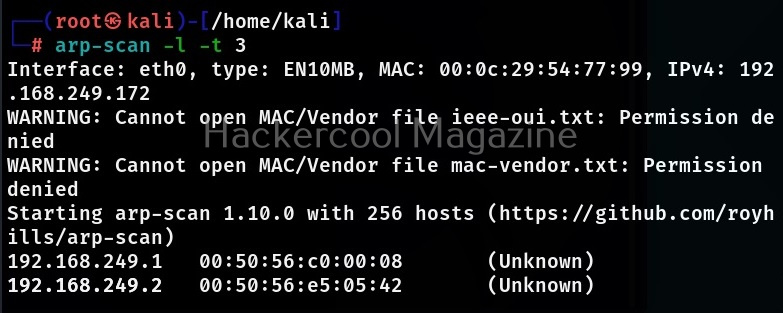
By default, 500ms is the timeout for this tool. This option can be used to change it however.

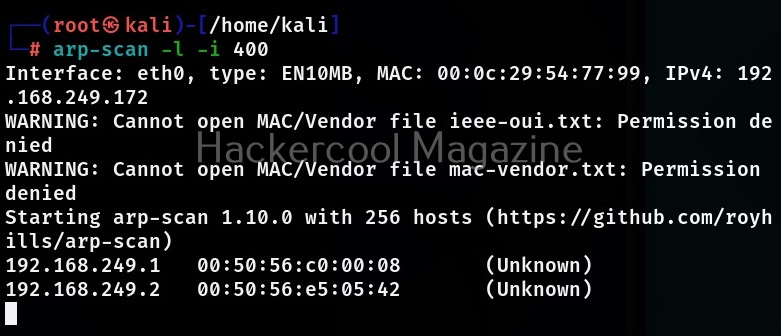
Interval (-i)

If you have limited bandwidth to use for scanning with this tool, you can use this option to control the outgoing bandwidth by limiting the packet rate. For example, let’s set the interval between each packet to 400 milliseconds. It can also be set to micro seconds by appending the “u” option.

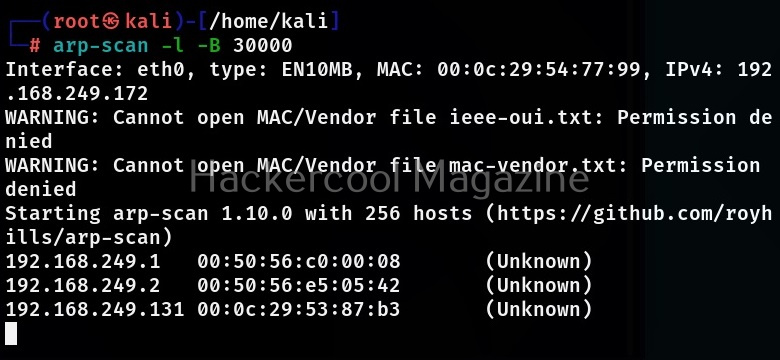
Bandwidth (-B)

This option is useful when you want to control the outbound bandwidth to a specific value. By default, bandwidth is 2,46,000 bits per second.

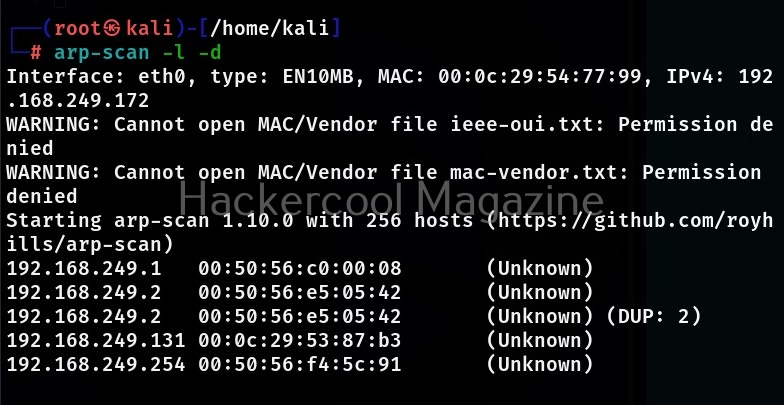
Resolve responding addresses to hostnames (-d)

This option is used to resolve the hostnames for addresses detected by this tool. The default output format will display the hostnames instead of the IPv4 address.

Limit the number of hosts to scan (-M)

By default, arp-scan scans all the hosts on the network that are LIVE. You can limit the number of hosts to scan using this option.