Posted on

JPS Virus maker: Beginners guide

Hello, aspiring ethical hackers. In our previous blogpost, you learnt how to create a virus from scratch. However, not always viruses are created from scratch in real-world. There are many virus makers available to easily create viruses. In this blogpost, you will learn about one such tool named JPS Virus maker.

Why we chose this tool particularly? There are numerous virus makers available on internet and for sale on dark web. We chose this tool because our intention is not to create a virus but just show you how easy it is to create a virus. An also because since its popular and harmless (because it is easily detected by even basic AV’s. Note that this is for education purpose only.

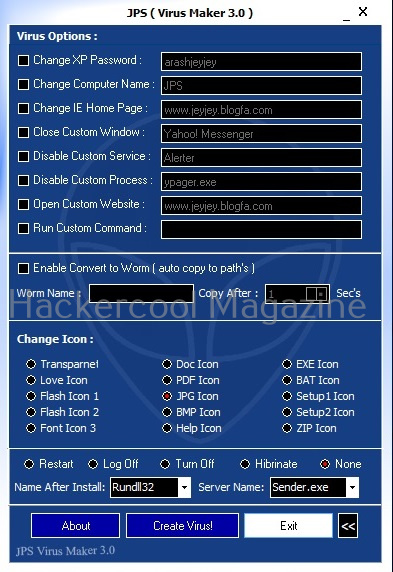
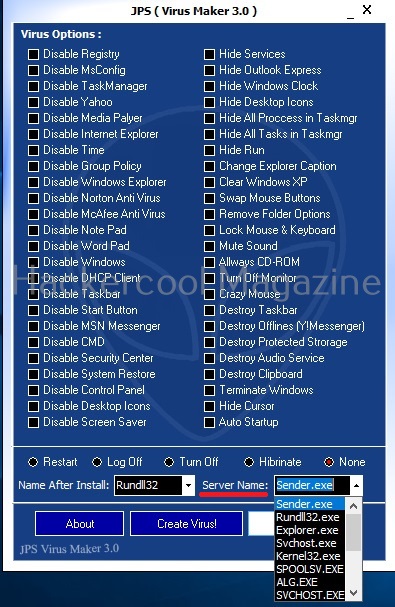
JPS virus maker runs on Windows. Once you download JPS virus maker to the Windows system, clicking on the executable opens a window as shown below. (Note that JPS virus maker is portable and needs to installation. Also note that Antivirus needs to be disabled while creating a virus with JPS virus maker. Otherwise Antivirus will flag it as malicious software.
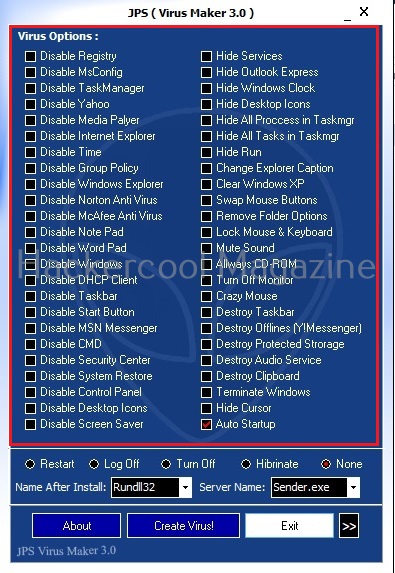
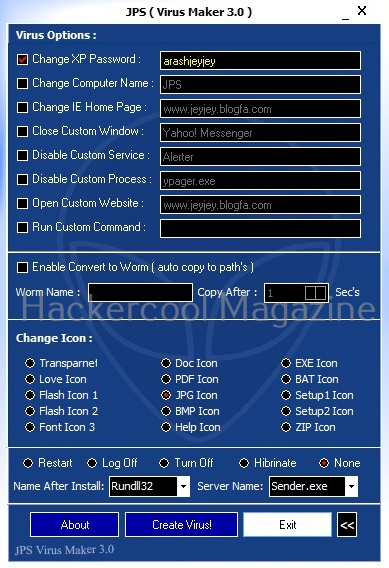
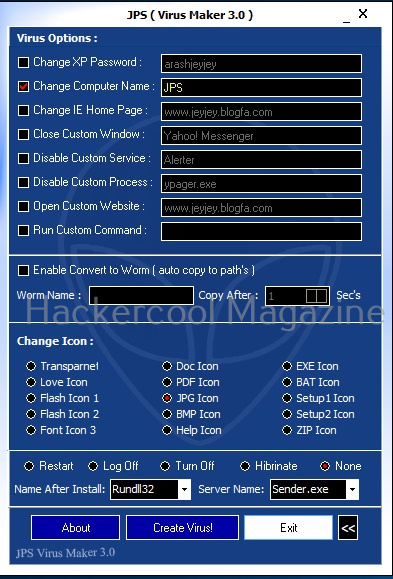
Here, you can see all the functions of the virus maker. You can specify any or all functions you want to perform on the targets system. You can select a single function or multiple functions at once.

But first let us click on the “About” button to learn more about its creator.
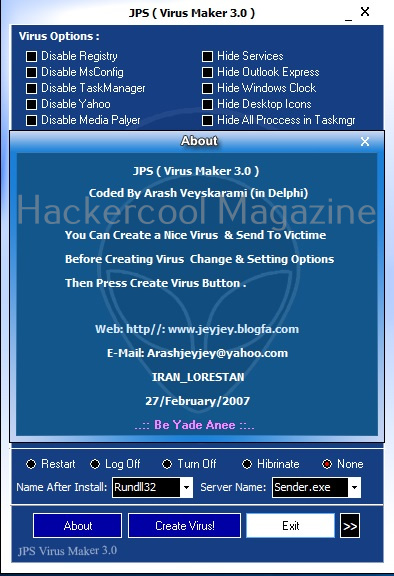
You can see that it is written in Delphi. With the “server name” option, you can select the name for the virus you want to create from the given values. Let’s name it “sender.exe”.
Similarly, you can also set the name for your virus after successful installation on the system.
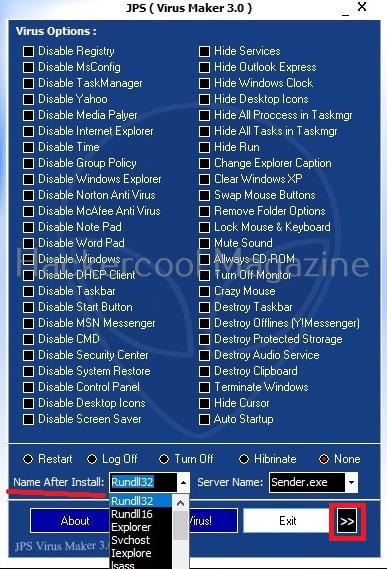
Below all the functions given for you to set for your virus, you can select the option to restart, log off, turn off and hibernate the target system. You can find additional functions for your virus by clicking on the button next to “Exit”.

You can even convert your virus into a worm. To understand the difference between virus and a worm, read our guide on malware. You can even select a icon for your virus. Let’s select PDF icon, for example.

After you select all the functions you want your virus to have, click on “Create Virus” and the virus will be created.
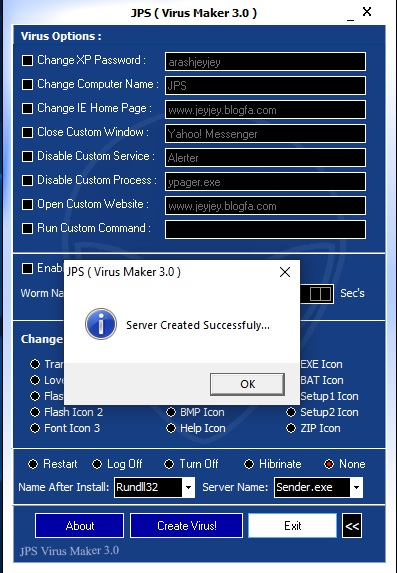

The virus is ready. Now all we need to do is to send it to the target and convince them to execute it. For this, you need to learn social engineering.

Posted on

Beginners guide to Hping3

Hello, aspiring ethical hackers. In this blogpost, you will learn about a tool named Hping 3. Hping3 is a network tool that can be used to send custom ICMP/TCP/UDP packets and to display target’s replies like ping does with ICMP. This tool can be used to perform echo requests, port scanning, test network performance using different protocols, perform traceroute, fingerprint target operating systems, test firewalls and even perform DOS attack.

Let’s see some of the uses of the this tool. For this we will be using Kali Linux on which hping3 is installed by default. As target, we will be using Metasploitable 2 set in our virtual hacking lab. So let’s begin with.

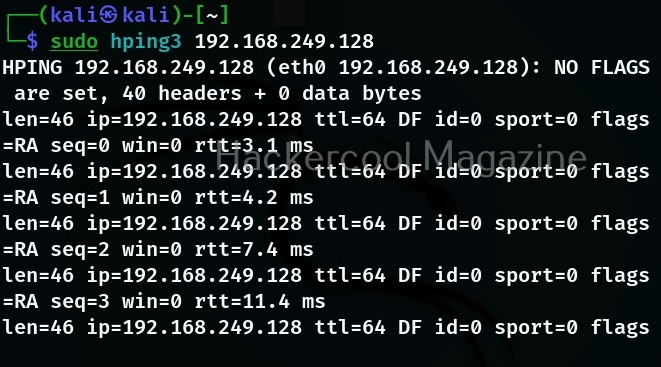
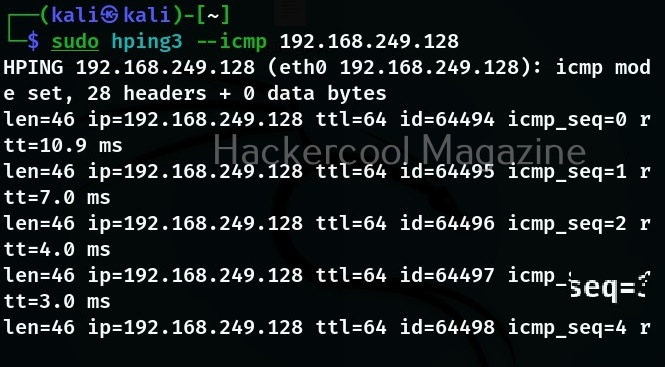
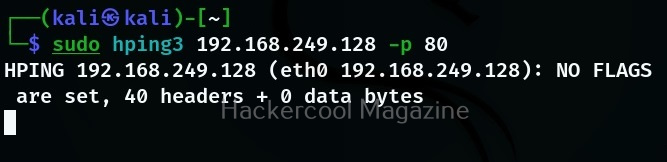
The simple way to use hping3 to specify a target IP address as shown below.

You can see that hping3 sends echo request messages and displays the replies.

Modes

Hping3 supports many modes and protocols. By default, it uses TCP protocol to send TCP header file to target system’s host port 0 with a window size of 64 without any TCP flags on.

The above image is of that only. However, hping3 supports more modes.

Raw IP mode:

In this mode, hping 3 will send IP headers with data appended to it.

ICMP mode:

In this mode, hping 3 will send ICMP echo requests which can also be modified.

UDP mode:

In this mode, hping 3 sends UDP to targets host’s port 0.

Listen mode:

In this mode, hping3 waist for incoming connections acting as a listener (waits for packets of a specified signature).

Scan mode:

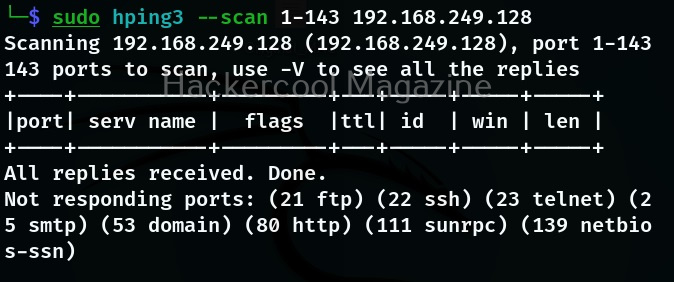
In this mode, the tool expects as argument that describes groups of ports to scan. Port groups can also be specified using comma separated notation.

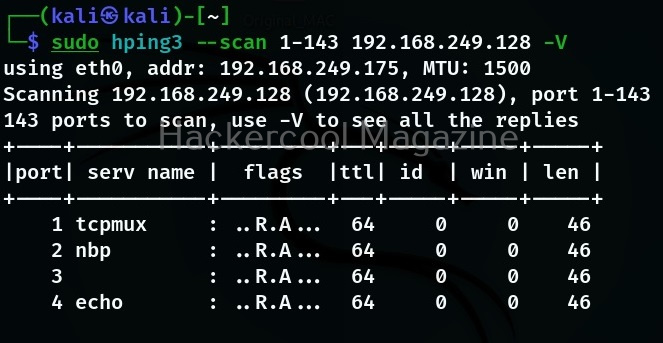
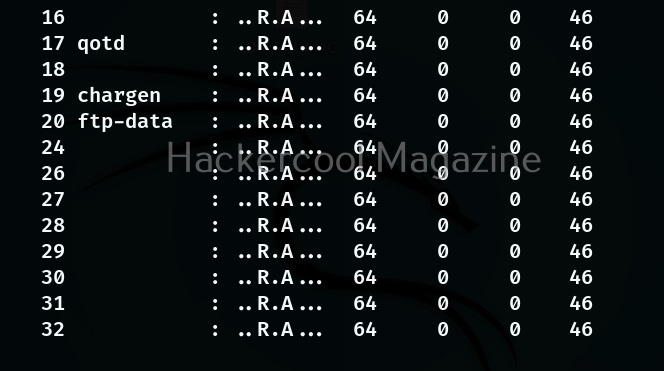
Detailed output (-V)

To get more detailed output while using this tool, verbosity level can be specified using “-v” option as shown below.

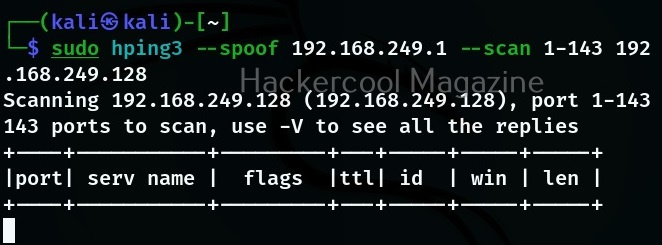
Spoofing your address (–spoof)

Hping 3 also allows you to spoof your address while using it as shown below.

Send data to a specific port (-p)

If you want to see how different ports on the target system are reacting to different packet, you need to send the packet using the ‘-p’ option. With this option, we can specify the destination port as shown below.

Number of packets to send (-c)

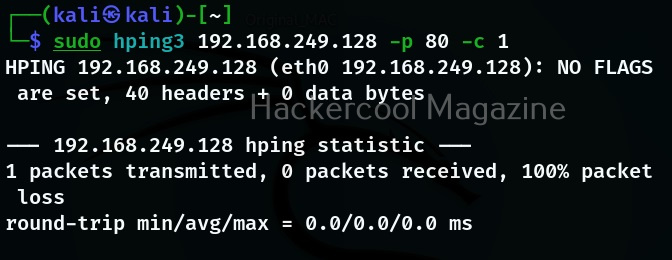
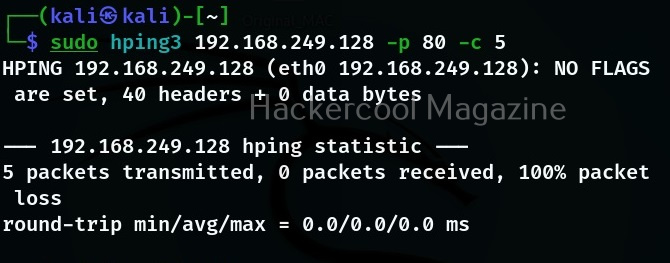
In the above example, hping 3 will continously send packets. You can even limit the number of packets to be sent using the ‘-c’ option. Let’s send only one packet to target port 80.

You can set the any number of packets you want.

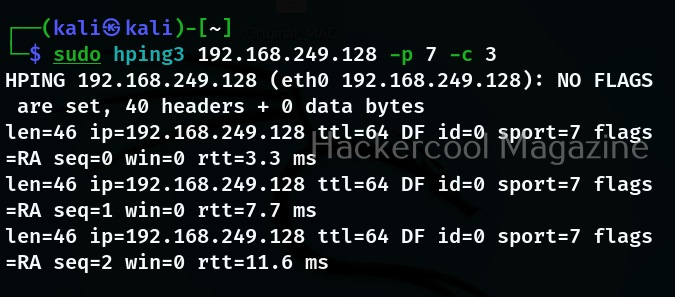
In the above image, you can see that there are no replies from target port 80 to above request. That’s because we are sending a ping request to port 80 which belongs to HTTP. Let’s send the same packet to port 8 (echo request) and see the difference.

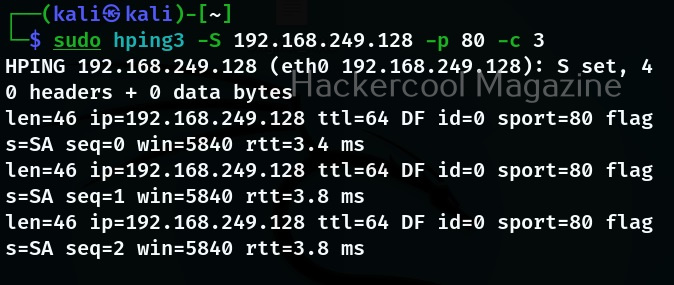
Now, we have a reply. Let us send a SYN request to port 80 of our target system and see the reply.

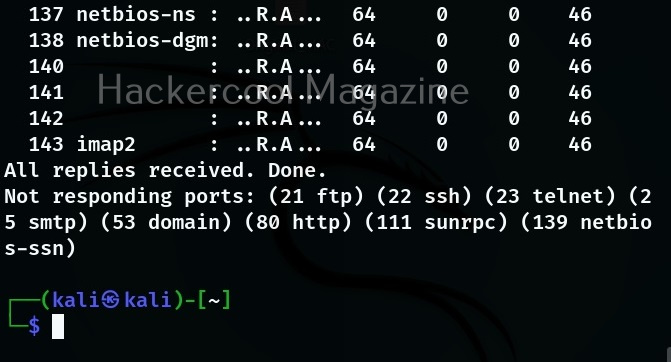
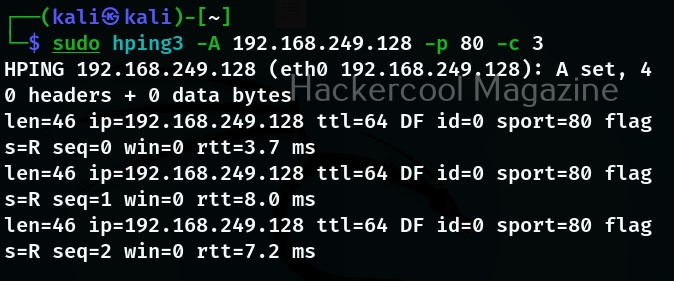
As you can see, we are getting SYN-ACK reply as expected. Let’s see how it reacts to ACK scan.

It’s replying with a RST flag. Just like this, we can perform all the scans that can be perform using NMap.

Denial of Service (DoS) attack

We can also perform DOS attack with hping3. Here are various options of sending a large number of packets to the target system or resource.

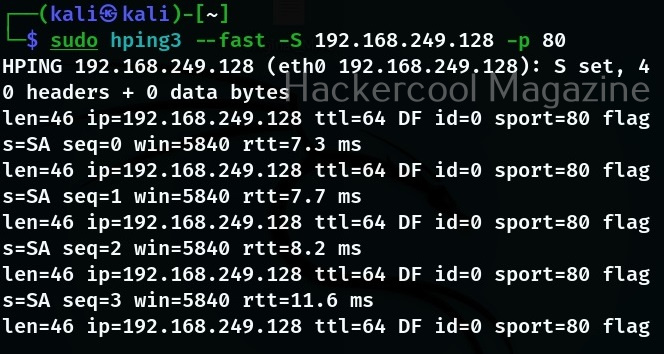
Fast:

With this option, hping3 will send 10 packets for second to the target. For example, let’s send SYN packets to target port 80.

Faster:

When we specify this option, it sends packet faster than the earlier option (fast).

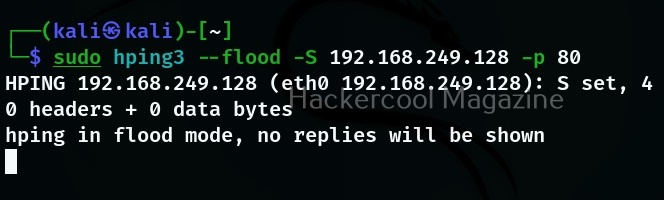
Flood;

The name itself implies that it will send packets faster than the earlier option without taking care even to display incoming replies.

Posted on

Complete guide to fcrackzip

Hello, aspiring ethical hackers. In our previous blogpost, you learnt about various methods of password cracking. In this blogpost, you will learn about fcrackzip, a tool that can crack passwords of zip archives. Frackzip is a fast password cracker written in assembler. It can crack password protected zip archives using brute forcing or dictionary based attacks.

This tool is useful for pen testers while doing pen tests, ethical hackers and even cyber forensic experts. Sometimes in the course of a pen test or a cyber forensic investigation, you encounter password protected zip archives. They may be backups or confidential files. Cracking the password of the password protected archives can reveal information that can be helpful further in a pen test. That’s where fcrackzip comes real handy.

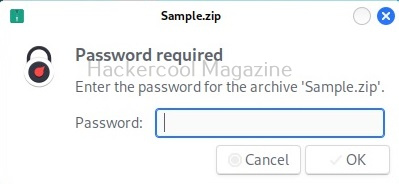
Let’s see how fcrackzip works. For this article, I will be using Kali Linux on which this tool is installed by default. We also need a password protected zip archive as shown below.

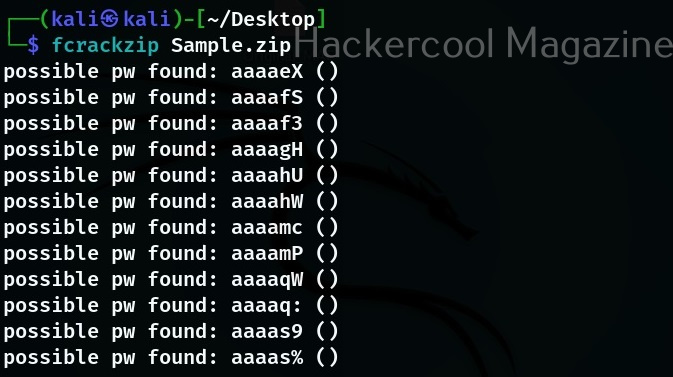
All you have to do to crack the passwords of the zip archive using fcrackzip is to give the below command.

fcrackzip <password protected zip archive>

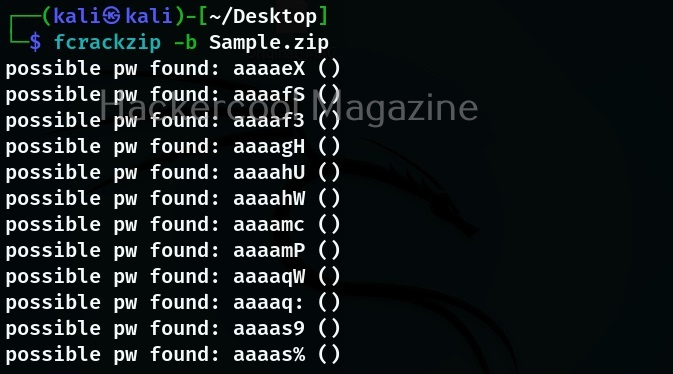
This will bruteforce the password of the zip archive. This is same as using the brute force option which is set with ‘-b’ option.

Set the initial password to test or specify a dictionary(-p)

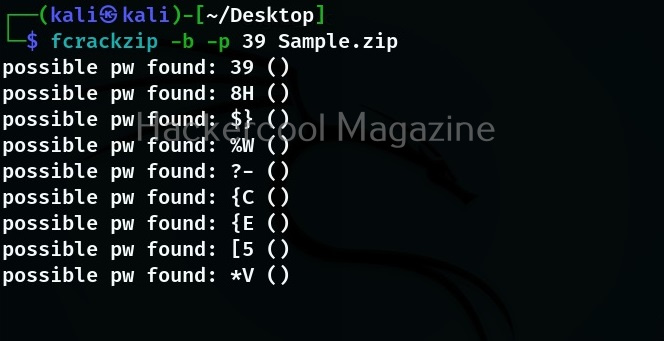
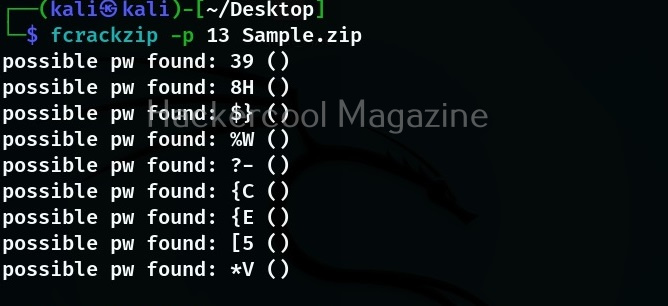
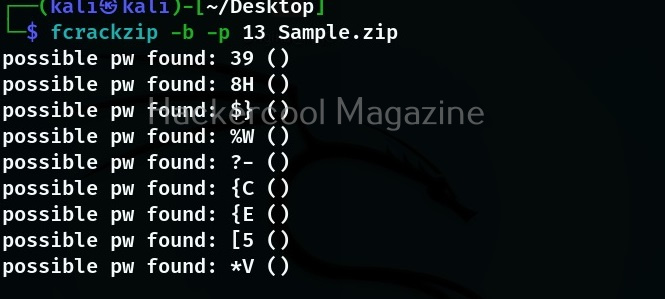
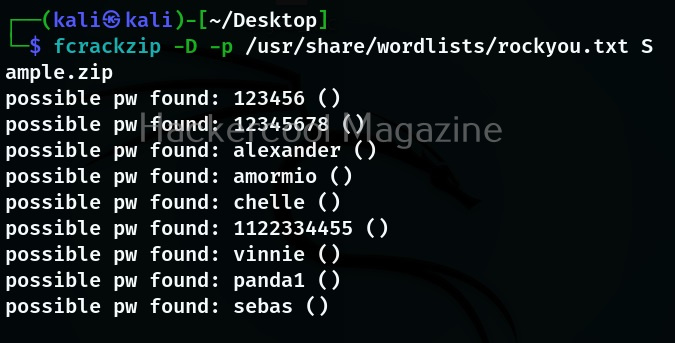
The ‘-p’ option of fcrackzip does two things. It can set initial password for brute forcing or it can be used to specify a wordlist while dictionary cracking.

Dictionary Cracking (-D)

You can set dictionary cracking by using option ‘-b’ as shown below.

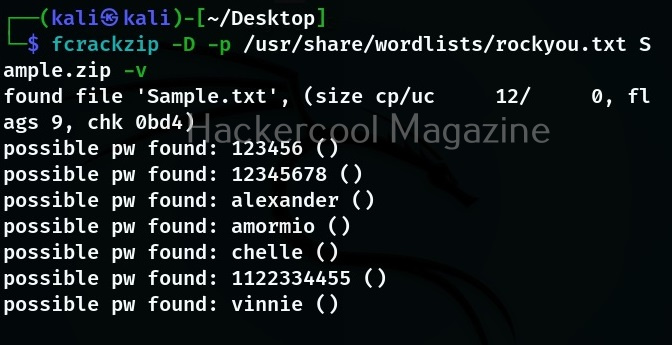
Get a more detailed output (-v)

If you want a detailed and verbose output you can get it using the ‘-v’ option as always.

Characterset specification

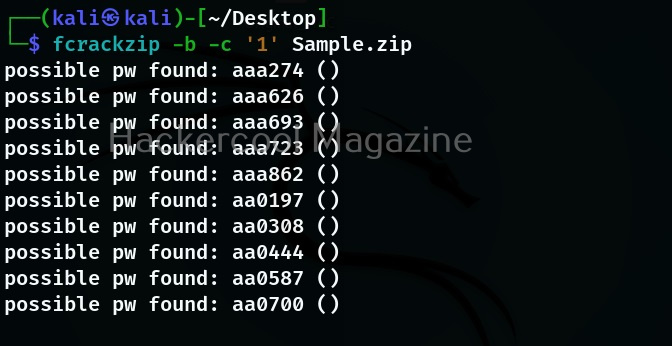
You can also specify a character set you want to use while brute forcing with fcrackzip using the “-c” option as shown below. Here’s how we can set fcrackzip to use only numbers while brute forcing.

Here are the options you can set with ‘-c’.

a: Include all lowercase character.

A: Include all uppercase charcater.

I: Include digits (0-9)

!: Include symbols !:$%&/()=?{[]}+*^#

Verifying the cracked password

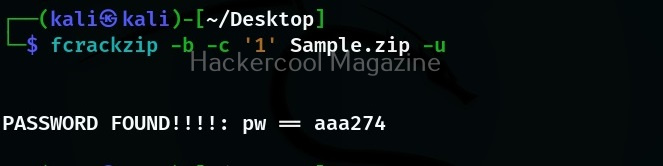
Till now you have seen that fcrackzip found many passwords. Well, all of them are not the correct passwords. Just like any password cracker there will be false positives while using this tool. We can weed out this false positives using unzip to extract the archive using the password fcrackzip claims to be found.

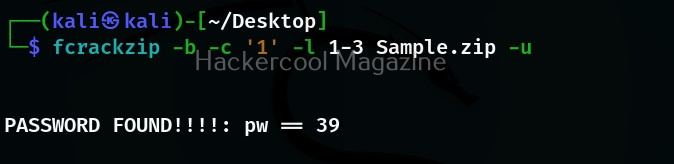
Specify the length of the password to use for cracking (-l).

Using this option, you can set the length of the password to use for brute forcing as shown below.

That’s how you use fcrackzip to crack password protected zip archives.

Posted on

Beginners guide to fuzzing

Hello, aspiring ethical hackers. In this blogpost, you will learn everything about fuzzing as an ethical hacker.

What is Fuzzing?

Fuzzing or fuzz testing is a term that comes from the domain of programming . It is a software testing technique in which invalid, unexpected or random data is provided to a computer program or a system to see how it responds.

It is usually checked if the program results in any crash, memory leaks or buffer overflows. Fuzz testing is usually performed to see if the software results in any vulnerability that can be exploited by hackers.

Types of Fuzzing

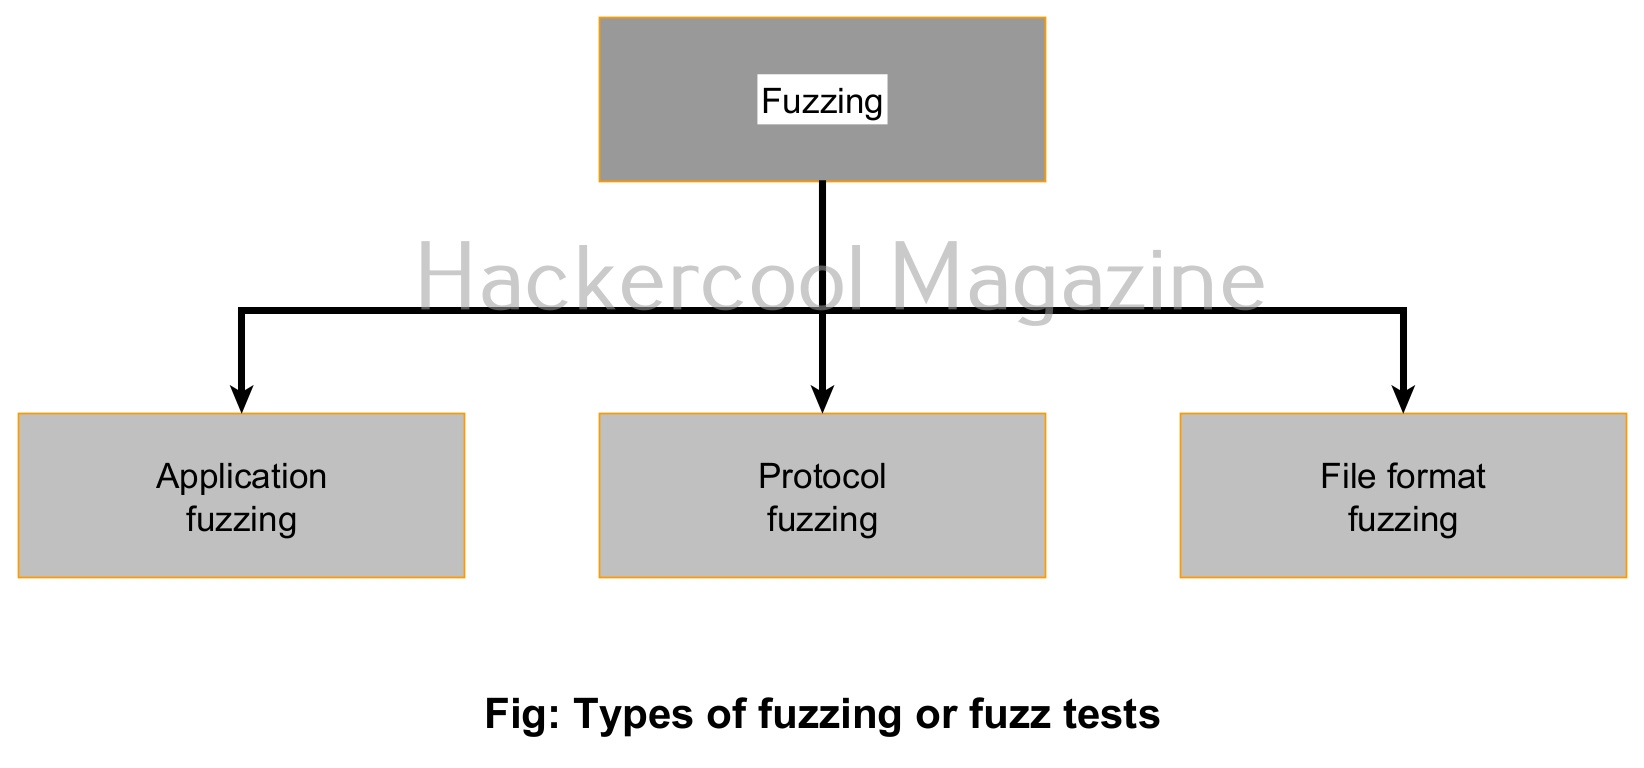
There are different types of fuzz tests. They are application fuzzing, protocol fuzzing and file format fuzz testing. Let’s learn about them in detail.

1. Application fuzzing:

In this type of fuzz test, options of a command line program or UI features such as buttons and input fields in forms are tested for any vulnerability by providing random inputs.

2. Protocol fuzzing:

Just like its name says, in this type of fuzz testing, protocols are tested to see how they react when random data is sent as input to them.

3. File format fuzzing:

In file format fuzz test, a different type of file format or a corrupted file is provided as input to the programs to see how they react. For example, let’s say a web application has file upload feature that takes docx files as input from users. This is the usual practice. But how does it react when a exe file or a exe file masquerading as docx file is uploaded to that application? This type of fuzz test intends to check this.

What is a Fuzzer?

A Fuzzer is a tool that tests software, operating systems or networks for security vulnerabilities. A Fuzzer is a program that automatically infects random data and detects vulnerability

Importance of fuzzing

Fuzz testing works on the concept that it is generally assumed that users will provide proper input to the web application or program or application. But what happens if random and unexpected input is provided to the same application. How does it behave? Does it pose a security threat that hackers can exploit? etc.

Posted on

Hackers guide to shellcode

Hello, aspiring ethical hackers. In our previous article, you learnt everything about a payload. In this article, you will learn everything you need to know about shellcode.

What is Shellcode?

In hacking, Shellcode is a small piece of code that is used as a payload during exploitation of a vulnerability. Differentiating it form a payload, shellcode is commonly written in machine or assembly language. It is known as shell code because it commonly starts a command shell on the target machine.

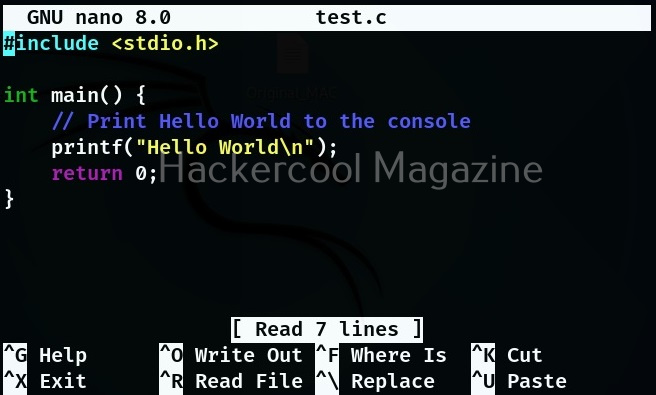
Let’s see what is shellcode. For this we are using Kali Linux but you can use any operating system that can run C programs and the related compilers. Kali Linux already has GCC compiler installed by default. Here, I write a simple C program for printing out “Hello world”.

Then I compile this C program using gcc as shown below and check its result.

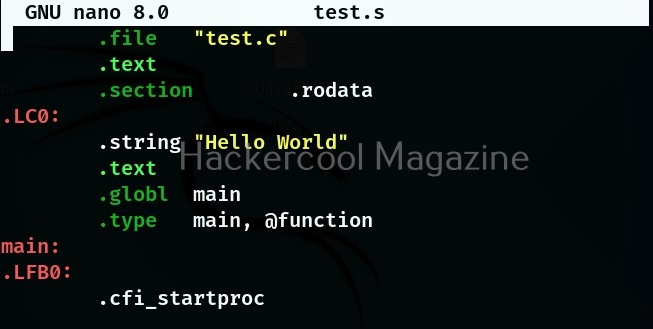
The program works fine. GCC compiler also allows us to view the program in assembly code format with the “-S” option.

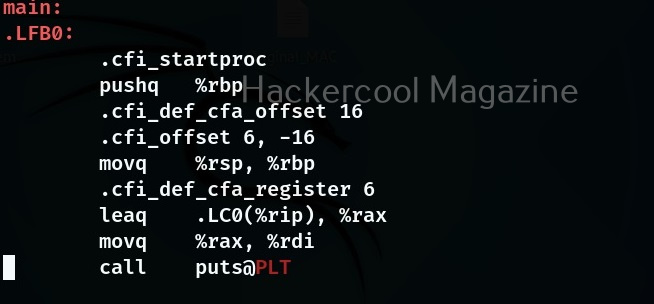
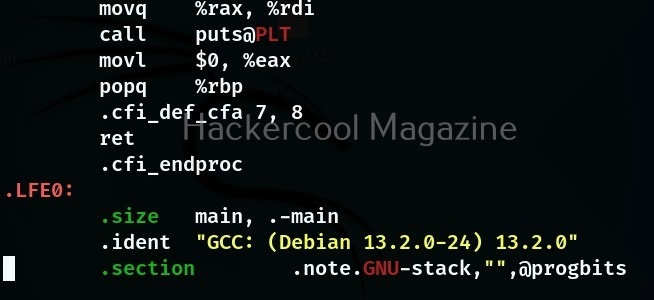
Running this command creates a new file with same name but with “.s” extension (test.s in our case). Opening that file with any text editor reveals the shellcode of that particular program as shown below.

Types of Shell code

There are different types of shell codes in hacking. They are,

1. Remote shellcode:

Remote shell code is used by hackers while targeting a remote machine. This is usually done by exploiting a vulnerable software on the target machine to get a shell back.

2. Local shell code:

This type of shell code is used on the local system on which the hacker already has access to. It is usually used when the hacker has limited privileges on the target system but can exploit a vulnerability in a software to elevate privileges.

3. Download and execute shell code:

This type of shell code, instead of spawning a shell, downloads another payload and executes it on the target system.

4. Staged shell code:

This type of shell code is used when the amount of data that can be injected into process or a software is limited. This shell code downloads additional shellcode and executes it on the target software or system.

Next, learn about shellcode injection.