Posted on

Metadata for Beginners: What It Is and Why It Matters

If you’re starting your journey in cybersecurity, digital investigations or ethical hacking, you’ll often hear the term metadata. At first, it sounds technical. But the concept is actually simple and incredibly important. Metadata can reveal hidden details about files, emails, images and documents that many people never notice.

In this beginner-friendly guide, you’ll learn:

  • What metadata is
  • Why it matters
  • Common types of metadata
  • Where metadata is found
  • How cybersecurity professionals use it

What is Metadata?

Metadata is simply Data about data. That sounds abstract, so let’s make it easier.

Imagine a photograph. The photo itself is the main data. Metadata is the hidden information attached to that photo, such as:

  • Date it was taken
  • Device used
  • File size
  • Image dimensions
  • GPS location (sometimes)

So:

The content is the data.
The descriptive information is the metadata.

Simple Real-World Example

Think about a book. The book’s text is the actual data. Metadata includes:

  • Title
  • Author
  • Publication date
  • ISBN
  • Number of pages

That information describes the book. The same idea applies to digital files.

Why Metadata Matters

Metadata can reveal a surprising amount of information. It helps people,

  • Organize files
  • Search efficiently
  • Track changes
  • Investigate activity
  • Understand context

In cybersecurity, metadata can provide valuable clues.

Common Types of Metadata

Metadata exists in many forms. Let’s break down common categories.

1. File Metadata:

Most digital files contain descriptive information. For example,

  • File name
  • File size
  • Creation date
  • Modification date
  • File type
  • Author information

This helps systems manage files efficiently.

2. Image Metadata:

Photos often contain hidden technical details. Examples:

  • Camera model
  • Device type
  • Resolution
  • Timestamp
  • GPS coordinates
  • Editing software

This is often called EXIF metadata.

3. Document Metadata:

Documents can contain useful embedded details. Examples:

  • Author name
  • Editing timestamps
  • Software version
  • Revision history
  • Company information

Common in:

  • PDFs
  • Word documents
  • Presentations

4. Email Metadata:

Emails contain hidden technical information beyond what you see. For example,

  • Sending server details
  • Message path
  • Timestamps
  • Sender routing information
  • Authentication data

Useful for email investigations.

5. Website Metadata:

Websites also contain metadata. Examples:

  • Page descriptions
  • Keywords
  • Open Graph tags
  • Structured data

Used for:

  • Search engines
  • Social sharing
  • Content indexing

6. System Metadata:

Operating systems track metadata too. Examples:

  • Access times
  • File ownership
  • Permissions
  • System timestamps

Useful for troubleshooting and analysis.

Where Can Metadata Be Found?

Metadata appears in many places. The most common sources are,

Images:

Photos often carry hidden embedded data.

Documents:

Office files frequently store author and revision information.

Emails:

Headers contain metadata.

PDFs:

Creation and editing information may be stored.

Audio / Video Files:

Media files may include:

  • Duration
  • Encoding details
  • Device information

Websites:

HTML metadata helps search engines understand content.

Hello aspiring Ethical Hackers. In our previous blog post, you learnt what is footprinting, why it is important and different types of footprinting techniques. In this blog post, you will learn about performing Footprinting using Metadata.

What is Metadata?

Metadata is a set of data that provides information about other data. Simply put, it is data about the data. Everyone knows data is very important but metadata is often ignored but equally important. But how is metadata helpful to Ethical Hackers. Before going there, let us see how to extract Metadata.

How to extract Metadata?

There are various tools and online resources that extract metadata from different files. For this article, let’s use one tool that is inbuilt in Kali Linux, exiftool. Exiftool extracts metadata from a number of file types.

Let’s extract metadata of a docx file.

Now, let’s extract it from a PDF file.

Let’s see another PDF file.

Last and final, let’s use it on an image file.

How is it useful in pen testing?

If you have noticed, we have performed metadata extraction from 3 types of files: Docx, PDF and an Image. That’s because these are the most common types of files that are available online. Any organization uses these types of files on their websites or anywhere else to convey information.

While extracting information of the docx file revealed the names of creators of the file (Admin, Kalyan). This revelation can help in gaining access later (i.e username is admin etc) or to perform a spear phishing attack targeted at the target user. We can also see that the document was created using Microsoft Word software. So, we can target these users with a malicious macro attack.

While observing the information extracted from a PDF file, we can see that this PDF was created using Microsoft Word. In this case, the version of the MS Word software is also very clear (2019) along with the creator’s name.

The second PDF file was created using Microsoft PowerPoint. So, we can figure out that these users need to be targeted with PowerPoint attack.

Images are another most common types of files found on a website or any other company’s property. We can see that the image I downloaded from a website is either edited or created with Photoshop along with its specific version. So, we can search for any vulnerabilities in this particular software or use this software themed lure to target this organization.

That’s how Metadata can help Pen testers in gaining information about the target organization.

Posted on

Network footprinting for beginners

Hello, aspiring Ethical Hackers. In our previous blogpost Footprinting Guide, you learnt about different types of footprinting techniques ethical hackers perform to gather information about their target. One of the important types of footprinting is Network Footprinting.

If you’re starting your ethical hacking or cybersecurity journey, one of the first skills you should learn is network footprinting. It may sound technical, but the core idea is simple. Network footprinting is about collecting information about a network before testing or securing it.

Think of it like exploring a building before entering it. You want to know:

  • How many doors are there?
  • Which rooms are occupied?
  • Where are the entry points?

That’s exactly what network footprinting helps you understand in the digital world. In this beginner-friendly guide, you’ll learn:


  • What network footprinting is
  • Why it matters
  • Common techniques
  • Beginner-friendly tools
  • Safe ways to practice

What is Network Footprinting?

Network footprinting is the process of gathering information about a target network and its connected systems. The goal is to understand:

  • What devices exist
  • What services are running
  • How the network is structured

This information helps security professionals identify potential weak points. In simple terms, You map the network before analyzing it further.

Why is Network Footprinting Important??

Without information, cybersecurity becomes guesswork. Network footprinting helps you:

1. Understand the Network:

You learn what systems are connected.

2. Identify Potential Entry Points:

You may discover:

  • Web servers
  • Remote access services
  • Exposed devices

3. Improve Troubleshooting:

Knowing the network structure makes issues easier to diagnose.

4. Think Like a Security Professional:

Real attackers gather information first. Ethical hackers do the same but legally.

What Information Can You Gather?

Network footprinting can reveal information about the target like,

  • IP addresses
  • Hostnames
  • Open ports
  • Running services
  • Operating system clues
  • Network topology
  • Device types

This creates a clearer picture of the target environment.

Common Network Footprinting Techniques

Let’s look at some of the most common methods used to perform network footprinting.

1. IP Address Discovery:

Every device on a network has an unique IP address. Finding these IP addresses helps you understand:

  • How many devices exist
  • Which systems are active and inactive

The devices having IP addresses include:

  • Computers
  • Servers
  • Routers
  • Printers

This is usually the first step.

2. Host Discovery:

Not every IP address belongs to an active system. Host discovery helps clearly identify:

  • Live devices
  • Reachable systems

This tells you what systems are actually online.

3. Port Discovery:

Devices offer services through ports.

Examples of services:

  • Web services
  • Remote access
  • File sharing

Finding open ports helps identify what services a device is offering. Open ports often reveal useful information.

4. Service Identification:

Once you find open ports, the next step is understanding:

  • What services are running

Examples:

  • Web servers
  • Secure remote access
  • Database services

This helps build a technical profile.

5. Operating System Detection:

Different operating systems behave differently. Network footprinting can help identify:

  • Linux systems
  • Windows systems
  • Networking devices

This helps you understand the target environment better.

6. Topology Mapping:

Network Topology refers to the way devices in a network connect to each other. This helps visualize:

  • Gateways
  • Routers
  • Internal structure

Think of it as drawing a map of the network.

Beginner-Friendly Tools

You don’t need dozens of tools for network footprinting. Start with a few basic tools.

1. Network Scanner Tools:

Used for:

  • Host discovery
  • Port identification

Ex: Nmap, Amass, masscan, Netcat, netdiscover and Angry IP Scanner etc

2. Packet Analysis Tools:

Help inspect:

  • Traffic
  • Requests
  • Responses

Ex: Wireshark, tcpdump etc

3. DNS Lookup Tools:

Useful for:

  • Name resolution
  • Service discovery

Start simple and learn concepts first.

Step-by-Step Beginner Workflow

Here’s a simple beginner approach to footprint a network.

Step 1: Identify Target Scope

Define what you’re analyzing. For example,

  • Home lab
  • Test environment
  • Target organization’s network

Always stay within legal boundaries.

Step 2: Discover Active Hosts

Once your scope is defined, find:

  • Live systems
  • Reachable devices

Step 3: Check Open Ports

After finding some LIVE or active hosts, look for:

  • Exposed services

Step 4: Identify Running Services

Understand:

  • What the systems are doing and what services are running.

Step 5: Map the Network

Visualize:

  • Connections
  • Structure

Step 6: Document Findings

Write down:

  • Devices
  • Ports
  • Observations

Documentation is a real cybersecurity habit.

Common Mistakes Beginners Make

Almost all beginners make the mistakes given below while performing network footprinting. Avoid these.

1. Jumping Straight Into Tools:

Understand concepts first.

2. Scanning Random Systems:

Never analyze systems without permission.

3. Ignoring Small Clues:

Small details can reveal a lot.

4. Not Taking Notes:

Without documentation, learning becomes messy.

5. Tool Dependence:

Tools hel but analysis matters more.

Tips to Learn Faster

Here are some tips for you to master network footprinting faster.

Be Curious:

Ask:

  • What device is this?
  • Why is this service exposed?

Document Everything:

Track:

  • Findings
  • Questions
  • Patterns

Practice Repeatedly:

Repeat the process in safe labs.

Connect the Dots:

Combine:

  • Network info
  • DNS info
  • System clues

Legal & Ethical Reminder

This is very important. Never:

  • Scan networks you do not own
  • Test unauthorized systems

Always:

  • Use home labs
  • Practice in safe training environments

Ethical hacking is about permission.

Real-World Beginner Example

Imagine you’re analyzing your home lab. You discover:

  • A laptop
  • A router
  • A printer
  • A media server

You then identify:

  • Which systems are active
  • Which services are exposed

This gives you a basic network map. That’s practical network footprinting.

Why Network Footprinting Matters in Ethical Hacking

Network footprinting helps ethical hackers:

  • Understand environments
  • Identify exposure
  • Prepare for security analysis

It’s one of the first steps in:

  • Penetration testing
  • Security assessments
  • Incident investigations

Beginner Practice Ideas

Here are some safe ways for beginners to practice network footprinting.

Home Lab Mapping:

Map your own home network.

Virtual Machine Labs:

Practice in isolated environments in your virtual labs.

Packet Observation:

Study traffic patterns.

Service Identification Practice:

Learn about common network services.

Conclusion

Network footprinting is one of the most valuable beginner cybersecurity skills. It teaches you how to:

  • Observe systems
  • Think logically
  • Build technical awareness

You don’t need advanced hacking knowledge to start. You just need:

  • Curiosity
  • Patience
  • Practice

Key takeaways for you from this blogpost are,

  • Network footprinting gathers network information
  • It helps identify systems and services
  • Documentation is critical
  • Practice only in legal environments

Posted on

Email analysis for beginners

Hello, aspiring Ethical Hackers. In our previous blogpost, you have learnt what is footprinting and various methods to perform footprinting. One such type of Footprinting is Email Footprinting or Email analysis.

Not just that. Emails are one of the most common ways cyber attacks happen. From phishing scams to malware delivery, attackers often use email as their first point of entry. That’s why learning email analysis is an important skill for anyone interested in cybersecurity or ethical hacking. The good news?

You don’t need advanced skills to start learning it. In this beginner-friendly guide, you’ll learn:

  • What email analysis is
  • Why it matters
  • How to analyze emails step by step
  • What suspicious signs to look for

What is Email Analysis?

Email analysis is the process of examining an email to determine whether it is safe, suspicious or malicious. This includes checking:

  • Sender information
  • Links
  • Attachments
  • Email headers
  • Writing style

In simple terms, you investigate an email before trusting it.

Why is Email Analysis Important?

Cybercriminals rely heavily on email attacks because they target people directly. Email analysis helps:

  • Detect phishing attempts
  • Identify fake senders
  • Prevent malware infections
  • Protect sensitive information

Why Attackers Use Email:

Email attacks are effective because:

  • People trust familiar brands
  • Emails can create urgency
  • Users may click without thinking

Even experienced users can be fooled.

Common Types of Malicious Emails

Before analyzing emails, you should understand some of the common malicious emails.

1. Phishing Emails:

These email are designed to steal:

  • Passwords
  • Banking details
  • Personal information

Usually pretend to be:

  • Banks
  • Companies
  • Online services

2. Malware Emails:

Contain:

  • Malicious attachments
  • Dangerous download links

Goal:

  • Infect systems

3. Spoofed Emails:

The sender address is faked to appear legitimate.

4. Scam Emails:

Try to trick victims into:

  • Sending money
  • Sharing sensitive information

Step-by-Step Email Analysis Process

Let’s go through a simple beginner workflow of analysing emails.

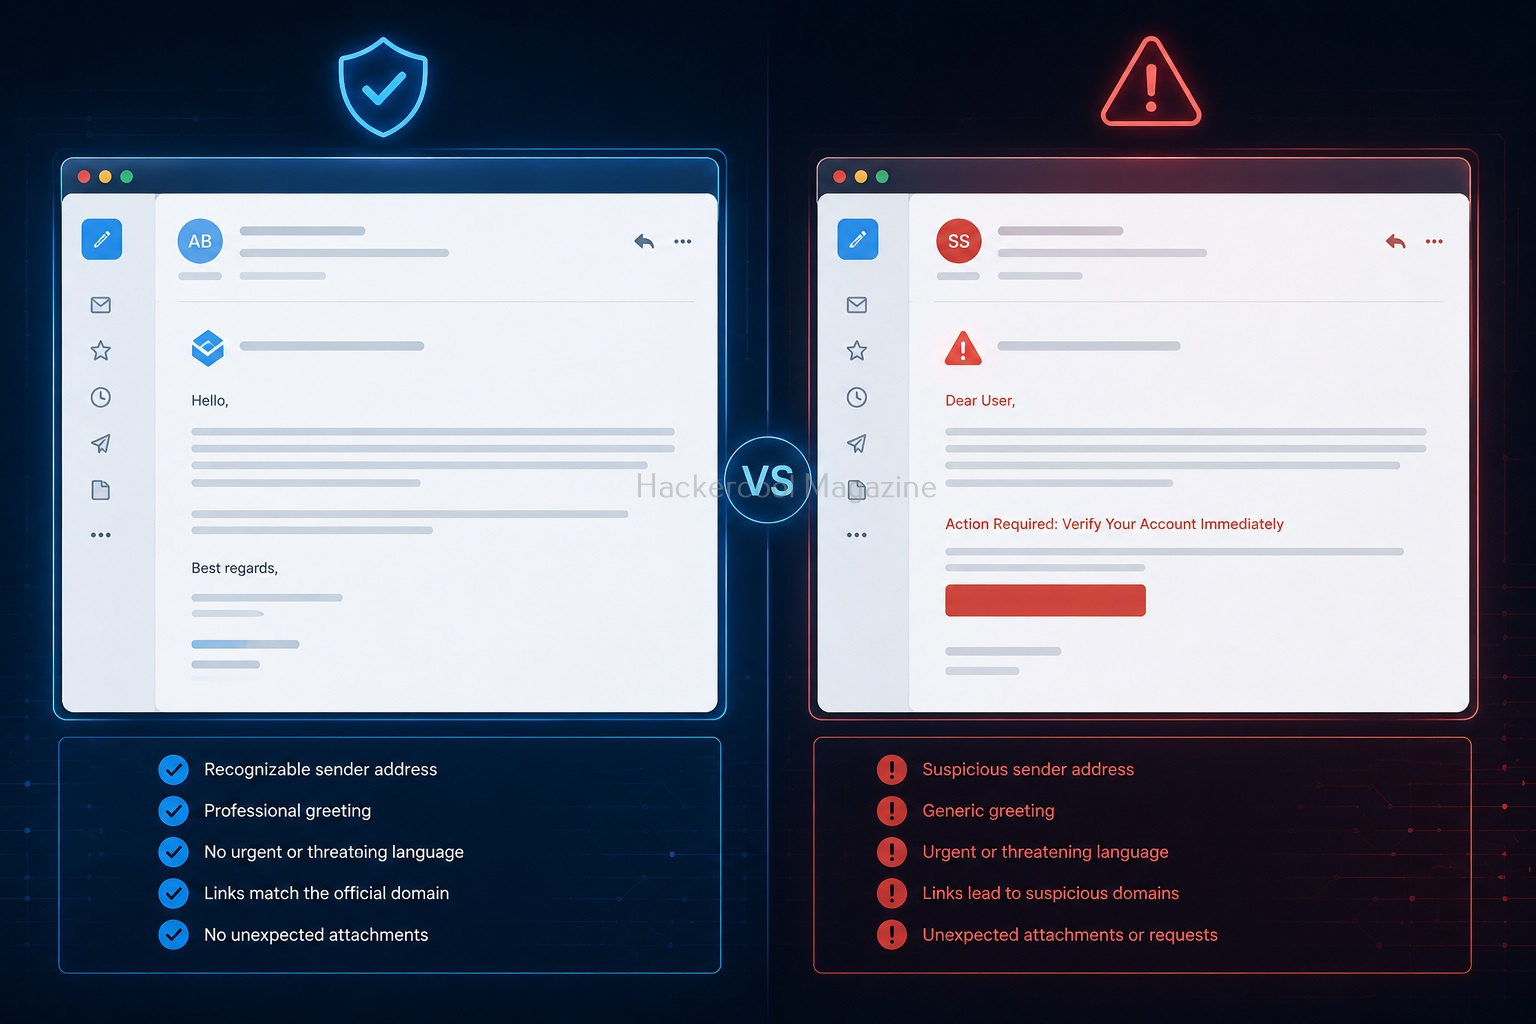
Step 1: Check the Sender Address:

This is the first thing you should inspect. Attackers often use:

  • Misspelled domains
  • Fake addresses

Example:

Real:

Fake:

Notice the subtle difference?

Step 2: Analyze the Subject Line:

Suspicious emails often create:

  • Fear
  • Urgency
  • Curiosity

Examples:

  • “Your account will be suspended!”
  • “Urgent payment required!”

Attackers want you to react quickly.

Step 3: Look For Suspicious Links:

Never trust links inside an email immediately. Hover over links and check:

  • Destination domain
  • Strange URLs

Red Flags:

  • Random characters
  • Shortened URLs
  • Misspelled domains

Step 4: Inspect Attachments:

Attachments can contain malware. Be cautious with:

  • ZIP files
  • EXE files
  • Office documents with macros

If unexpected, don’t open them.

Step 5: Check the Writing Style:

Many phishing emails contain:

  • Grammar mistakes
  • Unusual wording
  • Generic greetings

Examples:

  • “Dear user”
  • “Dear customer”

Legitimate companies usually personalize emails.

Step 6: Analyze Email Headers:

Headers contain technical information about the email. They can reveal:

  • Sending servers
  • Email path
  • Authentication results

Why Headers Matter:

Headers help identify:

  • Fake senders
  • Spoofing attempts

Beginners don’t need to master headers immediatel but learning basics helps a lot. Let’s show you a simple example of header analysis of a real-world email received on Gmail. Go to your Inbox and open a mail. Go to the vertical dots (move button) at the top right of the email and click on it as shown below.

Click on “Show original”.

This should show you the entire email headers of the particular mail.

Let’s learn about each header in detail.

Delivered To:

Email address to whom the mail has been delivered.

Received:

This header indicates all the SMTP servers through which this email has passed through before reaching to your Inbox. This contains server IP address, SMTPID etc.

X-Google-SMTP-source:

It shows the transferring email using a Gmail SMTP server. If this header is present, then it usually means this was transferred by GMAIL SMTP server.

X_Received-BY:

This header indicates the last visited SMTP server the mail reached before reaching your Inbox. It contains Server IP address, SMTP ID of the visited server and Date & time when the email was received by the SMTP server.

ARC-Seal, ARC-Message-Signature, ARC-Authentication-Results: ARC stands for Authenticated Receiver Chain (ARC). This is used to preserve email authentication results and to verify the identity of email intermediaries that forward a manage to its final destination (i.e. your Inbox).

SMTP-mailfrom:

You can see the IP address of the sender of the email.

Return-Path:

This is the path specified to go when email is bounced or not sent.

Received SPF:

SPF stands for Sender Policy Framework. This is used to prevent sender address forgery. It SPF is set to PASS, the Email source is valid, if it is softfail, it is likely the email source is fake and if it is having value Fail, source is invalid.

This is how Email headers can be analysed.

Step 7: Verify Before Taking Action:

If an email seems suspicious, don’t click immediately. Instead:

  • Visit the official website manually
  • Contact the company directly

Real-World Example (Simple Scenario)

Imagine receiving an email saying:

“Your account has been locked. Click here immediately.”

You notice:

  • The sender domain looks slightly different
  • The link points to another website
  • The email creates panic

These are classic phishing indicators.

Tools Used in Email Analysis

Beginners can use simple tools to help analyze emails. Common Tool Types:

  • Header analyzers
  • URL scanners
  • Attachment scanners

These tools help identify suspicious indicators.

Common Mistakes Beginner Make

Avoid making these mistakes.

Trusting Display Names:

Attackers can fake names easily. Always inspect actual email address.

Clicking Too Quickly:

Urgency is a common attacker tactic.

Ignoring Small Details:

Tiny spelling changes matter.

Assuming “Professional Looking” Means Safe:

Some phishing emails look very convincing.

Tips to Improve Your Email Analysis Skills

Slow Down:

Most mistakes happen because users rush.

Think Like an Atatcker:

Ask:

  • How is this trying to manipulate me?

Practice Regularly:

Analyze:

  • Spam emails
  • Example phishing emails

Compare Real vs Fake Emails:

This improves recognition skills quickly.

Legal & Ethical Reminder

When learning email analysis, never:

  • Open suspicious files recklessly
  • Interact with malicious links on real systems

Always:

  • Use safe environments
  • Practice responsibly

Why Email Analysis Matters in Cybersecurity?

Email analysis is important because:

  • Many attacks begin with phishing
  • Human error is a major security risk

Strong email analysis skills help:

  • Protect individuals
  • Protect organizations

Beginner Practice Ideas

Here are some ideas for beginners to practice email analysis.

1. Analyze Spam Emails:

Look for:

  • Suspicious wording
  • Fake domains

2. Study Example Phishing Emails:

Compare them with legitimate emails.

3. Learn Basic Headers:

Understand how email routing works.

How Email Analysis Helps Ethical Hackers?

Ethical hackers use email analysis to:

  • Understand phishing techniques
  • Test organizational awareness
  • Investigate incidents

It builds both defensive and analytical skills.

Conclusion

Email analysis is one of the most practical beginner cybersecurity skills you can learn.

You don’t need:

  • Expensive tools
  • Advanced programming skills

You just need:

  • Attention to detail
  • Curiosity
  • Practice

Key Takeaways

  • Always inspect sender addresses
  • Be cautious with links and attachments
  • Analyze before trusting
  • Think critically]]

Next time you receive an email: Don’t just read it. Analyze it. That’s how cybersecurity professionals think.

Posted on

DNS Footprinting for Beginners (Simple & Practical Guide)

Hello, aspiring Ethical Hackers. In our previous blogpost on Footprinting guide, you learnt about various techniques of Footprinting. In this blogpost, you will learn about DNS Footprinting which is one of the techniques of Footprinting in detail. If you’re starting your journey in ethical hacking, one of the most important skills to learn is DNS footprinting.

It may sound technical at first but the concept is actually simple. DNS footprinting is about understanding how a domain connects to real systems on the internet. In this beginner-friendly article, you’ll learn:

  • What DNS footprinting is
  • Why it matters
  • How to do it step by step
  • What to look for as a beginner

What is DNS Footprinting?

To understand DNS footprinting, you need to first understand what DNS is. DNS stands for Domain Name System. It acts like the phonebook of the internet. When you type a name of the website (like example.com), DNS translates it into an IP address that computers understand.

DNS footprinting means collecting information about a domain using DNS records.

Why is DNS Footprinting Important?

DNS footprinting reveals a lot about a target’s infrastructure. It helps you:

1. Understand System Structure:

You can see how a website is set up.

2. Discover Hidden Assets:

Discover subdomains like:

  • dev.example.com
  • admin.example.com

3. Identify Services:

DNS can reveal information about:

  • Email servers
  • Hosting providers

4. Map Attack Surface:

You get a clearer picture of what can be tested.

Hence, DNS footprinting is a key part of reconnaissance (information gathering).

Key DNS Records Explained for Beginners

When you perform DNS footprinting, you’ll encounter different types of records. Let’s simplify them:

1. A Record:

This record maps a domain to an IP address. For Example,

example.com --> 192.168.x.x

2. MX Record:

This record specifies mail servers used for email delivery.

3. NS Record:

This record shows name servers. Also indicates who manages DNS.

4. CNAME Record:

Alias for another domain. Helps redirect traffic.

5. TXT Record:

Stores text information related to the domain. Often used for:

  • Verification
  • Security policies

Understanding these records is important while performing DNS Footprinting.

How to Perform DNS Footprinting (Step-by-Step)

Let’s break down how to perform DNS Footprinting into simple steps.

STEP 1: Choose a Target Domain:

Start with:

  • Your own website
  • Or Practice domains

Always stay within legal boundaries.

STEP 2; Query DNS Records:

You can use:

  • Online DNS lookup tools
  • Command line tools

STEP 3; Analyze A Records:

Find:

  • IP addresses
  • Hosting information

STEP 4; Check MX Records:

Identify:

  • Email infrastructure

STEP 5; Look at NS Records:

Understand:

  • DNS providers

STEP 6; Discover Subdomains:

Find additional assets connected to the domain.

STEP 7; Document everything:

Note down:

  • Records
  • Findings
  • Patterns

This builds your analysis skills.

Example: What You Might Discover

With DNS footprinting, you might find:

  • Multiple subdomains
  • External email servers
  • Cloud hosting providers

This will help you to understand:

  • System architecture
  • Potential weak points

Tools for DNS Footprinting

Start with simple tools:

  • DNS lookup tools like nslookup and dig
  • Subdomain discovery tools
  • Command-line utilities

Here’s an example command with nslookup

nslookup example.com

Here’s another example with dig.

dig example.com

These help you to query DNS records quickly.

Common Mistakes Beginners Make

Here are some common mistakes beginners make during DNS Footprinting. Avoid making these.

Ignoring DNS Records:

Many beginners skip this step entirely.

Not Understanding Output:

Focus on meaning, not just data.

Collecting Too Much Data:

Filter the output to collect what’s useful.

Not connecting the collected Information:

Combine DNS with:

  • WHOIS
  • Subdomain discovery

Tips To Improve Your DNS Footprinting Skills

1. Be curious:

Ask yourself:

  • What else is connected?

2. Connect the Dots:

Combine multiple sources of information.

3. Take Notes:

Track everything you find.

4. Practice Regularly:

Try different domains.

Legal & Ethical Reminder

DNS footprinting is generally safe but you must stay ethical.

Never:

  • Use information for illegal purposes
  • Target systems without permission

Always:

  • Practice responsibly
  • Use labs or your own domains

Conclusion

DNS footprinting is a fundamental skill in ethical hacking. It teaches you how to:

  • Understand infrastructure
  • Gather intelligence
  • Think like a security professional

And the best part is that you can start learning it today with minimal tools.

Posted on

Google Dorking (Google Hacking) for beginners (Simple & Practical Guide)

Hello, aspiring Ethical Hackers. In our previous blogpost on Footprinting, you learnt various techniques by which hackers gather information about their targets. In this blogpost, you will learn about Google Dorking or Google Hacking, one of the techniques by which real-world hackers gather information.

Everyone knows what Google is. It is the most popular Search Engine that provides answers for anything we want, almost anything. Just a click away. However, if you think Google is just for searching websites, you’re only scratching the surface. For ethical hackers, Google is a powerful information-gathering tool—so powerful that it can reveal hidden data, login pages and even sensitive files. This technique is called Google Hacking (also known as Google Dorking).

Don’t worry—it’s not as complicated as it sounds. In this beginner-friendly guide, you’ll learn what Google hacking is, how it works and how to start using it safely and effectively.

What Is Google Dorking (Google Hacking)?

Google Dorking is the process of using advanced search techniques to find information that is not easily visible through normal searches. Instead of typing simple keywords, you use special search operators to filter results.

In simple terms:
You tell Google exactly what to find.

Why is Google Dorking Important?

Google indexes a huge portion of the internet. Sometimes, websites accidentally expose:

  • Login pages
  • Documents
  • Backup files
  • Sensitive information

Google dorking helps you:

  • Discover hidden data
  • Understand a target better
  • Find potential weaknesses

It’s a key skill in footprinting (reconnaissance).

Basic Google Search Operators

Let’s learn about some of the basic Google dork operators.

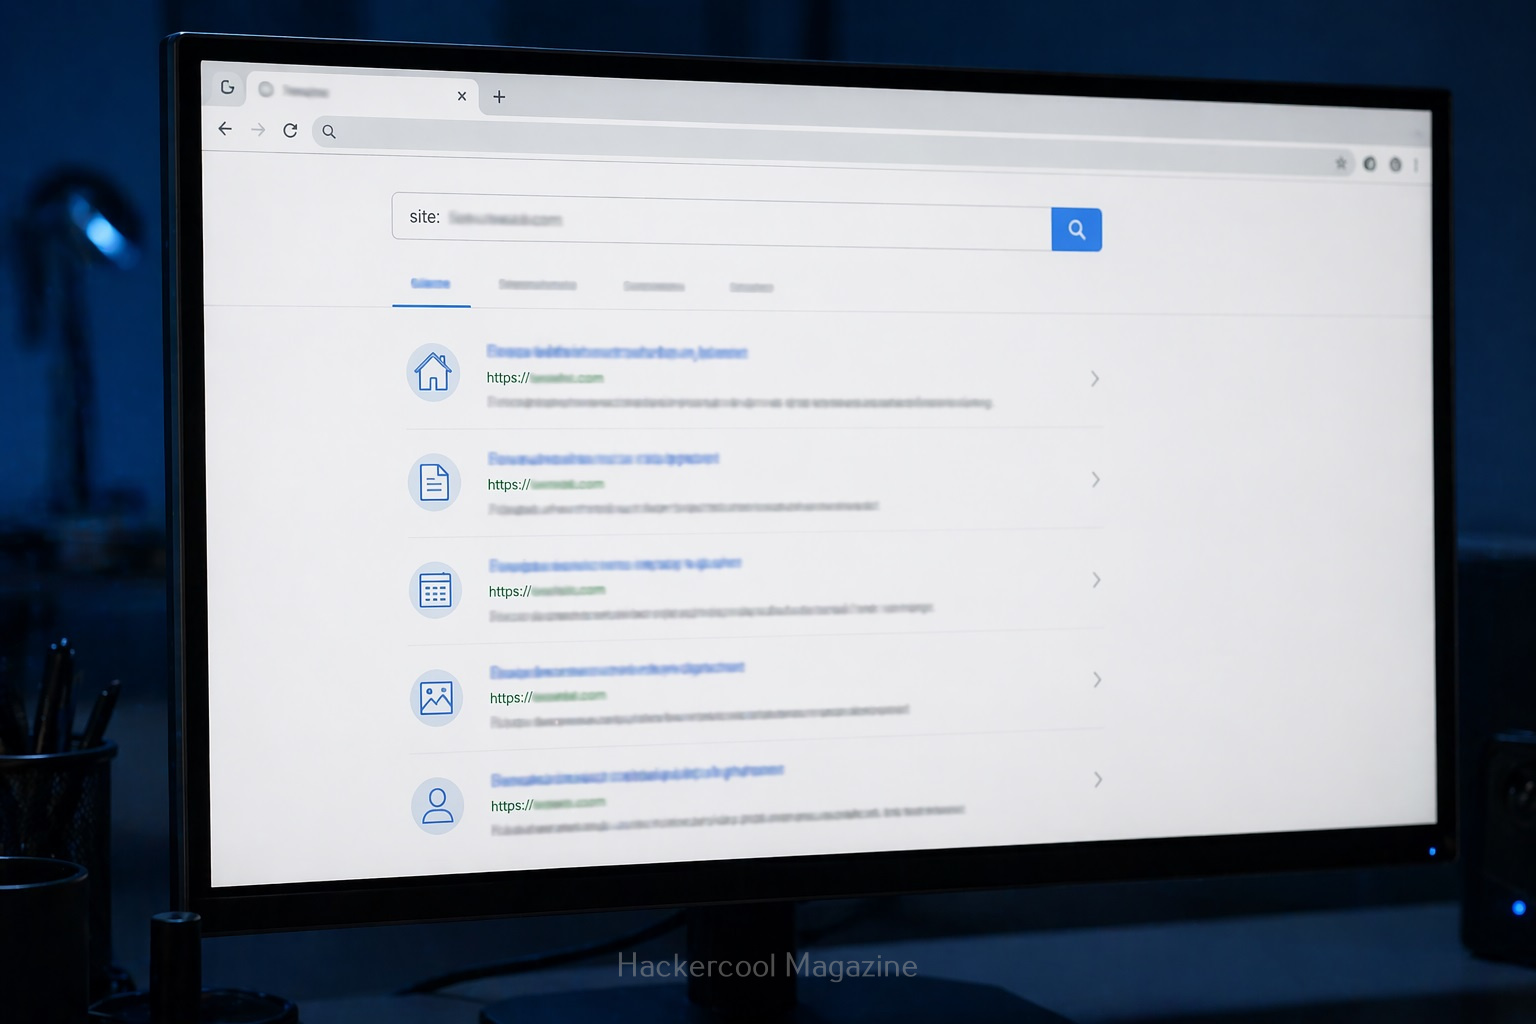
1. site:

This operator helps you to search for something within a specific website.

For example:

site: example.com

query finds all pages indexed from the domain example.com.

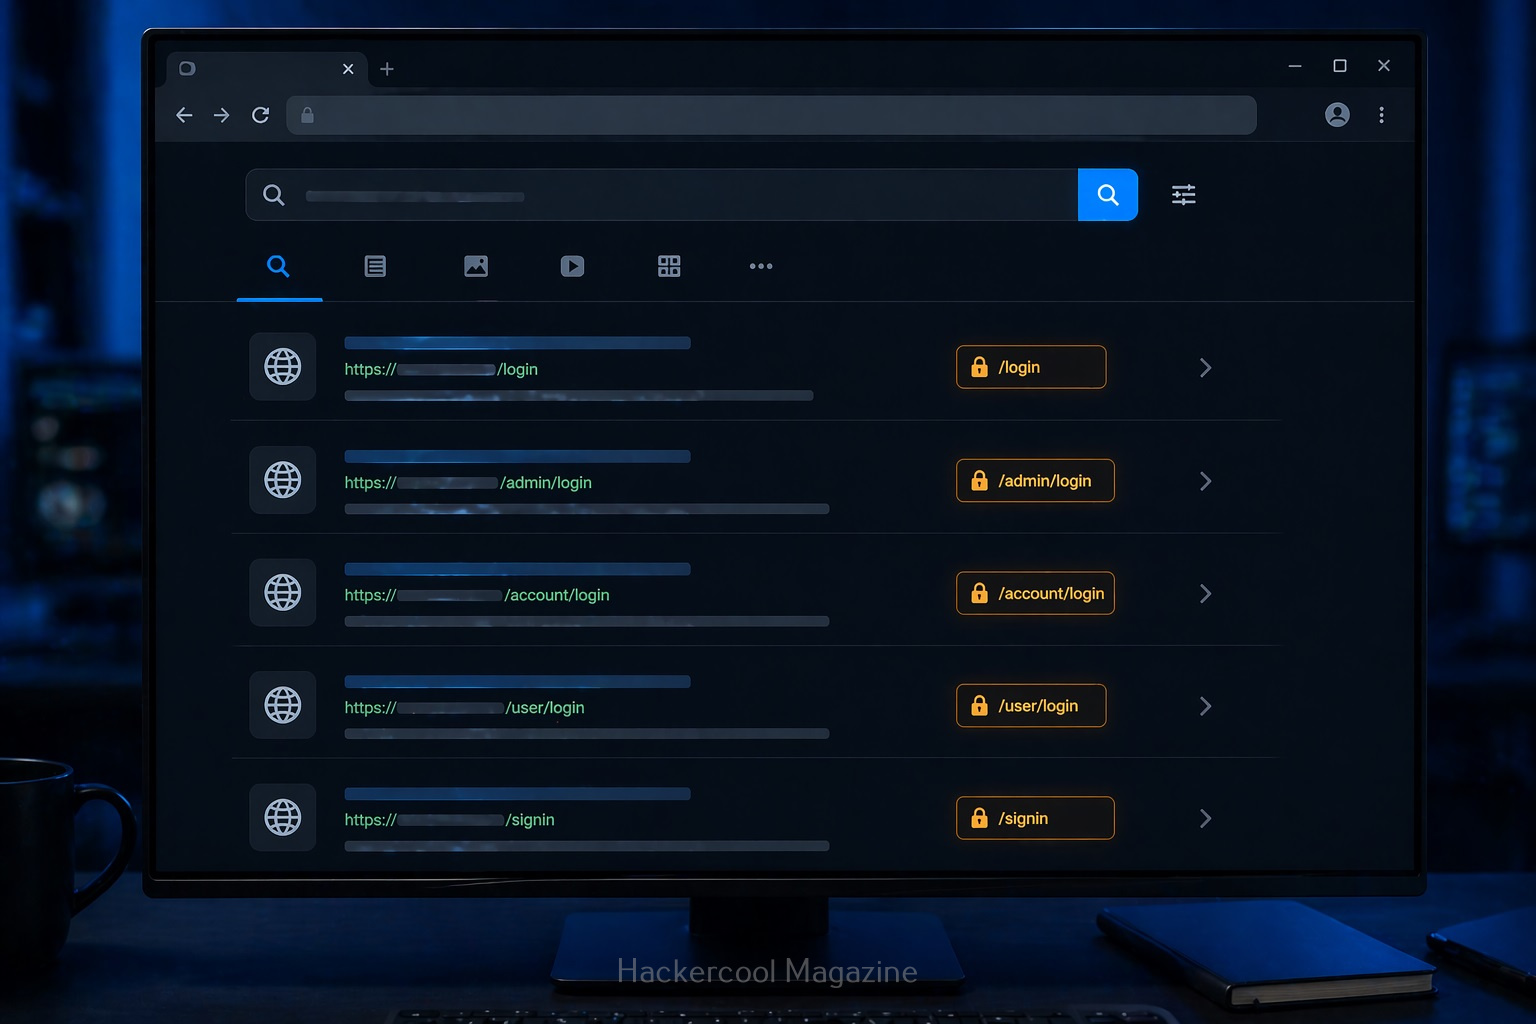
2. intitle:

Uisng this you can search for keywords in page titles.

For example:

intitle: "login"

This query is useful for finding login pages.

3. allintitle:

Works similarly to “intitle” but will show pages containing all the multiple keywords specified.

For example:

allintitle: "Best Project tools"

Shows the pages having all the words given above present.

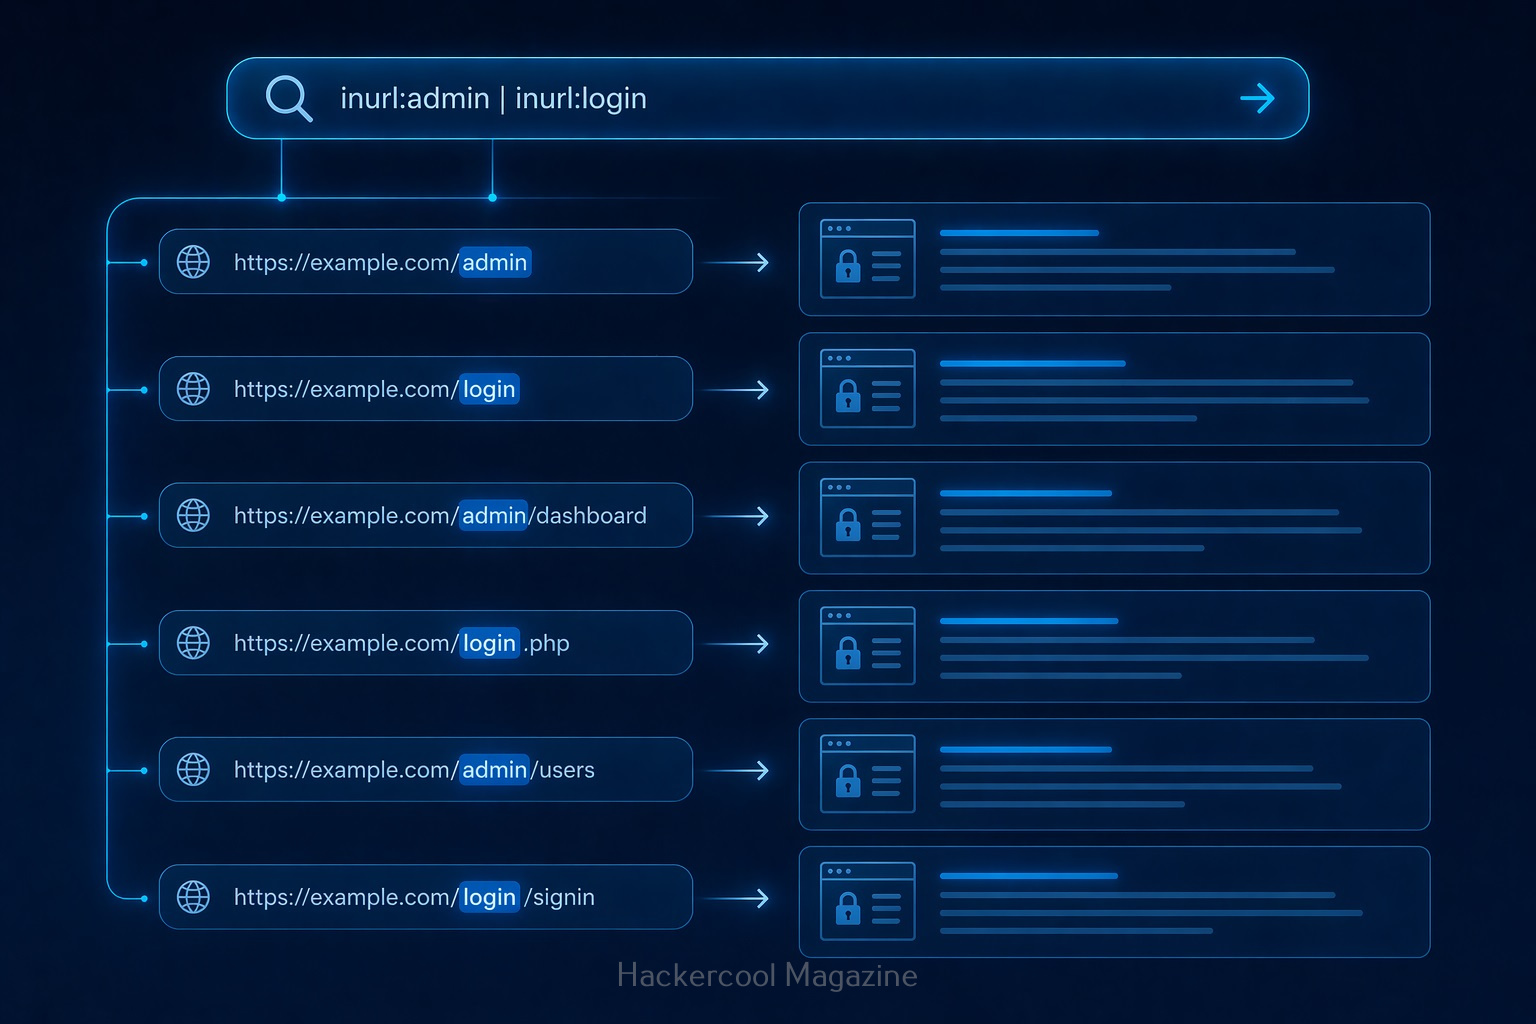
4. inurl:

Search within URLs.

For example:

inurl:admin

query finds pages with “admin” in the URL.

5. allinurl:

Displays pages containing all the specified keywords in the URL.

For example:

allinurl:login.php

This query displays all the pages having both words in the URL.

6. filetype:

This query is used to search for specific file types.

For example:

filetype:pdf

query can reveal:

  • Documents
  • Reports
  • Public files
  • and all other files in PDF format.

7. intext:

This query is used to search for a text within page content.

For example:

intext:"confidential"

query reveals pages containing text “confidential”.

8. allintext:

This query is used to search for web pages containing all of the specified words within the body text of the page.

For example:

allintext:"About us"

This query will display all the webpages containing the above two keywords in the body text.

9. cache:

This query displays the last cached version of a website stored by Google.

For example:

cache:example.com

This query displays the last cached version of the website example.com

Google Dorking examples for beginners

Here are some real-world examples of Google hacking for beginners.

1. Find all pages of a website:

site:example.com

This query helps you to map the entire website.

2. Find Login page of a specific website:

site:example.com intitle:"login"

3. Find Documents:

site:example.com filetype:pdf

Helps find you all PDF documents (reports, internal documents) on the website.

4. Find Admin Panels:

inurl:admin

Shows pages that may be restricted.

How Google Hacking Fits in Ethical Hacking

Google hacking is part of Footprinting (Reconnaissance phase). Before testing a system, you need to gather information. Google helps you:

  • Discover assets
  • Identify exposed content
  • Understand structure

It’s often the first step in any security assessment.

Tips for Better Google Hacking

To get better results with Google dorking, you should follow these tips.

1. Combine Operators:

For example:

site:example.com inurl:login filetype:php

This narrows results significantly.

2. Think Like a Search Engine:

Ask yourself:

  • What words would appear on this page?
  • How would it be structured?

3. Experiment:

Try different combinations and observe results.

4. Take Notes:

Track:

  • Useful queries
  • Interesting findings

Common Beginner Mistakes

Beginners often make these mistakes while using Google Dorking. Avoid these.

Using only Basic Searches:

Normal searches won’t reveal hidden data.

Not Understanding Results:

Don’t just search. Analyze what you find.

Trying To Do Too Much:

Start simple. Master basics first.

Ignoring Ethics:

This is the biggest mistake.

Real-world Use Cases

Google dorking can help you:

  • Discover exposed files
  • Identify login portals
  • Find outdated pages
  • Understand system structure

No doubt security professionals use this technique daily.

Beginner Practice Plan

Here’s a simple plan for you to practice Google dorking.

Day 1:

Learn basic operators

Day 2:

Practice on safe websites

Day 3:

Combine operators

Day 4:

Analyze results

Day 5:

Repeat with new queries

Within a week, you’ll see improvement.

Conclusion

Google hacking is one of the easiest ways to start learning ethical hacking. You know why? Because

  • Advanced tools
  • Complex setups

Just your brain and a search bar.